

Page 1

Analog Chronographs ........................................................... 4
Chrono Type I & II............................................................... 4
Chrono Type III & IV......................................................... 16
Chrono Type V................................................................... 26
Analog/Digital Chronographs ............................................ 35
Automatic Chronographs .................................................... 43
Tachymeter Feature .............................................................. 47
Ratchet Bezel Feature ........................................................... 49
Water-Resistance ................................................................... 50
Battery ...................................................................................... 51
Chronographes analogiques .............................................. 52
Chrono Type I & II............................................................. 52
Chrono Type III & IV......................................................... 65
Chrono Type V................................................................... 76
Chronographes analogiques/numériques ....................... 85
Chronographes automatiques
.............................................. 93
Fonctions de Tachymètre ..................................................... 98
Lunette tournante à rochet ................................................ 100
Etanchéité .............................................................................. 101
Pile .......................................................................................... 102
ENGLISHFRANÇAIS
Page 2
5
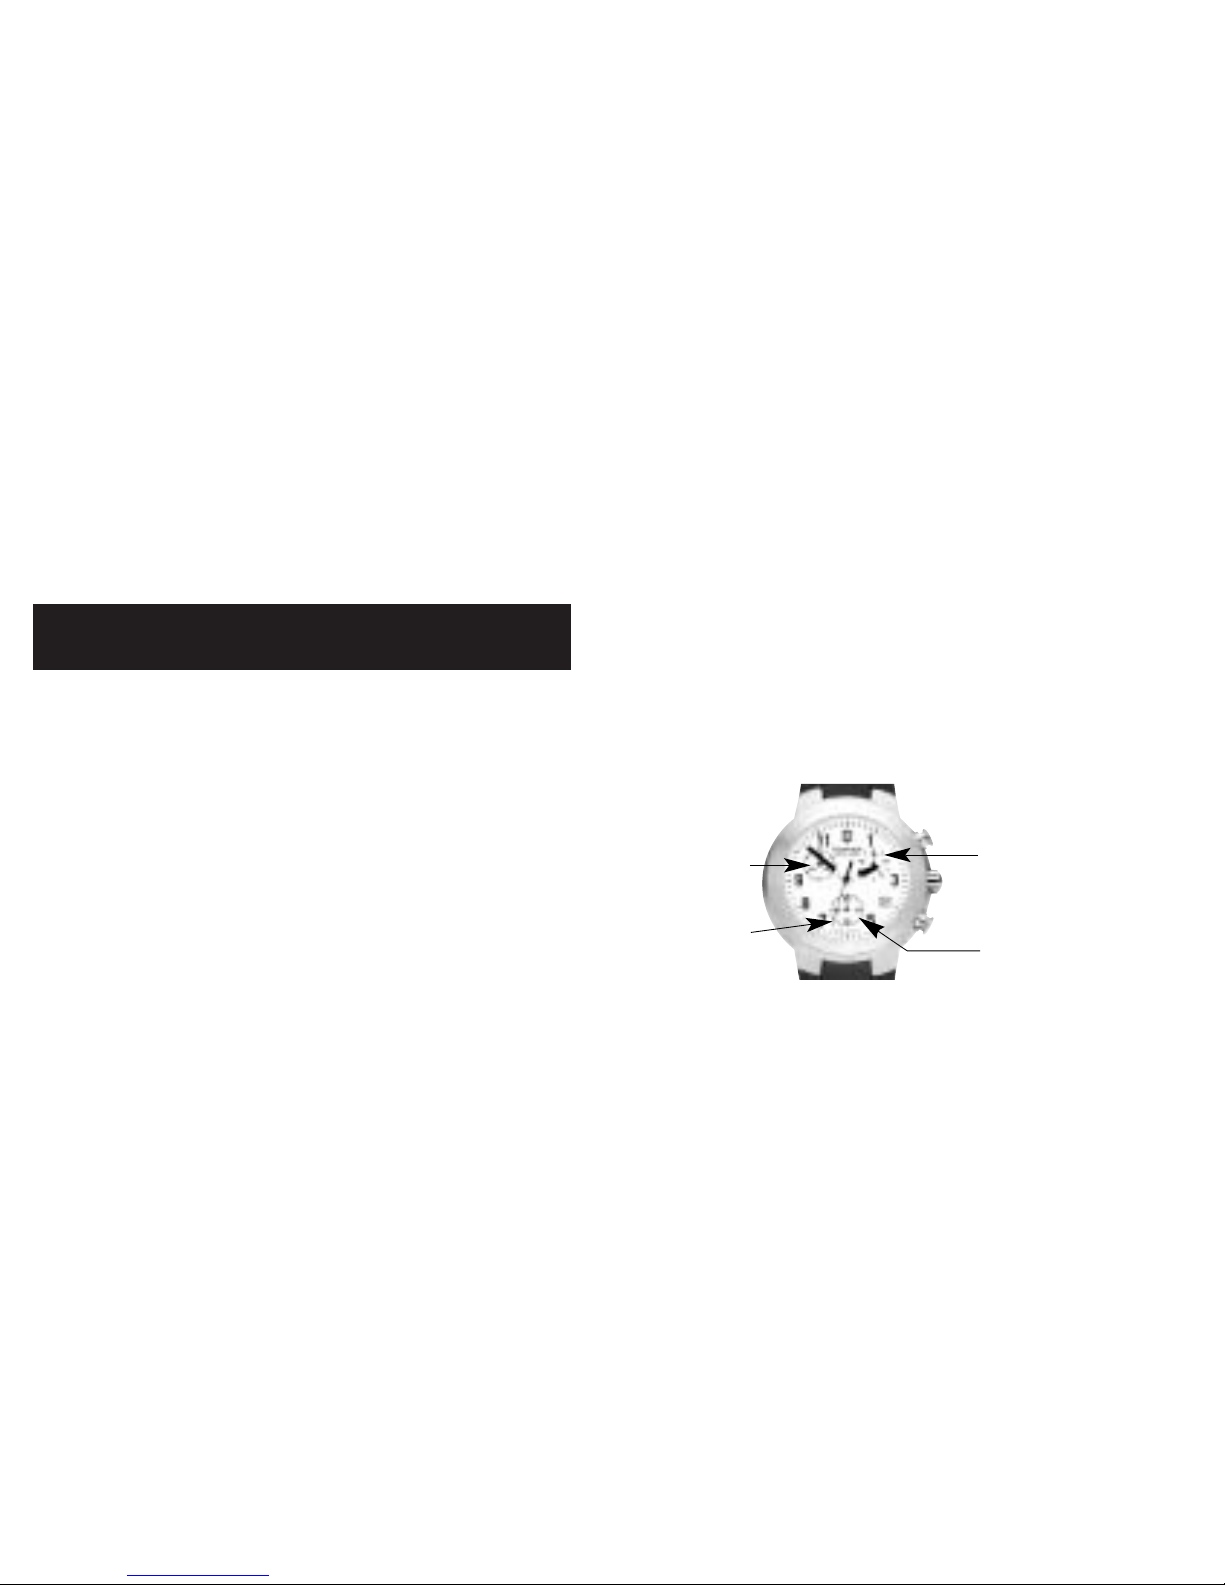
The crown has 3 positions:
1. Normal position: recessed
2. Extended position: to set the date
3. Fully extended position: to set the time
NOTE: Never operate the crown when the watch is wet.
B
A
Crown
30-minute
counter
Seconds
counter
One-tenth second timer
Seconds
subdial
ANALOG CHRONOGRAPHS
CHRONO TYPE I & II
NOTE: Your watch will have either a “pull-out“ or “screw-down“
crown. To determine this, gently try to pull out the crown to position 2.
If it does so, your watch has a pull-out crown. If not, use the thumb
and forefinger to apply mild pressure on the crown while rotating
toward you to release it. If it does so, your watch has a screw-down
crown.
CHRONOGRAPH OPERATING PROCEDURE
This chronograph movement features a 30 minute counter, one tenth
second timer, sweep seconds hand and date calendar. It enables
short times to be measured to an accuracy of one tenth of a second
in a 30-minute period.
4
Page 3
7
CHRONO TYPE II
The Quick-Set feature allows the hour hand to be advanced without
advancing the minute hand and will also quick-set the calendar. It is
especially useful when traveling to different time zones, as the hour
hand can be rapidly advanced to set the desired time.
PULL OUT CROWN
NOTE:
Never operate the crown when the watch is wet.
A. Pull the crown out to the middle position (2).
B. Turn the crown away from you until the date show-
ing is the day before the desired setting.
C. Pull out the crown to the fully extended position (3)
and rotate toward you. When midnight is reached,
the date will advance to the desired date. Continue
to turn the crown until the desired time is set.
Remember that the date advances at 12:00 midnight,
not 12:00 noon.
SETTING THE DATE & TIME
CHRONO TYPE I
A. Pull out the crown to position 2.
B. Rotate the crown toward you until the date showing
is the day before the desired setting.
C. Pull out the crown to position 3 and rotate toward
you. When midnight is reached, the date will
advance to the desired date. Continue to turn the
crown until the desired time is set. Remember, the
date advances at 12:00 midnight, not 12:00 noon.
D. Push in the crown, returning it to position 1. The date
and time are now set.
TO SET TIME ALONE: Refer to instruction “C“.
NOTE: Never operate the crown when the watch is wet.
6
Page 4
to turn the crown until the desired time is set.
Remember that the date advances at 12:00 midnight,
not 12:00 noon.
D. Push in the crown and screw down, away from you,
until it is sealed tight into its normal position (1). The
date and time are now set.
TO SET TIME ALONE: Unscrew the crown by turning it
toward you to get to unscrewed position (2) and refer to
instructions “C“.
9
D. Push back the crown in to its normal position (1). The date and
time are now set.
TO SET TIME ALONE: Refer to instructions “C“.
SCREW DOWN CROWN
NOTE:
You must always push in and screw down the crown to form
a water-resistant seal with the case. Never operate the crown when
the watch is wet.
SETTING THE DATE AND THE TIME
A. Unscrew the crown by turning it toward you, then
pull out crown to position 2.
B. Turn the crown away from you until the date show-
ing is the day before the desired setting.
C. Pull out the crown to the fully extended position (3)
and rotate toward you. When midnight is reached,
the date will advance to the desired date. Continue
8
Page 5
11
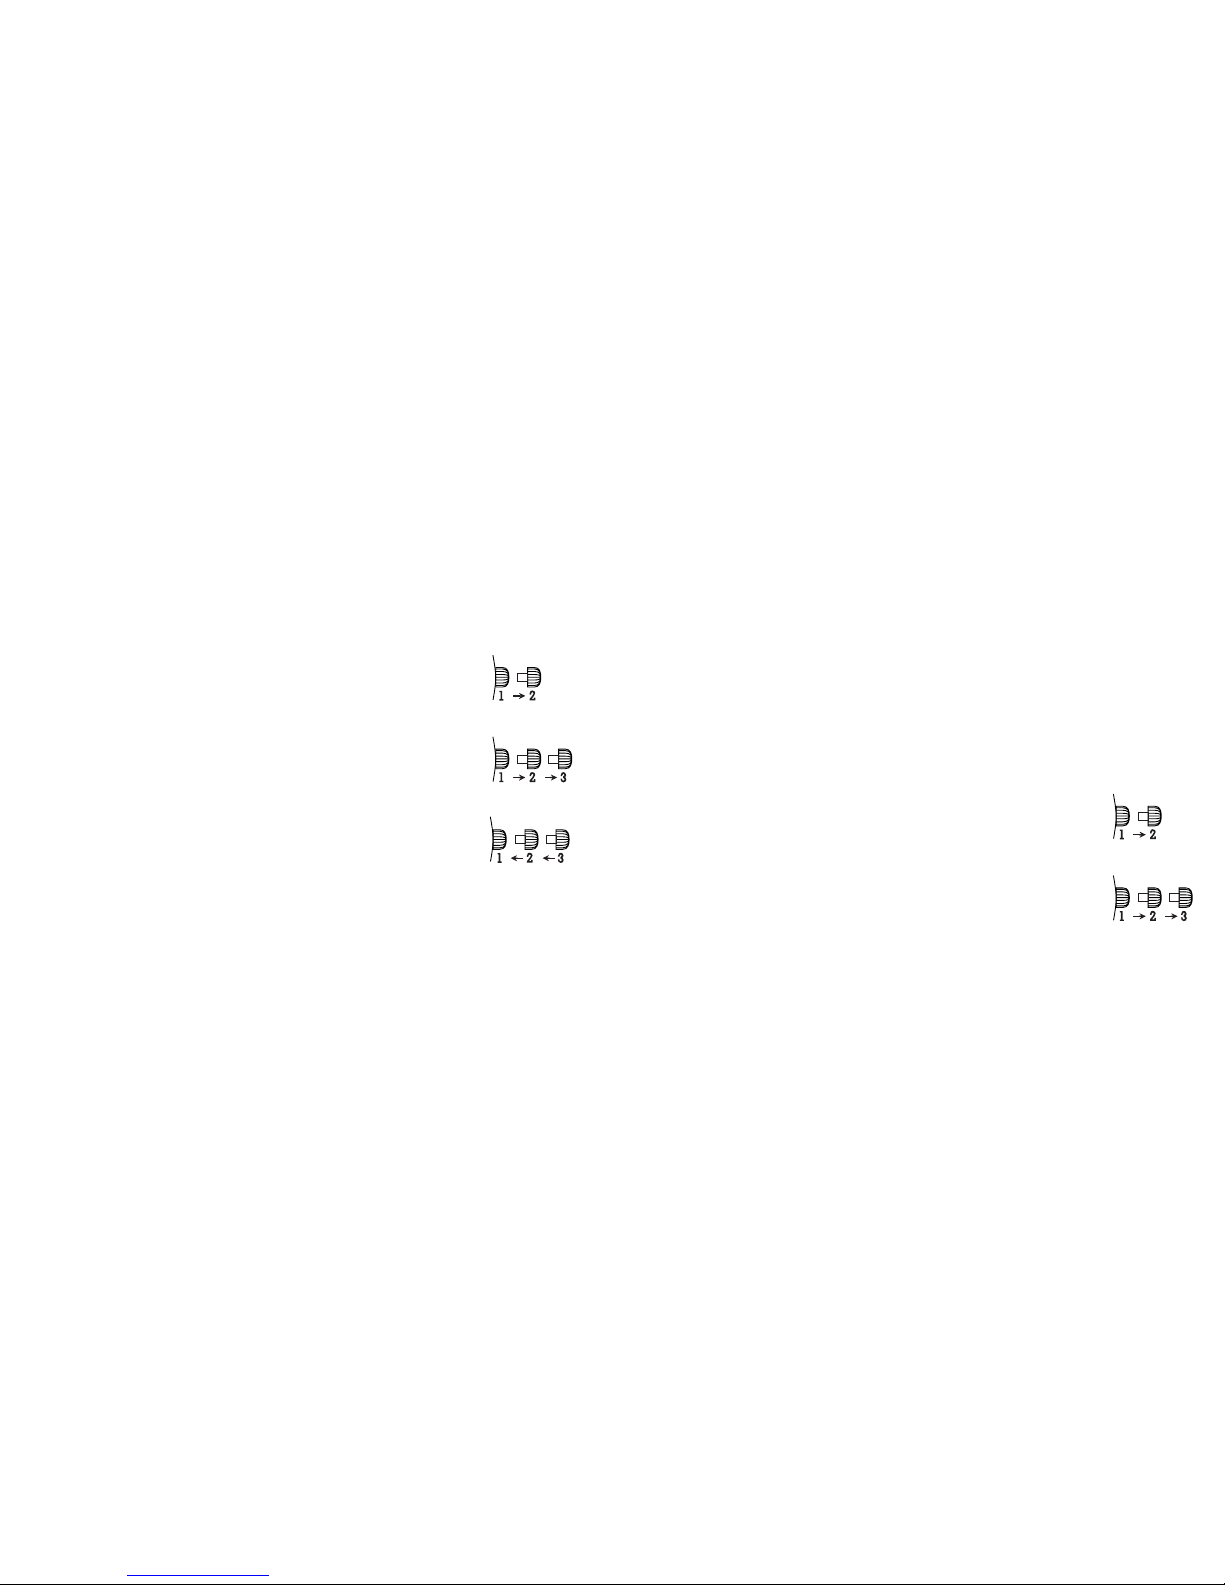
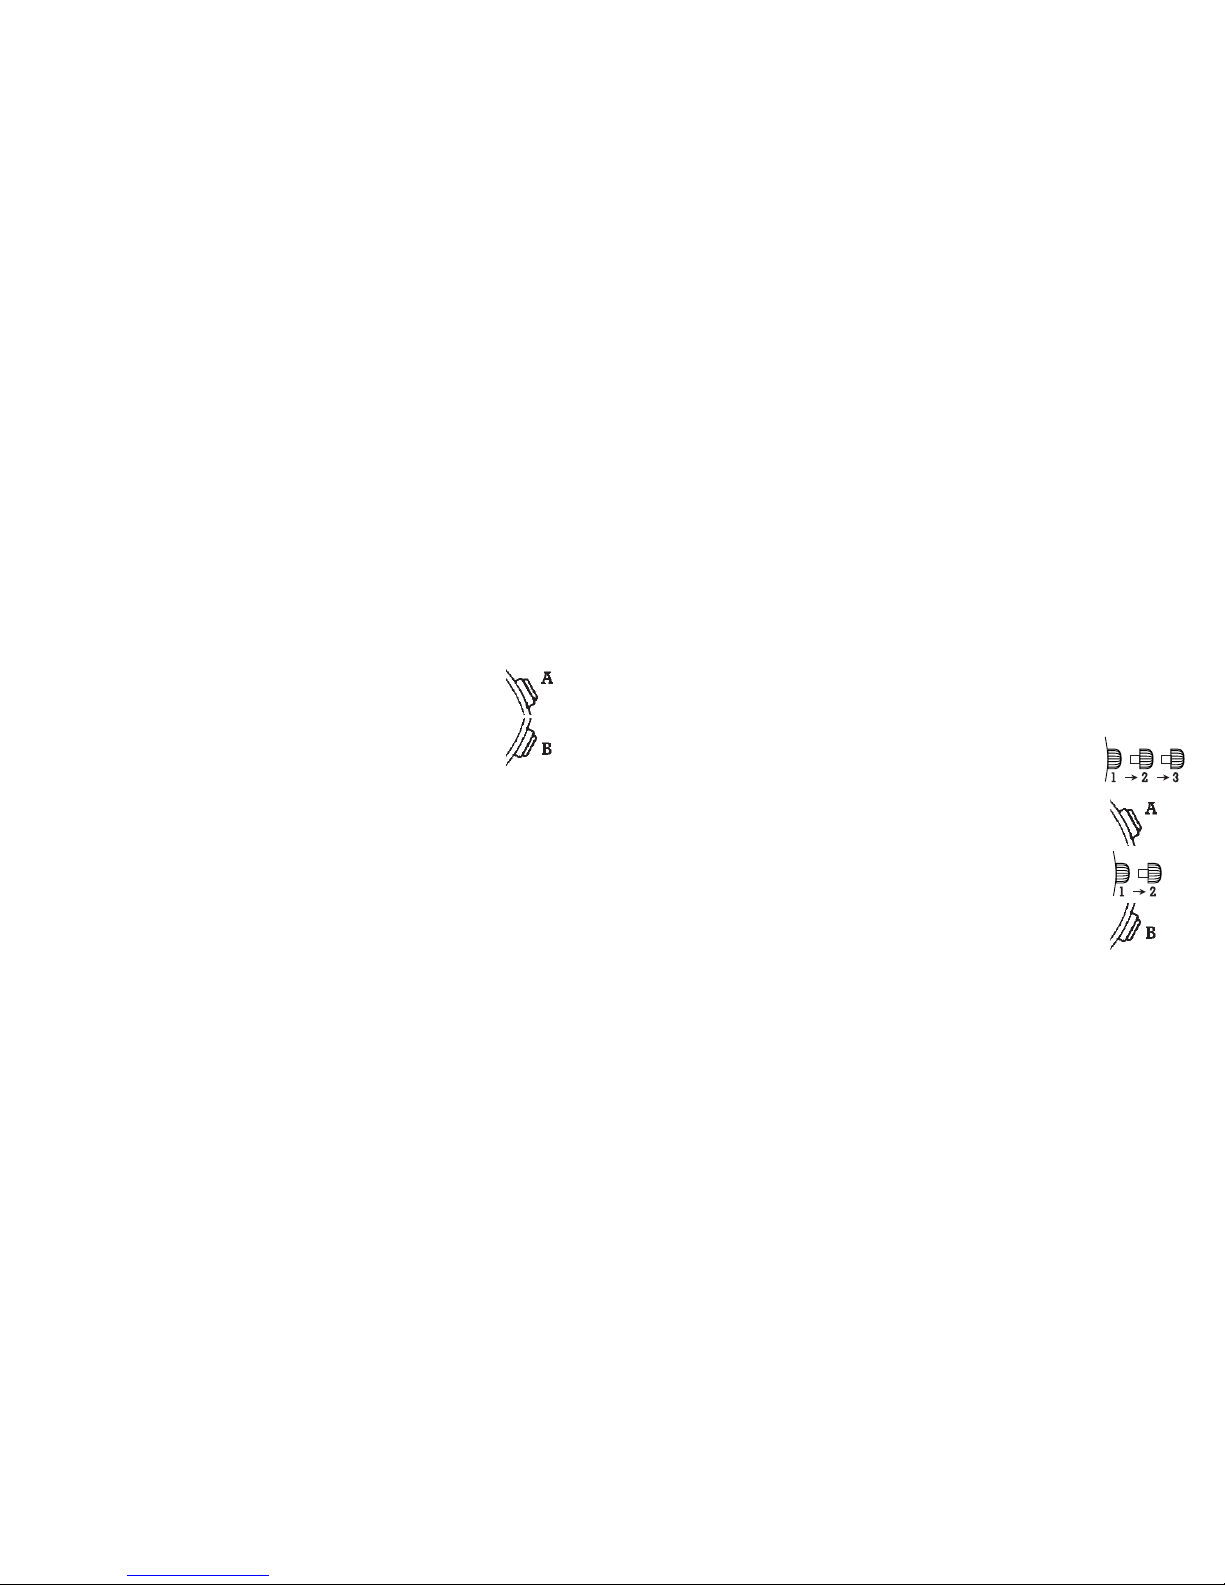
Measurement of Intermediate (Split) Times
•Press pusher A to start timing.
•Press pusher B to read off the first split time without
interrupting the measurement of the total time.
•Press pusher B to continue timing.
The chronograph has continued its measurement so that the
tenth of a second hand now reverts to zero and the other
hands “fly back” to allow for the elapsed time.
•Press pusher B again to read the split time.
• Repeat this procedure until the action to be timed has been
completed.
• Then press pusher A to stop timing.
• Once the timing operation has been completed,
press pusher B.
The chronograph and totalizer hands are now reset
to zero.
CHRONOGRAPH FUNCTIONS
CHRONO TYPE I & II
This movement indicates measured times in tenths of a second.
Measurement of Simple Times
•Press pusher A once to start the timing operation:
press again to stop timing.
• Once the timing operation has been completed,
press pusher B. The chronograph and totalizer
hands are now reset to zero.
Measurement of Partial Times (Addition function)
•Press pusher A again to restart timing. Further pressure on pusher A stops the timing operation. The
chronograph indicates the final time.
• Once the timing operation has been stopped, press
pusher B. The chronograph and totalizer hands are
now reset to zero.
10
Page 6
13
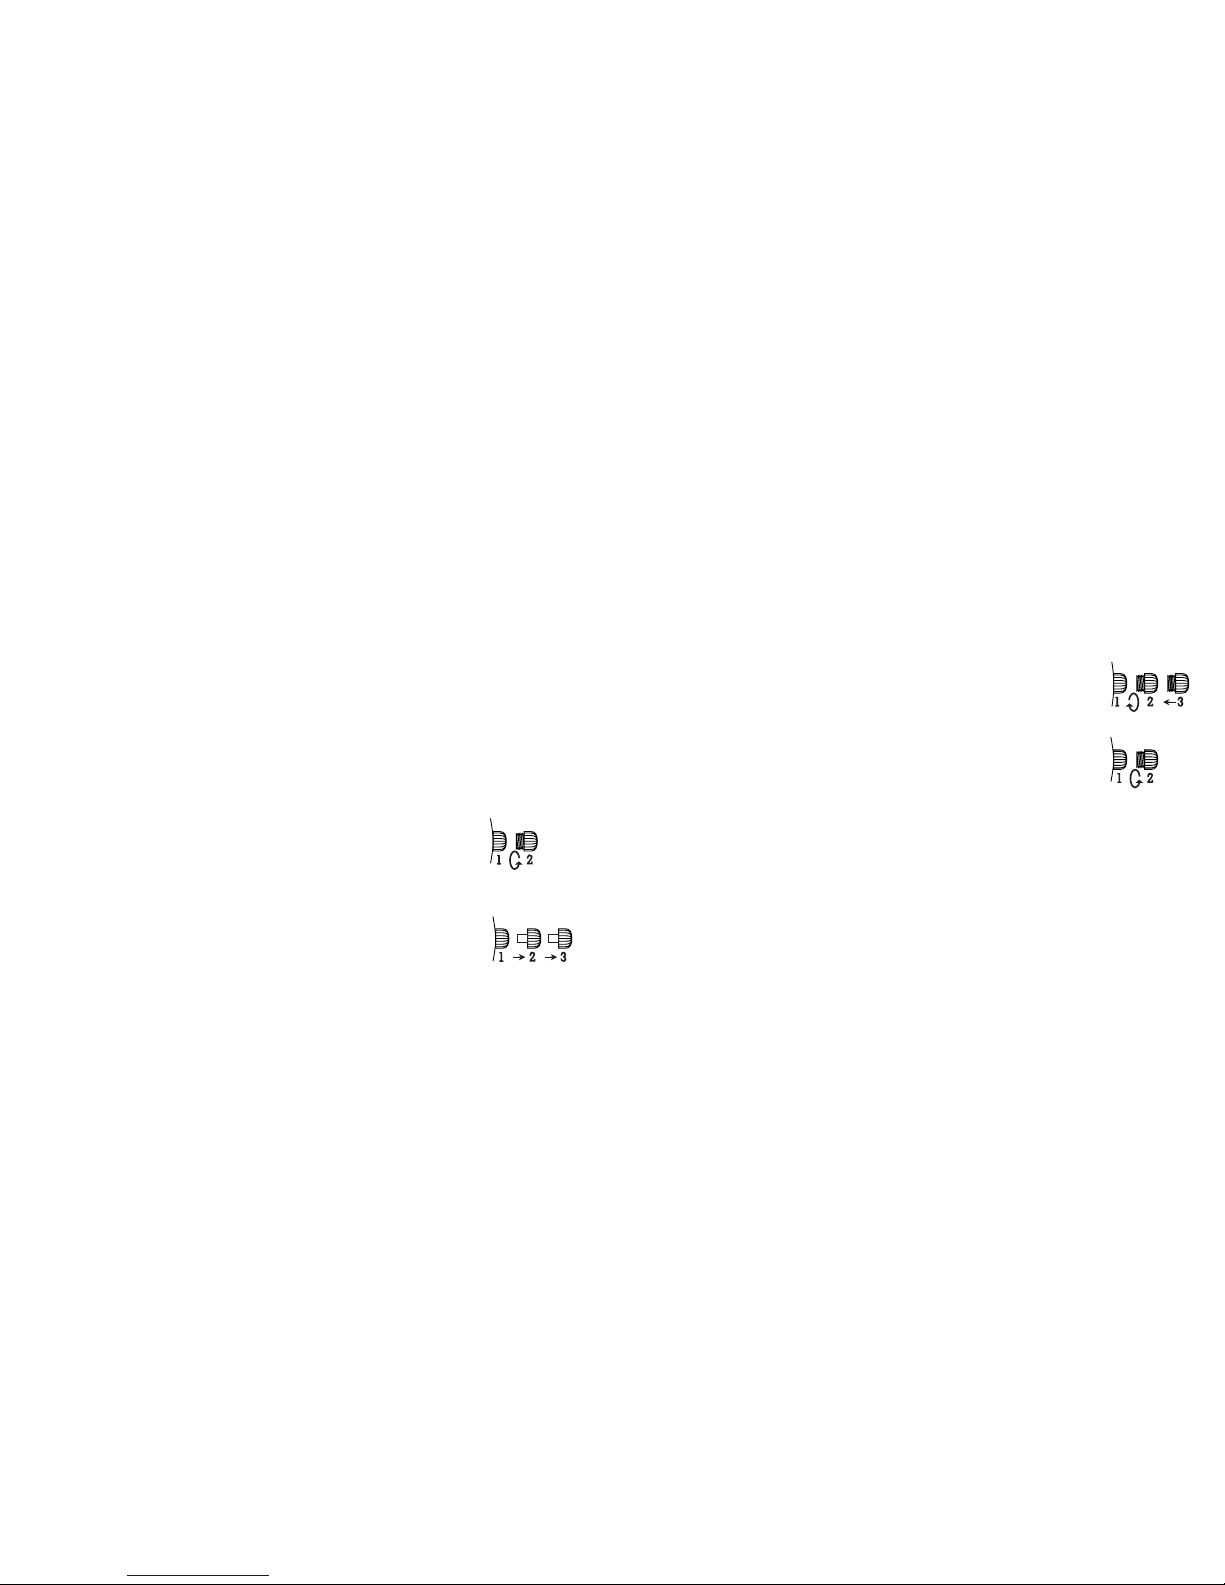
REINITIALIZING THE CHRONOGRAPH HANDS
Following a battery change, an incorrect actuation, violent impact
or exposure to a strong magnetic field, one or other of the chronograph counter hands may fail to revert to its original position (zero).
To reinitialize the hands, proceed as follows.
CHRONO TYPE I
Zero Reset of the Minutes Counter Hand
• Pull out the crown to position 3.
•Press pusher A briefly until the hand reverts to the
original position.
Zero Reset of the Seconds Counter Hand
• Pull out the crown to position 2.
•Press pusher B briefly until the hand reverts to the
original position.
Measurement of Two Times at Very Short Intervals
This function enables two times separated by a very short interval
to be measured.
•Press pusher A to start timing.
•Press pusher B to stop the first time without interrupting measurement of the second time.
•Press pusher A to stop measurement of the second time.
• The chronograph will indicate the first time.
•Press pusher B to display the second time.
• Once the timing operation has been completed, press pusher B.
The hands on the chronograph and totalizer reset to zero.
12
Page 7
•Press pusher B briefly until the hand reverts to the
original position.
Zero Reset of the Tenths of a Second Counter Hand
• Unscrew if necessary and then pull out the crown by
turning it toward you, then pull the crown out to position 3.
•Press pusher B briefly until the hand reverts to the
original position.
15
14
Zero Reset of the Tenths of a Second Counter Hand
• Pull out the crown to position 2.
•Press pusher A briefly until the hand reverts to the
original position.
CHRONO TYPE II
Zero Reset of the Chrono Seconds Hand
• Unscrew if necessary and then pull out the crown by
turning it toward you, then pull the crown out to position 3.
•Press pusher A briefly until the hand reverts to the
original position.
Zero Reset of the Elapsed Minute Hand
• Unscrew if necessary and then pull out the crown by
turning it toward you, then pull the crown out to position 2.
Page 8

The crown has 3 positions:
1. Normal position: recessed
2. Extended position: to set the date
3. Fully extended position: to set the time
SETTING THE DATE & TIME
CHRONO TYPE III & IV
Setting the Date (Quick Mode)
A. Pull out the crown to position 2 (the watch continues
to run).
B. Turn the crown until the correct date appears.
C. Push the crown back into position 1.
NOTE: The date can be changed during the date changing between
9:00 PM and 12:00 PM; please note that the date must be set to the
date of the following day as in this case the automatic date changing does not occur at midnight.
ANALOG CHRONOGRAPHS
CHRONO TYPE III & IV
NOTE: Your watch will have either a “pull-out“ or “screw-down“
crown. To determine this, gently try to pull out the crown to position 2.
If it does so, your watch has a pull-out crown. If not, use the thumb
and forefinger to apply mild pressure on the crown while rotating
toward you to release it. If it does so, your watch has a screw-down
crown.
CHRONOGRAPH OPERATING PROCEDURE
Chrono types III & IV feature a 12-hour counter, a 30-minute counter,
sweep second hand counter and date calendar. They enable time to
be measured to an accuracy of one second in a 12-hour period.
16
Page 9

19
CHRONO TYPE III
Display elements Control buttons
Second hand Push button A
Minute hand
Hour hand Crown
Center Stop-second
Minute counter Push button B
Hour counter
Date
Setting the Date and Time
A. Pull out the crown to position 2 (the watch continues
to run).
B. Turn the crown until yesterday’s date appears.
C. Pull out crown to position 3.
D. Turn the crown until the correct date appears.
E. Turn the crown until you reach the correct time.
F. Push the crown back into position 1.
TO SET TIME ALONE: Follow instructions “C“.
NOTE: In order to set the time to the exact second, the crown must be
pulled out when the second hand is in position “60“ (i.e. 12:00). Once
the hour and minute hands have been set, the crown must be
pushed back into position 1 at the exact second.
18
Page 10

21
The chronograph function records the time of an event in seconds up
to 12 hours.
Basic Function (Elapsed Time)
•Press pusher A (top) once to start the timing operation:
press again to stop timing.
• Once the timing operation has been completed, press
pusher B (bottom). The chronograph and totalizer
hands reset to zero.
Chronograph Accumulated Timing
•Press pusher A (top) once to start the timing operation:
press again to stop timing. Continue to press A to start
and stop the accumulated timing function.
• Once the timing operation has been completed, press
pusher B (bottom). The chronograph and totalizer
hands reset to zero.
CHRONO TYPE IV
Display elements Control buttons
Minute hand Push button A
Hour hand
Center Stop-second
Crown
Minute counter
Hour counter Push button B
Date
20
Page 11

23
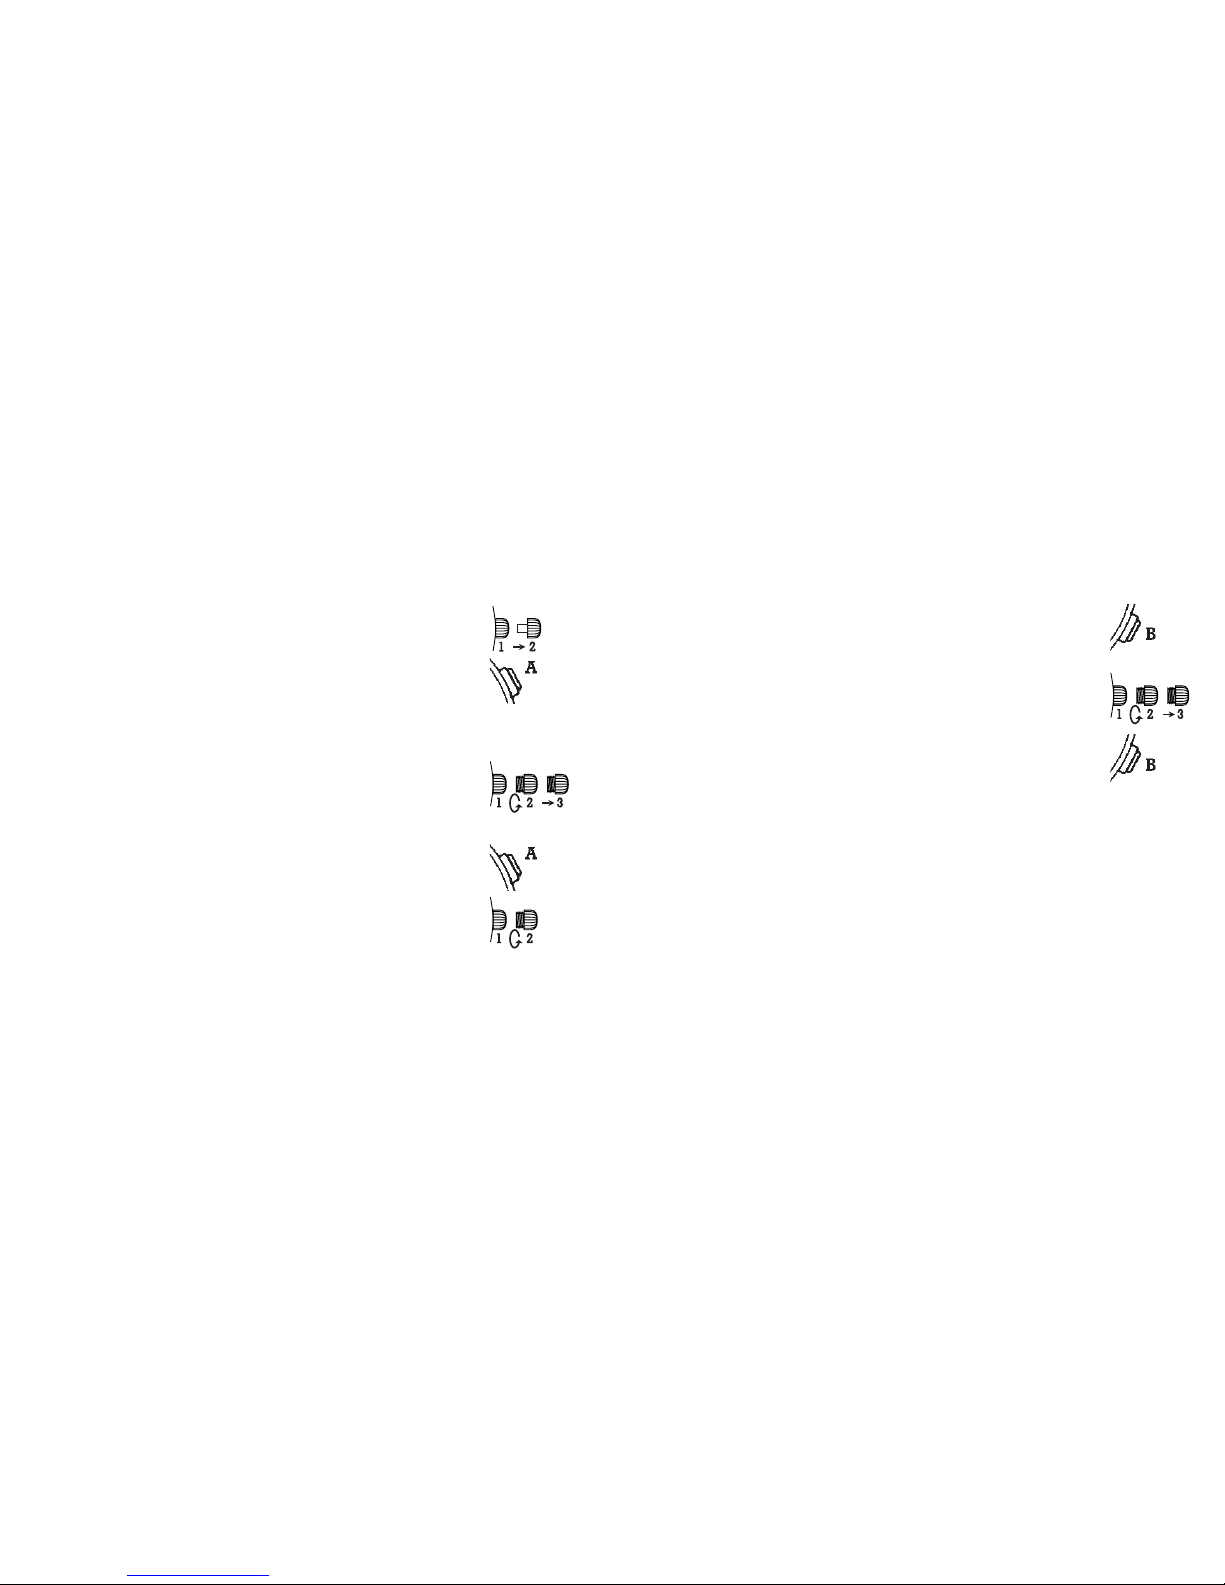
REINITIALIZING THE CHRONOGRAPH HANDS (SUBDIALS)
Following a battery change, an incorrect actuation, violent impact
or exposure to a strong magnetic field, one or other of the chronograph counter hands may fail to revert to its original position (zero).
To reinitialize the hands, proceed as follows.
CHRONO TYPE III
• Pull out the crown to position 3.
• Keep the pushers A and B depressed simultaneously
for at least 2 seconds (the center stop-second rotates
by 360 degrees). Corrective mode is activated.
Zero Reset of the Center Stop Second
• Single step: press pusher A briefly.
• Continuous: press and hold pusher A.
Adjusting next hand press pusher B.
Measurement of Intermediate (Split) Times
•Press pusher A to start timing.
•Press pusher B to read off the first split time without
interrupting the measurement of the total time.
•Press pusher B to continue timing.
The chronograph has continued its measurement so that the
chronograph hands catch-up to allow for the elapsed time.
•Press pusher B again to read the split time.
• Repeat this procedure until the action to be timed has been
completed.
• Then press pusher A to stop timing.
• Once the timing operation has been completed,
press pusher B. The chronograph and totalizer
hands are now reset to zero.
22
Page 12

25
Zero Reset of the Center Stop Second
• Single step: press pusher A briefly.
• Continuous: press and hold pusher A.
Adjusting next hand press pusher B.
Zero Reset of the Minute Counter Hand and the Hour
Counter Hand (position 6:00)
• Single step: press pusher A briefly.
• Continuous: press and hold pusher A.
Return the crown to position 1.
Zero Reset of the Hour Counter (position 6:00)
• Single step: press pusher A briefly.
• Continuous: press and hold pusher A.
Adjusting next hand press pusher B.
Zero Reset of the minute counter hand (position 9:00)
• Single step: press pusher A briefly.
• Continuous: press and hold pusher A.
Return the crown to position 1.
CHRONO TYPE IV
• Pull out the crown to position 3.
• Keep the pushers A and B depressed simultaneously
for at least 2 seconds (the center stop-second rotates
by 360 degrees). Corrective mode is activated.
24
Page 13

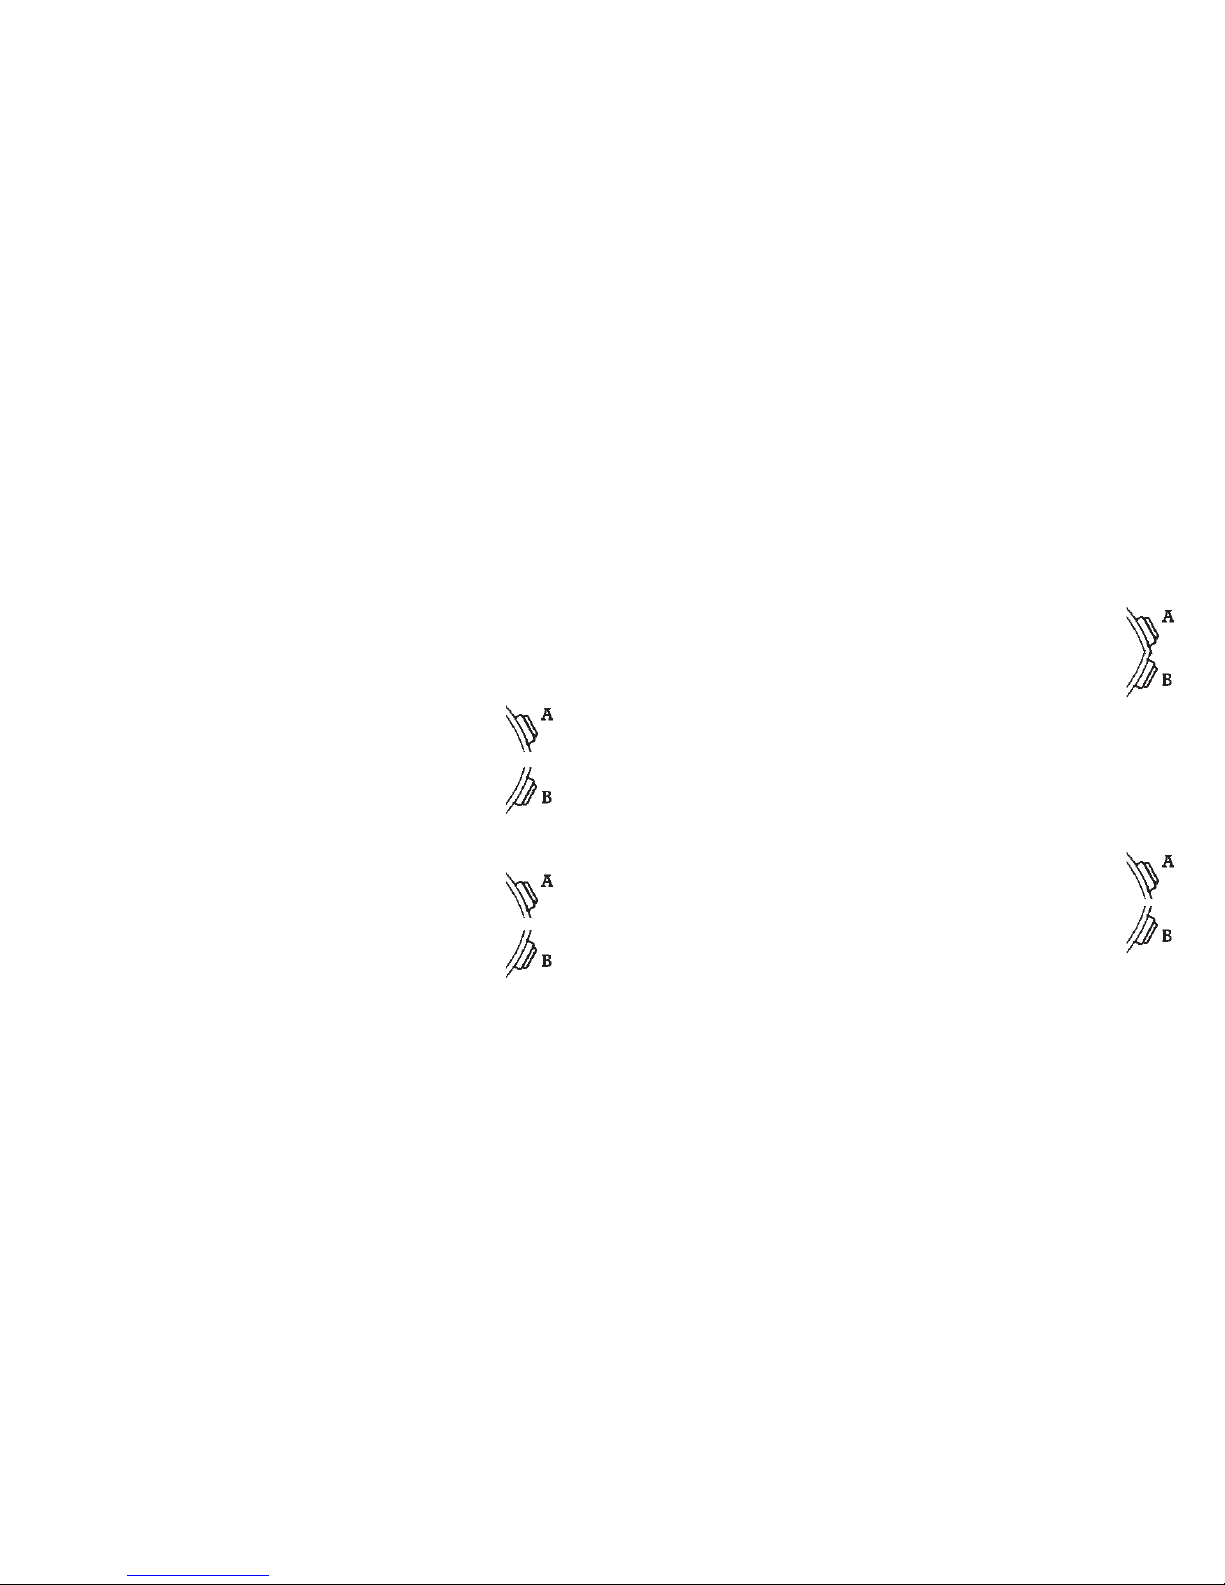
B
A
12 3
C
The crown
C has three positions which affect push button functions:
Position 1: Normal position.
Pushers
A and B: chronograph func-
tions.
Position 2: Quick correction of hour
hand. Date corrections by passing
through 24 hours.
Pusher
B (at 4 o’clock): Initialization
of the 60 minute counter.
Position 3: Time setting, stopping of
the movement (for storage).
Pusher
A (at 2 o’clock): Initialization
of the 60 second timer hand.
Pusher
B: Initialization of the 1/10th
of a second timer.
2726
ANALOG CHRONOGRAPHS
CHRONO TYPE V
NOTE: Your watch will have either a “pull-out“ or “screw-down“
crown. To determine this, gently try to pull out the crown to position 2.
If it does so, your watch has a pull-out crown. If not, use the thumb
and forefinger to apply mild pressure on the crown while rotating
toward you to release it. If it does so, your watch has a screw-down
crown.
CHRONOGRAPH OPERATING PROCEDURE
This chronograph movement features a 60 minute counter-hand, a
60 second counter hand (both located on center post – silver with red
tip) and one tenth second indicator.
Page 14

INSTRUCTIONS FOR SCREW DOWN CROWN
NOTE:
You must always push in and screw down the crown to form
a water-resistant seal with the case. Never operate the crown when
the watch is wet.
SETTING THE DATE AND THE TIME
A. Unscrew the crown by turning it toward you, then
pull out crown to position 2.
B. Turn the crown away from you until the date show-
ing is the day before the desired setting.
C. Pull out the crown to the fully extended position (3)
and rotate away from you. When midnight is
reached, the date will advance to the desired date.
Continue to turn the crown until the desired time is
set.
D. Push in the crown and screw down, away from you,
29
SETTING THE DATE & TIME (CHRONO TYPE V)
Remember, the date advances at 12:00 midnight, not 12:00 noon.
INSTRUCTIONS FOR PULL OUT CROWN
NOTE:
Never operate the crown when the watch is wet.
A. Pull out the crown to position 2 (middle position).
B. Rotate the crown away from you until the date show-
ing is the day before the desired setting.
C. Pull out the crown to position 3 (fulley extended) and
rotate away from you. When midnight is reached,
the date will advance to the desired date.
Continue to turn the crown until the desired time is set.
D. Push in the crown, returning it to position 1. The date
and time are now set.
TO SET TIME ALONE: Refer to instruction “C“ and “D“.
28
Page 15

Measurement of Elapsed Times
•Press pusher A (at 2 o’clock) to start the timing oper-
ation.
•Press again to stop timing.
NOTE: Timing will be indicated within 1/10th of a second on
appropriate sub-dial.
These two operations may be repeated several times, to add short
time measurements.
• Once the timing operation has been completed,
press pusher B (at 4 o’clock) briefly until the hands
revert to the original position.
Measurement of Intermediate (Split) Times
•Press pusher A to start timing.
•Press pusher B to read off the first split time without
interrupting the measurement of total time.
31
until it is sealed tight into its normal position (1). The
date and time are now set.
TO SET TIME ALONE: Unscrew the crown by turning it
toward you to get to unscrewed position (2) and refer to
instructions “C“ and “D“.
30
Page 16

REINITIALIZING THE CHRONOGRAPH HANDS
Following an incorrect activate, violent impact or exposure to a
strong magnetic field, one or the other of the chronograph counter
hands may fail to revert to its original position (zero). To reinitialize
the hands, proceed as follows:
Zero Reset of the Minute Counter Hand
• Pull out the crown to position 2.
•Press pusher B briefly until the hand reverts to the
original position (on 60).
Zero Reset of the Seconds Counter Hand
• Pull out the crown to position 3.
•Press pusher A briefly until the hand reverts to the
original position (on 60).
33
•Press pusher B to continue timing. The chronograph will continue its measurement by reverting the 1/10th hand to zero
and “flying back” to the elapsed time.
•Press pusher B again to read the second split time.
• Repeat this procedure until the action to be timed has been
completed.
•Press pusher A to stop timing.
NOTE: Timing will be indicated within 1/10th of a second on appropriate sub-dial.
• Once the timing operation has been stopped, press
pusher B briefly until the hands revert to the original
position. The chronograph and totalizer hands will
be reset to zero.
32
Page 17

35
ANALOG/DIGITAL CHRONOGRAPHS
Digital
Display
Display
Mode C
A Start/Stop
B Set
Crown stops
movement and
sets hands on
time
Inactive Position
Zero Reset of the 1/10th Second Counter
• Pull out the crown to position 3.
•Press pusher B briefly until the hand reverts to the
original position (on 0).
• Push the crown back down firmly against the case to
position 1.
NOTE: You must always push in and screw down (if applicable) the
crown to form a water resistant seal with the case. Never operate the
crown when the watch is wet.
34
Page 18

37
ADJUSTING THE DATE, MONTH, DAY
MODE
DATE
3 sec.
DIGITAL DISPLAY
Pusher C = MODE
By means of the pusher the different functions can be selected.
These are:
– Date
– Second Time Zone (12 or 24 hour display)
– Alarm
– Chrono (60 Minutes) / LAP
By pressing pusher A + B simultaneously when the date or the second time zone is displayed the chime can be switched on or off.
ANALOG DISPLAY
By pulling the crown the movement stops and the time can be set.
NOTE: The analog and digital movements of this watch operate
independently. Please set each individually to ensure they are kept
in sync.
36
Page 19

ADJUSTING THE SECOND TIME ZONE
3 sec.
C or B
MODE
38
ADJUSTING THE DATE, MONTH, DAY (cont.)
Page 20

41
USING THE CHRONOGRAPH
MODE
START/STOP
RESET
40
ADJUSTING THE ALARM
ALARM
ON - OFF
ALARM
ON - OFF
MODE
Page 21

AUTOMATIC CHRONOGRAPH
(SELF-WINDING MECHANICAL WATCH)
The chronograph movement indicates the hours, minutes, seconds
and date and enables short times to be measured to an accuracy of
1/5th of a second in a 12 hour period.
The crown C has three positions
• Position 1: Neutral and winding position (mechanical
movement only).
• Position 2: Correction of the date.
• Position 3: Setting the time, seconds stop.
IMPORTANT:
Some watches are fitted with a screw-down crown which
must be released before use. After use, push the crown
back to position 1, then press and screw down the crown
(to ensure a tight seal). Never operate the crown when the
watch is wet.
4342
LAP TIME
RATTRAPANTE-FUNCTIONS
Page 22

45
SETTING THE TIME
•Wind the movement if necessary.
• Pull the crown out to position 3. The seconds hand will stop.
•
If your watch indicates the date, make sure that the position of the
hands corresponds to a change of date at midnight and not at noon.
•Turn the crown to pre-position the hands on the desired time.
• At the time signal, push the crown back down firmly against the
case in position 1. The watch will begin to run again instantly.
NOTE: For precise time setting, it is advisable to pass the desired
minute and position the hand in the counterclockwise direction.
NOTE: Never operate the crown when the watch is wet.
44
Push-pieces
• Push-piece A: Chronometer start/stop
• Push-piece B: Chronograph zero reset.
Watch Indications
F
Hours D Minutes
G Seconds H Date
Chronograph Indications
I
12 hour counter
E 30 minute counter
J 60 second timer
Page 23

47
Zero Reset
• Once the timing operation has stopped, press push-piece B. The
chronograph and totalizer hands are reset to zero.
Winding
Your watch is wound automatically when you wear it on your wrist.
If the watch is not worn often enough, the movement will have to be
wound manually by turning the crown at least twenty times in position 1.
TACHYMETER FEATURE
You use your tachymeter to measure rates of speed. Although it is
marked “kmh” for kilometers per hour your tachymeter can also be
used to measure “mph” or other units per hour.
It can calculate how many cars per hour pass a given point on the
highway, or how many units roll off a production line per hour.
Here’s how it works:
46
RAPID DATE ADJUSTMENT
• Pull the crown out to position 2.
•Turn the crown clockwise until the correct date appears.
• Push the crown back down firmly against the case to position 1.
WARNING: The date must never be corrected between 8 pm and 2
am. The watch continues to run while the fast date correction is
being made.
CHRONOGRAPH FUNCTIONS
Start-Stop Function
•Press push-piece A once to start timing; press again to stop the
timing operation.
Restart Timing
•Press push-piece A again to restart timing.
Page 24

49
RATCHET BEZEL (Available on select models only)
The rotating ratchet bezel, available on select models only, was
designed to enable divers to time dives, but can be used to measure
any elapsed time period. The turning bezel has grooves to make it
easy to operate. To measure elapsed time, simply turn the bezel
counter-clockwise until the zero mark (also the 60 mark) is opposite
the minute hand. From this moment on, the position of the minute
hand in relation to the zero mark on the bezel will indicate the total
number of minutes that have elapsed.
48
TO MEASURE SPEEDS OF TRAVEL:
1. Assume you wish to measure a car’s average speed over a one
mile course. Start the stopwatch when the car passes the starting
point. Stop it when the car passes the one-mile or one-kilometer
mark.
2. Read the corresponding number on the outer tachymeter ring.
Let’s say the car covered one mile or one kilometer in 45 seconds.
The tachymeter number next to the 45-second mark is 80 – so the
car averaged 80 miles per hour, or 80 kilometers per hour, over
that measured course.
TO DETERMINE UNITS PER HOUR:
1. Start the stopwatch, count a convenient number of units and then
stop the watch. Say, for example, that you are counting units of
production and you stop the count at 10 units, and the sweep
seconds hand reads 45 seconds.
2. The tachymeter number next to the 45-second mark is 80. Multiply
10 times 80 to get the number of units produced per hour: 800.
NOTE: The tachymeter numbers offer you a mathematical shortcut.
Page 25

BATTERY
Your timepiece may be powered by a 1.55 volt silver oxide watch
battery.
DEAD BATTERIES SHOULD BE REPLACED IMMEDIATELY.
Substituting interchangeable batteries is not recommended. Battery
change should be performed by a qualified technician who should
also check the condition of the gaskets and the O-ring at the same
time. Battery is not covered by the warranty.
5150
WATER RESISTANCE
Please check the indication of water resistance on the case back of
your Victorinox Swiss Army watch and carefully read the corresponding explanation from the following list:
Water-resistant to 30 meters
(100 feet/3 ATM). Will withstand rain or splashes of
water but should not be worn
while showering, swimming
or diving.
Water-tested to 50 meters
(165 feet/5 ATM). Suitable
for showering or swimming in shallow water.
Water-tested to 100 meters
(330 feet/10 ATM). Suitable
for swimming or snorkeling.
Water-tested to 200 meters
(660 feet/20 ATM). Suitable
for swimming, snorkeling
or skin diving.
Water-tested to 300 meters
(990 feet/30 ATM). Suitable
for swimming, snorkeling
or scuba diving.
Water-tested to 500 meters
(1,650 feet/50 ATM). Suitable
for swimming, snorkeling
or scuba diving.
 Loading...