

Page 1
Need Help? Watch the video at www.victortech.com/High-Rise
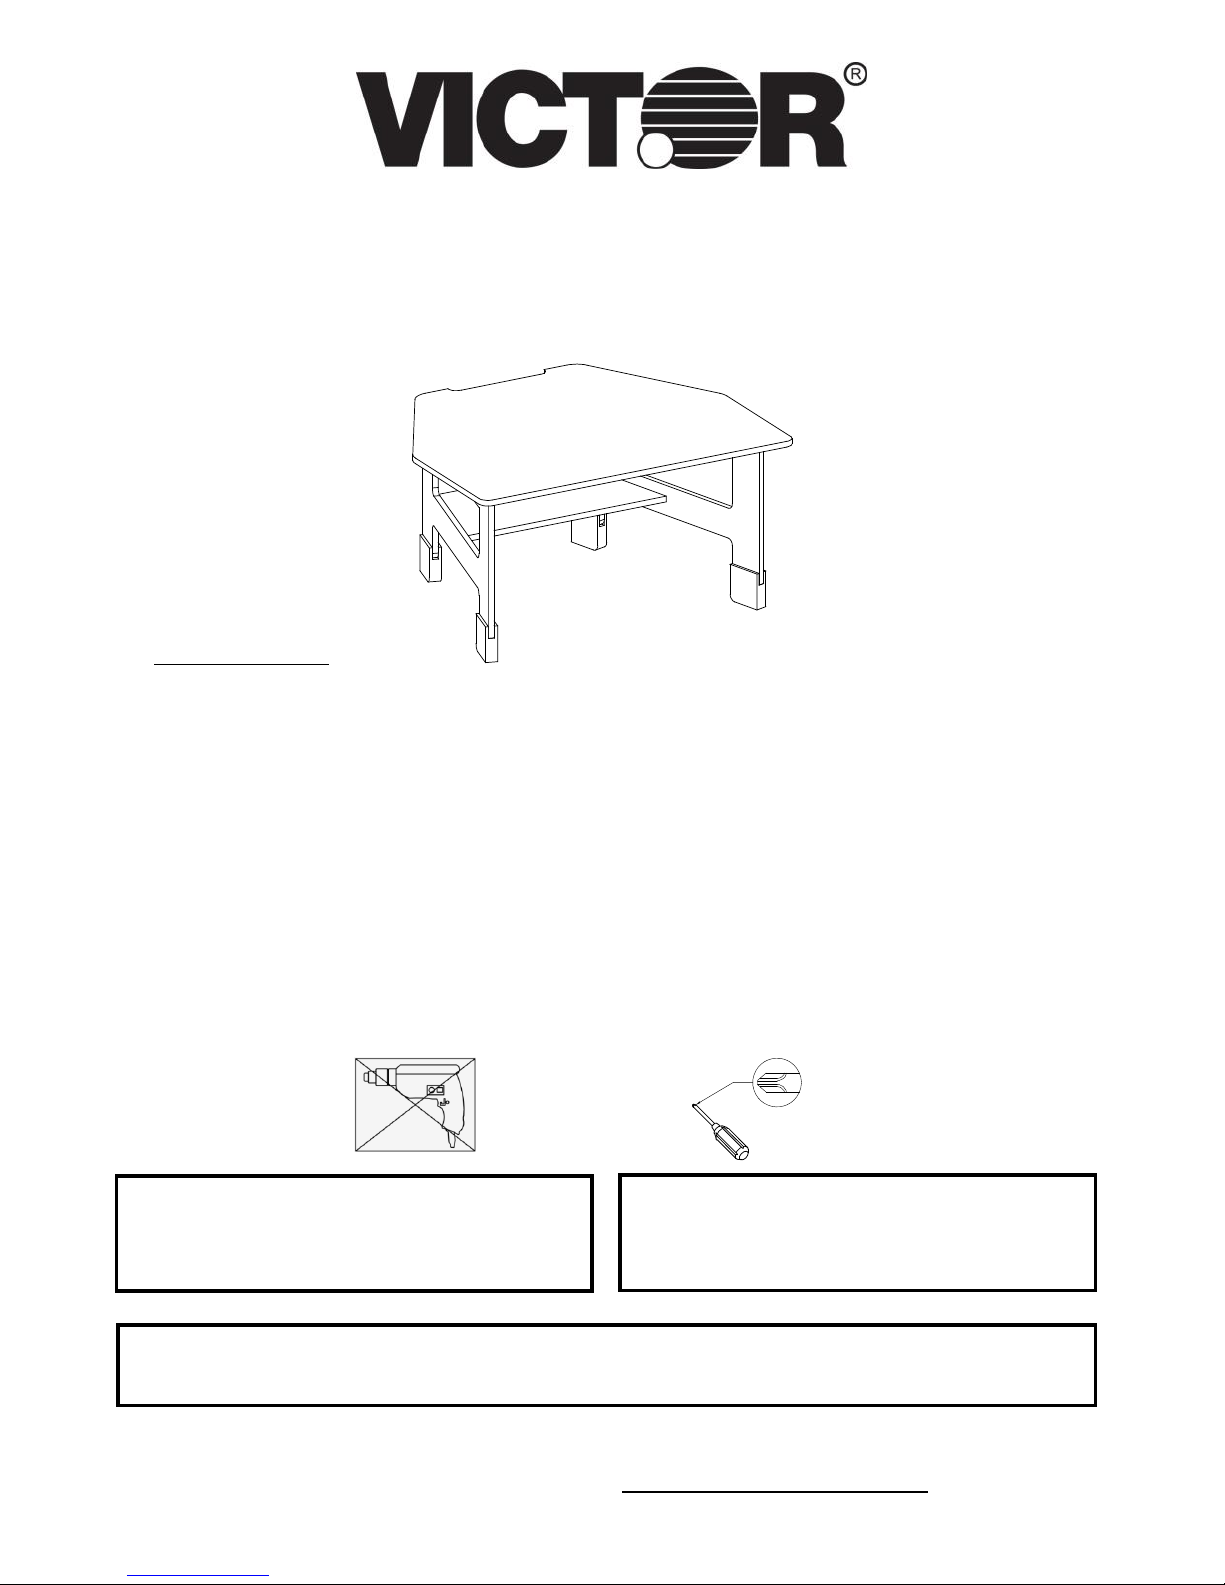
High Rise™ Stand-Up Desk Converter
With Built-In Shelf
Assembly Instructions for Model DC100
PRE-ASSEMBLY
• Please read all instructions before beginning assembly. We strongly recommend
you watch the video at www.victortech.com/High-Rise.
• Remove all parts and hardware from box and lay out on a scratch-free work surface,
as this will avoid damaging any parts during assembly. The shipping box provides
an ideal work surface.
• Do not dispose of any contents or packaging material until assembly is complete.
This will help to avoid accidentally discarding small parts or hardware.
• For your safety and ease, adult assembly by two people is recommended.
• Use the parts and hardware lists to identify and separate each of the pieces included
prior to starting assembly.
• Do not use power tools. Use only the included screwdriver.
Power tools can damage hardware and split wood.
Missing Parts or UPS Damaged Parts?
For your convenience you can E-mail us at
victor@victortech.com
If you require assistance during assembly, please call our
Customer Service Department
Monday – Friday 8 am to 4 pm CST 1-800-628-2420
Or watch our video at Victortech.com/High-Rise
Do not use unless all screws are tight. At least every six months, check all screws to be sure they are tight. If parts
are missing, broken, or worn, stop use of the product until repairs are made using Victor authorized parts.
Page 2
Need Help? Watch the video at www.victortech.com/High-Rise
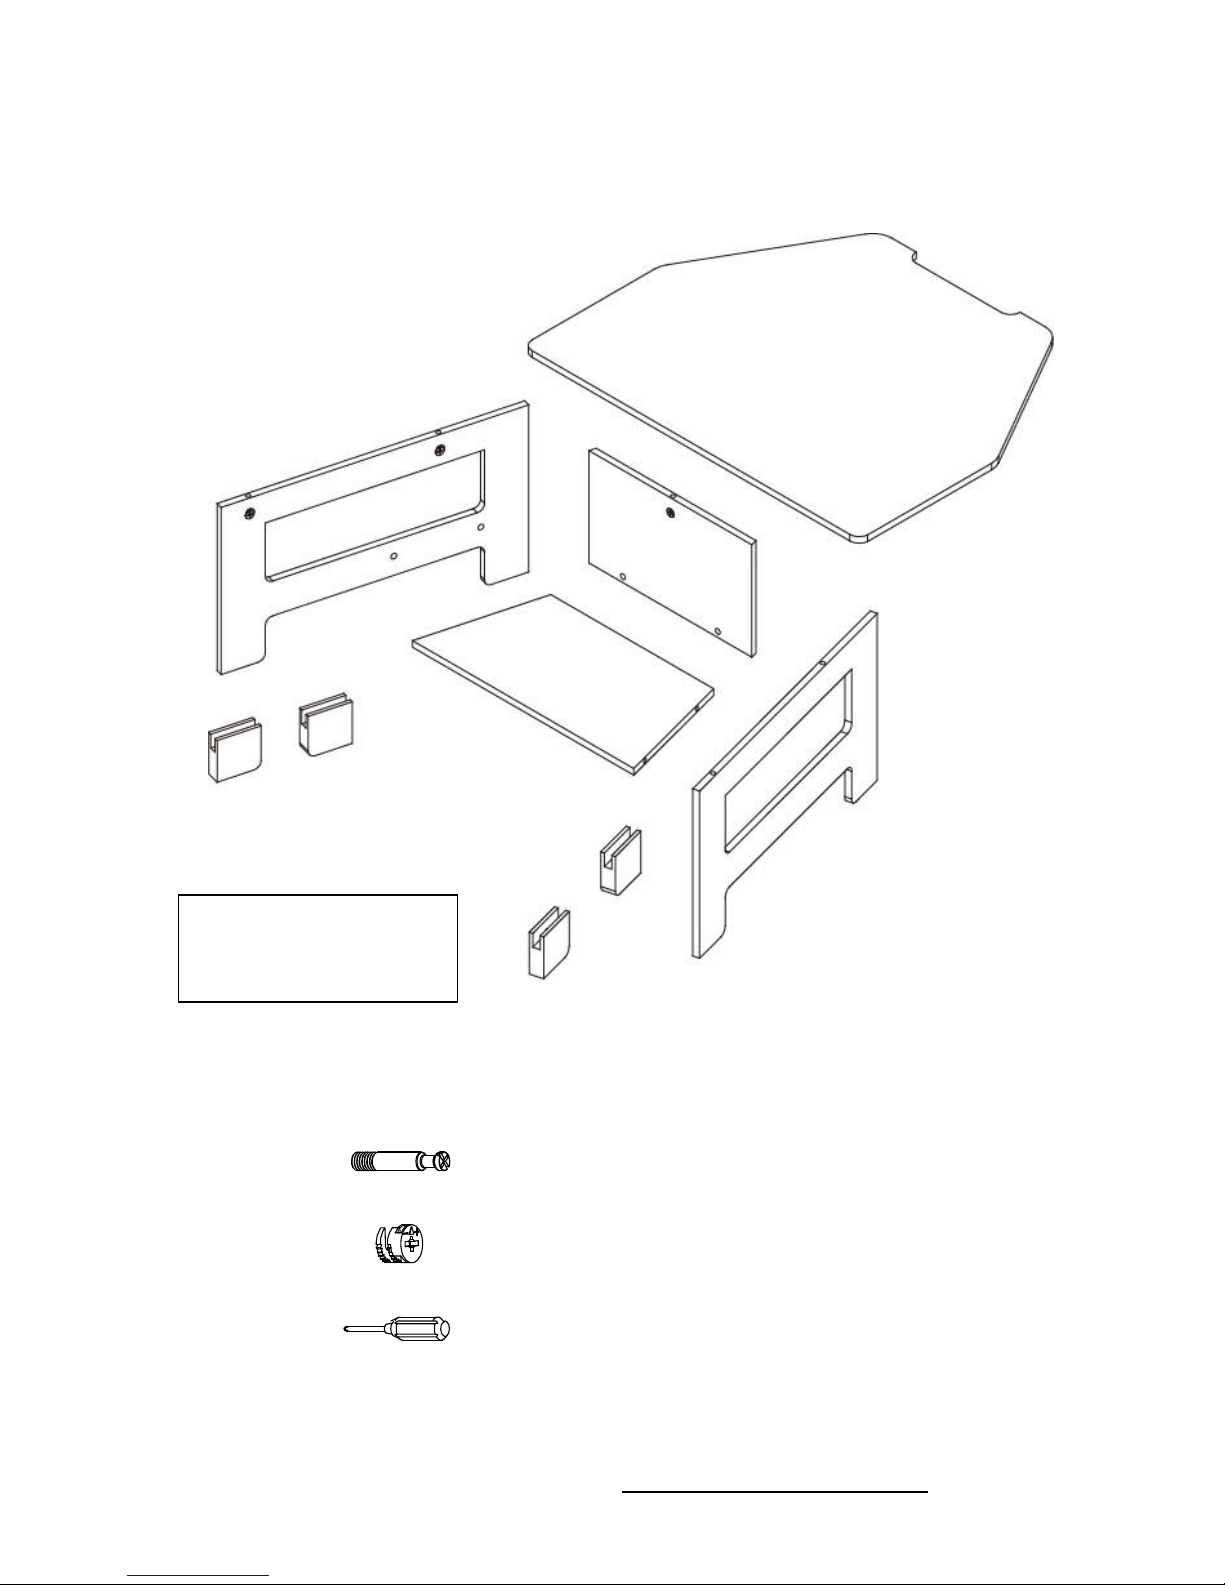
Parts List
Hardware List
A:Dowel 11 + 2 Extra
B:Cam Lock 11 Installed + 2 Extra
C:Screwdriver 1Pc
Missing Parts?
Call 1-800-628-2420 for
Victor customer service.
1
2 4 5 6 7 8 9
3
Page 3
Need Help? Watch the video at www.victortech.com/High-Rise
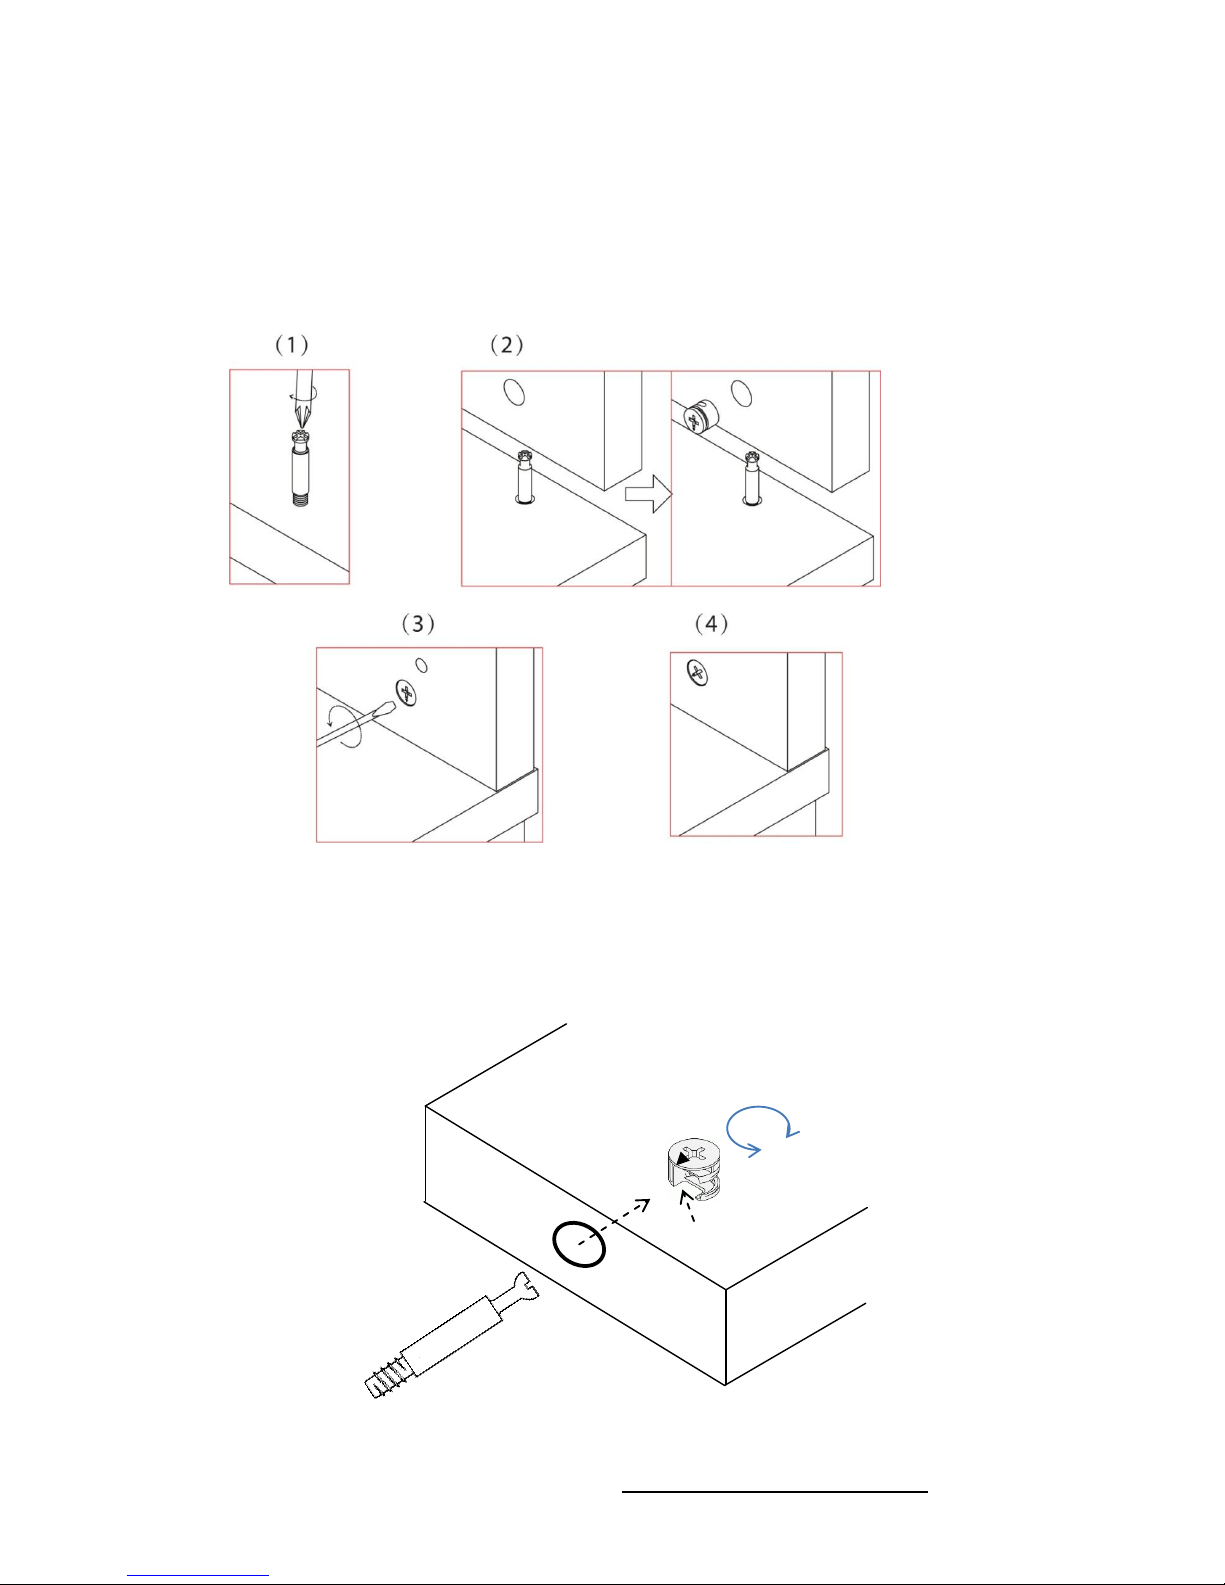
This product uses a system of Dowels and Cam Locks to connect pieces together.
(1) The Dowel is inserted into one part with a screwdriver.
(2) The Cam Lock is inserted in a hole on the other part. (Note: The Cam Lock may come
already assembled into the wood). The Dowel on one part is inserted into an access hole
on the other part and protrudes into the Cam Lock.
(3) The Cam Lock is rotated one-half rotation clockwise to connect the parts.
(4) When complete, the adjoining pieces will be held tightly together.
TIP!
Use the screwdriver to rotate Cam Lock until the small arrow is facing towards the open
hole where the dowel will be inserted. A Dowel will be inserted into the hole and into the
open side of the Cam Lock.
Access Hole
Open Side
Dowel
Page 4

Need Help? Watch the video at www.victortech.com/High-Rise
Step 1
Use Screwdriver to insert Dowels into small white threaded holes on Parts 2, 3, and 4.
Insertion should be easy. If strong force is required, back out the Dowel and start again.
Turn Dowel until all threads are no longer visible.
NOTE: In Steps 2, 3, and 4, you will be assembling the product upside down.
Step 2
Attach Part 4 to Part 5. The two Dowels on Part 4 go into the two side access holes on Part
5. Turn Cam Locks on Part 5 one-half rotation clockwise to connect 4 and 5 together. Do
not over tighten.
TIP: If a Cam Lock does not connect firmly,
make sure the inserted dowel is turned all
the way into the small white threaded hole.
Helpful Hint:
Make sure the cam locks are facing
up on Part 5 when attaching these
Page 5

Need Help? Watch the video at www.victortech.com/High-Rise
Attach Parts 2 and 3 to Part 5. The two Dowels on Part 2 go into the side access holes on
Part 5. The two Dowels on Part 3 go into the other side access holes on Part 5.
Turn Cam Locks on Part 5 one-half rotation clockwise to complete the connection. Do not
over tighten.
TIP: If a Cam Lock does not
connect firmly, make sure the
inserted dowel is turned all the way
into the small white threaded hole.
If not, the Cam will not lock.
Page 6

Need Help? Watch the video at www.victortech.com/High-Rise
Use Screwdriver to insert Dowels into small white threaded holes on Part 1.
Flip the assembly right-side up. Attach Part 1 to Parts 2, 3, and 4. The Dowels from Part 1
go into the top access holes of Parts 2, 3, and 4.
Turn Cam Locks on Parts 2, 3, and 4 one-half rotation clockwise to complete the
connection. Do not over tighten.
TIP: If a Cam Lock does not
connect firmly, make sure the
inserted dowel is turned all the way
into the small white threaded hole.
If not, the Cam will not lock.
Page 7

Need Help? Watch the video at www.victortech.com/High-Rise
Step 7
Place the High Rise™ Stand-Up Desk Converter on a desk. If taller height is desired,
assemble optional Height Extenders (Parts 6, 7, 8, and 9) to the bottom of each leg. This
will add 2 inches of height to the work surface.
Victor Technology
www.victortech.com
Bolingbrook, IL USA
1-800-628-2420
* We recommend not leaning on the DC100 High Rise Stand-Up Desk Converter. Doing so may cause the
unit to tip or break.
* This unit has been tested to accommodate up to 50 lbs. We recommend not exceeding this limit.
6 7 8
9
 Loading...