

Victesse frontengine User Manual
Victesse
Frontengine
User
Manual

Table of contents
Congratulations on the purchase of your new Victesse .................................................................................... 2
Use of the battery ................................................................................................................................................... 3
Operating computer and reading display ............................................................................................................ 4
Central display with control on the left side of the handlebar ......................................................................... 8
Error code .............................................................................................................................................................. 11
Lighting ................................................................................................................................................................... 12
Gears ...................................................................................................................................................................... 14
Adjusting the handlebar ...................................................................................................................................... 15
Adjusting the saddle ............................................................................................................................................. 17
Maintenance/cleaning .......................................................................................................................................... 18
English- 1
Victesse

Congratulations on the purchase of your new Victesse
Thank you and congratulations for choosing a Victesse bike! Victesse bicycles are built with the greatest
care and are only assembled with the best parts. We also offer at-home service, so we feel certain you
will have a wonderful experience with your Victesse bike.
This guide will help you get acquainted with all the features of your Victesse bike and includes tips to
help you keep your bike in perfect condition.
There is one tip we would like to share with you right away, as it has been shown to make e-bikes last
longer: always start off in a low assist mode and low gear (i.e. a gear in which you pedal faster). As your
speed increases, you can shift to a higher gear and higher assist mode. This provides a gentle, gradual
start. You will ride more safely and smoothly, and this minimizes stress on the battery and motor. This
will help to increase the life of your bike.
Happy cycling!
Victesse
English- 2
Use of the battery
> Carefully insert the battery into the battery slot
> Turn on the battery with the key: turn the key to the horizontal “on” position
- Always remove the key from the battery during use, because the key is not locked in the “on” position
- The battery itself is locked in the “on” position
Removing battery from the bicycle
> Turn the key to “off” to turn off the battery
> To release the battery lock, with the key in the “push” position push the key in gently and turn it to
“unlock”. Remove the key from the lock. You can now remove the battery from the battery slot by
pulling the battery out the back of the carrier rack.
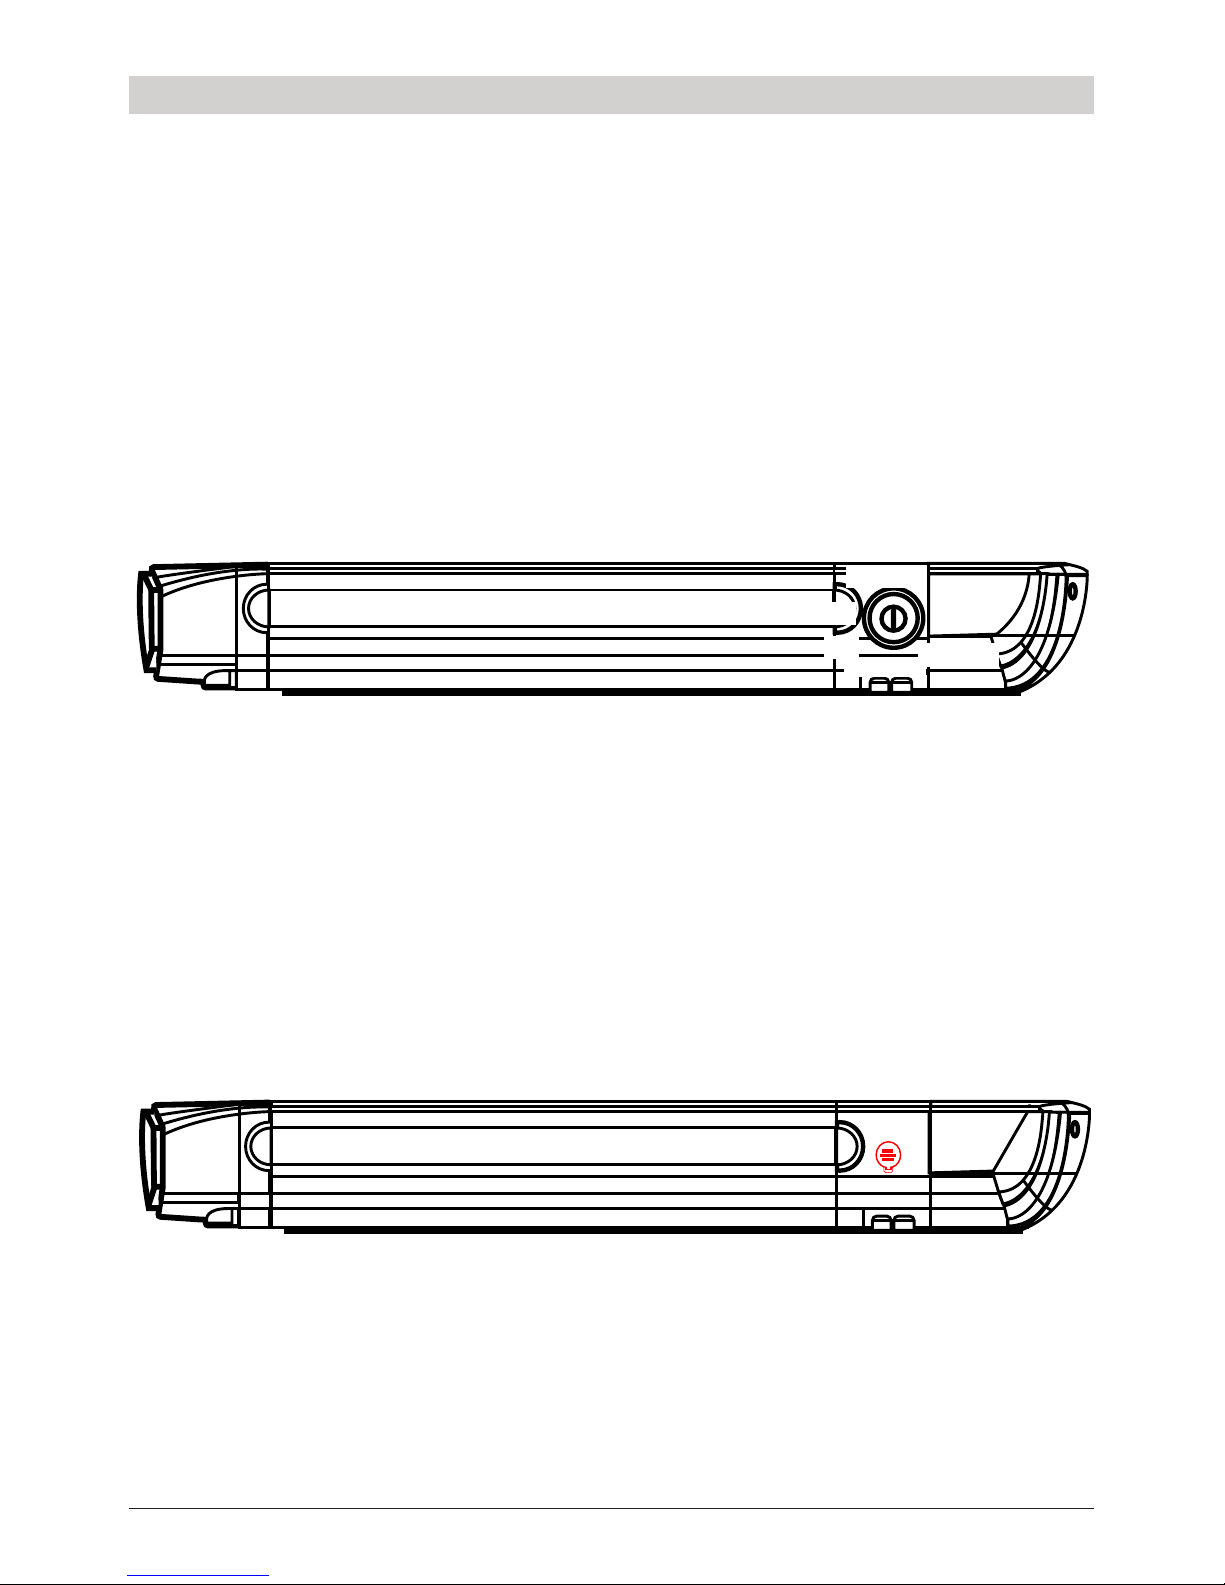
Fig. 1: Battery
Placing battery in the bicycle
You can slide the battery into the battery slot under the carrier rack. As soon as you hear a click the
battery is installed properly.
Charging
The battery must be charged with the supplied charger. The battery can remain in the bicycle while
charging, but it can also be taken out of the bicycle. Charging is done with regular household power. In
some cases you will have to turn on the battery before the battery can be charged. The charging port is
located under the cover (shown in red in figure 2).
Fig. 2: Battery port (under cover)
It usually takes about 4-6 hours to fully charge the battery from 0% to 100%. Sometimes it can take
longer, such as when the battery is new or the place where it is being charged is below 15 °C (59 °F).
Room temperature (around 21 °C/70 °F) is a good ambient temperature for the battery during charging.
IGNITION
ON
OFF
PUSH
UNLOCK
English- 3
Victesse

There is a LED on the charger. The light is red when the battery is charging and changes to green when
the battery is fully charged. The charger then stops charging, so there is no need to immediately unplug
the charger.
Note: When the 4 LEDs on the battery are lit, this does not necessarily mean that the battery is fully
charged. You can only be sure the battery is fully charged once the light on the charger is
green..
It is advisable to run the battery down to the 5 to 10% charge level and then fully recharge it the
first 3 times.
About the battery
> The 4 LEDs indicate the approximate battery status. Each LED represents about 25% of the full
battery charge.
- If only one LED is on, it is recommended that you charge the battery.
- The 5-block display on the handlebar shows the status with more precision.
> Do not place the battery in direct sunlight.
> Charge the battery every 2 months when not in use.
> The battery can be charged at any time. It does not harm the battery to charge it when it is at, say,
50% or 75%. We do recommend, however, that the battery be discharged almost completely and
then fully recharged every now and then.
> Do not drain the battery completely.
> In very cold temperatures the battery will operate less efficiently than at temperatures of around
10-20 °C (50-68 °F), and this may reduce the action radius by as much as 30%. This also applies to
charging: the charging process will take longer.
Operating computer and reading display
There are 2 displays available for the Victesse models with front-wheel motor: a display with integrated
control on the left side of the handlebar, and a centrally located display on the handlebar with control
on the left side of the handlebar.
Display on the left side of the handlebar
Once the battery is turned on, the computer can be turned on with the Mode M button on the control
panel by holding it for 2-3 seconds.
Turning on
1. Lock the battery and turn on the electrical system by turning the key all the way to the right (“on”).
2. Turn on the display by pressing the Mode
M
button for 3 seconds.
3. Use the speed adjuster to select the desired amount of pedal assistance by pressing the MINUS
-
and PLUS
+
buttons.
4. As soon as you pedal, the assist will turn on.
5. You interrupt the assist by stopping pedaling or squeezing the brakes.
Victesse
English- 4
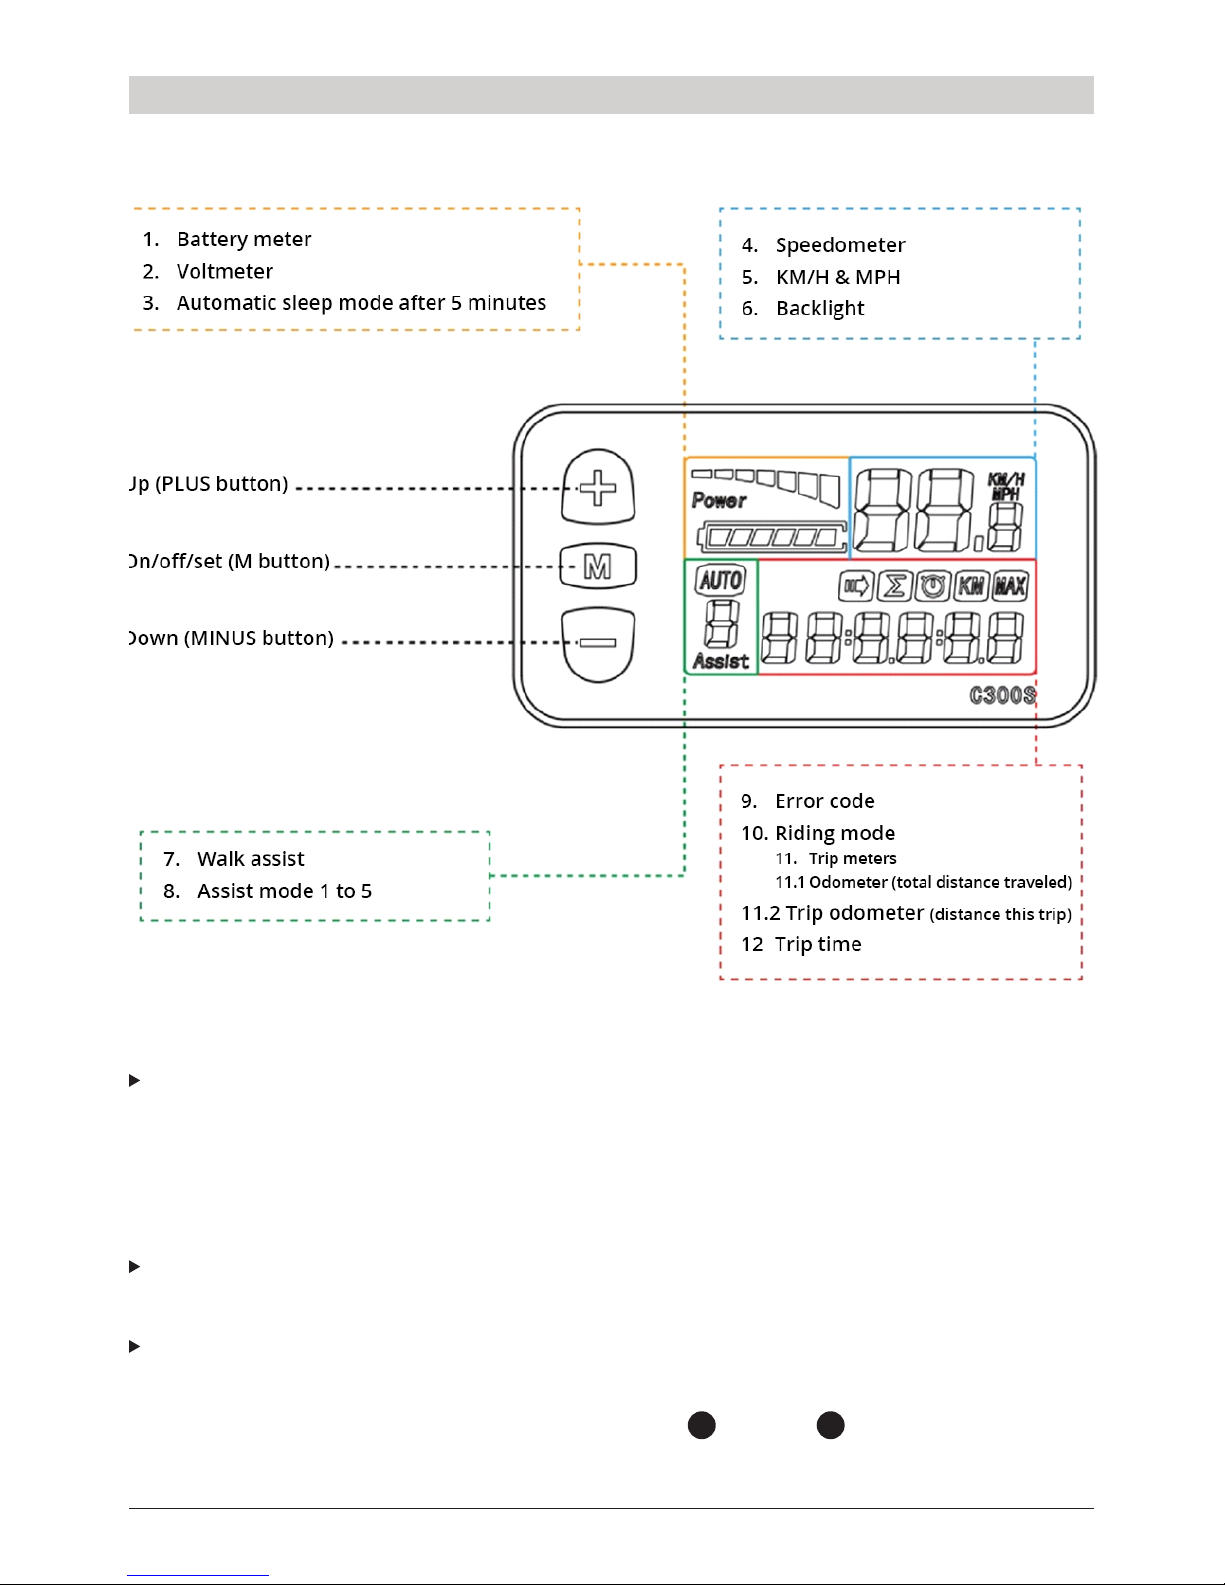
What the screen shows
Fig. 3: Display
BMS (battery monitoring system)
> Battery level – An outline in the shape of a battery, filled with blocks. Each block inside the outline
represents approximately 15% of the battery’s capacity. When the battery is almost discharged,
the battery-shaped outline will blink.
> Current voltage output
Speedometer
Current speed in km/h (or mph).
Assist mode (PAS [pedal assistance])
Assist mode (PAS [pedal assistance])
Assist mode – 1 to 9
Switch to a higher or lower assist mode with the MINUS
-
and PLUS + buttons.
English- 5
Victesse
Walk assist
When Walk assist is active, the “6 km” icon is shown. This is activated by pressing the MINUS
-
button for a few seconds. When you release the MINUS
-
button again, the self-drive function
stops.
Important! Never use the self-drive function while riding the bike!
Statistics
This section shows a number of things. These can be consulted by briefly pressing MODE M.
> ODO: Odometer – The total distance traveled (cannot be reset to 0).
> Trip 1: Measures the distance you have biked so far. This is reset automatically at 500 km, but can
be reset manually in menu 1).
> Trip 2: Shows the last traveled distance from the previous session for 30 seconds. This is reset
automatically and begins measuring the current session after the reset.
> Time: Measures how long you have been biking. This is reset automatically when the display is
turned off.
These items can also be displayed as a slide show. This is active when the icon is displayed.
Additional settings
Press and hold MINUS - and PLUS
+
buttons at the same time for 3 seconds. The display now
shows the option menu.
The following settings are available:
1. Reset trip meter
2. Set maximum speed
3. Set wheel diameter
4. Set km/h or mph
5. Setting riding mode
Pressing the MODE
M
button takes you to the next setting. Pressing the MINUS - and PLUS
+
buttons at the same time again closes the settings menu.
Victesse
English- 6
 Loading...