

Page 1
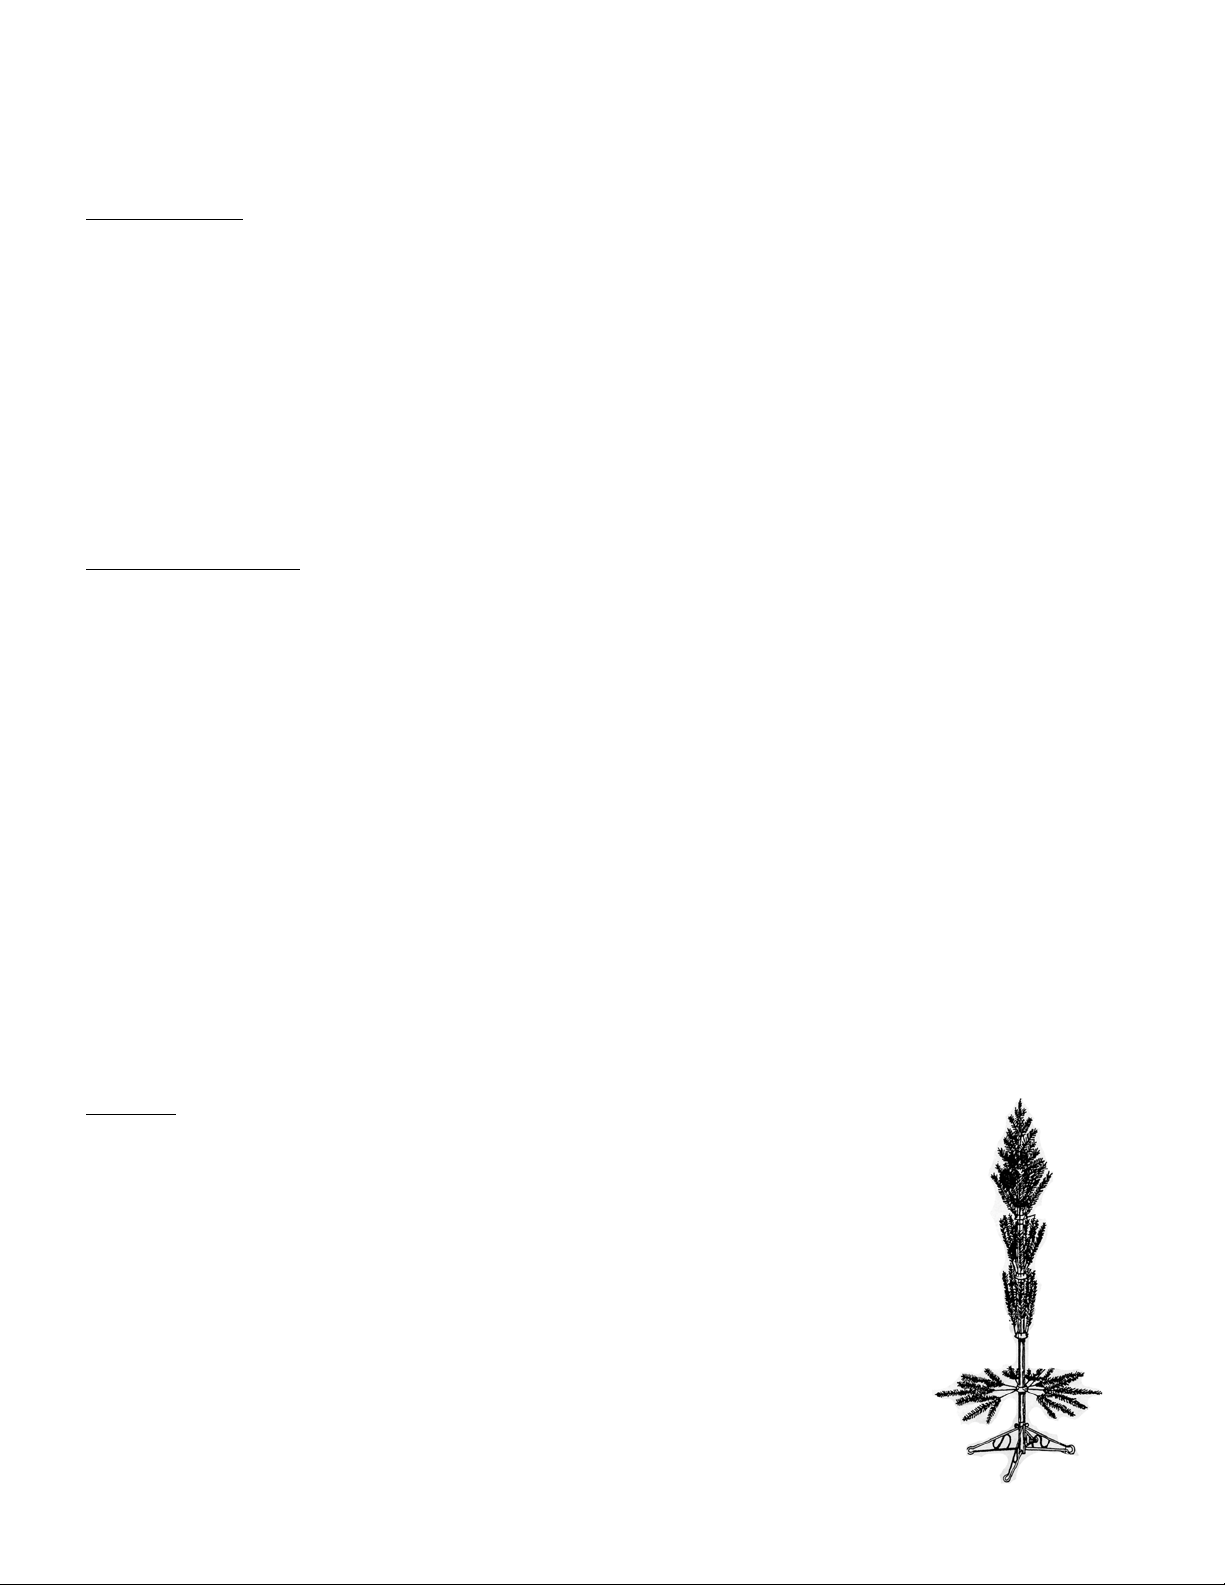
Hinged Tree Assembly Instructions
HELPFUL HINTS
• Read instructions completely before you assemble your tree. The model number of your tree is
printed on t
arises.
he side of the carton. Always use this number to identify your tree if any questi
on
• Save
• Use miniature tree lights.
• Replacing burned-out bulbs will make the
• Handling
BEFORE ASSEMBLING
1. Choose a clear, level location
2. Op
3. Carefully insert the Bottom Section of the tree into the locked stand. (The bottom section is the on
4. Allow branches to fall into pl
5. Locate the stacked plugs in the tree section. Plug the stack into the extension cord on the tree po
the carton for storing your tree.
other bulbs last longer.
the wiring and bulbs with care during packing and unpacking will prolong the life of
lighting package.
near a wall outlet.
en the tree stand and tighten the locking screws on the stand.
with the poi
branches
nt.) Make sure all wires stay clear of the stand opening when
ace or gently pull out and down. IMPORTANT: When adju
be sure that all wires are free of branch hinges.
joining the sections.
sting
Do Not Separate Any Plug From the Stack.
6. Plug the extension cord plug into your wall outlet. The tree section should now light up. If any
lights do n
you
ot light, check the plug stack for loose plugs. Also, check for broken or missing bulbs.
find broken or missing bulbs, replace with replacement bulbs, as necessary
.
the
e
le.
If
7. Insert
8. Insert
SHAPING
1. Shaping: Work from branches closest to pole. Fan out branches on to the left,
2. Shaping at
3. Top Section:
the Middle Section into the top of the pole of the standing Bottom Section. Repeat Asse
Steps 4
throu
one to the right and one at the center of the main stem. Alternate branches so
that they do not line up one behind the other. At the end of the stem, the
center branch tip should extend straight out. Curve each branch slightly
provide a natural look.
patt
branch strai
position.
provid
the tree.
through 6 for the Middle Section of the tr
the tree top section into the top of the pole for the middle section. Repeat Assembly St
gh 6. Plug the single plug for the top section into the top outlet of the middle section.
the top: Pull down branches of lowest layer in an even circul
ern. Repeat for each layer, working towards the top branch. Curve ea
ght up into position. Bend the top branch
Install tree top section by inserting the tree top into
ed at the top of the pole. The tree top should conform to the rest
ee.
straight up into
hole
mbly
eps 4
to
ar
ch
of
Page 2
STORAGE TIPS
1. Unplug the power strip from the wall outlet.
2. Unplug each section from the extension cord.
Do Not Separate Any Plug From It’s Stack
3. Gently lift off the top and middle sections, and remove the bottom section from the tree stand.
4. Replace the tree in its box, being careful not to damage the wire or break any bulbs.
o
5. Store the box in a cool, dry place where the temperature does not exceed 104
F (40 o C).
USER SERVICING INSTRUCTIONS
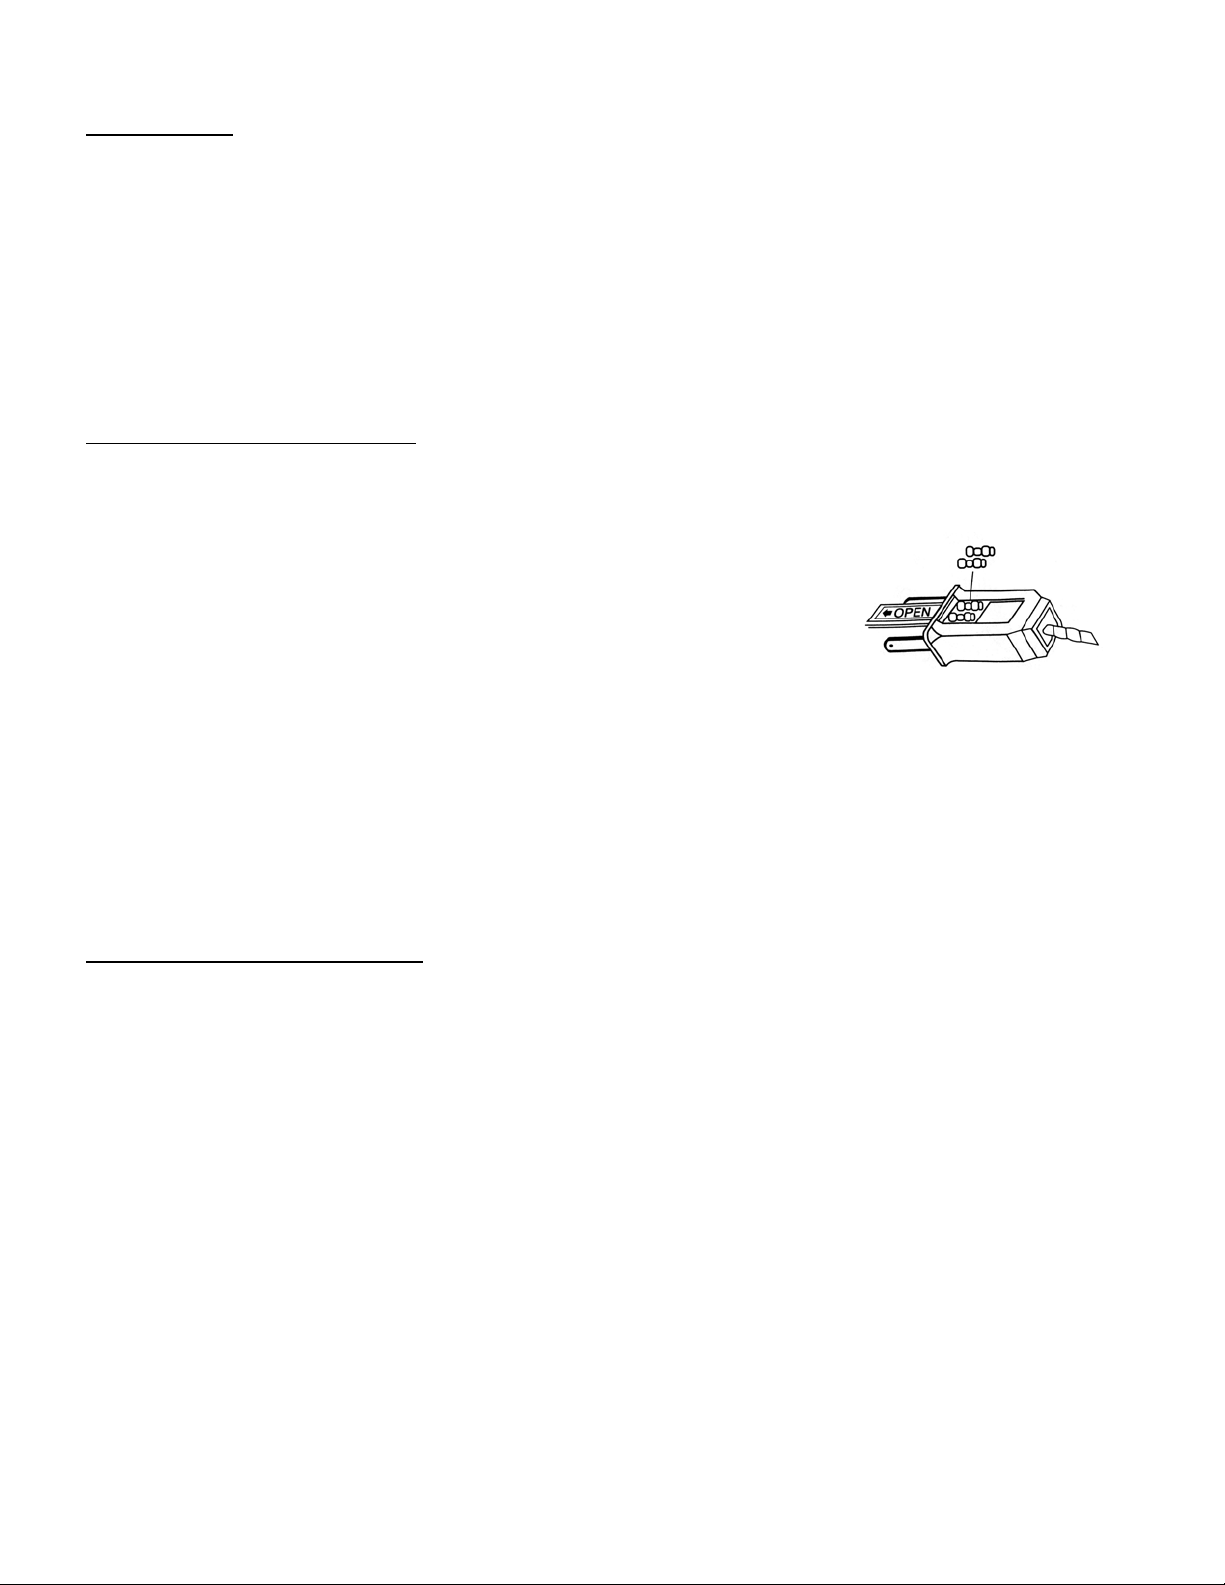
This product employs a replaceable fuse. The following instructions should be followed for successful
replacement for the fuse.
1. Grasp plug and remove from the receptacle or other outlet device.
Do not unplug by pulling on cord.
2. Open fuse cover(s). Use a small blade screwdriver to slide open fuse
access cover on top of attachment plug towards blades.
3. Remove fuse(s) carefully. Turn fuse holder over to remove fuse(s).
4. Risk of fire. Replace fuse(s) only with 3 Amp, 120 Volt fuse (provided with product ).
5. Close fuse cover(s). Slide closed the fuse access cover on top of attachment plug.
RISK OF FIRE: Do not replace attachment plug. The plug contains a safety device (fuse) that should not
be removed. Discard product if the attachment plug is damaged. This product employs series-connected
lamps. CAUTION: To reduce the risk of overheating, replace burned-out lamps promptly.
REPLACEMENT LAMPS AND FUSES
• Use only the bulb or fuse included
• Use 2.5 volt bulb for 50 or 100 light string
• Use 3.5 volt bulbs for 35 light string
• 125v, 5 amp fuse for extension cord
 Loading...