

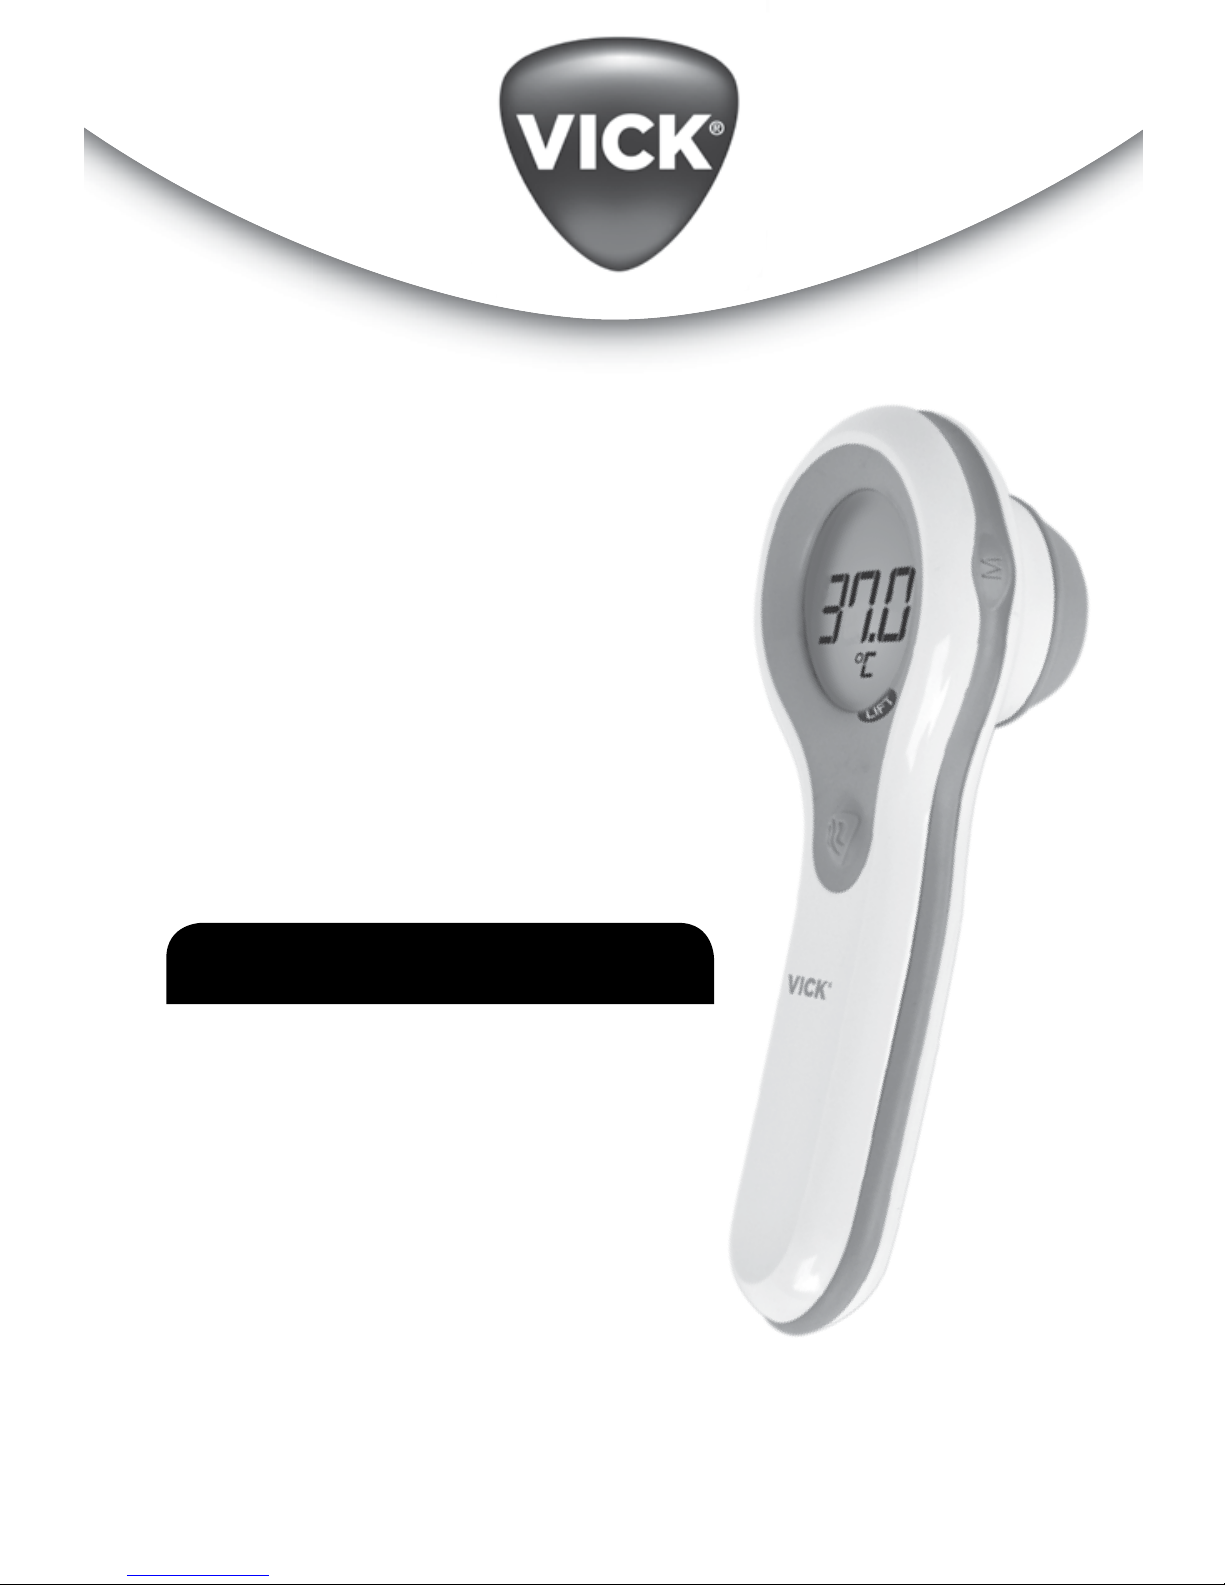
Vick V977-LA Use And Care Manual
Questions or Comments
E-mail: consumerrelations@kaz.com
www.kaz.com/vicks
USE AND CARE MANUAL
Forehead
Thermometer
IMPORTANT!
READ AND SAVE THESE INSTRUCTIONS
Model V977-LA
2
QUICK START GUIDE
for Forehead Thermometer
FIRST TIME USE:
• Pull plastic strip under battery cover.
• Remove 37°C (98.6°F) label from display.
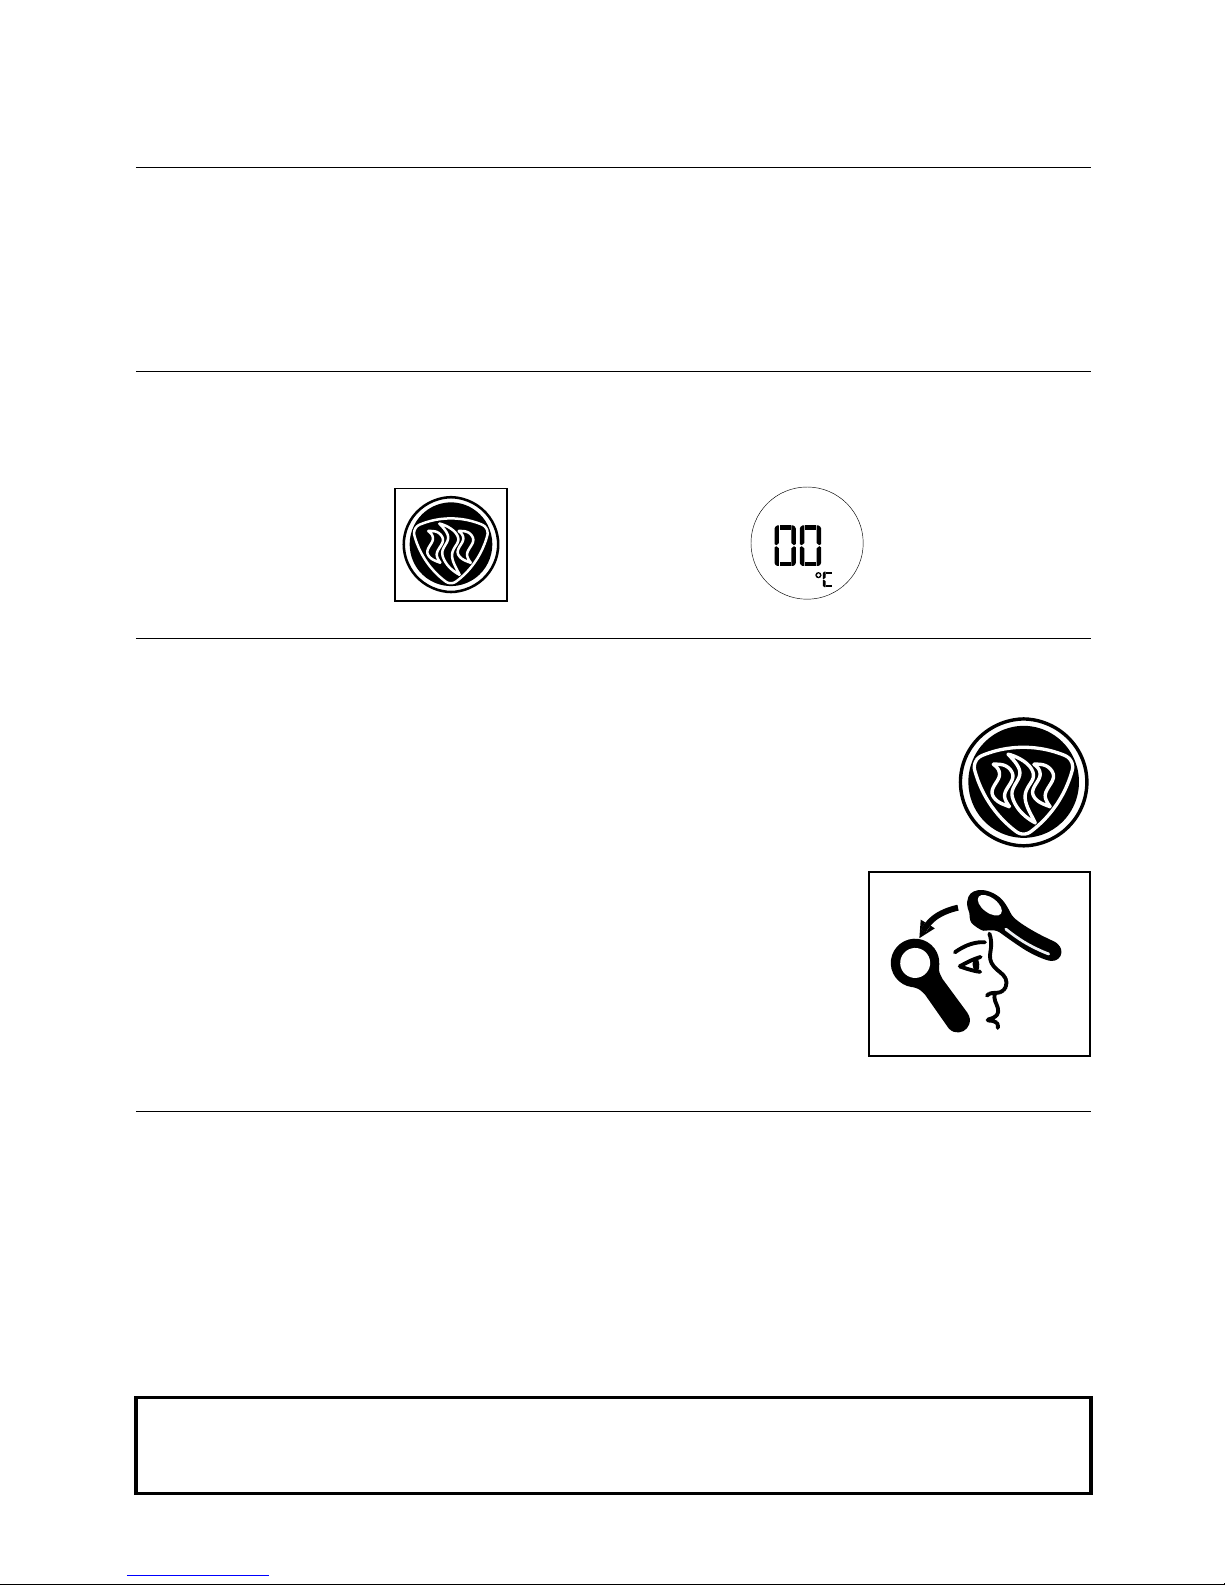
1
2
3
Remove
protective
scanner cap.
Wait for beep
and “00”.
Move hair away from forehead and place
scanner in the center of the forehead.
Press and release power button and
scan forehead slowly from the center
of the forehead to the temple -
wait for confirmation beep.
Repeat measurement if necessary-following the instructions in step 2.
PLEASE NOTE: The unit reads an “oral” equivalent temperature. Add 0.5°C (1°F) to
get a rectal equivalent. Take 3 measurements if readings appear low.
Turn On
Press and release
power button.
Scan
Repeat
Model V977-LA

3
Some Helpful Guidelines For Best Results
When Using the Forehead Thermometer
• Call your doctor when your child has diarrhea, vomiting or changes in appetite, lethargy
(sluggishness) or is unusually sleepy.
• It is important to know each individual’s normal temperature when they are well. This is the
only way to accurately diagnose a fever. Take multiple readings when healthy to determine
normal temperature.
• A child’s normal temperature can be as high as 37.7°C (99.9°F) or as low as 36.1°C (97.0°F).
Re-measure with a standard digital thermometer for confirmation, especially on infants (It
is recommended to use a digital thermometer rectally on infants and on sleeping infants if
there is a question about the measurement. Be sure to note this unit reads 0.5°C (1°F) lower
than a rectal digital measurement).
Forehead Thermometer
Instruction Manual
Thank you for purchasing the Vick Forehead Thermometer (V977-LA). It is intended for the
intermittent monitoring of human body temperature in the home. It is intended for use on
people of all ages except pre-term babies or very small (small for gestational age) babies.
The Forehead Thermometer is a high quality product incorporating the latest technology and
tested in accordance with international standards. With its unique technology, the Forehead
Thermometer can provide a stable, heat-interference-free reading with each measurement.
The instrument performs a self-test every time it is switched on to always guarantee the
accuracy of measurements. The Forehead Thermometer is intended for the monitoring of
human body temperature in the home. It is intended for use on people of all ages.
Please read these instructions carefully before using this instrument and keep the instructions
and the thermometer in a safe place.

4
1. The Advantages of your Forehead Thermometer
Measurement in 3 seconds
The innovative infrared technology allows measurement of forehead temperature
in only 3 seconds.
Accurate and reliable
Due to the unique probe assembly construction, the advanced infrared sensor, and the
complete calibration process this unit can offer a very accurate and reliable temperature
measurement comparable to one taken from the oral site with a regular digital thermometer.
Gentle and Easy to Use
• The Forehead Thermometer is non-invasive. A measurement can be taken even while a
child is sleeping.
• Design is easy to hold and use.
• The Forehead Thermometer is less threatening to a child than a rectal thermometer and
easier to use than other methods.
Multiple Reading Recalls
Users can recall the last 8 readings when entering the MemoryTracker™ recall mode, enabling
efficient tracking of temperature history and variations.
Safe and Hygienic
• No risk of broken glass or mercury ingestion.
• Completely safe for use on children.
Table of Contents
1. The Advantages of your Forehead Thermometer
2. How the Forehead Thermometer Measures Body Temperature
3. Important Safety Instructions
4. Product Description
5. Instructions for Use
6. Control Displays and Symbols
7. Memory Tracker Mode
8. Error Messages and Trouble Shooting
9. Care and Cleaning
10. Replacing the Battery
11. Technical Specifications
5
Color Range (°C) Range (°F) Meaning
Green 35.8 - 37.4 96.4 - 99.4 Acceptable
Yellow 37.5 - 38.5 99.5 - 101.3 Elevated
Red 38.6 + 101.4 + Possible High Fever
Fever InSight
®
Feature
Fever InSight helps you to better understand the meaning of your child’s temperature with
the color indicated on the display. The screen displays Green if no fever, Yellow when
the temperature is slightly elevated and a Red alert for fever. 10 audible beeps indicate
temperatures of 37.5 °C (99.5 °F) and above alert that the patient may have a fever.
3. Important Safety Instructions
• Never use the thermometer for purposes other than those it has been intended for. Please
follow the general safety precautions when using on children.
• Never immerse the Forehead Thermometer into water or other liquids (not waterproof).
For cleaning and disinfecting please follow the instructions in the “Cleaning and Storage”
section.
• Keep the instrument away from direct exposure to the sun and keep it in a dust-free, dry
area at the temperature between 16° - 40°C (60.8°- 104°F).
• Do not use the thermometer if there are signs of damage on the measuring sensor or on
the instrument itself. If damaged, do not attempt to repair the instrument! Please contact
our Consumer Relations Department
• This Forehead Thermometer consists of high-quality precision parts. Do not drop the
instrument. Protect it from severe impact and shock. Do not twist the instrument or the
measuring sensor
WARNING:
• Use of this Forehead Thermometer is not intended as a substitute for
consultation with your physician or pediatrician.
• Thermometer is not waterproof! NEVER immerse into liquids!
2. How the Forehead Thermometer Measures Body Temperature
The Forehead Thermometer measures infrared energy radiated from the skin above of the
eyebrow area and the surrounding tissue. This energy is collected through the lens and
converted to a temperature value. Temperature readings obtained by scanning above the
eyebrow area will provide the greatest accuracy.
The Forehead Thermometer has been clinically tested and proven to be safe and
accurate when used in accordance with its operating instruction manual.
6
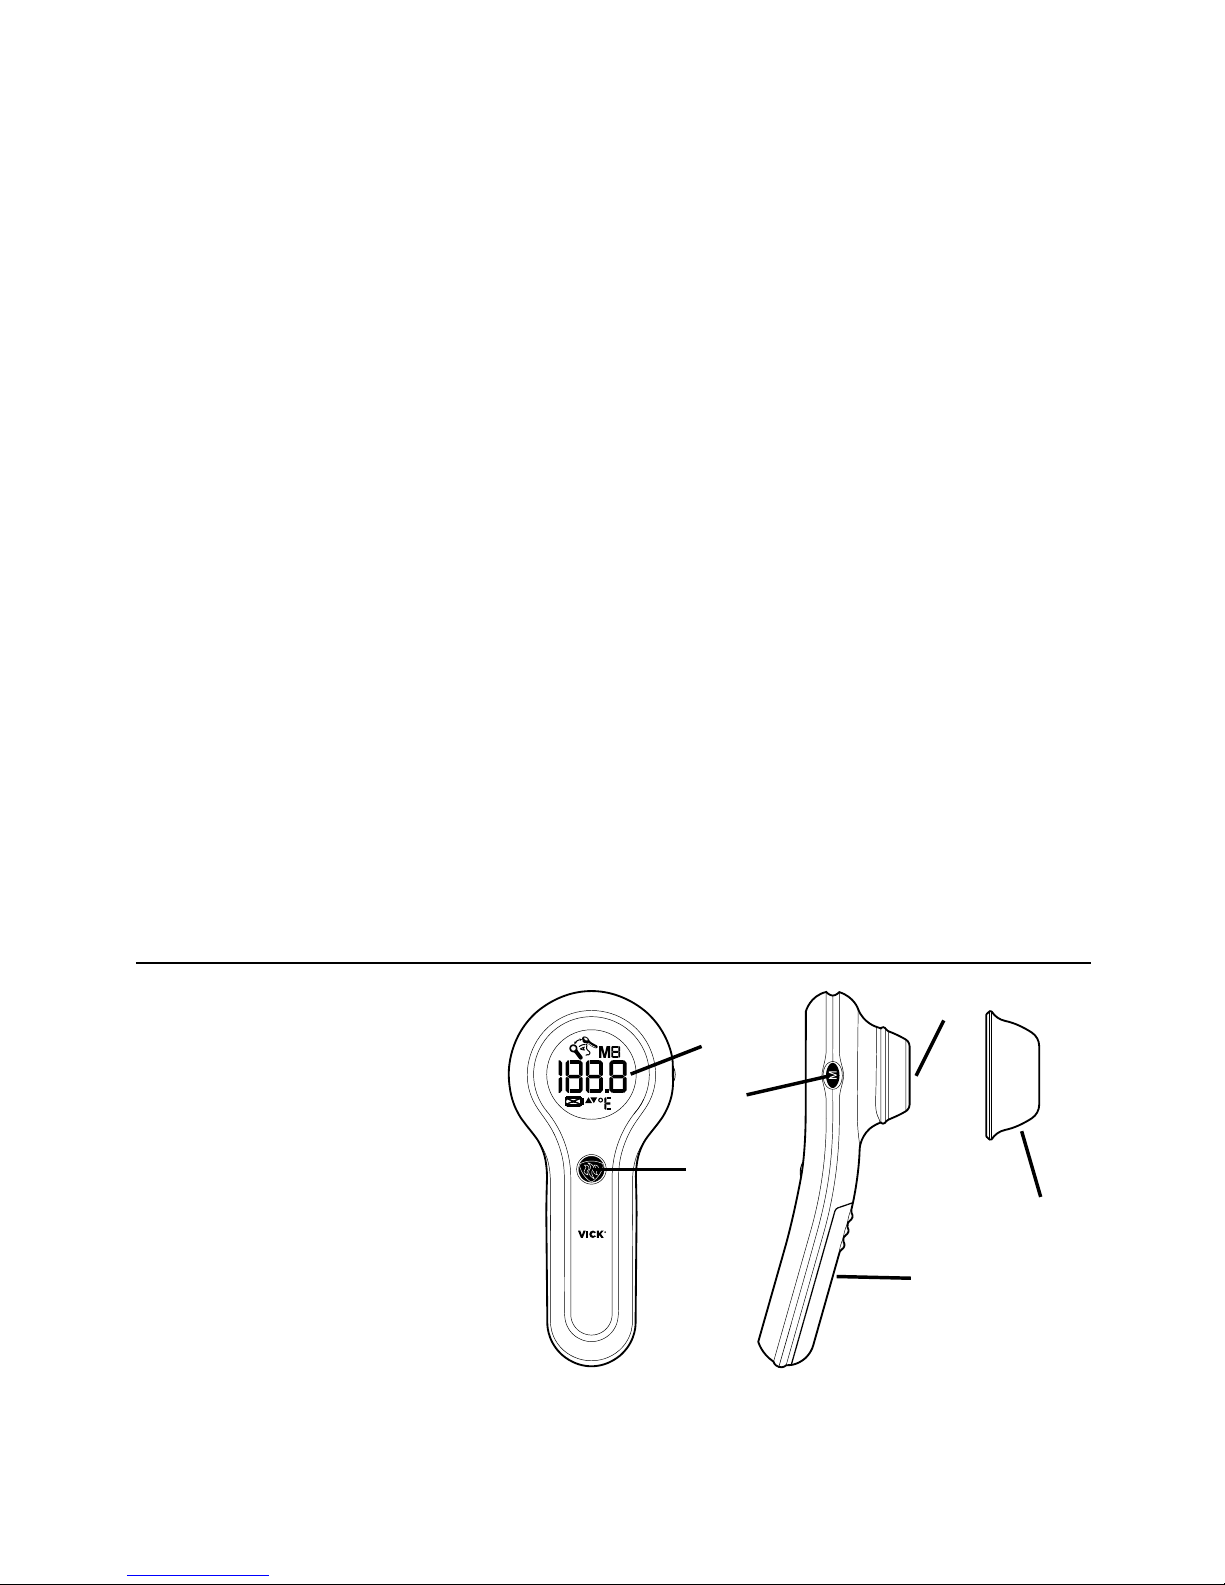
4. Product Description
(1) Power Button
(2) Scanner
(3) LCD Display
(4) Memory Button
(5) Battery Cover
(6) Protective Scanner Cap
(3)
(1)
(4)
(2)
(5)
(6)
This thermometer is not intended to interpret hypothermic temperatures.
Do not allow children to take their temperatures unattended.
Do not modify this equipment without authorization of manufacturer.
Parents/guardians should call the pediatrician upon noticing any untoward sign(s) or
symptom(s). For example, a child who exhibits irritability, vomiting, diarrhea, dehydration,
seizure, changes in appetite or activity, even in the absence of fever, or who exhibits a low
temperature, may still need to receive medical attention.
Children who are on antibiotics, analgesics, or antipyretics should not be assessed solely on
temperature readings to determine the severity of their illness.
Temperature elevation may signal a serious illness, especially in neonates and infants, or
in adults who are old, frail, or have a weakened immune system. Please seek professional
advice immediately when there is a temperature elevation and if you are taking temperature
of:
• neonates and infants under 3 months especially if fever exceeds 37.5°C for children less
than 3 months of age
• over 60 years of age
• having diabetes mellitus or a weakened immune system (e.g. HIV positive, cancer
chemotherapy, chronic steroid treatment, splenectomy)
• bedridden (e.g. nursing home patient, stroke, chronic illness, recovering from surgery)
• a transplant patient (e.g. liver, heart, lung, kidney)
Fever may be blunted or even absent in elderly patients.
7
5. Directions for Use
1. Press the Power button on front of unit. The LCD is activated to
show all indicators for 2 seconds.
2. When the screen shows “00”, a beep is heard and the thermometer is
ready for measurement.
3. Place the probe gently and flush onto the area approximately 1/2 inch
above the center of the eyebrow. If the eyebrow area is covered with
hair, sweat or dirt, please clean the area beforehand to improve the
reading accuracy.
4. Press the Power button once. Move the thermometer steadily
from 1/2 inch above the center of the eyebrow to 1/2 inch above the
tail of the eyebrow area and back to the center of the forehead. A long
beep will sound after 3 seconds to signal measurement complete. If
you do not reach the tail of the eyebrow before the long beep is heard,
repeat the measurement, moving the thermometer a little quicker.
5. Read the recorded temperature from the LCD display.
To repeat measurement, go to step 3 above and follow instructions.
(3)
(1)
(2)
(4)
(5)
To avoid an inaccurate measurement, note the following:
• Patients should stay in steady - state room condition for at least 30 minutes.
• Don’t remove the measurement device from the measuring area before hearing the
final beep.
• Don’t take a measurement while or immediately after nursing a baby.
• Don’t use the forehead thermometer in high humidity environments.
• Patients should not drink, eat, or be physically active before/while taking the measurement.
• Before placing the thermometer sensor onto the measurement area, remove dirt, hair,
or sweat.
• Use an alcohol swab to carefully clean the sensor and wait for 5 minutes before taking a
measurement on another patient.
• Always take the temperature in the same location, since the temperature readings may
vary from different locations.
• In the following situations it is recommended that three temperatures in the same location
be taken and the highest one taken as the reading:
1) Newborn infants in the first 100 days.
2) Children under three years of age with a compromised immune system and for whom the
presence or absence of fever is critical.
3) When the user is learning how to use the thermometer for the first time until he/she has
familiarized himself/herself with the instrument and obtains consistent readings.
8
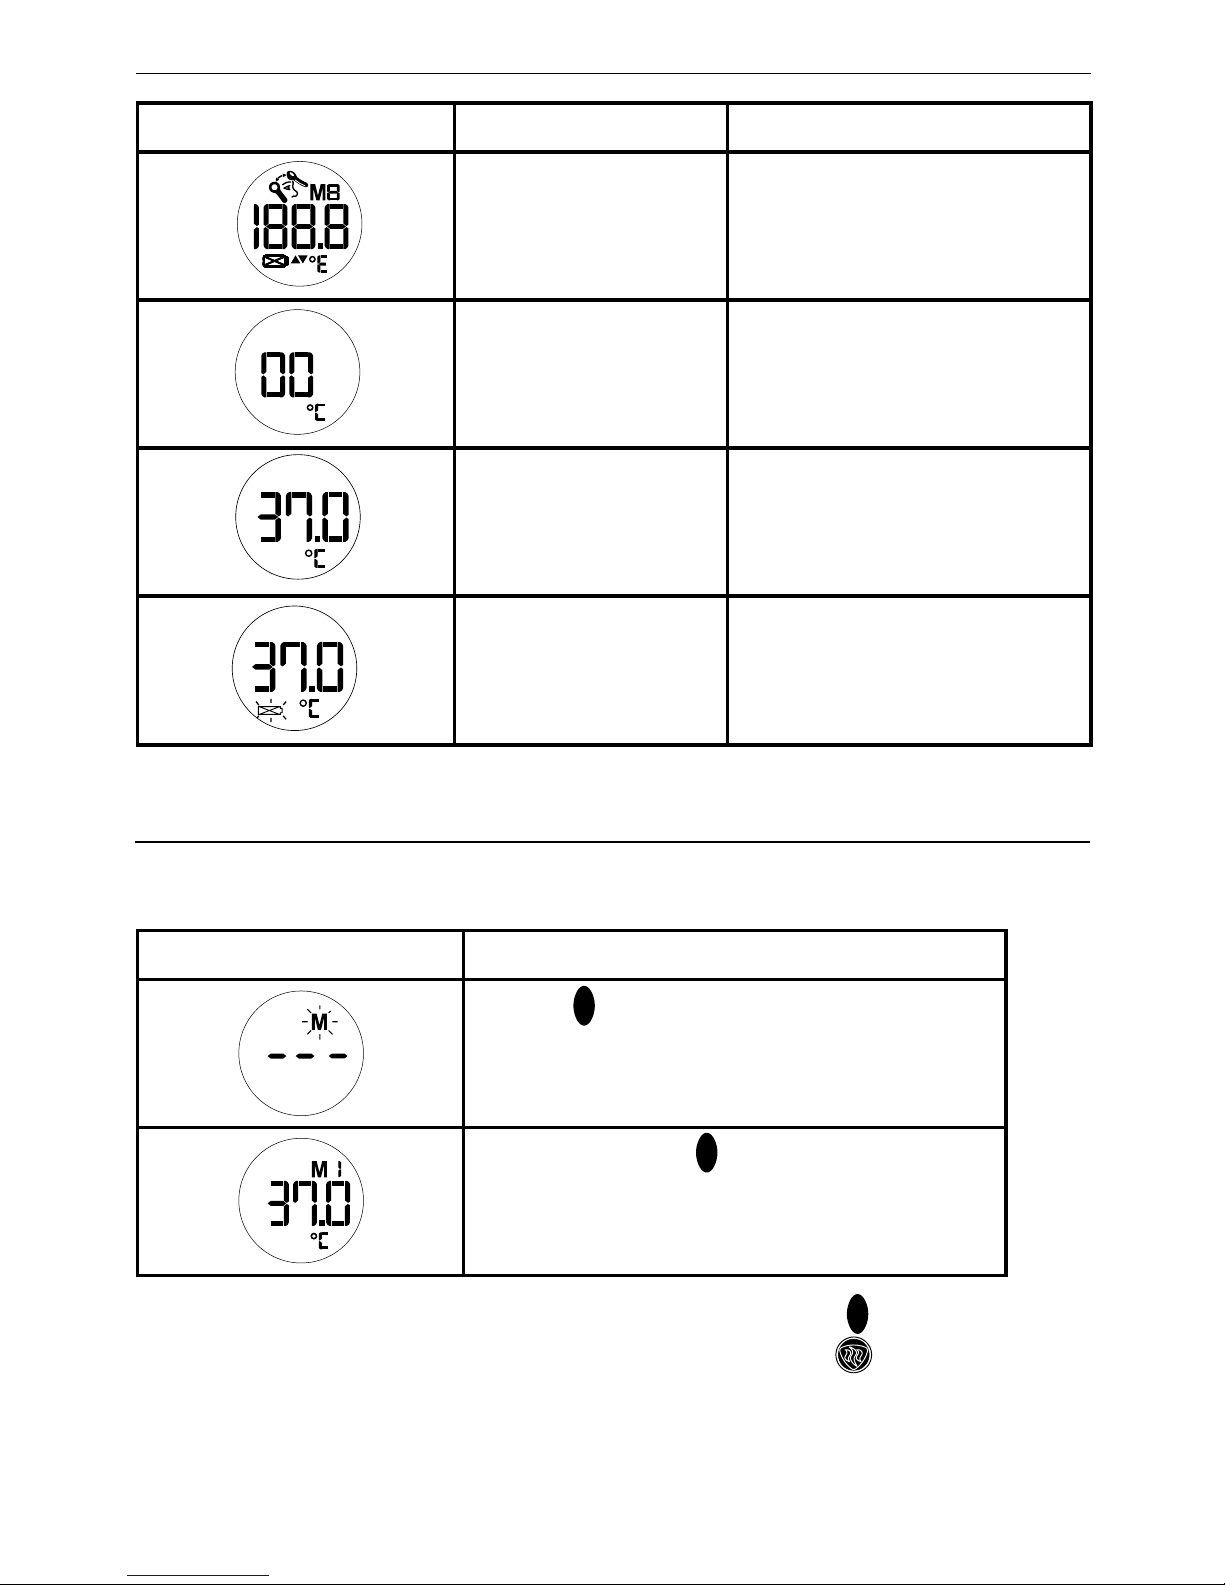
7. MemoryTracker™ Mode
Use the following steps to recall the last 8 temperature measurements.
Display Description
Press the button to enter Recall Mode when
power is off. The memory icon «M» flashes.
Press and release the button to recall the last
reading. The number 1 will appear showing the last
saved reading.
M
M
To exit memory mode and turn the thermometer off, press and hold the button for 3 seconds.
To exit memory mode and take another temperature, press the Power button.
M
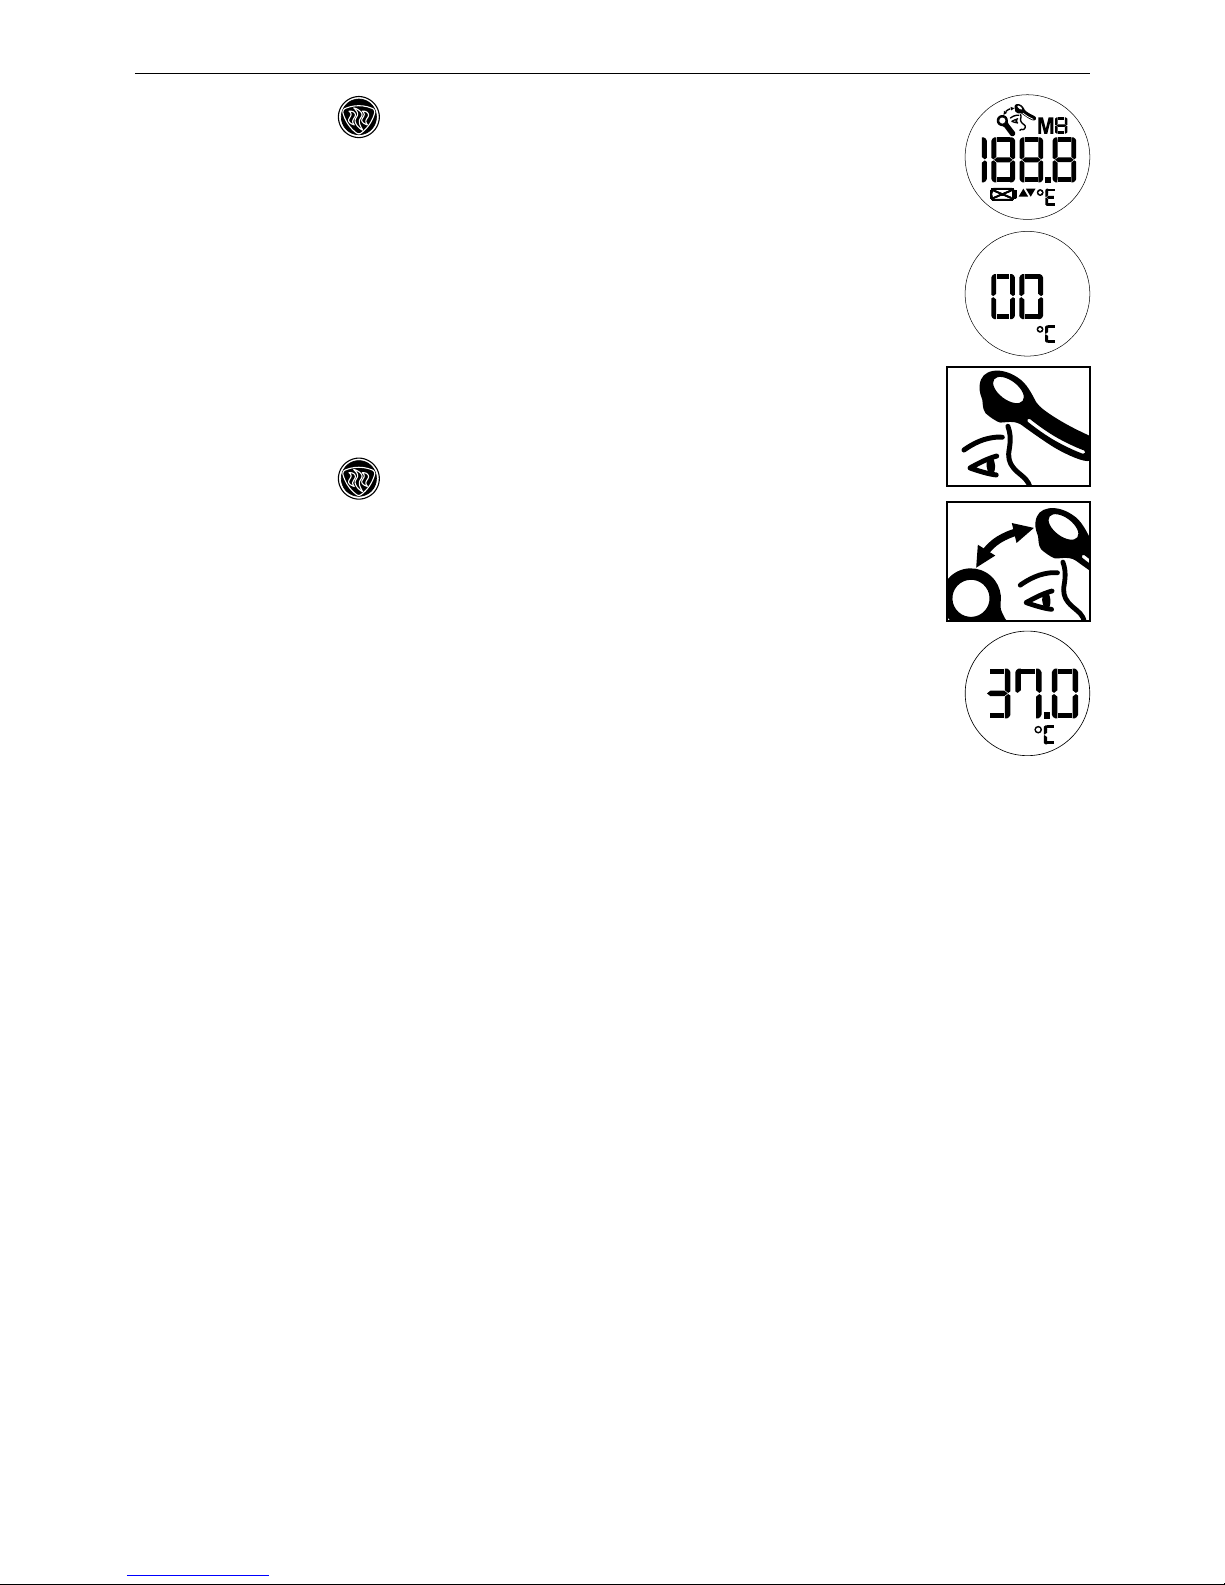
6. Control Displays and Symbols
LCD Display Display Meaning Description
Self check ensures
proper functioning
Press the On/Off button to run
on the unit, all segments will
be shown for 2 seconds.
Ready to measure The unit is ready for the
measurement, the screen
displays steady “00”.
Measurement complete The reading will be shown on
the LCD display.
Low battery indication When the unit is turned on, the
battery icon will keep flashing
to remind the user to replace
the batteries.
 Loading...