

Vibratrim VT202, VT202+1 Owner's Manual, Instructions & Warranty
VT202
Owner’s Manual
Instructions & Warranty

2
Thank you for purchasing our
product. While we do our best to
ensure the quality o all our
products, occasional errors or
omissions may occur. If you
notice a defect or missing parts
contact us at the address and
phone shown on the back of this
booklet.
GENERAL INSTRUCTIONS -
Before plugging the unit in, make
sure that the unit is not damaged
and that the unit is level.
1. Do not allow children or the
disabled to use the machine
without strict supervision from
a qualified person.
2. Never use accessories no
recommended by the
manufacturer.
3. Do not use the machine if the
power cable becomes
damaged or worn.
4. Keep the power cable away
from hot surfaces.
5. Do not use this machine
outdoors.
6. To unplug the machine, first
put the power switch to the -
-O- posltion and then unplug
it from the wall socket.
7. This unit has been designed
for home use only.
8. The VT202 has been designed
for a maximum user weight of
265 pounds.
9. Keep your hands well away
from any moving parts.
10. Use suitable clothing and
footware, making sure that
the laces/cords are tied
correctly.
11. It is not advisable to keep
your unit in damp locations
for long periods as it will be
prone to rust.
SAFETY BREAKER -
This model is equipped with an
electronic circuit breaker to
protect both the electronic and
electrical circuits.
This safety device (fuse) will be
automatically triggered if the unit
is subjected to abnormal force or
heat.
1. Set the switch (L) located on
the casing to the -O- (OFF)
position Fig B.
2. Change the fuse (c) (5 Amp).
3. Nest set the switch (L) to the -
I- (ON) position and the unit
will be ready for use again.
Plug the unit into a wall socket
with a grounded outlet. Set the
switch to the on position.
3
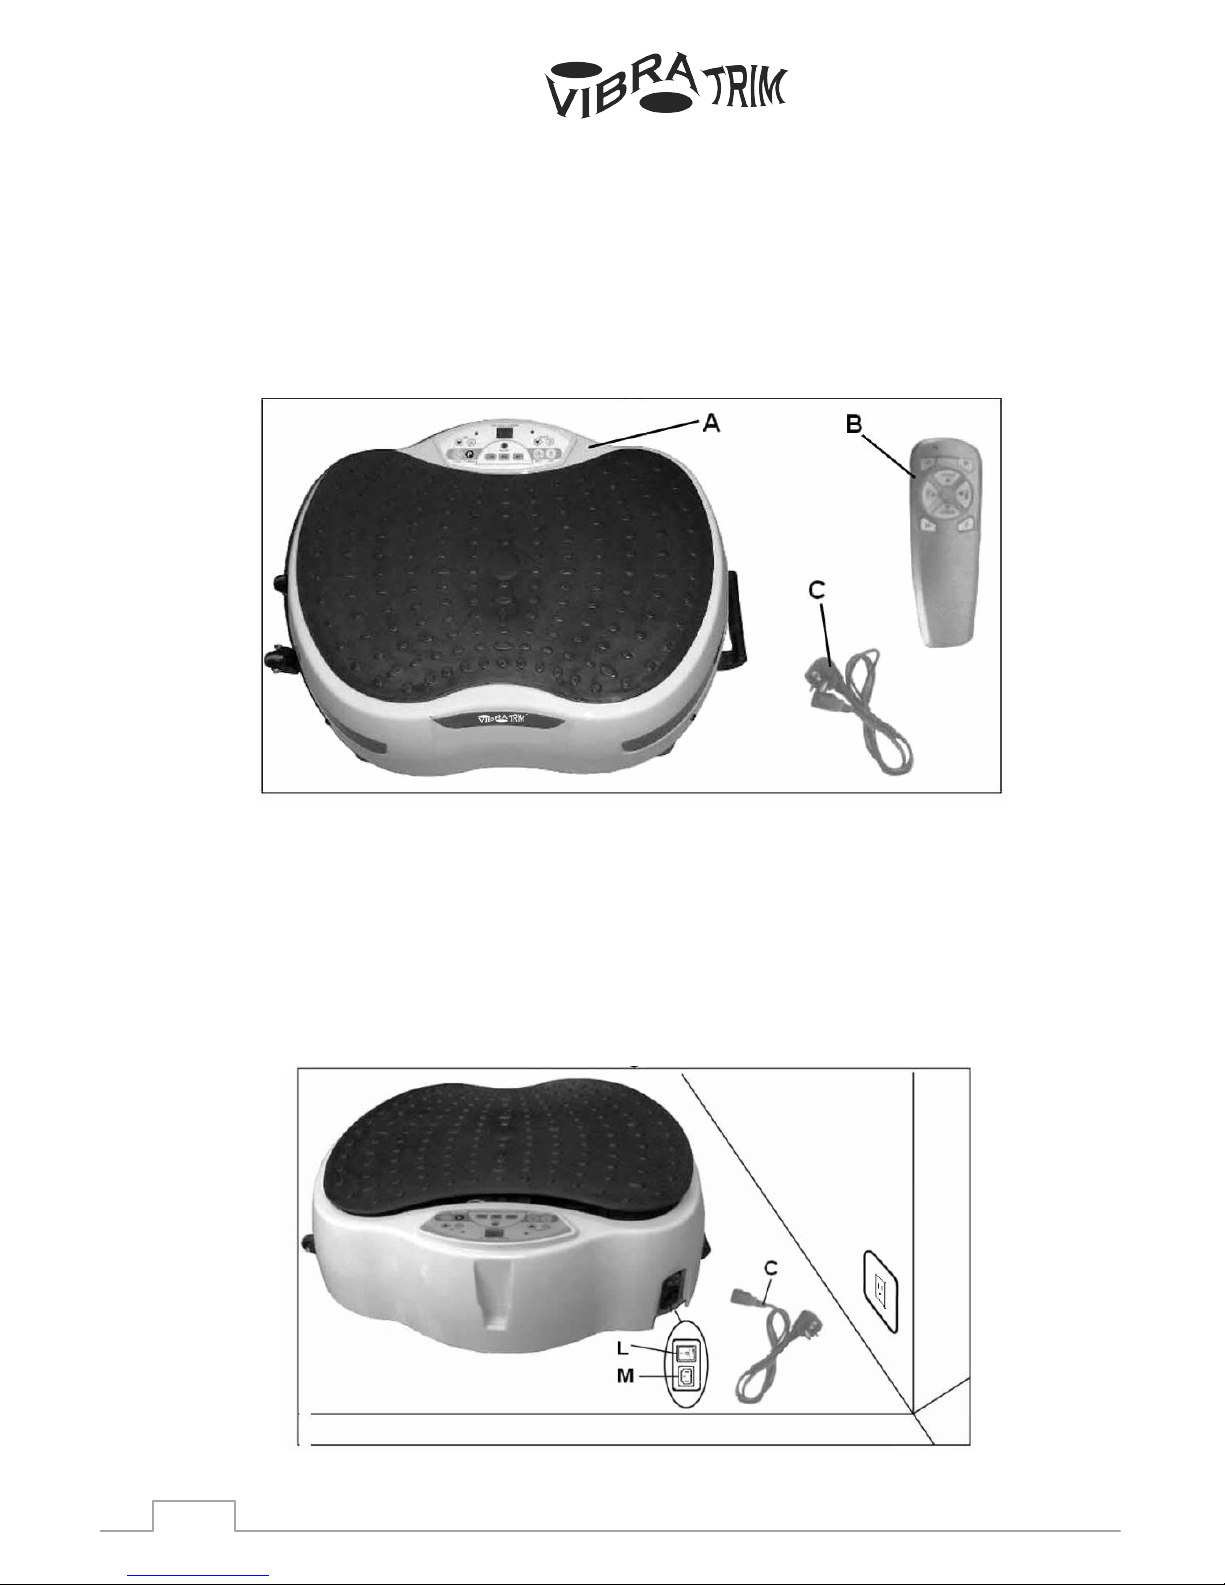
ASSEMBLY INSTRUCTIONS –
Take the unit out of the box and place it on the floor as shown.
Make sure that all of the pieces are there (A) Platform, (B) Remote
Control, (C) Power Cable.
START UP –
Plug the power cable © into the socket (M) on the unit.
The other end of the cable is plugged into the electric wall socket
(110Volt). Set the switch (L) to the (I) position.
4
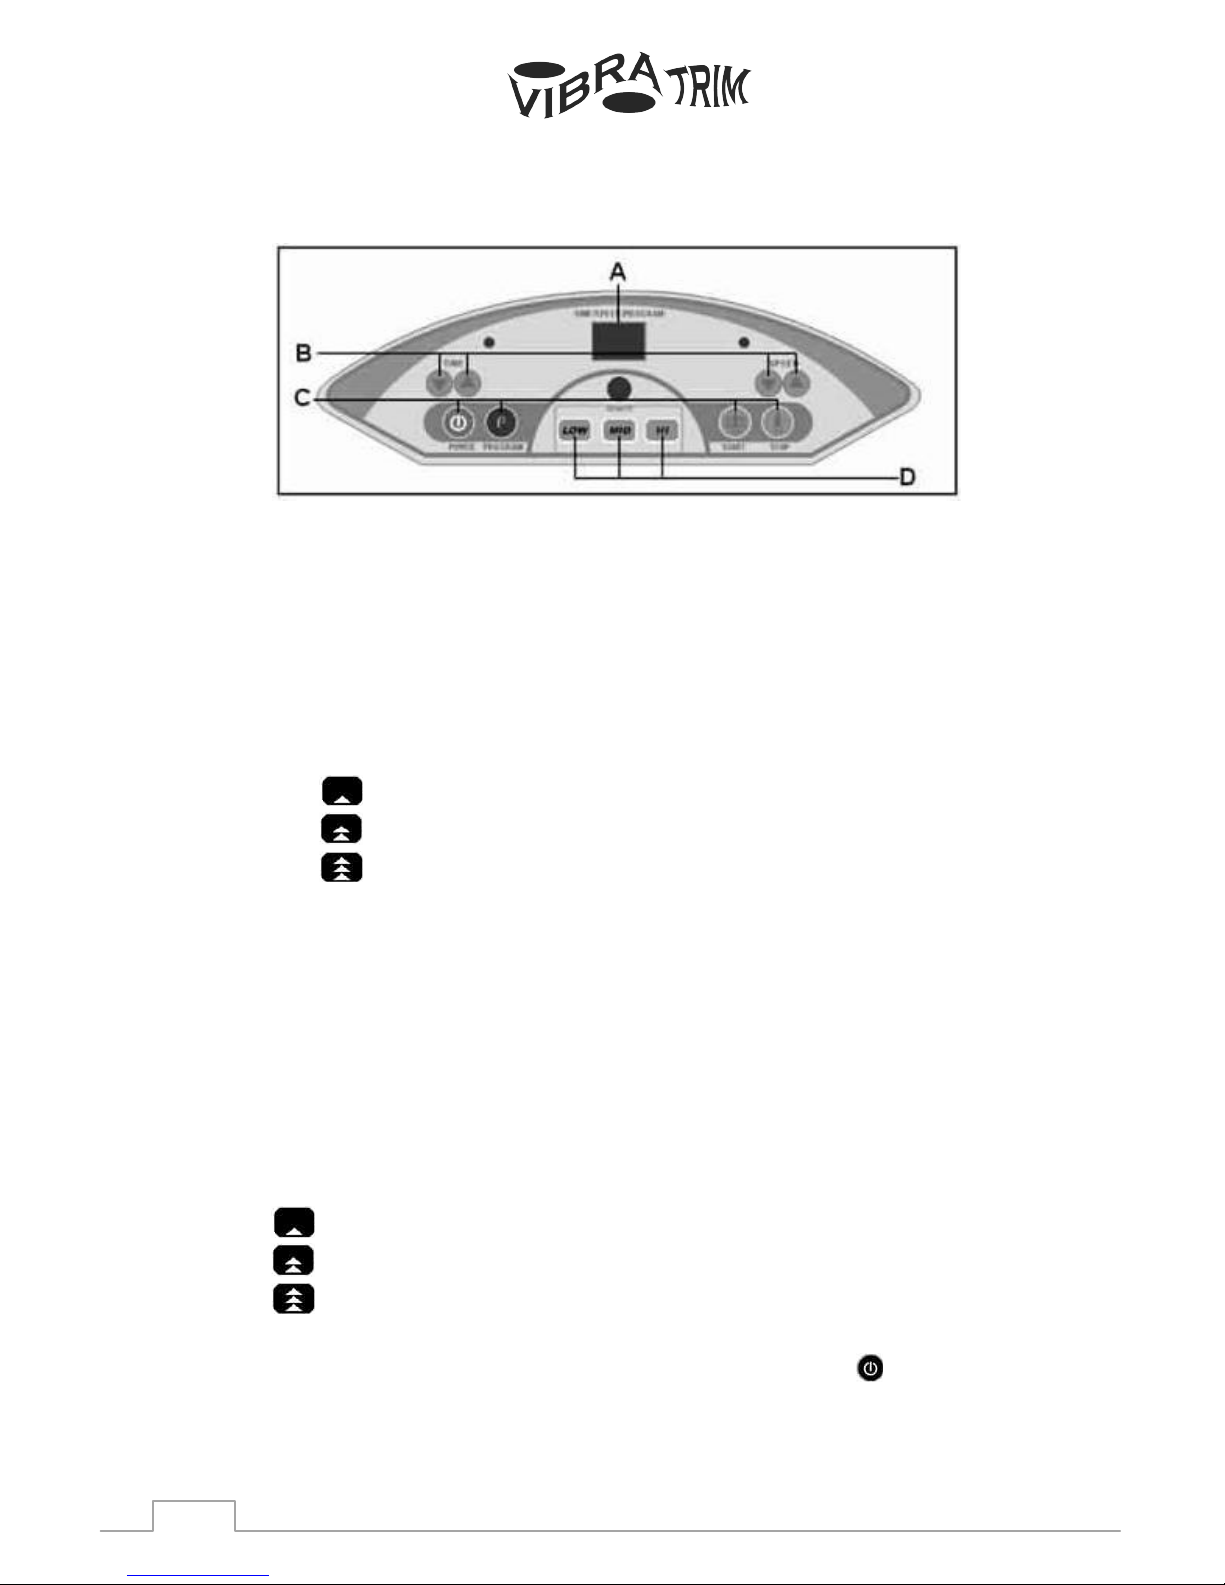
DISPLAY PANEL ELEMENTS -
A. This display simultaneously displays Time, Speed and
Program.
B. Buttons or keys for: Time (1-10 minutes), SPEED
(1-10 levels).
C. Buttons or keys for: POWER (ON); PROGRAM, START,
STOP.
D. Quick start buttons for speed and balancing:
LOW
MID
HI
MANUAL FUNCTION -
Use the ON/OFF key to switch the display panel on and the TIME
display will light up. Use the TIME key to select the duration
of the exercise. Next, press the START key.
You can adjust the platform’s rocking function by means of the
(SPEED ) keys.
This monitor has three quick selection speed keys, with a range of
scales for the rocking speed
6 Cycles/second. Warm-up exercise
10 Cycles/second. Normal exercise.
16 Cycles/second. Heavy exercise.
The unit will stop immediately if you press the STOP key.
When you have finished exercising, press the ON/OFF key and
the switch (L), Fig. B.
5
PROGRAM FUNCTION -
This platform has 3 preset programs that allow you to exercise
without making any changes on the display panel.
These programs are:
P-3. –Relaxation, circulation and coordination.
Duration 10 minutes
P-2. – Toning
Duration 10 minutes
P-1. – Boost
Duration 10 minutes
The program is shown on the display panel (A) by pressing the
PROGRAM key. Press the Program key again to select the
exercise that you wish to perform.
Next, press the START key to set the platform in motion. When the
program finishes the display panel will beep to indicate the end of
the exercise.
Switch the platform off by pressing the ON/OFF key and the
switch (L), Fig. B.
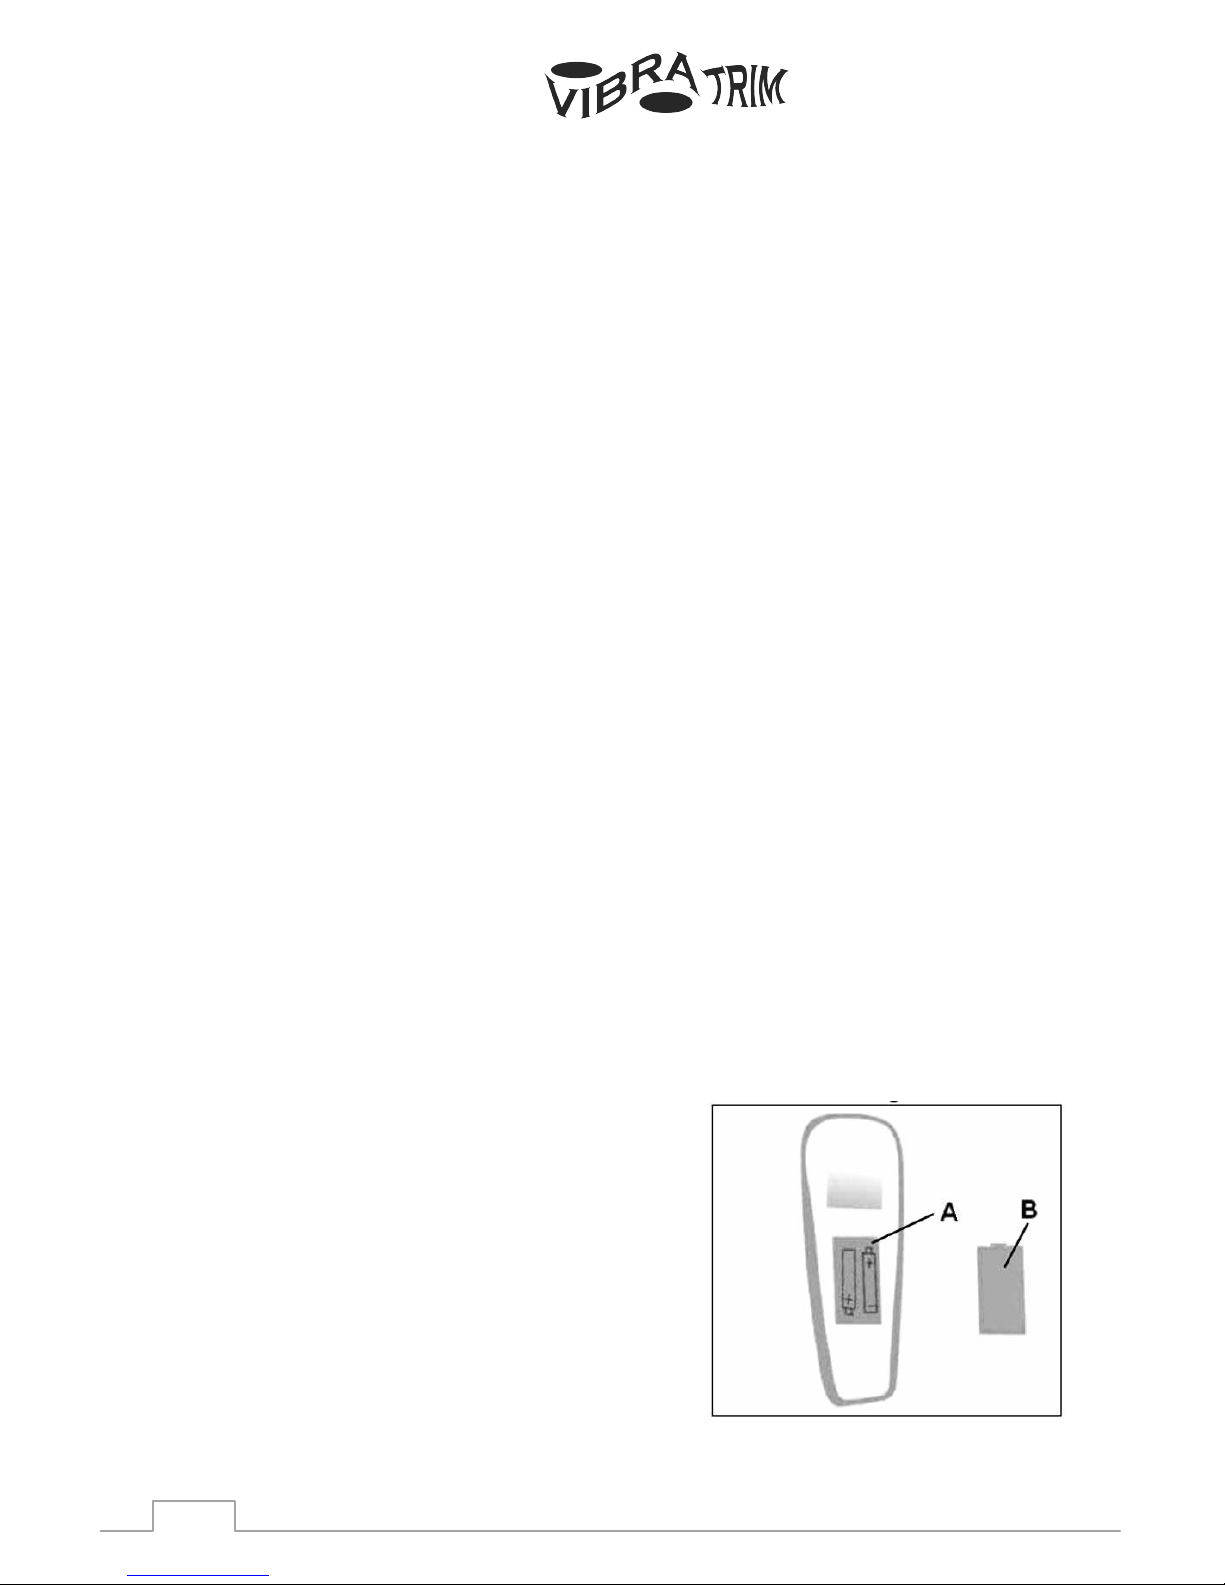
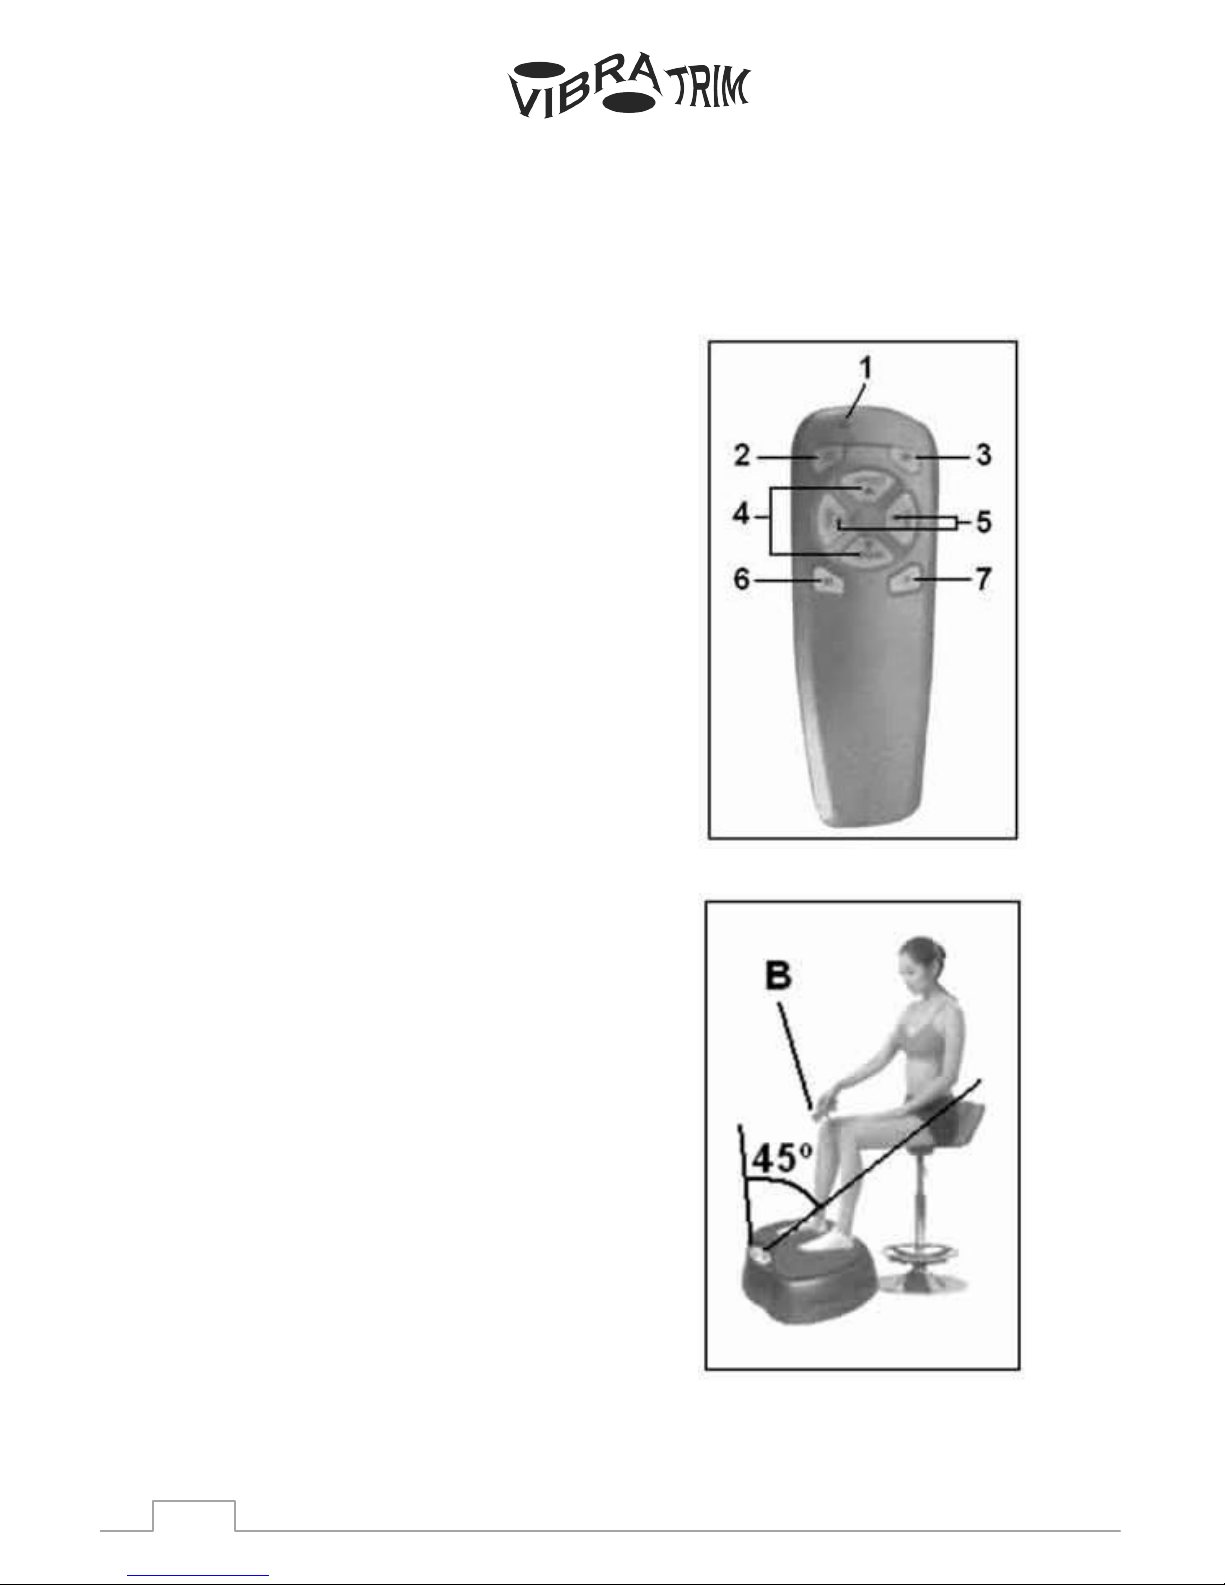
REMOTE CONTROL -
INSTALLING THE BATTERIES
This monitor uses two 1.5 volt
ALKALINE BATTERIES. To fit the
batteries, take the cover off the back
of the remote control (B) and
carefully insert the two “AAA” type
batteries into the battery
compartment (A), Fig.1, making sure
that the batteries polarity is correct
(matching the battery “+” terminal
with the “A” sign inside the battery
compartment, and the “-“ sign).
Replace the battery compartment
cover (B).
6
OPERATION -
For greater ease of use, when exercising, this platform has a remote
control unit to select the different operation modes.
Remote control key list:
1. Remote control unit ON LED
2. Remote control ON/OFF button
3. START/STOP key
4. Increase or decrease
speed keys
5. Increase or decrease time
keys
6. Balancing key: Low, Medium or
High
7. Program selection key.
NOTE:
To ensure a good signal between the
remote control unit and the monitor,
point the remote control at an angle of
approximately 45 degrees, as shown in
the diagram.
7
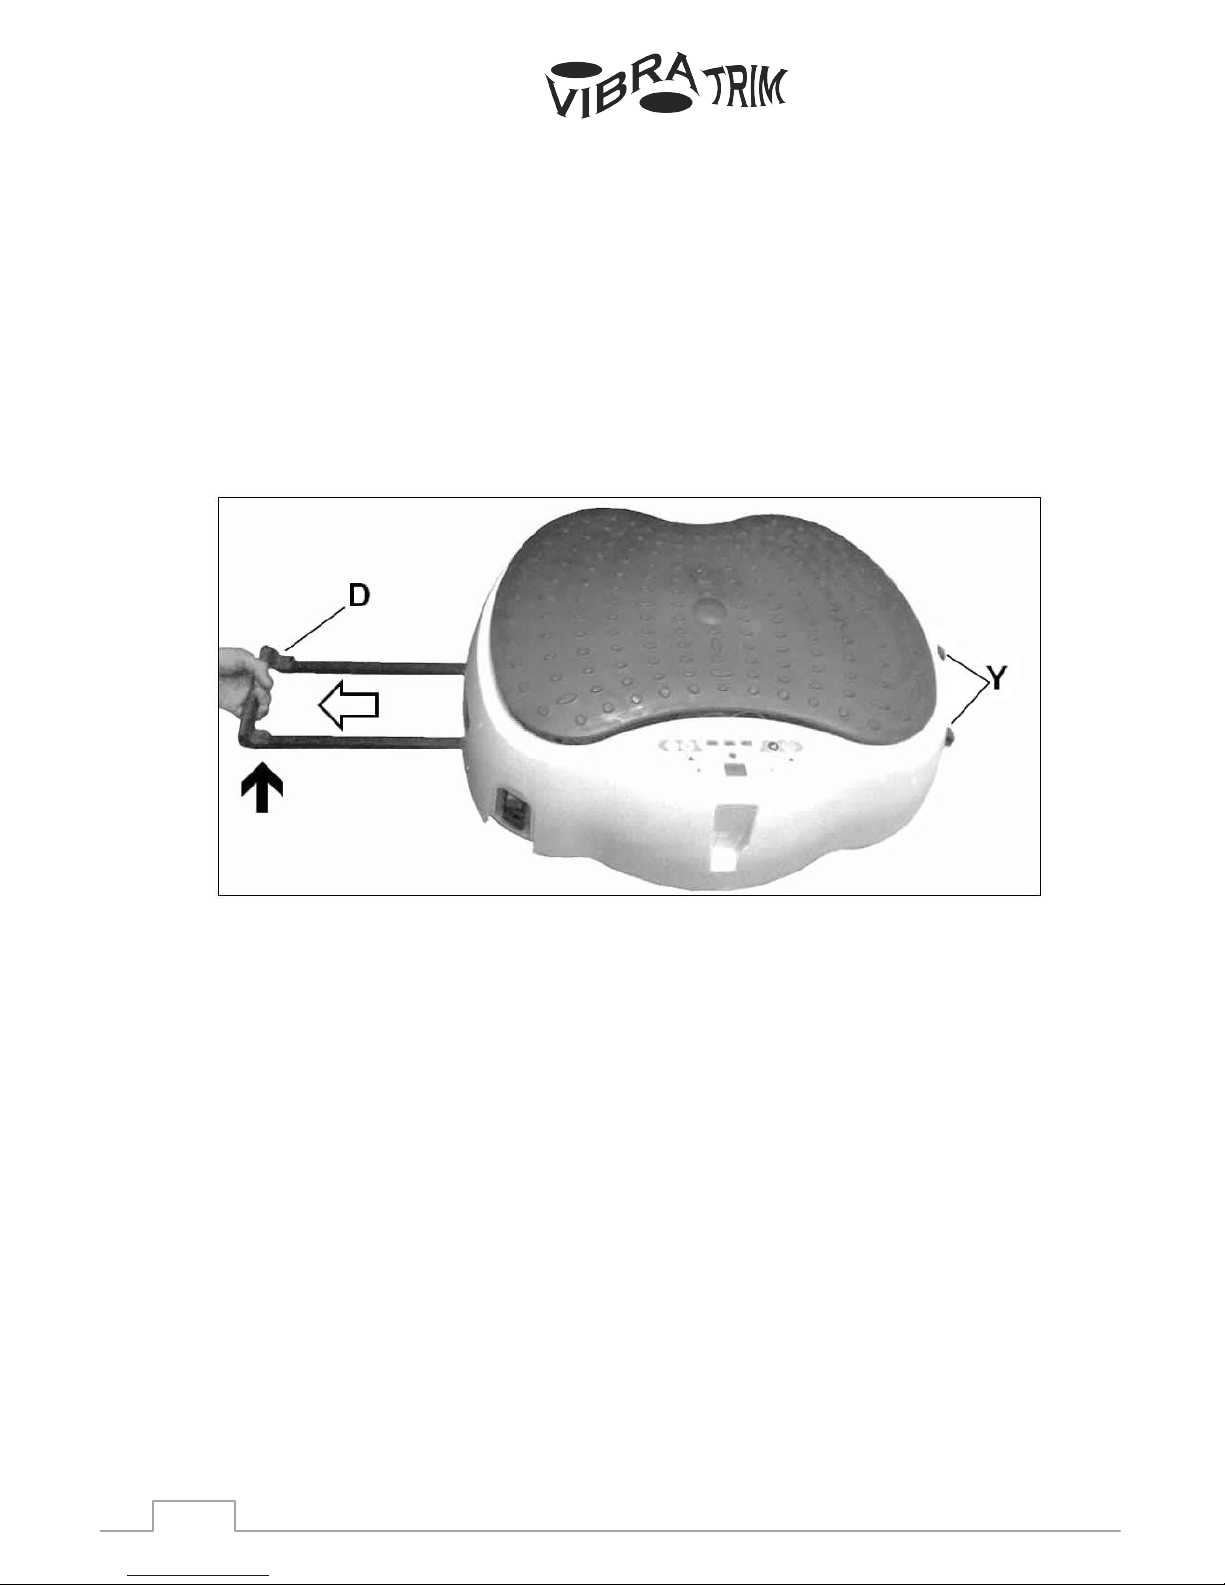
MOVEMENT & STORAGE.
The unit is equipped with wheels (Y), Fig. 3, to make it easier to
move. Make sure that the power cable is unplugged from the wall
socket. Pull out the handle (D) in the direction of the arrow <, as
shown below. Lift the platform in the direction of the arrow , so
that the wheels (Y) rest on the floor.
To prevent accidents, DO NOT MOVE THE PLATFORM ACROSS
UNEVEN FLOORS.
INSPECTION & MAINTENANCE –
Switch the unit off and unplug the power cord. Use a damp cloth
or towel to clean any dust off the surfaces of the platform and the
remote control unit. DO NOT USE SOLVENTS.
ATTENTION:
Periodically check that all of the fastening elements are duly
tightened and connected correctly. Check and tighten all the parts
on your unit every three months.
When in doubt, about any parts on the machine, do not hesitate to
get in touch with the Technical Assistance Service by phoning
customer service (see the back page of this manual).

8
We recommend that you use original spare parts to replace any
worn components. The use of other spare parts may cause injuries
or affect the performance of the machine.
USE OF THE PLATFORM:
Consult your doctor before using the balancing platform, especially
if suffering from pain or any illness. A workout on the Vibra-Trim
provides significant benefits and reactions for your body. These are
the same responses observed with traditional training methods, but
with greater intensity.
Use is NOT ADVISABLE for people suffering from the following
conditions:
Retinal related visual disorders
Serious vascular diseases (varicose veins at an advanced
stage) and cardiovascular problems in general.
Pregnancy
Serious types of hernias
Hip and knee prostheses (at high vibration levels).
Epilepsy]
Use of plates, pins and osteosynthetic structures in general
or any other internally fitted electric device.
Tumors and metastatic processes.
Being particularly tired, unwell or overly stressed.
Inflammation caused by injuries or an electro-muscular
nature.
Do not use after surgery (for at least 2 months), post-
traumatic situations or transient generic illnesses such as
headache, backache, etc. …. Until the symptoms disappear.
Vocal cord disorders.
Use of contraceptive coils (IUD)
Psychological intolerance to vibratory stimulation.
 Loading...