

VIA Technologies Hi-Speed USB2.0 PCI Card Version 1.1, EU-CV4N, Hi-Speed USB2.0 PCI Card User Manual
Page 1
USB2.0
PCI Card
High-Speed
In troduc tion
Tha nk s for pur ch as ing H igh-S peed US B2.0 PC I Card. W ith USB ( Unive rsal Se rial Bu s)
USB 2.0 Hig h-Spe ed port s, its ma ke you co nnect ing kin ds of USB d evice s and per ipher al to
you r deskt op comp uter in stant ly and co nveni ently .
Thi s US B2.0 PC I ca rd a llo ws you at tachi ng 1, 2, 3, o r 4 USB dev ic es i nstan tl y wi tho ut
reb ootin g your sy stem. W ith USB H ot-Sw appin g and Plu g-n-P lay fun ction , you don 't have
to no t only po wer dow n your sy stem in stall ing har dware b ut also w orry ab out run ning ou t of
slo ts on you r mothe rboar d or thos e confu sing IR Q's aga in.
Thi s US B PCI car d su pp ort s USB2. 0 High- Speed d evice a nd back ward co mpati ble wit h
USB 1.1 Ful l-Spe ed devi ce. Wel co me to the U SB R ev olu tion- Make it s imple a nd easy.
Feat ures
1. Su pport 3 2-bit P CI bus.
2. Fu lly com plian t with US B 2.0 & 1.1 d evice s.
3. Hi gh qual ity VIA ch ipset f or bett er perf orman ce.
4. Su pport U SB peri phera l Plug- n-Pla y & Hot-S wappi ng.
5. Su pport c onnec ting up t o 127 USB d evice s.
6. Da ta tran sfer- rate 1. 5/12/ 480 Mbp s.
7. Fu lly sup ports E HCI and O HCI Com plian t stand ards.
8. Dr iver fr ee for Mi croso ft Wind ows 200 0, XP, and 20 03 .
MAC 10 .3 o r l at er a nd Lin ux Ker nel 2. 5. 2 o r la te r.
Sy stem Requi r ement
1. Pe ntium o r equiv alent c omput er with a n avail able PC I slot.
2. CD -ROM / DV D-ROM r equir ed for dr iver in stall ation .
3. Mi croso ft Wind ows 98S E/ME/ 2000/ XP/20 03.
Packa g e Cont e nt
1.H igh-S peed US B2.0 PC I Card x 1
2.U ser's M anual x 1
3.C D Drive r x 1
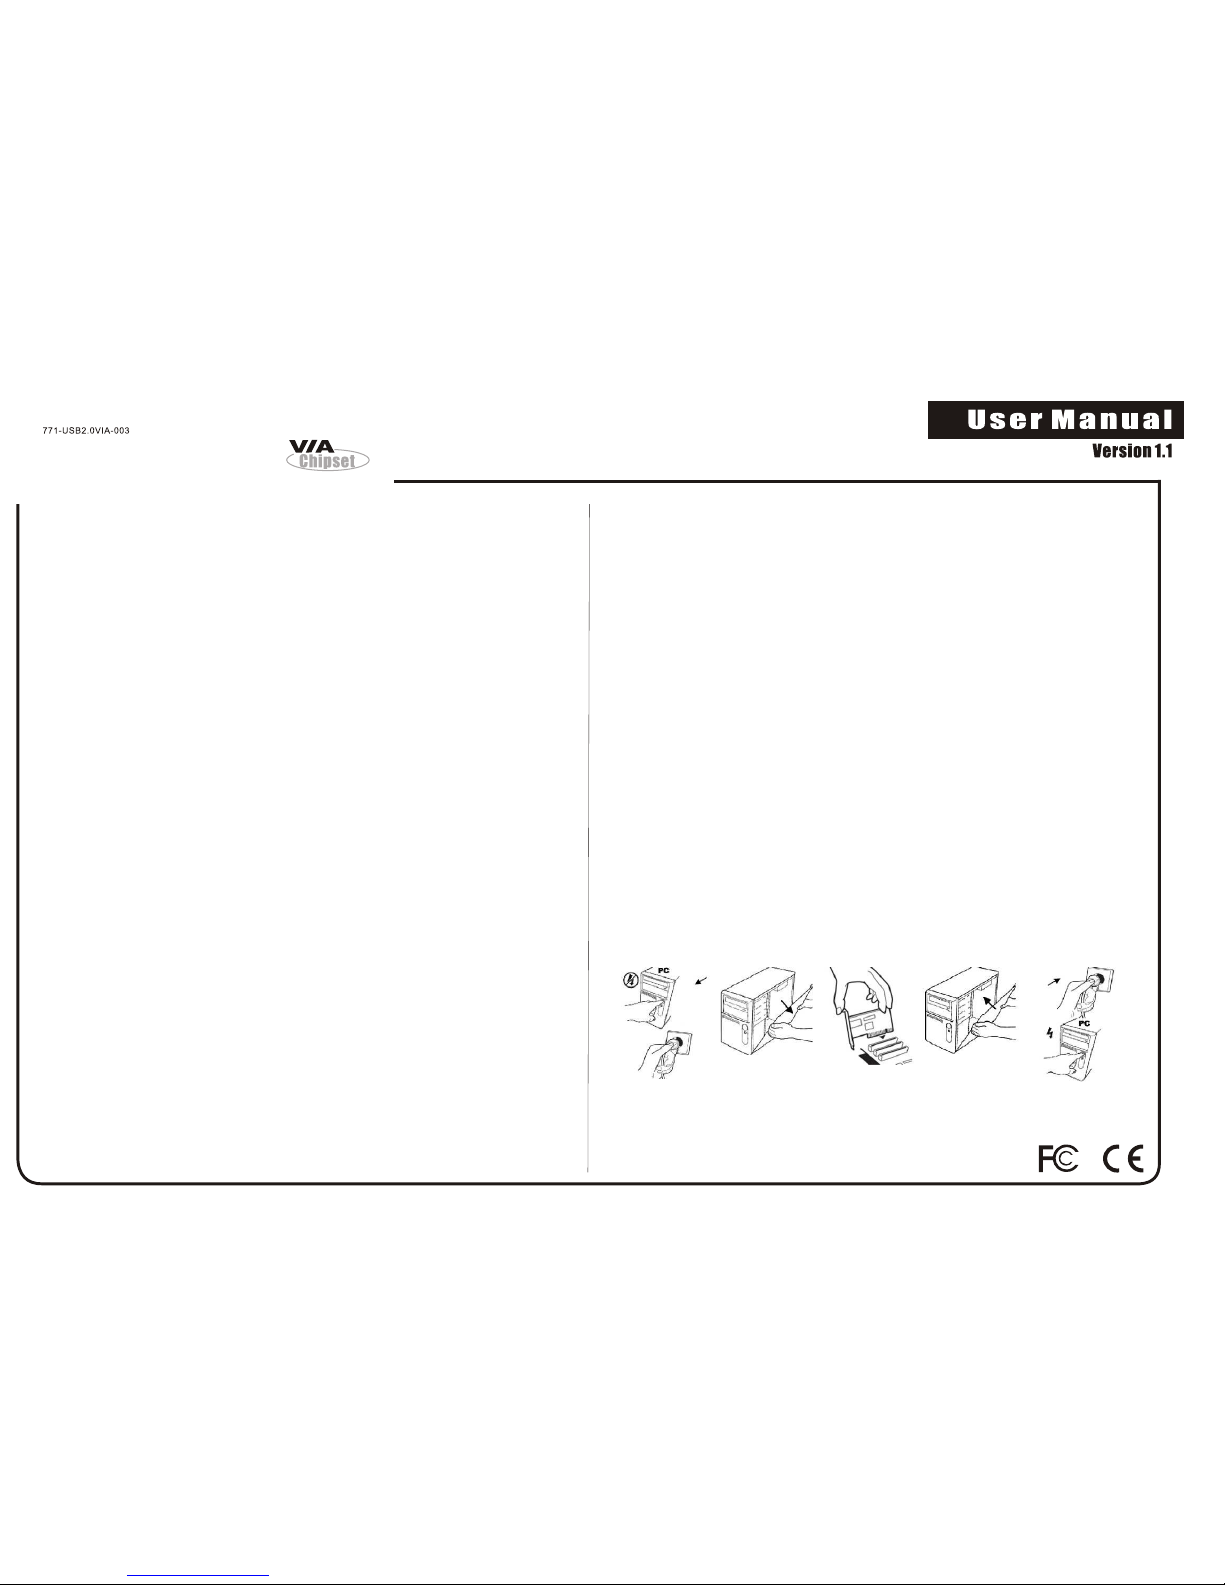
Ha r d ware In stall ati o n
Fol low the i nstru ction g iven be low to in stall t he USB 2. 0 PCI Car d
1.T urn y our com puter o ff
2.R emove t he powe r plug fr om the pl ug sock et.
3.R emove t he cove r from th e compu ter cas e.
4.I f fitte d. Remo ve the me tal cov er plat e on the re ar of a fre e PCI slo t (Whit e).
5.I nsert U SB 2.0 PC I card in to the fr ee PCI sl ot and sc rew it fi rmly on t he brac ket sid e.
6.P lace th e cover b ack ont o the com puter.
7.I nsert t he plug i nto the p lug soc ket.
Page 2
High-Speed USB2.0 PCI Card
Dr ive r i nsta llat ion
and
Win do ws 2 000 , XP, 200 3:
Win do ws
98S E and ME:
The s ystem w ill aut omati cally d etect U SB 2.0 PC I Card an d insta ll driv er by its elf und er
Win dows 20 03, XP, and 2 00 0 op era ti on s yst ems .
1. Pl ease ma ke sure t his PCI c ard has b een plu gged in to the PC I slot.
2. Sy stem wi ll dete ct the ne w hardw are, an d pleas e ignor e it.
Ins ert the C D drive r into th e CD-RO M drive a nd run th e "Setu p.exe " progr am
loc ated wi thin fo lder of t he Driv er CD:
:\US B\USB 2.0-V IA\DR IVER\ Setup .exe
3.T hen thi s Setup p rogra m will in stall t he driv er auto matic ally. Aft er i nstal li ng d riv er
Suc cessf ully, pr es s "Fini sh " to e nd dr iver in stall ation p roced ure and R eboot t he
sys tem.
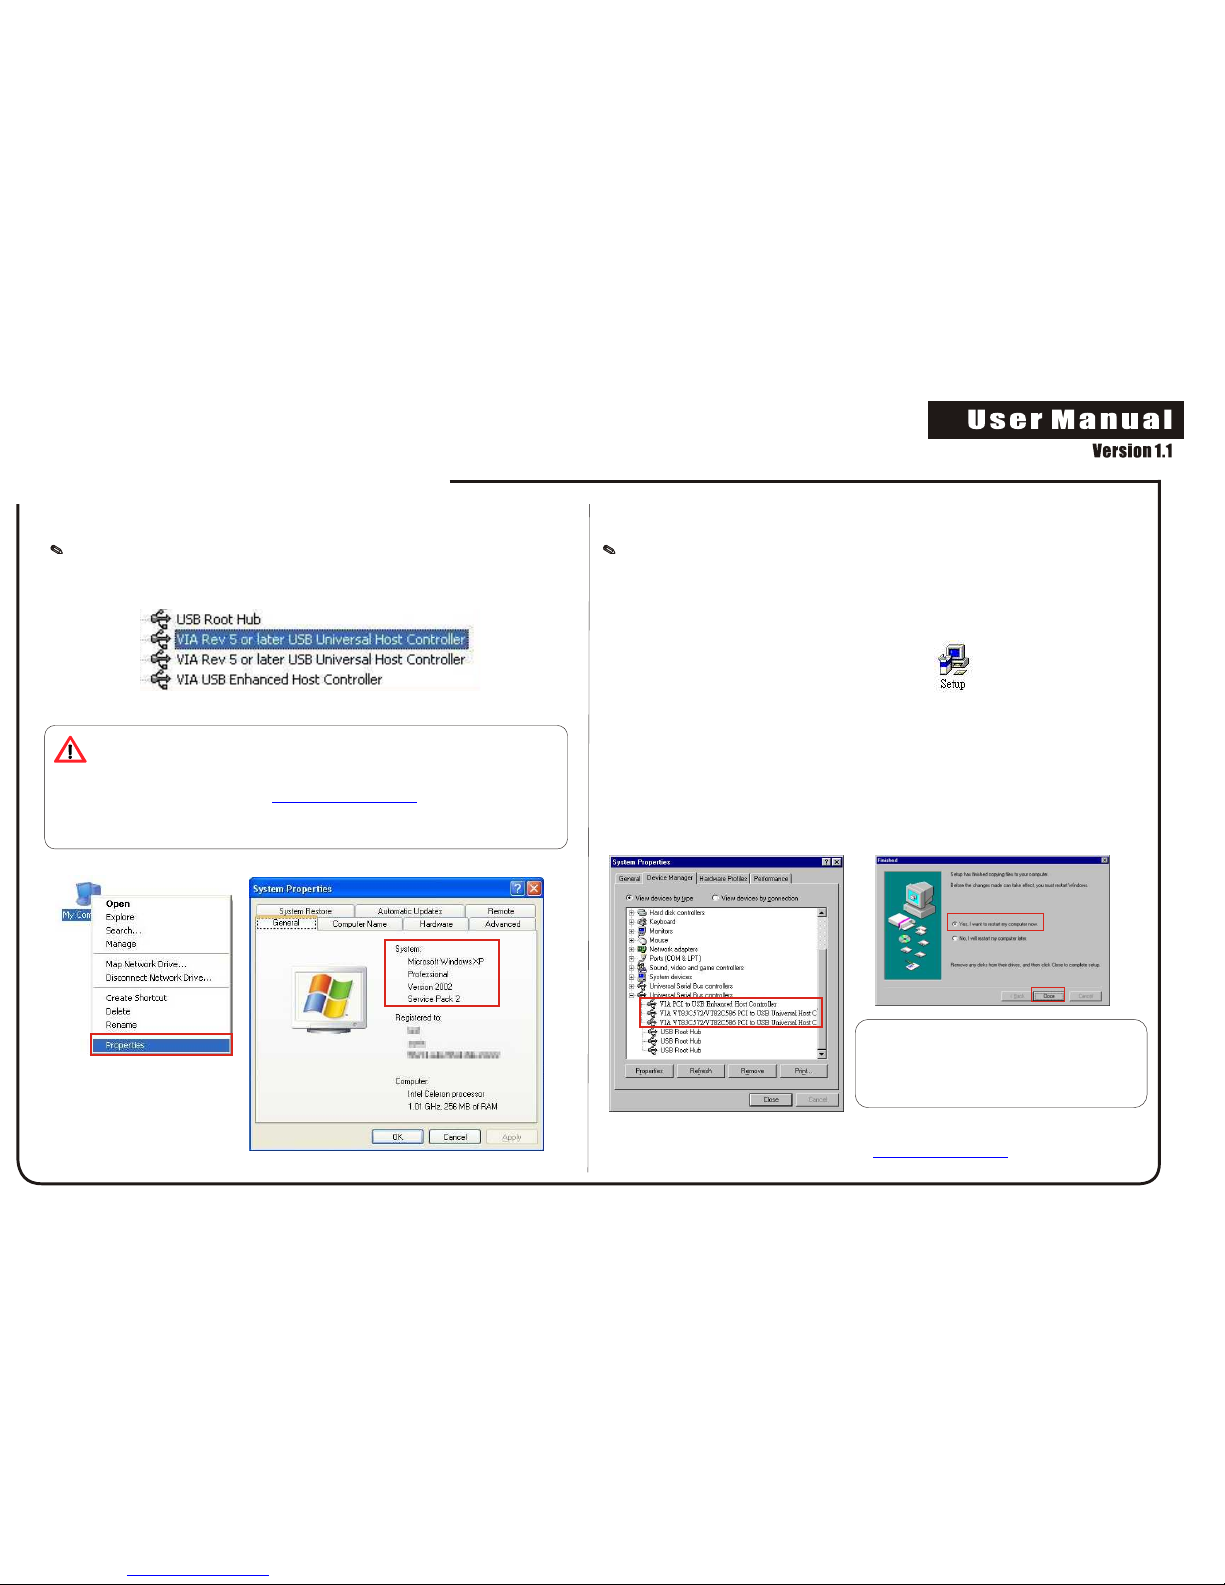
4.A fter re start ing , ope n the Dev ice Man ager an d check i f the dev ices ca n work pr operl y.
St ar t > C on tr ol le r Pa ne l > Sy st e m > Dev ic e Ma nag er
Not e :
If th ere is a ye llow ex clama tion ma rk on "VIA U SB Univ ersal O pen
Hos t Contro ller" , plea se remo ve this i tem fro m the Dev ice Man ager
by cl ickin g the Uni nstal l butto n and cli ck Refr esh to re - insta ll this
dri ver aga in.
※Whe n the pro cess of i nstal ling US B drive r, syste m would a sk your o rigin al oper ation
sys tem CD.
Ple ase vis it chip set ven dor ~ VIA w eb si te ( ) to ge t the lat est dri ver.htt p://w ww.vi a.c om.tw
Rig ht clic k your mo use on "M y Compu ter" an d selec t "Prop ertie s" to che ck your
ope ratio n syste m servi ce pack v ersio n as belo w pictu res sho wn. If yo ur oper ation
sys tem is NO T Mi croso ft Wind ow s 20 00 se rvice p ack 4 and W in do ws XP s er vic e pack 1
or la ter.
Ple ase vis it Micr osoft w eb site ( ) or us e updat e funct ion
on yo ur syst em to upg rade th e lates t versi on serv ice pac k of oper ation s ystem .
Oth erwis e
htt p://w ww.mic rosof t.com
thi s USB2. 0 PCI car d just on ly run US B1.1 da ta tran sfer sp eed.
 Loading...