

Page 1
Pasta Machine
CUC-26PM
Quick
Operational
Guide
Page 2

!!!!!!! nlike other type of pasta machines for home use, the
VIANTE Pasta Machine is capable of making gourmet-grade
pasta without the hassle in 3 easy steps:!
!
!Mix!
!
!Extrude!
!
!Cut!
!
!There is no need to spend a long time making the dough by
hand and then using a pasta cutter to make different types of
pasta. The Viante Pasta Machine is able to do it all for you.
Including mixing the ingredients to perfection and extruding
the pasta in 14 different shapes or types. !
1
2
3
U!
Page 3
1
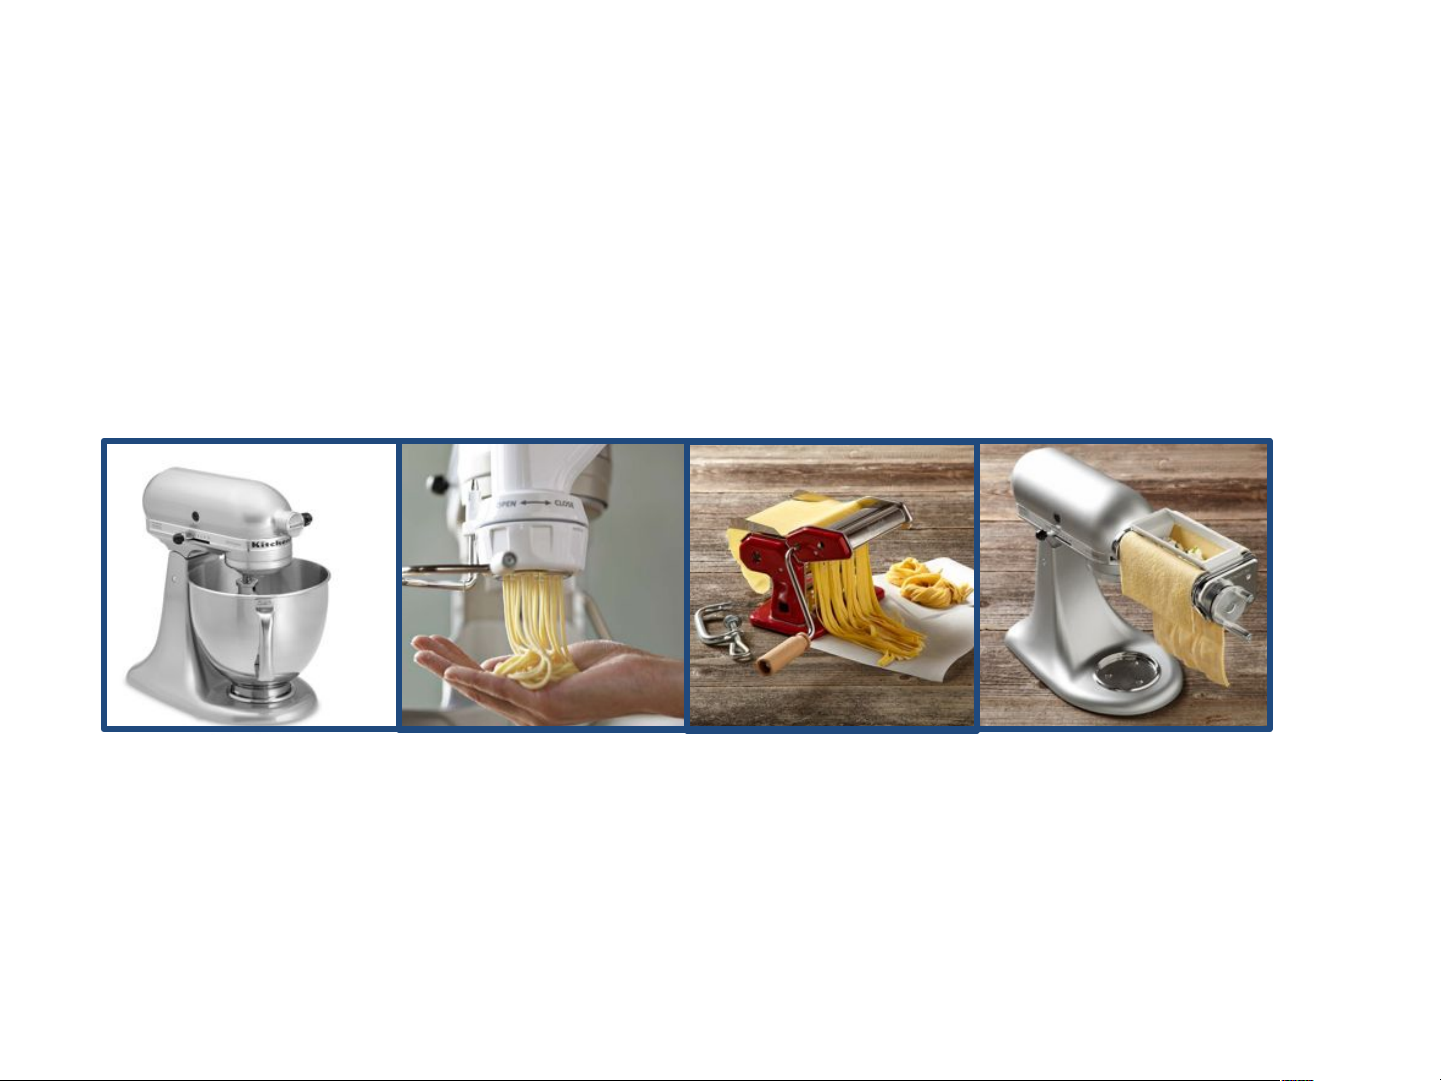
!!!!here are other products in the market that can simplify the pasta-making
process. However, they require that the dough is made by hand or by using a
powerful stand mixer. Then putting that dough into an extrusion attachment
by hand. And the amount of pasta types you can prepare with those
attachments is usually limited to a small number. !
!
!
!
!
!
!
!
!
!
The Viante Pasta Maker is the ONLY product in the market that allows you to
prepare 14 different types of pasta in an easy to use product. Just Mix,
Extrude and Cut. !
!
!!
T!
Example(of(other(pasta/making(products(requiring(different(steps(in(making(pasta(
Page 4
1
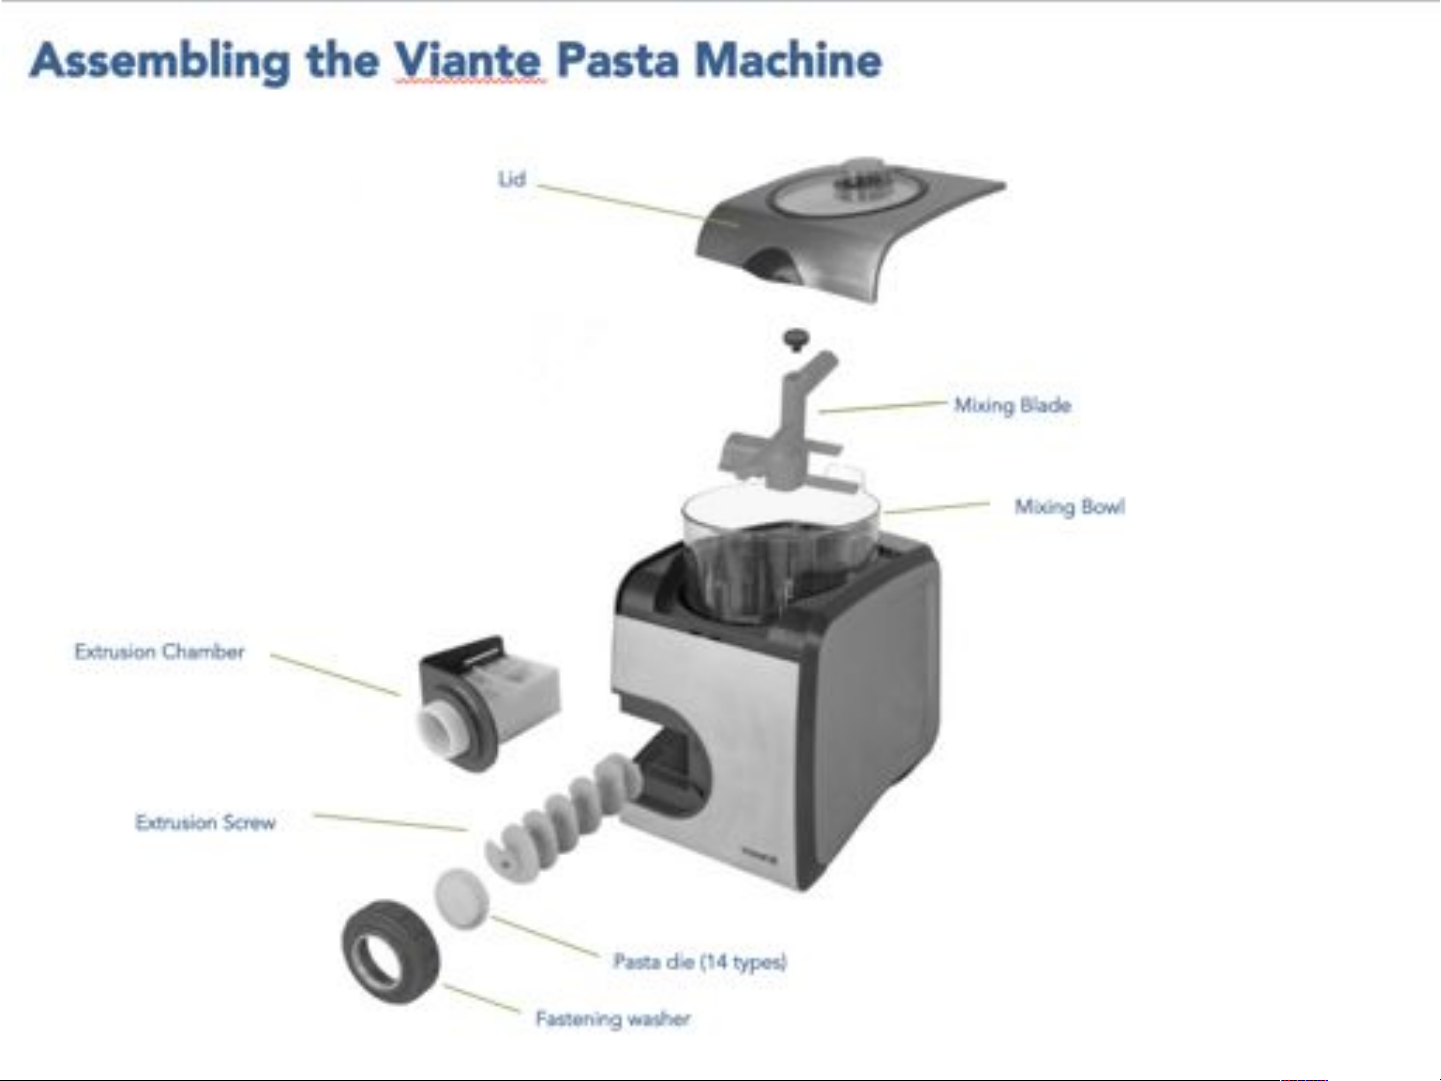
Assembling the Viante Pasta Machine!
Lid
Mixing Blade
Mixing Bowl
Extrusion Chamber
Extrusion Screw
Pasta die (14 types)
Fastening washer
Page 5
1
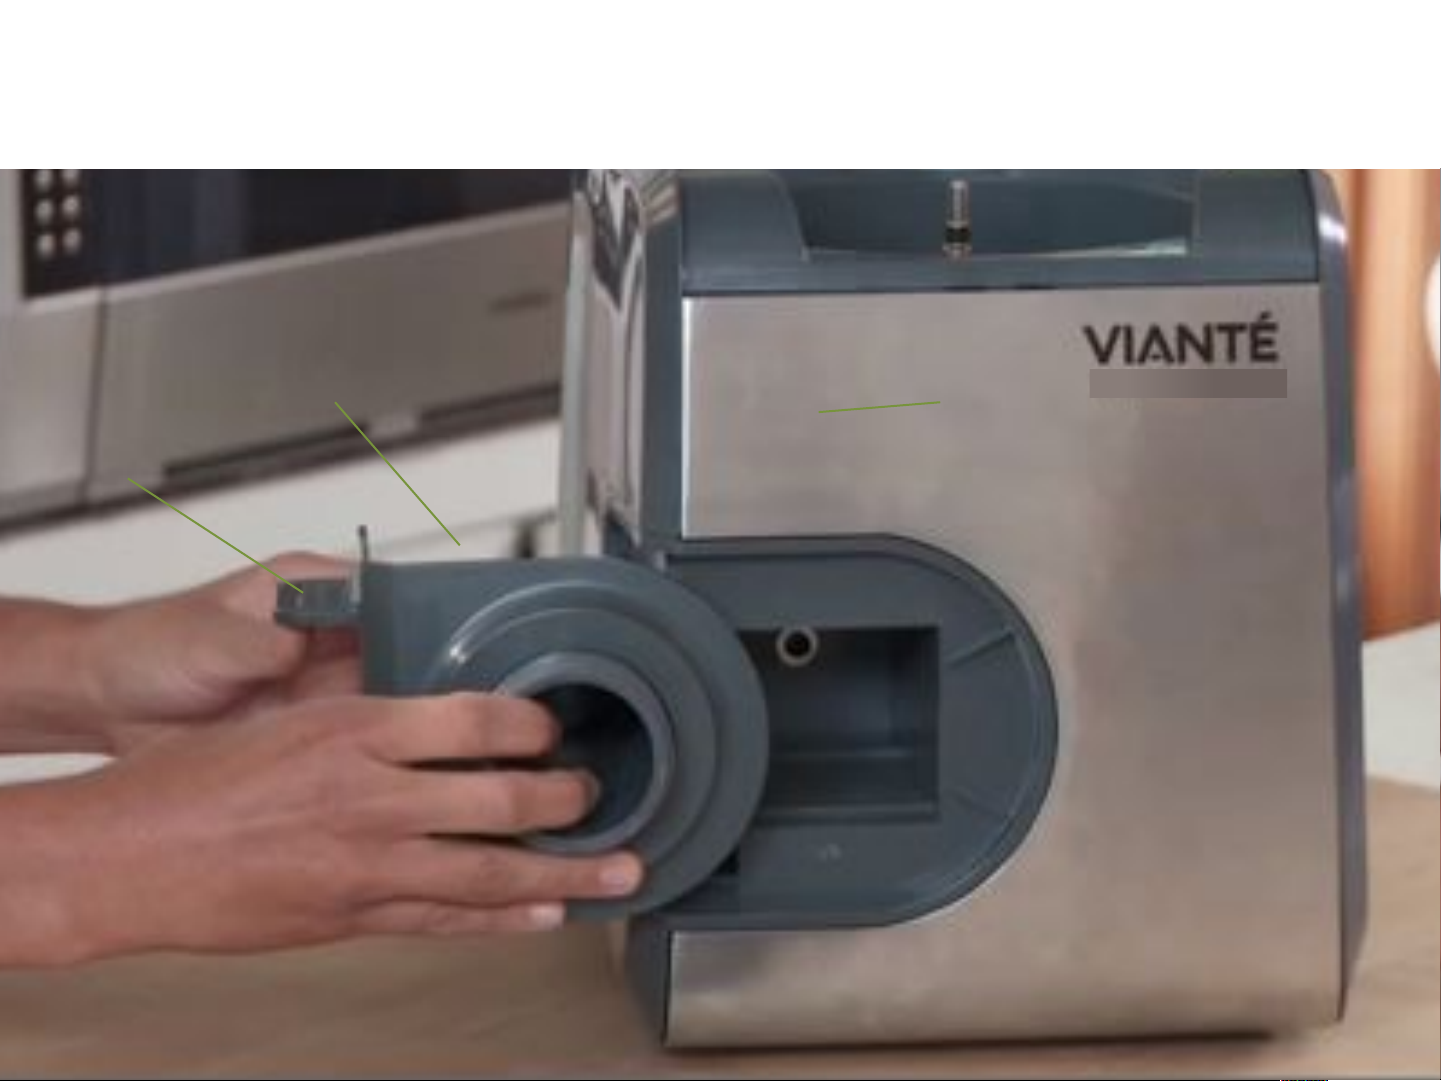
Inserting the Extrusion Chamber/Drawer!
Slider
Extrusion Chamber/drawer
Page 6
1
Inserting the Extrusion Screw!
Slider
Extrusion Chamber/drawer
Extrusion Screw
Page 7
1
Using the Fastening Tool!
Slider
Extrusion Chamber/drawer
Fastening Tool
Page 8
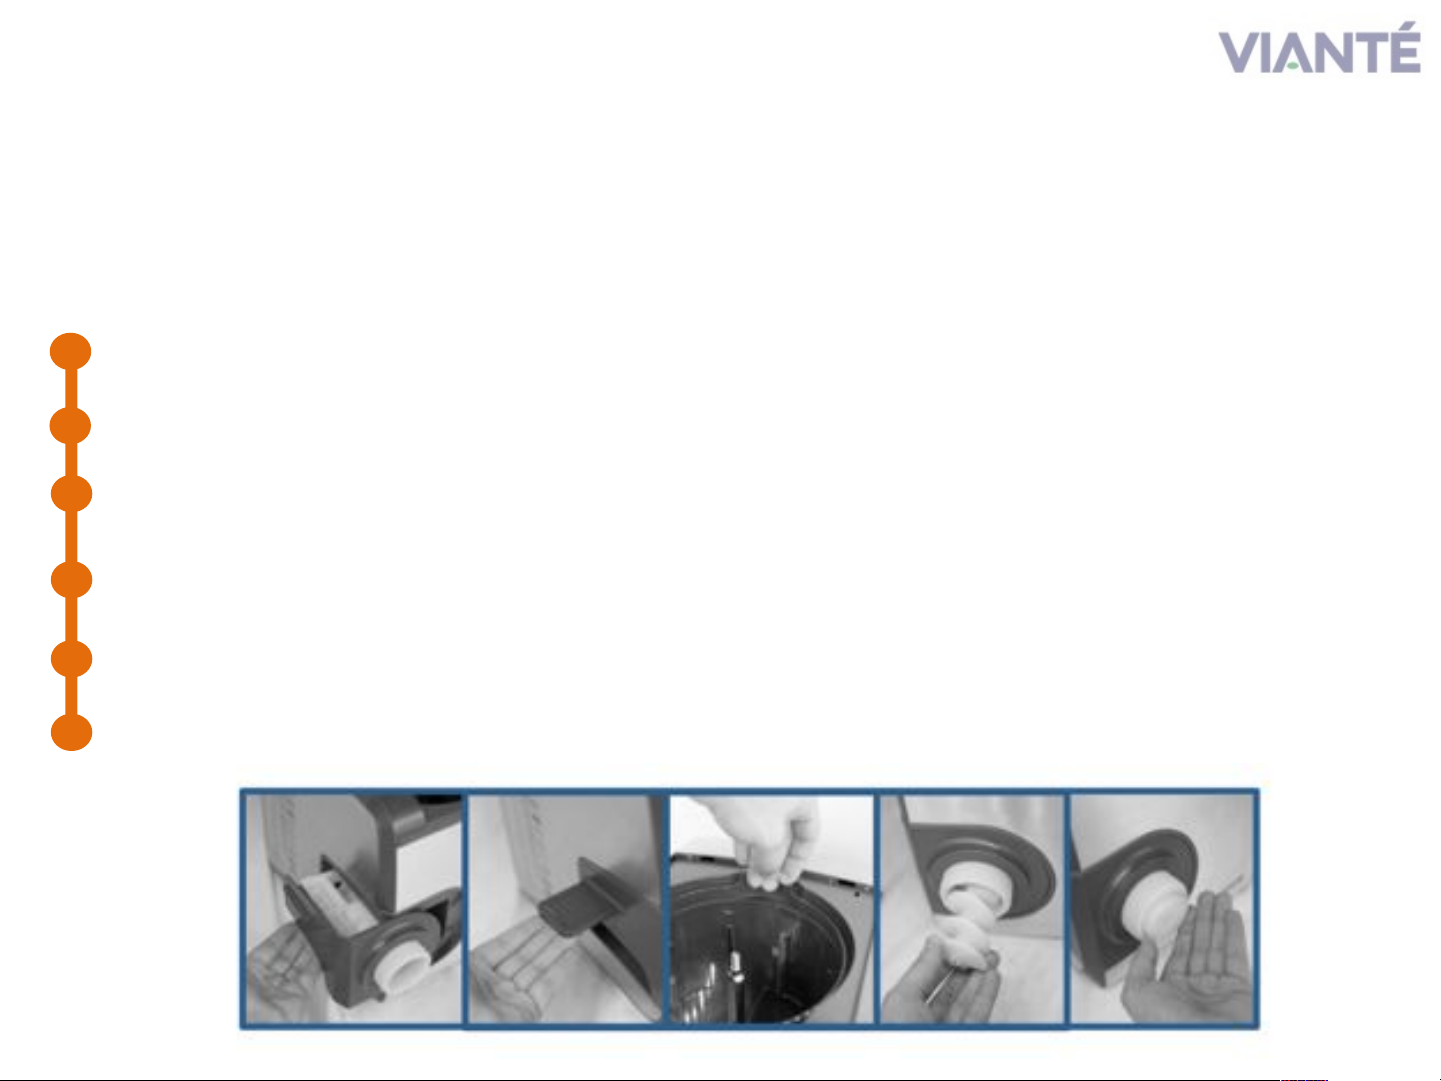
!!!!!he various components need to be assembled in the following
order:!
!
!
!
Introduce the extrusion chamber sideways into the machine and push firmly until it “clicks” into place. Then
make sure the plastic slide it’s inserted and in the closed position (all the way in).!
!
Place the mixing bowl from above and push down until it’s secured in its place. !
!
Place the mixing blade on the metal shaft and push down until it’s it reaches the bottom. Fasten it into place
using the fastening bolt provided.!
!
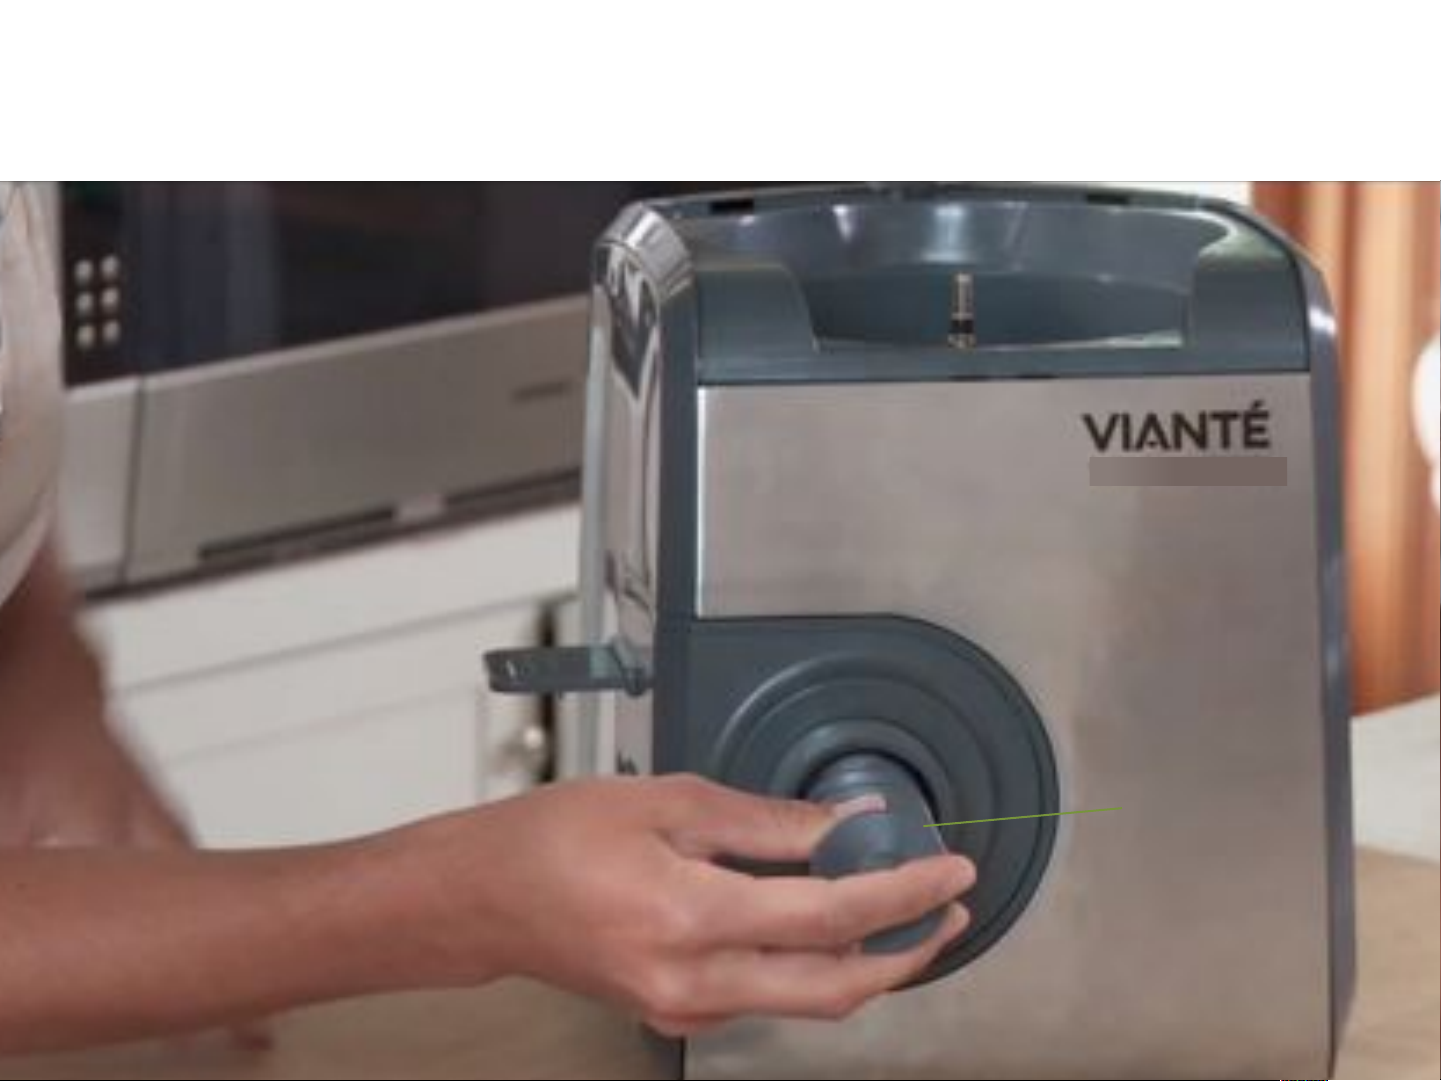
Introduce the extrusion screw in the extrusion chamber from the front opening until it’s deep in its place. !
Chose the pasta die you want to use and place it on the opening. !
!
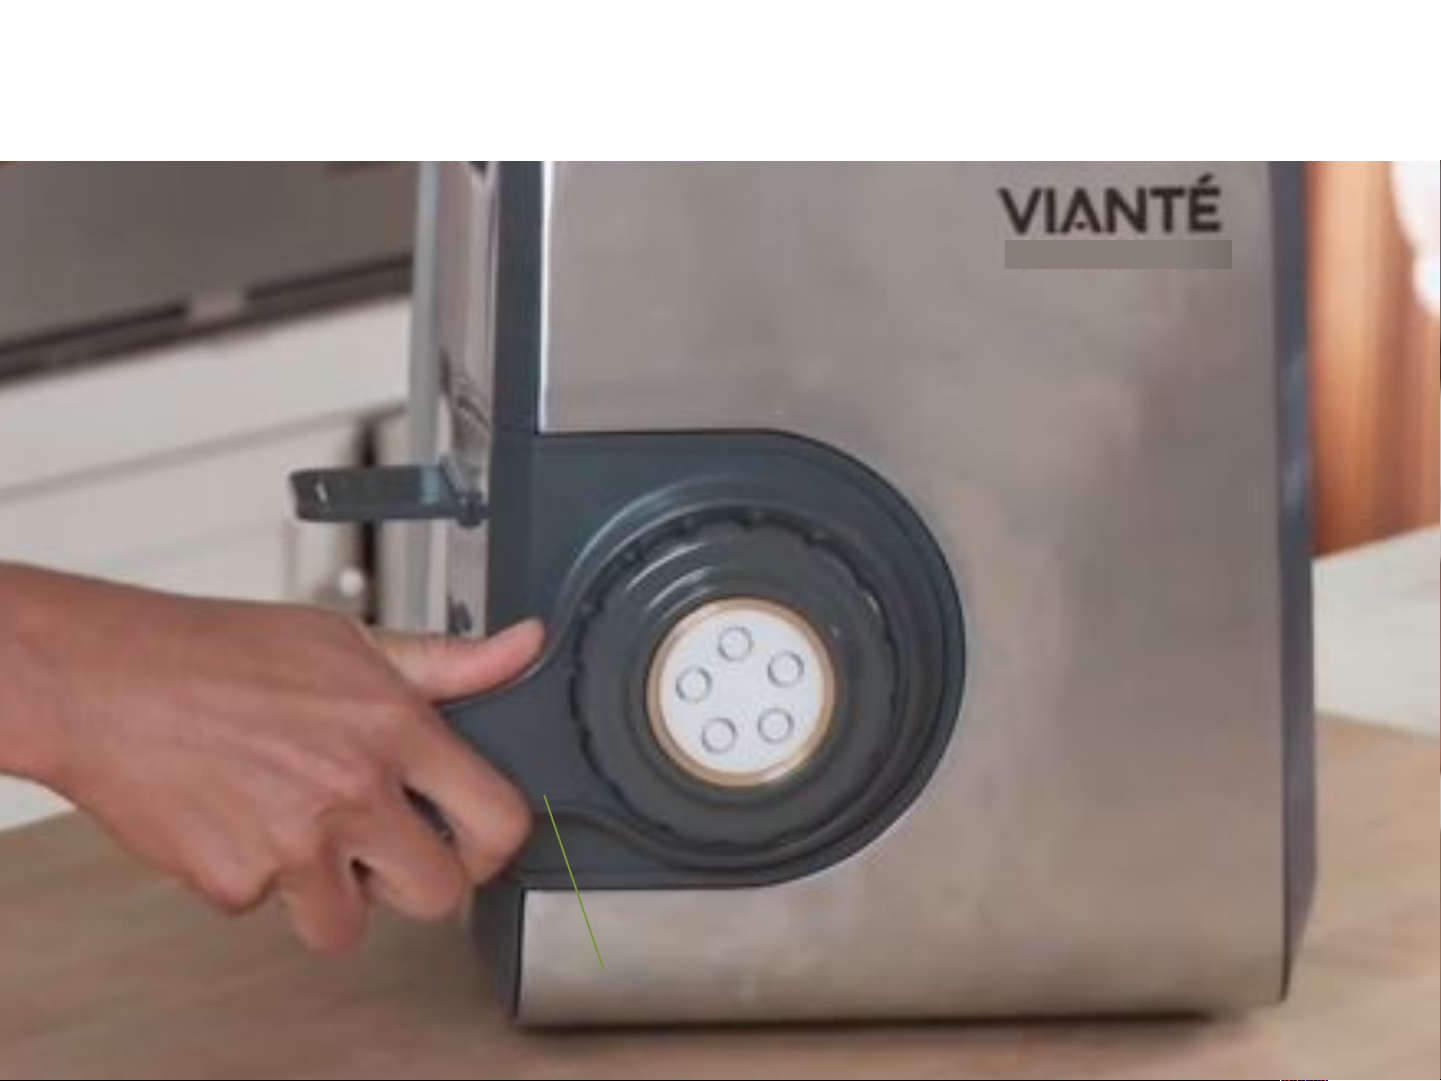
Use the metal washer to secure the pasta die by screwing it around the extrusion chamber front opening.
Use the fastening tool to tighten it (you can also do it by hand). !
!
Put the lid on the product. !
!
!!
!!
T!
1
2
3
4
5
6
Page 9

1
!!!!!!! ow is time to make pasta with your Viante Pasta Machine. !
!
There are many different recipes you can use. Here’s the basic
recipe:!
!
31/3 cups (500 grs) plain flour. !
2 large eggs (60g eggs).!
1 tblsp extra olive oil. !
120 ml (4oz.) water.!
½ teaspoon salt.!
Extra Flour for Dusting. !
!
There are additional recipes in the instructional Manual supplied with the product. Feel free to make
changes to the recipe but make sure you achieve the right consistency so the dough is not too dry
or too wet and it can extrude easily. !
!!
N!
Page 10

1
Place the FLOUR in the mixing bowl and close the lid. !
!
Slightly whisk the eggs, salt and olive oil together. !
!
Remove the small lid from the main lid. !
!
TURN ON THE MACHINE and begin to mix. !
!
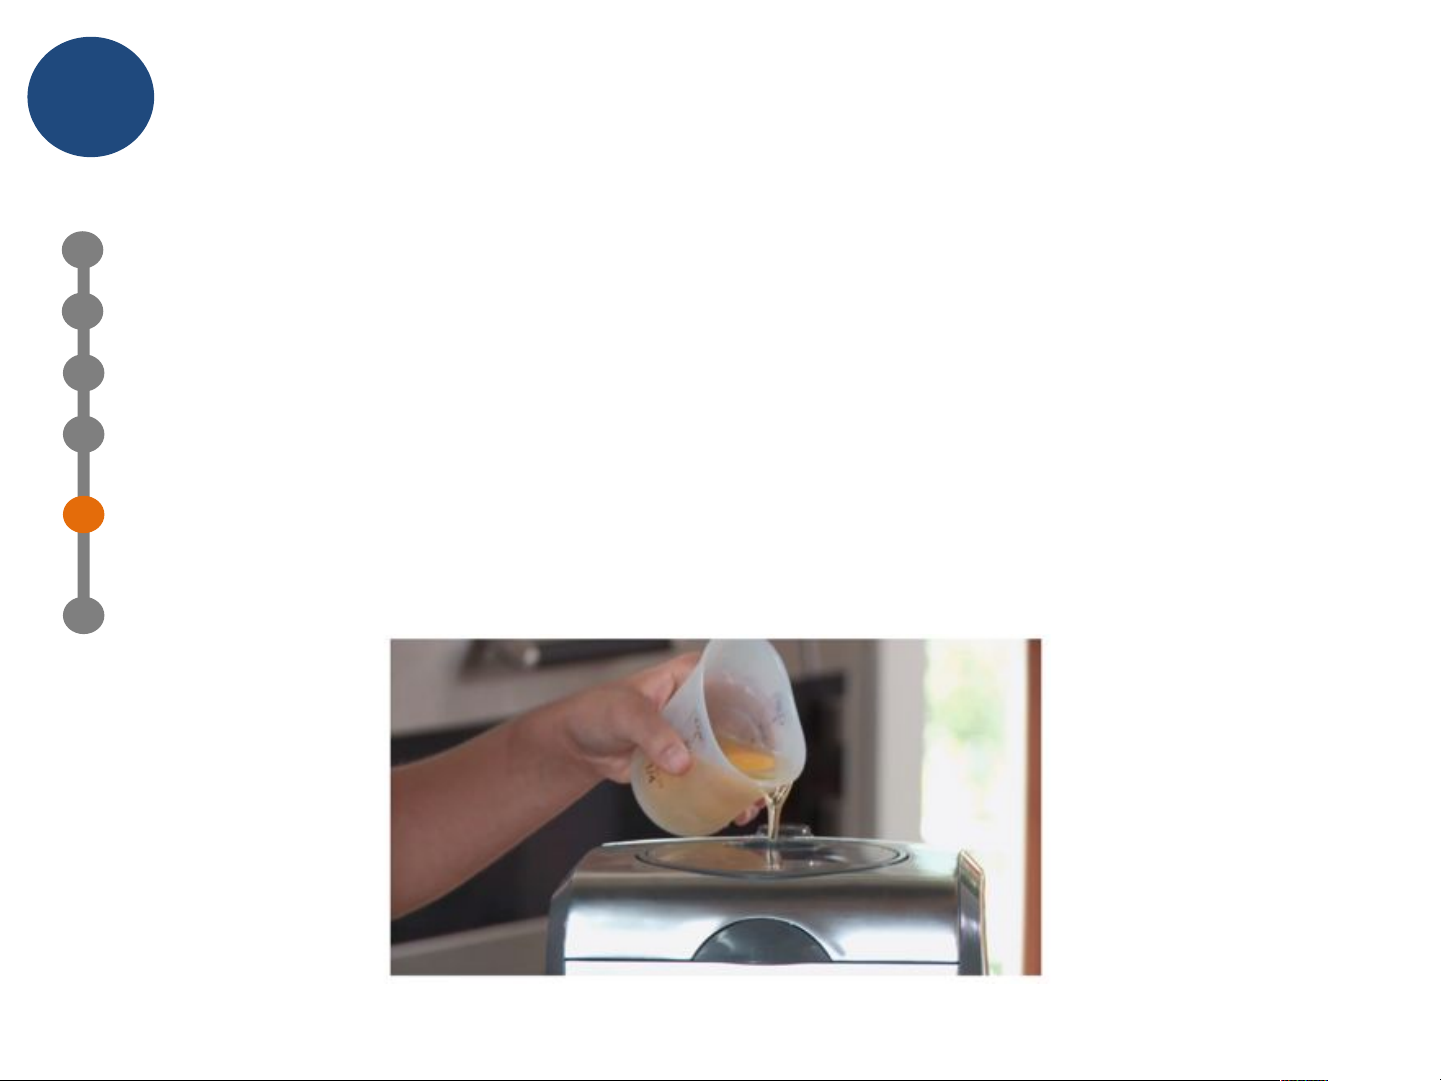
Slowly pour the whisked eggs through the small lid opening. Do it in small increments and allow 10 seconds
between each pour. !
!
Start pouring the water in very small increments. Allowing each increment to mix for 20 seconds. Look for
the right dough consistency (not too dry, not too wet). The dough should not be very sticky and should not
stick to the mixing blades. If it does, sprinkle a little flour (tea spoonful) and see if that’s enough. Repeat if
it’s still to wet or until reaching the right consistency. !
!
Allow to mix for two minutes. !
!
!
!
!
!
!
You might not need to use all the water. It depends on the amount of eggs and the type of flour and water
hardness. The best results are achieved by looking at the dough and realizing when the right consistency is
achieved. The right dough is elastic but not too wet and it’s not sticky. It is able to be pushed down to the
extrusion chamber smoothly. !
!
!!
1!
1
2
3
4
5
6
MIXING THE INGREDIENTS!
Page 11
1
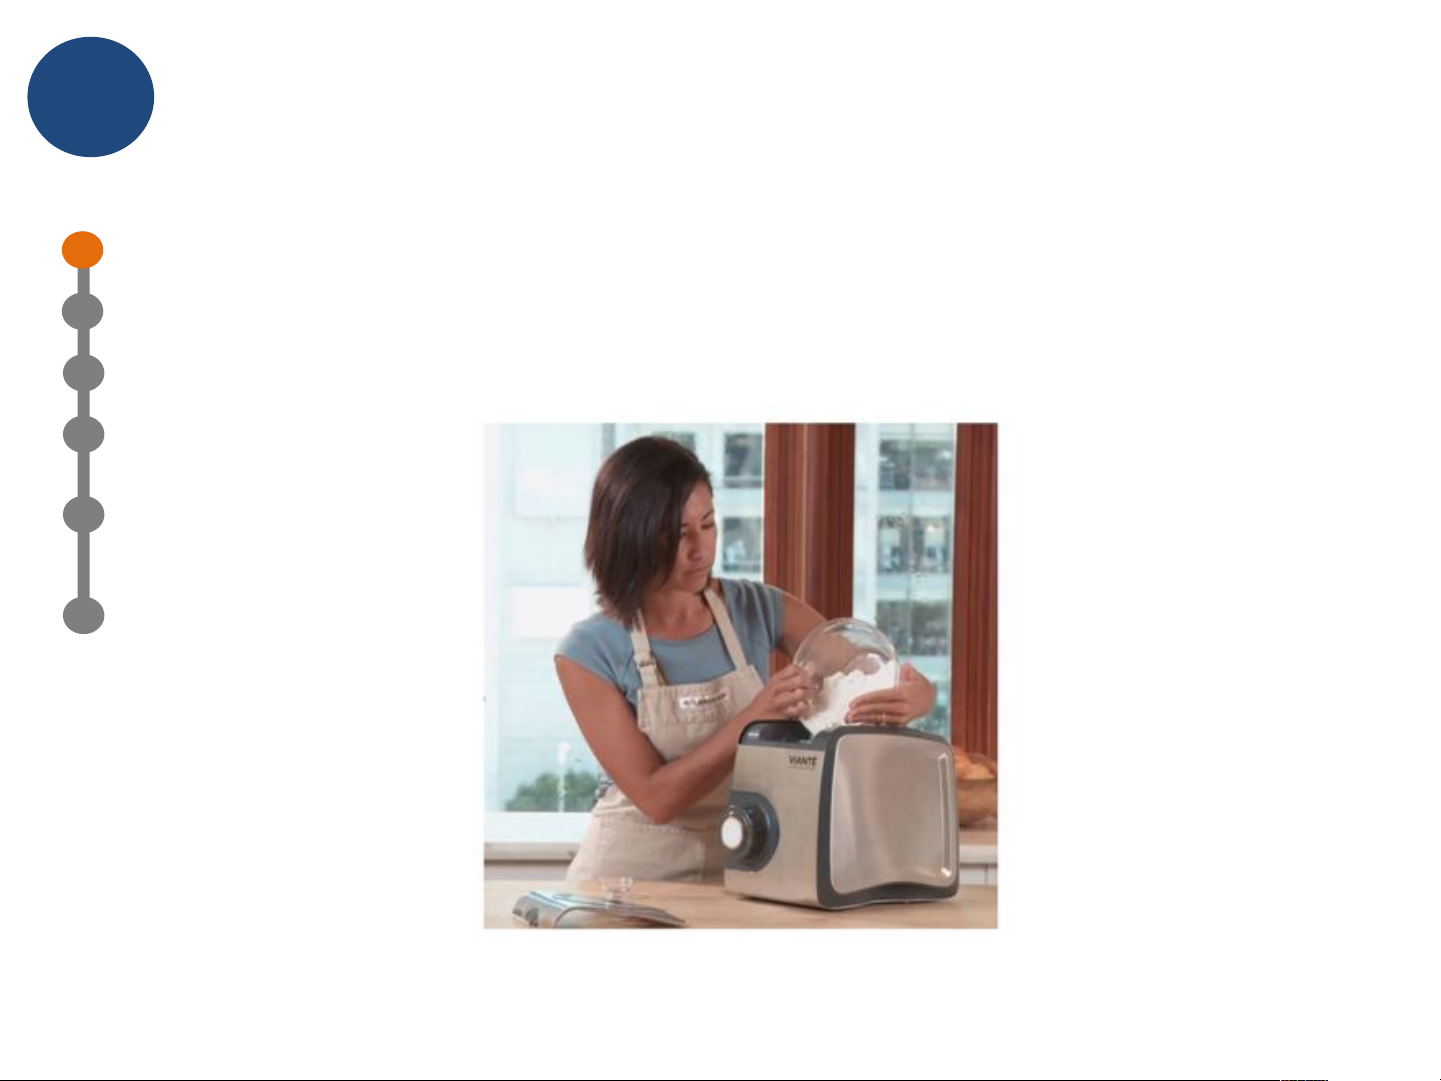
Place the FLOUR in the mixing bowl and close the lid. !
!
!
!
!
!
!
!
!
!!
1!
2
3
4
5
6
MIXING THE INGREDIENTS!
1
Page 12
1
Slowly pour the whisked eggs through the small lid opening. Do it in small increments and
allow 10 seconds between each pour. !
!
!
!
!
!
!
!
!
!
!
!!
1!
2
3
4
5
6
MIXING THE INGREDIENTS!
1
Page 13

1
You might not need to use all the water. It depends on the amount of eggs and the type of
flour and water hardness. The best results are achieved by looking at the dough and
realizing when the right consistency is achieved. The right dough is elastic but not too wet
and it’s not sticky. It is able to be pushed down to the extrusion chamber smoothly. !
!
Normally, adding the ingredients and allowing proper mixing should not take more than:!
!
5 minutes. !
!
If you let the ingredients mix for a long time they might become too elastic and sticky. And
it could results in a harder to extrude dough as it sticks to the mixing blade and mixing bowl.!
!
!!
1!
REMEMBER!!
Page 14

1
Once the mix has achieved its right consistency, pull from the slider on the side of the extrusion
chamber and place it in the open position. You don’t need to to remove it completely. !
!
Once the slider is put in the opened position, pasta will fall into the extruding chamber and will
start to come out of the front where the die disc is. !
!
As the pasta comes out, sprinkle some flour on it to avoid sticking. !
!
Once the desired length is achieved, cut the pasta using the wire cutter provided. !
!
Extrude all the dough in the mixing bowl. If some of the dough sticks to the mixing components,
remove the lid and move the pieces of dough by hand. This will solve the problem. You can repeat
this step if needed. !
!
Once all the dough is extruded, you can turn off the machine. !
!
All the dough in the mixing bowl should be able to be extruded in approximately 10 – 15 minutes. If
the dough consistency is too wet it might take a longer time as it’s harder for the dough to fall
down into the extrusion chamber. !
!
!
!
!
!!
2!
1
2
3
4
5
EXTRUDING/CUTTING THE PASTA!
Page 15

1
Like any complex product with many moving parts, the Viante Pasta Machine requires
proper cleaning and maintenance in order to deliver gourmet-grade pasta with each use.
Please consider the following instruction very carefully:!
!
All of the removable components are dish-washer safe. !
!
Make sure you don’t use the heated dry feature in your dish washer as it can cause
discoloration of plastic components and/or melting if you place plastic parts near the heating
elements. !
!
Use the provided brush to remove dry dough and flour from hard-to-reach areas. Especially
within the extrusion drawer or chamber. !
!
Use your fingers to remove all the sticky dough from moving parts before putting them in
the dish-washer. !
!
Use the provided needle tool to clean the dies properly by removing the dough in them. !
!
Use a wet cloth and mild soap to clean the body of the pasta machine. !
!
Do not submerge the pasta machine body as it will cause damage to the electrical
components. !
!
3!
CLEANING THE PASTA MAKER!
 Loading...