

vian BP700X, BP750X1, 880E, OP700, OH850 Quick Start Manual
...
Blood Pressure ECG Monitor
ECG Pen
OmniPAP
Quick Start Guide
BP700X/BP700X1 02
BP750X/BP750X1 09
880E 16
BP ECG Studio 20
OP700 / OH850 22
TABLE OF CONTENTS
Preparation Before Taking
Measurement
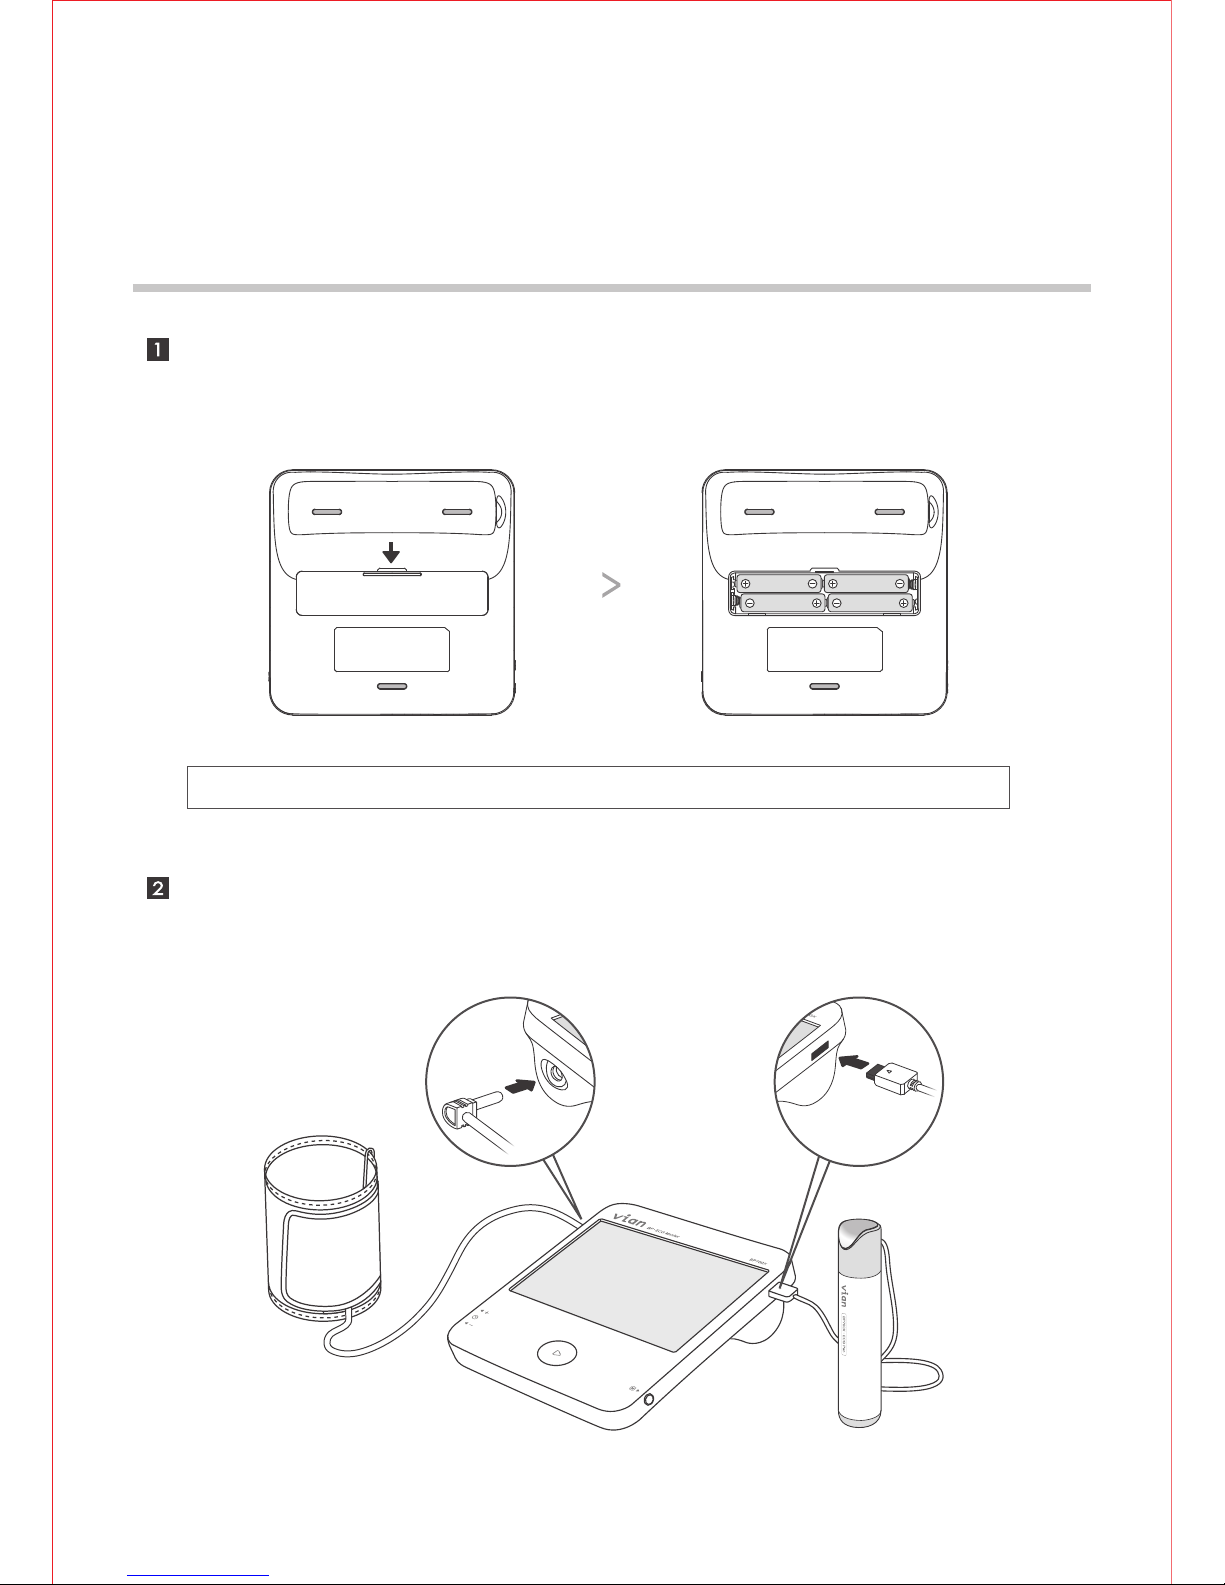
Install four “AAA” alkaline batteries by following the + (positive) and
- (negative) polarities indicated on the battery compartment.
02
Insert the air plug into air jack on the left side of main unit. Insert the cable
connector of ECG Pen to ECG port on the right side of main unit.
BP700X / BP700X1
Note : Four new “AAA” alkaline batteries will last for approximately 300 measurements.
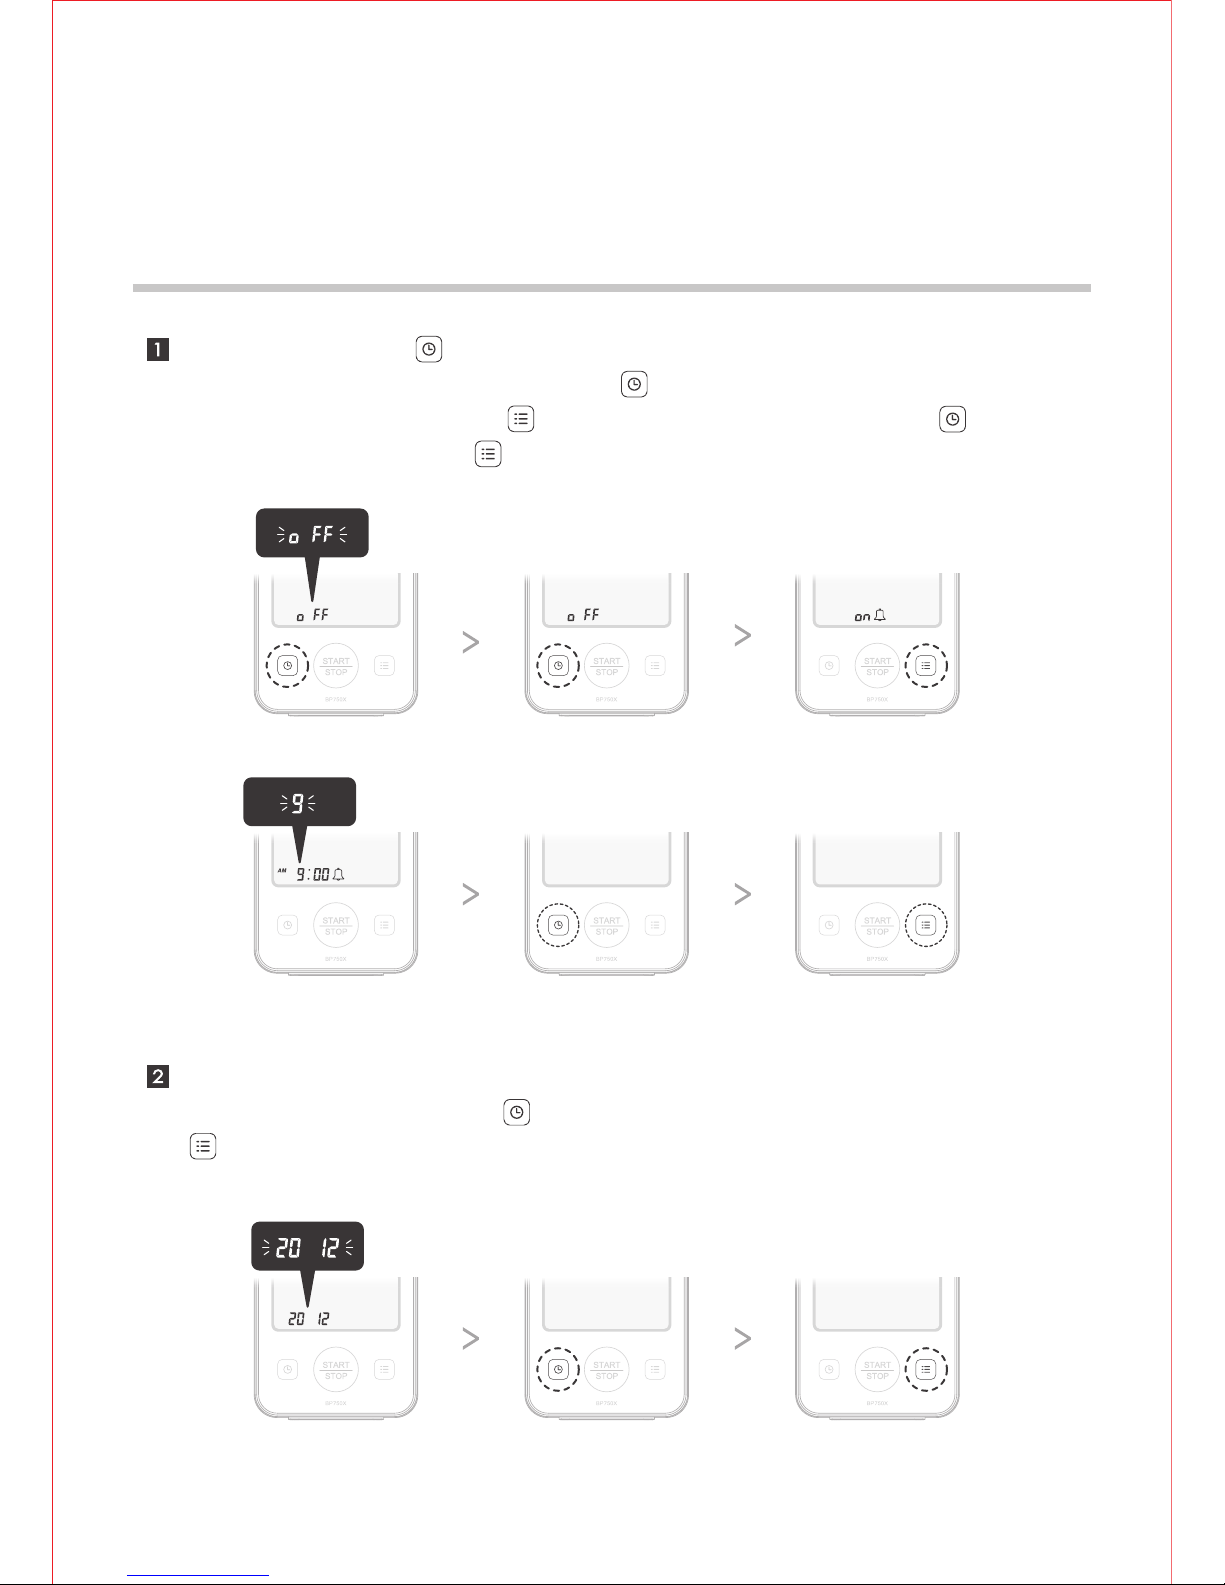
Date, Time & Alarm Settings
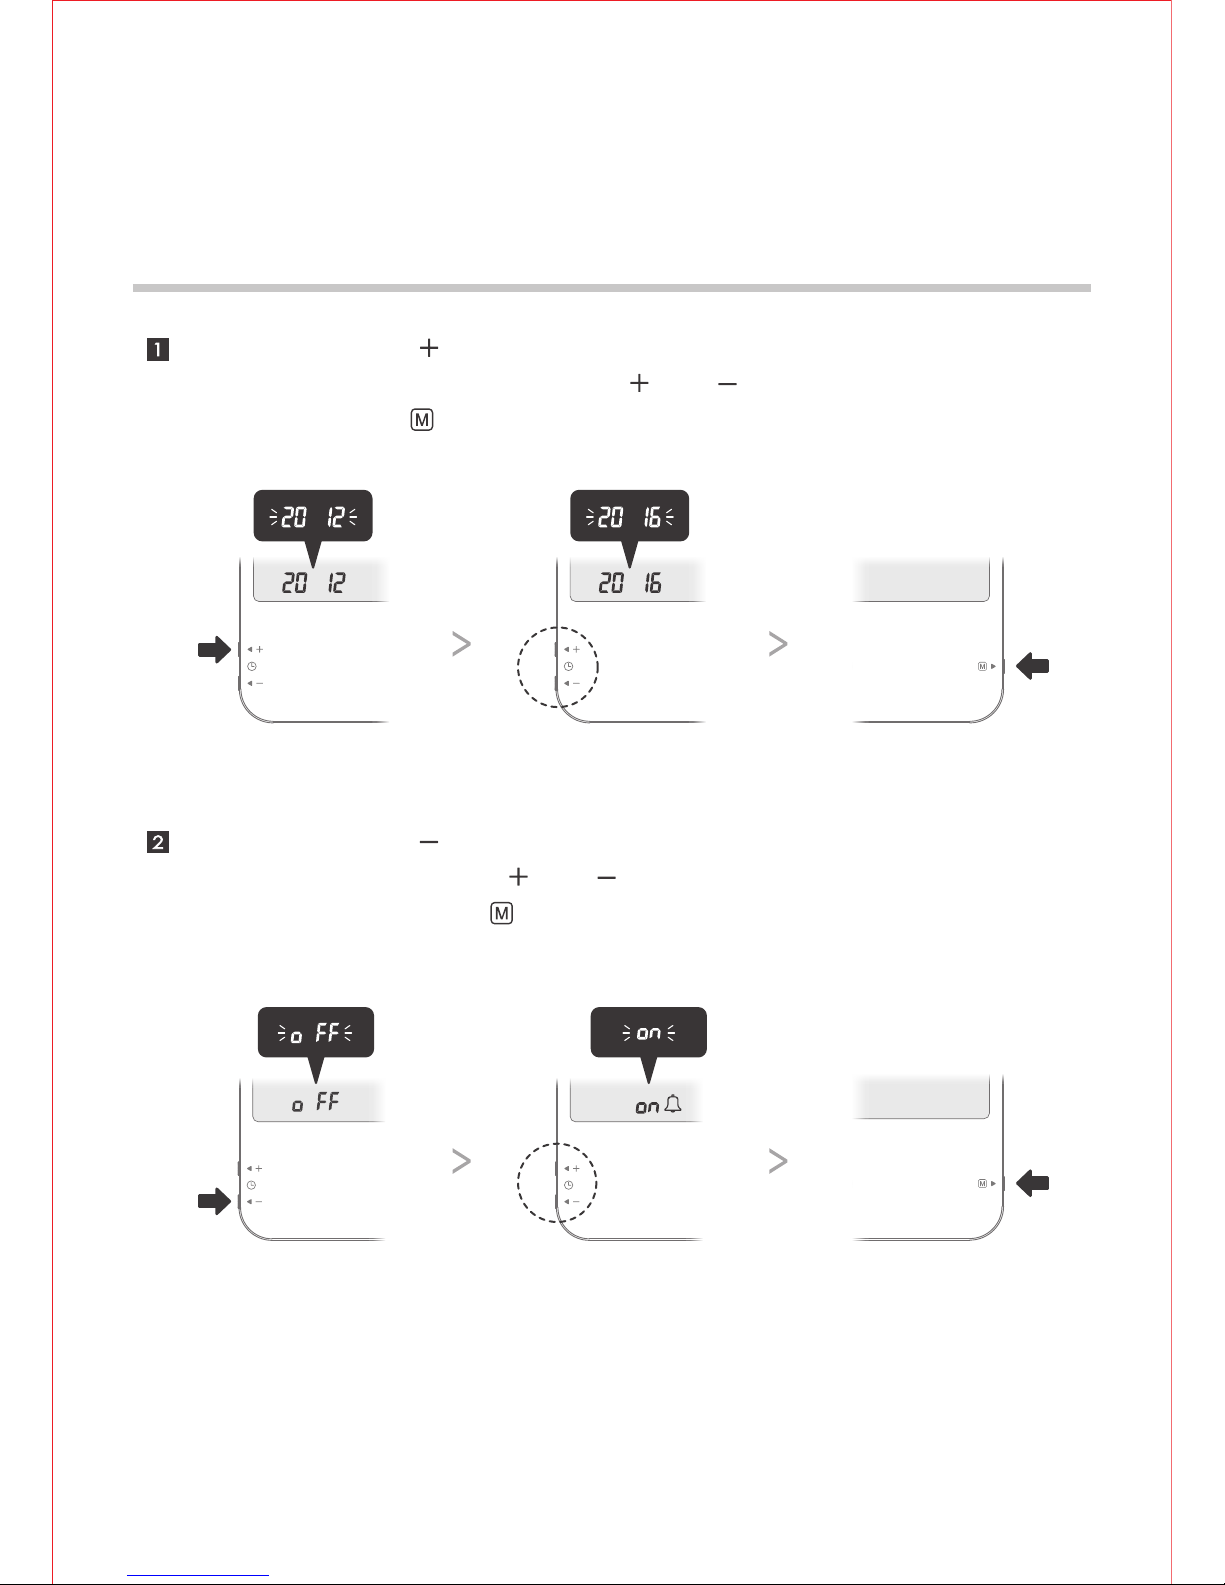
Press and hold the button on the left side for more than 3 seconds to enter
Alarm setting mode. Press and buttons to turn on the alarm function and
adjust values, then press button to apply your settings.
Press and hold the button on the left side for more than 3 seconds to
enter Date/Time setting mode. Press and buttons to adjust the
values, then press button to apply your settings.
03
BP700X / BP700X1
Blood Pressure
Cautions & Components Introduction
To assure accurate blood pressure measurement, please:
Rest for at least 20~30 minutes after exercising, bathing, eating, smoking
or drinking alcohol before taking measurement.
Take the measurement in a quiet place and under appropriate temperature.
Relax for 5~10 minutes before taking measurement.
Make sure the center of arm cuff is at the same level with your heart.
Do not move or talk during the measurement.
Wait at least 5 minutes before taking another blood pressure measurement.
04
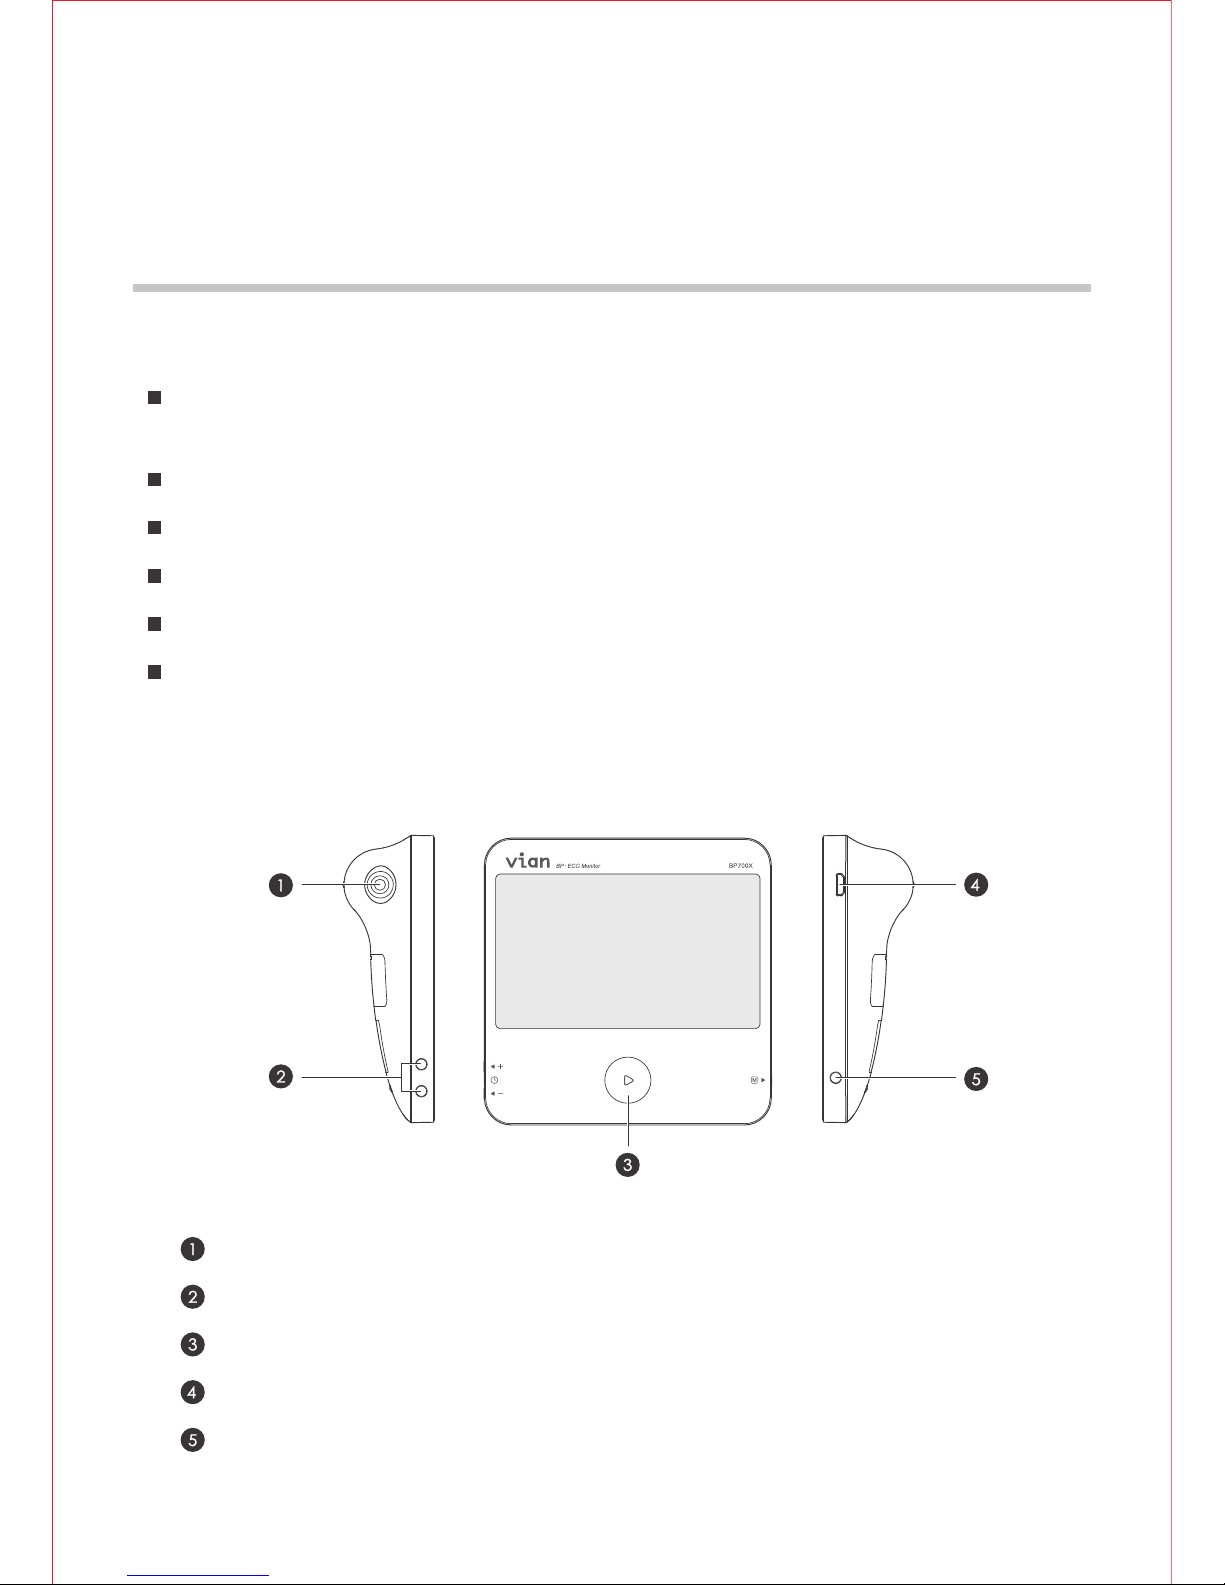
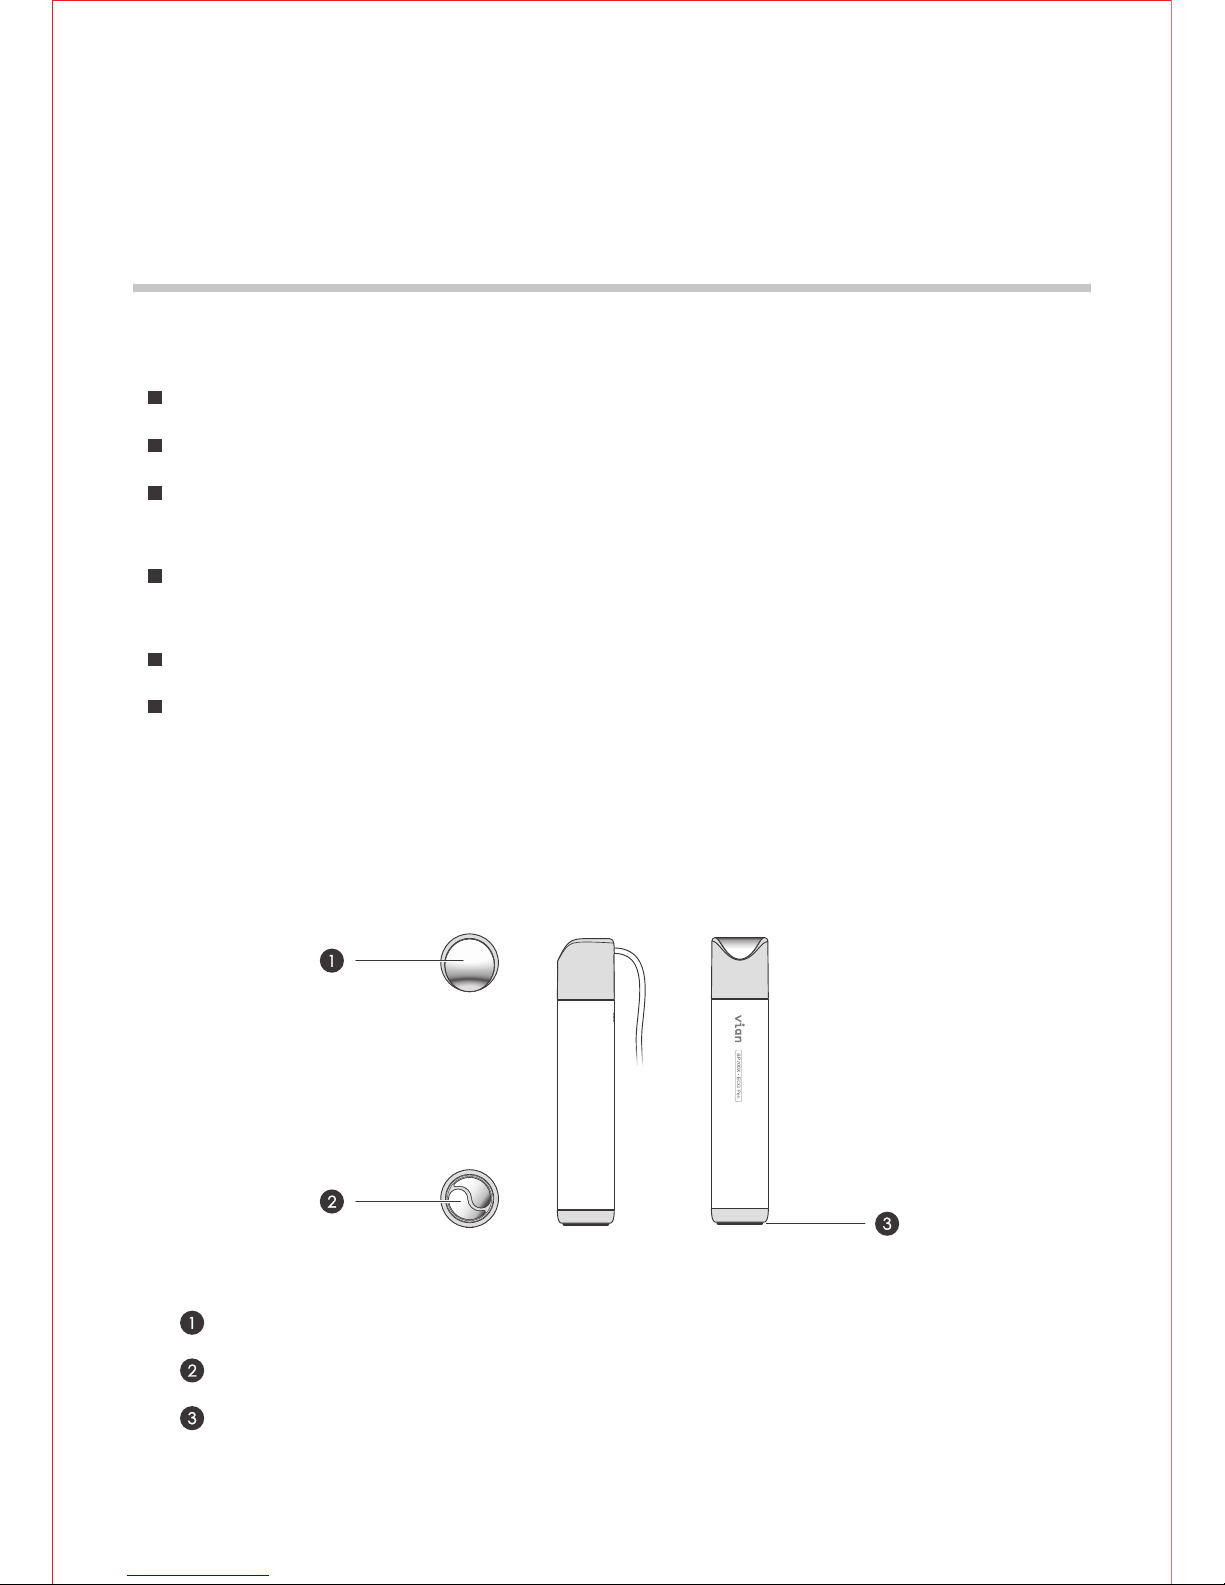
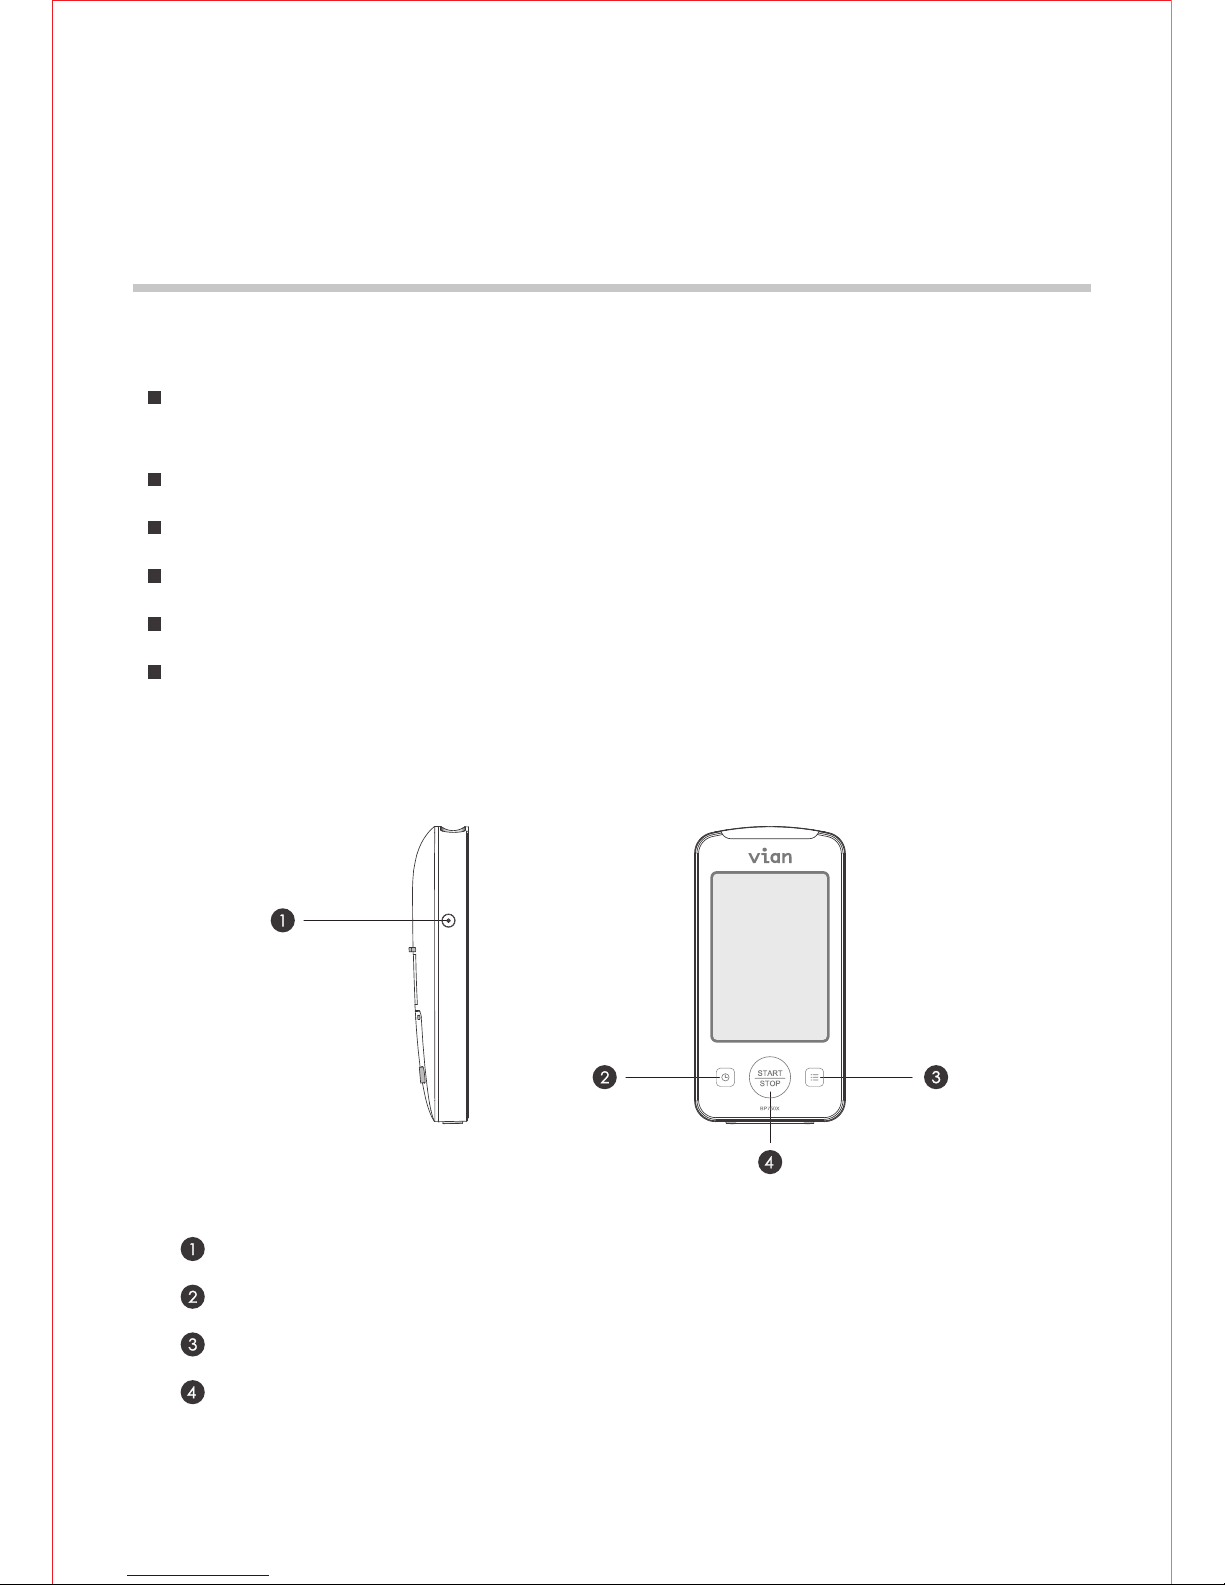
Components
Air Jack: connect air tube of arm cuff.
Adjust Button: increase/decrease values of settings.
Main Button: start the inflation, power off the device.
ECG/USB Port: connect ECG Pen/USB extension cord.
Memory Key: review records, switch user account and apply settings.
BP700X / BP700X1
Taking Blood Pressure Measurement
05
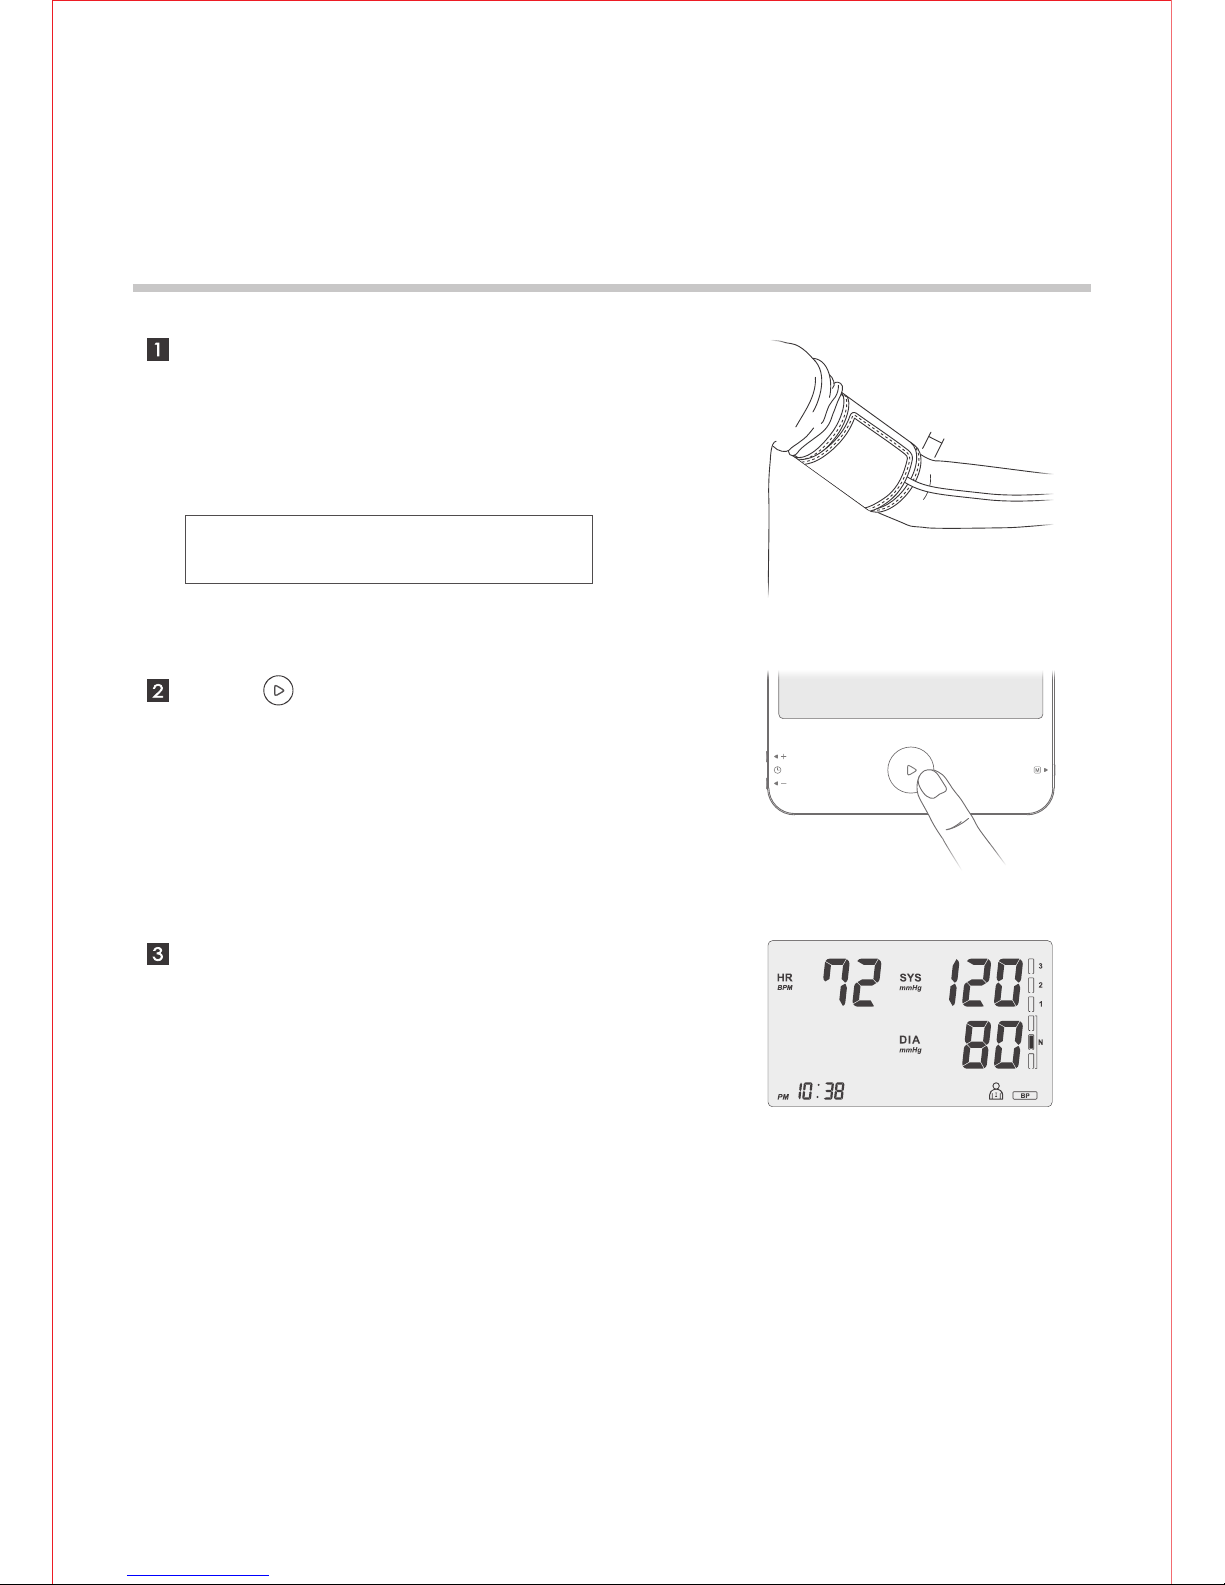
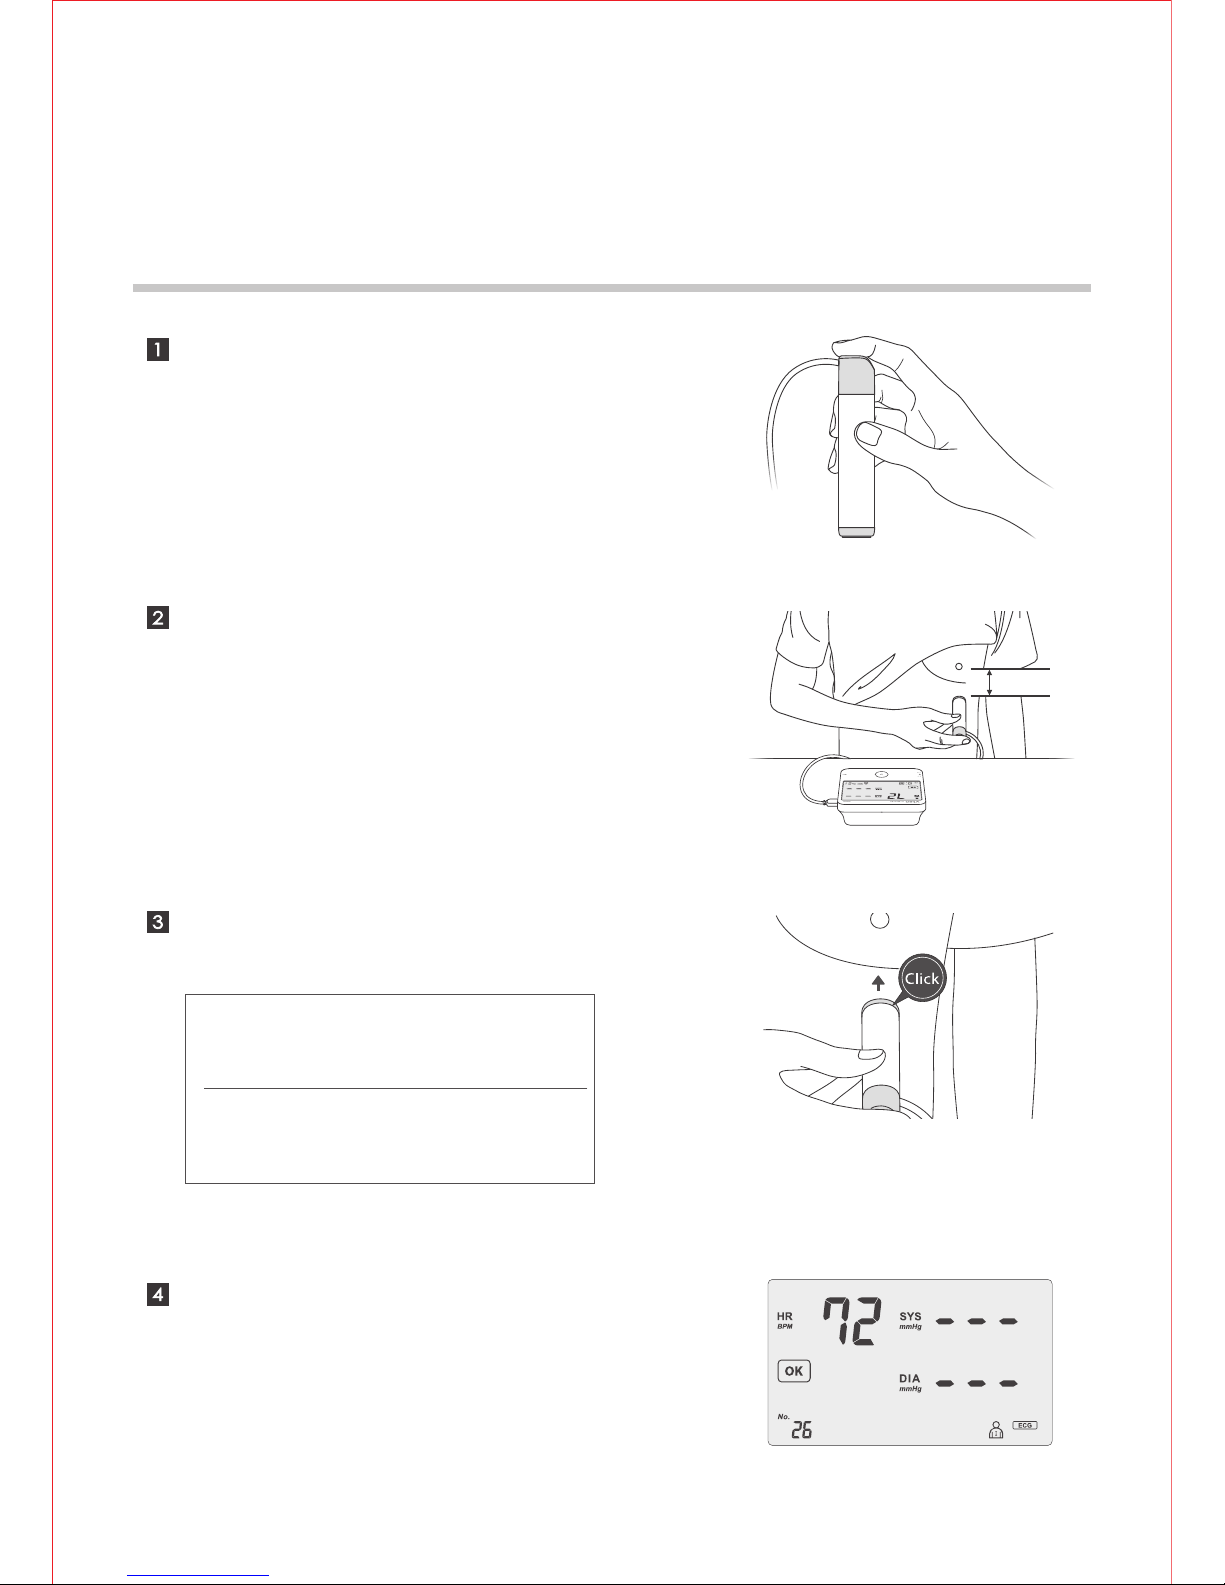
The measurement result will be
displayed on LCD after the
measurement is completed.
Position the arm cuff 1~2 cm
above your elbow with the air tube
running down inside of your
forearm.
1~2 cm
Press button to start your
measurement automatically.
Note : Avoid lying your arm on the air tube
and not over tighten the cuff.
BP700X / BP700X1
ECG
Cautions & Components Introduction
To assure accurate ECG measurement, please:
Remove the foil on the top and bottom electrodes.
Make sure the electrodes are directly contacting your skin.
If your skin or hands are dry, moisten them with damp cloth before taking
measurement.
Do not let your right hand in contact with your body and avoid heavily
pressing the top and bottom electrodes while taking measurement.
Do not use the ECG Pen in upside down direction.
Do not talk while taking measurement and keep the balance of your body to
avoid influencing the accuracy of measurement result.
06
Components
Top Electrode
Bottom Electrodes
Detection Switch
BP700X / BP700X1
5 cm
Taking ECG Measurement
07
Place your right index finger on
the top electrode.
Press the ECG Pen GENTLY until
you hear the click sound.
Place the bottom electrodes on
your lower-left chest supported
by the ribcage.
After 30 seconds measurement,
the result will be displayed on
LCD.
BP700X / BP700X1
Note1 : Avoid heavily pressing the
electrodes. Excessive muscle tension will
affect the accuracy of measurement.
Note2 : If the bottom electrodes are
released within 3 seconds, the
measurement will be aborted.
BP700X / BP700X1
LCD Display
08
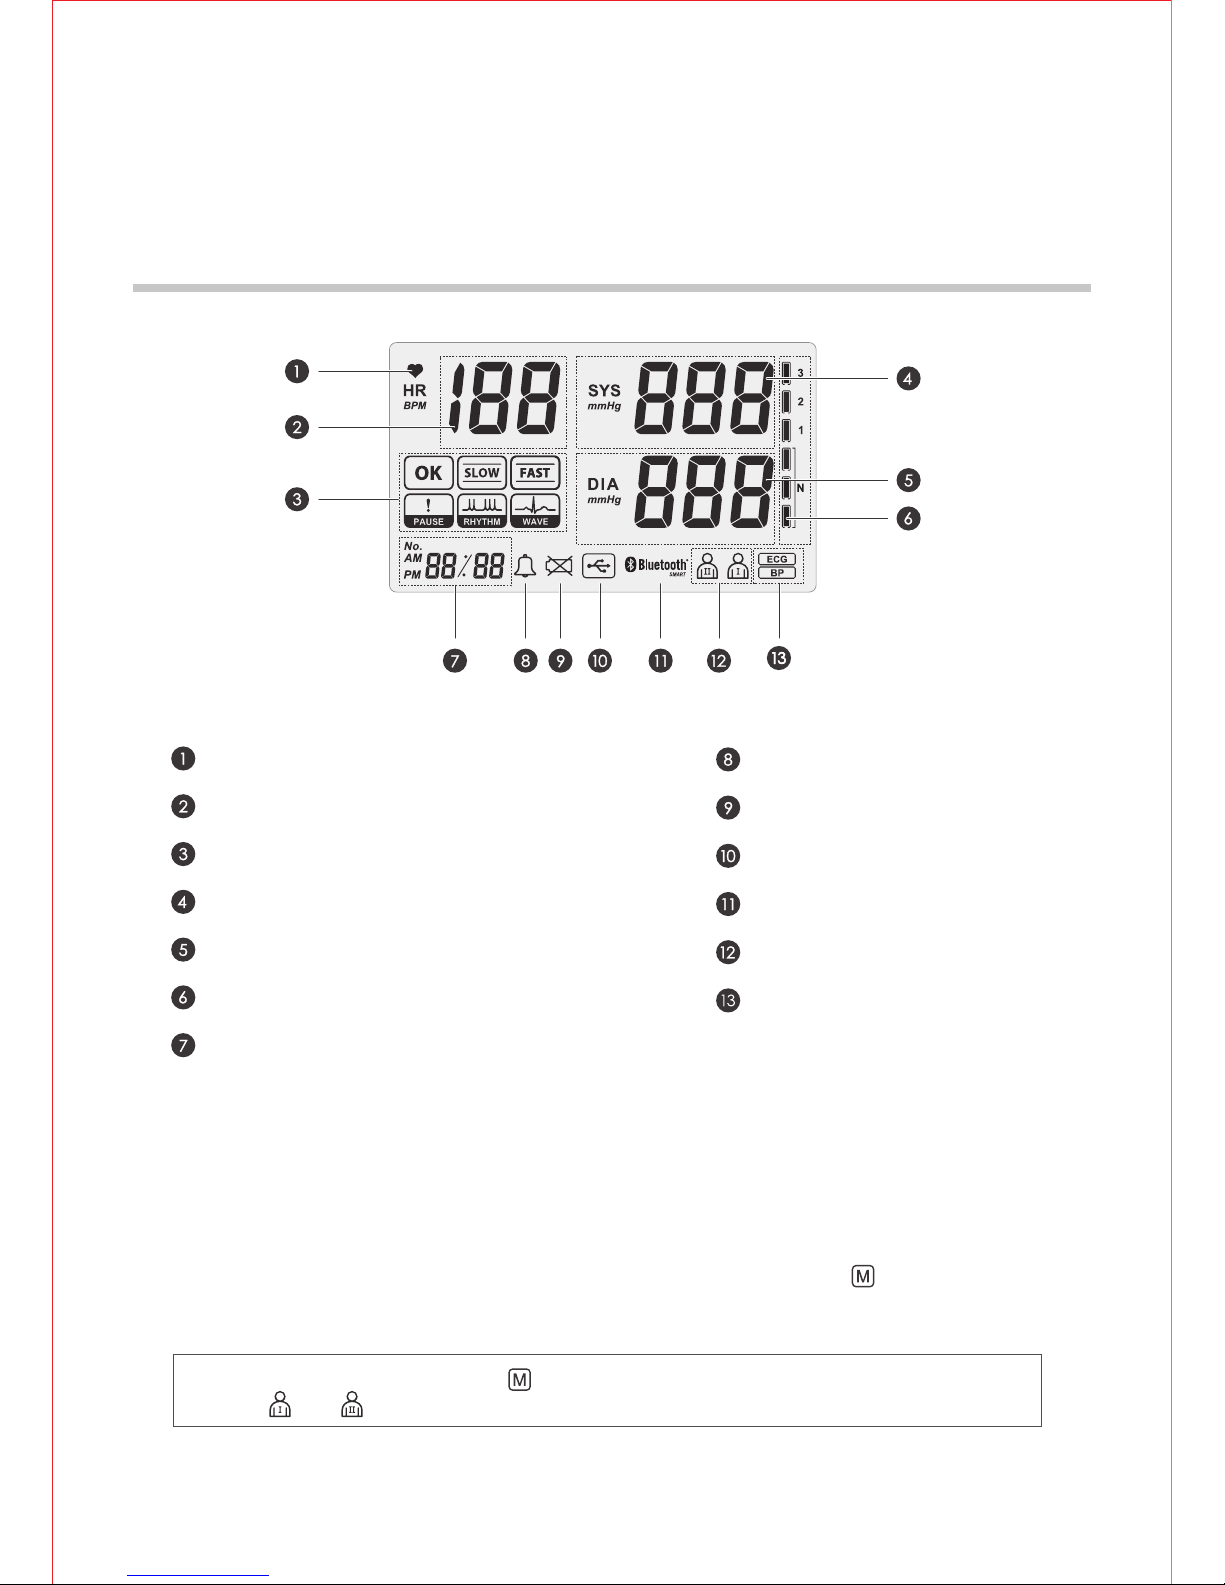
Heartbeat Indicator
Heart Rate
ECG Result Display
Systolic Blood Pressure
Diastolic Blood Pressure
WHO Classification Indicator
Time/Records No./Countdown
Alarm Indicator
Low Battery Indicator
USB Connection
Bluetooth Connection
User Account
Type of Measurement
Reviewing Measurement Records
When the device is shut down or in standby mode, you may review the
previous measurement results in cyclic order by pressing button
repeatedly.
Note : You may press and hold the button for more than 3 seconds to switch between user
account and .
BP750X / BP750X1
Note : Four new “AAA” alkaline batteries will last for approximately 300 measurements.
Preparation Before Taking
Measurement
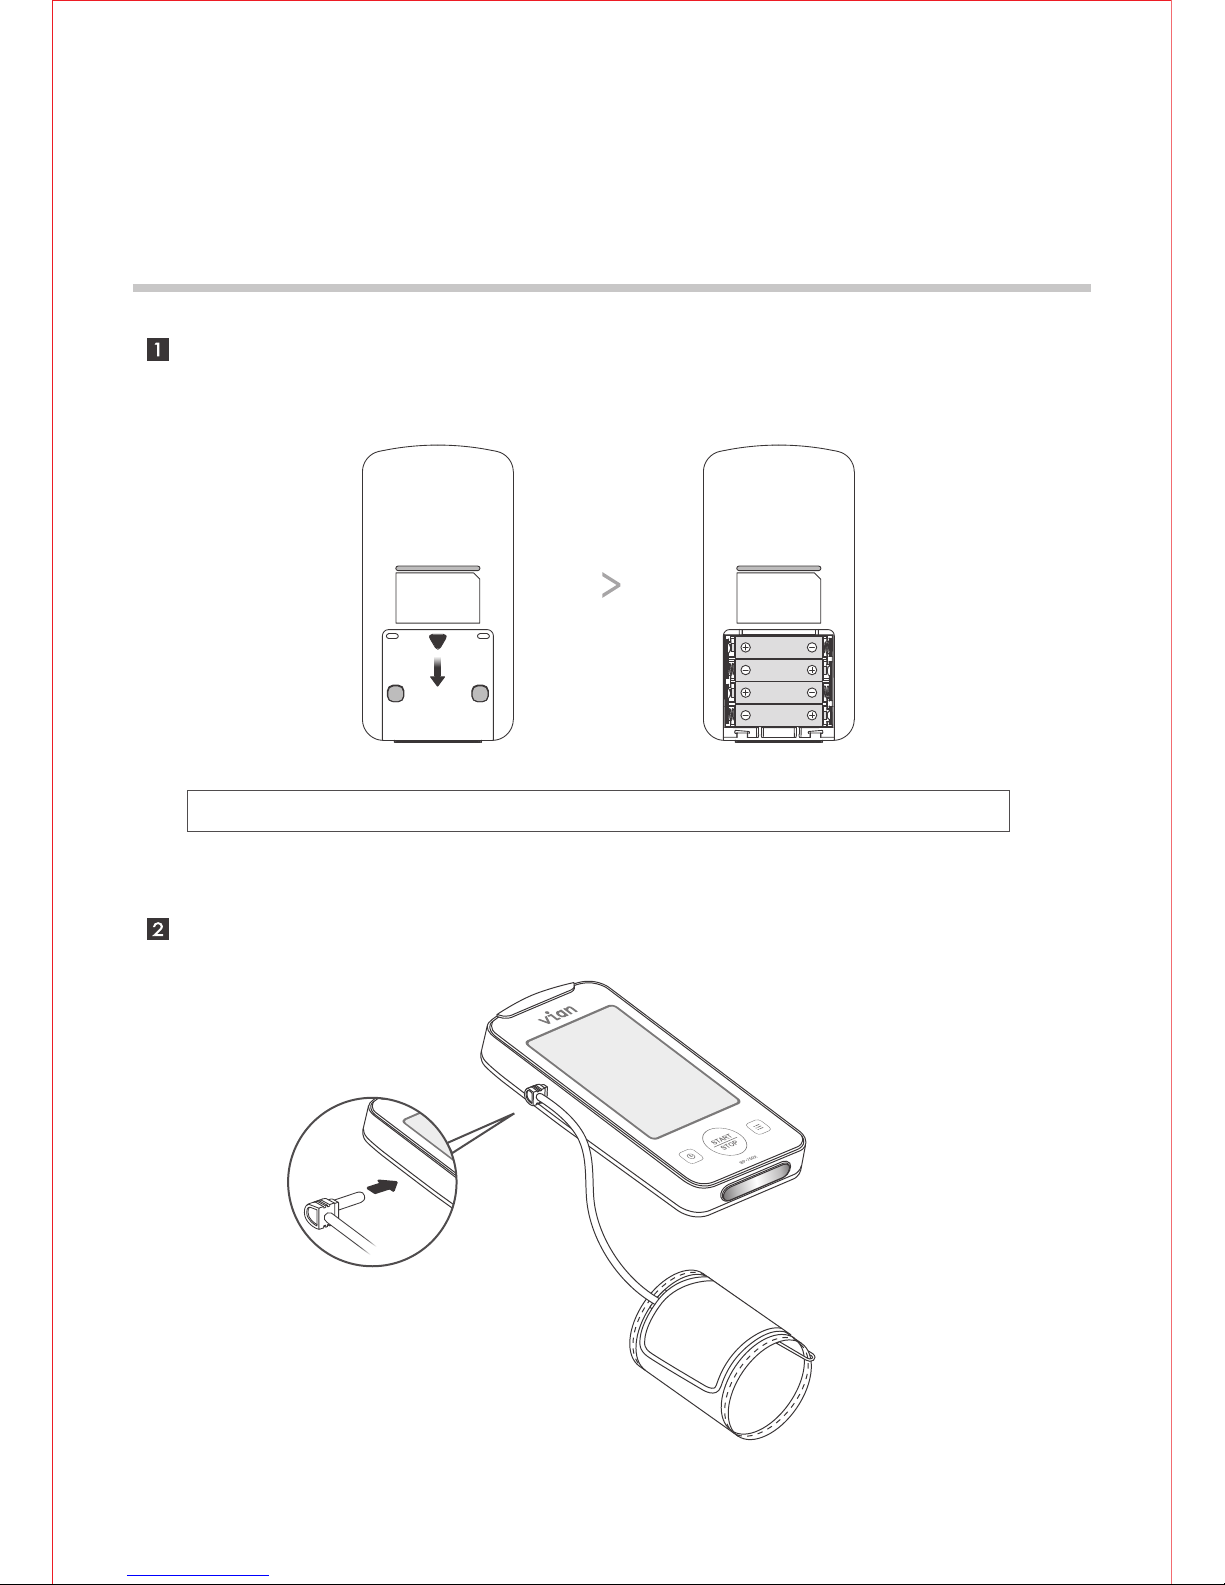
Install four “AAA” alkaline batteries by following the + (positive) and
- (negative) polarities indicated on the battery compartment.
09
Insert the air plug into air jack on the left side of the main unit.
BP750X / BP750X1
Date, Time & Alarm Settings
The display will turn to Date and Time Setting mode after completing the
setting of alarm. Press the button to adjust the values, then press the
button to apply your settings.
Press and hold the button for more than 3 seconds and the device will
enter Alarm Setting mode. Press the button again to switch the alarm
function on, then press the button to apply setting. Press the button
to adjust values and the button to apply your alarm settings.
10
BP750X / BP750X1
Blood Pressure
Cautions & Components Introduction
To assure accurate blood pressure measurement, please:
Rest for at least 20~30 minutes after exercising, bathing, eating, smoking
or drinking alcohol before taking measurement.
Take the measurement in a quiet place and under appropriate temperature.
Relax for 5~10 minutes before taking measurement.
Make sure the center of arm cuff is at the same level with your heart.
Do not move or talk during the measurement.
Wait at least 5 minutes before taking another blood pressure measurement.
11
Components
Air Jack: connect air tube of arm cuff.
Adjust Button: increase/decrease values of alarm/time settings.
Memory Key: review records, switch user account and apply settings.
Main Button: start inflation, power off the device.
 Loading...