

Page 1
For more details – consult your VGo User Guide.
You can view or download it at: vgocom.com/support
Quick Setup Guide
S
tep
1
Set up the hardware
5 M
in ut es
1) Unpack the box and make sure you have:
n VGo Upper section (part with LCD display)
n VGo Lower section (part with wheels)
n Charge Dock
n Charge Dock AC adapter and power cord
n Battery
n Handheld remote control (with AAA
batteries)
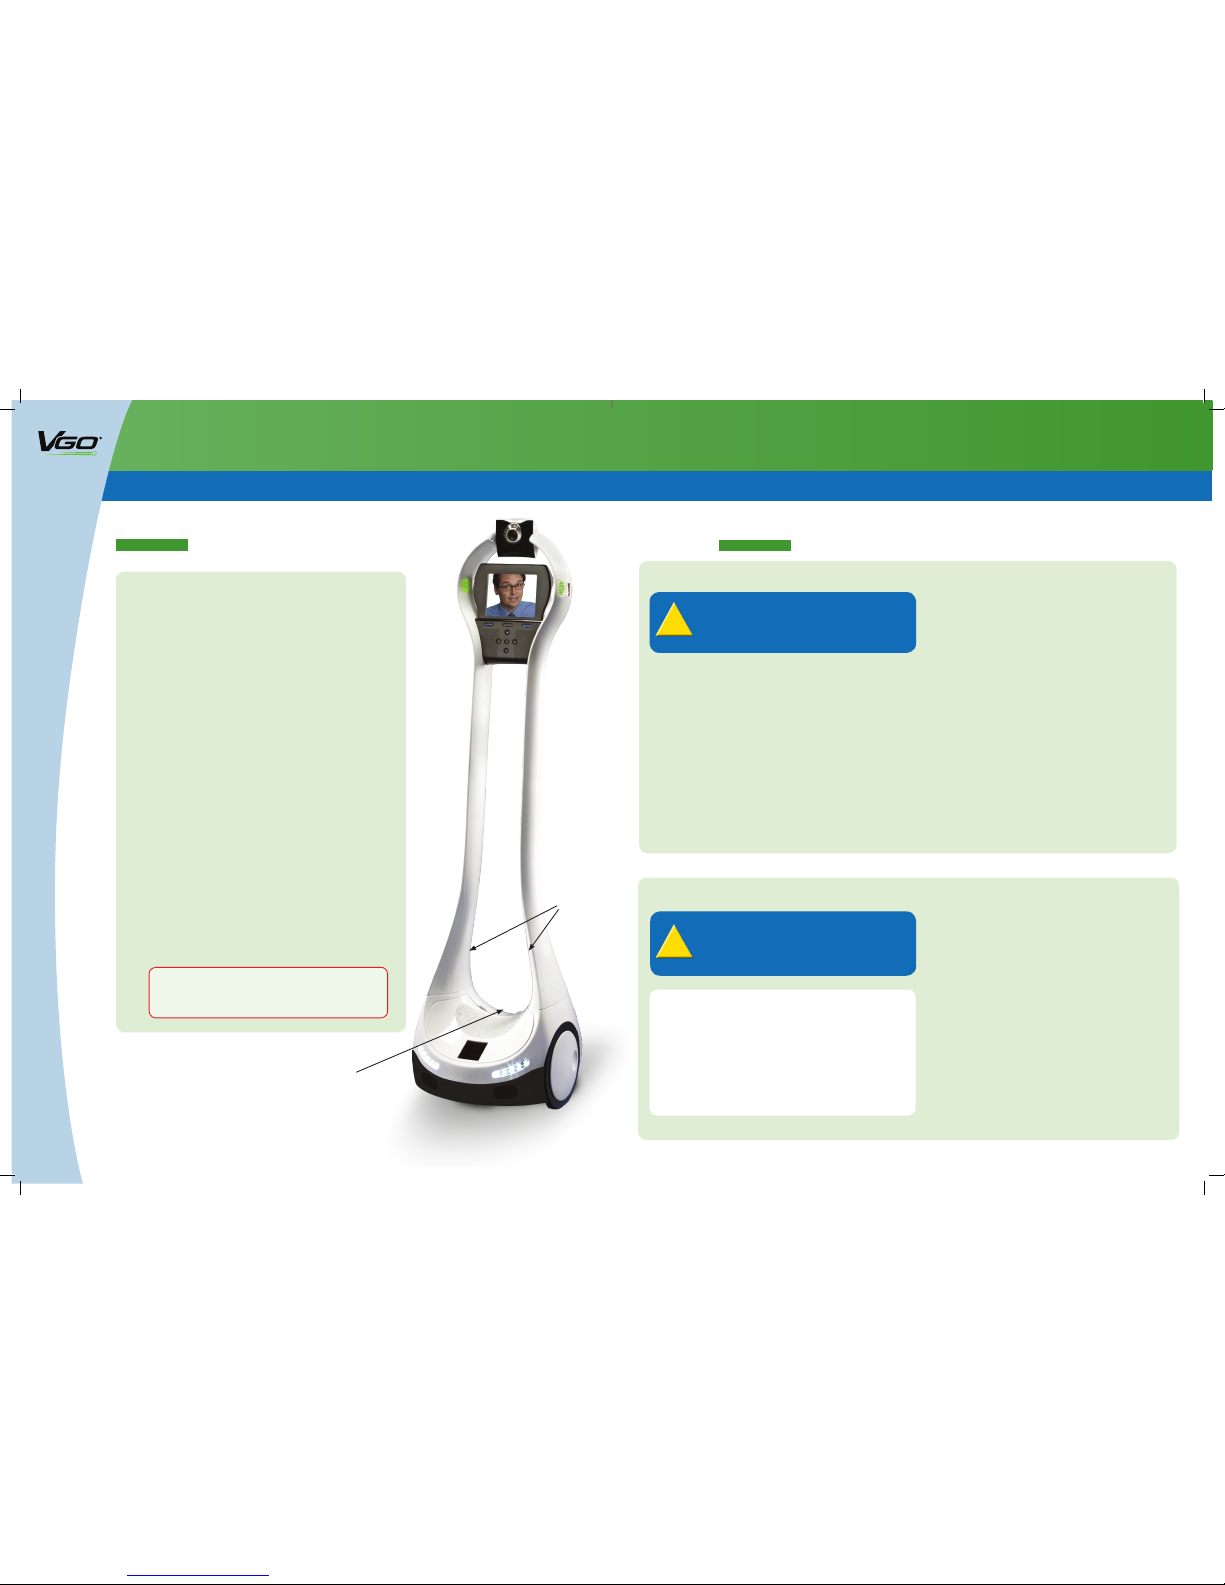
2) Hold the latches all the way up and gently,
but firmly seat the upper section stalks into
the lower section sockets.
3) Flip the latches down.
4) Remove the VGo’s battery compartment
cover, set the battery inside, with it’s wire
on top, beside the foam block. (Note: if you
have the full size extended-life battery,
remove the foam block).
5) Connect the battery wire, secure with the
velcro strap, and replace the cover.
6) Press and hold the Power button until it
lights up (found on the rear of the VGo,
just behind the battery compartment cover).
Battery Compartment
(in the back)
Step 2
Set up the wireless connection
For WiFi
1) From the Welcome screen, select Next to
configure your Wi-Fi.
2) Touch the center blue OK button to select WiFi
Network Settings Enabled. Then select WiFi
Networks.
3) Use the blue arrow keys to scroll and highlight
your required Wi-Fi network and touch the center OK button.
nNote, if the required network is “hidden,”
it will not be displayed in the list
nSelect Add Hidden and enter the SSID
and other settings as supplied by your
network administrator
4)
Enter your WEP key or Pass key and select Accept.
n If you are prompted to Select EAP
Method, then certificates are required.
Consult Appendix 1 of your user guide for
detailed instructions.
n If the network is “open” and no passkey
is required, this step will be skipped.
5)
Choose the DHCP or Static IP. Most networks
are DHCP. If Static IP, enter addresses for:
nAddress (IP Address)
nNetmask (SubNetmask)
nGateway (Default Gateway)
n Nameserver (DNS Nameserver)
6) Wait for a new screen that says
“Please Login to vgocom.com....” This may
take a few minutes.”
7) Leave your VGo at that screen and proceed
to Step 3.
5 M
in ut es
Latches
Save your VGo Box! Your VGo is packed with
custom foam. You may need the foam/box for shipping
to another location, or for returning to VGo in the
event that you need to have the VGo serviced.
1) From the Welcome screen, select Next to
configure your 4G LTE connection.
2) Use the blue arrow keys to highlight Cellular
Setting – Disabled. Touch the center blue
OK button to select.
3) A message will notify you that a re-boot is
required. Select Yes.
4)
The VGo will restart and the Welcome screen
will again be displayed. Select Next.
5) Select Cellular Setting – Enabled
6) Wait for a new screen that says
“Please Login to vgocom.com....”This may
take a few minutes
7) Leave your VGo at that screen and proceed
to Step 3.
For Verizon 4G LTE (applies only to VGo’s with embedded 4G LTE)
Consult the VGo User Guide on how to
setup VGo on networks that require 802.1X
EAP Authentication and how to enable
WiFi access point hopping / roaming.
!
A Verizon 4G LTE Sim Card has been
pre-installed. Your Verizon rep will
need to activate the Sim Card.
!
Page 2
Quick Setup Guide
For more details – consult your VGo User Guide.
You can view or download it at: vgocom.com/support
1) On your PC or Mac, go to
www.vgocom.com and click on
My Account.
2) Click on Create a New VGo
Community
.
3) On the Sign Up page be sure to
complete all fields and then click
Create Community.
Your VCode is:
4) You will receive an email shortly to
verify your account. Click on the
verify link inside.
5) Log-in with your recently created
username and password.
6) Select the Download tab and then
select Download Now.
7) When asked if you want to Run
or Save, select Run.
8) If you get a popup window that
says “This publisher could not be
verified…”, select Run.
9) Review the license agreement,
check the box for “I accept the terms
in the license agreement” and click
on Install.
10) If you get a pop-up that says “An
unidentified program wants to
access your computer”, click Allow
to continue.
11) Click on Finish.
Proceed to Step 4.
S
tep
3
Create a VGo account
Steps 3 and 4 should be completed by the person who will be administering
VGos within your organization (administrative privileges can be transferred /
changed at any time).
Skip this step and proceed to Step 4 if this VGo will be added to an existing
VGo Community within your organization.
!
After the download and install are complete,
you will see this shortcut icon on your desktop:
This equipment has been tested and found to comply with the limits for a Class A digital device, pursuant to Part 15 of the FCC Rules. These limits are designed
to provide reasonable protection against harmful interference when the equipment is operated in a commercial environment. This equipment generates, uses
and can radiate radio frequency energy and, if not installed and used in accordance with the instructions, may cause harmful interference to radio communications
.
Operation of this equipment in a residential area is likely to cause harmful interference in which case the user will be required to correct the interference at
his own expense.
Changes or modifications not expressly approved by VGo Communications, Inc. for compliance could void the users authority to operate the equipment.
© 2011-2013 VGo Communications, Inc. All rights reserved. Instructions subject to change. Printed in the USA. LTE is a trademark of ETSI.
770-000001-06
Step 4
Authenticate your VGo
Set up your Charge Dock
Plug the power cord into the Charge Dock and position
against a wall that is in an open area for easy access.
Select DOCK on the VGo touchpad or your VGo PC App
to charge the battery.
In order to detect the charging dock, VGo must be
within 10 feet and facing the front of the dock.
5 M
in ut es
5 M
in ut es
1) If you are not logged into your
account, go to
www.vgocom.com,
click on
My Account.
2) Enter your username and password
and click Login.
3) Select the VGo tab and then click
Add a VGo.
4) Enter the Activation Key that is
displayed on the screen of your VGo
and then click Add.
5) You will now see your new VGo
listed under the VGo tab.
n
It will typically be called New
VGo for (community name).
n
You may need to refresh the
page to see this.
6) Click on the name of the new VGo
(New VGo for.. .).
7) Click on Edit Properties and enter
a name that you want displayed in
user’s VGo lists. It’s best to give it
a location name that people will
recognize. For example:
HQ, 3rd Floor or Manufacturing
or Biology Lab or Nursing Home.
Enter a more precise location in
the location field and then
click Update.
8) Click on Manage User Access.
9) Select the users who are allowed
to access this VGo.
You are now ready to use your VGo. On your desktop, click , log-in,
and click on the location (VGo) you want to visit.
 Loading...