

Page 1

UNDERWATER CAMERA SYSTEM
Contents
Vexilar — Pioneers in Marine Electronics 2
Introduction 3
Fish Scout Features 4
About Your Fish Scout 5
Fish Scout Camera 6
Camera Mounting Options 7
Battery and Charge Indicator Location 8
Battery Charging Instructions 9
Soft Pack Features 10 -11
Fish Scout Operation 12 - 15
Fish Scout Camera LED Lighting 16
DTD Operation 16
Calibrating Your DTD Display 17
Ice Fishing & Open Water Use 18
D-130 Battery Status Indicator 20
Fish Scout Care & Specifications 21
Vexilar Accessories 22 - 23
Trouble Shooting 24
Contact Vexilar & Warranty Information 25
VEXILAR FISH SCOUT
OWNER’S MANUAL
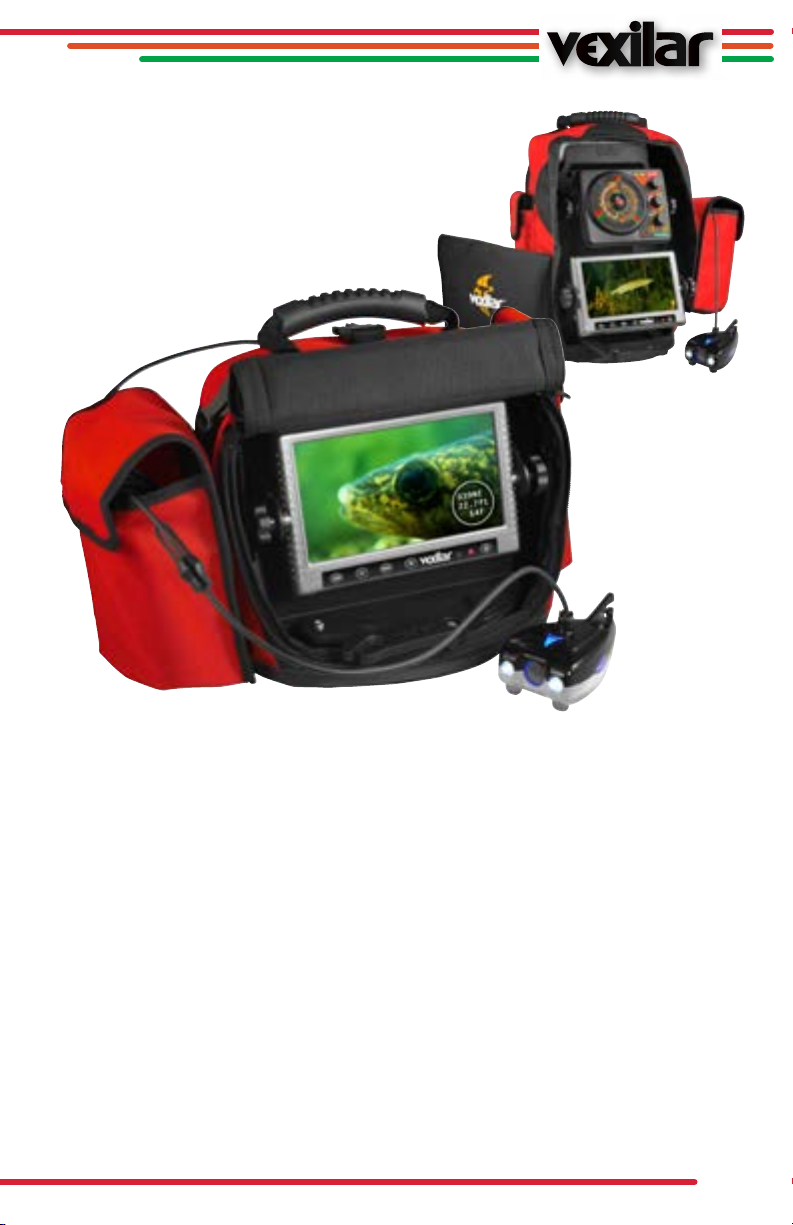
Fish Scout Configurations
The Vexilar Fish Scout underwater camera and monitor system is offered in two basic
configurations:
• Fish Scout Standard (#FS800 & FS2000DT)
Includes camera, 7” color monitor, and carrying case with soft pack
• Fish Scout Double Vision Underwater Camera And Monitor
Includes color camera, 7” color monitor and carrying case with soft pack. The
Double Vision case allows you to attach any FL series flasher above the camera,
giving you the ultimate view of what’s below.
• DTD Option: This is a camera only feature that adapts to any Fish Scout Monitor to
display depth, temperature and direction. It is available on all Fish Scout systems.
Only the gray/black camera housing with the DTD decal is capable of showing
Depth, Temperature and Direction. Also, a camera control box is required to fit
between the end of the camera cable and the monitor input.
MNL011C RV2
1
Page 2

VEXILAR — PIONEERS IN
MARINE ELECTRONICS
Established in 1960, Vexilar, Inc. has been a leading innovator of marine electronics in
the sport fishing industry for over 50 years. Some of their innovations include:
• The first straight-line paper graph for sportfishing (model 155)
• The first CRT (television) display (model 660)
• The first color display (model DE-12)
• The first fish alarm (model 120-SOS)
• The first Liquid Crystal Display (LCD) (model 480)
• The first self-leveling ice fishing transducer design (Ice-Ducer)
• The first split-screen zoom flasher (model FL-18)
• The first shoot-through-aluminum transducer design (AlumaDucer)
• The first Tri-Beam ice fishing transducer (Ice-Ducer)
• The first wi-fi sonar system (SonarPhone)
The FL series three-color flashers continue to lead the way in real-time high definition
flasher performance. Quality products backed by great customer service is the bedrock
of Vexilar, Inc. The Fish Scout Underwater Camera systems continue this great tradition.
A Long History of Vexilar Products
2
Page 3
INTRODUCTION
Fis h scout
Fi s h sc o ut
Do u bl e Vis io n
Congratulations, and thank you for purchasing a Fish Scout, Fish Scout Double Vision,
Fish Scout Double Vision without sonar or one of our Fish Scout systems with DTD (Depth,
Temperature and Direction). All Fish Scout systems are basically the same in operation,
so this Owner’s Manual will cover all current Fish Scout camera systems. For care and
operation of your Vexilar FL Flasher system on your Double Vision system, please review
the Vexilar FL flasher series Owner’s Manual. For this manual, we will be referring to both
the Fish Scout Underwater Viewing Systems and the Fish Scout Double Vision Underwater
Camera Systems as “Fish Scout” and will highlight items that relate to the DTD systems.
Vexilar has incorporated cutting edge technology in producing the most advanced and
versatile underwater viewing systems possible. Your new Fish Scout monitor and camera
can be used to view underwater structure, view bottom composition, watch fish and see
how fish react to your lure presentation. You can even discover sunken treasures or just
inspect the bottom of your boat. Vexilar’s mission is to create a tough and reliable product
you can enjoy for years. The Fish Scout Color Underwater Camera will be fun to use in
both open water and on the ice when safe conditions permit. Underwater viewing is a
great educational tool for young and old to experience the underwater world without
getting wet.
3
Page 4

FISH SCOUT FEATURES
• FS2000DT: Sony 1⁄4” CCD Super HAD 90 degree camera performs like two
separate camera systems in one. You will receive a high definition color image
when light conditions permit or it automatically shifts to black and white mode if
you are in low light conditions.
• FS800: CMOS7959 (color) 90 degree camera. It too will automatically shift to
the black and white mode if in low light conditions.
• 7“ High resolution LCD monitor equipped with thermostatically controlled heater
that engages at –4°F to enhance your viewing experience in extremely cold
conditions. This monitor also has a built-in light contrast sensor to automatically
brighten or dim the display as the light conditions change. Newer monitors may
also have a battery status display option.
• Tri-light lighting camera system not only gives you two variable power super bright
LED white lights for night viewing, but also side and directional internal lights so
you can easily see the direction the camera is pointed in the dark.
• Cable: 80 feet (FS2000DT) / 50 feet (FS800) Super thin, high strength, camera
cable with depth marking. You will find the cable is easy to wind and easy to keep
from tangling. The buckle on the handle allows you to clip the cable wrap to your
Fish Scout’s soft pack carrying case.
• The camera is designed to be used effectively in many ways: Resting on the
bottom, hanging at a 90 degree angle down to 80 feet, Down-View option for
looking straight downward, trolling where you can use of the optional tail fin and
the use of a rigid arm to suspend the camera at any angle. The Vexilar camera
housing has a special DOUBLE chamber system, so the outer protective shell
DOES take-on water for better balance and smaller profile and the inner lexan
camera chamber is 100% water proof.
• Easy touch keypad control panel automatically lights up in low light.
• On screen monitor adjustments by using menu keys.
• Video output jack. (connects to any camcorder that has a AV-IN port)
• Waterproof and weatherproof cable connections.
• Padded soft pack carrying case with cable and camera pouch.
• Super strong ABS molded internal frame holds the battery with an easy-charge
jack and a battery status indicator along with a Master Power Switch.
• 9 amp hour, 12v rechargeable battery with 1-amp V-410 Vexilar digital charger.
• Low power consumption allows you to view for over 10 hours on a full charge,
and over 8 hours using the Double Vision system.
• 2-Year limited warranty. Battery warranty is pro-rated.
4
Page 5

ABOUT YOUR FISH SCOUT
The Monitor
The Fish Scout features a high resolution 1414
by 234, 7 inch LCD with two viewing options,
a 16:9 wide screen monitor display or the more
traditional 4:3 perspective for close-up viewing.
Your Fish Scout gives you a bright, sharp and
clear view under most conditions, but if the
water is stained, dirty or has a lot of suspended
materials, the viewing WILL BE limited. The
daylight viewable display should not require
a sun shield for most outdoor viewing. When viewing outdoors, the brightness can be
increased or decreased to improve your viewing experience manually, but your Fish Scout
system is equipped with an internal light sensor that will automatically adjust your display
for ideal viewing. You will find that the best visibility will always be achieved when you
turn the display away from direct sunlight. Light conditions under water will dictate if you
see your image as color or black and white. The system automatically shifts from color in
good light conditions to black and white display, this is the normal operation of the system
to maximize your display contrast.
The ultra-thin monitor housing is sealed with a rubber gasket and all plug-in connections
are potted to protect the internal electronics from the harsh elements. The Fish Scout
may be used in the outdoor elements under most conditions, but cannot be submerged
underwater. The digital keypad on the monitor activates an on-screen menu display for
making adjustments to the monitor brightness, contrast, color and camera perspective.
In addition to adjusting the display screen settings, the digital keypad also controls
underwater lighting with 38 levels of lighting intensity. It also turns your monitor and
camera on and off and even tells you when you have power to your system. It is important
to know that your Master Power ON/OFF Switch, located in the back of the unit, controls
all power drain to your battery, so it must be in the off position when not in use to prevent
over-draining your battery and voiding your battery warranty.
Important: You will need to turn OFF the Master Power Switch in the back of the unit to
shut off all power drain from your system. Leaving your Master Power Switch ON means
you have power running to your system and this will over-discharge the battery in about
three weeks. You will want to keep the Master Power Switch in the OFF position when not
in use. This is NOT covered by your warranty.
While operating in cold temperatures (under –4°F), the Fish Scout utilizes a thermostatically
controlled LCD heating element that allows the display to operate at peak performance.
You may experience some delay in start up on extremely cold days, this is normal. When
5
Page 6
you turn on your monitor in cold weather it will flash red & green when the internal sensor
on the heating element detects the monitor temperature is below -4°F degrees. The red
light will continue to flash until the heating element has heated up the monitor enough
to give you the best image possible. The heating cycle will vary, but can take up to five
minutes for the light to stop flashing. This is normal on very cold days. Because the liquid in
the LCD can freeze, prolonged exposure to extreme temps can result in monitor damage.
Remember: A flashing red & green light and a delay in the monitor coming on when
temperatures are very cold is normal and is done to protect the LCD monitor. On very cold
days, expect the display to be a little blurry at first as the camera display may take a few
minutes to reach its optimum performance brightness. This procedure is done to protect
your investment and avoid excessive battery drain. Storing your camera in a warm place
at all times is ideal.
The Fish Scout Camera
In order to create an ultra clear, high-resolution picture,
Vexilar matched it with a high quality camera. The Fish
Scout uses a ultra low lux CCD camera. This camera
offers a wide 90° viewing angle, giving you a wide
coverage area for maximum visibility.
This camera has a very wide performance range,
giving you great picture quality. It offers both a color
camera, during good lighting conditions and automatically changes to a black and white
camera display for low light conditions. The Fish Scout camera sensor will automatically
switch between a color display or black and white depending on light conditions. The Fish
Scout will automatically switch between color modes depending on the light conditions.
You can check this yourself by turning on the camera and watching as you lower the
system under a table for example. While you may not be able to see much detail under
a dark table with the human eye, the low lux performance of your camera clearly shows
you in great detail what is under the table. While in the water, a cloud passing in front of
the sun could change the monitor from a color image to black and white, this is normal.
Note that the image you see out of the water with your camera is not the same as what
you will see under the water. Water distorts the perspective you normally expect to see.
Your Fish Scout camera is designed to function BELOW the water, not above it, for the
best image possible.
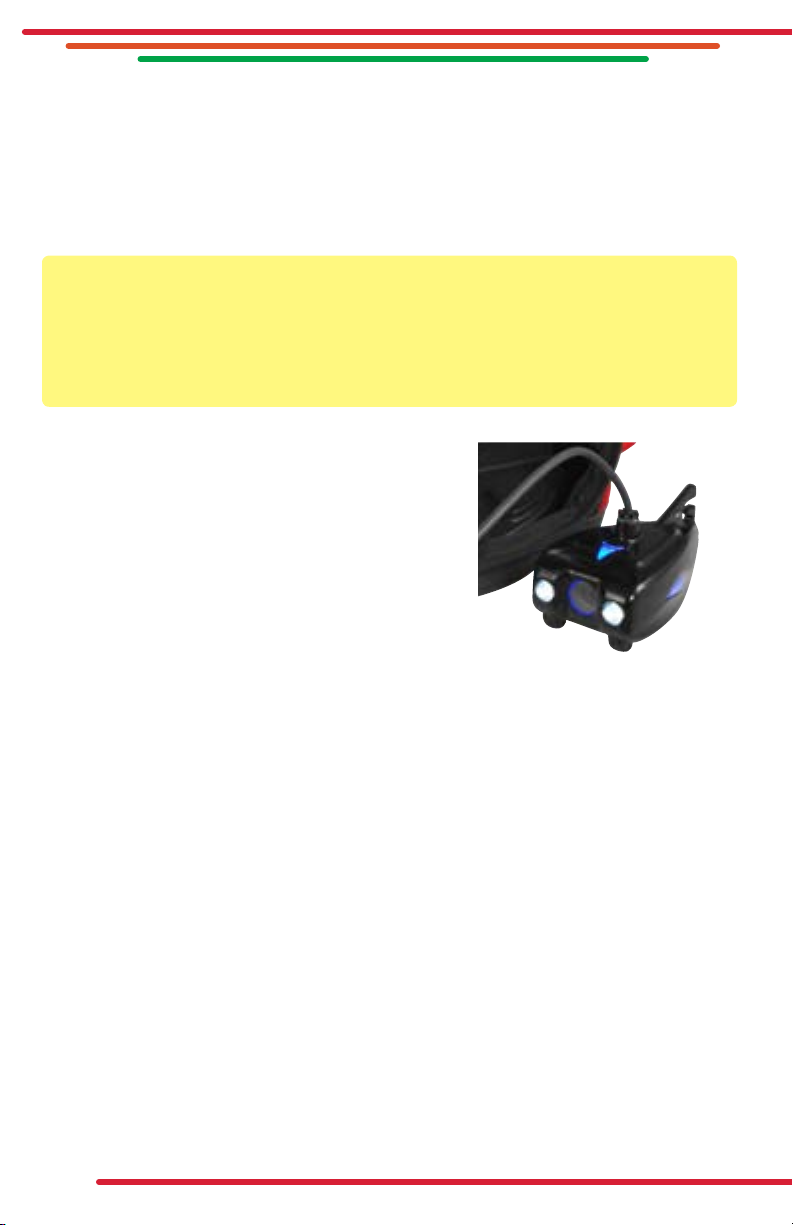
Your Vexilar Fish Scout camera has two high intensity white LEDs for low-light conditions.
This lighting control is easily accessible from the monitor control panel. These lights are
specifically positioned to flood all 90 degrees of your camera viewing angle with light.
The monitor control panel also lets you change the intensity of the lights by simply pressing
the plus or minus keys right after you hit the LED “ON” button on the far left side. A good
rule to remember is to use the least amount of additional light as possible to reduce the
amount of reflective particles seen in the water. Sharing your video images is easy with
6
Page 7
the pre-wired video-out RCA plug. The yellow video output jack located on the rear of the
monitor makes it possible to add an external monitor such as a big screen TV or a video
recording devise. Remember, not all camcorders have an AV-IN option so be sure to
check your camcorder before you head out on the water.
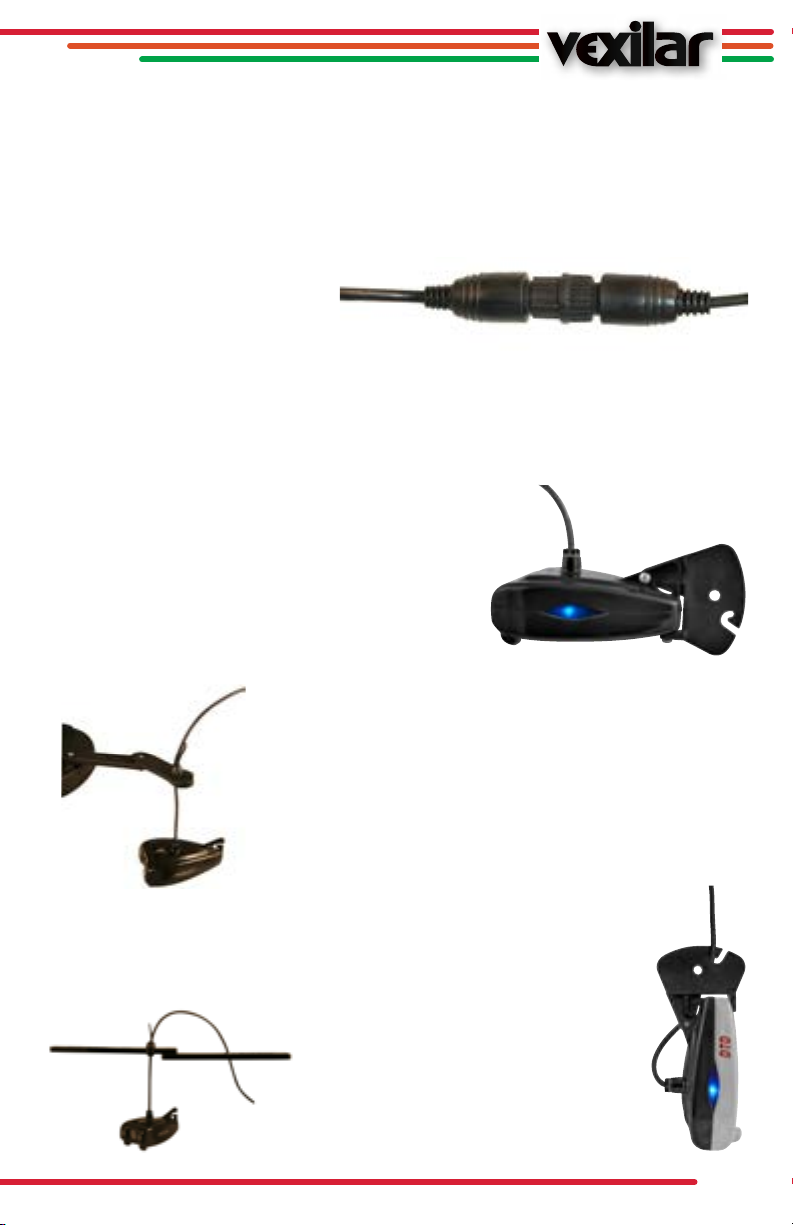
The camera and power cables have a custom-built waterproof and sealed connector. It is
critical you unscrew the connector
Unscrew to Separate
before trying to disconnect. This
connection routes power and
signals to your camera, so you
Waterproof Monitor to Camera Connection
want to make sure this connection
is tight at all times when in use. Your system has a super thin, super strong transmission
cable. It is NOT a good thing if you cut or damage your cable as water in the cable will,
over time destroy the cable. If you have any doubts as to the damage to your cable,
please contact the Vexilar service center for specific instructions. See page 24.
Camera Mounting Options
Trolling Fin
Your Fish Scout comes with two cable holding options.
One is an elbow suspension arm attached directly to
the bottom of your internal ABS frame. The elbow arm
is ideal for when you wish to look down an ice fishing
hole directly next to the monitor. The elbow support
arm easily folds out of way when not in use. The “egg”
Elbow Arm
attaches to your cable and allows you to suspend the camera at
whatever depth you wish to hold. By simply rotating the cable
and dropping the egg back into the round slot on the elbow
arm, you can hold the camera at any depth or direction.
or Pole Mount
Another option is to use the folding over-the-hole suspension
arm. This arm is kept in the long pocket on the side of your Fish
Scout soft pack case. This is used when you want to suspend
the camera over the ice fishing hole away from
the monitor. This is a common application since
having the camera too close to where you are fishing will result in the
fish getting tangled in the cable. By using the larger over-hole suspension
arm, you can place the camera in a secure viewing position four to eight
Suspension Arm
feet from where you are fishing to avoid
hooking the cable while fishing. The
over-the-hole suspension arm also has a
compass mounted in the arm so you will
be able to know which direction your
camera is pointing with a (DTD systems
only) camera system.
Down View
7
Page 8
The camera incorporates a custom designed zinc cast waterproof housing. The amount of
weight in this camera housing is balanced and designed to give you good camera control
while still-fishing or trolling. The housing WILL fill with water, to make for better balance
in the water. It is normal for water to drain out of the housing for a few seconds when it
is removed from the water. The optional tail fin (included) screws into position in the back
of the housing.
With the trolling fin on the camera housing, you are also able to attach it to a long pole
to hold the camera at various angles. This feature is popular with marinas and boat
owners who want to see the bottom of a boat or look for something nearly impossible
to see underwater without a camera. The actual pole is not available from Vexilar but is
commonly found at hardware stores in the paint or the window cleaning departments.
The housing is also designed to make it easy to attach to your cable and use in the
popular Down-Viewing perspective.
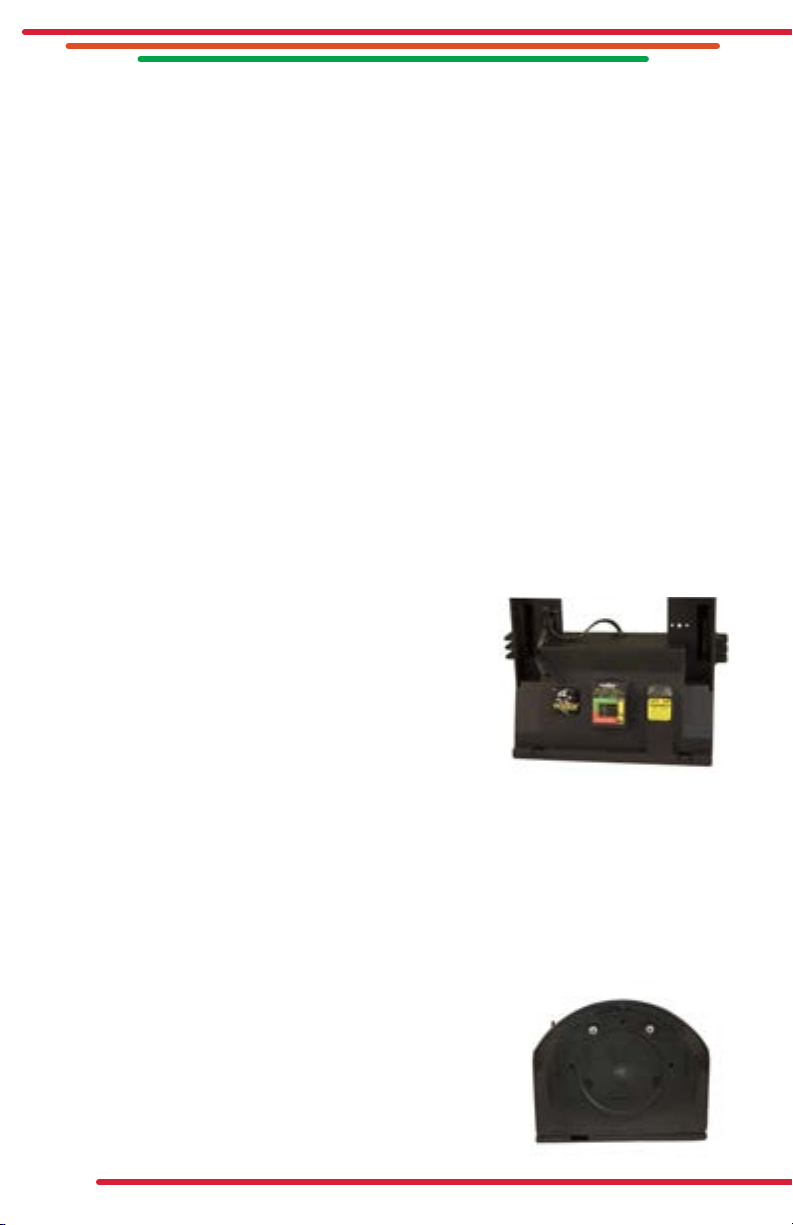
Battery and Charge Indicator Location
Following Vexilar’s superior standards, the Fish Scout monitor face is protected with a
padded soft pack case. Inside the soft pack is a molded ABS hard frame with an enclosed
battery compartment and D-130 battery status indicator
(FS2000DT DV systems only) to help keep track of power
consumption. You also have a Master Power Switch which
is critical to eliminate battery drain when not in use. Any
time your Master Power Switch is in the “ON” position,
your battery will be draining, so the Master Switch should
be turned “OFF“ whenever you are not using your system.
The sealed 9 amp rechargeable lead-acid battery can provide over 10 hours of
continuous use with ideal conditions on the Fish Scout, and over 8 hours on the Double
Vision systems. Battery run time will vary depending on the condition of the battery, use
of underwater LED lighting, level of display brightness and the ambient temperature (LCD
heater system). The 1 amp, fully automatic charger will quickly charge the battery back to
full capacity. See page 9 for complete battery charging and care instructions.
To remove the battery from the case for replacement,
simply remove the ABS hard frame from the soft pack case.
Remove Screws to Access
Battery Compartment
Then remove the two screws securing the bottom battery
door and swing it open. When replacing the battery and
reinstalling the door, be sure to be careful with the wire
positions so nothing gets pinched as the door is screwed
back into place.
8
Page 9

Battery Charging CHARGE AFTER EACH USE
1 Amp Digital Automatic Charger
(model V-410 / 1 Amp)
1. Allow the battery to warm up before charging. This makes it
easier for the charger to charge the battery and the battery is
more accepting of a charge.
2. Plug the charger into a wall outlet, verify that it is operating
by noting the illuminated RED light.
3. Connect the charger to the Easy Charge Jack attached to the
unit. The charger’s light will switch to RED, indicating that it is
connected correctly and the battery is charging.
If your charger is NOT equipped with an Easy Charge Jack,
remove the battery and connect connect the terminals to the
battery with the RED (+) connected to positive and BLACK
connected to negative (–). The charger’s light will switch to
RED, indicating that it is connected correctly and the battery
Easy Charge Jack
is charging.
FLASHING RED INDICATES A REVERSE CONNECTION.
4. Keep the charger plugged in and connected until the GREEN light turns on. This
indicates the battery is at full charge.
5. Unplug the charger from the wall outlet and disconnect from the battery.
Charging times will vary depending on how much the battery has been drained. If the
battery has been completely drained (approx. 8 to 10 hours of use on a 9 amp battery)
the battery will require about 9 hours of charging. Once the battery is fully charged
and the charger’s light returns to RED, the charger is then operating in a “Maintenance
Mode”. At this stage, the charger can remain connected to the battery indefinitely and the
battery will be maintained at full charge.
BATTERY DO’S BATTERY DON’TS
• Allow the battery to FULLY recharge after each
use. Recharge after every use.
• Give cold batteries extra time to charge. Charge
at room temperature if you can.
• Keep flames, sparks, and metal objects away
from batteries and terminals.
• Charge periodically during battery storage.
• Disconnect the battery when not in use.
• OVER DISCHARGE the battery, You should never
drain a battery to the point where your Fish Scout
stops.
• DISCONNECT exposed battery clips before
switching the charger OFF.
• Damage the battery or terminals by dropping.
• Use another device to determine if your battery is
fully charged. Go by the charger’s light alone.
DID YOU KNOW? Did you know? If you leave your main power switch on , in two weeks
the power drain from your D-130 will drain your battery to a point it may no longer accept
a charge. This battery miss-use is NOT covered under your warranty. Charge your battery
after every use and make sure the Master power switch is off before storing your unit.
>> Remember to charge after each use. The Battery has a Pro-Rated Warranty.
9
Page 10

SOFT PACK FEATURES
Your Fish Scout system comes standard
with a soft pack carrying case. This case
is an important part of your viewing system. The soft pack has some innovative
features to protect your display system,
so be sure to keep the front padded door
over your screen when not in use. Sharp
impacts on a LCD display will damage
your monitor, so protect it at all times.
The camera/cable pouch is another innovative feature on your Fish Scout. You
can clip the cable pouch to the side and have it locked into position using the heavy
Velcro strip. Or you can clip the cable pouch to the top of your bag so the entire system
can fit into a five gallon bucket for transport. You will find cable management is a big part
of owning a underwater viewing system and this easy-to-use winder system with a quick
drain pouch is very convenient.
Side-Mount Pouch Option
Rear-Mount Pouch Option
If you own a Double Vision system, your front panel does not roll up like the standard
Fish Scout. On the Double Vision, the Vexilar Flasher is mounted on top, so the front
panel folds in half so you can just use the flasher portion of the system. When you want
to also use the camera, simply swing
the front panel to the left like a door to
expose the camera section. The lower
support arms of your Double Vision
system extends out so you have a better
viewing angle when you want to use the
Vexilar flasher and camera at the same
time.
Double Vision
Side-Mount Pouch
Option
10
Page 11

Double Vision
Side-Mount Pouch
Option
Double Vision
Rear-Mount Pouch
Option
The Fish Scout Soft Packs provide essential protection for the monitor as well as additional
storage for the cable and camera with a separate snap-on pouch.
• Front Cover Flap: On the Fish Scout camera-only systems the front access doors
actually roll upwards and secures into position. On the Double Vision system the
front door folds down if you wish to just watch your Vexilar flasher, and then fold
back to the left to expose the monitor.
• Rear Access Flap: On each style of soft pack, you have an easy access rear door
that makes it easy to access your Master Power Switch and
to check-out your battery status indicator. This is also where
you will find the “Easy Charge Jack” that is pre-wired into
Easy Charge Jack
your enclosed battery compartment, so it is easy to plug into your Vexilar charger.
The Fish Scout soft pack also has a long storage
pouch on the side. This pocket is for storing the
over-the-hole suspension arm assembly.
Suspension Arm Compass
11
Page 12

FISH SCOUT OPERATION
Like all Vexilar products, the Fish Scout has been assembled and tested before shipment.
After removal from the packaging, locate the Master Power Switch at the rear of the unit
and turn it “ON”. The Battery Status Indicator will turn on and display the current level of
battery charge. It is always a good idea to check the charge in your battery periodically
whenever it is not in use to prevent battery damage. You NEVER want to drain your
battery to near zero since it will greatly shorten the life of your battery.
When the Master Power Switch is in the “ON” position, the unit has power and is ready
to go. Looking at the back side of your system, you will see the D-130 battery status is also
showing the current battery level. NOTE: the power drain from D-130 is minor, but it will
,in time, completely drain your battery of energy and this is not covered under warranty.
It is always best to keep your Master Power Switch in the “OFF“ position when not in use.
(Not included w/FS800)
Once the master power has been turned ON, a green light will be on the bottom right
hand of the monitor. Push button and light will turn red. This tells you your monitor is
ready to receive your camera signals. If you find the red & green light flashing, this is a
safety feature to alert you to the fact that the monitor temperature is below -4°F. At this
point the automatic heating sensor kicks in and the red & green light will be flashing until
the monitor is warm enough to function normally. It may take several minutes before the
internal heating element does its job and the light stops flashing. This is normal.
Sun Hood or No Sun Hood?
Your Fish Scout system is designed not to use a sun hood since the monitor sits inside the
soft pack. If you keep the sun behind the unit, you should have no problem seeing the
display. While most other portable monitors have a lux factor brightness of 250 to 300,
the Fish Scout monitor has a 400 Lux display brightness making it one of the brightest on
the market today.
Your Fish Scout system comes pre-wired and requires no special connections to start
operation other than turning the Master Power Switch to the “ON” position. To gain
access to the battery compartment, simply remove the two screws located in the underside
of your case. Remove those two screws to expose the battery compartment and the wiring
harness. With this system, it is important to remember that if you take wires apart, black is
negative and red is positive. Removing the battery is simple, just remember how it came
out of the compartment. You will want to be sure the wires are all to the one side as you
re-inset the battery to avoid any rubbing of wires.
Important: The main power and camera cable has a screw-lock waterproof connector.
Don’t try to pull this connector apart until you unscrew the outer ring first. Your camera will
not function unless this connector is secure.
12
Page 13

LED Button
Turns the camera’s
LED On, Off, and
with + and — buttons,
controls brightness.
Light Sensor Power Light
Minus Button
Used to adjust the
menu setting lower.
Menu Button
Access and exit the
display menu.
Plus Button
Used to adjust the
menu setting higher.
Power Button
Turns the camera
On and Off
Turning “ON” Your System
To turn “ON” the Fish Scout, press the Master Power Switch located in the back of the
carrying case to the “ON“ position. From the front of your unit, press the far right Power
button. When the monitor is turned on, the LED light will turn red which is next to the power
button on the monitor.
You may experience a flashing red & green light when you try to turn on your monitor
and camera. This flashing red light is telling you the internal heater is activated when the
monitor is at -4° F degrees or less. At this point the monitor display is being internally
warmed to allow you to get a good image. Depending on the temperature of the monitor,
a visual image can be fuzzy or not sharp. This will pass quickly. If at all possible, try to
store your camera in a warm location prior to turning on. Your goal will be to never store
your camera in a sub-zero environment overnight.
Operation of the Fish Scout’s Controls
The Fish Scout and Fish Scout systems with DTD use the same menu options. The Fish
Scout has a simple menu display with four different adjustments that can be made by
utilizing the on-screen display. These adjustments can be made to enhance the image on
the display to the user’s preference. (Note: All Fish Scout systems have been pre-set with
factory defaults for normal viewing.) To access the system menu, press the menu key on
13
Page 14

the keypad of the monitor. (Note: if you wait too long before selecting an adjustment,
the menu screen will time out and disappear). To change between on-screen adjustment
choices (brightness, contrast, color, perspective and reset), continue to press the menu
key. The selected on-screen adjustment will be highlighted on the LCD screen. To change
the settings within a selected menu, use the UP and DOWN arrows located on the far
right of the digital keypad. You will see the numbers of the selected adjustment increase or
decrease depending on the arrow direction you are depressing. To accept the changes,
release the UP/ DOWN arrow and settings will be saved. Once the settings are adjusted
properly, the on-screen menu will shut off automatically.
Display Brightness
Use the brightness adjustment to change the overall brightness of a picture. You can
lighten a picture that’s too dark, or darken one that’s too light. Different lighting conditions
and water clarity will affect the brightness of the picture. By adjusting the brightness, the
backlight of the display will increase making the picture brighter. This can be helpful when
viewing the Fish Scout outdoors. During daylight hours, adjusting the brightness can make
the display easier to see. Your Monitor is equipped with an “Auto Brightness” sensor
feature inside that will automatically adjust the display as light conditions change, but you
can override it manually if you wish using the menu keys.
Display Contrast
Contrast is the difference in brightness between lightest and darkest tones in a picture.
A picture with too much contrast has highlights (lighter tones) that are too bright and no
detail and shadow areas that are too black. A picture with too little contrast looks dull,
with no true blacks and more grayish highlights. Different water clarities coupled with the
amount of light available will affect the contrast. Adjust the contrast to the desired setting
for the best overall picture.
Display Color
Increasing the color saturation will increase the vividness but can make the picture look
darker overall. Decreasing the color saturation will make the colors look washed out
and gray. As light conditions change, don’t be afraid to adjust your color display to
improve the over-all image of what you see. This is especially true at dawn or sunset where
changing light conditions will greatly change what you can see clearly.
Perspective
This setting allows you to change your viewing perspective from a wide16:9 to a more
standard 4:3 viewing perspective with less image distortion.
Reset
Reset simply enables you to bring the monitor back to the factory default settings.
14
Page 15

Low Battery Operation Alerts
Your Fish Scout system offers two ways to keep track of battery condition. Your D-130
digital battery status indictor on the back side of your unit gives you a working status of
your battery whenever it is connected. It is critical to note that while your D-130 may drop
to zero, your camera system may still operate. This is because your D-130 is programmed
to tell you that 11 volts is zero and very near the actual run time remaining on your system.
Depending on the health of your battery, you may get 5 minutes or you may get 2 more
hours of camera operation. At 9.5 volts, a “BATT LOW” signal will pop-up in the upper left
corner of the screen telling you the system will shut down within two minutes of operation.
Remember that you must turn “OFF” the Master Power Switch in the back of the unit when
not in use. Failure to do so over time will drain your battery completely and this failure is
NOT covered by your warranty.
Please follow the charging directions to get your battery back to a full charge. Do not let
the battery stay in a drained state for more than 24 hours as it will greatly shorten the life
of your battery. Also, make sure you turn the Master Power Switch OFF during storage.
CAMERA LIGHTING
The Fish Scout Camera utilizes two, super bright, white LED lights.
The Fish Scout Camera housing has placed the lights farther from
the camera lens to reduce the bounce back reflection of suspending
objects in the water. This increases nighttime viewing distance and
also allows the two LED lights to fill the entire 90° degree viewing
angle of the camera lens. To turn the lighting system ON, press the
control key marked ”LED”, located on the monitor’s digital keypad.
By pressing the key, a yellow graphic on the monitor will show if
the LED is “ON” or LED is “OFF”.
You also have almost unlimited control of light intensity with your Fish Scout camera’s
LED lights. When the yellow letters say LED ON, you can use the plus or minus buttons
on the monitor control panel to control how bright you want the LED’s to be. To decrease
the intensity of the lights while the lights are ON, press the down key on the right side
of the digital keypad (Note: the lights always come on at the last intensity level, so you
may need to re-set light levels each time the LED lights are turned on). The amount of LED
light required will depend on the water clarity and amount of particulates in the water.
Darker, stained water will require more light while clear water will allow for better light
penetration, therefore decreasing the need for super bright LEDs.
Important: Be sure to check with your state’s regulations with regard to underwater lights
and camera usage.
15
Page 16

DTD (Depth Temperature and Direction)
Camera Use
This great option gives the user the ability to use Swiss digital sensor technology to tell you
the depth of the camera, the temperature of the water the camera is at and the direction
the camera is pointing under the water. This information graphic will be on screen inside
a round graphic in the lower right corner of the monitor. A Master Control box for the
DTD system is mounted below the monitor and is used to calibrate depth and to turn the
display ON or OFF.
Attaching your cable to the Master Control Box starts first with simply connecting your
DTD camera (all DTD cameras are two tone color of gray and black) to the “camera”
connector side of the control box and connecting the monitor to the “monitor” connector
on the other side of the control box.
Once connected and you turn your system on, you
will see the round white dial on the lower right
corner of the display in white. Note that the white
graphic will be very visible in water, but may not
be seen well above the water. The control panel
has only one button, the button controls both the
calibration of the unit and the ability to turn the DTD
display graphics ON or OFF.
DTD Switch Box
It is recommended you calibrate your depth setting only if you do not have a 0.0
feet reading before you submerge the camera. Simply depress the control box switch
once and the display will set depth back to zero. You will no longer need to use the
control box unless you decide you no longer wish to see the DTD display on the monitor
while you are fishing and that means you will simply press and hold the control button
for 3 seconds and the display will leave the screen. This is commonly used when
connecting to larger monitor or recording the image you see on the display.
DTD Option – This is a camera-only feature that adapts to any Fish Scout Monitor
to display Depth, Temperature and Direction. It is available on all Fish Scout systems.
Only the Gray/Black camera housing with the DTD decal is capable of showing Depth,
Temperature and Direction and a camera control box is required to fit between the end of
the camera cable and the monitor input.
Changing the Unit of Mesure - Turn the Fish Scout monitor ON, then locate the DTD
controller box. Press and hold the button for 5 seconds. The units should now be changed.
16
Page 17

Calibrating Your DTD Display
Located under and behind your monitor/TV is a small
box called the Calibration Switch Box with two short
cables, one coming out of each end. The box is firmly
mounted to your system base. If you bypass this Calibration Switch, your monitor will work perfectly, but the
DTD display information will not be shown on the lower
right portion of the monitor.
First, you will need to connect your DTD camera cable to the short cable coming out for
the Calibration box marked “camera”. On the other side of the switch is a short lead
marked “monitor” that connects to your monitor/TV.
Note: Be sure to hand tighten all connections as a loose connection will often cause a bad
image or no image at all on the monitor.
With your Monitor turned on, the DTD information will be displayed in the lower righthand corner of your monitor. Direction is factory set, so no problem there, but you will note
that in air the depth reading will be off. The depth senor ONLY works in water. If you want
an accurate depth reading, each time you power-up your system you should calibrate
your depth sensor by pressing the raised button on the calibration switch once. You will
see the display be set back to zero. DO NOT re-set while in water.
Note: The temperature reading in air will slowly rise as the sensor inside the camera
housing reacts to the heat generated by the camera. In water, the temperature readings
will be accurate.
Control Box
Additional DTD Control Options
• Press and hold for 3 seconds to take off DTD display
• Press and hold for 5 seconds to select Metric or Standard
• Press and hold for 8 seconds for DTD Calibration Mode
Mounting Tri-Beam or Dual Beam Control Box
If you wish to mount your switch box to your Double Vision system without sonar you will
find that there are holes pre-drilled to fit either your Tri-Beam control switch or your Dual
Beam control switch. Use a flat screwdriver or even a butter
knife to slowly pry off your switch box you’re your current Pro
Pack or Ultra Pack case and save the little plastic rivets that
hold your switch box into position. Use the same plastic rivets
to re-attach your switch box to your Double vision by pressing
Double Vision
them into the new hole positions.
17
Page 18

Reading Your DTD Display
There are three items listed inside your display circle and are very easy to understand.
The top numbers represent the direction the camera is pointed. It will first state the bearing
based off a true north heading. This function is used to give you a very exact camera
direction. The classic Cardinal points of North , South, East and West as well as intercardinal points of Northeast, Southeast, Southwest and Northwest will follow the bearing
numbers to make it very easy for you to get a general direction of where the camera is
pointing.
Note: Your folding over hole suspension arm located in the side pocket of your soft pack
bag has a compass you can use to help establish True North if you are unsure of direction.
The second number is the depth reading in feet. If at the surface the reading is NOT 0.0
feet you need to re-calibrate the camera and this is easily done by pressing the control box
button mounted under the monitor on the base of your system. By pressing the control box
button once and you will see the display re-set back to 0.0 feet.
The bottom number is the water temperature in Fahrenheit at the camera level, allow 30
seconds to insure an accurate reading.
Ice Fishing Usage
The Fish Scout Color Underwater Viewing System is a fun way to improve
your ice fishing experience and help you learn more about the underwater
world below. Many anglers find that using a Vexilar Flasher along with
their Fish Scout camera will teach you even more about what you are
seeing on your Vexilar flasher system. The Fish Scout can be used to
search for an ideal weed line or locate a rock pile where fish will generally
congregate. Winter waters are often the clearest, so you are often able
to easily move from hole to hole looking for some type of fish activity or
change in bottom content. The Fish Scout is designed to be easy to transport and use, so
moving from hole to hole is not a problem. Once you’ve located an area where you wish
to fish, use the over-the-hole suspension arm or the elbow support arm connected to the
base. The supplied cable stopper (egg) will then hold your camera in perfect position.
To assist in keeping the camera at the desired depth and direction, use the adjustable
egg stopper that is pre-installed on your cable. The egg locks your camera at a
specific direction and depth. You can use either the elbow support arm mounted on
the bottom of the case or the folding cross-hole suspension arm to hold your camera
in position. Try not to bounce the camera on the bottom as it will stir-up the bottom and
it may take several minutes for the cloud of dust to settle. For best results it is advised
that you not actually fish in the same holes as the camera to avoid tangling in the
camera cable.
18
Down View
Page 19

The Fish Scout also includes a Down-Viewing hook on the back of the camera tail fin that
allows you to point the camera straight down. Now in some situations, you can fish in the
same hole and have the camera suspended just below the surface and you can watch the
fish from a “top-down” perspective.
Viewing Tip: If you are looking to watch your lure while fishing, for ease of use, it is always
best to do this near the bottom where you can find your lure relating to the bottom. Using
the camera to help you find and catch suspended fish can be done, but it may take several
attempts to find your lure.
Open Water Usage
For open water use, simply turn the camera power ON and lower the camera into the
water. If you’re drifting with the wind or using a trolling motor with the Fish Scout, attach
the supplied trolling fin to the rear of the camera for added stability. The internal weight is
enough to keep the camera down while the fin will assist in keeping the camera tracking
straight through the water as the boat moves. If the camera becomes hung up on an
underwater object, back up in the direction you were traveling and slowly try to back the
camera out of the snag. You only want to pull directly upward with force as a last resort.
Pole Cam
There are many different uses for your underwater camera. One popular use is to use the
camera to inspect boat or lower unit damage while still in the water. You can attach to
the hole on the trolling fin to mount a pole or long arm. Again, these telescopic poles are
available at most hardware stores in the window cleaning or painting departments. This
can make viewing in those hard to reach spots possible.
19
Page 20

The D-130 Battery Status Indicator
Digital Battery Status Indicator
A unique battery fuel gauge that recognizes both the
discharge and charge cycle of your battery. It will
sense the current charging condition of the battery,
display the percentage of remaining capacity and
display a charge trend arrow...
( or ).
The D-130 will continue to measure capacity and
trend as long as it is connected to the battery. When
an additional “load” is applied to the battery, the
capacity will decrease according to the load applied.
When the load is removed, the digital readout will
remain at the last shown level and the trend arrow will
switch to point up. This rebound indicates the battery
is starting to recover, but the digital readout of the
capacity will hold at its lowest level unless you reset it
by disconnecting and reconnecting the D-130 to the battery.
*If you continue to use the D-130 without disconnecting it, the D-130 will show the last
capacity until the battery falls below this point, then continue to decline with use.
D-130
When a charger is attached to the system, the digital readout of capacity will remain the
same, up to an hour, with an ( ) arrow indicating that it is receiving a charge before
the digital readout will start to advance. Note, with some batteries, the very top rating for
a charged battery (12.7 volts) or 100% rating will not stay at 100% even though it might
be fully charged. This is normal.
Each battery charges differently and may be fully charged but reads 95%, instead of
100%. This is a normal occurrence with batteries since not all batteries will hold the same
top-end percentage when fully charged and is not an indication of a poor or defective
battery.
When you reconnect the D-130 to the battery, the display will show the current status of
the battery at that moment. Note that the D-130 needs to be connected to the battery
before a charger is connected to give an accurate reading.
IMPORTANT: Be sure the indicators are not on during long storage periods, as excessive
battery drain can result. This battery failure is NOT covered under your warranty, so do
not excessively drain your battery.
20
Page 21

Caring for Your Fish Scout
Important - Turn the Master Power Switch OFF during extended storage periods to avoid
excessive draining of the battery. Remember to recharge after each use, as well as
monthly during extended storage period.
Clean the display screen and camera lens using a 50/50 mixture of vinegar and water
and a soft cloth towel. Do not use harsh chemical cleaners on the display or damage may
result. Clean the display housing, camera body and cable with a mild detergent.
Be sure to avoid any sudden impacts to the front monitor face as nothing can be done to
repair the monitor if display is broken. This is not covered by warranty. If at all possible,
do not store the system in a sub-zero environment. Prolonged exposure to extreme cold
will affect the monitor’s display.
Cable management is key to preventing cuts or crimping of your cable. When not using
the camera, be sure to wind the cable onto the supplied cable wrap instead of allowing
the cable to lay on the ground or in the bottom of your boat where it could be stepped
on or damaged.
Camera Specifications
• FS2000DT: 1/4” Sony SUPER HAD CCD Color .05 – B&W .02
• FS800: CMOS7959 Color .5 – B&W .2
• Color / Black & White
• Resolution 420 horizontal lines Light Sensitivity lux:
• Field of View 90°
• Auto gain control
• Dual external super-bright LED lights
Monitor Specifications
• LCD Display 7” Dual Perspective 16:9 or 4:3 LCD display 1414 by 234)
• Auto light and temperature sensors
• Voltage 12 volt DC (9.5 volt minimum )
• Video out option
• Auto low light backlight control sensor on panel
Power Consumption
• FS2000DT: Total draw: 550 mA or 725 mA (Fish Scout Double Vision)
> 550mA without LED light on / 650mA with LED light on.
• FS800: Total draw: 550 mA
> 400 mA without LED light; 500 mA with light on.
21
Page 22

ACCESSORIES
Ultra Pack Carrying
Case Only
This portable case has
all the features.
Upgrade your older
system or build a
custom new system.
Genz “Blue Box”
Carrying Case Only
A solid carrying case
for your Vexilar flasher
or other electronics.
Soft Pack for the Pro &
Ultra Carrying Cases
Encloses and protects
the system. Offers a
clear zippered window
and access locations.
UC-100
BC-100
SP0007
Pro Pack II Carrying
Case Only
The latest generation
of our most popular
portable carrying
case.
Soft Pack for the
Genz Pack
Encloses and protects
the system. Offers
Velcro sealable access
locations and side
pocket storage.
FlexLight
Provides an adjustable
bright white light running
for hours on a single AA
battery. A great way to
put light where
you need it.
PC-100
SP0005
L-202
S-Cable
The suppression cable
reduces your flasher’s
output power. This
allows clearer
readings in shallow
or cluttered waters.
Mag Shield
Both magnifies and
protects the FL-8se or
FL-18 displays. Not
compatible with the
FL-12 or FL-20
22
S-140
MS0001
Sun Hood
Shields the display
on Fish Scout monitors
when using in very
bright light.
FSSK01
Flasher Cover
Neoprene cover will
protect the flasher face
during transport and
storage. Fits models
FL-12, FL-20 & FLX-28.
COV001
Page 23

Tri-Beam Ice-Ducer
Gives you the option
to select from a wide
20° beam, a mid 12°,
or a narrow 8° beam
angle. Switch included.
TB0033
Digital LCD Battery
Status Indicator
Shows the current
level of charge as
a percentage with
charge or discharge
mode indication.
D-130
Pro Mount
Offers a swivel action
and quick removal for
your flasher or other
electronics. It’s durable
and economical.
A.C.E. Adhesive
This acoustically
conductive epoxy
system is designed for
maximum performance
with minimal in-hull
transducer installation
effort
Beverage Holder
Fits into the rod holder
on the Ultra Pack and
Pro Pack II and allows
you to keep your
favorite beverage
close at hand.
SMC001
ACE001
CH-100
FL Digital Depth
Indicator
Gives depth and
battery voltage.
Works with any FL
Series flasher.
DD-100
Tackle Tote
A handy soft sided
tackle box that holds
three of our 4 by 6 inch
Vexilar tackle boxes.
Use it for all seasons.
TT-100
Vexilar Clothing
Vexilar offers a wide variety of styles of
caps, t-shirts, hoodies, bibs and parkas.
Be sure to show your Vexilar colors by
either ordering from our web site or by
visiting your nearest Vexilar dealer.
Visit vexilar.com for more great
gear and wear!
23
Page 24

TROUBLE SHOOTING
Red light on, no monitor or camera.
Check your battery status indictor, if your camera will turn on, your D-130 will still tell you how
much power you have in your battery. In low power situations, the red light may be on, but
there is not enough power to display an image.
Flashing Red & Green light when I turn the system on.
This is normal to let you know the auto heating element has been engaged. Any time the
heating element is on, the red & green light will flash.
Camera lights on, but no image on monitor?
You might have a loose or broken connection in your system. Unscrew and pull apart the
monitor to cable connector and re-connect it and be sure to hand tighten the connection again.
ON camera light is on, but no monitor.
Check battery level on the battery status indicator, this is a common problem of low battery.
Water seems too dirty to see.
This is not at all uncommon in dirty or heavily stained waters. Visibility will be limited and the
lights will not help in these situations. Understand the camera only shows you what is possible
to see and there will be limitations as to how far the water clarity will let you see.
Turned on main power switch and nothing turns on.
Remove the Internal structure from the soft pack and remove the two screws found on the
bottom side of the case. This will reveal the battery. Be sure all connections are intact and
wires are in good shape. Most likely, the battery drained to a point so low, nothing lights up.
Battery so low, charger won’t charge.
This is a very common occurrence and one we hope to solve with time. Most batteries if left
to simply stand with nothing attached to them will bounce back a little in 6 to 12 hours. This
might be enough to trigger the charger to turn on and start the re-charging process. It will not
hurt to connect the battery to the charger even if it is not charging and simply wait to see if it
engages with time. Please try this for at least 24 hours, if it does not work you should look to
replace the battery.
Can’t solve the problem? Call Vexilar service for support. If problems with your camera
persist, do not send it back to where you purchased it. It is always best to send it directly
to Vexilar for prompt service.
24
Page 25

SERVICE AND SUPPORT
If you find that you need help, please contact us. Have ready the model number and, if
possible, the serial number of your product. Please be sure to read this manual thoroughly
first.
Address
Vexilar, Inc.
6667 West Old Shakopee Road, Suite 101
Minneapolis, MN, 55438-2622
Telephone
(952) 884-5291
Email
service@vexilar.com
Web Site
www.vexilar.com
Warranty Information
This VEXILAR product is warranted against factory defects in material and workmanship
for a period of 2 years from the date of purchase or receipt as a gift*. During the warranty
period, VEXILAR will repair or at its option, replace at no cost to you for labor, materials or
return transportation provided the unit is returned, shipped prepaid to Vexilar, Inc., 6667
West Old Shakopee Road, Suite 101, Minneapolis, MN 55438-2622. This warranty
does not apply if the product has been damaged by accident or misuse, or as a result of
service or modification by other than the factory.
Except as otherwise expressly stated in this previous paragraph, the COMPANY MAKES
NO REPRESENTATION OR WARRANTY OF ANY KIND, EXPRESS OR IMPLIED, AS TO
MERCHANTABILITY, FITNESS FOR APARTICULAR PURPOSE, OR ANY OTHER MATTER
WITH RESPECT TO THIS PRODUCT. Company shall not be liable for, and purchaser
assumes responsibility for, all personal injury and property damage resulting from the
handling, possession or use of the product by Purchaser or others who obtain it through
purchaser.
* A sales receipt with date of purchase may be requested before service work is done under warranty if no
warranty registration information is on file. It is impossible to establish a date of purchase with a serial number
or UPC code. Sorry.
25
Page 26

INTRODUCING THE VEXILAR
FLX-28
This is Not Your Grandpa’s Sonar
Vexilar flasher technology is still help ing Grandpa catch fish, but now he might be looking
for an upgrade. The redesigned FLX-28 sets a new standard for performance other sonar
technology only dreams of doing.
The features found in the FLX-28 read like the wish list of avid ice anglers starting with
digital depth, Auto Range, Two zoom zones, battery status, FIVE color palettes to select
from for maximum visibility, five foot depth range adjustments starting at 10 feet, Maximum
range of 300, Day and Night display brightness settings, Low power options for fishing in
super shallow water, a unique Weed Mode for better performance while fishing in weeds.
And to top it all off, the unit even has its own Demo mode so you can show non-Vexilar
fans how the system works with a lifelike fish catching simulation to watch.
There are more features to the FLX-28 series than ever before inside a single flasher sonar
system. When fans of Vexilar say we could never improve the FL-8 that we introduced
over 20 years ago, they were amazed when the FL-18 hit the ice in 2002. By the time the
new flat screen FL-12 and 20 came out, Vexilar had established a new gold standard in
flasher performance. Surely, Vexilar could not improve on this? Welcome to the age of
the FLX series!
A unique brushless data transfer design system allows for the creation of a breakthrough
flasher display with digital depth and Auto Ranging technology. The features found in the
FLX-28 read like the wish list of avid Ice Anglers starting with digital depth, Auto Range,
Two zoom zones, FIVE color palettes to select from for maximum visibility, five foot depth
range adjustments starting at 10 feet, Maximum range of 300, Day and Night display
brightness settings, Low power options for fishing in super shallow water, a unique Weed
Mode for better performance while fishing in weeds.
The FLX-28 is totally revolutionary in the world of winter flasher sonar technology. Vexilar
has come a long way from the early FL-8, but Vexilar has never changed their commitment
to deliver the very best sonar systems in the world for over 50 years. Performance, quality,
innovation and reliability. Welcome to the amazing FLX-28.
Visit vexilar.com to Learn More About the FLX-28 !
26
Page 27

FLX-28 Pro Pack
27
Page 28

Vexilar’s SONARPHONE is a REVOLUTION
As the name implies, SONARPHONE turns your smart
phone or tablet into a fully functional sonar system that
will rival any high end sonar on the market today. Using
Patented WiFi signal technology to transmit to smart phones
or tablets. You don’t need cell phone coverage to use it,
the SONARPHONE will work anywhere in the world. The
SONARPHONE creates its own WiFi hotspot and you can
share your signal with as many people as you wish, the
software App is downloaded for free from the App store and
works with both Android and iOS systems.
• Compatibility: iOS 4.3 (iPhone, iPad) and Android 2.0
• Free App download
• Automatic Ranging & Sensitivity
• Water Temperature & Depth Indicator
• Audible Alarms for Fish, Shallow and Low Battery
• Fish Icon
• Zoom Bottom Track
• Noise Rejection
The new SONARPHONE gives you amazing
high-speed depth sounder performance
on your Smart Phone or Tablet
• Surface Clarity
• Battery Indicator
• SonarPhone Models Available:
SP100 (T-Pod), SP200 (T-Box), SP300 (T-Box Portable)
Visit Vexilar.com for More Info!
Vexilar’s FishPhone is All About FUN
FISHPHONE turns your smart phone or tablet into a fully functional
underwater camera monitor. Now anyone with a smart phone or
tablet will get a high quality video image delivered right to the
palm of your hand.
Using WiFi signal technology to create its own “hotspot” that
reaches out 300 feet in all directions, so you can share your video
signal with as many friends as you like or keep it totally secure. You
don’t need cell phone coverage to use it, the FISHPHONE works
anywhere in the world.
Model: FP100 - FishPhone Underwater Camera System
Both FREE software Apps are downloadable from the
Apple App store and Google Play. Both work with
Android and iOS Systems.
Visit Vexilar.com for More Info!
28
 Loading...