

Page 1

Page 2

Page 3

Page 4

Page 5

Page 6

Page 7
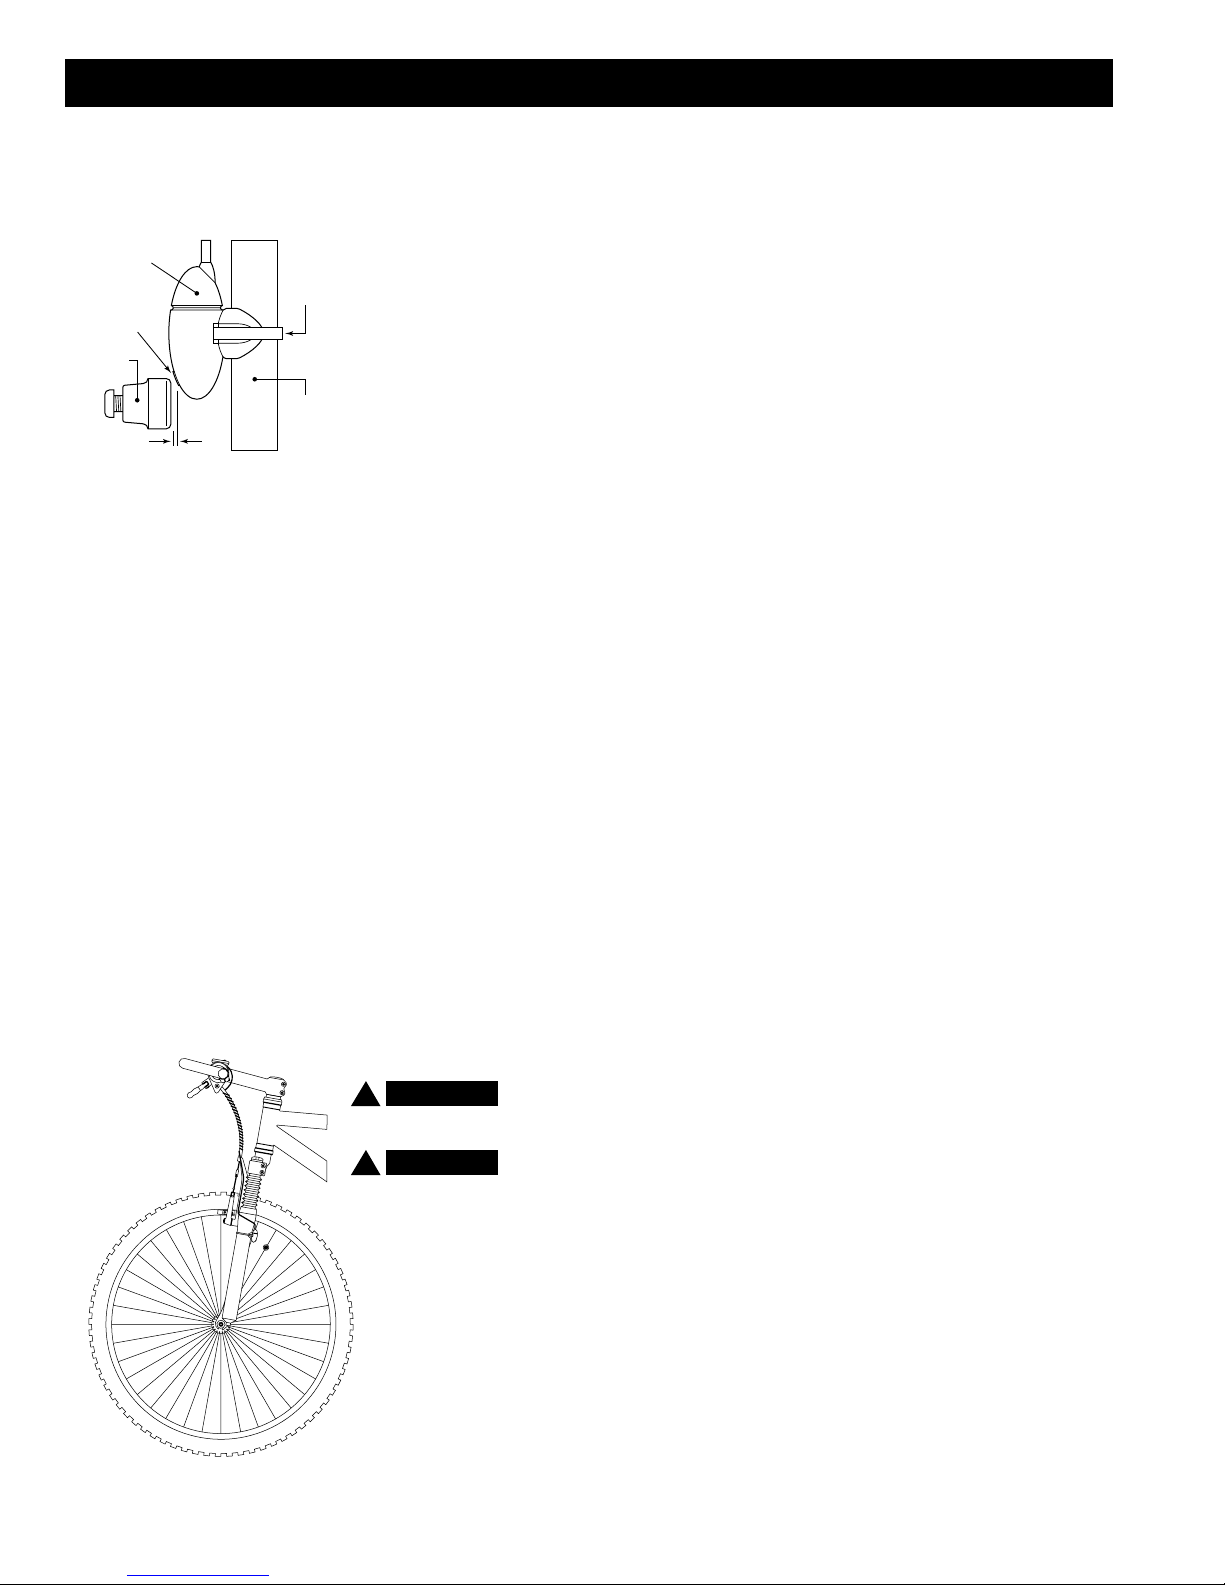
MAGNET, SENSOR AND BRACKET INSTALLATION
We recommend that you install your C-16 in the following manner, starting with
the sensor unit on the fork and working up to the mounting bracket on the handlebar.
STEP 1
Sensor
Alignment
Arrow
Wheel
Magnet
1-2mm
Zip-Tie
Fork Leg
Mount the new Vetta universal S-2 sensor (pat. pend.) loosely (so that you can
slide it around) to the fork blade using the zip-tie provided. The sensor can be
mounted at any point along the fork, however, we recommend a position on the
back side and near the top of the left fork blade. This will protect the sensor from
being hit by rocks, trees and other objects.
STEP 2
Again, loosely install the sensor magnet to one of the spokes on the left side of
the front wheel. Adjust the magnet and sensor position by sliding both pieces
around until you get the sensor as high on the fork blade as possible while still
maintaining the necessary magnet to sensor spacing (1-2mm).
should pass within 1-2mm of the sensor, and the top of the magnet should be no
higher than the top of the small arrow molded into the face of the sensor.
NOTE: The magnet
STEP 3
Route the sensor wire up the back of the fork securing with electrical tape.
CAUTION Do not use zip-ties to secure the sensor wire to the bike as this
!
may result in cut or broken wires.
CAUTION Be sure to leave enough slack in the wire to allow for the steering
!
motion of the bike and the action of the suspension fork, if you have one.
STEP 4
Carefully wrap the excess sensor wire around the front brake cable housing,
securing with electrical tape when necessary. When you are finished, you
should have just enough slack for the computer mounting shoe to reach the
handlebar.
Check to make sure that all of the excess sensor wire is either taped down or
wrapped around the brake cable so that nothing can catch on it while you are riding.
Wiring Diagram
Page 8

Page 9

WARRANTY
Vetta Sports warrants all Vetta products, to the original purchaser, to be free of defects in materials or
workmanship for a period of one year from the original date of purchase. Vetta Sports will, at its sole
discretion, repair or replace any product deemed defective. This express warranty is in lieu of all other
warranties, either expressed or implied. Any warranties of merchantability of fitness for a particular purpose
are limited to the one year duration of the above express warranty. Vetta Sports will not be held liable for any
incidental or consequential damages.
WARRANTY RETURN AND REPAIR PROCEDURE
If you ever experience a problem with the function of your Vetta C-16 cycle computer, please visit your local
Authorized Vetta Dealer for assistance.
Should you experience a problem with your Vetta C-16 cycle computer that can not be solved by your local
Authorized Vetta Dealer, please ask them to comply with the following simple steps to assure quick and
efficient processing of your claim.
STEP 1
Fill out the warranty information card within this manual.
STEP 2
Call the appropriate Vetta Customer Service number listed below for help or to obtain a Return Authorization
Number (RA Number).
STEP 3
Send the unit back to the appropriate Vetta Customer Service Center along with the original copy of your
purchase receipt and a detailed explanation of the problem you are experiencing.
Vetta Customer Service USA Vetta Customer Service Europe
1500 Kearns Boulevard Suite A-200 Via E. Fermi 4
Park City, UT 84060 USA Casella d'Asolo (TV) 31010 Italy
Phone: 1.800.GO.VETTA or 1.801.647.2929 Phone: 39.423.524094
Fax: 1.801.647.2947 Fax: 39.423.524199
Email: [email protected] Email: [email protected]
Serving: US, Canada, South America, Australia, Serving: Europe and the Middle East
New Zealand, and Asia
Page 10

 Loading...