

Page 1
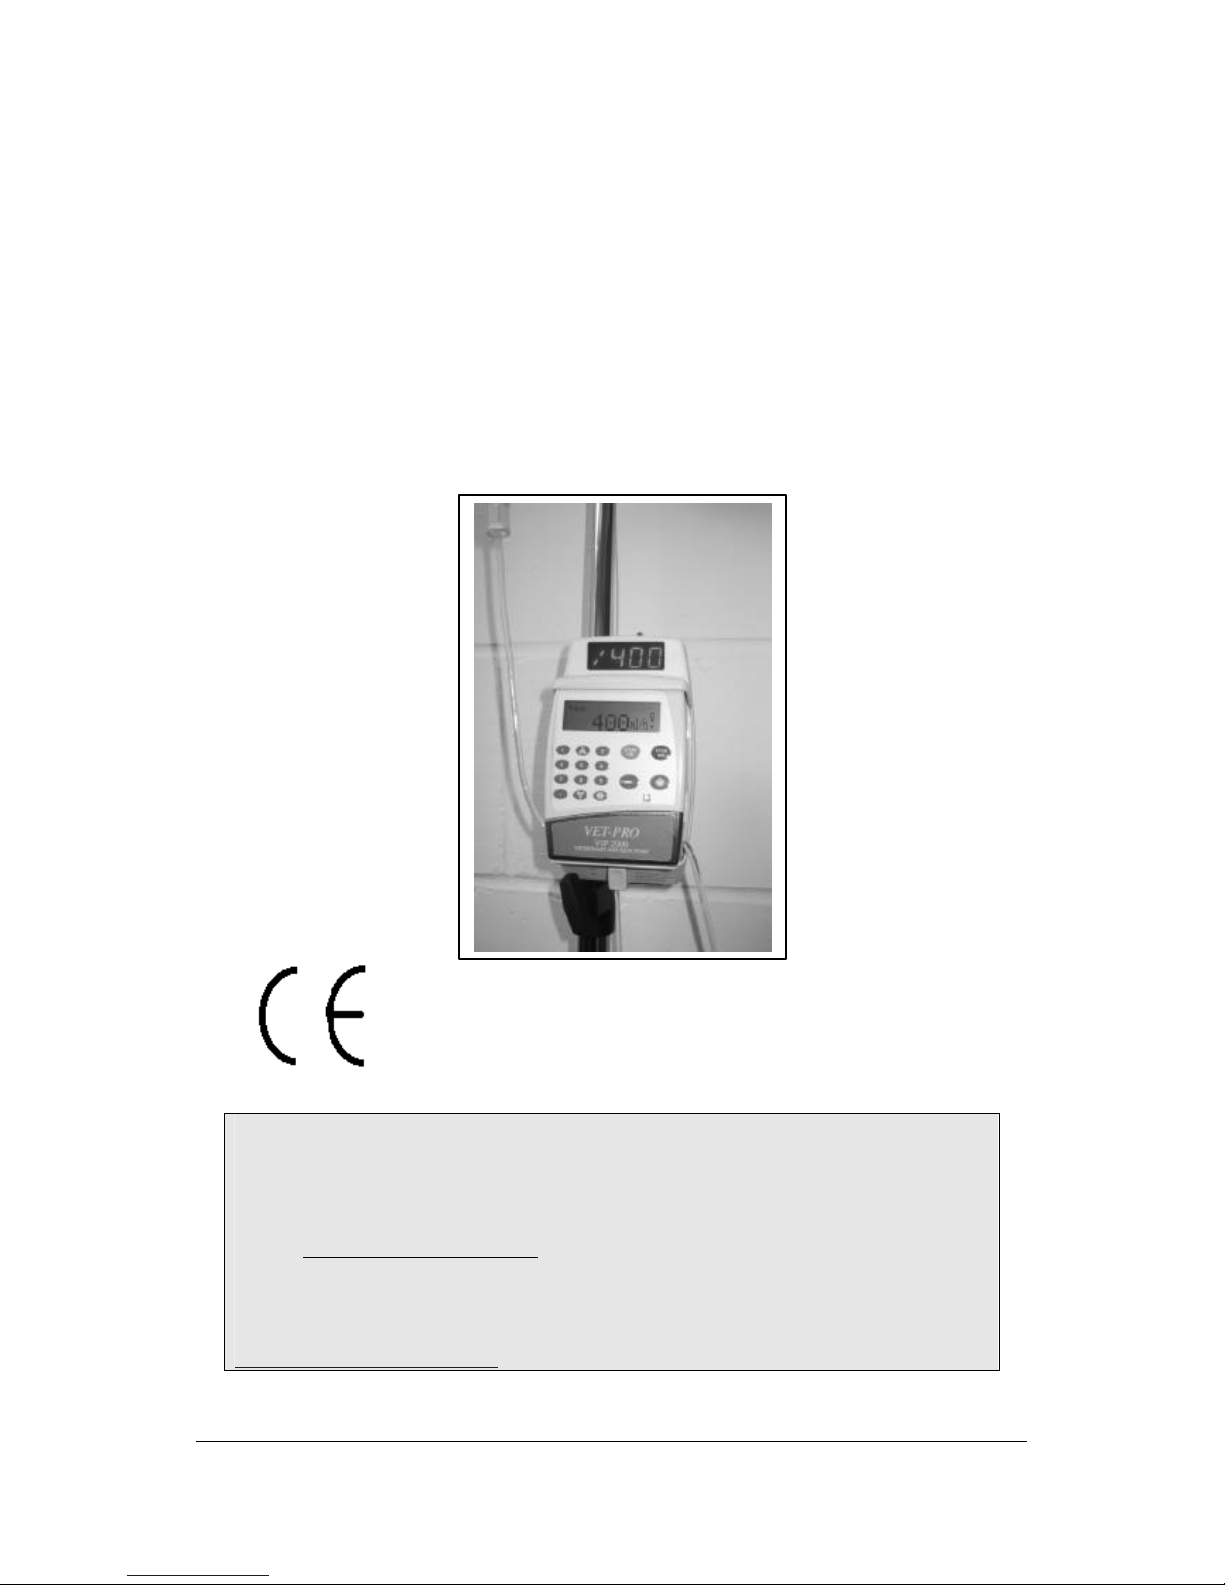
VET-PRO
VIP 2000
VETERINARY INFUSION PUMP
OPERATORS MANUAL
0473
Distributed in the U.K by:
Burtons Medical Equipment Ltd
Units 1 - 4 Guardian Industrial Estate
Pattenden Lane Marden Kent TN12 9QD UK
Email: [email protected]
Tel (SALES) : 01622 834300 Fax: 01622 834330
URL:WWW.burtons.uk.com
EDITION MARCH 2002
Ref.: 100-090VX
Page 2

VET-PRO Operator’s Manual
2
LIMITED WARRANTY
The VET-PRO Infusion Pump has been carefully manufactured from the highest quality
components.
The pump is guaranteed against defects in material and workmanship for twelve (12) months
from date of purchase by the original purchaser.
The obligation under this Limited Warranty, shall be limited, at the manufacturer’s option, or
that of its designated representative, to repairing or replacing pumps, which upon examination,
are found to be defective in material or workmanship. The repair or replacement of any
product under this Limited Warranty shall not extend the above-mentioned Warranty period.
All repairs under this Limited Warranty should be undertaken only by qualified, trained
service personnel. In the event that a pump is found to be defective during the warranty period,
the purchaser shall notify the manufactuer or its designated representative within thirty (30)
days after such defect is discovered.
The defective pump should be sent immediately to the manufacturer or its designated
representative for inspection, repair or replacement. Shipping costs are the purchaser’s
responsibility.
Material returned to the manufactuer or its designated representative should be properly
packaged. Inadequate packaging may result in severe pump damage.
This Limited Warranty shall not apply to defects or damage caused, wholly or in part, by
negligence, spilt fluids, dropping of the pump, misuse, abuse, improper installation or
alteration by anyone other than qualified, trained personnel; or to damage resulting from
inadequate packaging in shipping the pump to the manufacturer or its designated
representative.
If, after inspection, the manufactuer or its designated representative is unable to identify a
problem, the manufactuer or its designated representative reserves the right to invoice
purchaser for such inspection.
This Limited Warranty is the sole and entire warranty pertaining to the manufacturer’s
products and is in lieu of and excludes all other warranties of any nature whatsoever, whether
stated, or implied or arising by operation of law, trade, usage or course of dealing, including
but not limited to, warranties of merchantability and warranties of fitness for a particular
purpose. Purchaser expressly agrees that the remedies granted to it under this limited warranty
are purchaser’s sole and exclusive remedies with respect to any claim of purchaser arising
under this Limited Warranty.
Page 3

VET-PRO Operator’s Manual
3
Contents
Introduction …………………………………………………………………………
4
Glossary ……………………………………………………………………………..
5
Safety Precautions ……………………………………………………………………
6-7
Specifications ………………………………………………………………………..
8-9
Ordering Information 9
Trumpet and Flow Rate ………………………………………………………………
10-11
VET-PRO Front view ………………………………………………………………
12-13
VET-PRO with Open Door ………………………………………………………….
14
The Charger ………………………………………………………………………….
15
Optional Cage Mounting Bracket 16
Unpacking …………………………………………………………………………..
17
Loading the Administration Set …………………………………………………………….
17
Flush Function. …………………………………………………………………….
18
VET-PRO Operating ………………………………………………………………..
19
Pump Operation Test. ………………………………………………………….……
19
Air in Line Alarm Test. ……………………………………………………………..
20
Door Open Alarm Test. ……………………………………………………………..
21
Down Occlusion Alarm Test. ………………………………………………………
22
Charge Indicator Test. ………………………………………………………………
22
Programs …………………………………………………………………………….
23
Changing Current Program………………………………………………………………... 24-25
Down Occlusion Setting ………………………………………………………..……
26
CONTINUOUS Program……………………………………………………………..
27-30
25
STEPS PROTOCOL……………………………………………………………………..
30-31
TPN Program ………………………………………………………………………..
32-34
INTERMITTENT Program …………………………………………………………..
35-37
PCA Program – with protocols ………………………………..……………………..
37-44
PCA Program – Epidural Mode ………………………………..……………………..
45-46
PCA Program – without protocols ……………………………………………………
46
INFO Mode …………………………………………………………………………
47-48
Program Delay ………………………………………………………………………
48-49
Program Completed …………………………………………………………………
49-50
Locking ……………………………………………………………………………..
50-51
How to Lock …………………………………………………………………………
51-53
Battery Operation. ……………………………………………………………………
53-54
Cleaning and Storage ……………………………………………………………………….
54-55
Alarm Conditions……………………………………………………………………..
55
Troubleshooting
……………………………………………………………………..
55-58
Show Setting
………………………………………………………………………..
58-59
Adjust Setting ……………………………………………………………………….
59-60
Page 4

VET-PRO Operator’s Manual
4
Introduction
This Manual Provides directions for the setup and operation of the VET-PRO
Pump
VET-PRO Features
S Small, light and compact pump.
S Multi Programs:
CONTINUOUS
Continuous program.
Infusion Rate: 0.1 to 1200 ml/hr.
Volume: 0.1 to 9999 ml.
User can design a specific protocol, for drug
delivery, which contains up to 25 steps.
Infusion Rate: 0.1 to 1200 ml/hr.
Volume: up to 9999ml., For each step.
Accumulated Volume for all steps – up to 10
liters.
Rate Taper program, with programmable up
and down times
INTERMITTENT
A set Dose delivered in set intervals. Between
Intervals the pump will allow a base rate or
KVO.
PCA
Patient Control Analgesia, continuous delivery
plus /or programmed boluses.
Bolus Rate: 0.1-1000 ml/h
S
Highly accurate fluid delivery. The piston mechanism ensures an accurate
volume delivery over more than 24 hours using the same administration set
segment
S Operated with a customized safe administration set
S Rechargeable internal battery
S Can be latched into a Charger, which is mounted on an IV pole
S A.B.S. Anti-Bolus System
S Silent operation
25 STEPS
TPN
Page 5

VET-PRO Operator’s Manual
5
Glossary
Terms used in manual:
F
Note:
Essential operating procedure or condition.
G
Caution:
A precaution which, if not followed, could result in extensive
damage to the equipment.
I
Warning
A precaution, which, if not followed, can result in personal
injury or loss of life.
Page 6

VET-PRO Operator’s Manual
6
Safety Precautions
I
Warning
F
To avoid possible personal injury or loss of life, observe the following:
Note: Read the entire Operation Manual before using the pump, since the
text includes important precautions.
•
Disconnect the Charger from the mains, prior to opening the casing.
Voltage present on internal components may cause severe shock or death
on contact. Only trained service personnel should open the pump cover.
•
Before servicing pumps connected to mains via the Charger - remove
rings, watches, and other jewelry, which may present a shock / burn
hazard.
•
To prevent a fire hazard, replace blown fuses on the Charger only with
fuses of the same type and rating (see fuse values on the Charger PCB).
•
The equipment is not suitable for use in the presence of flammable gases
– e.g. air/oxygen/nitrous oxide mixture.
•
Watch your fingers / nails when opening the pump door.
To avoid possible injury to patient, observe the following:
I
Warning
Battery charging is enabled as long as the charger cord is
connected to the mains and the pump is in the charger.
Switching the pump off does not disconnect it from the
mains. In order to disconnect from the mains, take the
charger cable out of the mains. In order to disconnect pump
from the mains, take it out of the charger.
F Note:
To avoid battery damage do not leave the pump battery in a
temperature more than 500C
•
Make sure the pump is attached securely to the Charger, which is
connected snugly to an IV pole.
•
If the pump is dropped, return the pump for inspection by qualified
service personnel.
•
Before operation, verify that administration set tubing is not kinked or
occluded.
Page 7

VET-PRO Operator’s Manual
7
•
Although the pump will operate using a variety of giving sets, use of
other administration sets may impair the operation of the pump and the
accuracy of the infusion.
F Note:
The maximum volume that may be infused under SINGLE FAULT
CONDITION
is 0.1 ml
G CAUTION
To avoid possible damage to the equipment, observe the
following:
•
Do not immerse the pump in liquids.
•
Clean solution spills on the pump immediately. Use a damp
cloth or sponge. A cleaning disinfectant may be used. Wipe
thoroughly with a dry cloth.
•
Do not clean pump with chemicals such as Xylene, Acetone or
similar solvents. These chemicals cause damage to plastic
components and paint.
IWarning:
Any adjustments, maintenance, or repair of the uncovered
pump while connected to the power should be avoided. If
necessary, these repairs should be carried out by skilled
technicians who are aware of the hazards involved.
IWarning:
The pump should be operated within an ambient temperature
range of 15°C to 35°C. and at up to 85% humidity
IWarning
:
Do not operate the pump near high-energy radio-frequency
emitting equipment, such as electro-surgical cauterizing
equipment, and cellular telephones. False alarm signals may
occur.
Page 8

VET-PRO Operator’s Manual
8
Specifications
Pumping Mechanism: Piston Mechanism
Flow Rate: PCA: 0 to 100 ml/hr in 0.1ml increments
All other programs: 0.1 to 1200 ml/hr in 0.1ml or
1 ml increments.
Total Infused Volume: PCA: 0.1 to 1,000 ml.
Continuous, TPN, Intermittent: 0.1-9999 ml
25 Steps: 0.1 to 9999 ml. for each step
Accumulated volume for all steps- up to 10 liters.
Total Time Setting 100 hours
Accuracy: ± 3 %.
KVO rate: 0.1 to 5 ml/hr. (to be set)
Air Sensor: Ultrasonic, adjustable air bubble size
Maximum Pressure: 0.7 bar or 10 psi Adjustable (high/normal/low)
Power Supply: 110-240 VAC, 50/60 Hz. 20 W
Battery: Li-Ion 7.2V, 1450mA. (Rechargeable)
Battery Operation at 125 ml/hr 20 hours
Battery Charging:
Automatic when latched into the Charger
connected to an AC power source (4 hours)
Alarms: End Program
Low & End Battery
Air in line
Down Occlusion
Door Open
Pump Unattended
Internal Malfunction
Locking state
Missing Key
Dimensions:
112 x 89 x 32mm. (L x w x h).
Symbol Attention (Consult accompanying documents)
Page 9

VET-PRO Operator’s Manual
9
Specifications
Classification
Type CF Equipment
(degree of protection against electrical shock)
Housing: ABS (fire retardant)
Weight
280 gr. without battery
390 gr. With battery
Electrical Safety Complies with:
IEC 601-1 (Medical Electrical Equipment Safety),
IEC 601-2-24 (Infusion pumps and controllers),
IEC 601-1-4 (Programmable Electrical Medical
System), UL 2601- 1 and CAN/CSA C22.2 No
601.1.
Standards Manufacture in accordance to ISO 9001 and
EN 46001
CE marked (In accordance with the Medical
Devices Directive 93/42/EEC)
Ordering Information
129-000 VetPro 2000 Infusion pump c/w mains cable, carry case and
operators manual.
129-010 Veterinary Administration Set – Sold in packs of 25.
129-050 Cage mounting bracket – fits Suburban, Shor, Technik, & HC two
cages.
129-051 Cage mounting bracket – fits Geeling cages and others with
50mm x 50mm mesh doors.
Page 10

VET-PRO Operator’s Manual
10
Trumpet and Flow Rate
In VET-PRO, as with all infusion systems, the action of the pumping
mechanism and variations cause short – term fluctuations in rate accuracy.
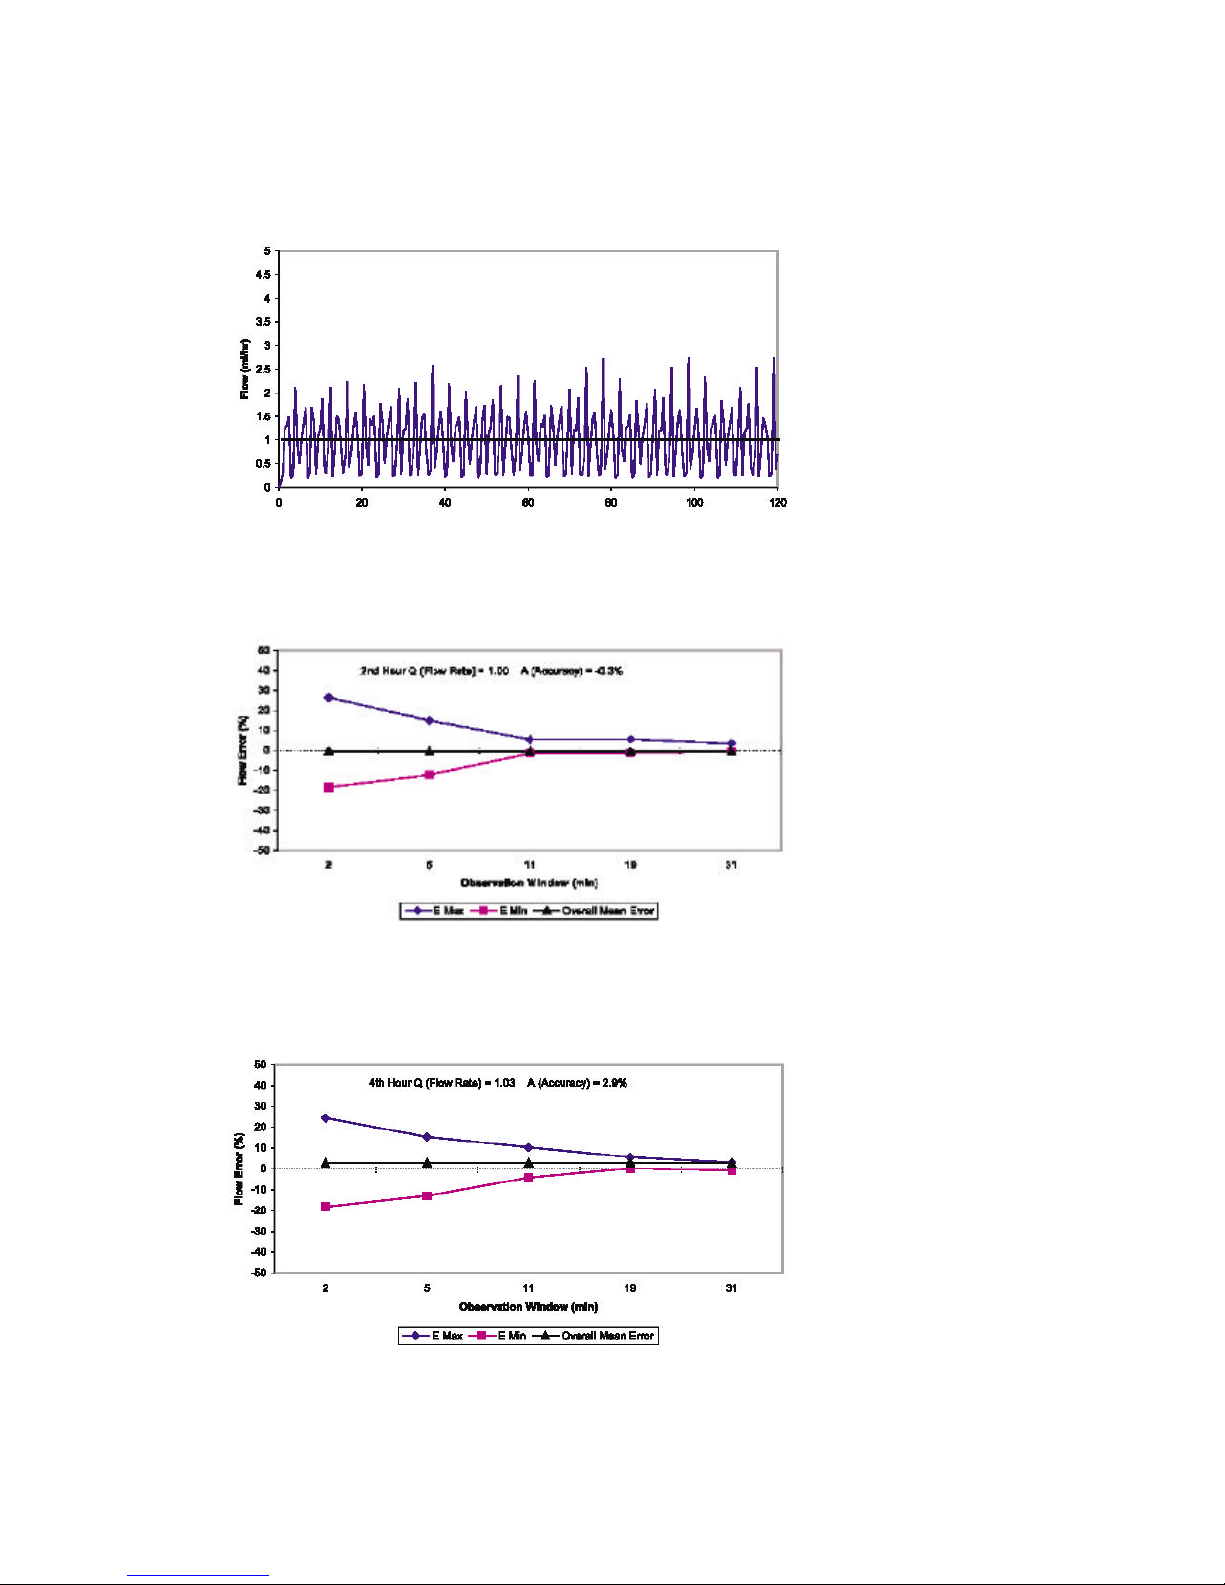
The following curves show typical performance of the system in two ways:
1. The accuracy of fluid delivery over various time periods is measured
(Trumpet curves).
2. The delay in onset of fluid flow when infusion commences (Start up
curves).
Trumpet curves are named for their characteristic shape. They display discrete
data averaged over particular time periods or “Observation windows”, not
continuous data versus operating time. Over long observation windows, shortterm fluctuation has little effect on accuracy as represented by the flat part of
the curve. As the observation window is reduced, short-term fluctuations have
greater effects as represented by the “mouth” of the trumpet.
Knowledge of system accuracy over various observation windows may be of
interest when certain drugs are being administered. Short term fluctuations in
rate accuracy may have clinical impact depending on the shelf-life of the drug
being infused and the degree of intravascular integration, the clinical effect
cannot be determined from the trumpet curves alone.
The Start-up curves represent continuous flow versus operating time for two
hours from the start of the infusion. They exhibit the delay in onset of delivery
due to mechanical compliance and provide a visual representation of
uniformity. Trumpet curves are derived from the second hour of this data.
Tests performed according to IEC 601-2-24 standard.
Page 11
VET-PRO Operator’s Manual
11
Start-Up Graph at 1.0 ml/h (Initial Period)
Using Human BodySet
Time (minutes)
Trumpet Graph at 1.0 ml/h (Initial Period)
Using Human BodySet
Overall Mean Error = -0.1% Max Rate Error = 8%
Trumpet Graph at 1.0 ml/h (After 4 Hours)
Using Human BodySet
Overall Mean Error = -1.1% Max Rate Error = 6%
Page 12
VET-PRO Operator’s Manual
12
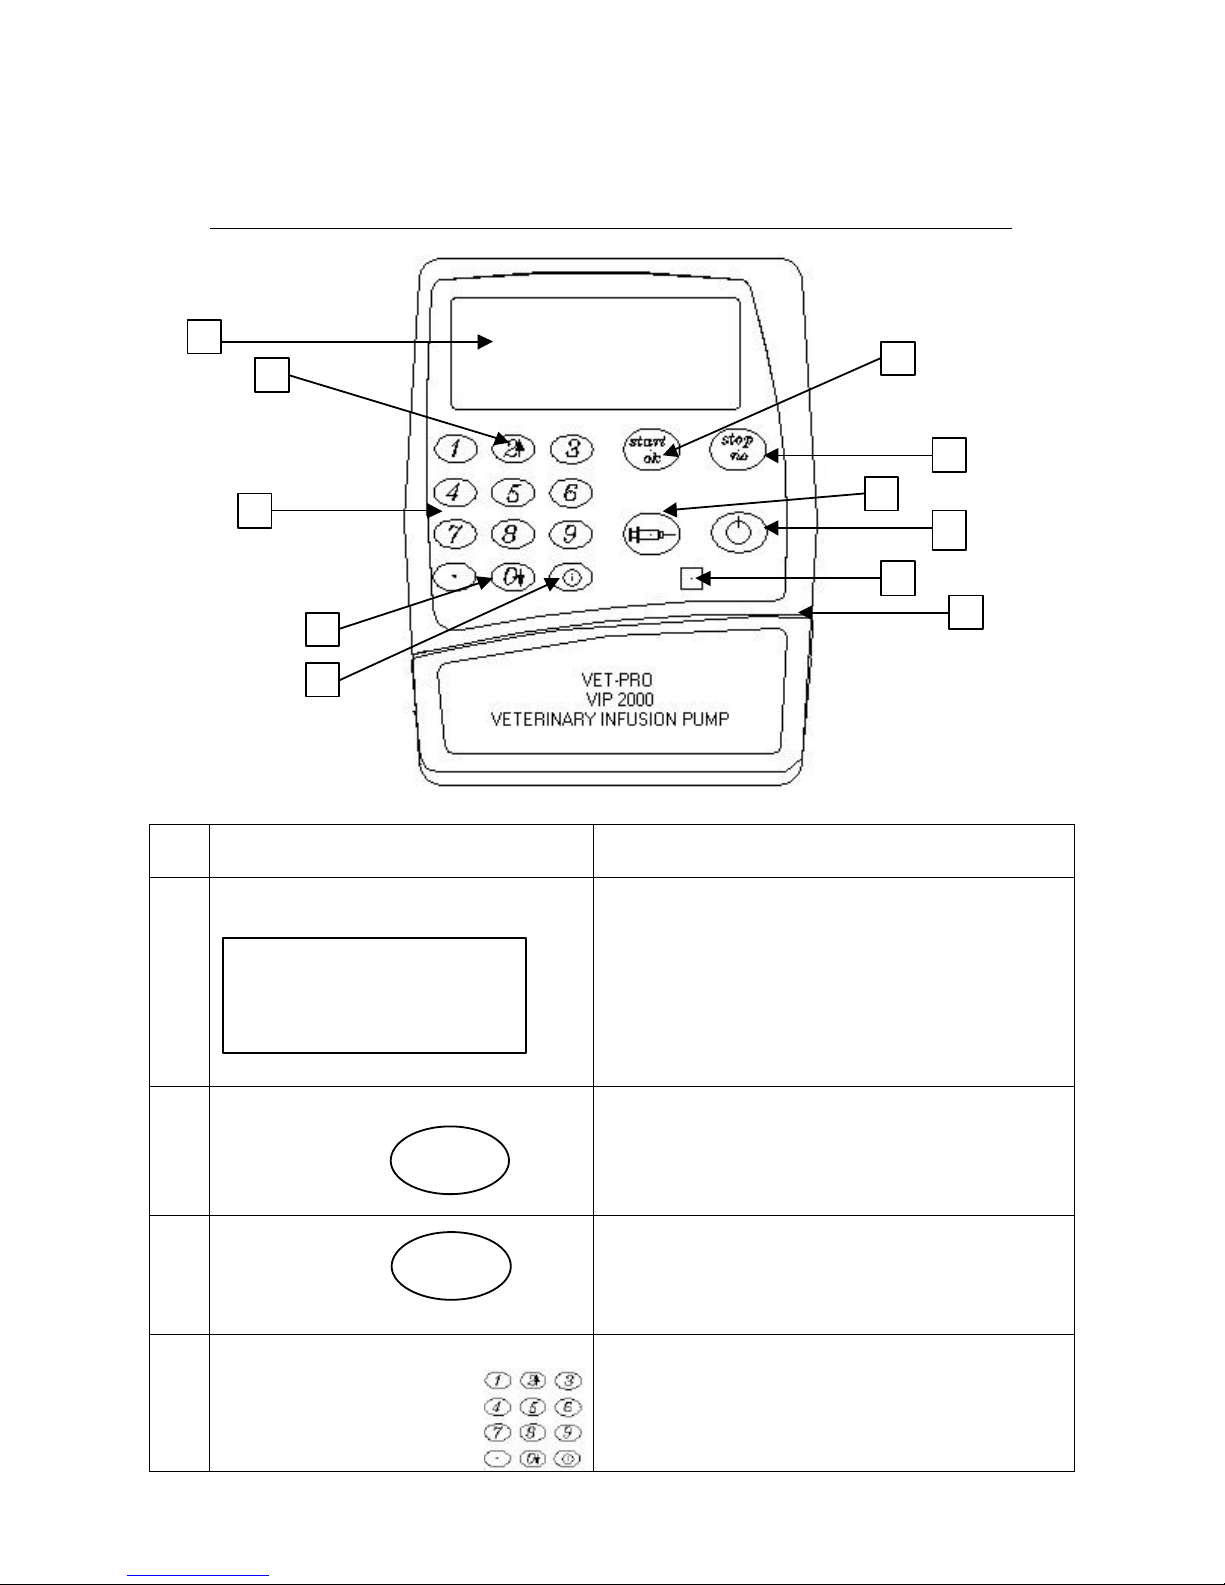
VET-PRO Front View
No.
Description
Function
1.
Display
Displays: Selected Infusion Rate, Total Time,
Time Delay, Volume To Be Infused and
Volume Infused.
2.
START/ OK Key
START
OK
Starts pump operation and delivery.
Confirms selection and setting.
3.
STOP/NO key
STOP
NO
• Silences an alarm condition and pauses
operation.
• Zeroes the displayed value during setting
•
Press to return to previous screen
4.
Numeric Keyboard
Used to set the RATE, TIME limit and VTBI.
Dial the required number.
Pressing NO will erase the last digit.
Rate: 125 ml /h
Press OK for Volume
8
7
3
4
9
Page 13
VET-PRO Operator’s Manual
13
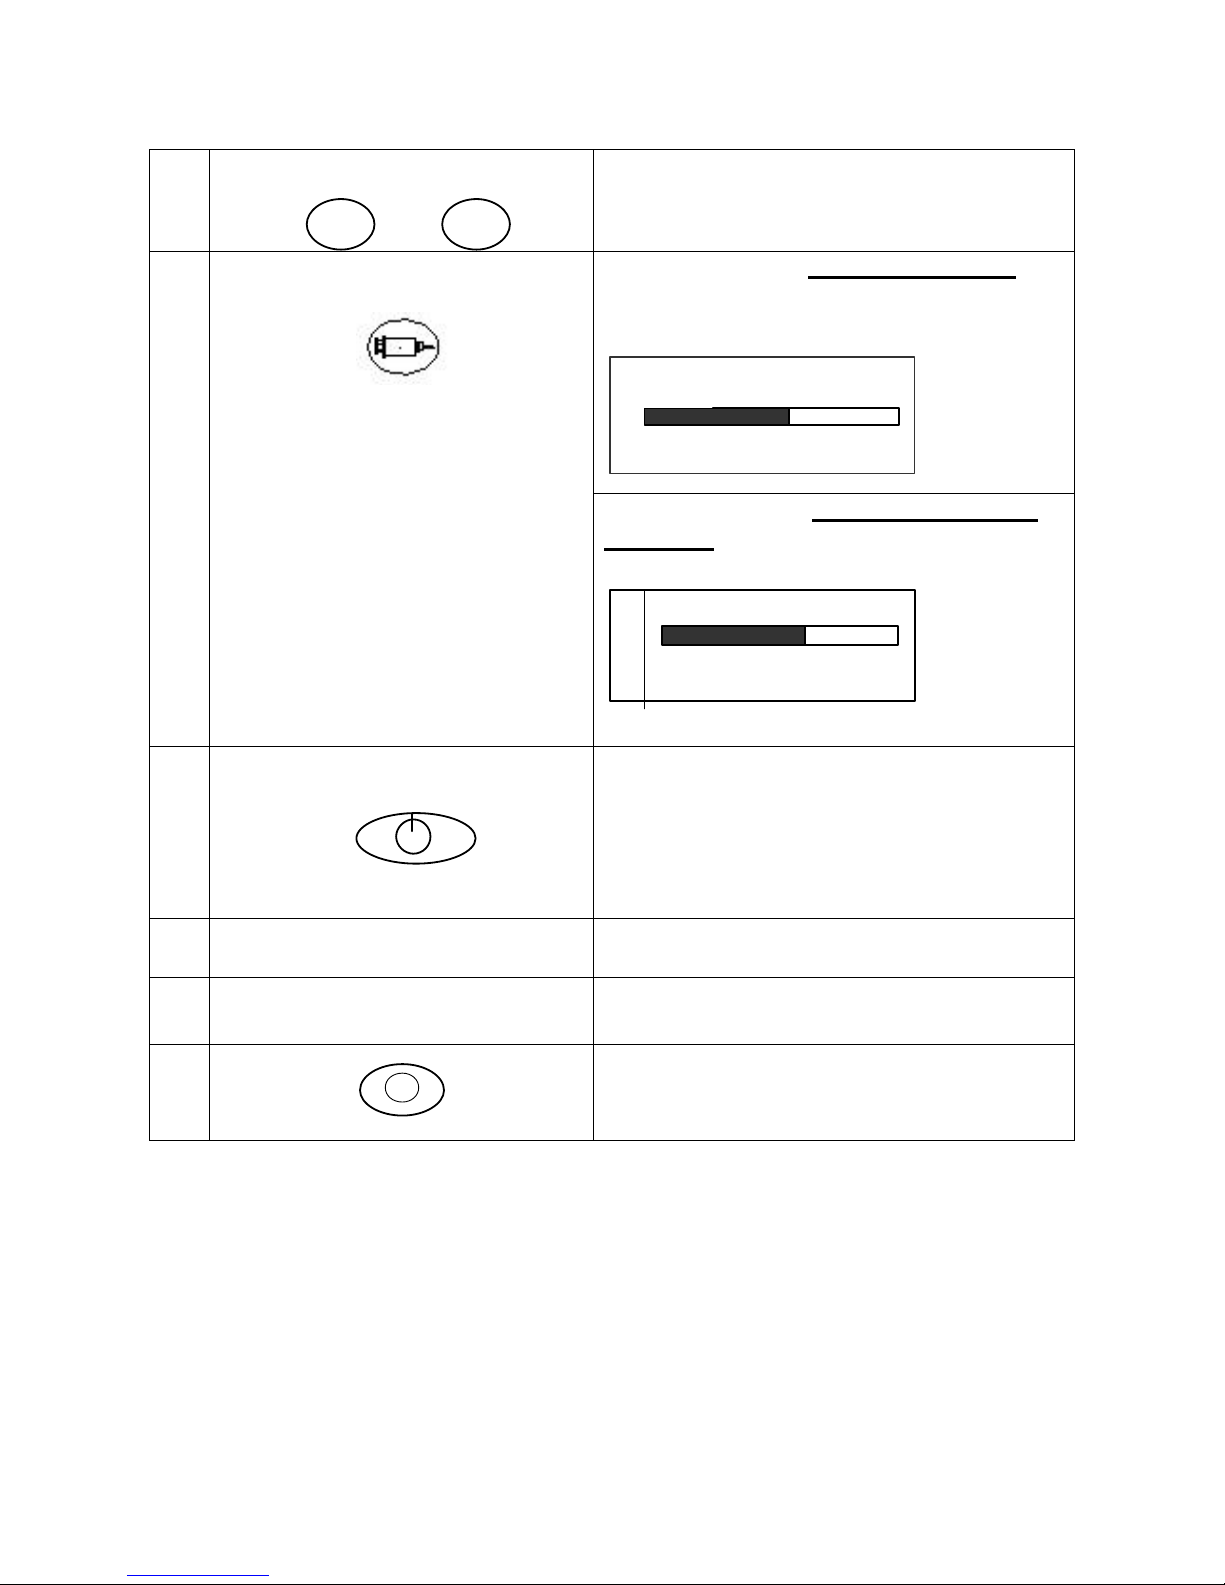
5.
Arrow keys
2£ 0¤
Enable scrolling through options.
Pressing Syringe key during data setting:
Enable Flushing procedure.
Flushing default volume: 4 ml.
6.
Syringe key
Pressing Syringe key during PCA program
operation:
Enable bolus procedure.
7.
On / Off key
Turns the pump on and off.
§ To turn the pump on press until the
self- test screen appears
§ To turn the pump off press until the
OFF Graph is all black and a beep is
sounded.
8.
Operation LED
Flashing of the LED indicates that the set
program is running.
9.
Door Latch
Opens the pump door.
Lift to open the door.
10.
Info key
i
Pressing Info key supplies information about
the pump and its programs (see info mode
chapter).
FLUSH 2 ml
0
4
B Volume, ml.
O
L
U
0 2.8 5
Page 14
VET-PRO Operator’s Manual
14
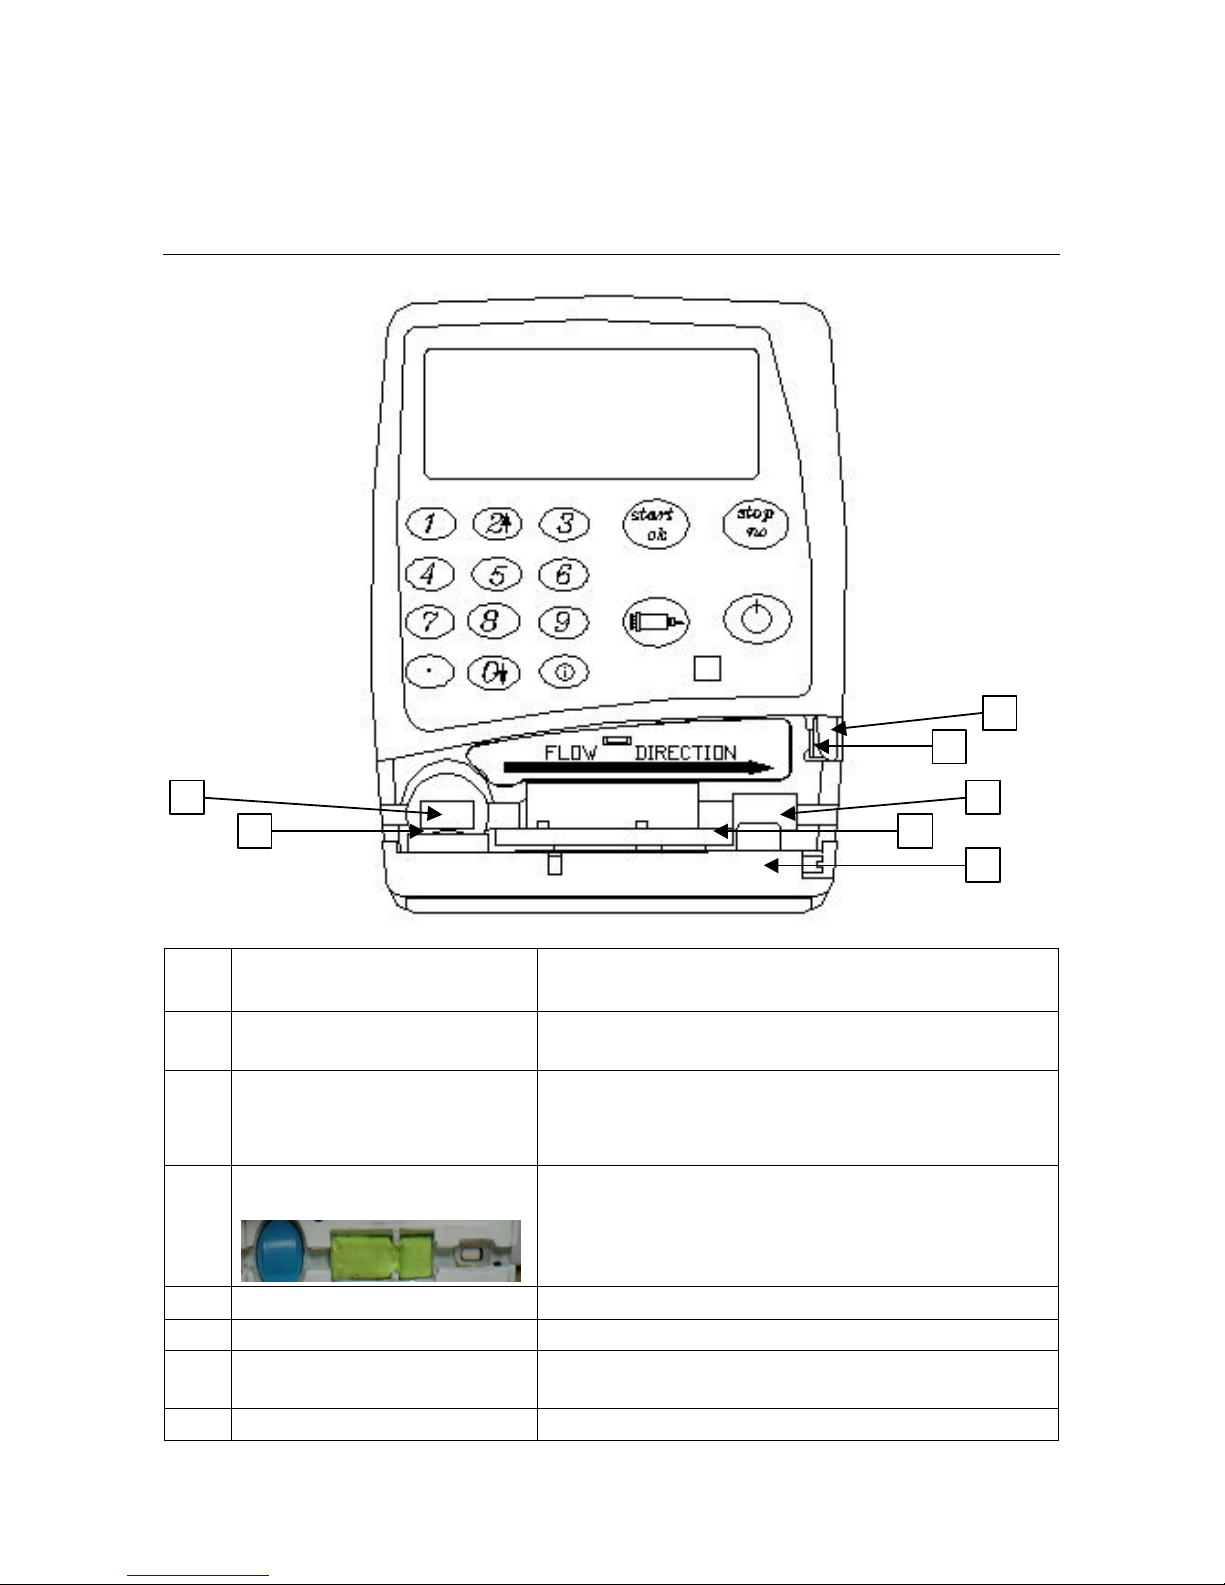
VET-PRO –with door open
No. Description
Function
1.
Latch holder
Holds the door closed when latch is in vertical
position.
2.
Pressure sensor
Detects downstream tubing restriction and
occlusion. Alarm level can be adjusted to suit
patient needs.
3.
Tubing Guide
Guide the administration set
4.
Pressing Plate
Connected to the door by 2 springs.
5.
Pump door
Covers the pressing plate.
6.
Air sensor – front
Ultrasonic air detector, which is mounted on the
front housing.
7.
Air sensor
-
door
Mounted on the door.
2
1
3
4
5
Page 15
VET-PRO Operator’s Manual
15
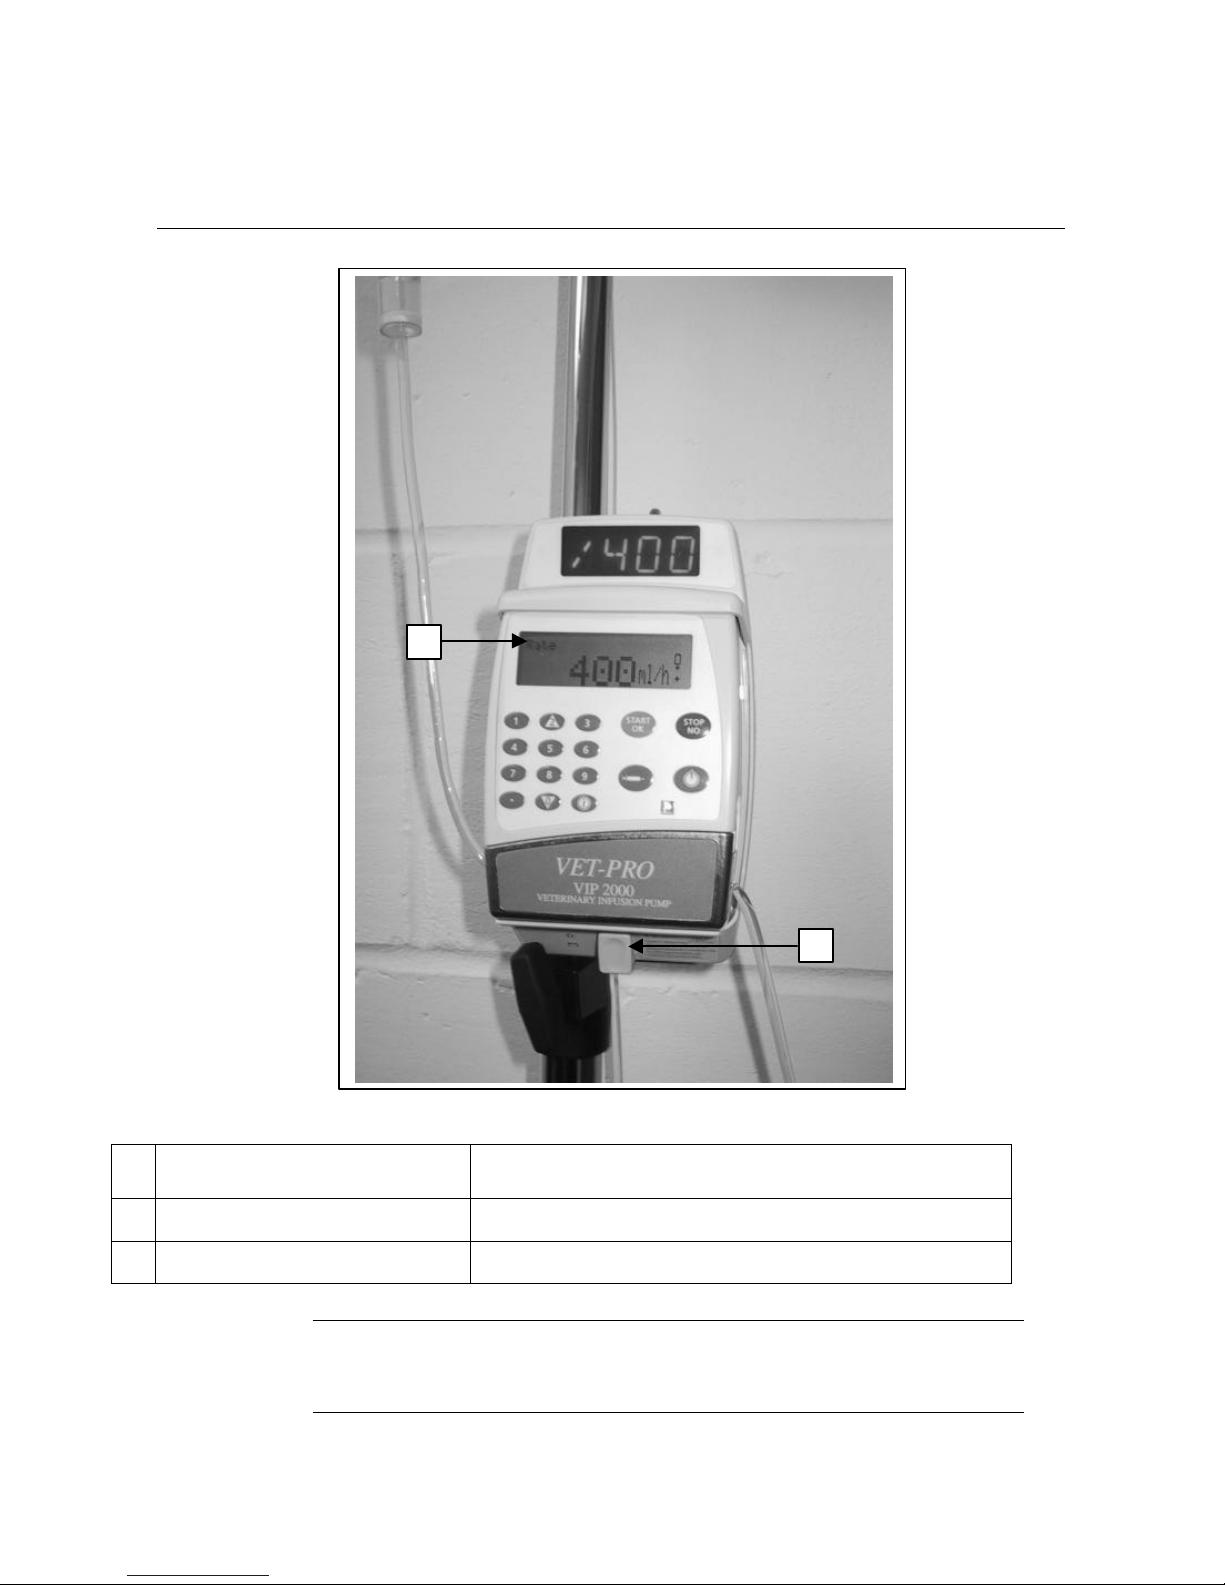
The Charger
IV Set Requirements
The VET-PRO pump should be operated only with the Bodyset.
The Bodyset administration set is supplied with an integrated valve (see
drawings below).
No
. Description Function
1.
Flow counter
Check the Flow
2.
Release Handle
Push to release the pump from the Charger.
F
Note:
The pump is protected against overcharging. In order to keep
your battery fully charged, connect the pump to the mains via the
charger whenever possible.
2
1
Page 16
VET-PRO Operator’s Manual
16
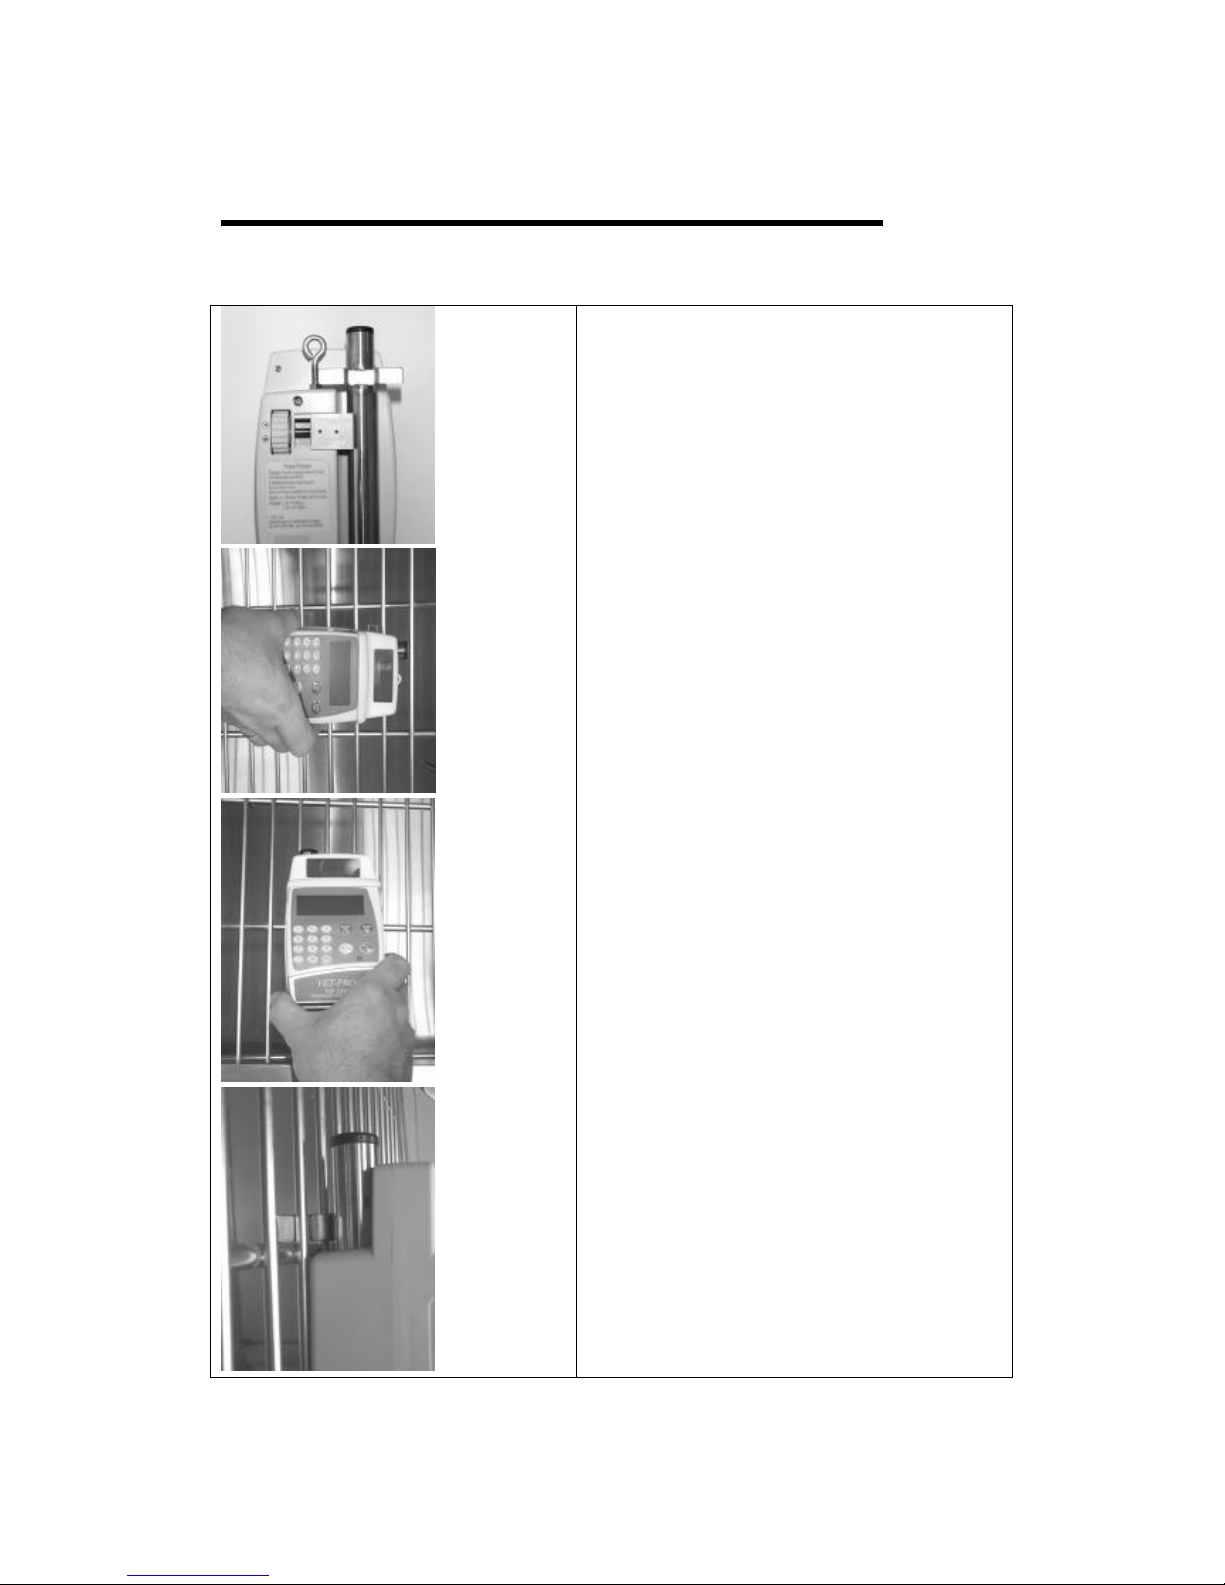
Optional Cage Bracket
Fig.1
Fig.2
Fig.3
Fig.4
Engage the pole of the bracket in the
slot on the rear of the charging base
(Fig.1). Rotate the clamp wheel until
the pole is held firmly. Ensure that the
horizontal arms of the bracket face
outward and are just above the top of
the pole slot.
Locate the arms of the bracket through
the grille of the cage door (Fig.2 & 3).
The arms should be rested on a
horizontal grille brace (Fig.4).
Stock code 129-050 is suitable for use
on most popular cage manufacturers
doors such as Suburban, Shorline,
Technik and HC Two.
Stock code 129-051 is suitable for use
on cage doors with a mesh size of
50mm x 50mm such as Geeling.
Please contact our sales team if you
need guidance on the suitability of
these brackets for your cage doors.
Page 17

VET-PRO Operator’s Manual
17
Unpacking:
1.
Carefully remove the pump and charger from the box.
2.
Make sure no items were damaged during shipment
3.
Make sure you have the following items:
•
VET-PRO Infusion Pump
•
Charger
•
Battery Pack
•
Operator’s Manual
•
Mains Cable
If any items are missing or damaged, contact your VET-PRO supplier.
Loading the Administration Set
F
Note:
Follow the Instructions supplied with the individual
administration set.
Use of any administration set, other than the original
manufacturers, may impair the operation of the pump and the
accuracy of the infusion.
1.
Lift the door latch to open the pump door.
2.
Insert the IV tubing into the tubing guide, following the direction flow label
located above the tubing slot. Insert the tubing from left to right, and avoid
stretching or pulling the tubing. Check key is located in correct position.
3.
Ensure that the distal flow valve is on the right hand side of the pump.
4.
Close the pump door. Press on the door to close firmly, ensure that the latch
is correctly applied.
F
Note:
Ensure that the tubing is inserted completely into the pumping
channel.
ADMINISTRATION SET RE-ORDER CODE 129-010
SUPPLIED IN PACKS OF 25
Page 18

VET-PRO Operator’s Manual
18
Flush Function (Priming)
Flush Function is used:
1.
Before starting a program (see instruction below);
2.
After the air in line alarm, as follows:
Press STOP/NO key to mute the alarm. Disconnect IV tubing from
patient; press the SYRINGE key to push air bubbles through.
When flushing is completed press START/OK key to resume program.
Flush operation
1.
Switch on the pump using the ON/OFF key. (Press until the self-test screen
appears). After a short self-test, the pump will display the program setting
and status followed by the last setting rate.
FLUSH
2.
Press the SYRINGE key to flush the
administration set.
ENSURE THE SET IS NOT CONNECTED
TO THE PATIENT !!
Press OK to start
3.
Press the START/OK key to start flushing.
4.
The display will show a graph indicating the
flush operation.
FLUSH 2 ml
0 4
5.
Once the flushing is completed, the display will change back to the previous
screen the pump was in, before flushing.
F
Note:
The flushing rate can be adjust, in adjust setting options, up
to 1200 ml/h. The default is 600 ml/hr. During flushing the
air in line alarm is disabled.
I
Warning
Always disconnect IV tubing from patient before starting
flushing procedure.
Page 19
VET-PRO Operator’s Manual
19
VET-PRO – Operation
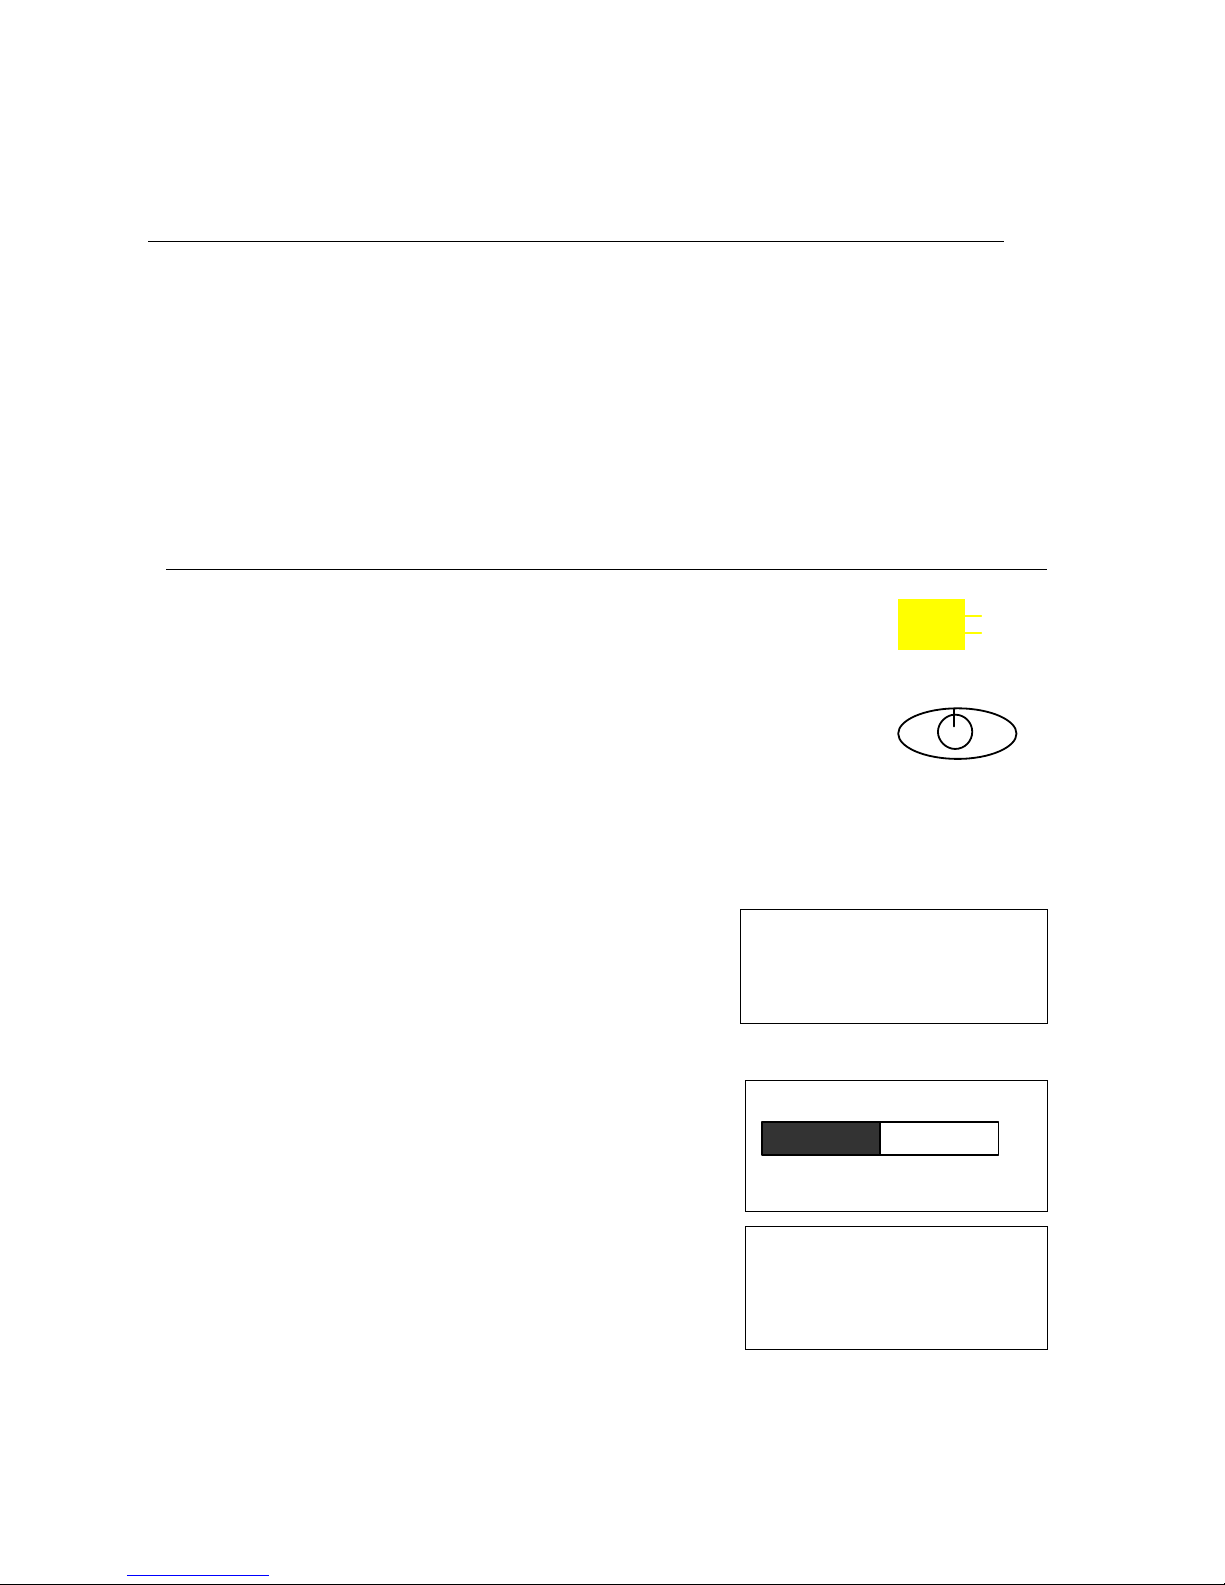
Before attaching the VET-PRO to a patient, run the following tests to verify that all
indicators and alarms work properly.
When an alarm is activated the following will occur:
1.
An alarm message will appear on the display.
2.
An audible alarm will be sounded.
3.
Infusion will cease.
Pump Operation Test:
1.
Click the pump into a Charger connected to AC power.
Verify that the CHARGE indicator is on (on charger).
2.
Load an administration set in the pump (as described on page 17).
3.
Switch on the pump using the ON/OFF key (press until the
self-test screen appears).
4.
The pump will display "Self Test" followed by the program selected and its
status. During the self-test a long beep will be performed. This procedure
verifies that the pump’s acoustic and visual features are working properly.
After overview, the display will show the last rate setting.
FLUSH
5.
Press the SYRINGE key to flush the
administration set.
Press OK to start
6.
Press the START/OK key to start flushing.
7.
The display will show a graph indicating the
flushing operation.
FLUSH 2 ml
0 4
Pump Unattended
Press start key
8.
When flushing is completed, wait without
pressing any key. Verify that when two
minutes have passed without any key being
pressed an audible alarm is activated and a
“Pump Unattended” message appears on the
display.
9.
Press the START/OK key to silence the alarm.
Page 20
VET-PRO Operator’s Manual
20
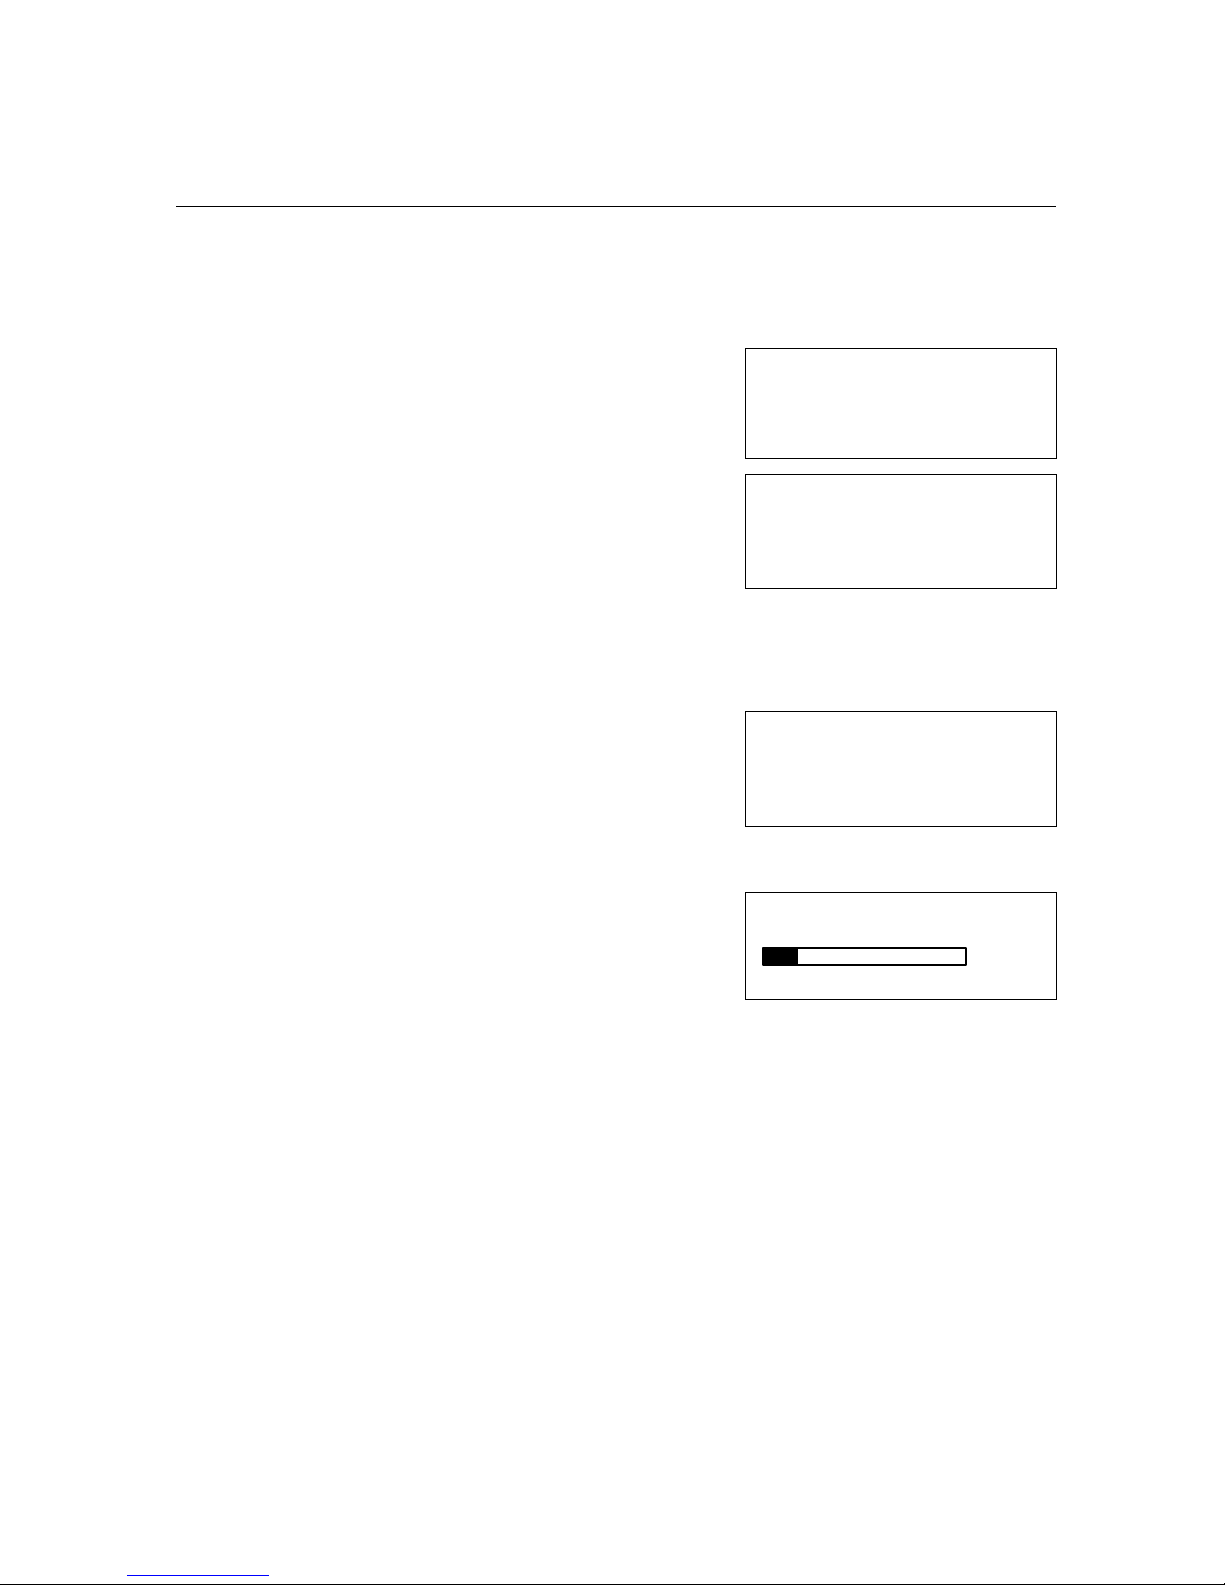
Air in Line - Alarm Test:
1.
Lift the door latch to open the pump door. Insert an administration set in the
tubing guide of the pump (as described on page 17).
2.
Close the door. Press the door until a click is heard.
Rate 500 ml/h
3.
Set the infusion rate at 500ml/hr, using the
Numeric keyboard.
Press OK for Volume
Volume 20 ml
4.
Set Volume at 20 ml.
Press OK to start
5.
Press the START/OK key to start operation. Turn the drip chamber upside
down, to allow an air bubble greater than 5 mm to enter into the
administration set.
Air in Line
6.
AIR alarm will be activated as soon as the air
bubble enters the set segment located behind
the pump door.
Clean air
7.
Press the STOP/NO key to turn the alarm off.
STOP
2 min
8.
STOP appears on the display.
Press OK to start
Page 21
VET-PRO Operator’s Manual
21
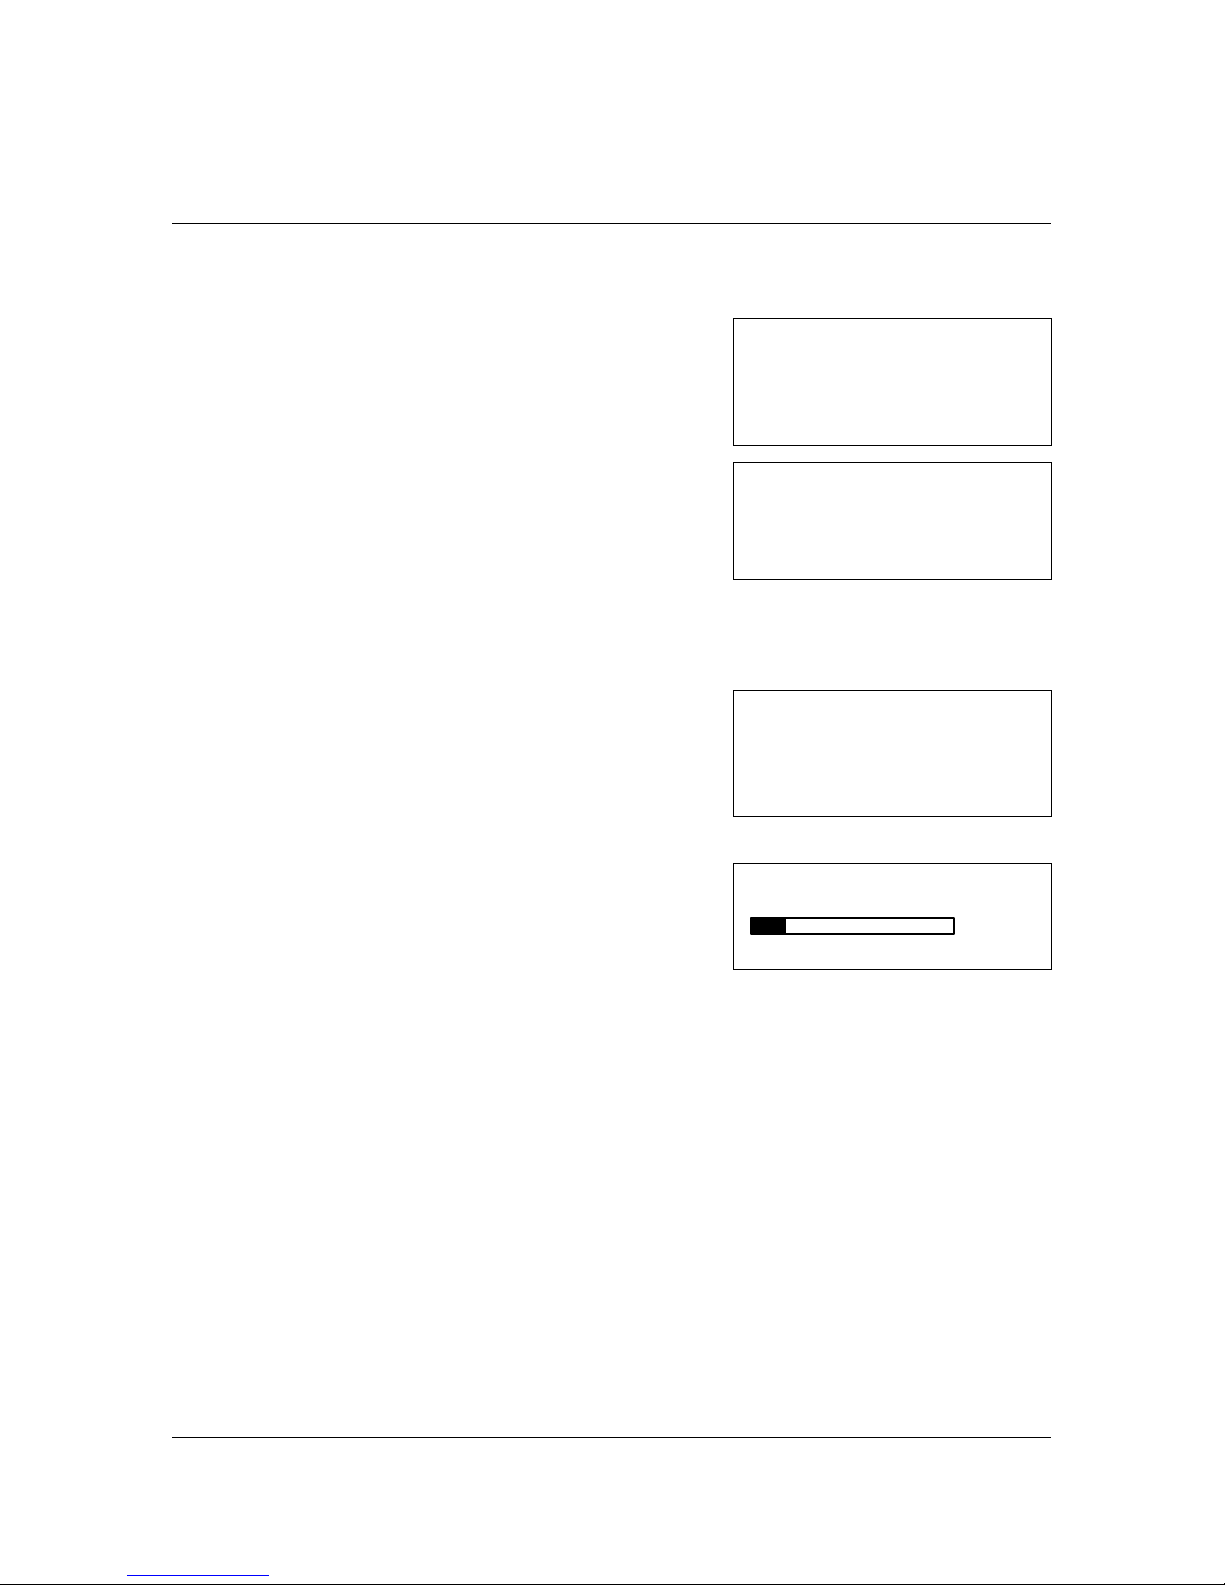
Door Open - Alarm Test:
1.
Insert an administration set into the pump (as described in page 17) and flush
it (as described on page 18).
Rate 500 ml/h
2.
Set the infusion rate at 500ml/hr, using the
numeric keyboard.
Press OK for Volume
Volume 20 ml
3.
Set Volume at 20 ml.
Press OK to start
3.
Press the START/OK key to start operation.
4. Open the pump door.
Door Open
5
Door Open alarm will be activated at once.
Close door
6.
Close the door.
STOP
2 min
7.
STOP appears on the display.
Press OK to start
Page 22
VET-PRO Operator’s Manual
22
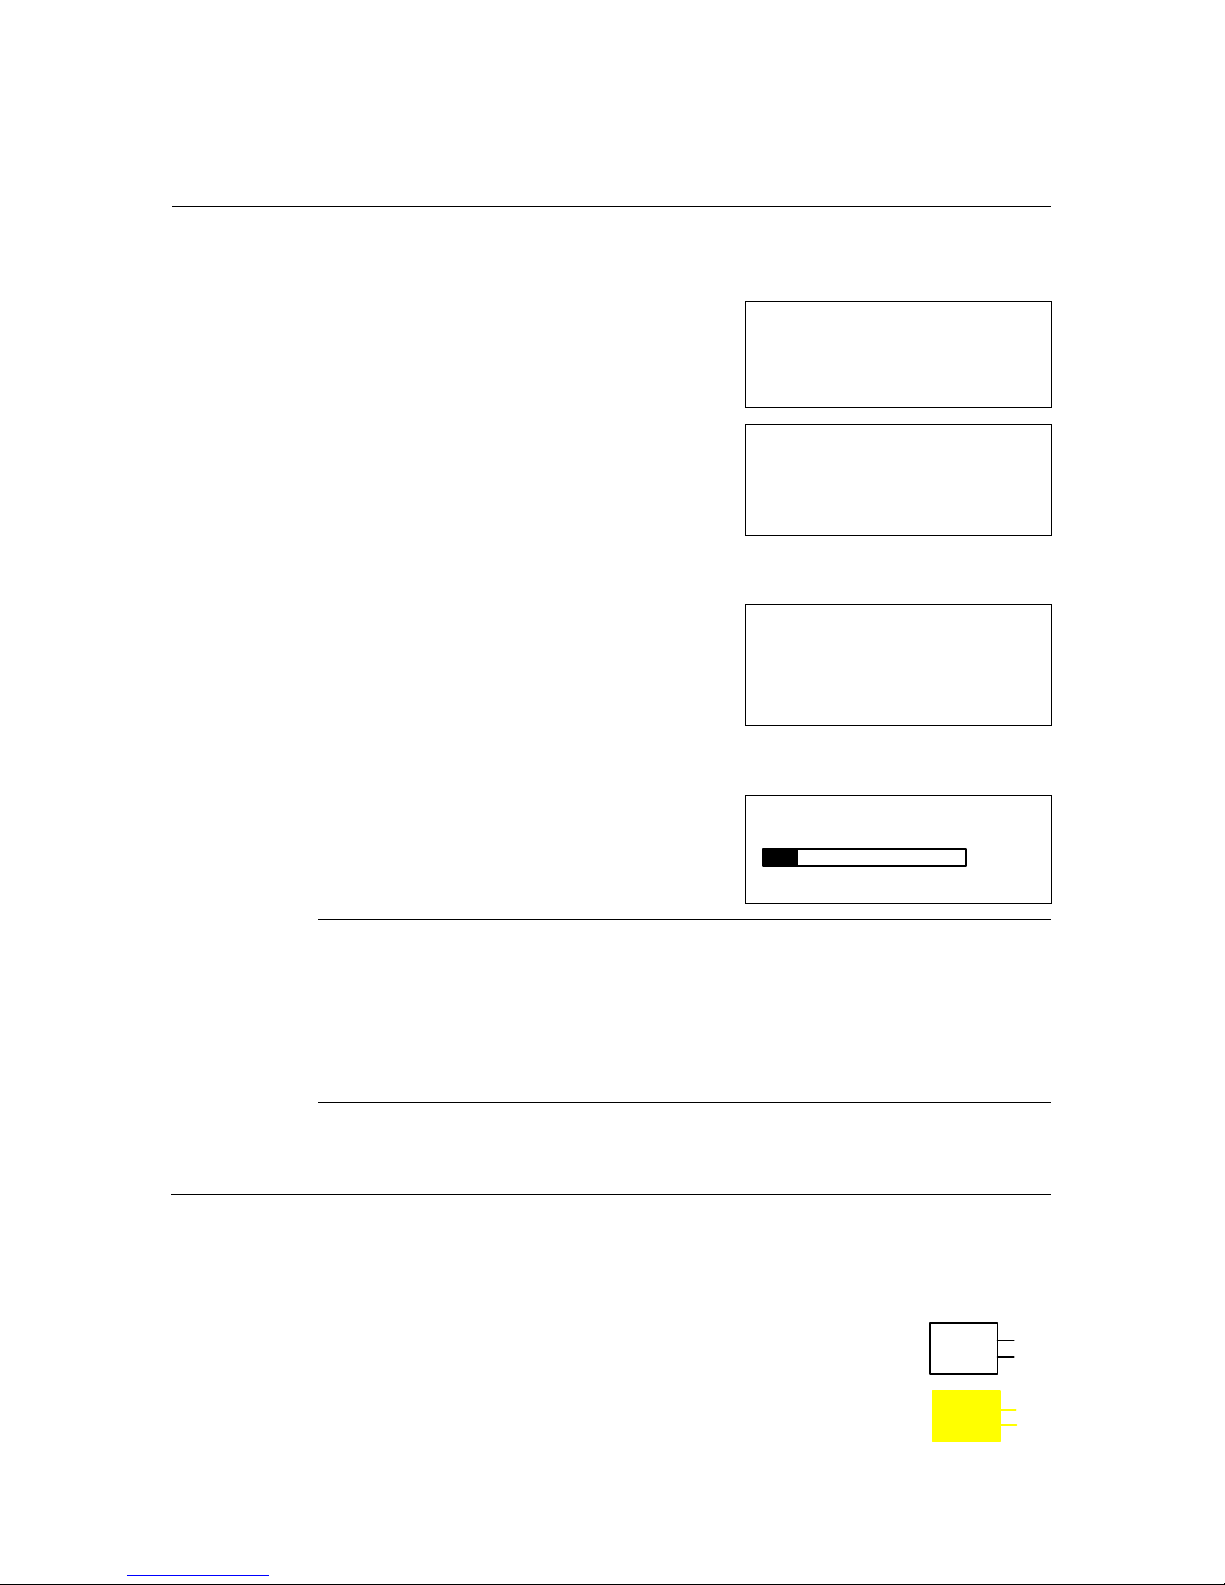
Down Occlusion - Alarm Test:
1.
Insert an administration set into the pump (as described in page 17) and flush
it (as described on page 18).
Rate 500 ml/h
2.
Set the infusion rate at 500ml/hr.
Press OK for Volume
Volume 20 ml
3.
Set Volume at 20 ml using the numeric
keyboard.
Press OK to start
4.
Occlude the administration set (between the pump and the patient).
5.
After 10 seconds Down Occlusion alarm will be
activated (At a rate of 60 ml/hr the Down
Occlusion alarm will occur after 60 sec. at a rate
of 1 ml/hr after 13 min.)
Down Occlusion
Press STOP to mute
6.
Press STOP/NO key to silence the alarm.
STOP
2 min
7.
STOP appears on the display.
Press OK to start
F
Note:
The pressure threshold can be changed to suit patient need (see
Changing the current default Pressure Limit, page 26).
Always ensure that the tubing and fluid are at least at room
temperature (>19 deg C ) Giving set tubing is effected by
temperature and the pump may not be able to operate is the tubing
is too stiff. This would cause a “Down Occlusion Alarm”
Charge Indicator Test:
1.
Click the pump into the Charger, connect the Charger to the mains and
check on the Charger that the pump's battery is being charged (red led for
charging and green led if the battery is full). Disconnect the power cord
from the AC power outlet.
2.
Verify that the CHARGE indicator is off.
3.
Connect the power cord to the AC power outlet. Verify that the
CHARGE indicator on the Charger is on.
Page 23

VET-PRO Operator’s Manual
23
Programs
The VET-PRO infusion pump features 5 different programs.
Following are the specifications for each program:
CONTINUOUS program
Rate: 0.1 to 1200 ml/hr
Total volume to be infused: 0.1 to 9999 ml.
25 STEPS program
User can design a specific protocol, for drug delivery,
which contains up to 25 steps.
Infusion Rate: 0.1 to 1200 ml/hr.
Volume: 9999 ml. For each step.
Accumulated volume for all steps- up to 10 liters.
TPN program
To be used for Total Parenteral Nutrition
The program has a taper up/taper down pattern. The
parameters to be set are: Total Volume, Time Up, Time
Down and Total Time. The pump will calculate the
maximal rate for verification.
INTERMITENT program
To be used for setting a Dose regiment, at set intervals.
PCA program
To be used for Pain Relief.
The PCA program combines basil rate and pre-programmed
Boluses.
Rate: 0 to 100 ml/hr.
Total volume to be infused: up to 1000 ml
Page 24
VET-PRO Operator’s Manual
24
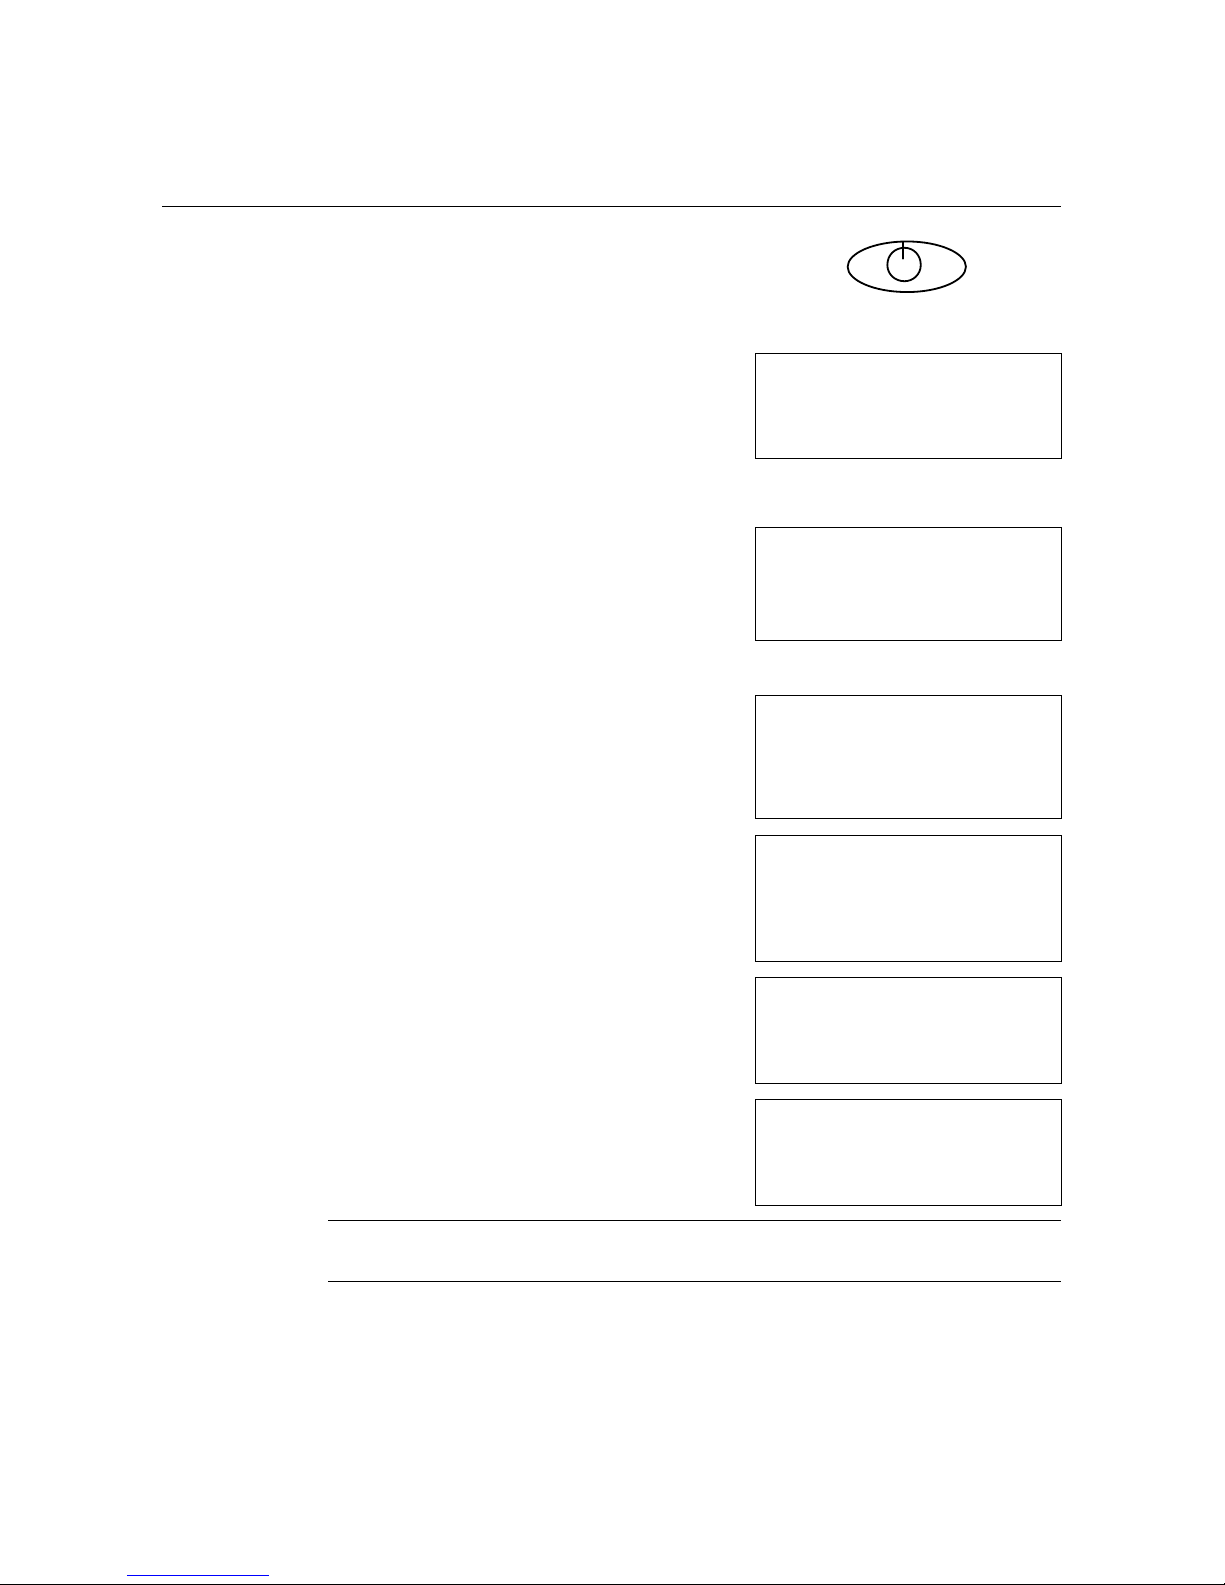
Changing Current Program:
1.
Switch the pump on by pressing ON/OFF key.
2. When the screen of Rate appears, press info key twice.
Volume Infused
Show Setting
3. Use ARROW keys to scroll to "Adjust Setting"
option.
=> Adjust Setting
4. Choose "Adjust Setting" with START/OK key.
Buzzer level
=> More …
5. Use ARROW keys (2?, 0?) to scroll to "More".
Show Setting
6. Confirm with START/OK key.
Technician
7. Set technician Code (Code 901), using the
numeric keyboard and confirm with
START/OK key.
Code
901
Pressure Default
=> Select Program
8. Scroll through the presetting parameters, using
the ARROW keys (2?, 0?), until the "Select
Program " option. Confirm with START/OK
key.
Flushing Volume
Select program:
=> CONTINUOUS
9. Choose the required program, using the
ARROW keys, and confirm with the
START/OK key.
TPN
History
=> Restart Pump
10.
Choose “Restart Pump” Option and confirm
with the START/OK key.
Pressure Default
F
Note:
The selected program will remain in the pump’s memory until
changed by the user.
Page 25

VET-PRO Operator’s Manual
25
F
Note:
User may change programs using the Short Cut:
CONTINUOUS
PROGRAM
1.
C
O N T
Press NO to change
When switching the pump on, after a short Self
Test, the pump will display the last selected
program for 5 seconds.
During this time, press the STOP/NO key for 2
sec. (Pressing any other key will elapse the pump
to the Rate screen).
Select program:
=> CONTINUOUS
2. The screen will show the “Select Program”
menu.
TPN
3. Choose the required program, using the ARROW keys,
and confirm with the START/OK key.
F
Note:
If the current selected program is PCA, the Short Cut option is not
available.
Page 26
VET-PRO Operator’s Manual
26
Down Occlusion Setting:
1.
Switch the pump on, by pressing ON/OFF key
2. When the screen of Rate appears, press info key twice.
Volume Infused
Show Setting
3. Use ARROW keys (2?, 0?) to scroll to "Adjust
Setting" option.
=> Adjust Setting
4. Choose "Adjust Setting" with START/ OK key.
Adjust setting:
=> Pressure Level
5. The option selected is “pressure level”.
Buzzer Level
6. Confirm with START/OK key.
Pressure setting
High
10 psi
7. Choose the desired pressure level, using the
arrow keys (2?, 0?).
Adjust ?? & press OK
8. Press the START/OK
key to store the parameter in the pump’s memory.
F
Note:
The following pressure parameters can be set:
Low = 5 psi (0.3 bar)
Normal = 7.5 psi (0.5 bar)
High = 10 psi (0.7 bar)
F
Note:
The selected pressure setting will remain in the pump’s memory
only until turning off (and then return to the default - HIGH).
F
Note:
In the event a down occlusion situation occurs, the patient is
protected by an anti-bolus feature, which prevents bolus delivery
to the patient when the downstream occlusion is released.
Page 27
VET-PRO Operator’s Manual
27
Connection of Pump to IV Pole
1. Connect the giving set to the medication bag. Mount the bag on an IV pole.
2. Click the pump into the Charger. Mount the Charger on an IV pole.
3. Connect the Charger via a standard power cord to a grounded AC outlet.
4. Open the door of the pump and insert the administration set into the pump’s
tubing guide (as described on page 17)
5. Switch the pump ON using the ON/OFF
key
(press until the self-test screen appears).
CONTINUOUS
PROGRAM
6. The program and status will appear on the
display followed by the last rate setting.
C
O
N
T
Press NO to change
7. Flush the administration set by pressing the SYRINGE key, and confirm
with START/OK.
8. Set the required program (see program select option on page 24) and continue
as described for every program setting.
9.
Verify that infusion is proceeding normally before leaving the pump
unattended.
Continuous Program
Switch the pump ON using the ON/OFF key.
CONTINUOUS
PROGRAM
C
O
N
T
Press NO to change
CONTINUOUS
Pump displays program name and status. The
status is either "Lock out" or "program"
(locking and unlocking the pump – see page
60).
C
O
N
T
LOCK OUT
Page 28

VET-PRO Operator’s Manual
28
Program Setting
F
Note:
Whenever you decide to set a new program, follow
instructions at the bottom of screen.
Rate over Volume
Rate 500 ml/h
1.
The pump will display the last set rate.
Use the numeric keys to change or
press START/OK to confirm.
Press OK for Volume
Rate: 500 ml/h
During operation the pump allows
rate titration, by pressing a
numeric or digital point key.
Adjust & press OK
F
Note:
The rate on the display will change during titration, however
operation rate will change only if the START/OK key is
pressed within 10 seconds confirming the rate change. If the
rate change is not confirmed within 10 seconds, the pump
will continue operation on the original rate, and the display
will return to the previous rate set.
F
Note:
From the STOP mode, the user may return to the Rate screen
by pressing twice on one of the numeric keys.
F
Note:
During stop or data setting mode, use the STOP/NO key to
return one step backwards: First press will erase the last digit
displayed, once all the digits are erased, pressing the
STOP/NO key will display the previous screen .
Volume 456 ml
Press OK to start
2.
When the Rate is confirmed, the
pump will display the last set volume
(if the time option is set off). Use the
numeric keys to change the Volume
or press START/OK to confirm and
start the program operation.
Setting Program Delay– Refer to
page 48.
Page 29

VET-PRO Operator’s Manual
29
.
During program operation, the pump
will display the rate in which the
program is operating.
Rate
250 ml/h
Note:
-If one of the values is changed during the programming
mode, the pump will not store the new value, unless changes
are confirmed by pressing the START/OK key.
-If the flush key is activated during data setting, the pump
will return to the original (previous) screen, once flushing is
completed.
Resume Press OK
In the event the program is in lock mode or if
the time option is on and the previous program
has been interrupted the pump will display the
Repeat/Resume screen.
C
O N T
Repeat Press NO
To continue the previous program (from where it stopped) press the
START/OK key.
To repeat the previous program from the beginning, or start a new
program (if pump is not in lock mode) press the STOP/NO key.
Volume over Time
Volume 456 ml
C
O N
T
Press OK key
1.
If time option is on (adjust setting –
see p. 60) after displaying program
name and status, pump will display
last set volume, set or confirm the
displayed number by pressing the
START/OK key.
otal Time 10:30
2.
C
O N
T
Press OK key
The display will show the time
screen, set the time, for a volume
over time program, and press
START/OK to start operation.
Setting Program Delay– Refer to
page 48
Page 30
VET-PRO Operator’s Manual
30
Time setting options:
A.setting 4 digits: 2 first digits will represent hours and the other 2 will
represent minutes
B.setting 2 digits for full hours
C.setting 1 digit for hours and using the digital point to set minutes.
D.using the digital point to set only minutes.
.
During program operation, the pump
will display the rate in which program
is operating.
Rate
250 ml/h
Note:
-If one of the values is changed during the programming
mode, the pump will not recall the new value, unless changes
are confirmed by pressing the START/OK key.
-If the flush key is activated during data setting, the pump
will return to the original (previous) screen, once flushing is
completed.
25 Steps Protocol
In the 25 steps program, the user can set up to twenty-five different
steps.Each step has its own rate and volume.The steps accumulation is
limited to a Volume of 10 liters. Protocol steps are delivered one after
another, sequentially, until all steps are completed.
Switch the pump ON using the ON/OFF key.
25 - Steps
PROGRAM
S
T
E
P
Press NO to change
25 - Steps
Pump displays program name and status. The
status is either "Lock out" or "program".
(locking and unlocking the pump – see page
50).
S
T
E
P
LOCK OUT
Page 31

VET-PRO Operator’s Manual
31
Program Setting
F
Note:
Whenever you decide to set a new program, follow the
instructions at the bottom of the screen.
Note:
-If one of the values is changed during the programming
mode, the pump will not store the new value, unless changes
are confirmed by pressing the START/OK key.
-If the flush key is activated during data setting, the pump
will return to the original (previous) screen, once flushing is
completed.
Step 1 Rate
100 ml/h
.
The pump will display the previous rate for the
first step. Set a new rate, using numeric keys,
or confirm pressing START/OK.
Press OK for Volume
Step 1 Volume
1000 ml
.
Pump will display the previous volume for first
step. Set a new volume, or confirm pressing
START/OK key.
Press OK to continue
3.
Pump will display the rate for step 2. Repeat directions as for step 1 and
repeat through all the steps required, up to 25.
Step 11 Rate
0 ml/h
4.
Press OK for Volume
After last required step, set rate to zero. This
indicates that all data required for the protocol
has been set. All protocols following the last
set protocol, will be automatically zeroed
.Press START/OK to confirm.
Total Steps 10
Total Volume 5000ml
5.
Press OK to start
After last step rate was set to zero or after 25
steps are completed, the pump will display the
accumulated data setting, to enable comparison
and verification. Press START/OK to start the
program or STOP/NO to scroll through all the
protocol settings again.
Setting Program Delay– Refer to page 48.
Rate Step 1 of 10
6.
During the program operation, the display
updates the user on which step the pump is
running.
S
T
E
p
100 ml/h
F
Note:
Pressing the STOP/NO key shall erase the last digit. Once
no digit is displayed, pressing the STOP/NO key will
change the screen to show the previous display.
Page 32
VET-PRO Operator’s Manual
32
TPN Program
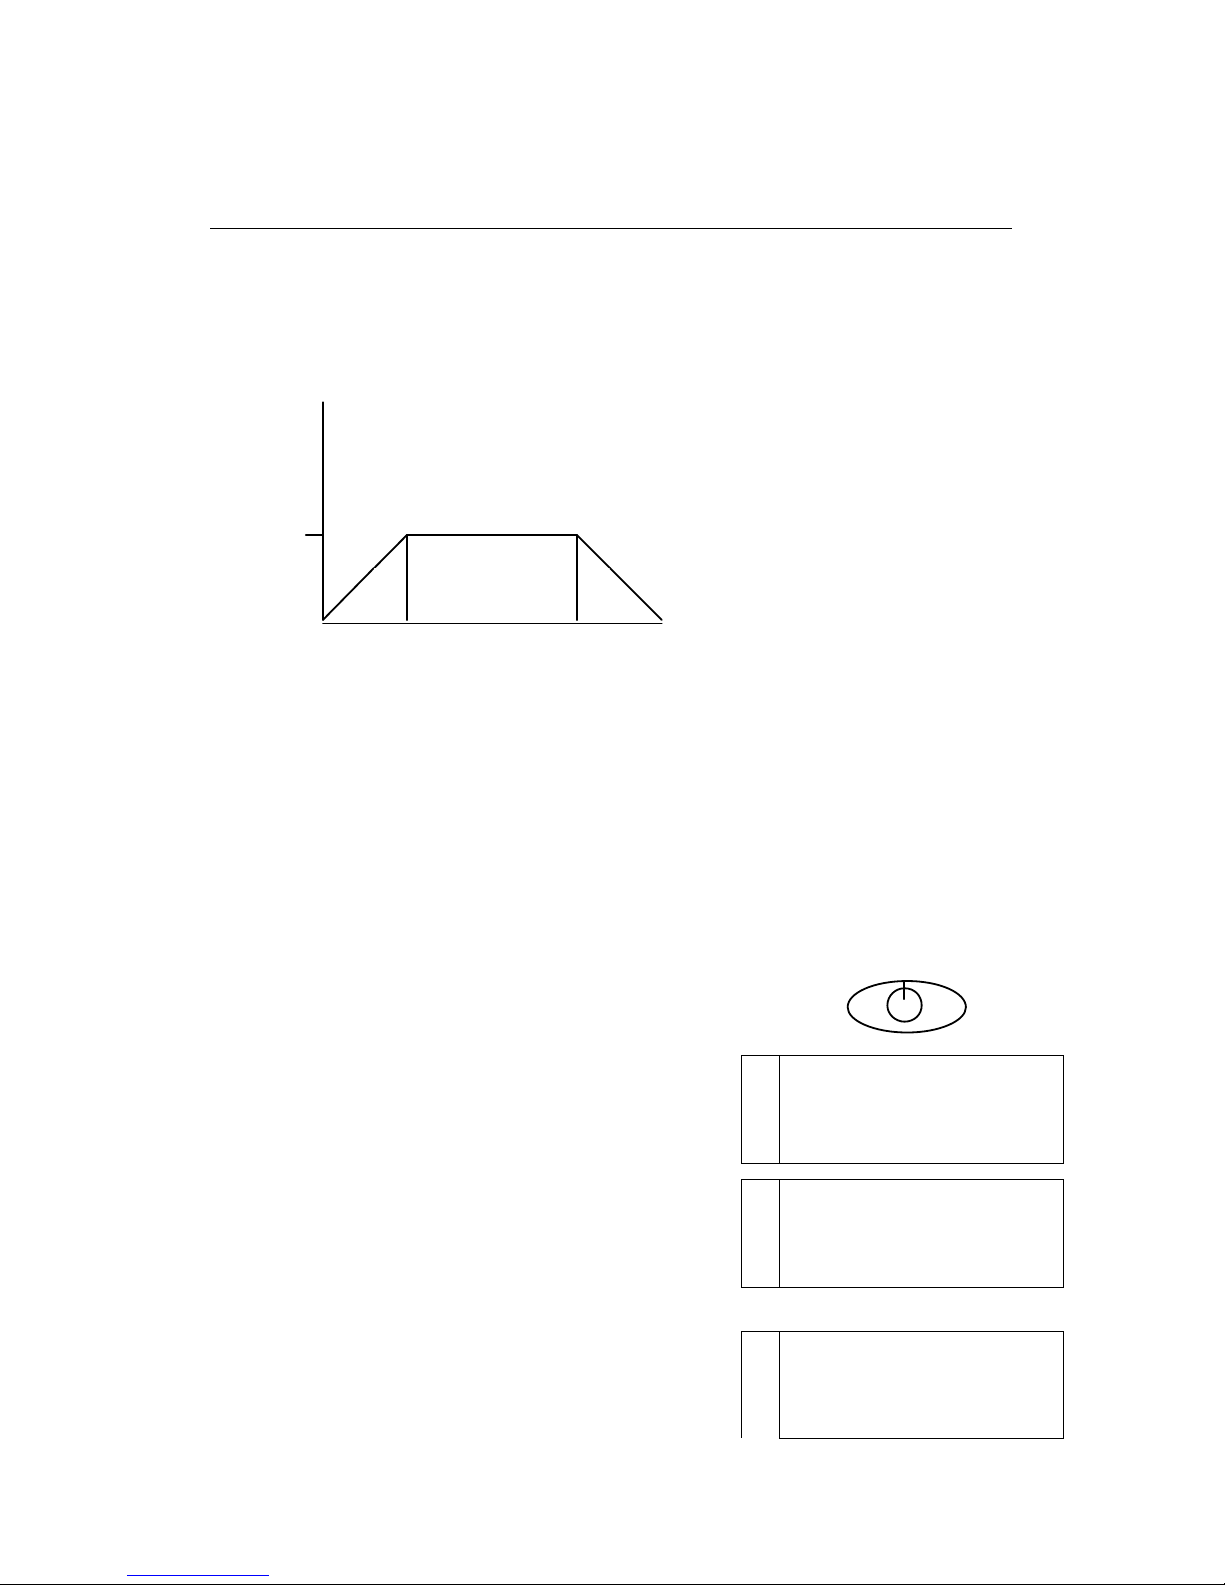
Total Parenteral Nutrition - This mode delivers an infusion while
automatically tapering up and down. The pattern of the program is a
trapezoid.
Rate
Time
On a TPN Program the user may set the total volume which corresponds
to the size of the bag to be infused, the total time, and the up and down
time. The pump displays the maximal rate, as calculated, from the set
parameters. The maximal rate display is used to verify that the setting
corresponds to the requested data, and to ensure that the maximal rate is
suitable to the patient.
Up and down time can be set to zero. A TPN program with up and down
time set to zero, is a continuous program.
Switch the pump ON using the ON/OFF key.
TPN
PROGRAM
T
P
N
Press NO to change
TPN
Pump displays program name and status. The
status is either "Lock out" or "program".
(locking and unlocking the pump – see page
50).
T
P
N
LOCK OUT
Resume Press OK
In the event a TPN program was interrupted
and was not completed, the pump will display
the Resume/Repeat screen.
T
P
N
Repeat Press NO
T1 T2 T3
Max Rate
T1 = Time UP
T2= Time FLAT
T3= Time DOWN
Page 33

VET-PRO Operator’s Manual
33
To continue the interrupted program, press the
START/OK key.
To repeat the previous program or start a new
Volume 1256 ml
Max Rate: 234 ml/h
T
P
N
Press OK to start
If you choose to complete an interrupted
program, the pump will display interrupted
program data. Scroll with the ARROW keys to
check program data. Pressing the START/OK
key will start the program operation.
Program Setting
F
Note:
Whenever you decide to set a new program, follow the
instructions at the bottom of the screen.
Note:
-If one of the values is changed during the programing mode,
the pump will not store the new value, unless the change is
confirmed by pressing the START/OK key.
-If the flush key is activated during data setting, the pump
will return to the original (previous) screen, once flushing
has been completed.
Volume 1256 ml
1.
The first parameter to set is the volume of the
TPN bag.
T
P
N
Press OK key
Total Time 12:30
T
P
N
Press OK key
2.
Set the total time for the program to run:
Options are:
a. Setting 4 digits - 2 first digits will represent
hours and the other 2 will represent minutes
b. Setting 2 digits for full hours
c. Setting 1 digit for hours and using the digital
point to set minutes.
d. Using the digital point to set only minutes.
Up Time: 0:30
3.
Set the time for the rate to taper up
(up to 4:15 h).
T
P
N
Press OK key
Down Time: 0:30
4.
Set the time for the rate to taper down
(up to 4:15 h).
T
P
N
Press OK key
Page 34

VET-PRO Operator’s Manual
34
Volume 1256 ml
Max Rate: 108 ml/h
T
P
N
Press OK to start
5.
The pump will calculate all the set data and
display the Maximal rate for the program (to
be infused during Flat period). Press the
START/OK key to start the program.
Setting Program Delay– Refer to page 48.
F
Note:
During the stop or data setting mode, use the STOP/NO key to
return one step backwards: First press will erase the last digit
displayed, once all the digits are erased pressing the STOP/NO
key will display the previous screen .
Rate U
P
2 ml/h
6.
During the TPN program operation, the pump
will display the actual rate and program
direction (Up/Flat/ Down).
Program operation will start from 2 ml/h and
will increase to the maximal rate.
Rate
. During the Flat session the rate will not change
and the pump will show the following message:
F
L A T
108 ml/h
Rate
.
During the last part of the program (T3), the
program will start to decrease the infusion rate
according to the set taper down time.
D
O W N
25 ml/h
F
Note:
T
P
N
Taper Down: 0:30
Press OK key
If the program must be interrupted
early, and the planned taper down
time must commence immediately
press the STOP/NO key continually
(2 sec) to stop the pump operation
and display Taper Down screen.
Set a new time or confirm the default setting. Press the START/OK
key to start the taper down process immediately.
Page 35
VET-PRO Operator’s Manual
35
Intermittent Program
This is a special program, which enables the design of a Dose delivery
protocol at set intervals. Each Dose will be given at a set time. Between
Doses the pump will Keep the Vein Open. The infusion program
continues until the total infusion bag is infused.
This “Launch and Forget” program enables the operator to program
medication treatment for long treatments. For treatments like, IV
Antibiotics, giving every 4 hours a dose of 100 ml, the intermittent
program is saving 5 administration sets, during 24 hours, and essential
time of the operator.
Example: Programs setting
Program
Rate Volume Time
Period-1
100 ml/hr 100 ml. 1:00
Period-2 - KVO
5 ml/hr. 20 ml. 4:00
Period-3
100 ml/hr 100 ml. 1:00
Period-4 - KVO
5 ml/hr. 20 ml. 4:00
Period-5
100 ml/hr 100 ml. 1:00
Period-6 - KVO
5 ml/hr. 20 ml. 4:00
Switch the pump ON using the ON/OFF key.
Intermittent
PROGRAM
I
N
T
R
Press NO to change
Intermittent
Pump displays the program name and status.
The status is either "Lock out" or "program".
(locking and unlocking the pump – see page
50).
I
N
T
R
LOCK OUT
Page 36
VET-PRO Operator’s Manual
36
Program Setting
F
Note:
Whenever you decide to set a new program, follow the
instructions at the bottom of the screen.
Note:
-If one of the values is changed during the programing mode,
the pump will not store the new value, unless the change is
confirmed by pressing the START/OK key.
-If the flush key is activated during data setting, the pump
will return to the original (previous) screen, once flushing
has been completed.
Rate 4 ml/h
1.
The pump will display the last set rate. Change
or press START/OK to confirm.
Press OK for Volume
Dose Vol: 100 ml
2.
The pump will display the last set Dose
Volume. Change or press START/OK to
confirm
Press OK to continue
Pause 04:00
3.
Adjust the time pause between Doses (up to
20:00 hours), or confirm the last setting by
pressing the START/OK key.
Press OK to continue
Volume 1000 ml
4.
The pump will display the last set Volume
(total volume to be infused). Use the numeric
keys to change or press START/OK to
confirm and start program operation.
Press OK to start
5.
During the intermittent program the display
will show continually the actual rate of
infusion.
Rate
5 ml/h
6.
During a pause between the doses, the display
will show the KVO screen.
Delay 4:00
KVO 5 ml/h
Page 37

VET-PRO Operator’s Manual
37
Rate: 500 ml/h
During operation the pump allows
rate titration, by pressing a
numeric or digital point key.
Adjust & press OK
F
Note:
The rate on the display will change during titration, however
the operation rate will change only if the START/OK key is
pressed within 10 seconds confirming the rate change. If the
rate change is not confirmed within 10 seconds, the pump will
continue operation on the original rate, and the display will
return to the previous rate setting.
F
Note:
During stop or data setting mode, use the STOP/NO key to
return one step backwards: First press will erase the last
digit displayed, once all the digits are errsed pressing the
STOP/NO key will display the previous screen .
F
Note:
Delay Before start option is cancelled in the Intermittent
program.
PCA Program –
With protocols
Patient Control Analgesia is a program used in subcutaneous, IV or
epidural pain relief. Pain management is undertaken by delivering a
continuous basal rate, in combination with pre-programmed Boluses. The
pump will deliver only the boluses corresponding to the preset time
intervals. All attempts to obtain a bolus are stored in the pump memory.
The operator can read these statistics and adjust the settings as required.
It is possible to set and store up to 5 different protocols for PCA,
including names of drugs.
Switch the pump ON using the ON/OFF key.
Page 38

VET-PRO Operator’s Manual
38
PCA
P
C
A
PROGRAM
PCA
P
C
A
PCA MODE
PCA
P
C
A
Epidural Mode
Pump displays program name and status. The
status is either " Program ", "PCA Mode" or
“Epidural Mode”.
The PCA program operates only in a lock
mode.
Program mode will be displayed if no protocol
has been locked.
PCA mode will be displayed if a protocol has
been locked and Epidural mode is Off.
Epidural mode will be displayed if a protocol
has been locked and Epidural mode is On – see
epidural mode chapter.
In all cases entering the PCA parameters and/or
changing them, requires a code.
Program Setting
F
Note:
Whenever you decide to set a new program, follow
instructions at the bottom of the screen.
1.
To enter PCA menu, pump will require a code.
Use numeric keys to set code 007 and confirm
with START/OK key.
P
C
A
Enter Code
007
Press OK key
.
P
C
A
=> Flush
MD Bolus
History
Pump will display the PCA menu. Use the
arrow keys to scroll through the different
options, and select the required option, using
the START/OK key. Selecting the “More..”
option will display the Adjust Setting second
selection menu.
3. Flushing is disabled during operation, therfore, always flush the set
before starting a program.
Selecting the flush option from the PCA menu, will display the flush
previous screen. Pressing the START/OK key will activate the flush
procedure. If no key will be pressed within 10 sec. the pump will return to the
PCA menu screen.
When the flush is completed the pump will go back to the PCA menu screen.
F
Note:
The flushing rate can be adjusted, in adjust setting options,
up to 1200 ml/h. The default is 600 ml/hr. During flushing
the air in line alarm is disabled.
Page 39
VET-PRO Operator’s Manual
39
I
Warning
Always disconnect IV tubing from patient before starting
flushing procedure.
4.
Select the “Modify Program” option and press
the START/OK key.
P
C
A
Select Program
=> Modify Program
More
5.
Use the numeric key to set the code 008 and
press the START/OK key.
P
C
A
Enter Code
008
Press OK key
Epidural Mode
OFF
6.
Adjust ?? & press OK
If Epidural mode is required (see p.53) use
arrows key to change the setting to ON and
approve using the START/OK key.
To continue with epidural mode OFF, press
START/OK key and move to step 8.
Air sensor alarm
ON
Adjust ?? & press OK
7.
If Epidural Mode was set ON, the user will
have to decide if to set the air alarm on or off.
Use arrows key to change the setting as
required and approve using the START/OK
key.
8.
P
C
A
Clear History &
Start New Bag
Press the START/OK key to start new bag and
clear previous program data. Pump will display
bag volume screen - continue to step 9.
Pressing the STOP/NO key will display
program accumulation screen. Pressing
START/OK key from accumulation screen
will take the VTBI left from previous program
as total vtbi for the new program. continue to
step 10.
9.
Pump will display the Bag Volume screen
(with total volume of previous program). Use
the numeric keys to set a new value or approve
the previous value, using the START/OK key.
P
C
A
Bag Vol: 500 ml
Press OK key
A:MORPHINE
B: METHADONE
10.
C: PETHIDINE
Pump will display the list of 5 protocols with
drug names. Use the arrow keys to scroll
through the options.
Pressing the START/OK key will display the
rate screen of the chosen protocol.
Pressing the STOP/NO key twice will enable
the user to change the drug name.
Page 40

VET-PRO Operator’s Manual
40
Use the STOP/NO key to erase the displayed drug name.Use the arrow keys
and keys of 4 and 6 to move between letters. Select the letters using the
START/OK key. Once the protocol name is completed, return the select key
to the empty space, before the letter A and repeatedly press the START/OK
key until the display returns to the Protocol List.
11.
P
A
Rate 50 ml/h
Adjust & press OK
Pump will display the rate screen (the chosen
protocol will be displayed on the left column of
the screen). Use the numeric keys to set a new
value (up to 100 ml/hr) or approve the previous
value, using the START/OK key. Rate can be
displayed in mg/ml, as well. Using this option
– go to step 12, if not, continue to step 13.
12.
P
C
A
Concentration
0.5 mg/ml
From the rate screen press the STOP/NO key 3
times to display the concentration screen. Use
numeric keys to set concentration and approve
by pressing the START/OK. Pump will go
back to the protocols list.
To return from mg to ml, press STOP/NO key
twice, from rate screen, enter a concentration of
0 mg/ml, and press the START/OK key for
approval.
13.
Pump will display the Bolus screen. Use the
numeric keys to set a new value or approve the
previous value, using the START/OK key.
P
A
BOLUS 5 ml
Adjust & press OK
14.
P
A
LockTime 60 Min
Adjust & press OK
Lock time is the minimal time between
boluses. When a bolus is required during the
lock time, a beep will be sounded but no bolus
will be given. Use the numeric keys to set a
new value or approve the previous value, using
the START/OK key.
15.
P
A
4 H Limit 10 ml
Adjust & press OK
4 H Limit is the maximum volume to be given in 4
hours. Once this volume will be infused the pump will
operate in the KVO mode, to complete the 4 hours.
Use the numeric keys to set a new value or approve the
previous value, using START/OK key.
16.
PCA program operates only in a lock mode.
Press the START/OK to lock the program or
STOP/NO to go back to protocols list and
scroll again through the data.
P
C
A
Lock:Press OK
Scroll:Press NO
Page 41
VET-PRO Operator’s Manual
41
Bag Vol: 500 ml
Volume Left 500
Infused 0
17.
P
A
Press OK to start
The pump will display the protocol
accumultion screen. Use the arrow keys to
scroll through the data. Press the START/OK
to start the program operation. Pressing the
STOP/NO twice will go back to menu screen.
Note:
-If one of the values is changed during the programing mode,
the pump will not store the new value, unless the change is
confirmed by pressing the START/OK key.
MORPHINE
Rate 50 ml/h
18.
During the PCA program the display will show
the selected protocol, the name of the drug, the
rate of operating and the bolus volume.
P
A
BOLUS 5 ml
Volume 5 ml
19.
B
O
L
U
0 2.1 5
Pressing the Syringe key and approving with
START/OK key will activate the Bolus
Operation. When the Bolus is given, the pump
will display the progress of the procedure.
A bolus can also be given by pressing twice
on the bolus cable.
20.
P
C
A
Resume:Press OK
Menu:Press NO
After a program has been locked, whenever the
pump will be turn on, resume-menu screen will
be displayed. Pressing START/OK key will
display accumulation screen, with Volume to
be infused, as volume left from previous
program. User can only continue previous
program by pressing again START/OK key.
Pressing STOP/NO key, will display code
setting screen. Set code 007, to enter the PCA
menu.
Start new bag
1.
Selecting “Start new Bag”, from the PCA
menu, will display another screen for approval.
P
C
A
History
=> Start New Bag
Select Program
Page 42

VET-PRO Operator’s Manual
42
2.
Pressing the START/OK key will start a new
bag (Set total bag as Volume to be infused with
no regards to previous Volume Infused). All
other parameters are locked and can not be
changed. Pressing the STOP/NO key will go
back to the menu.
Start New Bag
Resume – Press OK
Air Sensor Alarm
ON
3.
Adjust ?? & press OK
Pump will display Air sensor alarm message, if
epidural mode is On. If epidural mode is off,
air alarm is automatic on and pump will display
accumulation screen – continue to step 4.
If epidural mode is on, user can choose to set
air sensor to OFF (use arrow keys to change air
sensor status and press START/OK key for
approval).
Bag Vol: 100ml
Volume Left 100
Infused 5
4.
P
C
A
Press OK to Start
Data includes previous Volume Infused.
Pressing the START/OK key, from
accumulation screen, will start program
operation. Pressing the STOP/NO key will go
back to display resume-menu screen.
F
Note:
After end program, user can start a new bag without a code.
Pump will display the option to start a new bag or going
back to menu. Pressing START/OK key will display
program accumulation screen. Approving with START/OK
will start the program.
Selecting a Program
1.
Selecting “Select Program”, from the PCA
menu, will display 2 options – to start new bag
or to continue with previous bag.
P
C
A
Start New Bag
=> Select Program
Modify Program
2.
P
C
A
Clear History &
Start New Bag
Pressing the START/OK key will clear the
volume infused history and start a new bag.
Pressing the STOP/NO key will continue the
program with previous Volume Infused. In
both cases pump will continue to display
accumulation screen.
Page 43

VET-PRO Operator’s Manual
43
Bag Vol: 500ml
Volume Left 500
Infused 0
3.
P
C
A
Resume - Press OK
Pressing the START/OK key will display the
protocols list. Pressing the STOP/NO key will
display again PCA main menu.
A:MORPHINE
B: METHADONE
4.
Use the arrow keys to scroll through different
protocols and select with the START/OK key.
C: PETHIDINE
Rate 50 ml/h
BOLUS 5 ML
LockTime 60 Min
5.
Pump will display the protocol accumulation
screen. If Epidural mode was set to OFF,
pressing START/OK key will start program
operation.
P
A
4 H Limit 100 ml
Air sensor alarm
ON
Adjust ?? & press OK
6.
If epidural mode is On, pump will display Air
sensor alarm message. User can choose to set
air sensor to OFF (use arrow keys to change air
sensor status and press START/OK key for
approval). Press the START/OK key to start
operation.
MD Bolus
P
C
A
Flush
=> MD Bolus
History
P
C
A
MD Bolus
Volume 2 ml
Press OK to start
Selecting the MD Bolus, from PCA menu, will
display the MD Bolus setting screen. If no key
is pressed within 30 sec. the pump will go back
to the code screen.
Use the numeric keys to set the Bolus Volume,
up to 25.5 ml.
When the Bolus is completed the pump will
display the Resume/Menu screen. Press the
STOP/NO key to go back to the menu code
screen or the START/OK key to display the
program accumulation screen.
Page 44
VET-PRO Operator’s Manual
44
History
P
C
A
MD Bolus
=> History
Select Program
H
2
4
From 12.01.02 11:10
To 13.01.02 11:10
Given: 200 ml
Bol. Given: 4
Selecting “History“ will display the PCA
operation history for the last 24 hours or last
program, if started within the last 24 hours.
Pump will display: Volume Infused, Bolus
Given and Bolus attempted. Use the
ARROW keys to scroll through data.
Use the down ARROW key to scroll to the
information regarding the last 8 hours. Use
the ARROW keys to scroll through the data.
H
8
From
To 13.01.02 11:10
Given: 80 ml
Bol. Given: 2
Press the info key for details per hour. Use the
ARROW keys to scroll through the data.
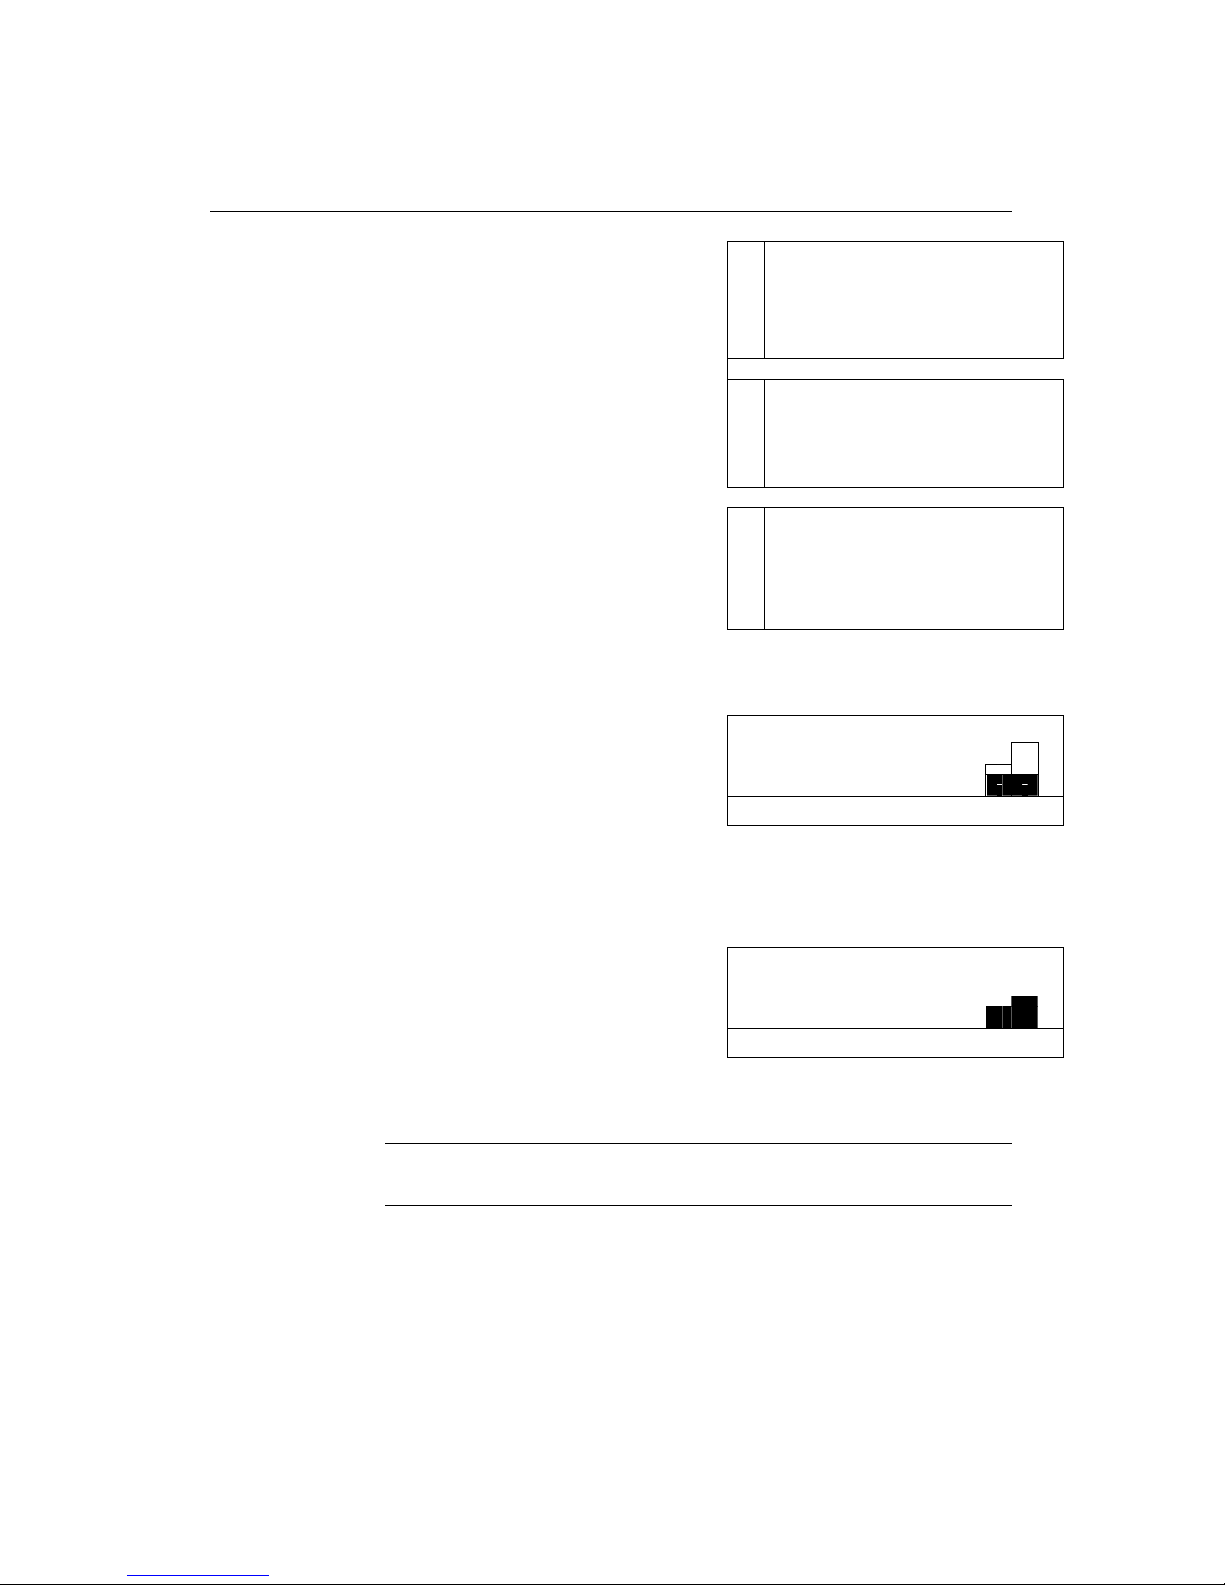
Boluses Last 24 Hr
Press the info key once more to display the
Boluses given and attempted for the last 24
hours or last program, in a graphic way.
Every column in the graph represents 1 hour.
The black areas in each column are the
boluses given and the white areas are the
patient attempts for boluses.
Volume Last 24 Hr
Press the info key once more to display the
Volume infused for the last 24 hours or last
program, in a graphic way.
Every column in the graph represents 1 hour.
F
Note:
History can also be displayed during operation, by
pressing the STOP/NO key and then the info key.
Page 45

VET-PRO Operator’s Manual
45
PCA Program – Epidural Mode
The epidural mode is a variation of the PCA Protocol mode with 2 main
differences: the Air in line and back pressure detection operate differently
than in other programs.
Air in Line Alarm
Epidural Mode
Air Sensor Disabled
There is a choice in air detection system to
disable the air in line alarm when Epidural
mode is ON. When pump operates in Epidural
mode, the display will show every 8 seconds
either the message “Epidural mode, air sensor
disabled” or “Epidural mode, air sensor
enabled”.
Pressure Sensor
In both Bolus mode (bolus request by user and MD bolus) and during
flushing, the operation rate will vary as a result of the pressure sensor
reading.
In case that the back pressure will rise above a preset border, the Bolus
and flushing operation rate will go down to maintain a preset
backpressure.
This system may increase operation time, but protect the patient from
high back pressure infusion.
F
Note:
During Epidural mode, pressure limit will be 20 psi, with
no regards to the pressure setting. In case that although
the rate was adjusted the pressure reach 20 psi an alarm
will be activated.
After exit from Epidural mode, pump will automatically
return to operate according to the pressure setting.
Setting Epidural mode to ON
Epidural Mode
OFF
Adjust ?? & press OK
Whenever the user chooses to modify a
program (using code 008), the epidural mode
will be set to OFF. Use arrows key to change
the setting to ON and approve using the
Page 46

VET-PRO Operator’s Manual
46
Air sensor alarm
ON
Adjust ?? & press OK
After setting the Epidural Mode to ON, the
user will have to decide if to set the air alarm
on or off. Use arrows key to change the
setting to ON and approve using the
START/OK key.
If epidural mode is on, whenever the user chooses the option to start a
new bag or select a program, the pump will display the option to set air
alarm on/off (if epidural mode is off, air alarm is automatically on).
F
Note:
If the user chooses to resume the program from PCA first
screen (before entering PCA menu) all epidural setting
will remain without confirming it with the user.
PCA Program –
Without protocols
There are models, in which the PCA program has no protocol options. In
those models no code is required to set or change the PCA data. The
pump should not be in the lock mode (if required, unlock the pump as
described on page 51).
In this type of PCA, the user should only set or approve the Bag Volume,
Program Rate, Bolus Volume and Locking time (between boluses).
Setting is as described in the PCA Program with Protocols.
Page 47
VET-PRO Operator’s Manual
47
Info Mode
Pressing on the info key during operation will
display the total Volume To Be Infused and the
Infused Volume. The screen will be displayed
for 7 seconds.
Infused
Pressing twice on the info key during operation
will display the battery status.The screen will be
displayed for 7 seconds.
Battery Level
t + 25c
Pressing 3 times on the info key during
operation will display the administration set
temperature.The screen will be displayed for 7
seconds.
This option is not available in the 25 steps
program.
Boluses
A
ttempted: 3
Given: 1
Pressing 3 times on the info key, during PCA
program, will display Boluses History, from
beginning of the program operation.
P
C A
Delay 60Min
Pressing 4 times on the info key during
operation will display the time left until the end
of the program. This Option is not available in
the 25 steps program and in the PCA program.
Time Left
0:59
Time
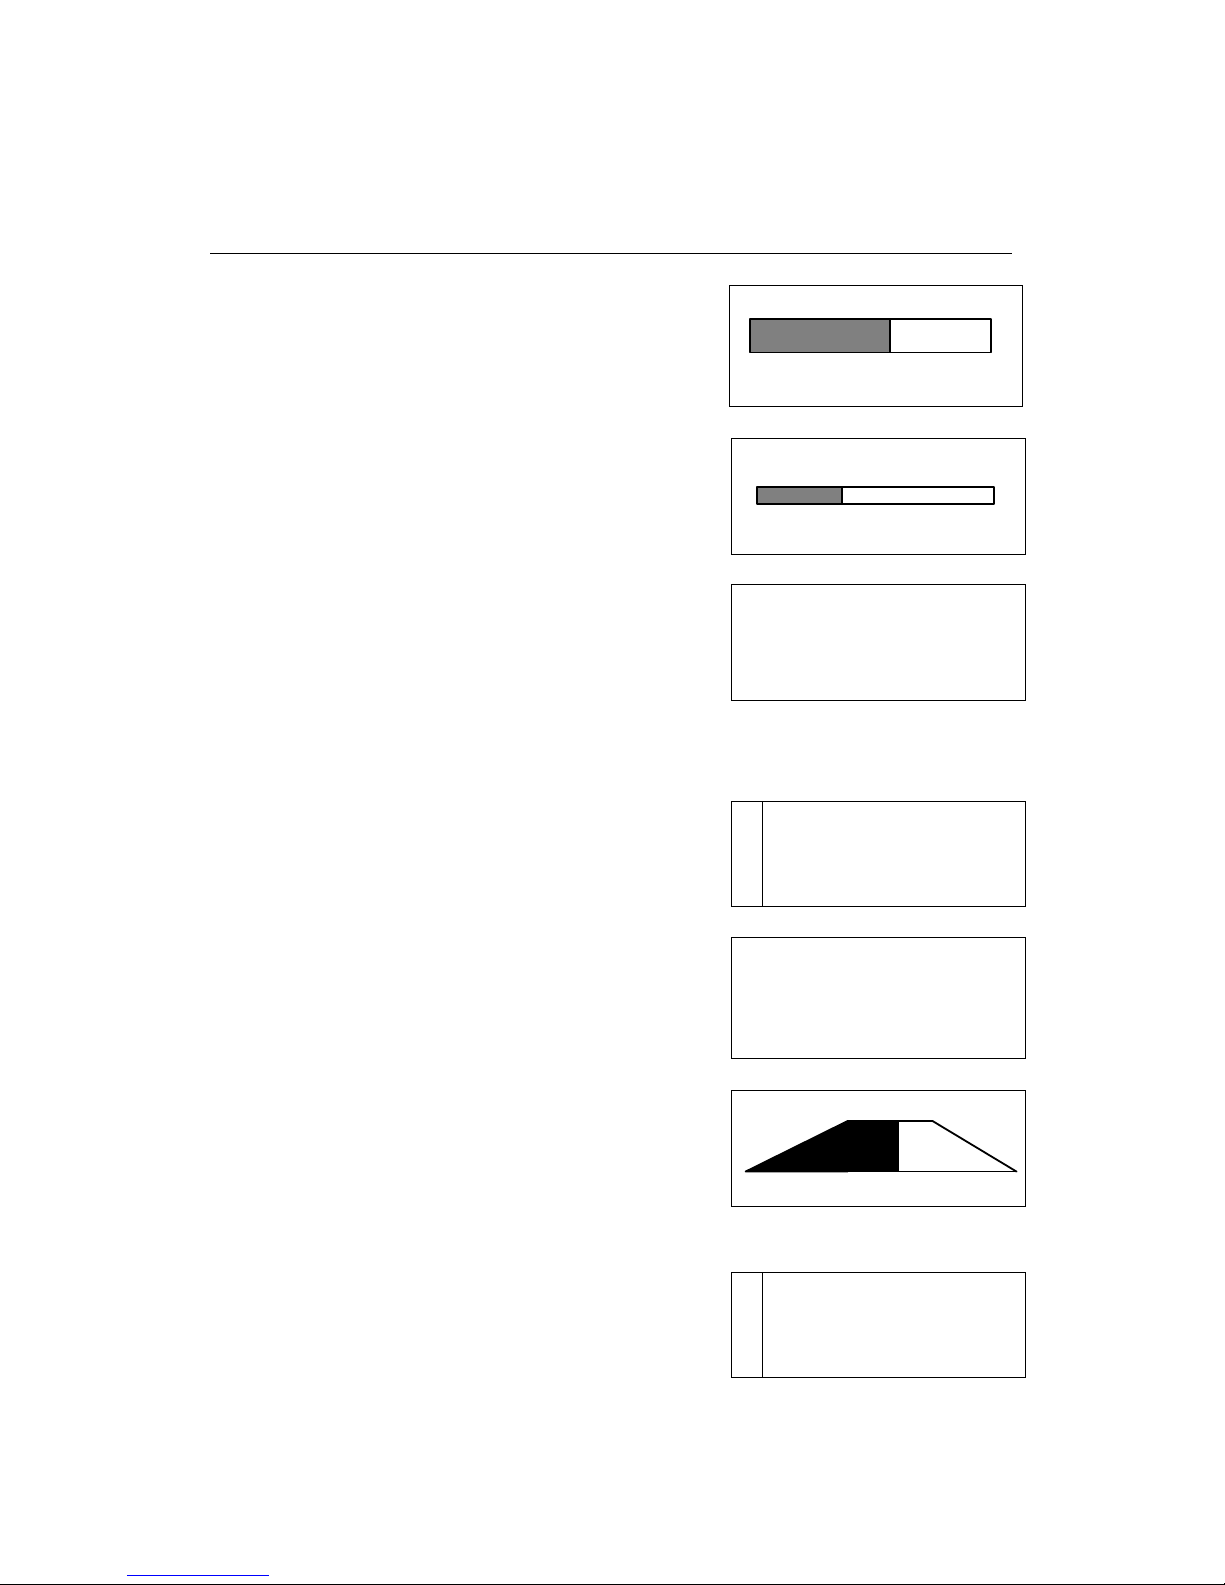
Pressing 4 times on the info key during TPN
operation will display the program status using a
graph. The performed part of the trapeze will be
painted black. The screen will be displayed for 7
seconds.
Rate: 50 ml/h
BOLUS 1 ml
Lock Time 60Min
Pressing 4 times on the info key during PCA
operation will display the data of the present
protocol operating.
P
A
4 H Limit
200 ml
ml
Empty Full
0 6:30 12
Page 48

VET-PRO Operator’s Manual
48
Pressing 5 times on the info key during PCA
operation will display the time and date.
Time 8:30
Date 24.03.02
To clear the volume infused (VI): press the info
key to display the volume infused (from stop or
setting mode) and then the STOP/NO key. The
screen will change to show volume infused zero.
Infused
Pressing the STOP/NO
key after the program is completed , will erased the
VI. The option to erase the volume infused
through info, is used in case the
last program was not completed.
F
Note:
Exit from the info mode is automatic after 10 sec, or can
be achieved by pressing the info key.
Program Delay
Delay of the program before the start is enabled in the Continuous
program (both in rate over volume and in volume over time), TPN and
the 25 steps program.
C
O N T
Volume 250ml
Press OK for Delay
To enable delay before start option, set delay
before start to on, as described on page 48
(Adjust Setting). After setting the program data
the pump will enable the delay setting.
C
O N T
Rate 25 ml/h
Volume 250ml
Time 10:00
Press OK for Delay
Time Delay 15:00
Press OK to start
Use the numeric keys to set the time delay (up
to 20 hours).
At this stage, if no value was set, pressing the
START/OK key wil start the program
operation with no delay.
ml
Page 49
VET-PRO Operator’s Manual
49
Delay 12:20
During the time delay, the KVO session will
run. Time left will count down, until 00:00. At
this stage the set program will automatically
start operation.
KVO 5 ml/h
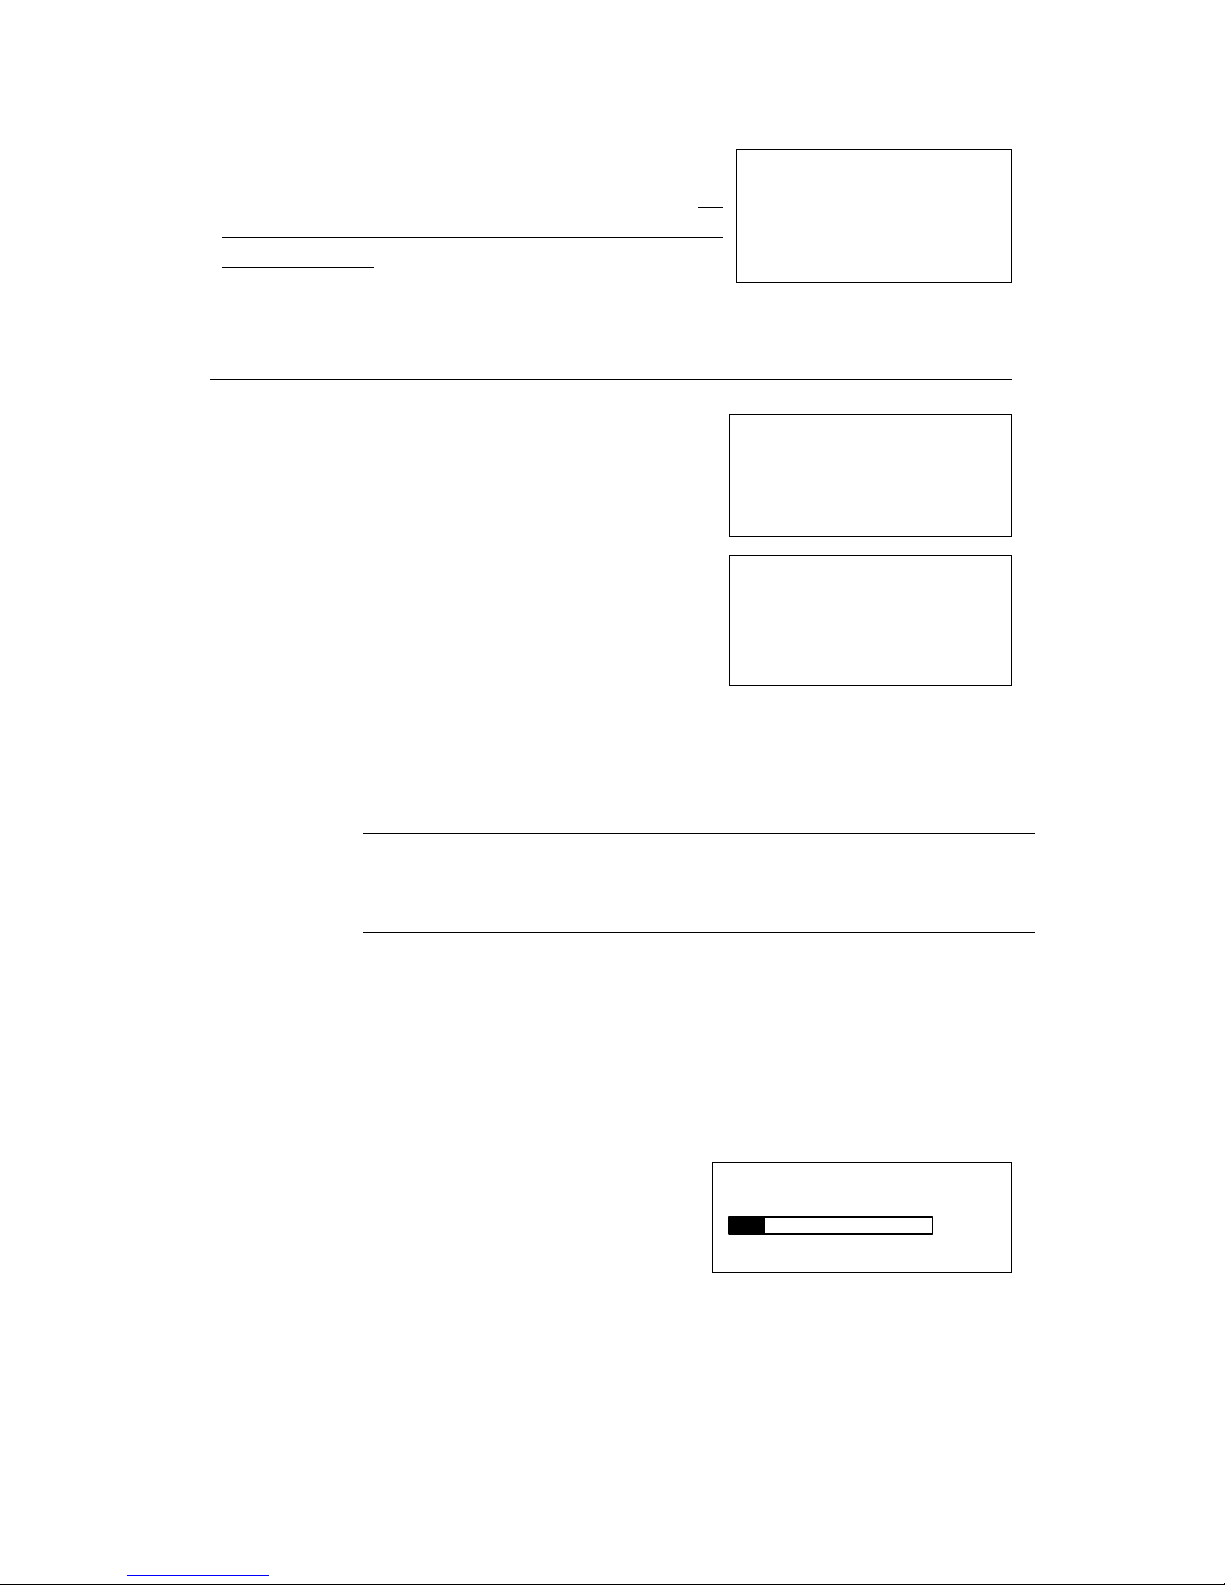
Program Completed
End PROGRAM
When the program is completed, the following
message will appear on the display: press the
STOP/NO key to mute the alarm.
Press STOP to mute
KVO 5 ml/h
The pump will automatically turn to a KVO
mode when the program is completed. Press
the STOP/NO key to reset the pump and set a
new program.
Press STOP to renew
If the main program rate is higher than the KVO rate, set in the technician
mode, the rate will remain as set in the technician mode. If the main
program rate is lower than the KVO set rate in the technician mode, the
pump will operate at the program rate. KVO volume is limited to 5 ml.
F
Note:
Before operating the pump, make sure the IV bag contains 5
mls more than the VTBI– for the KVO (and delay time, if
applicable)
When the program is completed a special sound algorithm will be
performed: 4 single beeps followed by a 4 minute pause, then again 4
beeps, another 4 minute pause and a continuous alarm is activated.
When the audible alarm is activated, the display shows the “end program”
screen. Between the beeps and alarm pause the display shows the KVO
screen.
STOP
2 min
Press the STOP/NO key to stop the pump.
This ceases the pump operation and the
display shows STOP.
Press OK to start
Stop mode is limited to 2 min. After 2 min. an audiable alarm is sounded.
Press the STOP/NO key again, to mute the alarm.
Page 50

VET-PRO Operator’s Manual
50
From STOP mode, switch the pump off by
pressing the ON/OFF key (continuously
until a beep is sounded).
OFF
WAIT FOR BEEP
F
Note:
The pump cannot be switched off during operation.
Important: Use the technique dictated by the IV container provider.
1. Ensure that the pump is not infusing by placing the pump in STOP mode or
turning the pump OFF.
2. Remove the bag spike on the IV set from the empty / used container. Discard
the empty/used container according to the providers instructions.
3. Prepare a new container as per the providers instructions and insert the spike
into the new container.
4. Squeeze the drip chamber (if applicable) to fill approximately halfway with
fluid.
5. Restart infusion.
Locking
The VET-PRO enables the user to lock the programs, on three different
levels.
Level 1 (keys locking)
Level 2 (lock out program)
Level 3 (presetting maximal rates)
Level 1 – key locking
The VET-PRO keys locking function disables all but the info key,
START/OK (during setting mode) and STOP/NO (during operation mode)
keys.
Level – program locking
Page 51
VET-PRO Operator’s Manual
51
The VET-PRO has a unique option, which enables the user to lock out the
numeric keys, so that entered parameters, or set programs cannot be changed
once they are set.
This option is important, for example, to prevent inexperienced staff
unknowingly changing the program; or for operators repeating the same
program every day, it's important to have a lock-out program, to prevent
mistakes in setting.
Level 3 – maximal rate locking
The VET-PRO provides the option of setting a maximal rate in the technician
mode. The program rate can be adjusted up to a preset limit. For home patient
(mainly for TPN or PCA treatments), who must repeat the same program
daily, the option of adjusting the delivery regiment is very important.
How to Lock ?
Level 1 – key locking
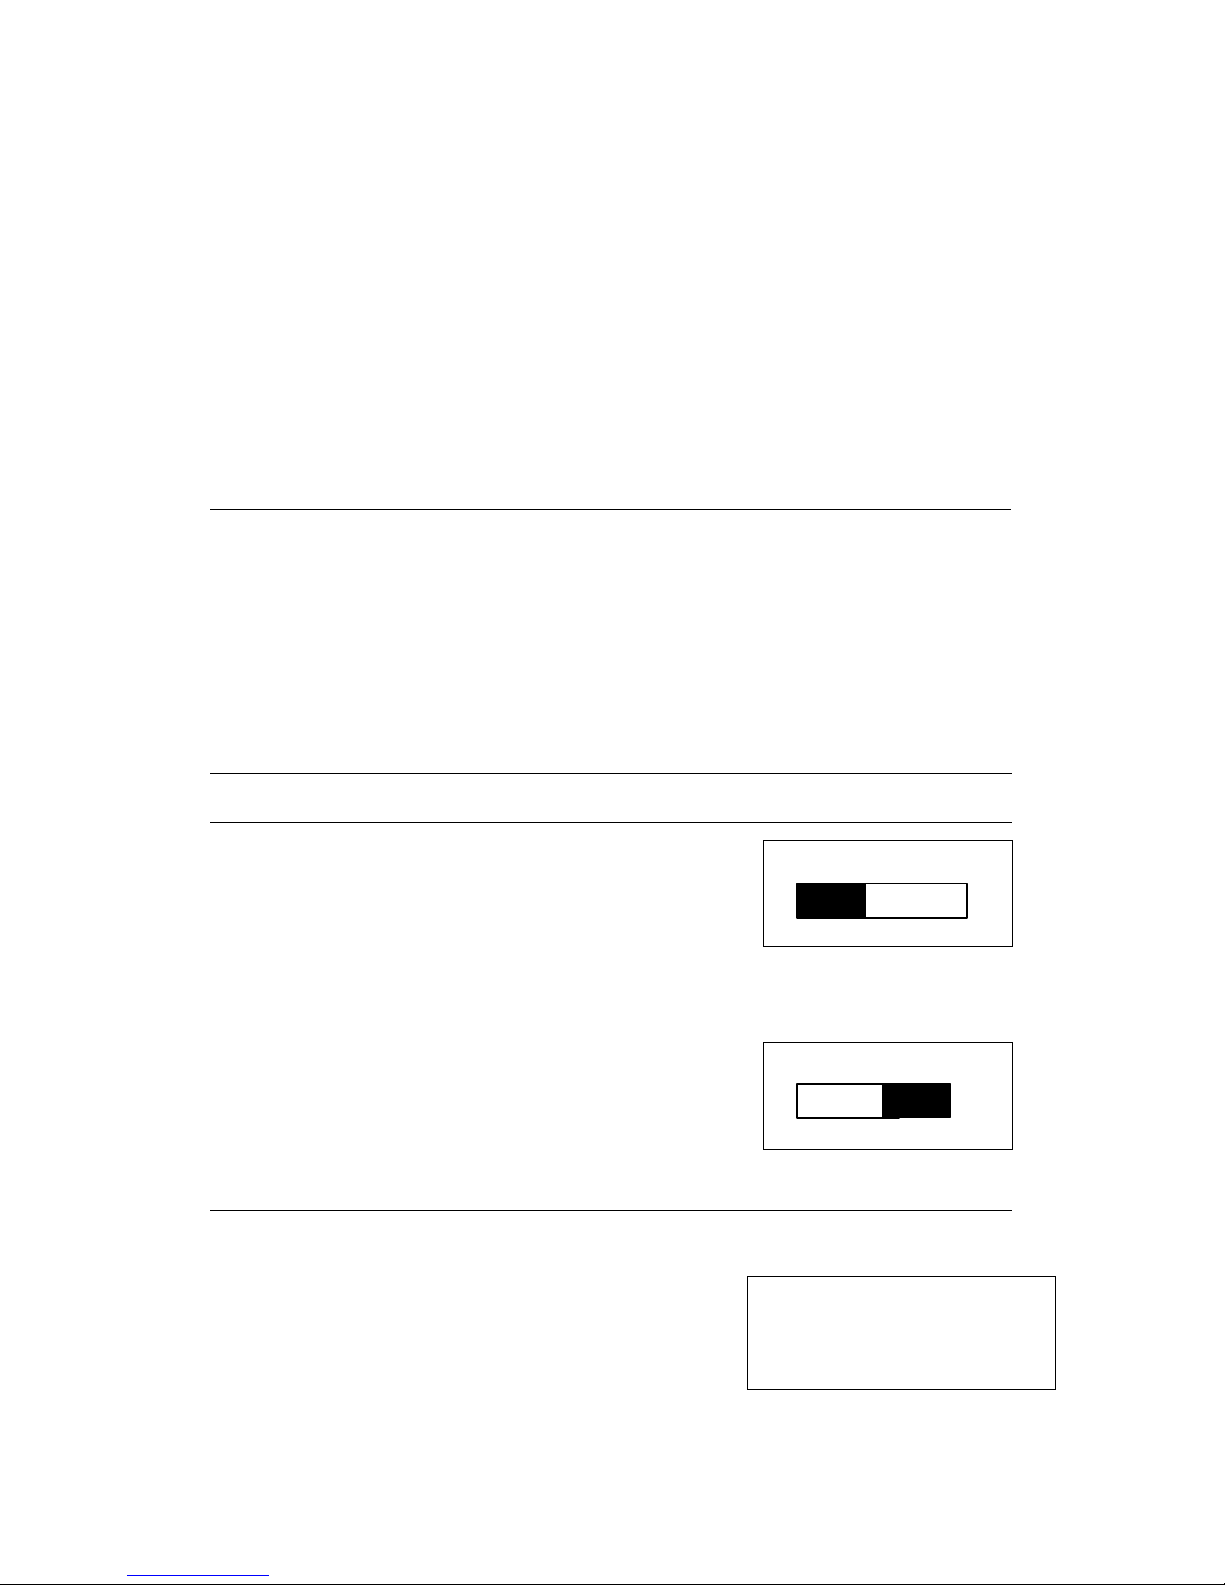
LOCK Mode
Pressing continuously on the info key, untill the
graph is all black and a beep is sounded will lock
the program.
OFF ON
“1” will be shown on the right side of the display, indicating that the
program is first level locked.
LOCK Mode
Pressing continuously on the info key, untill the
graph is all empty and a beep is sounded will
unlock the program.
OFF ON
Level – program locking
Press info key twice, from stop or setting mode.
Volume Infused
Show Setting
Use ARROW keys to scroll to "Adjust Setting"
option.
=> Adjust Setting
Page 52
VET-PRO Operator’s Manual
52
Choose "Adjust Setting" with START/OK key.
Buzzer level
=> More …
Use ARROW keys to scroll to "More" and
confirm with START/OK key.
Show Setting
Technician
Set technician Code (Code 902), and confirm
with START/OK key.
Code
902
Lock Out
ON
Use one of ARROW keys to change from OFF
to ON. Confirm with START/OK key.
Adjust ?? & press OK
The default setting is “Lock Out - NO”.
Unlock in the same procedure.
“2” will be shown on the right side of the display, indicating that the
program is second level locked.
Level 3 – maximal rate locking
The operator can adjust the Maximal rate acceptable according to patient
needs:
Press info key twice.
Volume Infused
Show Setting
Use ARROW keys to scroll to "Adjust Setting"
option.
=> Adjust Setting
Enter "Adjust Setting" pressing START/OK key.
Buzzer level
=> More …
Use ARROW keys to scroll to "More".
Adjust Setting
Confirm selection with START/OK key.
Technician
Set technician Code (Code 901), using the
numeric keys, and confirm with START/OK
key.
Code
901
Page 53

VET-PRO Operator’s Manual
53
Bolus Rate
=> Maximal Rate
Scroll through the setting parameters, using the
ARROW keys, until the "Maximal Rate "
option. Confirm with START/OK key.
KVO Rate
Maximal Rate
500 ml/h
Set the maximal rate, using the ARROW keys
and confirm with START/OK key.
Adjust & press OK
F
Note:
The default setting for a maximal rate is 500 ml/h. “ ” will
be shown on the right side of the display, indicating that the
program is in the third lock level only when the max. rate
will be set to a rate different than 500 ml/h.
F
Note:
§ The selected Locking Option will remain in the
pump’s memory until changed by the user.
§ Whenever the pump is in more than one locking
level, the higher level will be displayed on the right
side of the screen.
Battery Operation
The VET-PRO can operate on battery power, enabling operation when the
patient is being moved or during electrical power failure. When the pump runs
on the battery power, the AC icon is off. At full charge, the battery provides 9
hours of operation at an infusion rate of 250ml/hr.
I
Warning
Don’t operate the pump on AC power if the battery is not
loaded in the pump for back up.
F Note:
When the pump is not in use, click the pump into the Charger and
plug the system into an AC wall outlet (if possible) to charge
battery.
F Note:
After the ³end battery“ signal has been activated or following
long periods of storage, wait 2 minutes after the pump has been
connected to an AC power supply before operating.
Page 54

VET-PRO Operator’s Manual
54
There are two battery alarm conditions:
1.
The pump will warn that the battery is low a
minimum of 30 minutes before the “end
battery” alarm activates (when the battery
power reaches less than 7.1v).
Low Battery
Connect to charger
2.
After the ³battery low´ warnings, when the
battery power reaches less than 6.05v, the
pump will cease operation and the "end
battery" alarm will be activated.
End Battery
Connect to charger
•
If the battery runs out, End Battery appears on the display. The pump stops
the infusion.
•
From the "end battery" state the user cannot restart the pump, until it has
been connected to mains.
G
Caution:
Leaving the battery in a discharged state for a long period of
time may damage the battery.
F
Note:
Whenever possible, use the pump connected to an AC power
supply via the charging unit. This preserves the battery power
supply for emergency use or for situations where the AC power
is not available.
F
Note:
Replace the battery once every four years.
Cleaning and Storage
Before the transfer of a pump to a new patient and periodically during use, clean
the pump by wiping over with a lint-free cloth lightly dampened with warm water
and a standard disinfectant / detergent solution.
IWarning:
Before cleaning always switch off and disconnect from the AC
power supply.
G CAUTION Do not clean pump with chemicals such as Xylene, Acetone or
similar solvents. These chemicals cause damage to plastic
components and paint.
Page 55

VET-PRO Operator’s Manual
55
If the pump is to be stored for an extended period it should be first cleaned and
the battery fully charged. Store in a clean, dry atmosphere at room temperature
and, if available, employ the original packaging for protection.
Once every 3 months during storage, carry out functional tests as described in
p.23-26 and ensure that the battery is fully charged.
Alarms Conditions
At any time, when the pump detects a problem, an alarm is activated and the
following will occur:
•
An alarm message appears on the display, stating the cause of the alarm and
indicates instructions for continued use.
•
An audible alarm sounds.
•
The infusion stops.
Alarms
•
Air in Line
•
Door Open
•
Down Occlusion
•
Pump Unattended
•
Low Battery
•
End Battery
•
Internal Malfunction
•
End Program
•
Missing Key
The “Troubleshooting Table” (on the next pages) describes the pump’s alarm
conditions and remedies.
Page 56
VET-PRO Operator’s Manual
56
Troubleshooting
Description Result Possible Cause Remedy
Air in Line
Air in Line
Clean air
Air is present in
administration set
Disconnect patient,
press the STOP/NO
key and remove the air
from Administration
set, as described on
page 17. After flushing,
press the START/OK
key to resume the
Infusion
ceases
The roller clamp above the
pump is closed.
Open Roler clamp
Door Open
The door of the pump was
not closed prior to operation
Door Open
Close door
Infusion
ceases
T
he door has accidentally
opened during operation.
Close Door
Down stream occlusion
Roller clamp closed
Open the Roller clamp
Set kinked
Straight out the
set
Down Occlusion
Press STOP to mute
Administration set loaded
incorrectly
Reload administration
set, as described on
page 17
Cannula blocked
Change Cannula
Infusion too cold, affecting
the elasticity of the tubing
Bring the tubing up to
room temperature
>19deg C. Warm the
liquid.
Infusion
ceases
**User may change
pressure setting
Adjust pressure setting,
as described on page 26
No key has been pressed
for 2 minutes, during
setting
Pump Unattended
Press start key
Pump
operation
has been
stopped
N
o key was pressed for 2
minutes.
Press the START/OK
key
Page 57
VET-PRO Operator’s Manual
57
Troubleshooting
Description Result Possible Cause Remedy
Message displayed
showing ± 30 minutes
left of battery operation
Low Battery
Connect to charger
If pump
won’t be
connected
to mains,
battery will
be depleted
Message will
be displayed as
long as the internal battery
voltage is less than 7.1v.
Connect to Mains
End Battery
End Battery
Connect to charger
Infusion
ceases
Battery is depleted.
The pump cannot be used
before being connected to
mains.
Connect to Mains and
wait 2 minutes before
operating.
Message displayed in the
TPN programs, that the
parameters entered are
incorrect and cannot be
calculated by the pump
Wrong TPN Date
Check Data
Program
will not
start
operating
The set parameters are
impossible to perform.
Volume or time parameters
are incorrect
Check data and change
accordingly.
Pump is in lock-mode
Lock out
Program
parameters
can not be
changed
The program is
set in
second-
level locking, which
enables daily operation of
the set program, without the
ability to change parameters.
No action required.
A fatal error is detected
Error XXX
Send for Service
Infusion
ceases
The pump will advise the
user to send
the pump for
service.
Restart the pump. If the
alarm does not stop
pack the pump
properly, in its original
packaging, and send it
for service.
Page 58
VET-PRO Operator’s Manual
58
Troubleshooting
Description Result Possible Cause Remedy
Program completed
End PROGRAM
Press STOP to mute
The program was completed
KVO 5 ml/h
Press STOP to renew
Pump
will turn
to KVO
mode
KVO (Keep Vein Open)
program starts.
Press the STOP/NO
key to restart
Show Setting
The program was designed to disable unauthourised user access to
technician settings. Access to show setting mode, enable the user to
inspect all settings, but not change them.
Press info key twice.
Volume Infused
=>Show Setting
Choose "Show Setting" to display all software
adjustable parameters.
Adjust setting
Show Setting:
=>Battery Level
Scroll down the followung parameters on the
Show Setting mode:
Lock Out
Show Setting Options
Screen no. Setting Screen
1 Battery Level (Empty ? Full) Battery Level
2 Lock Out Option (ON/OFF) Lock Out
3 Time & Date display Time, Date
4 Tube Temperature Tube Temperature
5 Buzzer Level Buzzer Level
6 Pressure level
(High/Normal/Low)
Pressure level
7 Pressure Default Pressure Default
8 Select Program Select Program
9 Display Flushing Volume (4 ml. Flushing Volume
Page 59
VET-PRO Operator’s Manual
59
Is the default- up to 20 ml)
10 Showing Flushing Rate
(up to 1200 ml/hr)
Flushing Rate
11 Display BOLUS rate Bolus Rate
Maximal Rate setting Maximal Rate
Display KVO rate KVO Rate
Air bubbles size Air Size
Store last program Store last Program
Operation led option (on/off) Operation Led
Time option (on/off) Time Option
18 Delay before start option (on/off) Delay Before Start
19 Language Language
20 Pump Serial Number Serial Number
21 Production Date Production Date
22 Operation time from service
(hours)
Operation Time
23 Software Version Software Version
24 Volume Calibration Volume Calibration
25 Pressure calibration - delta Pressure Delta
26 Pressure calibration CAP Pressure CAP
27 EXIT EXIT
Adjust Setting
Press info key twice.
Volume Infused
Show Setting
Choose "Adjust Setting" to display all software
adjustable parameters.
=>Adjust Setting
Confirm with START/OK key.
Adjust Setting:
=> Pressure Level
See list of parameters that can be set on "Adjust
Setting" selection on the next page.
Buzzer Level
The first 2 parameters, Pressure level and Buzzer level, can be adjusted using
the arrow keys- no secret code required.
Buzzer level
=> More …
Access to “More…” will required a code.
Use ARROW keys to scroll to "More".
Show Setting
Page 60

VET-PRO Operator’s Manual
60
Confirm with START/OK key.
Technician
Set technician Code (Code ), using the
numeric keys and confirm with START/OK
key.
Code
** For program locking (lock level 2) – set code 902
Scroll through the setting parameters, using the ARROW keys and change
them if necessary.
Adjust Setting Options
Screen no. Adjust Screen
A Lock Out Option (Code 902 ) Lock Out
B Buzzer Level (no code required) Buzzer Level (1 to 7)
C Pressure level (no code required) Pressure level (high,
normal, low)
Use code 901 to enter
1 Restart Pump Restart Pump
2 Pressure Default Pressure Default
3 Select Program Select Program
Setting Flushing volume
(up to 20 ml)
Flushing Volume
5 Setting Flushing Rate
(up to 1200 ml/hr)
Flushing Rate
6 Setting BOLUS rate (different
from default)
Bolus Rate
7 Maximal Rate setting Maximal Rate
8 Setting KVO rate KVO Rate
9 Air bubbles size Air Size
11 Store last program Store Last Program
2 Setting Operation led (on/off) Operation Led
3 Time Option On/ Off Time Option
4 Time Delay Option On/Off Delay Before Start
5 Language Language
16 SetTime & Date Set Time & Date
7 View History Events History
 Loading...