

Page 1
user manual
1
Scandinavia’s largest webshop for scales
Box 79, Industrivagen 3
760 40 Vaddo, Sweden
Tel. +46 (0)176-208920
Fax +46 (0)176-208929
Email [email protected]
Web www.vetek.com
REVISED
03.20 10
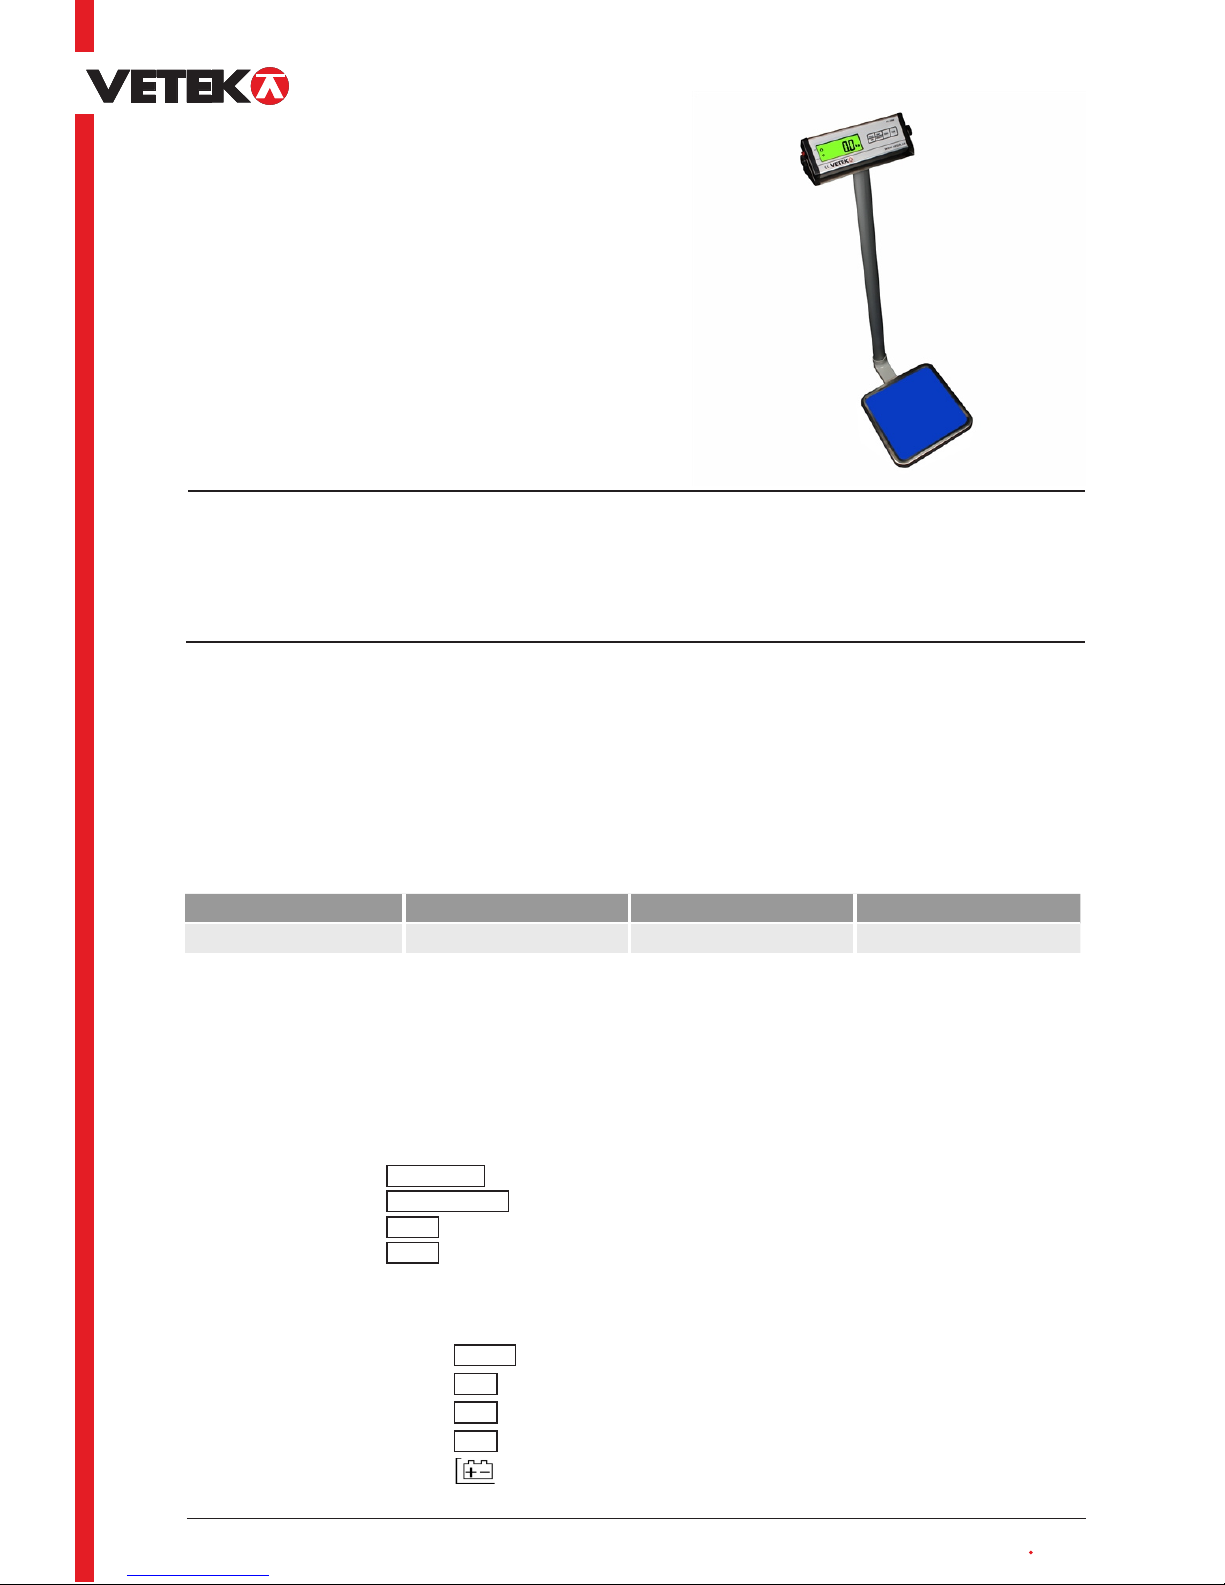
PERSONAL SCALE: FR-MS
(MS3200 Indicator, Product Type MS-3200)
FEATURES
1. Compact Dimensions: 220×90×40
2. Material: Aluminium
3. Display Options: LCD-display med 5 tecken
4. Capacity/Division:
TABELL 1
CAPACIT Y DIVISION1 DIVISION 2 DIVISION 3
200 kg 0,05 kg 0,1 kg 0,2 kg
5. Power: Rechargeable battery 6×AA / AC adapter 9V 500mA
6. Power saving: auto shut-off timing selectable (120seconds/180seconds/240seconds/360secons/Off)
7. Operating Temperature: 5 – 35°C
8. Operating Humidity: 25 % - 95 % RH
9. 4Keys: HOLD/BMI , UNIT/WEIGHT , ZERO , TARE
HOLD/BMI Press this key to store weight value
UNIT/WEIGHT Toggle among KG and LB unit
ZERO Zero the weight
TARE Tare the weight
11. Zero Range: (4 % to full capacity)
12. Tare Range: (100 % to full capacity)
13. Error Message indication: EEEEE Overload
ErrL Power on zero count too low
ErrH Power on zero count too high
ErrE Eeprom Error
Low battery indication
Page 2
user manual
www.vetek.com [email protected]
2
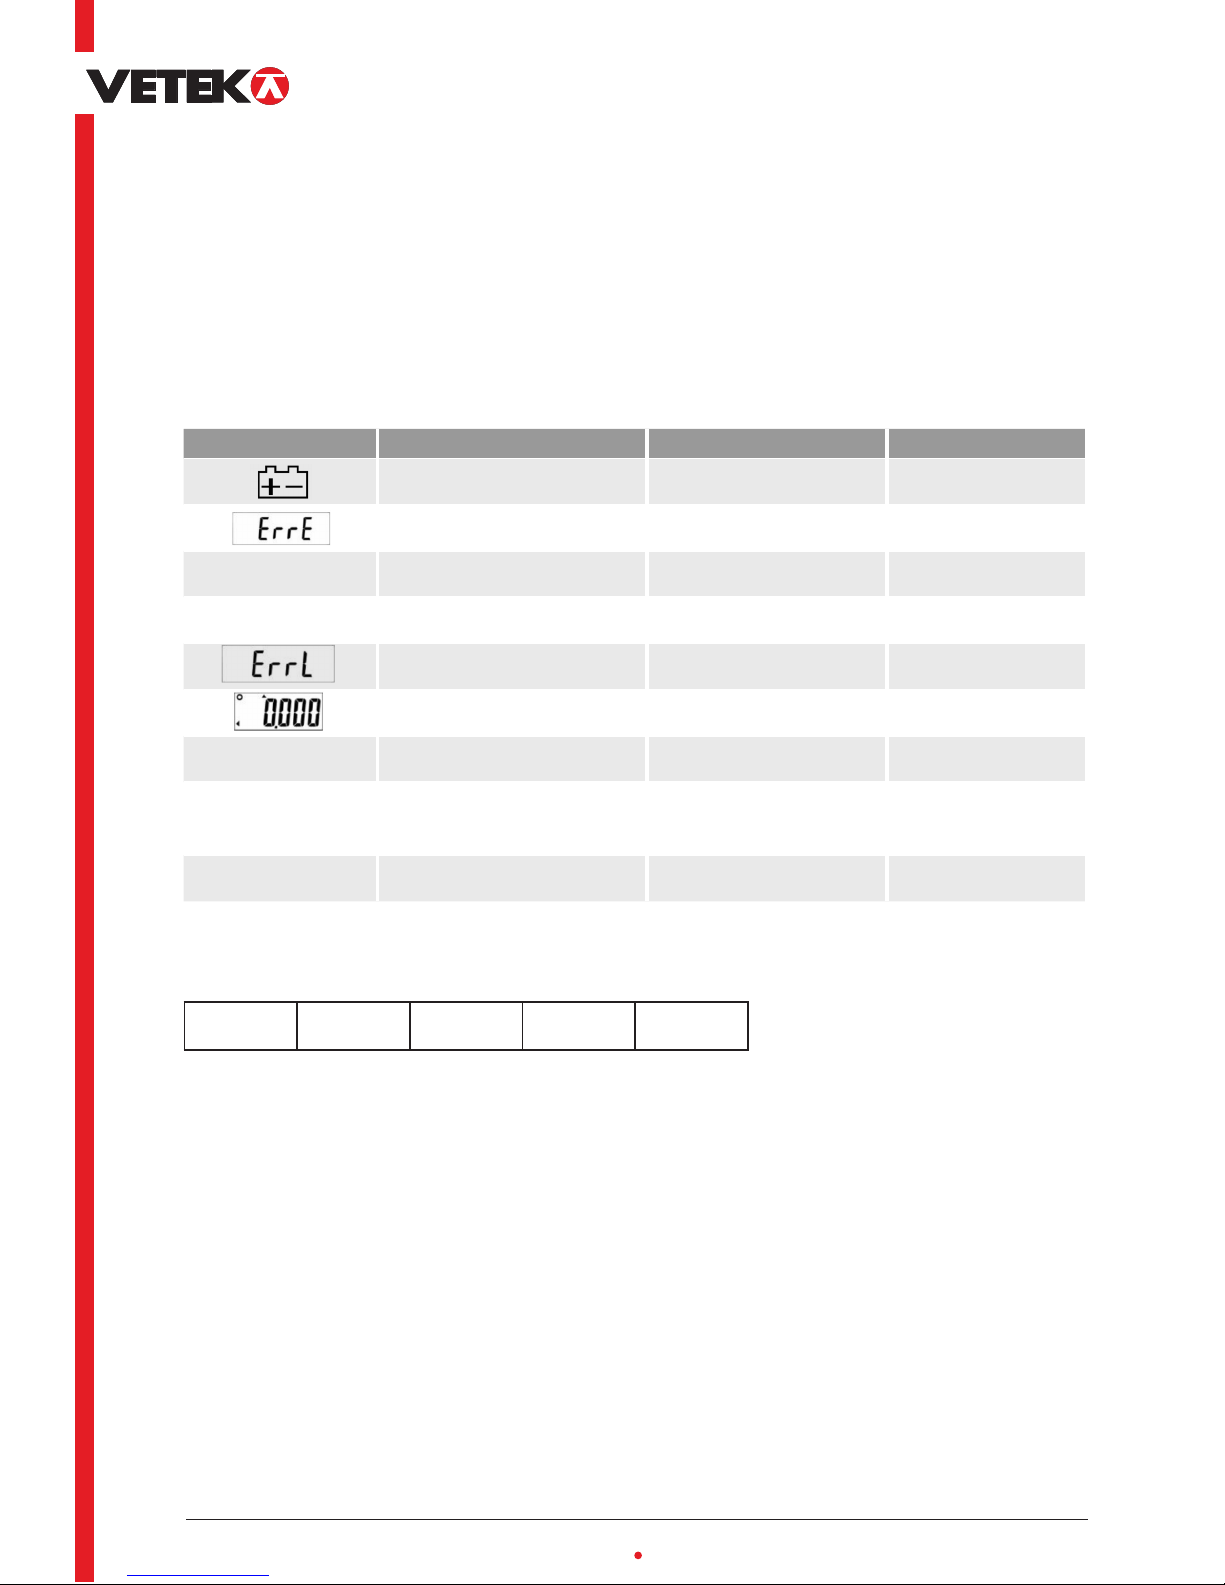
AUTO SHUT OFF MODE
STATE DESCRIPTION TIME FOR SHUT OFF NOTE
Low battery indication 30 seconds
EEPROM ERROR 30 seconds
EEEEE Overload 30 seconds
ErrH Zero value higher 30 seconds
Zero value lower 30 seconds
Zero Tracking According to time of shut off
Negativ vikt Display of weighing in minus value According to time of shut off
Samma viktvärde Display of weighing in same value According to time of shut off
Inclusion zero tracking
and minus weight
Olika viktvärden
Display of weighing in diff. value
No Off Inclusion minus weight
14. Two calibration weight units : kg / lb
15. Open calibration weight
16. Power on zero-setting range: + 10%
17. Zero range: + 4% of full capacity
18. Three modes : Normal mode / Setting mode /Internal Auto Calibration mode
19. RS232 function
BESKRIVNING AV TANGENTERN
HOLD BMI UNIT WEIGHT ZERO TARE
1. HOLD/BMI:
A. Press this key to store weight value.
B. To release Hold feature, Press the HOLD key again.
C. To release Hold feature and tare the weight, Press the TARE key.
D. Press and hold this key, the scale will enter to BMI setting.2. UNIT/WEIGHT:
A. Välj viktenhet: kg eller lb.
B. Sist använda viktenhet visas nästa gång enheten startas.
3. ZERO:
A. When there’s load on the scale , press this key to return to zero
.
B. Put a container on the scale, press this key to tare the weight, and the tarred value is stored..
4. TARE:
A. When there’s load on the scale , press this key to return to zero.
B. Put a container on the scale, press this key to tare the weight, and the tarred value is stored.
5. STRÖMBRYTARE:
When the scale is in use or not in use, please turn the power on or the power off.
Page 3
user manual
www.vetek.com [email protected]
3
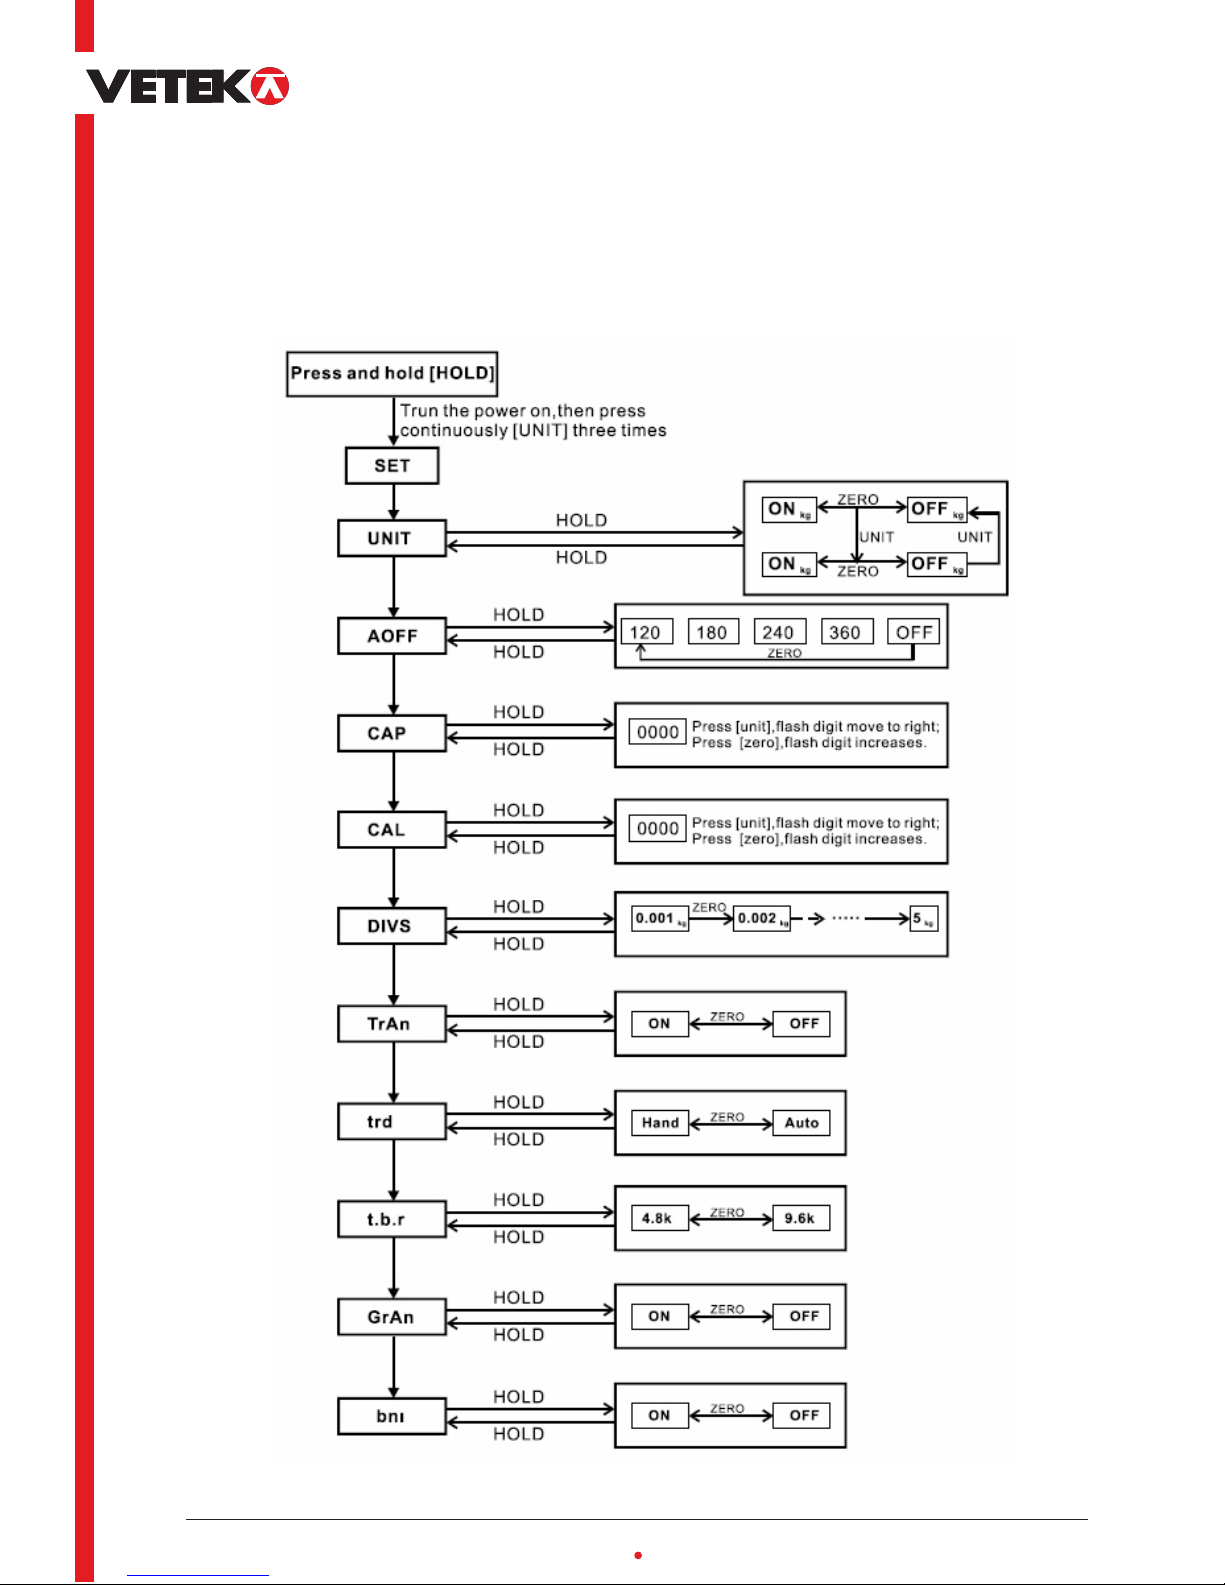
FUNCTION TABLE:
Press and hold [ HOLD/BMI] to turn the power, and then press continuously [UNIT/WEIGHT] three times,
the display will show the “SET”.
Page 4
user manual
www.vetek.com [email protected]
4
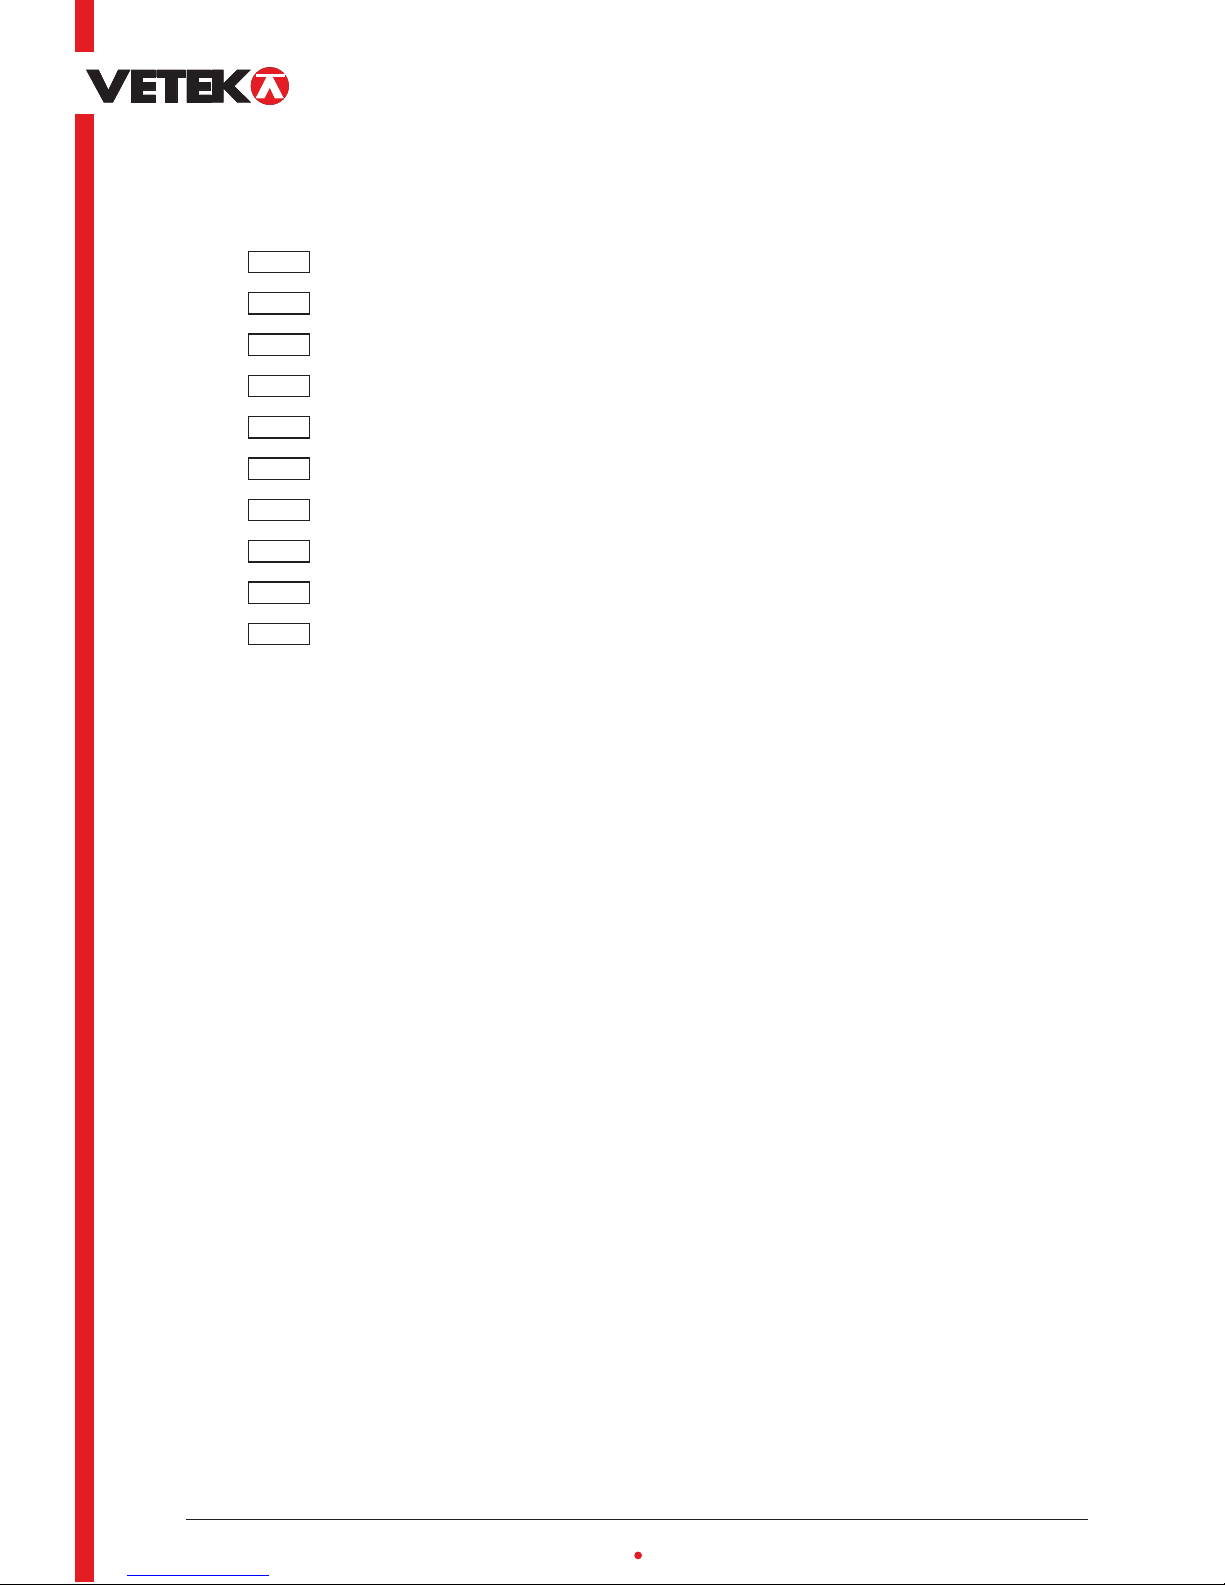
1. AOFF Time for auto off (120s / 180s / 240s /360s / off)
2. Unit Weight units: kg / lb
3. CAP Capacity (1 ~ 9999 kg)
4. divS Division (0,001 ~ 5 kg)
5. CAL Calibration weight (1 ~ 9999 kg)
6. trAn RS232 Transfer
7. t.b.r. RS232 Transfer band rate
8. Grav. Gravity
9. trd. Transfer mode
10. BMI WEIGHT/H2 ( ON/OFF)
TABEL 2 – CALIBRATION WEIGHT
1. Press and hold [ZERO] to turn the power on, and then press continuously [UNIT/WEIGHT] three times,
the display will show the “CALukg”.(press [UNIT/WEIGHT] key to selected the calibration unit)
2. Press [ZERO] key, when the display will show AD value, press [ZERO] key, the display will show “SAVE”
and then show calibration weight.
3. Press [ZERO] key again, the display will show “SAVE” and then return to AD value. Now calibration
weight is complete.
BMI FUNCTION SETTING
1. Body on the pan, it should your weght: 80kg
2. When the display stable, press HOLD to keep the display 80kg
3. Press and hold the HOLD key, until it display HLT 100, it means to input your height in cm
4. Press HOLD and UNIT keys until the display 180, it means 180cm
5. Press TARE, it display 80kg and 25%.
THE MEANING OF FUNCTION SETTING
Page 5

user manual
www.vetek.com [email protected]
5
1. When the function trAn set ON, the RS232 is actived
2. Baud rate is selected 4800 or 9600 when the function t.b.r. set 4800 or 9600.
3. RS232 Transmission Agreement:
Mode: Simplex Asynchronous Serial
Baud rate: 4800 or 9600
Data Bit: 8
Parity Bit: NONE
Stop Bit: 1
Data Format: ASCII
4. Transmission Information Format:16 Byte, blank=20H
<STX><Status><+/-><D><D><D><D><D><D><D><U><U><U><U><U><ETX>
5. Transmission Information Format show:
STX: Start of Transmission=02H
Status:Status bit
Example:*=(2AH)=Stable weight, ~=(7EH)=Unstable Weight
+/-: +=(2BH)=Positive Weight , -=(2Dh)=Negat Weight
DDDDDDD: Value of Weight , 7 ASCII Code
UUUUU: 4 ASCII Code Weight Units: kg or LB
ETX: Stop of Transmission =03H
SETTING THE ACCELERATION TO GRAVITY MODE
1. Press [TARE] and [UNITS] rst, then press [ON/OFF], while keeping [TARE] and [UNITS]pressed, the
display will show “SEt”, then press the [UNITS] several times until the display show ”GrAv” press [TARE]
the display show “on” press the [HOLD] the display show “OFF” .When the display show “ON” means
acceleration to gravity is actived. When the display show “OFF” means acceleration to gravity is inactived.
2. When acceleration to gravity is actived press [ON/OFF] turn the power off, then press [ON/OFF]
turn the power on, then press [UNITS] key 3 seconds enter to acceleration to gravity mode .1). when
the display show “C9.○ 00” ( ○ for ash digit ) rst setting the local gravity.2). press [TARE] key again,
rightward ash digit, 3).press [ HOLD ] key, increase digit input the gravity value, press [UNITS] the
display enter to another local acceleration to gravity mode.
3. When the display show “U9.○ 00” ( ○ for ash digit) repeat the steps 1)-3) .press [UNITS] the display
will return the normal weighing mode.
INTERFACE
1.Signal interface (microphone socket)
Pin 1 (red)------- E+(positive source)
Pin 2 (blue)------- S+(positive signal)
Pin 3 (black)------- E-(negative source)
Pin 4 (white)------- S-(negative signal)
Pin 5 (no)
No sign ------- GND
2. Rechargeable battery socket: AC/DC 9V――――― ―inner positive ,external negative
3. RS232 interface: DB9
RS232 TRANSMIT FUNCTION
 Loading...