

Page 1
10/27/2010 rev. 10/27/2010 APS manual.doc
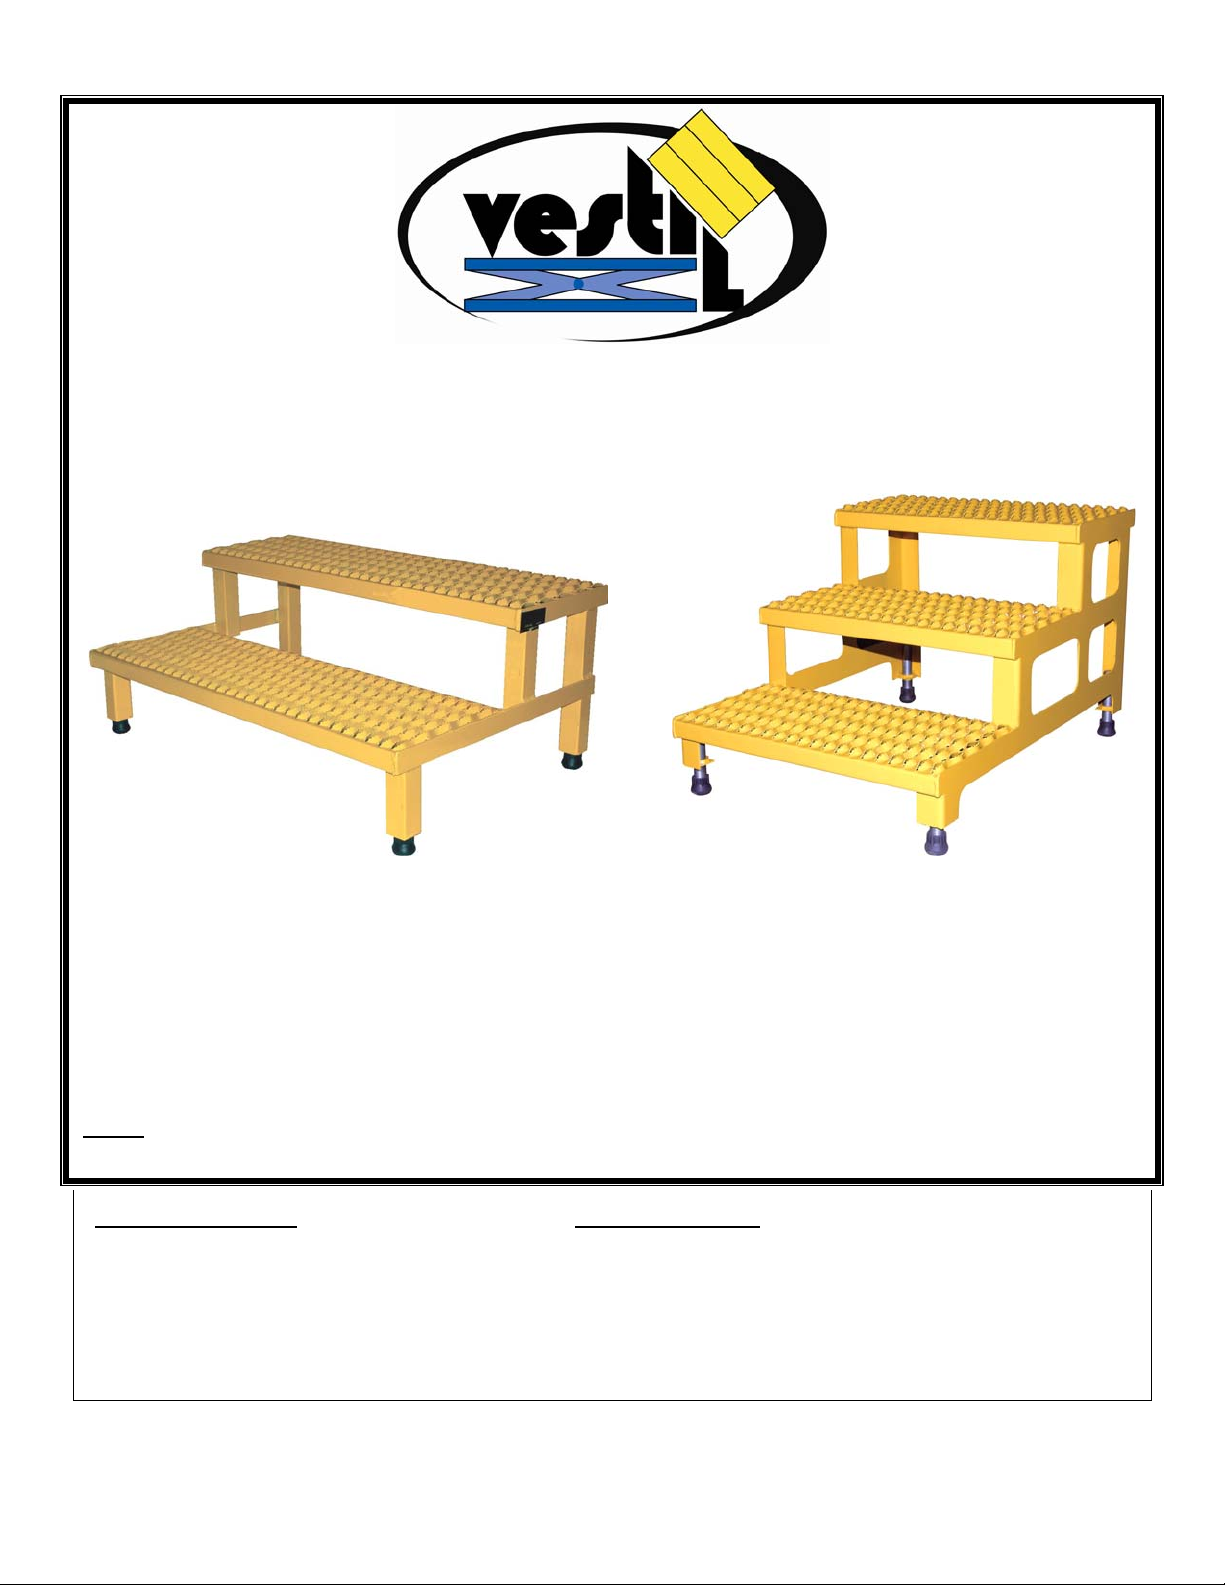
ASP-SERIES ADJUSTABLE STEP MATE STANDS
INSTRUCTION MANUAL
VESTIL MANUFACTURING CORP.
2999 NORTH WAYNE STREET, P.O. BOX 507, ANGOLA, IN 46703
TELEPHONE: (260) 665-7586 -OR- TOLL FREE (800) 348-0868
FAX: (260) 665-1339
URL: WWW.VESTILMFG.COM EMAIL: SALES@VESTIL.COM
NOTE: Compliance with regulations, codes, and/or statutory (non-voluntary) standards enforced in the
Table of Contents Table of Figures
Product Introduction……………………….......... 2 Fig. 1A “ASP-PORT”…………………………………………….. 3
Safety Principles……………………................... 2 Fig. 1B “[ASP-PORT] Hardware kit”………………..………….. 3
Safety Guidelines…………………..................... 3 Fig. 1C “ASP-PORT fastened to step stand”…………...…….. 3
ASP-PORT installation & use…………………… 3 Fig. 2A “ASP-PORT-HT”………………..…………..…...……… 4
ASP-PORT-HT features & use instructions…… 4 Fig. 2B “Engaging side frame of step stand”………………………… 4
Inspections & Maintenance……………………... 4 Fig. 3 “Stand leveling”……………………………5
Fig. 4 “Product markings and labels”…………………………... 5
location where the product is used is exclusively the responsibility of the end-user.
Cop
yright 2010 Vestil Manufacturing Corp.
p. 1 of 5
Page 2
10/27/2010 rev. 10/27/2010 APS manual.doc
PRODUCT INTRODUCTION
Thank you for purchasing an ASP-series “Adjustable Step-Mate Stand” (“step stand,” or
“steps”) made by Vestil Manufacturing Corporation (“Vestil”). Our step stands are durable, highquality products that combine safety-enhancing features and reliable mechanisms. Although
use and maintenance procedures are intuitively obvious, all persons who might use or maintain
this product must familiarize themselves with the instructions provided in this manual.
The standard design incorporates serrated, no-slip tread and independently adjustable legs. Option packages include:
stainless steel or aluminum construction rather than standard painted steel; “ASP-PORT” bolt-on wheel and handle kit;
“ASP-PORT-HT” specially-adapted dolly with pneumatic wheels. Dimensions and other product specifications appear in
the following table:
Overall size
(WxL) in inches
(~cm)
Number of
steps
Standard
painted steel
model
designation
Net weight in
pounds (~kg)
Stainless steel
model
designation
Net weight in
pounds (~kg)
24 x 24 2 ASP-24 25 (11.4kg) ASP-24-SS 28 (12.7kg) ASP-24-A 19 (8.6kg)
36 x 24 2 ASP-36 33 (15kg) ASP-36-SS 36 (16.4kg) ASP-36-A 23 (10.5kg)
48 x 24 2 ASP-48 38 (17.3kg) ASP-48-SS 42 (19.1kg) ASP-48-A 25 (11.4kg)
60 x 24 2 ASP-60 44 (20kg) ASP-60-SS 48 (21.8kg) ASP-60-A 28 (12.7kg)
72 x 24 2 ASP-72 47 (21.4kg) ASP-72-SS 52 (23.6kg) ASP-72-A 30 (13.6kg)
24 x 36 3 ASP-24-3 40 (18.2kg) ASP-24-3-SS 44 (20kg) ASP-24-3-A 26 (11.8kg)
36 x 36 3 ASP-36-3 51 (23.2kg) ASP-36-3-SS 56 (25.5kg) ASP-36-3-A 32 (14.5kg)
48 x 36 3 ASP-48-3 62 (28.2kg) ASP-48-3-SS 68 (31kg) ASP-48-3-A 37 (16.8kg)
Aluminum
model
designation
Net weight in
pounds (~kg)
Safety Principles
Vestil Manufacturing Corp. recognizes the critical importance of workplace safety. However, although Vestil diligently
strives to identify foreseeable hazardous situations, this manual cannot address every conceivable danger. The end-user
is ultimately responsible for exercising sound judgment at all times.
This manual will acquaint persons authorized to use and/or maintain this step stand with safe use and maintenance
procedures. Therefore, each person, who might use or perform maintenance on the step stand, must read and
understand every instruction BEFORE using the device or performing maintenance. Users should have access to
the manual at all times and should routinely review the directions.
This manual uses SIGNAL WORDS to classify personal injury risks and situations that might lead to property damage,
as well as to draw attention to safety message(s). The reader must understand that each signal word indicates the
seriousness of the identified hazard.
Identifies a hazardous situation which, if not avoided, WILL result in DEATH or SERIOUS
Identifies a hazardous situation which, if not avoided, COULD result in DEATH or SERIOUS
Indicates a hazardous situation which, if not avoided, COULD result in MINOR or MODERATE
Identifies practices likely to result in product/property damage, such as operation that might damage the
Employers are responsible for training employees to use the product properly. If you do not understand an instruction,
ask your supervisor or employer for assistance, because failure to follow the directions in this manual might result in
serious personal injury or even death.
Vestil is not liable for any injury or property damage that occurs as a consequence of failing to apply either: 1) the
instructions that appear in this manual; or 2) the information provided on labels affixed to the product. Furthermore, failure
to exercise good judgment and common sense might result in property damage, serious personal injury or death. Such
failure is solely the fault of the person(s) using the step stand.
INJURY. Use of this signal word is limited to the most extreme situations.
INJURY.
injury.
step stand.
Cop
yright 2010 Vestil Manufacturing Corp.
p. 2 of 5
Page 3

10/27/2010 rev. 10/27/2010 APS manual.doc
SAFETY GUIDELINES
Study the entire manual before you use the product for the first time and before each subsequent use
Failure to read and understand the instructions included in this manual before
using or servicing the step stand constitutes misuse of the product.
. Read the
manual to refresh your understanding of the safe use, inspection and maintenance procedures explained on p. 3-5. If
questions remain about the product after you finish reading the manual, ask your employer or supervisor for help. DO
NOT attempt to resolve any problems with the step stand unless you are authorized to do so and are certain
safe to use afterwards.
that it will be
Electrocution might result if the step stand contacts electrified wires. Reduce the likelihood of electrocution
by applying common sense:
DO NOT contact electrified wires with any part of the step stand;
DO NOT use the steps in an area where contact with electrified wires is likely;
DO NOT use the steps close to electrified wires or other sources of electricity;
Before using the steps, always inspect the usage area for unusual conditions that require special precautions.
Read the entire manual before installing option kits or adjusting or using the step stand. If
questions remain after you finish reading the manual, ask your supervisor or employer for clarification. Improper assembly
or installation might result in serious personal injuries:
ALWAYS level the step stand before using it. (See “Leveling the step stand” on p. 5).
DO NOT store items, materials, etc. on the step stand.
DO NOT place weight that exceeds the maximum rated load (capacity) on one or more steps.
DO NOT use a structurally compromised step stand. Examples of structural damage include: broken or severely
damaged posts (legs), steps, or frame, and damage caused by rust or corrosion. Inspect the step stand according to
the inspection instructions on p. 4. DO NOT use the steps unless the unit and all installed options pass every part of
the inspection.
ASP-PORT Option Package:
FIG. 1A:
ASP-PORT
(includes
hardware kit: 3
bolts, 3 flat
washers, 3 hex
nuts, and drill
bit
Bolt holes
Frame
supporting
uppermost
step
Bolt tab
(circled)
FIG. 1B: Hardware kit
Right side
FIG. 1C: ASPPORT fastened to
step stand
INSTALLATION AND USE INSTRUCTIONS
to the handle except as necessary to transport to step stand (see Step 5 below).
Step 1: Hold the PORT handle assembly up to the side of your ASP-series step stand;
then mark the stand with the locations of the 3 bolt holes. [NOTE: The right side of the
handle should roughly align with the rear legs. See diagram below.]
Step 2: Drill each of the holes using the 9/32in. drill bit included in the hardware kit.
.
Part
Number
Description Quantity
Item
No
1 14-525-001 Handle weldment 1
2
3
16-132-009
65078
Hard rubber wheel
1¼in. x 4in.
1/8in. x 1½in. zincplated cotter pin
2
2
4 ND87060 9/32 in. drill bit 1
¼ in. – 20 x 1½ in.
5 11009
zinc-plated HHCS #2
3
bolt
6 33004
7 37018
¼ in. type A narrow
flat washer
¼ in. – 20 zinc-plated
UNC nylock nut
3
3
ASP-PORT is NOT a handrail! Do not lean against or apply weight
Step 3: Fasten the handle to the step stand. Feed a bolt through each of the holes,
and secure it with a flat washer and ¼ in. hex nut.
Rear
legs
Wheel
shaft
Step 4: Adjust the height of the legs so that the step stand rests firmly on all 4 (rubber)
feet.
Step 5: To transport the step stand, grasp the top of the handle, brace the wheel shaft
with your foot, and tilt the stand toward you until the wheels contact the ground.
Cop
yright 2010 Vestil Manufacturing Corp.
p. 3 of 5
Page 4

10/27/2010 rev. 10/27/2010 APS manual.doc
ASP-PORT-HT features and use instructions:
FIG. 2A: ASP-PORT-HT
Load platform
Inspections & Mainten
At least 1 time per week, inspect:
1. Wearing parts:
Rubber feet –examine the feet for excessive wear, and replace them as necessary to provide a reliable, no-slip
contact with the ground.
Threaded legs
Fasteners - bolts, nuts, washers. Replace all damaged fasteners BEFORE using the steps again.
[ASP-PORT] Wheels – inspect the surface of each wheel for damage that could prevent smooth operation, and
examine the cotter pins and wheel rims. Replace wheel(s) if necessary.
Handle weldment – inspect welds for cracks
[ASP-PORT-HT] – examine wheels and check the inflation pressure. Add/remove air as required to match the
inflation recommendations of the wheel manufacturer. Inspect the cotter pins and washers that prevent the
wheels from sliding off of the wheel shaft. Replace any component(s) that is damaged too significantly to
function/operate properly.
2. Steps and frame: confirm that each step and the frame are structurally sound, not corroded or rusted. DO NOT use
the step stand if a step(s) are structurally compromised or dangerously rusted or corroded.
3. Welds: confirm that all welds are intact. DO NOT use the step stand if authorized maintenance personnel determine
that a damaged weld compromises the soundness of the steps.
4. Overall condition of Step stand, [ASP-PORT] handle, [ASP-PORT-HT] dolly: the structure should be clean, square
and rigid, and free of rust and corrosion. Remove dirt and debris. DO NOT use the step stand if rusted or corroded to
a degree that compromises structural integrity.
ance
FIG. 2B: Engaging side frame of step stand
FIG. 2C: Step stand frame-engaging brackets
Cop
yright 2010 Vestil Manufacturing Corp.
p. 4 of 5
USE INSTRUCTIONS
Step 1
either the left or right side of the
step stand.
Step 2
(see Fig. 2A) underneath the
step stand.
Step 3
push it forward until the side
frame of the step stand aligns
with the frame-engaging
brackets (see Fig.’s 2B and 2C);
-ORManually lift the stand and set it
down so that the side frame fits
inside the frame-engaging
brackets.
Step 4
with your foot, and then tilt the
dolly back. Transport the step
stand to the desired location.
Step 5
the frame and brackets separate;
-ORManually lift the step stand out of
the brackets.
: Position the dolly on
: Slide the load platform
: Tilt the dolly forward and
: Brace the wheel shaft
: Tilt the dolly forward until
Page 5

10/27/2010 rev. 10/27/2010 APS manual.doc
Leveling the step stand:
Before walking/standing on the step stand, make sure that the steps are level. Adjust the height of each of the legs to level the
stand. Grasp the rubber boot and turn the threaded leg counterclockwise to decrease height, or clockwise to in crease the height of
the particular corner of the stand.
Leg post
: Stand leveling
FIG. 3
Threaded leg
Turn counterclockwise to decrease height Turn clockwise to increase height
FIG. 4: Product Markings and Labels
(Label #213)
A
C
B
B (Label #726)
A
C (Large Vestil logo)
Copyright 2010 Vestil Manufacturing Corp.
p. 5 of 5
 Loading...