

VESTEL RN 425S Service Manual

VESTEL REFRIGERATOR
SERVICE MANUEL CODE : 52000615
VESTEL CUSTOMER PRODUCT
MODEL : MODEL : CUSTOMER : CODE:
VESTEL WHITE GOODS
CUSTOMER SUPPORT
SERVICE MANUAL
RN 425S SMP 420.05 FRANCE / VESTEL FRANCE / STARFROST 10600044

Printed Date : 24 / 04 / 2004 Document No : 52000615
CONTENTS PAGE
1. ASSEMBLE & DISASSEMBLE
* Changing the door swing direction 1-3
* Changing the freezer door swing direction 4
* Changing the thermostat 5
* Thermostat knob 5
3. REFRIGERANT CYCLE DIAGRAM 6
4. COMPRESSOR AREA VIEW 7
5. CIRCUIT DIAGRAM 7
6. INTERIOR PARTS 8
7. INTERIOR PARTS LIST 9-10
8. DOOR ASSY. PARTS 11
9. DOOR ASSY. PARTS LIST 12
10. UNIT PARTS 13
11.UNIT PARTS LIST 14
1
VESTEL
WHITE GOODS
VESTEL REFRIGERATOR
Printed Date : 24 / 04 / 2004 Document No : 52000615
VESTEL WHITE GOODS
CUSTOMER
SUPPORT
APRIL
2004
ASSEMBLE & DISASSEMBLE
Figure - 1
Figure - 2
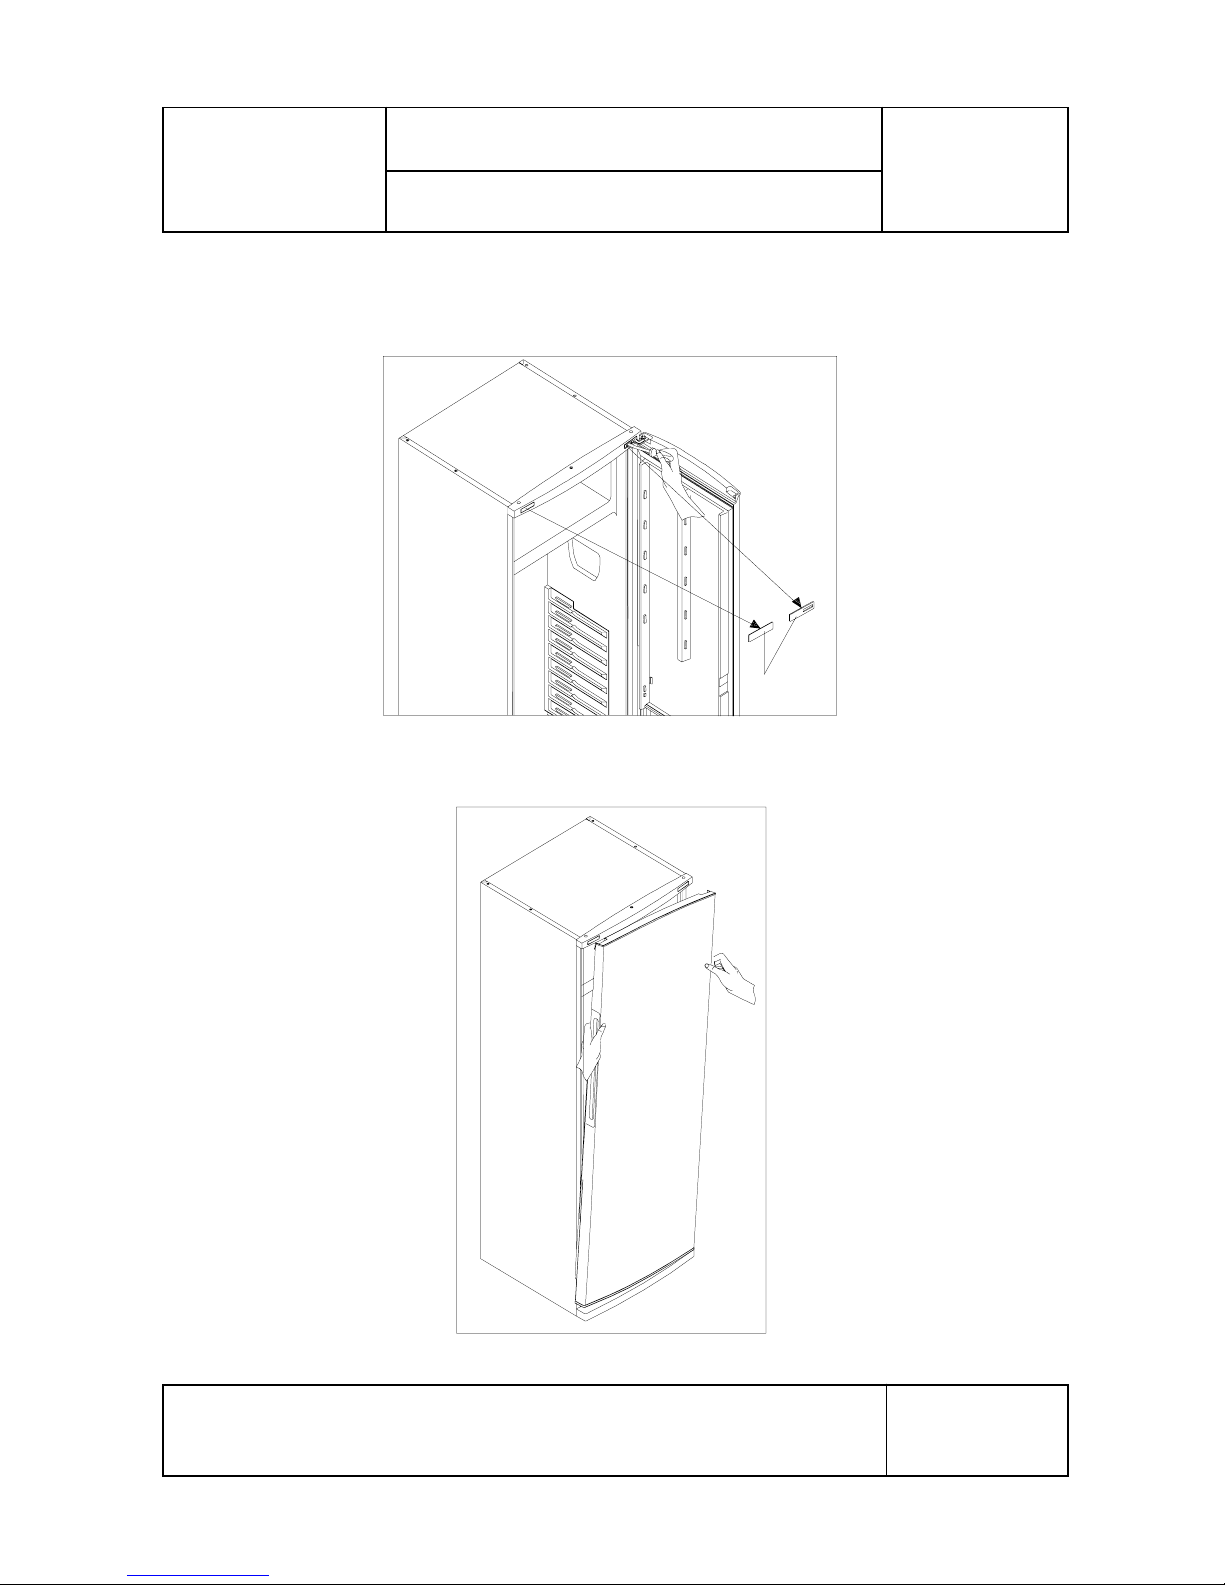
A- Changing The Door Swing Direction :
1- Remove the head panel hinge covers and unscrew the two screws fixing the top
hinge and remove it. (FIG-1)
2- Dismantle the door from bottom hinge by pulling the door upwards. (FIG-2)
Hinge covers
VESTEL
WHITE GOODS
APRIL
2004
VESTEL WHITE GOODS
CUSTOMER
SUPPORT
VESTEL REFRIGERATOR
2
Printed Date : 24 / 04 / 2004 Document No : 52000615
ASSEMBLE & DISASSEMBLE
Figure - 3
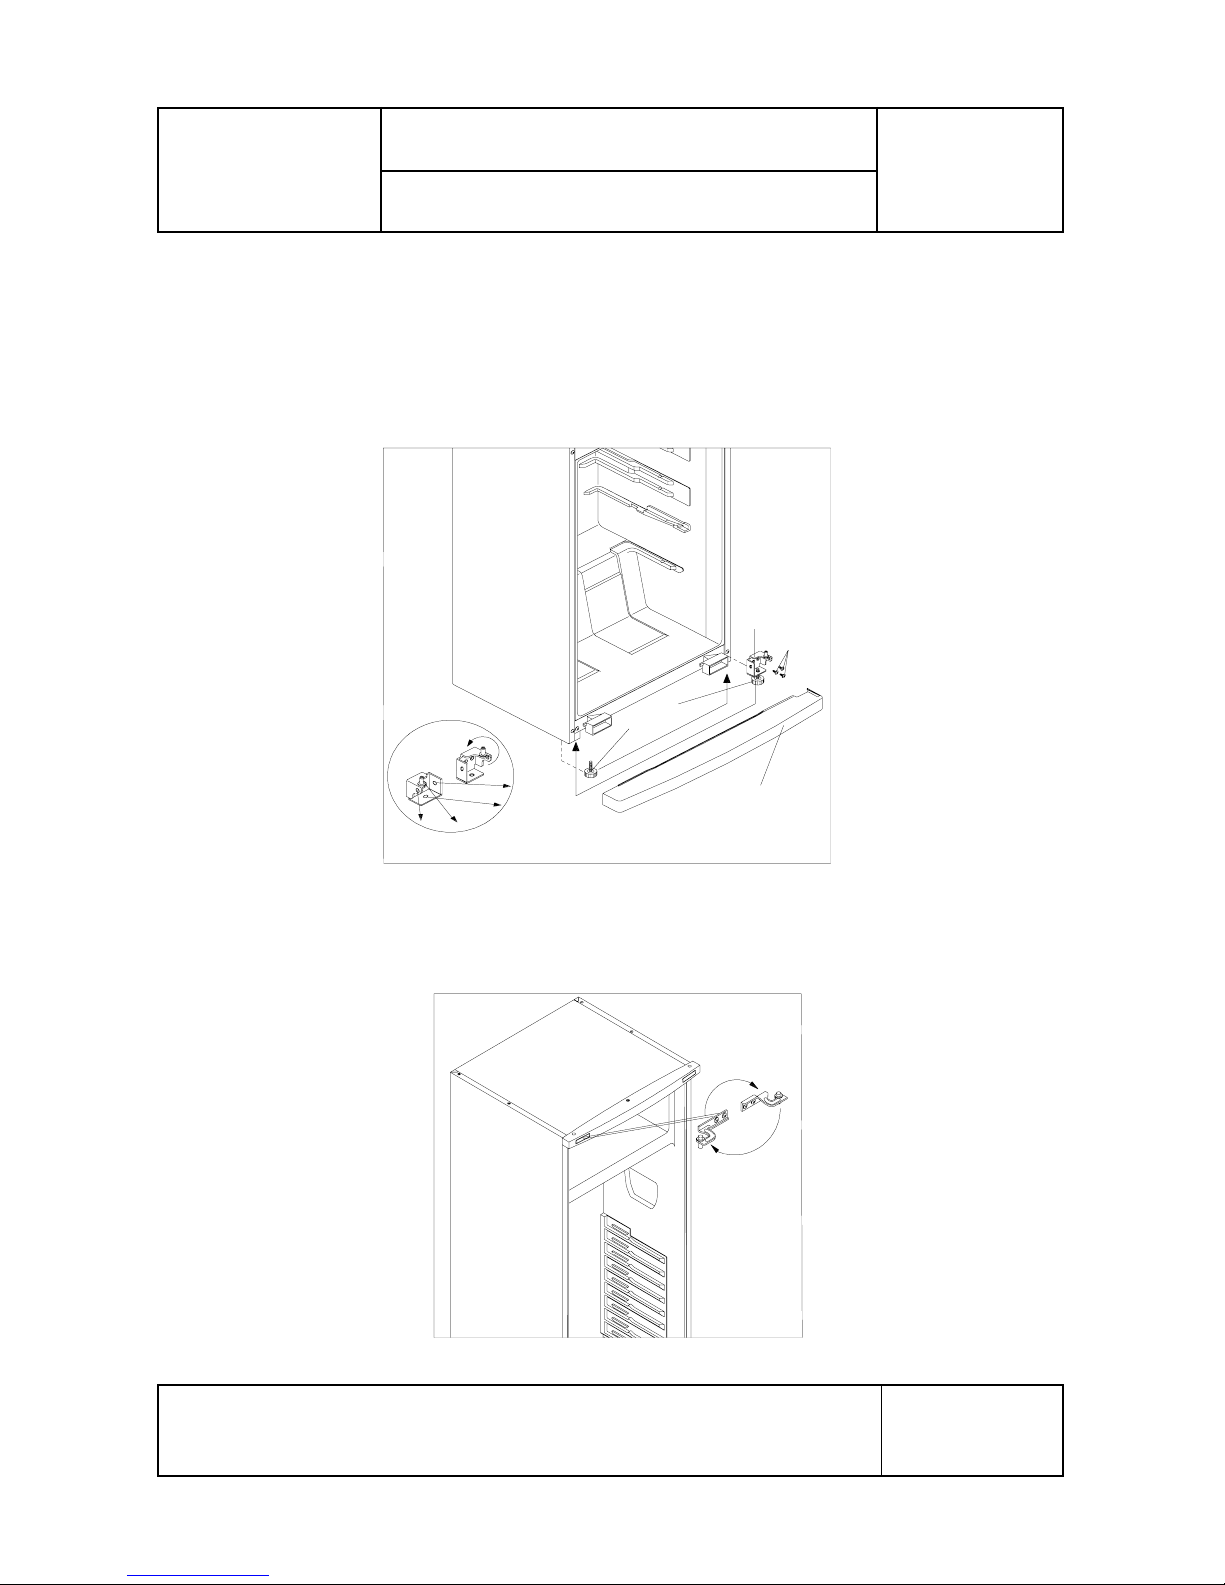
3- Remove the kick plate by pulling forward. Unscrew the bottom hinge fixing screws
and remove it. Unscrew the pin of bottom hinge from Hole 1, rotate the bottom hinge
900 and screw the pin to Hole 2. Dismantle stationary foot of bottom hinge from Hole 3
and screw the stationary foot to Hole 4. (See Detail A) Then remove the stationary foot
from the left side and assemble it to the right side. Screw the hinge to bottom left side
of the cabinet. (FIG-3)
Screw
Kick Plate
Hole 4
Hole 1
Hole 2
Stationary
Foot
Hole 3
Detail A
Bottom
Hinge
Figure - 4
Turn the
top hinge
180°
4- Unscrew the pin of the top hinge. Turn the top hinge by 1800 then screw the pin of
the top hinge. (FIG-4)
3
VESTEL
WHITE GOODS
VESTEL REFRIGERATOR
Printed Date : 24 / 04 / 2004 Document No : 52000615
VESTEL WHITE GOODS
CUSTOMER
SUPPORT
APRIL
2004
ASSEMBLE & DISASSEMBLE
Figure - 5
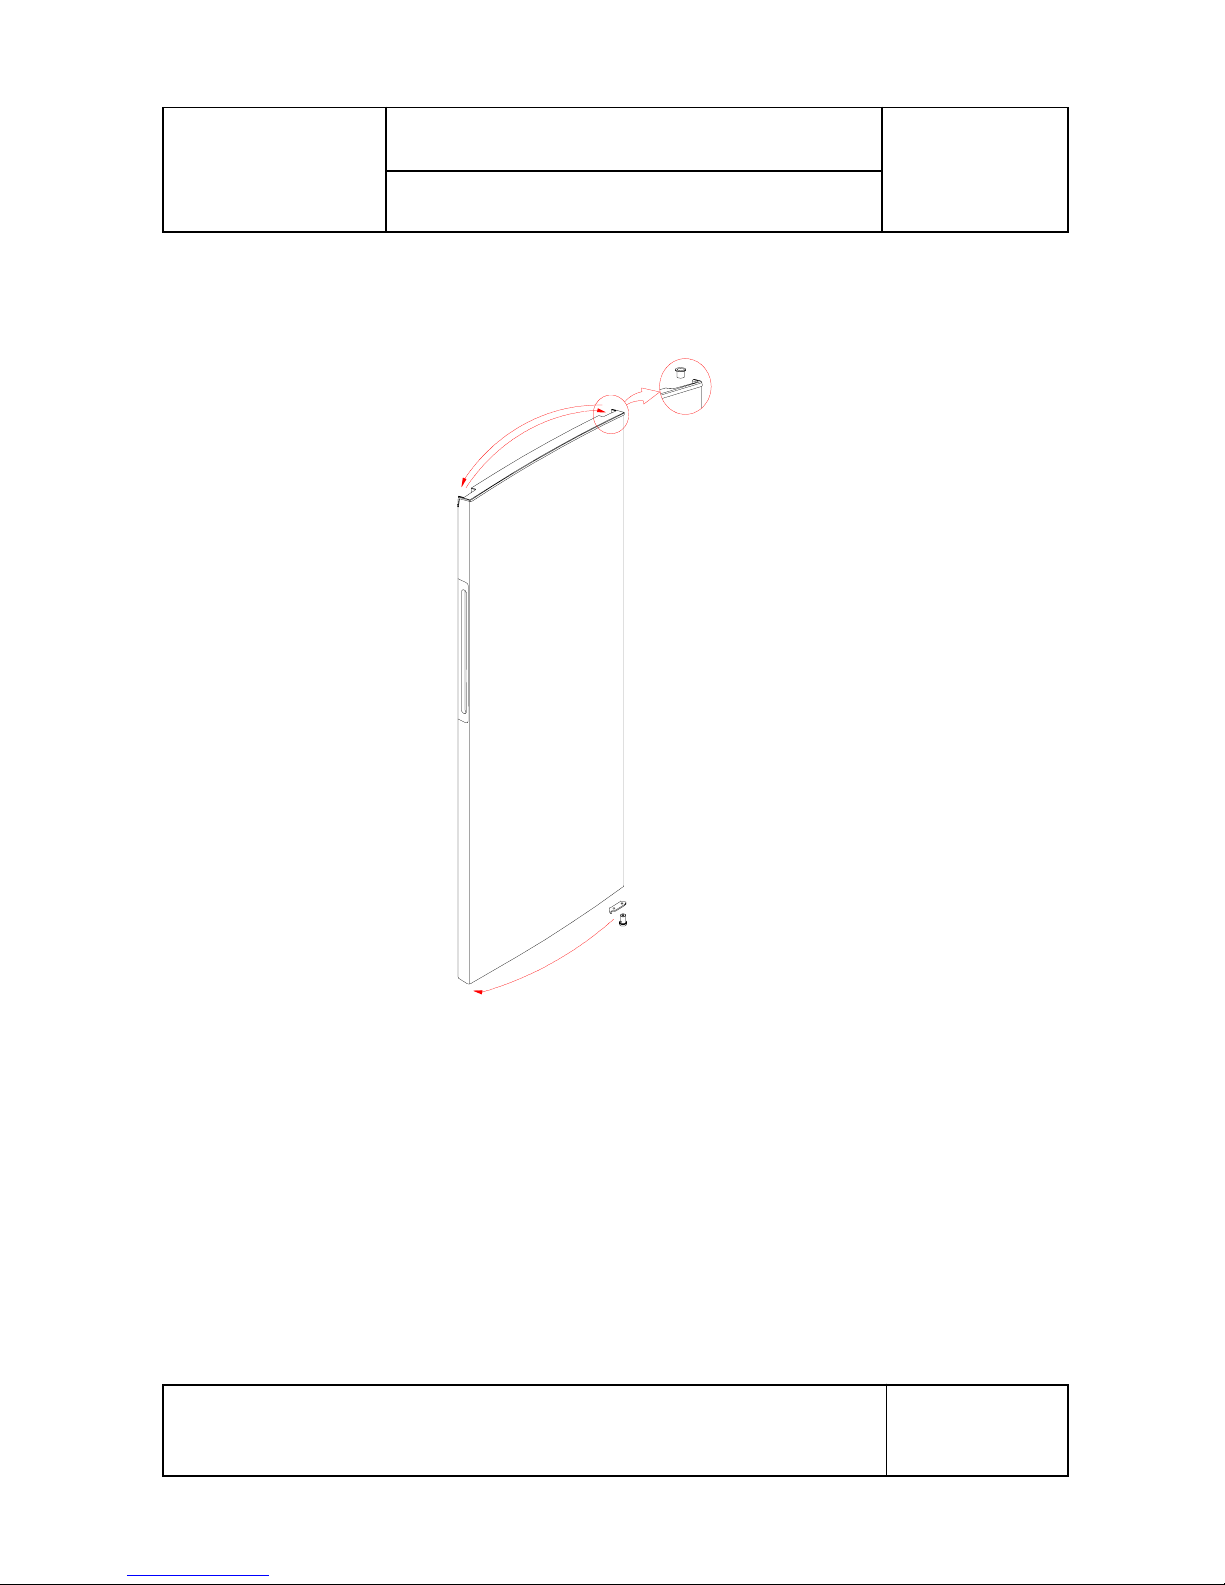
5- Remove the top bushing and insert it into left side hole. (FIG-5)
Remove the bottom bushing and bottom stopper and reassemble them to the
left side. (FIG-5)
6- Assemble the door by repeating the reverse operation of items 1 and 2.
( Screw the top hinge to left hand side. ) Fix the hinge covers by replacing the right and
left one. Finally, by using a knife cut left side of the kick plate and assemble it.

VESTEL
WHITE GOODS
APRIL
2004
VESTEL WHITE GOODS
CUSTOMER
SUPPORT
VESTEL REFRIGERATOR
4
Printed Date : 24 / 04 / 2004 Document No : 52000615
ASSEMBLE & DISASSEMBLE
1. Remove the freezer door hinge cover. (FIG-1) Unscrew the two screws fixing the
freezer door hinge and remove the freezer door (FIG-2)
2. Unscrew the one screw fixing the freezer door holder and remove it. Then screw it
to the right side. Remove the two small caps on the left side and insert them to right
side as shown in the figure. (FIG-3) Assemble the freezer door and fix the freezer
door hinge by tighting the screws. (Reverse operation of item 1) (FIG-4) Finally,
insert the freezer door hinge cover.
Freezer Door
Holder
insert the two
small caps
Figure - 1
Figure - 2
Figure - 3
Figure - 4
Changing The Freezer Door Swing Direction :
 Loading...