

G
VRS Luxsensor S
VRS Luxsensor S
85400521 H1
Art. nr.:
01180000
Short description
For inside mounting on the window pane
Transmit commands combined with Touch Control VRS
Safety precautions
– Contact a professional electrician to install the control system.
– Check the control system for signs of mechanical damage af-
ter unpacking. If you notice any shipping damage, do not start
up the control system and notify your supplier immediately.
– The control system should only be used for the purpose spec-
ified by the manufacturer (refer to the operating instructions).
Any changes or modifications thereof are not permissible and
will result in loss of all warranty claims.
– If the control units or the connected sunshade cannot be oper-
ated without presenting a hazard, it must be switched off and
prevented from being switched on unintentionally.
– This device contains a pollutant battery. The end user must re-
cycle all used batteries in accordance with regulation 91/157/
EWG. Disposing of the batteries in household waste is strictly
forbidden.
Technical data
VRS Luxsensor S Art. nr.: 01180000
Lux sensor in Vestamatic Radio System (VRS).
Installation and Operating Instructions
Installation
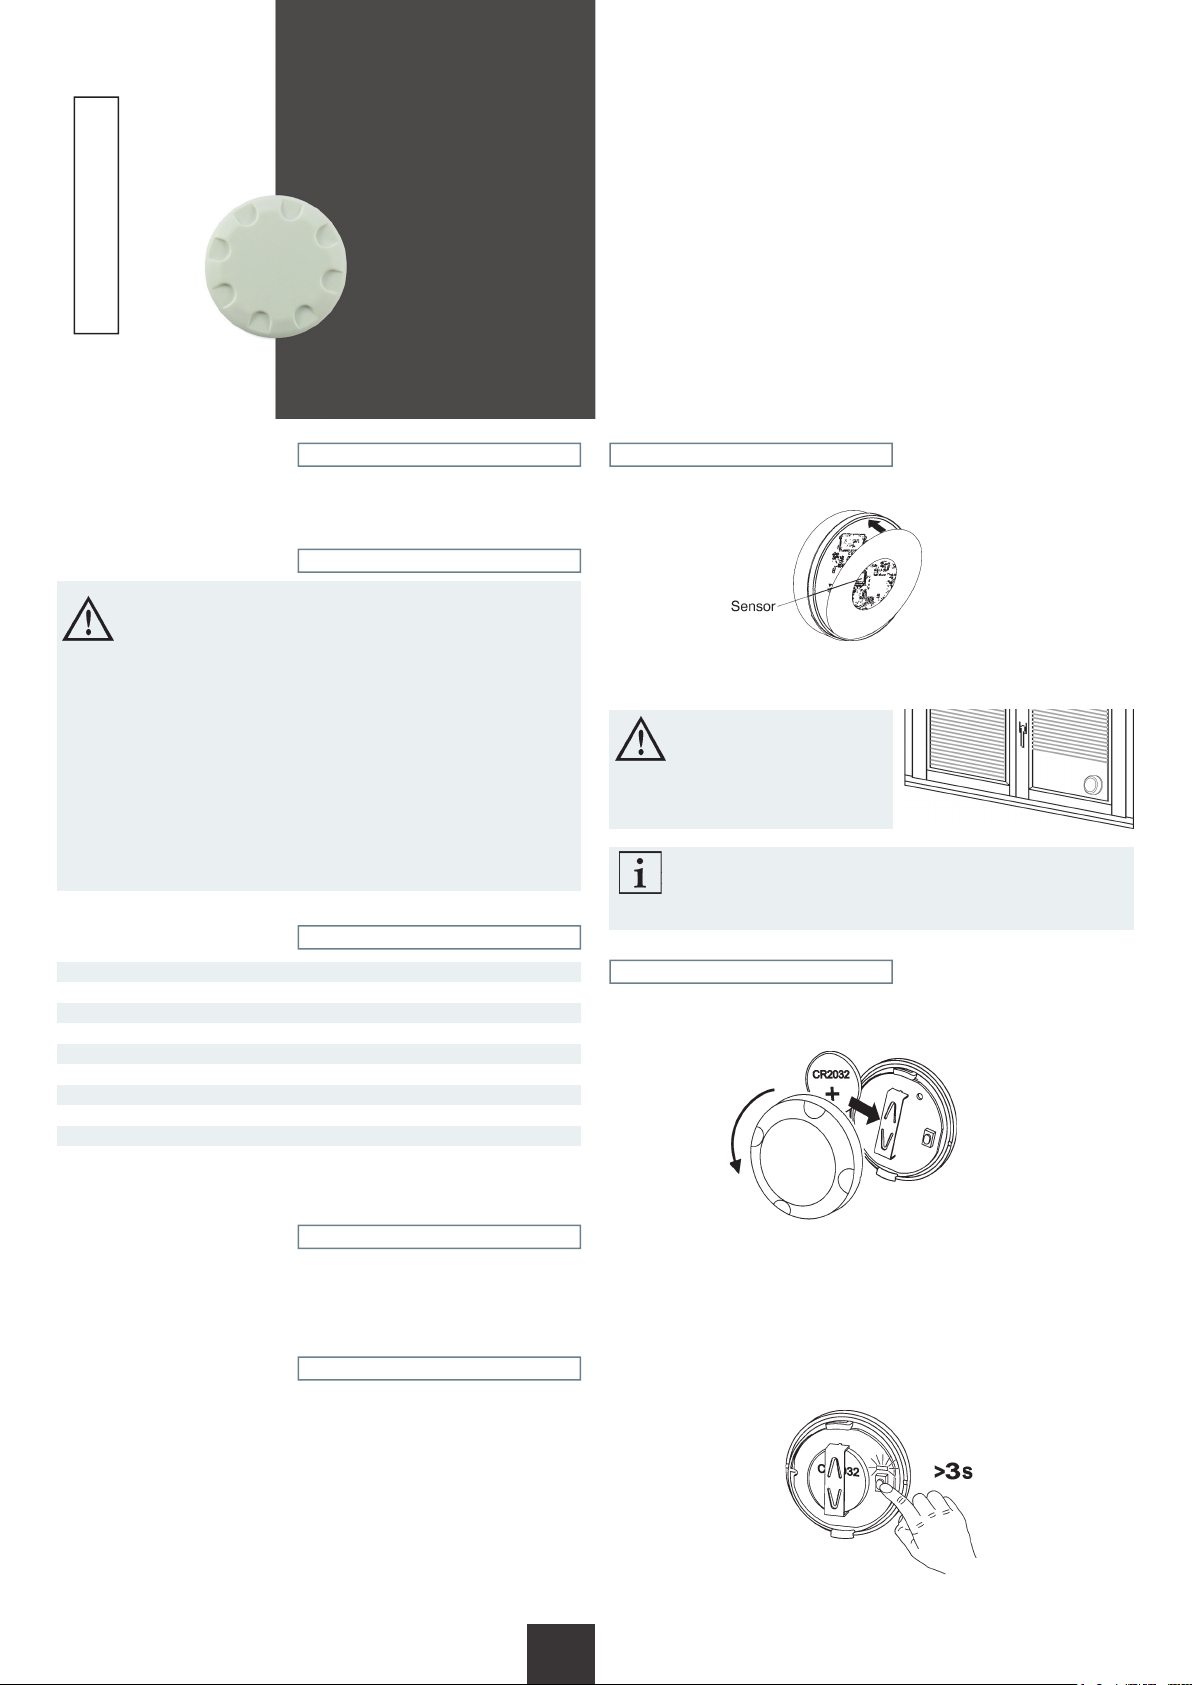
1. Stick the adhesive ring on the outside of the transparent casing.
ACHTUNG!
Verdecken Sie den
Sensor nicht.
2. Stick the sensor close to the bottom edge of the window onto the cleaned
window glass from the inside.
ATTENTION!
Make sure to install the sensor in a shadow-free position!
The Light Sensor may not be
covered by or located in a
shade place!
Note:
For removing the sensor can simply be taken off the window
pane. Rub off the remainder of adhesive with your fingers before
you stick on a new adhesive ring.
Radio frequency: 868 MHz
Modulation: FSK
Power supply: 1 × 3 V-Battery, CR 2032
Protection degree: IP 50
Programmable range: 2 kLux to 60 kLux
Operating temperature: 0°C (32°F) to +70°C (158°F)
Range in buildings: approx. 30 m
Dimensions (L × W × H): Ø 41 × 13 mm
Weight: 13 g
Conformity:
This product conforms to the basic requirements of the R&TTE Directive
1999/5/EC. The Declaration of Conformity can be found on the web page:
www.vestamatic.com.
The Lux sensor can only be used in connection with Vestamatic controls for
the wireless transmission of control commands.
The manufacturer will not assume any liability for damage caused by improper or inappropriate handling.
The Lux sensor periodically measures the current brightness value. If the
brightness exceeds or falls below the user-defined threshold, the sensor
transmits a movement command to the control.
If the brightness value is over the threshold for one minute, the DOWN
command is transmitted. If the brightness value is below the threshold for
16 minutes, the UP command is transmitted.
p
Conformity
Functional description
Start-up
1. Fit batteries
Open the casing and insert the battery into the compartment.
ATTENTION!
The positive pole
must be visible.
2. Setting the threshold.
To set the threshold at which the sensor is to respond, wait until the
current brightness is appropriate. Then push the sensor button (> 3 seconds) until the LED lights up. The current brightness value is saved as
the new threshold.
If you wish to change the threshold, repeat the procedure – the old value
is overwritten.
Art.-Nr.: 85400521 H1 • Vestamatic GmbH • Dohrweg 27 • D-41066 Mönchengladbach • www.vestamatic.com
1/2
G
Subject to modifications.© Vestamatic GmbH
VRS Luxsensor S
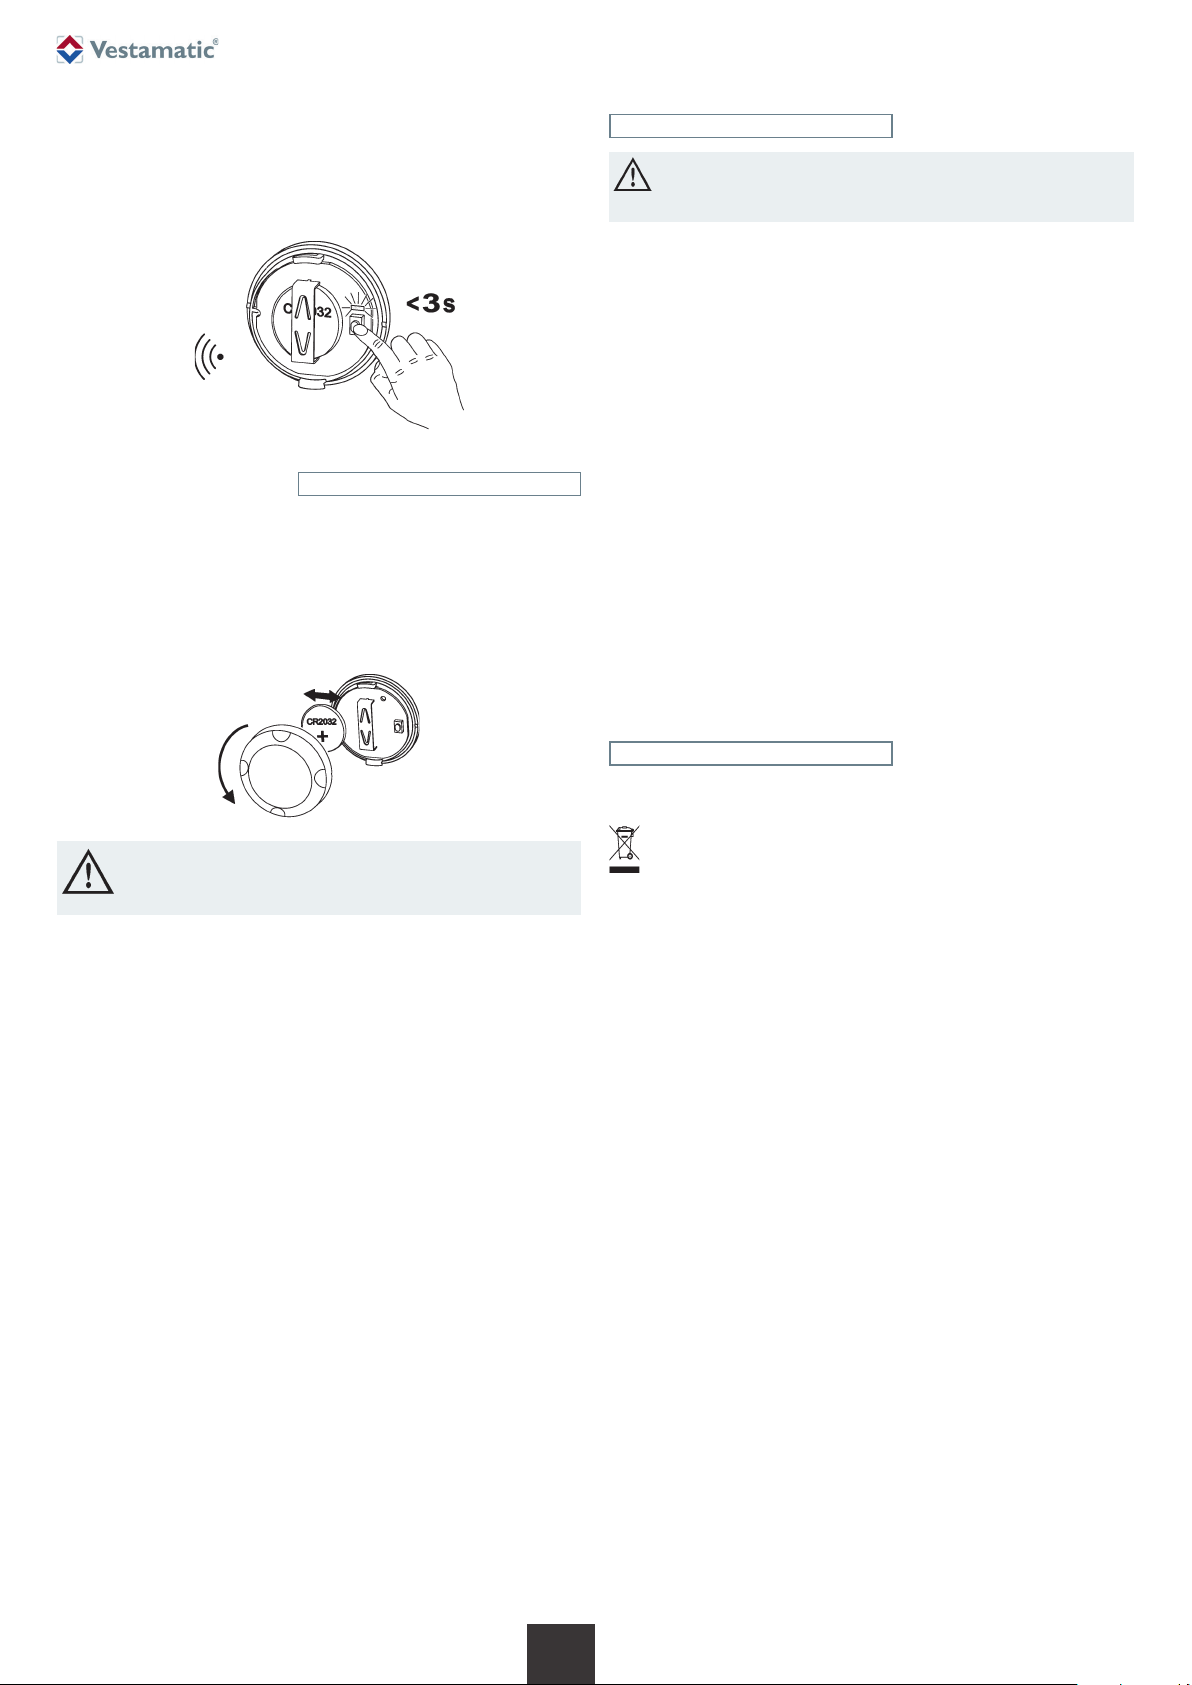
3. Registering the light sensor to the control.
The sensor must be registered to the control, so that the control can
receive the movement commands.
To register the sensor, activate learning mode on the control and then
briefly press the sensor button (< 3 seconds). The LED lights up briefly
and the sensor code has been registered by the control.
Exchanging the battery
If an empty battery symbol appears on the control system’s information
display, replace the battery to ensure that the VRS lux sensor continues to
operate reliably. Unscrew the VRS lux sensor housing by turning it slightly
to the left and replace the CR 2032 type battery.
Then reassemble the housing by following the instructions in the reverse
order. When the sensor emits the next transmission signal, the battery
warning will automatically disappear from the control system’s information
display.
Instructions of radio receivers
ATTENTION!
Radio transmission is not suitable for safety operations,
such as emergency-stop, emergency call or warning signals.
Signals are transmitted across the Europe-wide approved 868 MHz frequency band. The radio transmission range largely depends on the constructional circumstances of the building. If other adjacent radio devices are
simultaneously sending signals, mutual interferences cannot be debared.
Such interferences can also affect individual units of a group of receivers.
Observing the following instructions will minimize these interferences:
Avoid to mount radio receivers onto or adjacent to metal surfaces.
Maintain minimum 50 cm clearance to consumer loads, such as micro-
wave ovens or TV sets.
Keep a minimum clearance of 50 cm between each mounted radio re-
ceiver.
Keep a minimum clearance of 50 cm between a radio receiver and a
radio transmitter.
If a radio-transmitted command cannot be clearly detected, the command
execution will be suppressed by means of an integrated automatic safety
function. The command must then be issued again.
ATTENTION!
The positive pole must be visible!
Keep batteries out of the reach of children.
Disposal of waste
The disposal of electrical equipment and batteries in household
waste is strictly forbidden.
The symbol (dustbin crossed out, in line with WEEE Appendix IV) in-
dicates separate collection of electrical and electronic products in EU
countries. Do not dispose of the device or battery in your household
waste. Ask your town or local council about the return and collection
systems available in your area to dispose of this product.
2/2
G
Art.-Nr.: 85400521 H1 • Vestamatic GmbH • Dohrweg 27 • D-41066 Mönchengladbach • www.vestamatic.com
Subject to modifications.© Vestamatic GmbH
 Loading...