

Page 1

s5015 User Manual
1- Welcome 3
1.1. Exciting Features ............................................................................. 3
1.2. Technical Specification ..................................................................... 4
2- Phone Layout 5
2.1. Keys and Parts ................................................................................ 5
2.2. Icons and Indicators ......................................................................... 7
3- Getting Started 8
3.1. Insert SIM card ................................................................................ 8
3.2. Insert Memory card .......................................................................... 9
3.3. Unlock the Phone .......................................................................... 10
3.4. Using the Touch screen.................................................................. 11
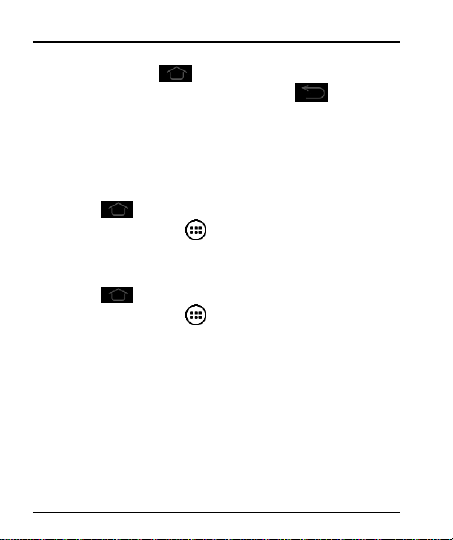
3.5. Using the Phone’s Buttons ............................................................. 12
3.6. Context Menus .............................................................................. 13
3.7. Options menus .............................................................................. 13
3.8. Menu Icons .................................................................................... 13
4- Placing and Receiving Calls 15
4.1. Make a Call ................................................................................... 15
4.2. Disable Phone Calls (Airplane mode) ............................................. 15
4.3. Disable SIM card ........................................................................... 16
5- The Home Screen 17
5.1. Open and Close the Launcher ....................................................... 18
5.2. Switch to Recently Used Application .............................................. 20
5.3. Customize Home Screen ............................................................... 20
6- Connect to the Internet 22
6.1. To configure your Internet:.............................................................. 22
6.2. Access Internet via Wi-Fi................................................................ 22
7- Managing Notifications 23
7.1. Open the Notifications Panel .......................................................... 23
Page 2

User Manual
7.2. Respond to Notifications ................................................................ 23
7.3. Close Notifications Panel ............................................................... 24
8- Messaging 25
8.1. Message environment & Settings ................................................... 25
8.2. Using the Onscreen Keyboard ....................................................... 28
8.3. Create and Send Multimedia Message ........................................... 29
8.4. Operation on a message: ............................................................... 30
8.5. Lock a Message ............................................................................ 30
9- Multimedia 31
9.1. Camera ......................................................................................... 31
9.2. Gallery ........................................................................................... 32
9.3. Share an Album ............................................................................. 32
9.4. Music32
9.5. FM Radio ....................................................................................... 33
9.6. Record Sounds .............................................................................. 33
9.7. Make Printscreens ......................................................................... 33
10- Connect to Networks and Devices 34
10.1. Connect to PC ............................................................................. 34
10.2. Connect to Internet ...................................................................... 35
10.3. Connect to Wi-Fi Networks........................................................... 35
10.4. Pair With Bluetooth Devices ......................................................... 35
11.5. Connect to Internet via your Phone .............................................. 35
10.6. Install Secure Certificate from SD Card ........................................ 35
11- Download Applications 37
12- Phone Settings 38
13- Health and Safety Information 40
2
Page 3

User Manual
11--
WWEELLCCOOMME
E
1.1. Exciting Features
Congratulations on becoming a proud owner of the KitKat Android mobile phone. You
have now joined the millions of satisfied customers spread across the Globe. Your
KitKat device offers you these exciting features and much more:
Android 4.4.2
5 inch Screen
Cameras (front and back)
1.3GHz Quad core Processor
External Memory (Expandable to 32 GB)
Dual SIM
Multimedia player
GPS
Gravity sensor
Wi-Fi
Bluetooth 3.0
3
Page 4

User Manual
1.2. Technical Specification
GENERAL:
Android 4.4.2
Dimensions: 143.5*71.5*8 mm / Weight: 135g
2100mAh Li-ion battery
SCREEN:
5" HD capacitive touchscreen
1280*720pixels, 17.1M of colors
HARDWARE:
1.3GHz Processor / 512MB RAM
8GB ROM, 1GB RAM
External SD-card slot up to 32GB
8 MPx Back Camera Auto-Focus + 5 MPx Front Camera
White LED flash
Gravity Sensor
COMMUNICATION:
DUAL SIM. 2G/3G
Support GPRS, EDGE networks. GSM850/900/1800/1900MHz HSDPA
WCDMA 850/1700/1900
Support GPS and AGPS (Subject of the installation of the relevant
software)
Bluetooth 3.0
Wi-Fi 802.11 b/g/n
3.5mm Jack Plug
Micro-USB 2.0 receiver
4
Page 5
User Manual
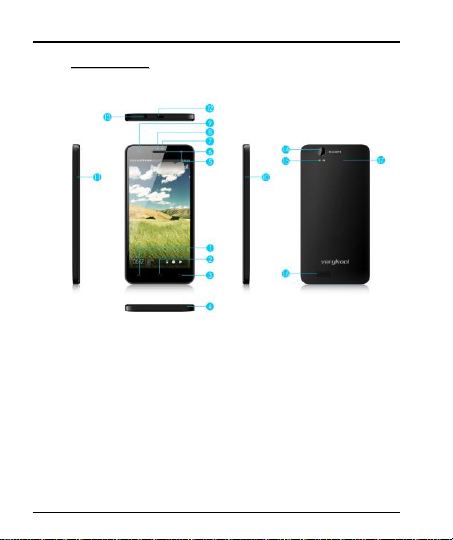
22--
PPHHOONNEE LLAAYYOOUUTT
2.1. Keys and Parts
5
Page 6

User Manual
6
Page 7
2.2. Icons and Indicators
Icons
Indicators
Icons
Indicators
Signal strength indicator
Alarm has been set
New missed calls
Wi-Fi is activated
USB is connected
Bluetooth is on
The headphone is being
used
Battery charging
symbol
New message from SIM
1
Airplane mode is
activated
7
User Manual
Page 8

User Manual
33--
GGEETTTTIINNGG SSTTAARRTTEEDD
3.1. Insert SIM card
The KitKat is a Dual SIM mobile phone allowing you to use the facility of two
networks. To insert SIM card(s):
Switch off the mobile phone and remove the rear cover and battery.
Insert the SIM card correctly in the card slot(s) (See figure below).
Insert SIM card carefully!
Finally insert the battery and replace the rear cover of the mobile phone.
8
Page 9

User Manual
3.2. Insert Memory card
The phone allows you to expand external memory with a micro SD card, up to 32GB.
Power off the mobile phone, and then remove the rear cover and battery.
Insert the memory card into the slot.
Finally insert the battery and the rear cover of the mobile phone.
Use only compatible memory cards approved by with this device. Incompatible
memory cards may damage the card or the device will corrupt the data stored in the
card.
9
Page 10

User Manual
3.3. Unlock the Phone
You may need to provide PIN, Password, or draw a pattern to unlock your phone.
To unlock the screen:
Press the power key to wake up the phone.
Hold and drag the unlock icon to the right to
unlock.
You may be required to unlock your phone based on the unlock method in settings.
To set the unlock method:
On the main menu, touch Settings > Security.
Touch Set up screen lock.
Choose the type of locking as desired. You can set your screen lock on the
basis of pattern, PIN, Password or none.
10
Page 11

User Manual
3.4. Using the Touch screen
You can use the touch screen in the following ways:
Touch: Acts on items on the screen, such as application and settings icons, to
type letters and symbols using the onscreen keyboard, or to press onscreen
buttons.
Touch and hold: Touch and hold an item on the screen until an action occurs.
Drag: Touch and hold an item and move your finger on the screen until you
reach the target position.
Swipe or slide: Quickly slide your finger across the surface of the screen,
(without dragging an item). For example, slide the screen up or down to scroll
a list,
Double-tap: Tap quickly twice on a webpage, map, or other screen to zoom.
For example, double-tap a section of a webpage in Browser to zoom that
section to fit the width of the screen. You can also double-tap to control t zoom,
in Maps, and in other applications.
Pinch: In some applications (Such as Maps, Browser, and Gallery) you can
zoom in and out by placing two fingers on the screen at once and pinching
them together (to zoom out) or spreading them apart (to zoom in).
Rotate the screen: On most screens, the orientation of the screen changes as
you rotate it. You can turn this feature on and off.
11
Page 12
User Manual
Button
Press
Menu: opens context menu with further options and
actions, content depends directly on applications.
Home: returns to Home screen. Hold it to access the
list of last used applications.
Back: returns to the previous screen you were
working in, even if it was in a different application. Can
be used to hide the keyboard.
3.5. Using the Phone’s Buttons
The phone’s buttons offer a lot of functions and shortcuts.
The phone provides you with Context menus and Options menus for accessing the
features in an intuitive way.
12
Page 13
User Manual
3.6. Context Menus
You can open context menu by touching key. Not all screens have context
menus. If you touch key inside application that has no context menu, nothing
happens.
Examples of context menu from Contacts environment:
3.7. Options menus
Options menus contain tools that apply to specific items on the screen. You can open
an option by touching and holding an item on the screen. Not all items have options
menus.
When you touch and hold some items on a screen, an Options menu opens.
3.8. Menu Icons
You have the following menu icons to easily let you access its important features:
13
Page 14

Opens the dialer
Opens messaging
Opens the main menu
Opens the contacts list
Opens the browser
14
User Manual
Page 15

User Manual
44--
PPLLAACCIINNGG AANNDD RREECCEEIIVVIINNGG CCAALLLLSS
You can dial a phone number or touch a number in your contacts. You can also place
from the call log or contacts.
4.1. Make a Call
Tap the icon on main menu or the home screen to dial the desired
number.
Touch the icon on main menu or the home screen to make a call from
contact, groups or favorites.
To dial an international number, touch and hold the 0 key to enter the Plus (+)
symbol, and then enter the international country prefix, followed by the phone
number
Touch the icon to call with SIM 1 or SIM 2.
Press the Volume Up/ Down keys to adjust the call volume.
You can access Call Logs, Contacts from the dialer screen.
While during a call, touch the icon to end a call.
4.2. Disable Phone Calls (Airplane mode)
Some locations like airplanes may require you to turn off your mobile, Wi-Fi, and
Bluetooth wireless connections.
Press and hold the Power button.
Touch the Airplane mode.
15
Page 16
User Manual
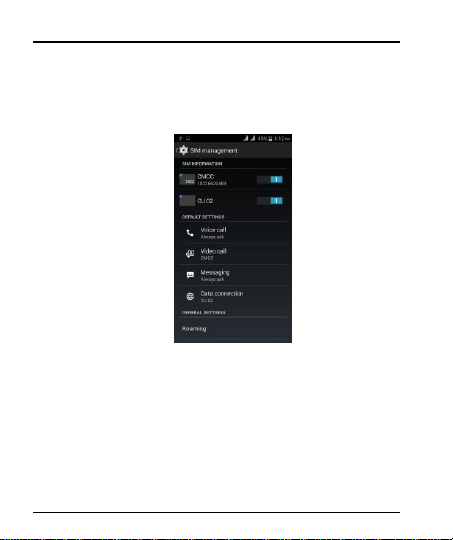
4.3. Disable SIM card
If you want to to close the SIM card, to do it go to:
Settings
> Dual SIM Settings
> turn off SIM1/SIM2
16
Page 17
User Manual
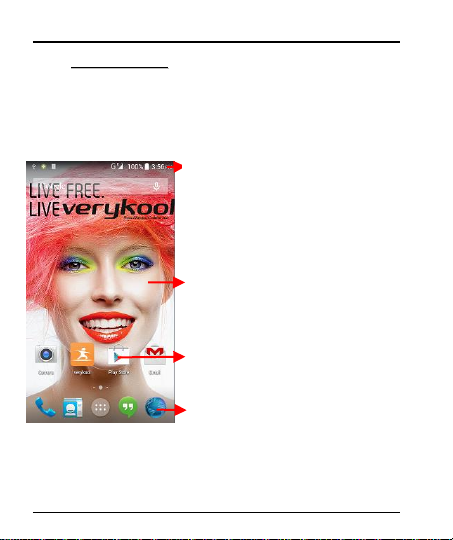
55--
TTHHEE HHOOMMEE SSCCRREEEENN
Touch and hold an empty spot to change wallpaper.
Touch an icon to launch the corresponding application;
bottom icons are accessible from all desktop screens.
Touch and hold to move or remove an icon or a widget.
The status bar shows the time,signal strength,battery
satus and notification
When you sign in, the home screen opens.
The Home screen is your starting point to access all the features on your phone.
Touch the main menu icon at the bottom of the screen to view all installed
applications.
17
Page 18
User Manual
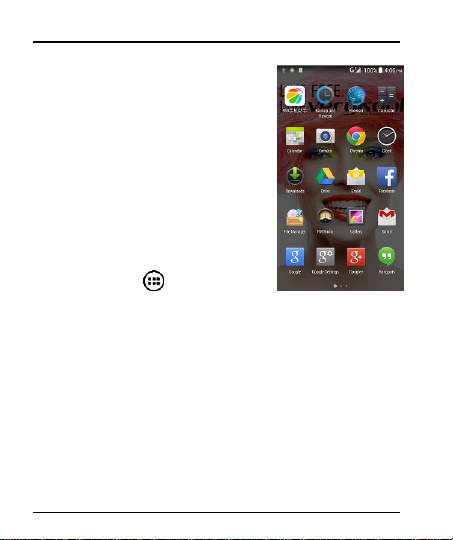
5.1. Open and Close the Launcher
Touch the Launcher Icon to open the main menu.
You have access to all applications installed on your device and their widgets when
available.
Touch an application to open and launch it.
To add an application shortcut to the desktop screen, press and hold it until it vibrates
and enters Home screen. Place it and release your finger.
Slide the Launcher left or right to bring more icons into view.
As soon as you install a new application, it comes in this list.
18
Page 19
User Manual
Widgets come when you press menu key on the home screen. You can directly touch
WIDGETS at below of the screen
You cannot launch widget like an application; you can only place it on desktop
screen.
Press and hold it until it vibrates and enters Home screen. Place it and release your
finger. A context menu opens to configure the widget or resize it, naturally, it depends
on the widget.
Press Home icon or Back icon to close the Launcher.
19
Page 20
User Manual
5.2. Switch to Recently Used Application
Press and hold the icon for a few seconds.
Touch an icon to open its application. Or press to return to the
current application.
5.3. Customize Home Screen
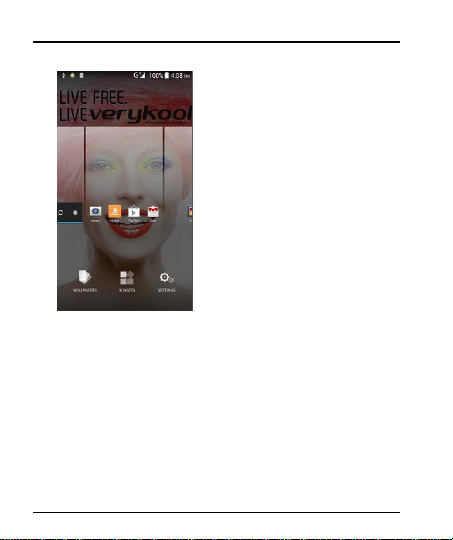
You can add applications, shortcuts, widgets, and other items to any part of the Home
screen or change the wallpaper.
Applications:
Press to open the Home screen.
Touch the Launcher Icon to open the main menu.
To add an application shortcut to the desktop screen, press and hold it until
it vibrates and enters Home screen. Place it and release your finger.
Widgets:
Press to open the Home screen.
Touch the Launcher Icon on your home screen.
Touch widgets on the top of screen.
You are in the main widgets screen, you can
Move between screens: Swipe left or right
Drag a widget to a home screen: Touch and hold the widget’s i con, slide
your finger where you want to place it, and lift your finger.
You may be asked to make further choices before the widget activates. If
there isn’t room where you dropped it, the widget won’t get added to the
Home Screen.
Wallpapers: Wallpapers are images from Gallery, still images included with the
system, and live images. They take the place of the default background for your
Home Screen.
20
Page 21

User Manual
Touch and hold anywhere on a desktop Home screen that’s not occupied. A
list of options appears.
Touch one of the following wallpaper source:
o Gallery: Choose from pictures that you’ve taken with camera or
downloaded to your device.
o Live Wallpaper: Choose from a scrolling list of animated
wallpapers.Even you can choose a video file from your Video
Wallpaper folder .
o Wallpaper: Choose from thumbnails of default images.
For set wallpaper, touch SET WALLPAPER at the top of the screen (for
Gallery images) or set wallpaper.
Folders: You can very easily regroup desktop icons in a folder on screen to save
space and access more applications.
Touch and hold any icon on desktop screen to move it.
Go on another icon and release to create a folder containing both icons.
Then add as many icons as folder can hold, give it a name, move it where
you want.
You have all the tools to customize your KitKat Smart Phone.
21
Page 22

User Manual
66--
CCOONNNNEECCTT TTOO TTHHEE IINNTTEERRNNEETT
6.1. To configure your Internet:
Go to Settings> Wireless & Networks >More > Mobile Networks >Tap Data
Enabled.
By default, your network provider sends the Access Point Name settings via
SMS, or it comes automatically with your SIM card. You may need to install these
settings. After this, you can choose from the listed access point names. If the access
point names are not listed by default, please contact your network provider for the
same.
To add any operator Access point Name, go to settings > More > Mobile
networks > Access Point Name.
WARNING: to avoid any over cost contact your operator to know more about
Access Point Name regarding your subscription.
After you have selected or configured the access point name, go to
Settings> Wireless & Networks >Data usage >Tap Mobile Data to enable Internet
connection.
6.2. Access Internet via Wi-Fi
To browse the Internet via Wi-Fi:
Go to Menu> System settings> wireless & networks and then tap Wi-Fi.
Next, go to Menu> settings> wireless & networks > Wi-Fi Settings and
then enable Wi-Fi. Next, select the WIFI connection listed under Wi-Fi networks.
22
Page 23

User Manual
77--
MMAANNAAGGIINNGG NNOOTTIIFFIICCAATTIIOONNSS
Notification icons inform you of new messages and events. When you receive a
notification, its icon appears in the status bar, along with a summary that appears
only briefly.
7.1. Open the Notifications Panel
Drag the status bar down from the top of the screen as shown below:
The Notifications panel displays your network provider name and a list of your current
notifications.
7.2. Respond to Notifications
Open the notification panel and touch a notification to respond to it. What happens
next depends on the notification.
23
Page 24

User Manual
7.3. Close Notifications Panel
Drag the tab at the bottom of the Notifications panel to the top of the screen. Or just
press the back button. The panel also closes when you touch a notification to
respond to it.
24
Page 25
User Manual
88--
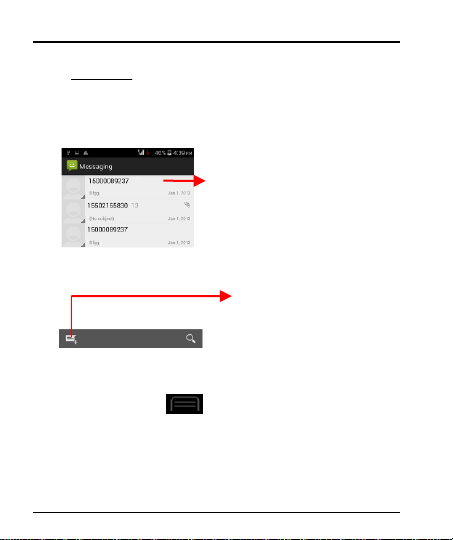
MMEESSSSAAGGIINNGG
Touch to compose a new text or
multimedia message.
Touch to open a messaging conversation
8.1. Message environment & Settings
You can use Messaging to exchange text messages and multimedia messages with
your friends.
You can also press the key and open the context menu to work on
25
Page 26

User Manual
messages and their settings.
26
Page 27

User Manual
The messages settings allow you to set SMS/MMS limits, notifications, vibrate or
ringtones, delivery reports and many others.
Take a tour and explore messages settings, you’ll find interesting things.
27
Page 28

User Manual
Touch once to capitalize the next letter you type.
Touch and hold or double tap for CapsLock.
Secondary characters panel
(special, symbols, numbers)
Write your message here. After
typing, press icon to close the
keyboard.
Touch and hold the text field to
open a menu and to copy/cut texts
8.2. Using the Onscreen Keyboard
Some applications display the keyboard by default. In others, you touch a text field
where you want to enter text, to open the keyboard.
28
Page 29

User Manual
Recipient zone: write the name, the number
or tap the icon on right to access contacts list
This is to erase characters
This is enter key, press it then
cursor move to next line
Chose the SIM card you want to send
your message with
8.3. Create and Send Multimedia Message
A Message becomes an MMS if you send it to an email address, or add multimedia
media file(s).
Touch compose new message.
Enter or select a mobile phone number.
Touch the composition text box and write your message.
Touch the key to open the context menu.
Touch Attach to attach various types of files.
Send the MMS.
29
Page 30

User Manual
8.4. Operation on a message:
Open the message thread containing the message your want to operate.
Touch and hold this message until a context menu opens.
Make your choice.
To forward a message:
Touch Forward in this menu.
Add a contact.
Touch Send to send the message.
You can also Copy message text, Save message to SIM card, View message details
and delete message.
8.5. Lock a Message
You can lock a message so it won’t be deleted if you reach your storage limits.
Touch and hold message in a message window.
Touch Lock message in the menu that opens.
Unlock a message by touching and holding it and then touch Unlock message.
30
Page 31

User Manual
99--
MMUULLTTIIMMEEDDIIAA
Touch to take picture,
video or panoramic
Touch to switch front and back
camera
Touch to chose Panorama
mODEmODmode
Touch to chose Live Photo
mode
Touch to change settings
Touch to chose face beauty
Mode
Touch to change setting
9.1. Camera
Your camera’s pictures and v ideos are stored in both the SD card and device. You
can copy pictures and videos from both the SD card and device to a PC and vice
versa.
31
Page 32
User Manual
9.2. Gallery
You can use the Gallery to view pictures and play videos and share files.
Touch the Gallery icon in the main menu.
Touch an album to open and view its contents.
Touch a picture or a video in an album to view it.
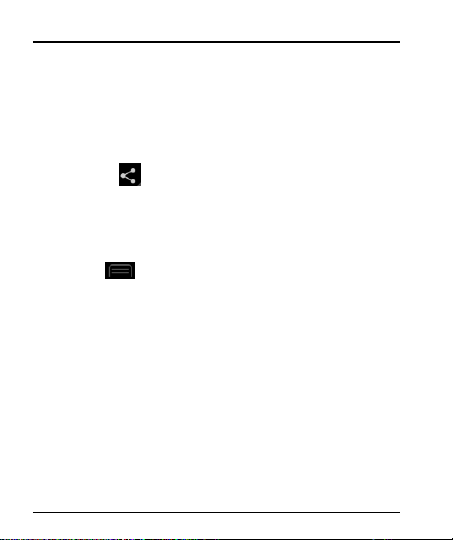
9.3. Share an Album
Open the main Gallery window.
Check or uncheck the albums you want to share.
Touch the icon at the top of screen to share via Bluetooth, Email. Or
touch the message icon at the top of screen to Share via MMS.
You can share via email, Bluetooth, and so on.
9.4. Music
You can easily transfer your favorite music from your PC to the SD card and
experience a whole world of interesting and melodious music.
Touch the key or the intuitive buttons and icons on the phone in music
interface to enjoy the features of your music player.
Press the phone’s volume up/down keys on the left side of the mobile phone to
adjust the volume.
32
Page 33
User Manual
9.5. FM Radio
You can listen to your favorite FM channels using the inbuilt FM receiver of
your phone and a corded earphone (the wire is used as antenna).
Touch the key or the intuitive buttons and icons on the phone in Radio
interface to explore and enjoy the features of your inbuilt FM radio:
Record sound
Search FM stations
Enable speaker
Press the phone’s volume up/down keys on the left side of the mobile phone to
adjust the volume.
9.6. Record Sounds
Touch the Sound Recorder in the main menu.
Tap to start recording a voice clip. “Recording” appears when it is
recording a voice clip.
Tap to stop and save the recording.
9.7. Make Screenshot
Press and hold for 1 second both Volume Down and Power buttons
together.
33
Page 34
User Manual
1100--
CCOONNNNEECCTT TTOO NNEETTWWOORRKKSS AANNDD DDEEVVIICCEESS
Your phone can connect to a variety of networks and devices, including Wi-Fi, GPRS,
Bluetooth, devices, such as headsets. You can also transfer files to/from your PC
through the data cable.
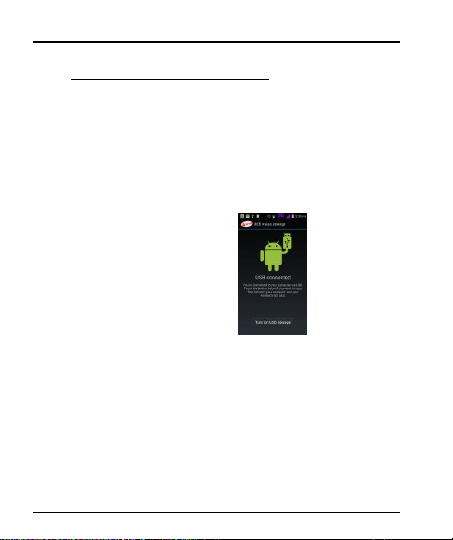
10.1. Connect to PC
Plug the phone to a computer with the supplied cable.
Go to Notifications bar
Touch "USB connected"
Then touch “Turn on USB storage” (see below).
This mounts the external SD card and internal memory as USB keys. Then you can
manage your files directly from your computer.
Once finished, click again (“Turn off USB storage”) to unmount SD card from
computer and use it with phone again.
WARNING: during USB connection, SD card is no longer available to the phone, all
apps using SD card cannot work. Don't erase/move applications data also.
34
Page 35

User Manual
10.2. Connect to Internet
Refer to section 6 for details.
10.3. Connect to Wi-Fi Networks
Refer to Section 6 for details.
10.4. Pair With Bluetooth Devices
Go to Settings > Wireless & networks> Bluetooth settings.
If Bluetooth is off, check Bluetooth to turn it on. Your phone scans and
displays the Bluetooth devices in range.
If the device you want to pair with is not in the list, make it discoverable.
If your phone stops scanning before you make the other device
discoverable, touch Scan for devices.
Touch the ID of the other device in the list Settings to pair them. If you are
prompted to for a password, enter any password on one device and
enter the same password you entered in the other device to be paired, If
the pairing is successful, your phone connects to the device.
11.5. Connect to Internet via your Phone
You can browse the Internet on your PC using your mobile phone. To do this:
Connect your mobile phone to your PC via the USB cable.
Go to Settings> Wireless & Networks>More >Tethering & portable hotspot
and then touch USB Tethering.
A prompt for installation will appear on your PC. Proceed as suggested.
In case of Linux, Windows 7 and Vista OS, the drivers get automatically installed.
However, in case of Windows XP, maybe you need to manually install the drivers.
10.6. Install Secure Certificate from SD Card
If your VPN or Wi-Fi Network relies on secure certificates, you must obtain the
certificates and store them in your phone’s storage, before you can configure access
to those VPN or Wi-Fi networks on your phone.
You may need to download the certificates from a website.
35
Page 36

User Manual
Copy the certificate from your computer to the root of the SD card.
Touch Settings> Security.
Touch Install from SD card under Credential Storage.
Touch the file name of the certificate to install. Only the names of
certificates that you have not already installed on your phone are
displayed.
If prompted, enter the certificate’s password and touch OK.
Enter a name for the certificate and touch OK.
36
Page 37

User Manual
1111--
DDOOWWNNLLOOAADD AAPPPPLLIICCAATTIIOONNSS
The phone has a default configuration which includes some applications. Discover all
others apps by using play store. You will be able to connect with 3G or Wi-Fi for
example, and by signing in the application with just an email.
This is what it looks like:
37
Page 38
User Manual
1122--
PPHHOONNEE SSEETTTTIINNGGSS
Wi-Fi
Lets you configure and manage connections to
networks and devices by Using Wi-Fi.
Bluetooth
Lets you manage Bluetooth to communicate with
other Bluetooth devices, such as headsets and
other portable devices.
SIM management
Lets you turn on or turn off your SIM card and
configure your SIM card to be used to voice call,
video call, SMS send and data connection.
Data usage
Data usage refers to the amount of data uploaded or
downloaded by your device during a given period.
More…
Lets you configure and manage connections to
networks and devices.
Audio profiles
Lets you configure how and at what volume the
phone rings, vibrates etc.
Display
Lets you configure brightness and other screen
settings.
Storage
Lets you see and manage available space on your
phone and on your SD card.
Battery
Lets you check the battery level and status.
Apps
Lets you view all applications downloaded or on SD
card and mange all running applications in devices.
Accounts & sync
Lets you add, remove and manage your Google and
other supported accounts.
Location
Lets you set the location related settings like Wi-Fi
and mobile network, GPS settings for your
phone and
check to take account of your location in search res
ults and other services.
Security
Lets you protect personal information, like adjust
your phone's lock, set SIM card lock etc.
You can go to Settings to customize your phone’s preferences and behavior in a
variety of ways:
38
Page 39
User Manual
Language & input
Lets you select the language for the text on your
phone and for configuring the onscreen keyboard.
Backup & reset
Lets you backup your personal data and settings
and reset your phone.
Date & time
Lets you choose preferences such as format and
time zones.
Accessibility
Enable your installed accessibility applications and
adjust related settings.
Developer options
Lets you enable or disable USB debug and set
interface animation effect.
About phone
View information about your phone, such as signal
strength, status, phone information and battery use.
39
Page 40

User Manual
1133--
HHEEAALLTTHH AANNDD SSAAFFEETTYY IINNFFOORRMMAATTIIOONN
Please read the following guidelines regarding the use of your phone. Not following
them may be dangerous or illegal.
Certification Information (SAR)
Your phone is designed not to exceed the limits of emission of radio waves
recommended by international guidelines. These guidelines include safety margins
designed to assure the protection of all persons, regardless of age and health.
SAR (specific absorption rate) is the unit of body-absorbed RF quantity when the
phone is in use. SAR value is ascertained according to the highest RF level
generated during laboratory tests.
The true SAR level during phone usage will be far lower than this level.
The SAR value of the phone may change depending on factors such as how close
you are to a network tower, use of accessories and other enhancements.
The highest SAR value of the device is 0.67W/kg (head) and 0.95 W/kg (body)
averaged over 10 gm of human tissue.
The SAR value may differ depending on national reporting, testing requirements and
the network band.
40
Page 41

User Manual
SAR Recommendations
Use a wireless hands-free system (headphone, headset) with a low power Bluetooth
emitter.
Please keep your calls short and use SMS whenever more convenient. This advice
applies especially to children, adolescents and pregnant women.
Prefer to use your cell phone when the signal quality is good.
People having active medical implants should preferably keep the cell phone at least
15 cm away from the implant.
Maintain a preferable distance of 15 mm from the device.
Safe Driving
Do not use the phone while driving. When you have to use the phone, please use the
personal hands-free kit.
Please do not put the phone onto any passenger seat or any place from which it may
fall down in case of vehicular collision or emergency braking.
During Flight
Flight is influenced by interference caused by the phone. It is illegal to use a phone
on the airplane. Please turn off your phone or switch to flight mode during a flight.
41
Page 42

User Manual
In Hospitals
Your Phone’s radio waves may interfere with the functioning medical devices.
Consult a physician or the manufacturer of the medical device to determine whether
they are adequately shielded from external Radio Frequency. Switch off your device
when regulations instruct you to do so.
Do not carry the wireless device in the breast pocket.
Turn off the phone if there is any reason to suspect that interference is taking place.
Unsafe Areas
Please turn off your phone when you are close to a gas station or in the vicinity of any
place where fuel and chemical preparations, or any other dangerous goods are
stored.
Taking Care of Your Device
Your device is a product of superior design and craftsmanship and should be handled
with care: The following suggestions will help you protect your phone:
Keep the device dry. If your device gets wet, remove the battery without turning on
the device, wipe it with a dry cloth and take it the service center.
Do not store the device in high or cold temperature. High temperatures can shorten
the life of electronic devices and damage batteries.
Do not use or store the device in dusty, dirty areas. Its moving parts and electronic
components can be damaged.
Do not attempt to open the device other than as instructed in this guide. Repairing
the phone by yourself other than our authorized service agents/centers goes against
the warranty rules.
Do not drop, knock, or shake the device. Rough handling can break internal circuit
boards and fine mechanics.
42
Page 43

User Manual
Do not use harsh chemicals, cleaning solvents, or strong detergents to clean the
device. Only use a soft, clean, dry cloth to clean the surface of the device.
Do not store your device near magnetic fields or allow your device to come in contact
with magnetic fields for extended period of time.
Battery Recommendations
Please put the battery in a well-ventilated place out of direct sunlight. Charge the
battery at room temperature range.
If the time span of the battery after charging becomes much shorter than usual, the
battery life is at an end. Replace the battery with a new battery of the same make and
specification.
Do not discard the battery with household trash. Please dispose of used battery
according to your local environmental laws and guidelines.
Use manufacturer approved batteries, chargers, accessories and supplies. We will
not be responsible for user’s safety when using unapproved batteries or accessories.
43
Page 44

User Manual
Recycle Your Phone
The WEEE logo (shown at the left) appears on the product (battery, handset,
and charger) to indicate that this product must not be disposed off or dumped with
your other household wastes. You are liable to dispose of all your electronic or
electrical waste equipment by relocating over to the specified collection point for
recycling. of such hazardous waste.
Collection and proper recovery of your electronic waste equipments at the time of
disposal will allow us to help preserve the environment. Recycling of the electronic
waste equipment will ensure safety of human health and environment.
Disclaimers
The colors and specifications shown/mentioned in the user manual may differ from
the actual product. Images shown are for representation purpose only. Other product
logos and company names mentioned herein may be trademarks or trade names of
their respective owners.
The content of this manual may vary from the actual content displayed in the mobile
phone. In such a case, the later shall govern.
We keep the right to make modifications to any of the content in this User Manual
without public announcement or prior notification.
For devices with external power supplies, plug socket should be placed in short
distance and easily accessible.
Using the wrong type battery replacement there is a danger of explosion, be sure to
follow the instructions disposal of used batteries.
Copyrights
All rights reserved. Reproduction, transfer, distribution or storage of part or all of the
44
Page 45

User Manual
contents in this document in any form without the prior written permission of is strictly
prohibited.
45
To prevent possible hearing damage, do not listen at
high volume levels of long periods.
To use the device only with the earphones included,
never change the earphones included for another one.
Page 46

User Manual
§ 15.19 Labelling requirements.
This device complies with part 15 of the FCC Rules. Operation is
subject to the following two conditions: (1) This device may not cause
harmful interference, and (2) this device must accept any
interference received, including interference that may cause
undesired operation.
§ 15.21 Information to user.
Any Changes or modifications not expressly approved by the
party responsible for compliance could void the user's authority to
operate the equipment.
§ 15.105 Information to the user.
Note: This equipment has been tested and found to comply with
the limits for a Class B digital device, pursuant to part 15 of the FCC
Rules. These limits are designed to provide reasonable protection
46
Page 47

User Manual
against harmful interference in a residential installation. This
equipment generates uses and can radiate radio frequency energy
and, if not installed and used in accordance with the instructions,
may cause harmful interference to radio communications. However,
there is no guarantee that interference will not occur in a particular
installation. If this equipment does cause harmful interference to
radio or television reception, which can be determined by turning the
equipment off and on, the user is encouraged to try to correct the
interference by one or more of the following measures:
-Reorient or relocate the receiving antenna.
-Increase the separation between the equipment and receiver.
-Connect the equipment into an outlet on a circuit different from
that to which the receiver is connected.
-Consult the dealer or an experienced radio/TV technician for
help.
Specific Absorption Rate (SAR) information:
This Automotive Diagnosis Computer meets the government's
requirements for exposure to radio waves. The guidelines are based
on standards that were developed by independent scientific
47
Page 48

User Manual
organizations through periodic and thorough evaluation of scientific
studies. The standards include a substantial safety margin designed
to assure the safety of all persons regardless of age or health.
FCC RF Exposure Information and Statement The SAR limit of
USA (FCC) is 1.6 W/kg averaged over one gram of tissue. Device
types: LAUNCH (FCC ID: WA6S5015) has also been tested against
this SAR limit. The highest SAR value reported under this standard
during product certification for use at the ear is 0.67W/kg and when
properly worn on the body is 1.42W/kg. This device was tested for
typical body-worn operations with the back of the handset kept 1.5cm
from the body. To maintain compliance with FCC RF exposure
requirements, use accessories that maintain a 1.5cm separation
distance between the user's body and the back of the handset. The
use of belt clips, holsters and similar accessories should not contain
metallic components in its assembly. The use of accessories that do
not satisfy these requirements may not comply with FCC RF
exposure requirements, and should be avoided.
Body-worn Operation
This device was tested for typical body-worn operations. To
comply with RF exposure requirements, a minimum separation
distance of 1.5 cm must be maintained between the user’s body and
48
Page 49

User Manual
the handset, including the antenna. Third-party belt-clips, holsters,
and similar accessories used by this device should not contain any
metallic components. Body-worn accessories that do not meet these
requirements may not comply with RF exposure requirements and
should be avoided. Use only the supplied or an approved antenna.
49
 Loading...