

Page 1

i601 User Manual
Thank you for purchasing the i601 mobile phone
Page 2

Thank you for purchasing this mobile phone
Please read all safety precautions and this manual carefully
before using your device to ensure safe and proper use.
Content, images and screenshots used in this manual may
differ in appearance from the actual product.
No part of this manual may be reproduced, distributed,
translated, or transmitted in any form or by any means,
electronic or mechanical, including photocopying, recording,
or storing in any information storage and retrieval system,
without the prior written permission.
Copyright © 2013 All rights are reserved
Page 3

Contents
1. Getting to know your phone .............................................. 1
1.1Your Phone.................................................................1
1.2 Status icons...............................................................1
1.3 Installing SIM card and battery..................................1
1.4 Installing Storage card...............................................1
1.5 Battery charging........................................................1
1.6 Power on/ off..............................................................2
1.6.1 Power on..............................................................2
1.6.2 Power off..............................................................2
1.7 Using shortcut keys................................................... 2
2. Using Call Function ............................................................ 3
2.1 Making a call..............................................................3
2.2 Answering or rejecting a call..................................... 3
2.2.1 Answer a call........................................................3
2.2.2 Reject a call..........................................................3
2.3 Adjusting call volume.................................................3
2.4 Ending a call..............................................................3
3. Phonebook ........................................................................... 3
3.1 View a contact........................................................... 3
3.2 Adding a new contact ...............................................3
4. Message ............................................................................... 4
4.1 Write message...........................................................4
4.2 Inbox..........................................................................4
4.3 Outbox.......................................................................4
4.4 Drafts......................................................................... 4
4.5 Sentbox......................................................................4
4.6 Message setting........................................................4
4.6.1 Templates.............................................................5
4.6.2 Voice mail server..................................................5
-I-
Page 4

4.6.3 Settings................................................................ 5
4.7.4 Message capacity................................................6
5. Call logs ................................................................................ 6
5.1 Dialed calls................................................................ 6
5.2 Received calls...........................................................6
5.3 Missed calls...............................................................6
5.4 Rejected calls............................................................ 6
5.5 Delete all.................................................................... 7
5.6 Call timers..................................................................7
5.7 Call cost (need the network support)........................7
6. Settings ................................................................................ 7
6.1 Call settings...............................................................7
6.1.1 Network selection.................................................7
6.1.2 Call divert............................................................. 7
6.1.3 Call barred............................................................7
6.1.4 Call waiting (Need network support)....................8
6.1.5 Hide ID (Need network support).......................... 8
6.1.6 Select line.............................................................8
6.1.7 Flight mode..........................................................9
6.1.8 Others...................................................................9
6.2 Phone settings...........................................................9
6.2.1 Time & date..........................................................9
6.2.2 Select language...................................................9
6.2.4 Auto power on/off...............................................10
6.2.5 Power management ..........................................10
6.2.6 Restore factory settings.....................................10
6.3 Display settings.......................................................10
6.3.1 Wallpaper settings..............................................10
6.3.2 Idle display settings............................................10
6.3.3 Contrast..............................................................10
6.3.4 Backlight.............................................................10
-II-
Page 5

6.3.5 Keypad backlight time........................................10
6.3.6 Animation effect..................................................11
6.4 Security settings......................................................11
6.4.1 PIN......................................................................11
6.4.3 Privacy...............................................................12
6.4.4 Auto keypad lock................................................12
6.4.5 Lock screen by end- key....................................13
6.4.6 Power-on password...........................................13
6.5 Connection management........................................13
6.5.1 Network account................................................13
7. Entertainment .................................................................... 13
7.1 Camera....................................................................13
7.2 Video recorder.........................................................14
7.3 Images.....................................................................14
7.4 Audio player.............................................................14
7.5 Video player.............................................................14
7.6 Recorder..................................................................15
7.7 FM Radio.................................................................15
8. File manager ...................................................................... 16
9. Application ......................................................................... 16
10. Profiles ............................................................................. 16
10.1 Normal...................................................................16
10.2 Silent...................................................................... 16
10.3 Meeting .................................................................16
10.4 Indoor.....................................................................16
10.5 Outdoor..................................................................17
10.6 Earphone...............................................................17
10.7 Bluetooth...............................................................17
11. Tools ................................................................................. 17
11.1Alarm....................................................................... 17
11.2Calendar.................................................................17
-III-
Page 6

11.3 World clock............................................................17
11.4 Torch......................................................................17
12. WAP .................................................................................. 17
12.1 Input URL..............................................................17
12.2 Bookmarks.............................................................18
12.3 History....................................................................18
12.4 Offline pages.........................................................18
13. Extra .................................................................................. 18
13.1Calculator...............................................................18
13.2 Bluetooth...............................................................18
14. Shortcut ............................................................................ 19
15. Other Functions .............................................................. 19
16. Common Questions ........................................................ 19
17. Maintenance Guideline .................................................. 21
18. FCC RF Exposure Information and Statement ............ 21
-IV-
Page 7

1 Getting to know your phone
1.1 Your Phone
Functions Description
1. Left soft key (LSK) 7. Keypad
2. Right soft key (RSK) 8. Receiver
3. Send key (Snd) 9. USB/Headset jack
4. End key (End)/Power key 10. Torch
5. Navigation key 11. Camera
6. OK key 12. Speaker
1.2 Status icons
Icon Function description
Represent current SIM network signal.
The more bars, the stronger the signal
-1-
Page 8
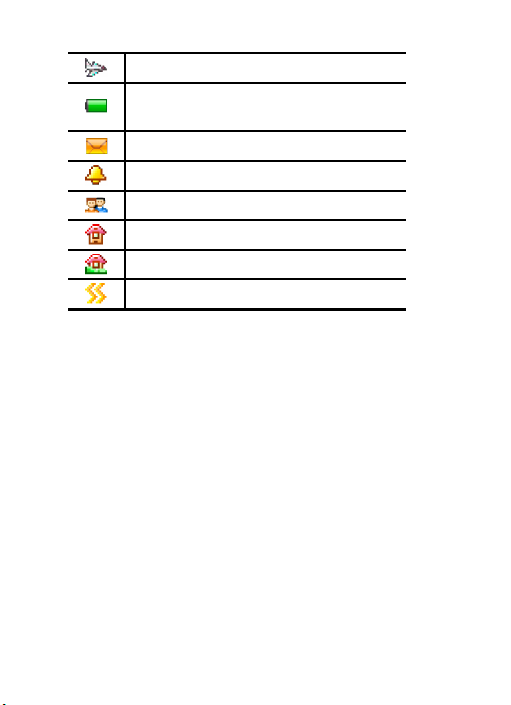
Flight mode
Battery status, more bars indicate more
battery capacity left
Unread SMS
Clock has been set
Profile has been set as Silent Mode
Profile has been set as Indoor Mode
Profile has been set as Outdoor Mode
Profile has been set as Meeting Mode
-2-
Page 9

1.3 Installing SIM card and battery
1. Hold on 【End Key】 for about three seconds to switch off
the phone.
2. Remove the battery cover.
3. Remove the battery.
4. Follow the sign for SIM on the phone to install SIM.
Please make sure that the golden contacts of the card
face into the phone and the notched corner has the same
direction with the card slot, then push the other side of
the card gently until it fixes itself in the card slot.
5. Replace the battery with its golden contact part facing the
set phone battery contact piece, and then replace the
battery cover.
1.4 Installing Storage card
1. Hold on 【End Key】 for about three seconds to switch off
the phone.
2. Remove the battery cover.
3. Remove the battery.
4. Follow the arrow direction on the T-Card slot cover, open
card slot cover, put the T-Card into the slot vertically, and
make sure that the gold contacts of the card face
upwards, until the card fixes itself in the card slot.
5. Follow the arrow direction on the T-Card slot cover, pull
card slot cover to lock the card slot.
1.5 Battery charging
Charged by the travel charger
1. Install the battery correctly into the phone.
-1-
Page 10
2. Insert the lead of the travel charger to connecting slot of
the phone, and then connect the charger to a standard
power socket.
When charging is complete, unplug the charger from the
standard power socket first, and then disconnect the phone
and charger.
1.6 Power on/ off
1.6.1 Power on
Hold on 【End Key 】 for three seconds to switch on the
phone.
1.6.2 Power off
Hold on 【End Key】for three seconds to switch off the phone.
Warning:
Don’t switch the phone on in areas where wireless
phone usage is prohibited or where it may cause
interference or danger, and also make sure that you
haven’t activated the function “Auto power on/off”.
1.7 Using shortcut keys
Pressing some keys directly from the Home Screen provides
direct access to common phone functions.
Key Operation Function
Call key press briefly Enter Call History
1 Key hold on Enter voicemail box
-2-
Page 11

2 Using Call Function
2.1 Making a call
On the Home Screen, input the area code and phone number.
Press Send key to dial.
2.2 Answering or rejecting a call
2.2.1 Answer a call
When there is an incoming call, you can press 【Call Key】to
answer.
2.2.2 Reject a call
When there is an incoming call, you can press 【End Key】to
reject it.
2.3 Adjusting call volume
During a call, you can press 【 + Key/- Key 】 to adjust the
earphone volume.
2.4 Ending a call
Press 【End Key 】 to end the call.
3 Phonebook
3.1 View a contact
Enter the contacts, the phone is defaulted to show contact list
with all entries. Press【Left Key/Right Key】to switch between
different groups.
3.2 Adding a new contact
On the Contacts list, select <Options→New> to create a new
contact.
-3-
Page 12

Phone: You can input the contact name, mobile
phone, home phone, etc. You can also set special
image and ring for the contact entry.
SIM: The input record will be saved to SIM, with each
name one phone number.
4 Message
4.1 Write message
In the main menu, select [Message→Write message] to edit
a new SMS directly. After writing an SMS, select <Send > to
send the message.
4.2 Inbox
Store all received SMS.
4.3 Outbox
Store all SMS failed to be sent.
4.4 Drafts
Save edited SMS haven’t sent.
4.5 Sentbox
Store all the SMS successfully sent out. If you want the sent
messages be saved automatically, please select
[Message→Options], then select [Settings→SMS→Save
sent messages→Save].
4.6 Message setting
On the Home Screen, press 【Send Key】 to enter the main
menu, then select [Message→Options] to enter the message
setting menu.
-4-
Page 13

4.6.1 Templates
While editing messages, you can directly cite the preset
common phrases. Select <Edit> to set the common phrases
by yourselves.
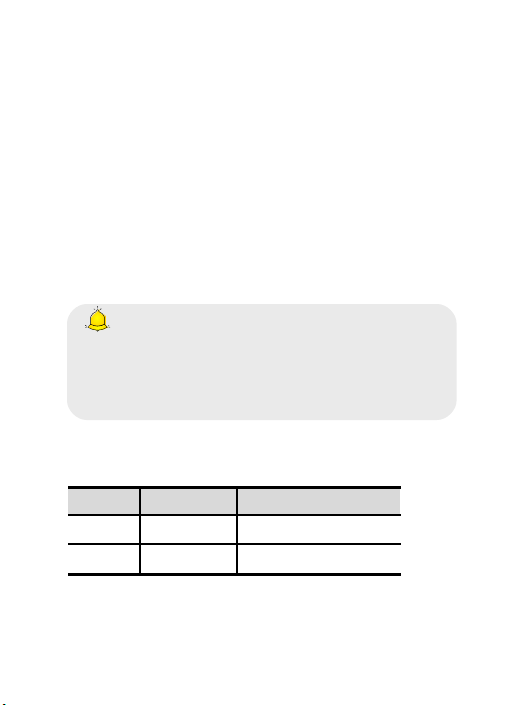
4.6.2 Voice mail server
This function works like an answering machine, which can
transfer a missed call to your personal voice mail, allowing the
caller to leave a voice message and notify you by an SMS.
Voice Mail is a part of the bundled software provided by
network operator, therefore, you need to register to active this
function, and manually set the phone. Please contact with
your network operator for more details.
Caution:
It’s workable to transfer the voice call into the voice mail
(The number the call will leave a message) by setting
“Divert calls”.
4.6.3 Settings
SMS
SIM msg center: While sending messages, you must
set the service center number provided by network
operator. Most SIM cards defaulted contain the service
center number. You can also gain this number directly
from the network operator.
Caution:
If you modify or delete the service center number, an
SMS might not be sent successfully.
-5-
Page 14

Message validity period: Allows you to set the length
of time during which your SMS will be stored in the
message center. The validity period depends on the
network operator.
Status report: Select [On], then the text message
center will inform you when you successfully sent a
message.
Save sent messages: You can select whether to save
the sent message or not.
Preferred storage: You can select to save the SMS to
the SIM card or the phone first.
SMS Backup: You can export SMS from phone or
import SMS to phone.
4.7.4 Message capacity
You can view memory capacity status for SMS via this
function.
5 Call logs
Enter the main menu, and then select [Call logs] to enter the
call list.
5.1 Dialed calls
Display recent calls dialed.
5.2 Received calls
Display recent calls received.
5.3 Missed calls
Display recent calls unpicked up.
5.4 Rejected calls
Display recent calls rejected.
-6-
Page 15

5.5 Delete all
Delete all the call entries.
5.6 Call timers
Select the desired SIM Card, and then you can view all
relevant information about the SIM Card.
5.7 Call cost (need the network support)
Total cost: Record total call charges for SIM.
Max cost: You can set the desired upper limit for call
costs.
Price per unit: Record the cost rate for SIM.
Reset cost: Reset the total call charges as zero.
6 Settings
6.1 Call settings
6.1.1 Network selection
Auto select: The phone can automatically search and
register available networks.
Manual select: Enable this function, the phone will search
for the network, and list all searched networks, then you
need to choose the one needed to register.
6.1.2 Call divert
Based the set diverting conditions, incoming calls will be
forwarded into voicemail or other numbers.
6.1.3 Call barred
This function helps you to restrict the incoming and outgoing
calls.
Select the desired call and press <OK>, then you can select
-7-
Page 16

[Activated], [Off] or [Query status]. Select [Activated], the
phone will need network support current setting.
Caution:
1.Some network operators forbid the function. For more
details, please contact your network service provider.
2. The network operator will provide you the initial
network password while you apply for this service.
6.1.4 Call waiting (Need network support)
Activated: If you set the function on, the network will alert
you that there is an incoming call. You can keep current
call and answer another one.
Off: Cancel call waiting function, then the new incoming
calls won’t be answered while you’re on the phone
already.
Query status: Select it to view current status of this
function.
6.1.5 Hide ID (Need network support)
Hide ID: While calling, the recipient won’t see your phone
number.
Display own ID: While calling, your phone number will be
visible for the recipient.
Display ID by network: While calling, whether your
phone number will be visible or not for the receiver
depends on the network presetting.
6.1.6 Select line
You can choose Line 1 or Line 2 as you need.
-8-
Page 17

6.1.7 Flight mode
Activate: Activate flight mode, then all network service
won’t be available.
Select when power on: You can select whether to
activate flight mode when power on.
6.1.8 Others
50 secs warning
If you activate the function, an elapsed time reminder will be
heard at the 50th second of every minute during your call, so
that you may end the call timely to save the phone fare.
Answer/Reject mode
Reply SMS after reject: You can select whether to
reply an SMS after rejecting a call.
Any-key answer: If you set this function on, you can
answer the call by pressing any-key.
Auto redial
If you set this function on, the phone will redial the number
after an unsuccessful call.
6.2 Phone settings
6.2.1 Time & date
Set time: Directly input the time or press 【Up /Down
Key】 to set it.
Set date: Directly input the date or press 【Up /Down
Key】to set it.
6.2.2 Select language
You can select the language you want.
-9-
Page 18

6.2.4 Auto power on/off
You can set the phone to switch on/off at a scheduled
time.
6.2.5 Power management
Display the battery capacity.
6.2.6 Restore factory settings
Reset all parameter values into default status. Please enter
the privacy preserving password (Initial password is 0000) to
resume factory setting.
6.3 Display settings
6.3.1 Wallpaper settings
Select the default or other pictures as the wallpaper of the
phone.
6.3.2 Idle display settings
You can choose that which item will be displayed on the
standby screen.
6.3.3 Contrast
Press 【Left /Right Key】to adjust the contrast.
6.3.4 Backlight
Select the desired backlight time.
6.3.5 Keypad backlight time
Select the desired keypad light time.
-10-
Page 19

6.3.6 Animation effect
Power on display: You can select the preset
animation or others as the Power on animation for
your phone.
Power off display: You can select the preset
animation or others as the Power off animation for
your phone.
6.4 Security settings
In order to secure the information, you can set PIN code,
PIN2 code, power-on password and Mobile tracker function.
6.4.1 PIN
PIN code is the personal identification number for SIM card. If
never be modified, the initial password set by network
operator should be 1234 or 0000. If activated the power-on
PIN code, then you have to input the PIN password each time
you switch the phone on. You can modify the PIN code to
prevent your SIM card being used by others.
Caution:
If you input your PIN code incorrectly three times in
succession, the SIM card will be locked automatically,
and prompting to enter PUK code to unlock it. Therefore,
please do remember the PIN code, if you modify it.
PUK code (PUK1) is made up by 8 digits, unmodifiable. When
the phone is locked by PIN code, please enter correct PUK
code to unlock the phone. If you incorrectly input the PUK
code ten times in succession, then the SIM card cannot be
used any more. Some PUK codes are provided together with
the SIM card, some should be gained from the network
-11-
Page 20

service provider. If you don’t know the PUK code while your
PIN code is locked, please never input the code casually. In
this case, please call the hotline of the service provider for
your SIM card, after simply checking about the user identity,
you can gain the PUK code for free to unlock your phone.
Caution:
Please be careful when use this function. If you forget
PUK code, please consult your network operator. If
you incorrectly input the PUK code ten times in
succession, the SIM card will be scrap.
Select the desired SIM type and have the following options:
Activated: You should input PIN code each time
switching the phone on.
Modify: You should activate PIN code before
modifying it.
Off: You should input the correct PIN code before
deactivating it.
6.4.3 Privacy
Secured by phone password, the phone will be protected from
other unauthorized users. When password function has been
activated for call logs or message, you have to enter correct
password on corresponding main menu or sub-menu. The
defaulted password is “0000”.
6.4.4 Auto keypad lock
After activating this function, the phone will be locked
automatically if the time you set is arrived, so as to avoid error
-12-
Page 21

operations.
Manual lock keypad: On the Home screen, hold on 【 *
Key】for three seconds to lock the keypad manually.
Manual unlock keypad: On the Home screen, hold on【 *
Key】for three seconds to unlock the keypad manually.
6.4.5 Lock screen by end- key
Once activated this function, On Home Screen, when the
backlight is on, press 【End Key】to turn off the backlight and
auto lock the keypad.
6.4.6 Power-on password
You should set the power on password when you use this
function for the first time. After activated this function, you
should input password each time you switch the phone on.
Caution:
Power-on password doesn’t have the limitation for wrongly
inputting. Please remember carefully about the Power on
PWD, otherwise, the phone won’t be switched on normally
once password forgotten.
6.5 Connection management
6.5.1 Network account
You can select the desired network account, and you can add
the desired account by yourself as well.
7 Entertainment
7.1 Camera
Enter the main menu, and select [Camera] to enter the
-13-
Page 22

camera preview screen, press 【OK Key】 to take a photo.
7.2 Video recorder
Enter the main menu, and select [Entertainment→Video
recorder] to enter the video preview screen, and press 【OK
Key】to start recording the video.
7.3 Images
This function allows you to quickly browse photos and
pictures.
7.4 Audio player
Enter the main menu, and select [Entertainment→Audio
player] to enter the Audio Player screen.
The below table shows the icons on the Player screen:
Icon Description
/ Press【OK Key】to play or pause
/
Press【Left/Right Key】to skip to
last /next one
Show the playing volume, press
【+/ - Key】to adjust the volume
Background audio player
While playing a song, press 【 End Key】to quit the Playing
screen to enter the background playing mode.
7.5 Video player
Enter the main menu, and click [Entertainment→Video
player].
Icon description:
-14-
Page 23

Icon Description
/
Play or pause
/ Skip to the last/next file
Stop playing
Show the playing volume, press 【+/ -
Key】to adjust the volume
7.6 Recorder
Enter the main menu, select [Entertainment→Recorder],
and choose <Options→Start recording > to start recording.
Select <Pause> to have the recording pause for a while,
select <Stop> to cease recording. After ceasing the
recording, the recorded file will be automatically save in the
folder [Audio], select <Options→Record file list> to check.
7.7 FM Radio
Enter the main menu, then select [Entertainment→FM
radio].
Icon description:
Icon Description
Press 【Down Key】to activate
or deactivate the radio
Frequency scrolling bar,
press【Left/Right Key】to
adjust the frequency
/
Press【Left /Right Key】to
-15-
Page 24

adjust the radio frequency.
Display the player volume,
Press【+/-Key】to adjust it
8 File manager
This menu allows you to manage files stored in the storage
card.
9 Application
For richness your entertainment life, the mobile phone
provides you the interesting application. Please get more
information in the instructions of the phone.
10 Profiles
10.1 Normal
Activate: Activate the chosen profile.
Customize: Set the options as required.
Rename: Modify the name of the selected profile.
10.2 Silent
For the settings, please refer to” Normal”.
10.3 Meeting
For the settings, please refer to” Normal”.
10.4 Indoor
For the settings, please refer to” Normal”.
-16-
Page 25

10.5 Outdoor
For the settings, please refer to” Normal”.
10.6 Earphone
For the settings, please refer to” Normal”.
10.7 Bluetooth
For the settings, please refer to” Normal”.
11 Tools
11.1Alarm
On the Home Screen, press 【OK Key】 to enter the main
menu, and select [Tools→Alarm], then you can set the
alarm name, time, ring and mode.
11.2Calendar
Enter the main menu, and select [Tools→Calendar] to
enter the Calendar screen.
11.3 World clock
This function allows you to check the standard time in
different areas of the world.
11.4 Torch
You can press the OK key to activate the flashlight.
12 WAP
12.1 Input URL
Enter the wanted website, and click to connect it.
-17-
Page 26

12.2 Bookmarks
Save the common visited website into the Favorites, and
marked by simple names. Select one saved name, then the
corresponding web will be connected.
12.3 History
Record the websites you visited before.
12.4 Offline pages
After saving a website as snapshot, you can browse the
website while offline.
Caution:
1. Your network service provider may not support some
functions. In order to ensure the browser work normally,
please confirm first that your SIM card supports and
have the Internet function activated.
2. If you browse the web page, flowrate fee will be
charged.
13 Extra
13.1Calculator
Directly input numbers, press 【Navigation Key 】 to select
your desired operation symbols (+, -, /, X). Press 【OK Key 】to
get the answer.
13.2 Bluetooth
Open/Close Bluetooth: This function allows you to switch
the Bluetooth on or off.
Bluetooth visibility: Set to show or hide the Bluetooth of
your phone. If you select to hide the phone, other devices
-18-
Page 27

cannot detect the Bluetooth device of your phone, even
you activated your Bluetooth function.
Paired device: You can search for the nearby Bluetooth-
enabled devices
My Bluetooth name: If Bluetooth function activated, while
other devices search for Bluetooth signal, the
corresponding name represents your phone.
14 Shortcut
Enter the chosen shortcut menu. You can change the
responsible shortcuts for 【 Navigation Key 】 under standby
mode.
15 Other Functions
Mass storage: this function is used to read and write files
from PC to the storage.
16 Common Questions
Unable to make some calls
! Call barring has been set and barred utilization of the
mobile phone. Please check and cancel call barring.
Other person is answering my call
! The mobile phone has been set into divert your calls to
another phone number. Please check and cancel call
divert.
The mobile phone cannot search for the network
-19-
Page 28

! The mobile phone is outside of the network coverage area
(or there are physical obstructions between the mobile
phone and the transmitter), and calls cannot be made
or answered. If you are in one room, please move
close to the window.
! In the operation process, the mobile phone may display the
following operating tips:
“Emergency”
! You are outside the network coverage area of the service
provider. But another network area where you locate
allows you to make emergency call according to the
signal strength.
“Invalid SIM”
! The SIM card of the mobile phone is locked and the
inserted SIM card is unable to be accepted. Please
insert the correct SIM card or contact with the vendor.
“Please Enter PUK”
! The SIM card has been locked since the wrong PIN code
has been inputted for three times. You must consult
your network provider for special PUK code with eight
numbers to unlock the SIM card (The PUK code may
have been provided with your PIN code at the same
time).
Warning:
The SIM card will be permanently locked if you input the
wrong PUK code for ten consecutive times and you must
apply for a new SIM card from your network provider.
-20-
Page 29

17 Maintenance Guideline
Welcome to use i601. If there is a problem when you using
the phone, please contact with the vender or consult the local
maintenance center. If your mobile phone is in need of repair,
you can take your phone to local maintenance center, if there
is no local maintenance center, please pass your phone and
the purchasing invoice to the vendor.
18 FCC RF Exposure Information and
Statement
The SAR limit of USA (FCC) is 1.6 W/kg averaged over one
gram of tissue. Device types i601(FCC ID: WA6i601) has also
been tested against this SAR limit. The highest SAR value
reported under this standard during product certification for
use at the ear is 1.010W/kg and when properly worn on the
body is 1.040W/kg. This device was tested for typical bodyworn operations with the back of the handset kept 1.5cm from
the body. To maintain compliance with FCC RF exposure
requirements, use accessories that maintain a 1.5cm
separation distance between the user's body and the back of
the handset. The use of belt clips, holsters and similar
accessories should not contain metallic components in its
assembly. The use of accessories that do not satisfy these
requirements may not comply with FCC RF exposure
requirements, and should be avoided.
FCC WARNING
This device complies with Part 15 of the FCC Rules.
Operation is subject to the following two conditions:
(1) this device may not cause harmful interference, and
-21-
Page 30

(2)this device must accept any interference received,
including interference that may cause undesired operation.
NOTE 1: This equipment has been tested and found to
comply with the limits for a Class B digital device, pursuant to
part 15 of the FCC Rules. These limits are designed to
provide reasonable protection against harmful interference in
a residential installation. This equipment generates, uses and
can radiate radio frequency energy and, if not installed and
used in accordance with the instructions, may cause harmful
interference to radio communications. However, there is no
guarantee that interference will not occur in a particular
installation. If this equipment does cause harmful interference
to radio or television reception, which can be determined by
turning the equipment off and on, the user is encouraged to
try to correct the interference by one or more of the following
measures:
-Reorient or relocate the receiving antenna.
-Increase the separation between the equipment and receiver.
-Connect the equipment into an outlet on a circuit different
from that to which the receiver is connected.
-Consult the dealer or an experienced radio/TV technician for
help.
NOTE 2: Any changes or modifications to this unit not
expressly approved by the party responsible for compliance
could void the user's authority to operate the equipment.
-22-
Page 31

NOTE 3: The manufacturer is not responsible for any radio or
TV interference caused by unauthorized modifications to this
equipment. Such modifications could void the user’s authority
to operate the equipment.
-23-
 Loading...