

Page 1

verykool I277 mobile phone
User Manual
The content of this manual is correct at the time of issuance. However, Verykool USA
Inc. reserves the right to amend technology specifications without any prior
notification.
Some descriptions in this manual may be different from the actual mobile phone,
depending on differences in software and network suppliers.
- 1 -
Page 2

Contents
1 Basics
1.1 Introduction
Thank you for choosing the I277 GSM/GPRS digital mobile phone. After reading
this guide you will be able to fully master the use of your I277 mobile phone and
appreciate all its functions and ease of use.
The I277 mobile phone is designed for use on the GSM/GPRS networks. Not only
the I277 provides you with basic calling functions, but also with many practical
functions such as a name card style phonebook, personalized 64 chord ring tones and
pictures, clock, alarm, camera, video player, video recorder, audio player, T-Flash card
support, sound recorder, calculator, calendar, GPRS surfing, MMS,and H-Free etc, to
improve the time you spend on working and playing. Moreover, the I277 uses a
personalized user- interface and the perfect functional design to satisfy all your needs.
The I277 mobile phone is compatible with GSM/GPRS technology and has been
approved by certification authorities both domestically and abroad.
All rights reserved.
1.2 Safety Notice
!
If your mobile phone is lost or stolen, please contact the telecommunications
authorities or a sales agent immediately to have a hold put on the SIM card.
This will prevent economic loss caused by unauthorized calls made from your
mobile phone.
!
When you contact the telecommunications authorities or a sales agent, they
will need to know the IMEI number of your mobile phone (remove battery to
expose number located on the label on back of phone). Please copy this
number and keep in a safe place for future use.
!
In order to avoid the misuse of your mobile phone please take the following
preventative measures:
-
Set the PIN number of your mobile phone’s SIM card and change this number
immediately if it becomes known to a third party.
-
Please keep the phone out of sight when leaving it in a vehicle. It is best to
keep the phone on your person, or locked in the trunk.
-
Set call restrictions.
1.3 For Your Safety
- 2 -
Page 3

Please read these safety guidelines before using your mobile phone to assure the
safe and proper use of the phone.
1.3.1General matters
!
Please turn off your mobile phone on an airplane, hospital or any locations
that may restrict mobile phone use.Otherwise,normal operation of electrical
equipment and medical instruments will be affected. Please obey local
regulations when using your mobile phone.
!
While driving please obey local laws and regulations regarding mobile phone
use. When using your phone while driving, please obey the following rules:
Concentrate on driving and be aware of traffic conditions; Use your mobile
phone hands-free function, . under poor driving conditions, please stop the
car before -using your phone.
!
Please obey laws, regulations and signs when near an area storing fuel,
chemicals, or volatile materials.
!
Please keep mobile phones, batteries and chargers out of reach of children
。
!
To prevent damage to your mobile phone, do not use other types of batteries
or chargers; it could cause battery leakage, overheating, cracking, fire or other
dangers.
!
Please do not use your mobile phone near low signal or precision electronic
equipment. Radio wave interference may cause the malfunctioning of such
electronic equipment and other problems. Special attention must be paid near
the following equipment: hearing aids, pacemakers and other electronic
medical equipment, smoke detectors, automatic doors and other automatic
control installations. To find out the effect of mobile phones on a pacemaker
or other electronic medical equipment please contact the manufacturers or
local sales agents of the equipment.
!
This mobile phone has an auto” power on” function. Please refer to the
mobile phone’s clock setting to assure that the mobile phone will not
automatically turn on during a plane flight.
!
To avoid the mobile phone malfunctioningor catching fire, please do not
violently impact, jolt or throw your mobile phone.
!
Please do not place the battery, mobile phone or charger in a microwave oven
or high-pressure equipment. Otherwise,it could lead to unexpected accidents
such as damage to the circuitry or a fire.
!
Please do not use your mobile phone near flammable or volatile gases,
otherwise it may cause malfunctioning or fire.
!
Please do not subject your mobile phone to high temperatures, high humidity
or dusty places; otherwise it may lead tomalfunction of your mobile phone.
!
To avoidfalling,malfunctioning or being damaged, please do not place your
phone on uneven or unstable surfaces.
1.3.2 Phone Safety
!
Do not disassemble or modify the mobile phone, as it will lead to damage
such as battery leakage or circuitry failure.
!
Please do not subject the LCD to impact or use the screen to strike things, as
- 3 -
Page 4

this will damage the LCD board and cause leakage of the liquid crystal.
There is a risk of blindness if the liquid crystal substance gets into the eyes. If
this occurs, rinse eyes immediately with clear water (under no circumstances
rub your eyes) and go immediately to a hospital for treatment.
!
Under very rare circumstances using the mobile phone in certain model cars
may negatively effect the internal electronic equipment. In order to assure
your safety under such circumstances please do not use the mobile phone. If
your car is equipped with an airbag, please do not place your phone on top of
it or within the contact area of the airbag in order to avoid seriously harming
the driver or passenger when the airbag inflates.
!
Please do not use needles, pen tips, or other sharp objects on the keypad as
this may damage the mobile phone or cause it to malfunction.
!
Avoid letting the phone come into close contact with magnetic objects such
as magnetic cards as the radiation waves of the mobile phone may erase the
information stored on floppy disks, pay cards and credit cards.
!
Please keep small metal objects, such as thumbtacks, far away from the
receiver. When the receiver is in use it becomes magnetic and may attract
these small metal objects and may cause injury or damage to the mobile
phone.
!
Do not expose the mobile phone to humidity, water or other liquida. If liquids
enter the phone, it could cause short circuits, battery leaks or other
malfunctions.
!
Please use the mobile phone in a place away from landline telephones,
televisions, radios, and automated office equipment to avoid affecting both
the equipment and the mobile phone.
1.3.3 Battery Safety
!
Do not disassemble or modify the battery, as this will cause the battery to
leak, overheat, crack and catch fire.
!
Do not dispose of old batteries with everyday domestic garbage. Please
dispose of old batteries at the directed places with specific rules for their
disposal.
!
Please do not put/throw batteries into a fire, as this will cause the battery to
catch fire and explode.
!
When installing the battery, do not use force or pressure, as this will cause
the battery to leak, overheat, crack and catch fire.
!
Please do not use wires, needles or other metal objects to short-circuit the
battery. Also, do not put the battery near necklaces or other metal objects, as
this will cause the battery to leak, overheat, crack and catch fire.
!
Please do not solder the contact points of the battery, as this will cause the
battery to leak, overheat, crack and catch fire.
!
If liquid from the battery goes into the eyes, there is a risk of blindness. If
this occurs do not rub the eyes, but immediately rinse eyes with clear water
and go to ahospital for treatment.
!
Please do not use or place the battery near high temperatures such as near a
- 4 -
Page 5

fire or heating vessel, as this will cause the battery to leak, overheat, crack
and catch fire.
!
If the battery overheats, changes color, or becomes distorted during use,
charging, or storage, please stop using and replace it with a new battery.
!
If the liquid from the battery touches skin or clothing, this may cause burning
of the skin. Immediately use clear water to rinse and seek medical attention if
necessary.
!
If the battery leaks or gives off a strange odor, please remove the battery
from the vicinity of the open fire to avoid a fire or explosion.
!
Please do not let the battery become wet as this will cause the battery
overheat, smoke and corrode.
!
Please do not use or expose battery in high temperatures or direct sunlight, as
this will cause the battery to leak and overheat, lower performance, and
shorten the battery’s life.
!
Please do not continuously charge for more than 24 hours.
!
Please place the battery in a cool, shady and well-ventilated place out of
direct sunlight.
!
The life of all mobile phone batteries is limited. The usable time of batteries
decreases with frequent charging. When charging becomes ineffective this
means that the battery is out of service and the battery should be replaced
with a new one of the designated type.
1.3.4 Charger Safety
!
Please do not disassemble or modify the charger, as it will lead to physical
harm, electrical shock, fire or damage to the charger.
!
Please use AC 110 to 220 volts. The use of any other voltage will cause
battery leakage, fire and even damage to the mobile phone and charger.
!
It is forbidden to short circuit the charger, as this will cause electrical shock,
smoking and damage to the charger.
!
Please do not use the charger if the power cord is damaged, as this will cause
fire or electrical shock.
!
Please immediately clean any dust gathered on the electrical outlet.
!
Please do not place vessels with water near the charger in order to avoid
water splashing onto the charger and causing an electrical shortage, leakage
or other malfunction.
!
If the charger comes in contact with water or other liquid the power must
immediately be switched off to avoid an electrical short or shock, fire or
malfunction of the charger.
!
Please do not use the charger in bathroom or other excessive moist areas, as
this will cause electrical shock, fire or damage to the charger.
!
Please do not touch the charger with wet hands, as this will cause electrical
shock.
!
Do not modify or place heavy objects on the power cord, as this will cause
electrical shock or fire.
!
Before cleaning or maintenance please unplug the charger from the electrical
- 5 -
Page 6
outlet.
!
When unplugging charger, do not pull on the cord directly, hold on to the
body of the charger to pull the charger out of outlet, as pulling on the cord
will damage the cord and lead electrical shock or fire.
!
Please do not charge in the following places: moist or humid places, dusty
places or places with excessive vibration (this will cause malfunctioning); or
near televisions, radios, electronic products (this will effect the picture and
sound)
1.3.5 Cleaning and Maintenance
!
The mobile phone, battery and charger are not water resistant. Please do not
use them in restrooms or other excessively moist areas and likewise avoid
allowing them to get wet in the rain.
!
Use soft, dry cloth to clean the mobile phone, battery and charger.
!
Please do not use alcohol, thinner, benzene or other solvents to wipe the
mobile phone.
A dirty outlet will cause poor electrical contact, lose of power and even inability to
recharge. Please clean regularly
2 Before Use
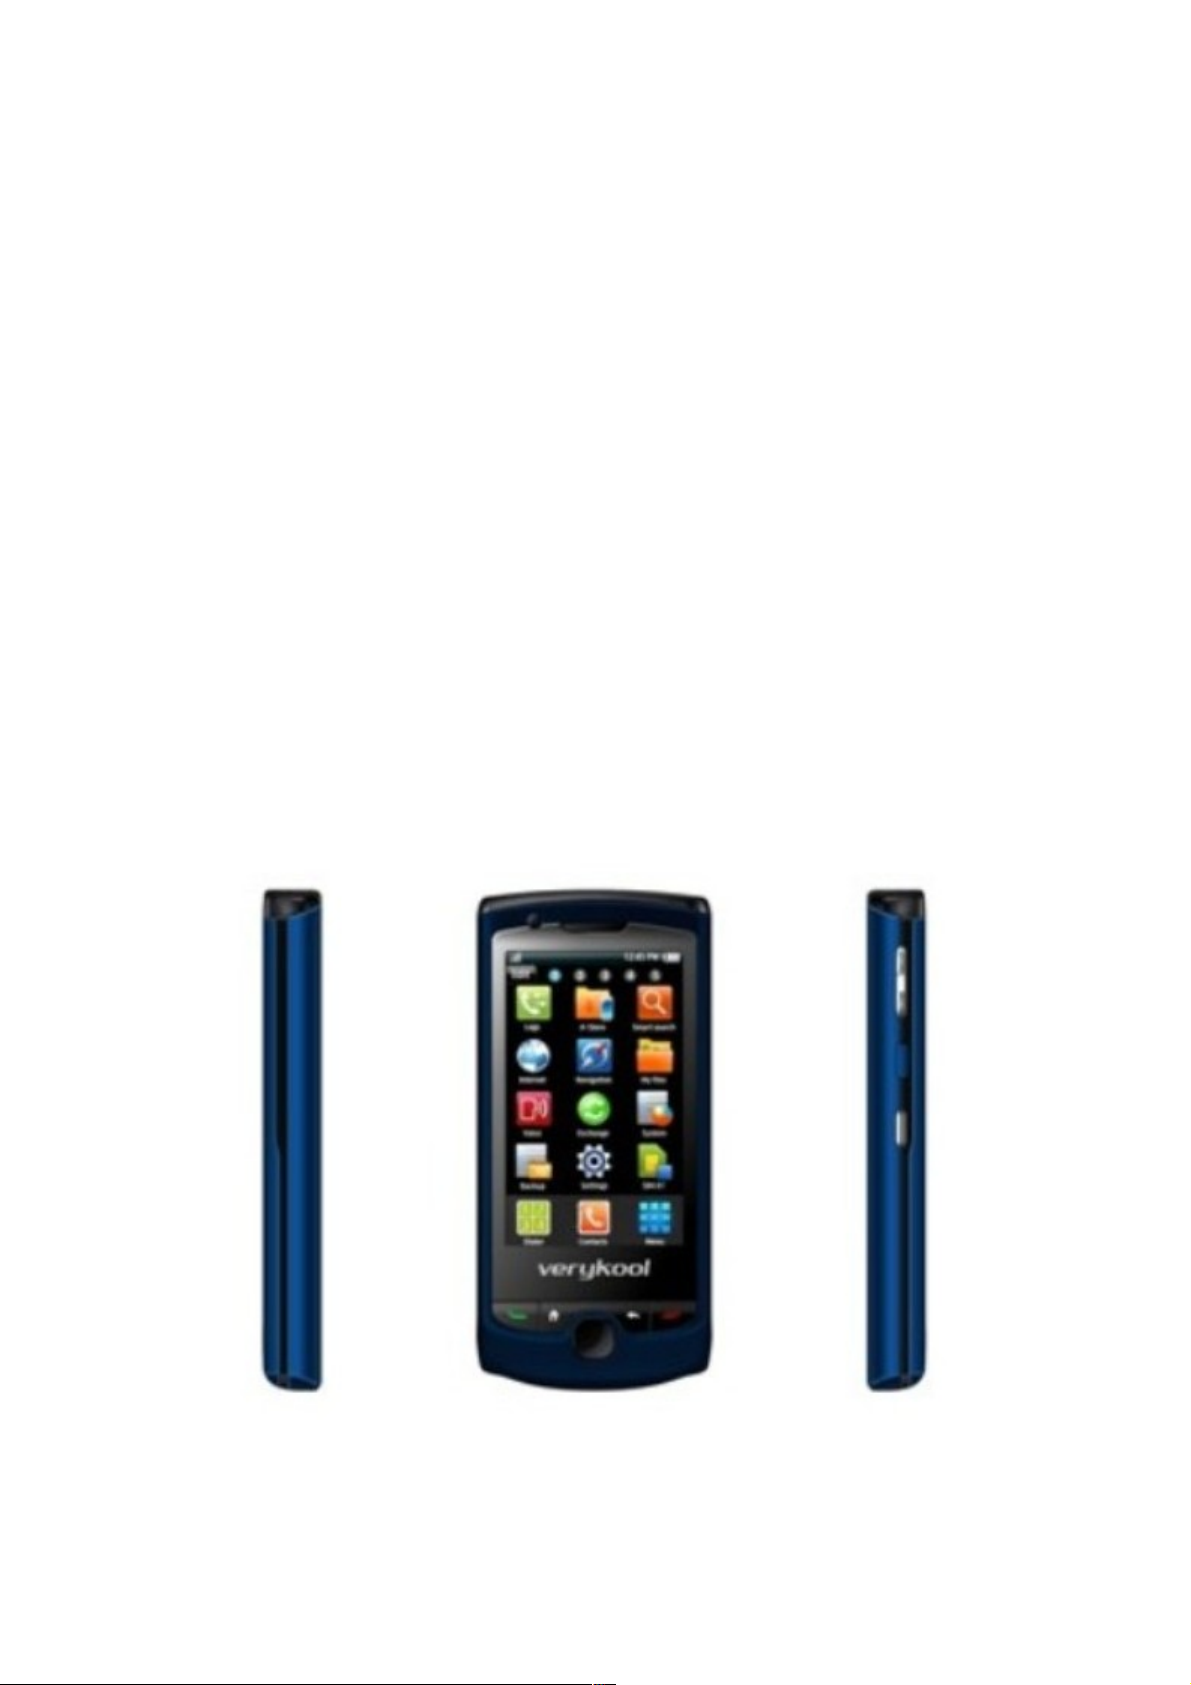
2.1 The Names and Explanation of Each Part
2.1.1 Appearance
2.1.2 Keypad Instructions
1.
OK key:OK key function is the same as the left soft key.
2.
Menu key : press this key for the main menu.
- 6 -
Page 7
3.
Back key: to perform the function of the prompt displayed in the lower right
corner of the screen.
4.
Dial key: to dial and pick up calls; on standby, to see all calls record list.
5.
Hang-up key: to end a call or reject incoming calls, to return to the idle
screen, long press to power on/off the handset.
6.
Camera key: press the camera key to enter “Camera” menu.
7.
Side volume keys: Press to adjust the volume when playing music, video, FM
and TV.
Note: In this handbook, the phrase “press the key” refers to pressing and
thereafter releasing a key; “Long press a key” refers to pressing a key and
keeping it pressed for 2 seconds or longer.
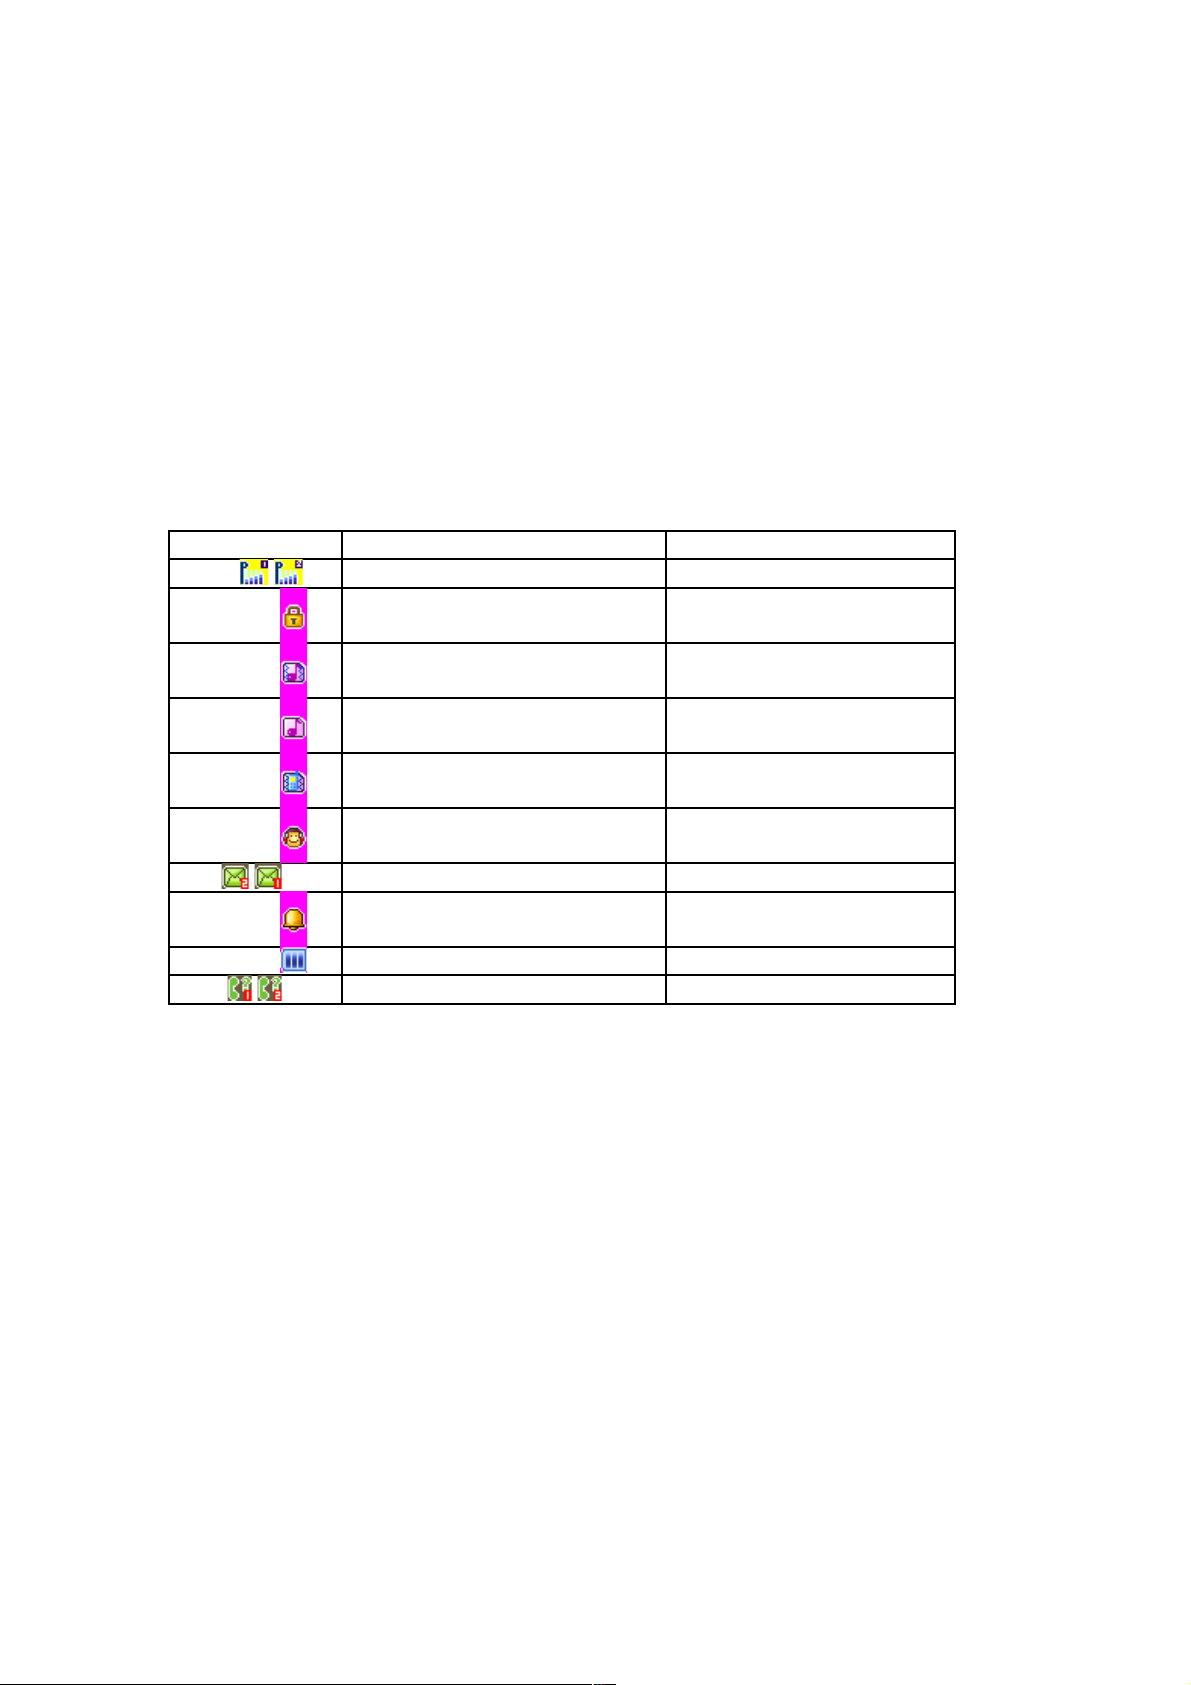
2.1.3 Icon
Icon Explanation Location
Signal intensity of network At the top of screen
Keyboard is locked At the top of screen
Vibration and sound At the top of screen
Ring At the top of screen
Vibration and silent At the top of screen
Earphone is inserted At the top of screen
Text message is received At the top of screen
Startup alarm At the top of screen
Shows the battery level At the top of screen
There are Missed calls At the top of screen
2.2 Insertion of the SIM Card and Memory Card
Note: For Dual-SIM models, please select SIM1/SIM2 before proceeding to below
steps
2.2.1 Insertion of SIM Card
The metal surface of the SIM card is very easily scraped. Before inserting into the
phone you must carefully remove it.
!
Turn off the phone; remove the battery and unplug other external power sources.
!
Insert the SIM card into the SIM slot.
!
When you need to remove the SIM card, please first turn off the phone, remove
the battery, then remove the SIM card.
2.2.2 Insertion of Memory Card
!
Turn off the phone; remove the battery and unplug other external power sources.
!
Put the Memory Card into the Memory Card slot.
!
When you need to remove the Memory Card, please first turn off the phone,
remove the battery, then remove .
- 7 -
Page 8

2.3 Battery
The battery is initially charged only 50% of its total capacity. Please fully recharge
the battery after completely discharching for the first 3 times, to get the best of your
battery performance
2.3.1 Removal and Installation of the Battery
!
When removing the battery follow the below steps:
①
Push the battery cover towards the bottom;
②
Lift the bottom part of the battery, take out the battery from the mobile-
phone.
Warning: You must turn off your mobile phone before removing the battery.
Under no circumstances should you remove the battery when the mobile phone is
on as this may damage the SIM card and your mobile phone.
!
When installing the battery follow the below steps:
①
Following the direction of the arrow, push the battery to insert in to the
mobile-phone.
②
Place the battery cover.
③
Push the battery cover up.
2.3.2 Battery charging
!
The charger connector with the bottom of the phone (with the arrow pointing
upward).
!
The battery capacity Icon will start flashing periodically; when charging at
power-off status, charging indicator on the screen means the phone is charging
now. If you are using a phone in low battery, it may need certain time for
charging indicator to appear on the screen after starting to charge.
!
When the Capacity Icon is full and doesn't flash any more, the charging process is
complete. If your phone is charged in power off status, “charging complete” will
also show. Charging process usually takes 1-2.5 hours. Battery, phone and
charger normally heats up during the charging process.
!
When the charging is complete, disconnect the phone and the charger from the
AC power outlet.
Note: Be sure to charge in ventilated place with the temperature ranging from -10℃
to +45 , and ℃ always use the charger provided by the original manufacturer. Using
unauthorized charger may cause damage, which is outside of the warranty coverage.
2.4 Safety password
PIN code/PUK code
The PIN code (individual identification number) prevents your SIM card from
illegal use. The PIN code is generally provided with the SIM card. If the wrong PIN
code is entered 3 consecutive times, it will be locked and the PUK code must be
entered to unlock. Please consult with your network provider for more details. (PIN
code default is 1234).
3 Features
3.1 Function hotkey
Function Hotkey Mode
- 8 -
Page 9

Power on/off Long press the Hang-up key In any screen
Control receiver volume Press Side volume keys Calling screen
Enter the main menu Press the Menu key Idle screen
Silent/Normal mode Long click the # key Idle screen
Note: For Dual-SIM models, please select SIM1/SIM2 before proceeding to below
steps.
3.2 Dialing
You may dial and receive calls on your phone when the symbol of your network
provider appears on the screen. The information bar on the upper left corner of the
screen indicates network strength (the signal is strongest when there are four lines
visible).
3.3 Rejecting calls
You can press the hang up key to reject any incoming call.
3.4 Receiving calls
You can choose different modes to receive calls. If the earphones are already
plugged in, you can use the button located on the earphones to answer the call. If it is
inconvenient to press the button, then you can set the“Auto” as “On”, with the
earphones plugged in, and the phone will automatically pick up after ringing or
vibrating for 5 seconds. If you have set the “Any Key”, you can pick up the call by
pressing any key other than the hang up key.
3.5 Ending a call
During a call you can press the hang up key to end a call. You can also cancel a call
you have just dialled by pressing the hang up key.
3.6 Emergency calls
If you are located within the network area (you can find this out by referring to the
network strength indicator located on the upper left-hand corner of your mobile phone
screen), you should be able to make emergency calls. If your network provider does
not provide roaming at your current location, “Emergency” will appear on the screen.
If you are located within a network area, even if you do not have a SIM card, you will
be able to transmit emergency calls.
3.7 Extension dialing
Some fixed phone extensions cannot be called directly. You need to input a “P”
before the extension number. The “P” can be input at the dial screen by long clicking
the * key and switch to it.
3.8 Call history
Get in this menu to view the missed/received/dialed calls.
3.9 Call divert
After activating this function, the network will notify you that you have a new
incoming call when you are talking on the phone. For details of how to use this
function you can contact your network operator.
3.10 Call waiting
The call diversion network service permits you to divert, under certain preset
situations, certain incoming calls to a telephone number designated by you. This
- 9 -
Page 10

service requires network support. Please contact your network provider to activate this
service. You can set and cancel the incoming call diversion function of your mobile
phone.
3.11 Call barring
The Call Barring allows the user to prevent incoming or outgoing calls based on
user-defined conditions. The network provider provides you with a 4 digit Barring
PW to allow you to activate the “Call Barring” service. When you use this function,
please contact your network provider
3.12 Turning the Phone On and Off
To turn on or off the phone please long press the Hang-up key.
4 Function Menu
4.1 How to Use the Function Menu
4.1.1 Scroll to select Function
!
On standby, press the ok key -to enter the main function menu. During a
call click “Options” to enter the call option menu, then use Touch-screen
slide to scroll to the desired item on the menu and press the ok key to select
the function.
!
In all the menu and submenu, use Touch-screen slide to scroll to the
desired function and press the left soft key to enter the function item.
4.1.2 Shortcut select function
Most main menus and submenus have speed numbers. This speed number
is the function’s corresponding index number.
!
On standby, press the OK key to enter the main menu, Touch-screen
slide to scroll to the desired item on the menu.
!
Enter the main menu’s speed number to enter the corresponding option.
Enter the submenu’s speed number to select the corresponding option.
4.1.3 Exit Menu
Usually, you can exit the current menu by click the “Back”. You can also press
the hang-up key to return to the idle screen.
4.2 File manager
Click "Ok" to enter this submenu, menu display “Phone” and "Memory Card"
( if the Memory card has been inserted into the mobile-phone).
!
Open to display all the files and folders in the root.
!
New Folder to create a new folder.
!
Format to format the Phone or Memory Card, it will delete all of the data
and file.
!
Rename to rename your Phone or Memory Card.
!
Details to show the Name/Total size/Free size of your Phone or Memory
Card.
Open the root, it will display the file or folder list, select a folder and
press the left soft key “Options”:
!
Open to display the content in the current folder.
!
New Folder to create a new folder.
!
Rename to change the current file or folder name.
- 10 -
Page 11

!
Delete to delete the current file or folder.
!
Sort by to select sort the folders By Name, By Type, By Time and By
Size, or not array to select None.
Select one file and press the left soft key “Options”. It may show
different items according to the different file format:
!
View to view the image file.
!
Play to play multimedia file.
!
Use to use the different file in different usage. The music file can be used
in User Profile as ringtone. The image file can be used in Power
On/Off Display,Wallpaper and Screen Saver.
!
Send to send the file by MMS.
!
Detail to display detail information about Date and Size.
!
Rename to change the file name.
!
Copy to copy the current file to other place. Press OK to start, press
Select to copy the file in current position, press Open to enter the
folder, press New Folder to set up a new folder.
!
Move to move the current file to other place, same as Copy.
!
Delete to delete the current file (Note: if the file attribute is Read Only,
it can not be deleted.).
!
Delete all files to delete all files in the current folder.
!
Mark several to multi-select several files to copy/delete/move.
!
Sort to sort the files By Name, By Type, By Time and By Size, or
None.
4.3 Phonebook
Note: For Dual-SIM models, please select SIM1/SIM2 before proceeding to
below steps
You can use the phonebook function “To Phone” to save name card information
such as Name, Number, Caller ringtone and Caller Group.
Note: This phone is able to save up to 500 phone book records, and the record
storage of SIM card is decided by the capacity of the SIM card.
The options of this result by the ok key are following:
!
View : view the details of entry
!
Send text message : to send text message to the current phone entry
!
Send multimedia message : to send the multimedia message to the current entry.
!
Call : to make a call directly.
!
IP dial : activate the IP dial-up of numbers in the phonebook.
!
Edit : edit the entry.
!
Delete : delete the entry.
!
Copy : copy the entry.
!
Move : move the entry.
!
Send contact : send the entry of “as text message”.”as multimedia message” and
“via Bluetooth”.
!
Add to blacklist : add the entry to blacklist.
!
Caller groups : he phone is programmed with 5 caller groups. You can make
- 11 -
Page 12

some individual settings for each group, such as rename, ring type, incoming call
picture and each group member’s personal setting.
!
Phonebook settings: set the phonebook in nine categories: Preferred storage,
Speed dial, My number, vCard version, Extra numbers, Memory status, Copy
contacts, Move contacts and Delete all contacts.
4.4 Fun & Games
4.4.1 Java
Show the JAVA applications list installed. You can install the Java programs
through file manage. At this list, you can launch or delete them by option menus
4.4.2 Java settings
JAVA settings include JAVA audio, JAVA backlight, Network setting, etc.
4.4.3 Java default security
In this menu you can set Third party、Untrusted domain、Restore settings and
domain options
4.4.4 Java network
In this menu you can set network for java.
4.4.5 Games
In this menu there is a puzzle game for your leisure time entertainment.
4.5 Call center
Note: For Dual-SIM models, please select SIM1/SIM2 before proceeding to
below steps
4.5.1 Call history
In this menu you can view all call records, including missed calls, received calls,
dialed calls; click on the above have been received, missed, dialed the phone icon,
enter the corresponding call log list. In the call log list, select records, click on the
options for the following operations:
"
View: to view the current record.
"
Call: to call the current record.
"
Save to phonebook: to save the current number to phonebook.
"
Add to blacklist: to add the current record to blacklist.
"
Edit before call: to edit the current record before call.
"
Delete: to delete the current record.
"
Delete all: to delete all call log records.
"
Advanced: to set call timers, call cost, text msg.counter and GPRS counter.
4.5.2 Call settings
In this menu you can set Caller ID, Call waiting, Call divert, Call barring, Line
switching ,Closed user group and Advance settings.
In the Advance settings you can set Blacklist, Auto redial, IP dial, Call time
display, Call time reminder ,Auto quick end, Reject by SMS and Emergency &
Service call.
4.6 Messaging
This feature allows you to send, receive, store and edit all kinds of information,
and its network must support a variety of features, please contact the company with
the network operator.
- 12 -
Page 13

Note: For Dual-SIM models, please select SIM1/SIM2 before proceeding to
below steps
4.6.1 Write message
Text message
Before writing a text message, please confirm that you have set the short message
service centre number.
You can edit your short message by entering the” Text Message” submenu.
Click the “option” to enter the “Option” menu:
!
Send to : click ok key to enter number,insert the number then click the ok key
can select “send”,”edit recipient”,”remove recipient” and “remove all
recipients” .
!
Input Method: to offer 8 kinds of input methods.
!
Insert template: to insert character information of prearranging at the
currently cursor place.
!
Advanced : in this menu you can set “insert object” ,”insert number” ,”insert
name”,”insert bookmart” and ”text fomat”.
!
Save to Drafts: save this message to Drafts.
Multimedia message
When you select “Multimedia message”, click the “ok” to wirte message
interface, you can input content. After finishing it, click the“Options”, have options
as follows:
!
Send to Complete editing of the current MMS.
!
Input Method to choose one kind as acquiescence characters editor.
!
Text options
!
Add picture to select a picture from [File Manager] submenu or take
picture and insert into the current page.
!
Add sound to select an audio from [File Manager] submenu or record
sound and insert into the current page.
!
Add Video to select a video from [File Manager] submenu or record video
and insert into the current page.
!
Add subject to edit the subject for this message.
!
Preview MMS to preview the current MMS.
!
Slide options in this menu you can set “add slide behind”, “add slide
before” or “slide timing”.
!
Advanced in this menu you can select “insert text template”,”insert
attachment”,”insert contact number”, “insert contact name” or “insert bookmark”.
!
Save to Drafts to save the message to Drafts.
!
Save as template to save as template
!
Details in this menu you can
Note: Some of the options above only appear under certain circumstances, for
example, "Delete Slide" only appears when the current MMS exceeds one page.
Each page of a MMS can only contain one picture and one sound. When the
current page contains a sound or picture, "Edit image" or "Edit Audio" will
appear. When editing an MMS, the status information line bar at the top of the
- 13 -
Page 14

screen will display the following: the current page/total pages; and the entire size
of the MMS.
4.6.2 Inbox
Text message
Enter the “Inbox” submenu to view received messages. When you receive a short
message, your mobile phone will vibrate (if Alert Type set to the Vibration) and ring
(if Alert Type set to the Ring), display the prompt information. If you do not wish to
read it immediately, after you exit this interface, the envelope icon appears at the top
of the screen on standby and the short message will automatically be saved on the
SIM card. The amount of short messages that can be saved (this includes received
messages as well as saved messages) is based on the memory size of the SIM card.
!
When viewing the short message list in “Inbox”, the sender’s phone
number or name (if the name has already been saved in the phonebook) will
be displayed, and show that receives the date of short messages by floating
item.
!
When looking at the short message list, you can use the Touch-screen slide to
select the short message. When the “Inbox” short message list appears, you can
click the “Ok” to read the detailed contents of a message, the date and time of
receipt and the name (if the name has already been saved in the phonebook) or
telephone number of the sender. At this time you can also click the“Option” to
perform the following operations:
View view the message.
Reply by SMS to send the text message to the sender of the current
message.
Reply by MMS to send the multimedia message to the sender of the current
message.
Call sender to call the sender of the current message.
Forward to edit the current message Send.
Delete to delete the current short message
Delete all to delete all message of the inbox.
Save to phonebook save the sender to the phonebook.
In view the message interface you can also click the “Options” to perform the
following operations:
Reply to send a short message to the sender of the current message.
Call sender to call the sender of the current message.
Forward to edit the current message Send.
Delete to delete the current short message.
Advanced to use number, URL and USSD
Multimedia message
Enter the "Inbox" submenu. Your mobile phone will display a list of the MMS in
the "Inbox" (include download prompt). Use the Touch-screen slide to scroll to the
MMS, you wish to read, by clicking the "Options", you can carry out the following
operations on the current MMS.
- 14 -
Page 15

!
Download: to download the current MMS content (if the MMS is not
download to the phone).
!
View: to look over the current MMS content.
!
Reply: to edit the MMS to reply sender, at the same time, subject change to
"Re:" and old subject.
!
Reply by SMS: to edit the SMS to reply sender
!
Reply all: to edit the MMS to reply all, at the same time, subject change to
"Re:" and old subject.
!
Forward: to edit the correlative message to forward the current MMS, at the
same time, subject change to "Fw:" and old subject.
!
Delete: to delete the current MMS.
!
Delete All: to delete all the MMS in the inbox.
!
Properties: to can look over the sender's number, subject, and sent time and
date, MMS Size and so on.
!
Use Details: to pick up the number of sender and the bookmarks of content.
You can Dial the number or Save to Phone Book, also you can Goto the
bookmarks or add bookmarks.
4.6.3 Drafts
Text message
In the Outbox list interface, select a message, Click the “option”, you can make
the following operation.
!
View to view the current message
!
Send to send the current message
!
Edit to edit the current message.
!
Delete to delete the current message.
!
Delete all to delete all message in “Drafts”
Multimedia message
Boxes in the Outbox list interface, select an MMS, Click the “option, you can
make the following operation.
!
Send: Send the article MMS.
!
Play: Play the article MMS.
!
Editor: enter the MMS editing interface, you can edit the MMS.
!
Delete: Delete the clause MMS.
!
Delete all: Delete the mailbox has not made all of the information.
4.6.4 Outbox
E Enter the “Outbox” submenu to view the short messages (saved in the SIM card
and owner phone) in the mobile phone. After the “Outbox” short message list
appears, you can use the Touch-screen to scroll and select the short message; click the
“Ok” to read the detailed contents of the selected short messages. At this time you
may also click “Options” to perform the following functions:
!
View to view the current message
!
Resend to send the current message.
!
Edit to edit the current message.
- 15 -
Page 16

!
Delete to delete the current short message.
!
Delete All to delete all the messages in “Outbox”
4.6.5 Sent messages
This mailbox store has send a message
4.6.6 Delete messages
Can be removed separately from Inbox, Outbox, Sent messages, drafts or all of the
information to delete all.
4.6.7 Broadcast message
In this menu you can use the broadcast message.
4.6.8 Templates
Text message
Click the “ok” to enter information template list, can edit or remove the template
message or Write Message.
Multimedia message
Click the "Ok" to enter information template list, can View it, Properties and Write
Message
4.6.9 Message settings
Text message
When using the short message function you must first make the necessary
settings.
Enter the “Message Settings” submenu to select the following operations:
!
Profile Setting Please contact your network provider to get the SC
Address. Profile list have one profile, two profiles and four
profiles because the different network supports and SIM card.
Select one Profile, press the left soft key “Edit”, can set the
Profile Name, SC Address, Valid Period and Message Type.
During Valid Period, the short message service centre will
continuously resend a message until it is received. The message
Valid Period is applicable for all sent messages. You can set the
message Valid Period as any of the following: “1 hour”, “6
hours”, “12 hours”, “1 day”, “3 days”, “1 Week” or “maximum”.
The network operators must support this function for it to be
available. Message Type can select the Text, Fax, Page, E-mail by
the left/right keys.
Note: Message Validity Perid, Fax, Page and E-mail need support by the
network operator.
!
Common Setting to set On/Off for the Delivery Report. If you set it as
“On”, when the recipient receives your short message, or if the
short message is not received for some reason, the short message
center will send a status report so that you can see whether the
message has been delivered.
Note: The network operator must support this function for it to be
available.
!
Memory Status to display the memory by n/m form in the SIM card and
- 16 -
Page 17

phone, thereinto, “n” denotes the current memory message, “m”
denotes the most message capability in the SIM card or phone.
Your mobile-phone can save 200 items (include Inbox and Outbox)
SMS at most. SMS numbers are decided with SIM card capability
in the SIM card.
!
Preferred Storage to select to save the messages to “SIM” or “Phone”.
Multimedia message
The user must make the necessary settings in order to use the multimedia
message.
Enter the "MMS Settings" submenu and make the following settings:
Profiles
You can Activate profile and View profile.
Common settings
Enter the “common setting” submenu and make the following settings:
"
Compose: include Creation Mode, Image Resizing and Auto
Signature.
"
Sending: include Validity period, Delivery report, Read report,
Priority, Slide Timing, Delivery time.
"
Retrieval: include Home network, Roaming, Read Report, and
Delivery Report.
!
Memory Status: view Usage, Used Space, and Free Space.
4.7 Multimedia
4.7.1 Mobile TV
I In this menu you can enjoy watching mobile TV
4.7.2 Camera
Camera Settings
I In the preview mode of the camera click “Options”, to access the following:
!
Photos: to enter photos folder, view the pictures saved.
!
Camera settings: Click to select to set Shutter sounds, EV, Contrast, Anti-
flicker , Delay timer and Cont. shot, if you click the “Ok”, the
settings will be activate.
!
Image settings: to set the Image size and Image quality. Image size can be
selected from240×400、80×60、160×120、320×240、640x480;
Image quality can be selected from Normal, Good and Low.
!
White balance: you can select from Auto, Daylight, Tungsten,
Fluorescent, Cloud, and Incandescence.
!
Scene mode: you can choose Auto or Night, you only choose Night in dark
environment.
!
Effect Settings: to set the special effect from Normal, Grayscale, Sepia,
Sepia green, Sepia blue and Color invert when you are taking
photo.
!
Sensor Select: to select camera 1 or camera 2.
!
Storage: to set the storage of the photos from Phone or Memory card.
!
Restore Default: to restore the settings of camera to default setting
- 17 -
Page 18

except the self capture mode.
Taking a photo
!
After framing the picture you wish to take, keep the camera steady and
press the Camera key to take pictures. You can view the photos in the
“Image Viewer” menu, or in File Manager.
4.7.3 Image viewer
Select the “Image Viewer” menu; you can conveniently view the photos listed.
Click the “Options” to select the following contents: View, Browse Style, Use,
Send, Rename, Delete, Delete All Files, Sort by and Storage.
"
View: to view the photo.
"
Browse mode: to choose view mode (matrix mode/list mode).
"
Use: to set the photo as Wallpaper, Screen Saver or Caller picture.
"
Send: to send the photo by MMS, but it will depend on the MMS space size,
screen size, and so on.
"
Rename: to change the name of the selected photo.
"
Delete: to delete the selected photo.
"
Delete all files: Delete all saved pictures
"
Sort By: to sort the photo as following rank(by name/by type/by time/by size)
"
Storage: to choose the viewer path.
4.7.4 Video recorder
To enter the “Video Recorder” menu, the recorder displays the preview window.
Video Recorder Settings
Click the “Options” for the following operations: :
!
Camcorder Settings: to set content as follows, include EV, Night Mode and
Anti-flicker. Click the “Ok” to activate the current settings.
!
Video Setting: to set the Video Quality, Size limit reached, Time limit
reached and Record audio.
!
White balance: you can select from Auto, Daylight, Tungsten,
Fluorescent, Cloud, and Incandescence.
!
Effect Setting: to set the special effect for the movie.
!
Storage: to set the storage of the video from Phone or Memory card.
!
Restore Default: to restore the default settings of video.
Video
!
In the preview screen, click the “ok” to begin to kinescope.
!
Click “ok” to pause recording, then click “ok” again to continue recording.
!
When a video is recording, touch “Stop”, stop and save the video, then return
to the preview mode.
You can view the videos from the “Video Player” menu or in file manager
4.7.5 Media player
In this menu you can play video and music. Must be added the list of files to play
videos and music, the specific steps: In the Media player menu, select My playlists,
select the options "new" to create a new file, into the file and select the options "add"
to add video files or music files from T Card , add after the success that can play
- 18 -
Page 19

video and music.
4.7.6 Sound recorder
In this menu, mobile-phone can record sound. The format will be AMR, WAV or
AWB. Click the start button to start recording. When recording, click the pause button
to select “Pause” or “Cont.”, can pause or continue recording, Click the Stop button
to select “Stop”, you can also edit and save the file. The recorded file is saved in
[Audio] folder.
Select “Options” and access the following options:
"
New record: to record a new sound.
"
Play: to play the current record.
"
Append: for AMR and AWB format, you can append the record to the
current file, and save it as the same file.
"
Rename: to change the name of the sound file.
"
Delete: to delete the sound file.
"
Delete all files: to delete all sound files.
"
Settings: to change the file format. You can select AMR, WAV or AWB
by the left/right key.
"
Use: to set the current recorded file as the ringtone in the User Profile.
"
Send: to send the current recorded file by MMS.
4.7.7 FM radio
Enter this menu, press Adjusting the volume keys to adjust the volume, Click the
icon for stickers to adjust the channel, click the “ok” to control the Fm radio to play.
Click the “option” can select the operation as follows:
"
Channel list You can set up to 20 FM channels.
"
Manual input You can input the frequency of FM radio.
"
Preset auto search The auto search will acquire available FM radio
frequencies and establish the channel list.
"
Settings to set the Record format, Audio quality and Record storage.
"
Record Records the radio broadcast.
"
Append Regarding the AMR document, may supplement the sound
recording in the current recording document, and will possess in finally
the sound recording record retention current document.
"
File list display the recorded files.
4.8 Organizer
4.8.1 Calendar
Click the “Options”:
!
View today view the pre-saved event of today.
!
View all view all the pre-saved events.
!
Add event add an event as Reminder, Meeting or Course.
!
Jump to date jump to a specified date of your preference
!
Go to weekly/monthly view switch the format of the calendar between
weekly view and monthly view.
4.8.2 Tasks
Display all the task arrangement. If there is no task, it will show Empty, click
- 19 -
Page 20

“Add” to create a task. Otherwise, click “Options” to enter the option menu:
!
View view and edit the current task.
!
Add add a new task. You can choose the task type from Date, Call
and Anniversary.
!
Edit edit the current task.
!
Delete delete the current task.
!
Delete all delete all tasks.
!
Send vCalendar send the task by SMS or MMS.
!
Save as file save the task as a file.
4.8.3 Alarm
The mobile-phone can set up to five alarms, Selecting one alarm, you can turn
on/off,set the time, repeat mode, snooze time, and alert type.
4.8.4 World clock
Enter the World Clock submenu, display world time zone map, move coordinate
location by the left/right keys, the interface will show the city time located by the
coordinates
4.8.5 Notes
In this menu you can create and edit notes.
4.9 Settings
4.9.1 Pen calibration
For calibration of the screen, touch the center of the crosson the screen.
4.9.2 Phone settings
In this menu you can set Time and date, Schedule power on/off, Language, Pref.
input methods, Encoding, Display, Auto update of date and time, UART settings
and Misc. settings.
4.9.3 Network settings
In this menu you can set the network Network selection and Preferences.
4.9.4 Security settings
In this menu you can set SIM Security settings, Phone lock, Auto keypad lock
and Change password.
4.9.5 Restore factory settings
Enter the “Restore Factory Settings” submenu. Here you can restore the relevant
settings to the manufacturer’s default settings.
Note: Restoring Factory settings requires the correct handset unlock code to
be entered. Some settings cannot be restored to the manufacturer’s settings until
the phone is rebooted.
4.9.6 Sound effects
Set the audio effect of audio player: Equalizer effect.
4.10 User profiles
Your mobile phone provides five different user profiles that you can select, for
different occasions.
!
General for use under general circumstances.
!
Meeting for use in meetings. This requires presetting (for example, Alert
Type is set to Vibration only).
- 20 -
Page 21

!
Outdoor for use in outdoor activities. This requires presetting (for
example, you can set raise the volume of the receiver and ring
tone).
!
Indoor for use in indoor activities. This requires presetting.
!
Headset for use in headset activities, this mode will activate when the
earphone is inserted. This requires presetting (for example, you
can lower the volume of the receiver and ring tone).
!
Bluetooth for use in Bluetooth activities, this mode will activate when
connecting to a Bluetooth device.
Note: These five profiles have already been set and the default profile is
“General” when the mobile phone leaves the factory. On standby, you can long
press the # key to turn silence on or off.
Press the up/down keys to select a profile, then click the “Options”:
Activate: to activate selecting profile.
Customize: for you to customize the profile.
Select “Customize” menu, it will display the menu as follows:
!
Tone Setup: customize different ring tones with different option, for example,
incoming call, power on or off, and so on.
!
Volume
:
Two type of volume can be set: Ring Tone (including incoming
call, alarm, power on, power off, message tone) and Key Tone
(associated with key press).
!
Alert Type
:
set the kind of alert for incoming calls. You can select from four
types: Ring Only/Vibration Only/Vibration and Ring/
Vibration then Ring.
!
Ring Type
:
set the mode of ring, including Single, Repeat and Ascending.
!
Extra Tone
:
The user can turn on or off the tone as follows: Warning,
Error, Camp on and Connect.
!
Answer Mode:The user can select different modes for answering: Any Key
(except for the Hang-up key, right soft key) and Auto (when the
earphone is inserted)
4.11 Extra
4.11.1 Calculator
Click the buttons on the screen to calculate.
4.11.2 Unit Converter
Select from the unit options to convert.
4.11.3 Currency converter
Select the currency to convert.
4.11.4 Stopwatch
In this menu you can use the Typical stopwatch and nWay stopwatch.
4.12 Services
4.12.1 STK*
Press the up/down keys to select “STK”. Press the left soft key to enter the
“STK” main menu. Here you can use the value-added services provided by your
network operator.
- 21 -
Page 22

Your mobile phone supports STK functions. But if your SIM card and network
operator does not provide this service, then you will not be able to use this function.
For more information please contact your network operator
4.12.2 Internet service
Your mobile phone supports wireless application protocol (Internet service)
service. You can access many different WAP services such as news, weather reports,
flight information, and others. These services are customized for mobile phones and
maintained by WAP service providers.
Network support is necessary for Internet services. Please contact your network
provider and/or the service provider of the desired service. The service provider will
also provide instructions on how to use their service.
In the services menu, use the Touch-screen to scroll and select “Internet
service” and click “ok” to enter the menu. Here you will see the following menu
options: “Homepage”, “Bookmarks”, “Recent Pages”,, “Input address”, “Service
Inbox” and “Settings”.
Homepage
Select “Homepage” to enter the home page, use this menu to connect your phone
to the network and load the home page of the service provider.The Home page is the
WAP site set upon activation . Home page is set in the [Settings]\[Edit Profile]\
[Homepage].
Bookmarks
Display the bookmark list. Use the Touch-screen to scroll and select a bookmark,
click “Options” to access the following options:
Go to:connect to the address appointed.
Edit:edit the Title and Address of the bookmark.
Send: send the bookmark to others via SMS or MMS.
Delete
:
delete the selected bookmark.
Delete All: delete all bookmarks.
Add Bookmark: edit the name and address of a new bookmark.
Note:If the bookmark is empty, you need to input the address first, then connect..
Recent Pages
Shows the list of webpages recently visited.
Input address
Use this menu to manually enter the URL address of a website and access the
website. Except for Bookmarks and Recent Pages, Enter Address provides the
other route to access the website.
Service Inbox
Select “Service Inbox” to view received service messages.
The mobile phone can receive service messages sent by your service provider. For
example, service messages may consist of notifications on news briefings, or a line of
a text message, or a WAP service address.
Settings
Select “Settings” to enter settings for online browsing, including”Select SIM”,
“Profiles”, “Browser Options”, “Service Message Settings”, “Clear Cache”and
- 22 -
Page 23

“Clear Cookies”
!
Select SIM to select use sim1 or sim 2 (For Dual-SIM models only).
!
Profiles to display the edit profile list. After edit and save the list, select
“Activate account” to activate.
"
Account name: change the name.
"
Homepage: change the homepage.
"
Data Account: select the data account from GSM Data and
GPRS.
"
Connection Type: select the connection type from WAP and
HTTP, depend on the gateway. Press the up\down keys to
select.
If you select WAP, you can set:
IP Address: ! input the gateway IP address.
Security: ! set joint security, depend on the gateway.
If you select HTTP, you can set:
Proxy Address: ! input gateway Proxy address.
Proxy Port: set the proxy port.
"
Username: set the user ID for APN Service.
"
Password: set the user password for APN Service.
!
Browser Options set the Timeout and Show Images:
"
Timeout
:
set a time limit, integer of 30-300 (second) , if
there is no data entered or transferred beyond this time limit the
service will automatically turn off.
"
Show Images: to set the images, show and not show, by
turning On or Off.
"
Cache: turn on/off cache.
"
Cookies: turn on/off cookies.
!
Service Message Settings set to incept or not
incept the WAP service message.
!
Clear Cache Clear the cache memory of the data
or services that you have visited
!
Clear Cookies Clear the cookies of the data or
services that you have visited
Note: If you tried to visit, or successfully visited confidential information that
required a password (such as a bank account), please clear your mobile phone’s
cache memory each time for your protection.
4.13 Connectivuty
4.13.1 Bluetooth
In this meun, you can access the following operations:
!
Power Click to select Bluetooth on/off.
!
Visibilty Click to select Bluetooth visibility on/off.
!
My device Select an item, press the left key “option” and select the
following operations:
"
Connect connect to a device shown on the searched list.
- 23 -
Page 24

"
Disconnect Disconnect from the device.
"
Rename Edit the name of the device.
"
Delete Delete this record.
"
Delete All Delete all records.
"
Service list Demonstrates this equipment's record of service.
"
Inquiry new Device Searches for new Bluetooth devices within range.
!
Search audio device searches for Bluetooth devices which has connected
with this handset before and new devices within range.
!
My name You can edit the Bluetooth name in this menu.
!
Advanced press letf soft key “ok ” then select the operation as follows:
"
Audio path: Set Leave in phone or Forward to BT headset.
"
Storage : select your storage to phone, memory card or Always ask.
"
Sharing permission: choose fully control or Read only.
"
My address: display my address.
4.13.2 Data account
GPRS
In this menu, the mobile-phone will show the Data Account list of GPRS data.
You can select and edit the GPRS data:
Account Name
:
edit specify a name for the account
APN
:
edit APN.
User Name
:
edit the user identification to login the APN.
Password: edit the password to login the APN.
Auth. Type
:
set the authority type to Normal or Secure.
Primary DNS
:
edit the Primary DNS address.
Secondary DNS: to edit the Secondary DNS address.
5 Input Method
5.1 General Outline
This mobile phone provides many input methods. Character entry functions
permitted by this mobile phone are:
- Inputting and editing of short messages
- Inputting and editing of names in the phone book
- Looking up the phone entry by name
- Editing of text in MMS.
6. Declaration of Conformity
This equipment has been tested and found to comply with the limits for a Class B
digital device, pursuant to Part 15 of the FCC Rules. These limits are designed to
provide reasonable protection installation. This equipment generates uses and can
radiate radio frequency energy and, if not installed and used in accordance with the
instructions, may cause harmful interference to radio communications. However,
there is no guarantee that interference will not occur in a particular installation. If this
- 24 -
Page 25

equipment does cause harmful interference to radio or television reception, which can
be determined by turning the equipment off and on, the user is encouraged to try to
correct the interference by one or more of the following measures:
-- Reorient or relocate the receiving antenna.
-- Increase the separation between the equipment and receiver.
-- Connect the equipment into an outlet on a circuit different from that to which the
receiver is connected.
Any changes or modifications not expressly approved by the party responsible for
compliance could void the user’s authority to operate the equipment.
This device complies with part 15 of the FCC Rules. Operation is subject to the
following two conditions:
(1) This device may not cause harmful interference, and (2) this device must accept
any interference received, including interference that may cause undesired operation.
THIS MOBILE PHONE MEETS THE INTERNATIONAL RECOMMENDATIONS
FOR EXPOSURE TO
RADIO WAVES
Your mobile phone is a radio transmitter and receiver. It is designed and manufactured
not to exceed the limits for exposure to radio frequency (RF) energy defined by the
international standards. These recommendations have been established by the
International Commission on Non-Ionizing Radiation Protection (ICNIRP) and, the
Institute of Electrical and Electronics Engineers (IEEE) that forecast a substantial
safety margin for assuring the protection of all persons, regardless of age and health.
The exposure recommendations for mobile phones use a measurement unit known as
the Specific Absorption Rate (SAR). The SAR limit recommended by the ICNIRP for
the mobile phones used by the general public is 2.0W/kg averaged over ten grams of
tissue and, is 1,6W/kg averaged over one gram of tissue by IEEE Std 1528 for the
head.
Tests for SAR have been conducted using recommended operating positions with the
mobile phone transmitting at its highest certified power level in all tested frequency
bands. Although the SAR is determined at the highest certified power level, the actual
SAR levels of the mobile phone while operating are generally below the maximum
SAR value. This is because the phone is designed to operate at multiple power levels
so as to use only the power required to reach the network. In general, the closer you
are to a base station antenna, the lower the power output.
While there may be differences between the SAR levels of various phones and at
various positions, they all meet the international protection standards for exposure to
- 25 -
Page 26

radio waves.
The highest SAR value for this model phone when tested was 0.62W/kg at ear and
0.39 W/kg for use close to the body.
For limiting the radio waves exposure, it is recommended to reduce the mobile phone
call duration or to use a headset. The purpose of those precautions is to take the
mobile phone away from the head and the body.
For body worn operation, this phone has been tested and meets FCC RF exposure
guidelines when used whit an accessory that contains no metal and that positions the
handset a minimum of 1.5cm from the body. Use of other accessories may not ensure
compliance with FCC RF exposure guidelines.
7. Hearing Aid Compatibility
Mobile Phone i277 has been tested and received an HAC rating of M3/T3. The
Phone has been tested and classified as eligible for its use with earphones for some of
the device’s features. Nevertheless, it is possible that this telephone may utilize a
newer mobile technology not yet been tested for its use with earphones. It is
important that you test the different telephone features exhaustively, in different
places, utilizing its earphone to determine if you experience some background noise
of interference. Consult with your local customer service center to get information
about the refund and changes policy, and to obtain information about the
compatibility with earphones
- 26 -
 Loading...