

Page 1

i125(verykool) Usuario Manual_V1.0
I125 Manual de usuario
_!b`a!a!\!2K:KP!GKP!:;O;9BKP!PKI!O;P;OU6:KP\!-CIASI6!M6OQ;!:;!;PQ;!:K9SH;IQK!MS;:;!P;O!
O;MOK:S9C:6!PCI!6SQKOCY69CLI\!2K:6P!G6P!H6O96P!X!IKH8O;P! :;!H6O96P!H;I9CKI6:KP!;I!;PQ6!
MS8GC969CLI!PKI!MOKMC;:6:!:;!PSP!O;PM;9RUKP!MOKMC;Q6OCKP\
!
,C;IQO6P!NS;!QK:KP!GKP!;P=S;OYKP!M6O6!6P;ASO6O!G6!;W69RQS:!:;!QK:KP!GKP! 9KIQ;IC:KP!:;!;PQ;!
H6IS6G[!IK !6PSHCHKP! ICIASI6!O;PMKIP68CGC:6:! MKO!;OOKO;P[!KHCPCKI;P !K! :;9G6O69CKI;P! :;!
ICIATI!RMK!;I!;PQ;!H6IS6G[!PC!Q6G;P!;OOKO;P! S!KHCPCKI;P!K!:;9G6O69CKI;P!O;PSGQ6IQ;P!:;!G6!
I;AGCA;I9C6[! 699C:;IQ;P! K!9S6GNSC;O!KQO6!96SP6\!&G!9KIQ;IC:K!:;!;PQ;!H6IS6G !;PQ7!PSE;Q6P!6!
96H8CKP!PCI!MO;UCK!6UCPK\
!
/OKQ;A;O!IS;PQOK!H;:CK!6H8C;IQ;Z!-KP!;P=KOY6HKP!M6O6!MOK:S9CO!MOK:S9QKP!:;!9KI=KOHC:6:!
9KI!G6P!IKOH6P!6H8C;IQ6G;P!AGK86G;P\!/KO!=6UKO!9KIPSGQ;! 9KI!G6P!6SQKOC:6:;P!GK96G;P!M6O6!PS!
;GCHCI69CLI!6:;9S6:6\
!
!
Nota:!&G!,6IS6G ! :; ! SPS6OCK ! ;P ! PLGK ! M6O6 ! ASC6O ! 6G ! SPS6OCK ! 69;O96! :; ! G6 ! =SI9CKI6GC:6: ! :;G!
Q;G<=KIK\!&PQ6!:KPCP!IK!M6O;9;!9S6GNSC;O !9;OR>96:K!:;!Q;9IKGKAD6\!"GASI6P!=SI9CKI;P!MS;:;I!
U6OC6O!:;8C:K!6!HK:C>969CKI;P!X!SMAO6:6RKIP!:;G!PK@V6O;!K!MKO!;OOKO!:;!CHMO;PCLI\
Patentada y Confidencial -1-
Page 2
i125(verykool) Usuario Manual_V1.0
PRECAUCIONES DE SEGURIDAD
Antes de usar su teléfono, lea la siguiente información importante para eliminar o
reducir la posibilidad de causar daños y lesiones personales.
No use teléfonos inalámbricos mientras conduce.
Apague los dispositivos inalámbricos en
aviones. La señal puede causar
interferencia.Utilizarlas en los aviones es ilegal.
No utilice teléfonos móviles donde se
voladura.Siga estrictamente las normas y
reglamentos.
No utilice teléfonos móviles en las gasolineras.No
lo utilice cerca de combustible o productos
químicos. No deseche la batería ni el móvil en un
incendio.
Siga los reglamentos o normas en instalaciones de
cuidado de salud y hospital. Apague el teléfono
cerca de aparatos médicos.
Todos los dispositivos inalámbricos pueden recibir
interferencias que pueden afectar su rendimiento.
La reparación o instalación del aparato debe
hacerse en
Centros de servicio autorizados
Utilice sólo baterías y accesorios homologados.
Uso sólo en posición normal. No exponga el
teléfono a temperaturas altas por encima de +
60Fde+ 140C ( ) . No use nada estático para
limpiar el teléfono.
Asegúrese de que el teléfono está encendido y en
servicio. Ingrese el número de emergencia y, a
continuación, pulse la tecla de Pick Up. Dar su
ubicación. No termine la llamada hasta que se le
indique.
Uso indebido invalidará la garantía! Estas instrucciones de seguridad se aplican
también a accesorios originales.
Patentada y Confidencial -2-
Page 3

i125(verykool) Usuario Manual_V1.0
Tabla de contenido
a!$G6U;P!X!6M6OC;I9C6!:;!Q;G<=KI K
a\a!*HMO;PCLI!?PC96
a\b!&PM;9C>969CLI!:;!Q;9G6P
a\c!*9KIKP
b!'SI9CLI!:;!H;IT
c!*IQOK:S99CLI
c\a!*IPQ6G69CLI!:;!G6!86Q;OD6
c\b!$6OA6!:;!G6!86Q;OD6
c\c!*IP;OQ6O!G6!Q6OE;Q6!1*,
c\d!3RGCY6O!2^'G6PB!96O:
c\d\a!*IPQ6G6O!2^'G6PB!96O:
c\d\b!3RGCY6O!2^'G6PB!96O:
c\e!&I9;I:C:K!K!6M6A6:K
d!+G6H6O!6!=SI9CKI;P
d\a!/6O6!B69;O!SI6!GG6H6:6
d\b!$KIQ;PQ6O!SI6!GG6H6:6
d\c!)^GC8O;])^);G:
d\d!+G6H6:6!;I!;PM;O6
d\e!.M9CKI;P!:;!GG6H6:6
d\e\a!%SO6IQ;!SI6!GG6H6:6
d\e\b!/6O6!B69;O!SI6!GG6H6:6!HSGRM6OR:CPQ6
e!%CO;9QKOCK!Q;G;=LIC9K
e\a!"AO;A6O!IS;UK!9KIQ69QK
e\b!4CPQ6
e\c!&IUC6O!H;IP6E;!:;!Q;WQK
e\d!&IUC6O!H;IP6E;!HSGRH;:C6
e\e!+G6H6O
e\f!*/!:C6G
e\g!&:CQ6O
e\h!&GCHCI6O
e\i!$KMC6
e\a`!,KU;O
e\aa!"J6:CO!6!GCPQ6!I;AO6
e\ab!(OSMKP!:;!GG6H6IQ;P
e\ac!$KI>ASO69CKI;P!MBKI;8KKF
f!,;IP6E;OD6
f\a!&P9OC8CO!H;IP6E;
f\a\a!,;66PA;!:;!Q;WQK
f\a\b!,;66PA;!HSGRH;:C6
f\b!#6I:;E6!:;!;IQO6:6
f\c!#KOO6:KO;P
f\d!+6!86I:;E6!:;!P6GC:6
f\e!,;IP6E;P!;IUC6:KP
f\f!#KOO6O!H;IP6E;P
f\g!,;IP6E;
Patentada y Confidencial -3-
Page 4

i125(verykool) Usuario Manual_V1.0
f\h!$KI>ASO69CKI;P!:;!H;IP6E;P
f\h\a!,;66PA;!:;!Q;WQK
f\h\b!,;66PA;!HSGRH;:C6
f\h\c!,;IP6E;!:;!P;OUC9CK
g!$6GG!9;IQ;O
g\a!$6GG!GKAP
g\a\a!+G6H6:6P!M;O:C:6P
g\a\b!+G6HP
g\a\c!+G6H6:6P!O;9C8C:6P
g\a\d!#KOO6O!O;ACPQOKP!:;!GG6H6:6
g\b!"ESPQ;P!:;!GG6H6:6
g\b\a!+G6H6:6!;I!;PM;O6
g\b\b!%;PUDK!:;!GG6H6:6P
g\b\c!+G6H6:6P
g\b\d!+DI;6!:;!9KIHSQ69CLI
g\b\e!$KI>ASO69CLI!:;!6U6I9;
h!$KI>ASO69CLI
h\a!$KI>ASO69CLI!:;G!Q;G<=KIK
h\a\a!)KO6!X!=;9B6
h\a\b!/OKAO6H69CLI!;I9;I:C:K
h\a\c!*:CKH6
h\a\d!/O;=;OC:K!:;!H<QK:K!:;!;IQO6:6
h\a\e!/6IQ6GG6
h\a\f!%;:C96:K!9G6U;
h\a\g!,K:K!:;!US;GK
h\a\h!$KI>ASO69CLI!,CP9\
h\b!$KI>ASO69CLI!:;!G6!O;:
h\c!$KI>ASO69CLI!:;!P;ASOC:6:
h\c\a!1;ASOC:6:!1*,
h\c\b!1;ASOC:6:!:;!Q;G<=KIKP
h\c\c!#GKNS;K!:;!Q;9G6:K!6SQKH7R9K
h\d!$KI;9RUC:6:
h\d\a!#GS;QKKQB
h\d\b!$S;IQ6!:;!:6QKP
h\e!0;PQ6SO6O!9KI>ASO69CKI;P!:;!=78OC96
h\f!&=;9QKP!:;!PKIC:K
i!,SGRH;:C6
i\a!'CG;!H6I6A;O
i\a\a!2;G<=KIK
i\a\b!26OE;Q6!:;!H;HKOC6
i\b!$7H6O6
i\c!*H6A;!UC;V;O
i\d!4C:;K!O;9KO:;O
i\e!4C:;K!MG6X;O
i\f!0;MOK:S9QKO!:;!6S:CK
i\g!(O686:KO!:;!PKIC:K
i\h!06:CK!',
a`!&IQO;Q;ICHC;IQK
aa!/;O>G;P!:;!SPS6OCK
Patentada y Confidencial -4-
Page 5

i125(verykool) Usuario Manual_V1.0
aa\a!(;I;O6G
aa\b!1CG;I9CKP6
aa\c!0;SICLI
aa\d!"G!6CO;!GC8O;
aa\e!,C!;PRGK
ab!.OA6ICY6:KO
ab\a!$6G;I:6OCK
ab\b!"G6OH6
ab\c!0;GKE!HSI:C6G
ab\d!+CIQ;OI6
ac!1;OUC9CKP
ac\a!-6U;A6:KO!5"/
ad!$KI>ASO69CKI;P!:;!;IQO6:6!:;!Q;WQK
ad\a!'SI9CKI;P!:;!Q;9G6!M6O6!;G!HK:K!:;!;IQO6:6
ad\b!,K:K!"#$!HSGRQ6M
ae!%CO;9QOC9;P!M6O6!;G!;>9C;IQ;!X!P;ASOK!SRGCY6O
ae\a!$SC:6:K!X!H6IQ;ICHC;IQK
ae\b!,6IQ;ICHC;IQK!:;!G6!86Q;OD6
af!1KGS9CLI!:;!MOK8G;H6P
ag!*I=KOH69CLI!:;!&WMGKPSO;!:;!0'!:;!G6!'$$!X!:;9G6O69CLI!
ah!"%4&02&-$*"!:;!'$$!
Patentada y Confidencial -5-
Page 6
i125(verykool) Usuario Manual_V1.0
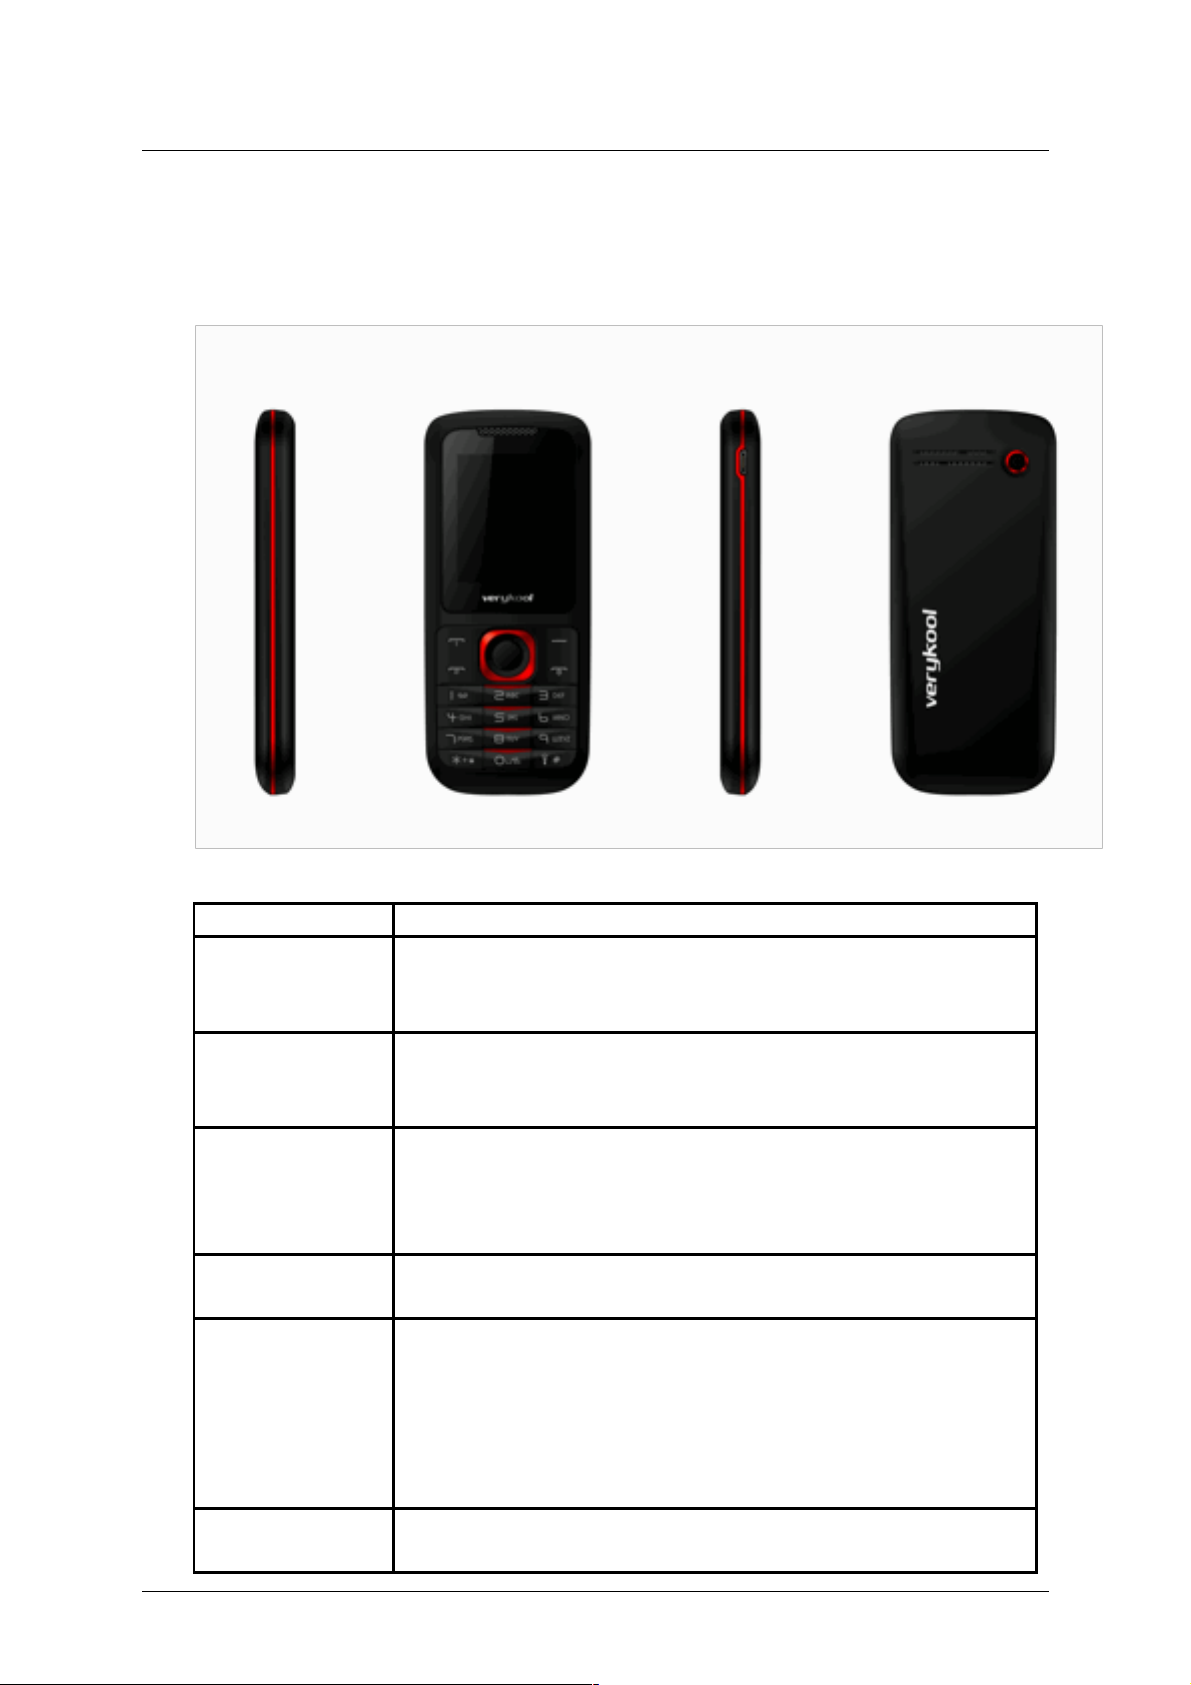
1 Claves y apariencia de teléfono
1.1 Impresión física
1.2 Especificación de las teclas
Teclas Especificación
Tecla suave
izquierda
" Contestar una llamada entrante.
" Menú principal en modo de espera.
" Confirmar los elementos seleccionados.
Tecla de marcado " Hacer una llamada por SIM Card
" Contestar una llamada entrante.
" Vista SIM tarjeta llamar registros en modo de espera.
Tecla Finalizar " Encendido o encendido apagado el teléfono (por apretando y
manteniendo durante unos 3s).
" Finalizar una llamada, o rechazar una llamada entrante.
" Volver al modo de espera.
Tecla suave
derecha
" Lista de directorio telefónico de la pantalla en modo de espera.
" Volver al menú anterior.
Teclas de
navegación
Indica 【↑】【↓】【←】【→】 cuatro direcciones.
En modo de espera, pulse 【 .↑ 】 para acceder a accesos directos;
En modo de espera, pulse 【 .↓ 】 para acceder la alarma;
En modo de espera, pulse 【 .← 】 para acceder a perfiles de
usuario;
En modo de espera, pulse 【 .→ 】 para acceder a Agregar contacto;
Tecla OK " En modo de espera, pulse la tecla OK para mostrar el menú
principal.
Patentada y Confidencial -6-
Page 7
i125(verykool) Usuario Manual_V1.0
" Tecla Pulsar OK para confirmar la selección
* Tecla / bloquear
clave
" Pulse tecla programable izquierda, a continuación, pulse *
clave para bloquear/desbloquear el teclado.
" En entrada modo, ingresar puntuación. Para mostrar "*", "+", "P" y
la "W" presionándolo varias veces en modo de espera...
Teclado
" Caracteres, carta y números de Enter
" Llame al centro de correo de voz en modo de espera (por si
mantiene pulsada la 1 tecla durante aproximadamente 3s)
" Marcación de números de teléfono en modo de espera (por
mantener pulsado las teclas 2-9 durante unos 3s)
" Seleccionar un elemento de submenú marcado con el número de
dígitos correspondiente.
# Clave
" Para activar o desactivar el modo silencio en modo de espera
(manteniendo pulsada tecla # durante 3 segundos).
※ Nota: En modo de espera significa que el teléfono está encendido pero no se utiliza para
cualquier función . ※
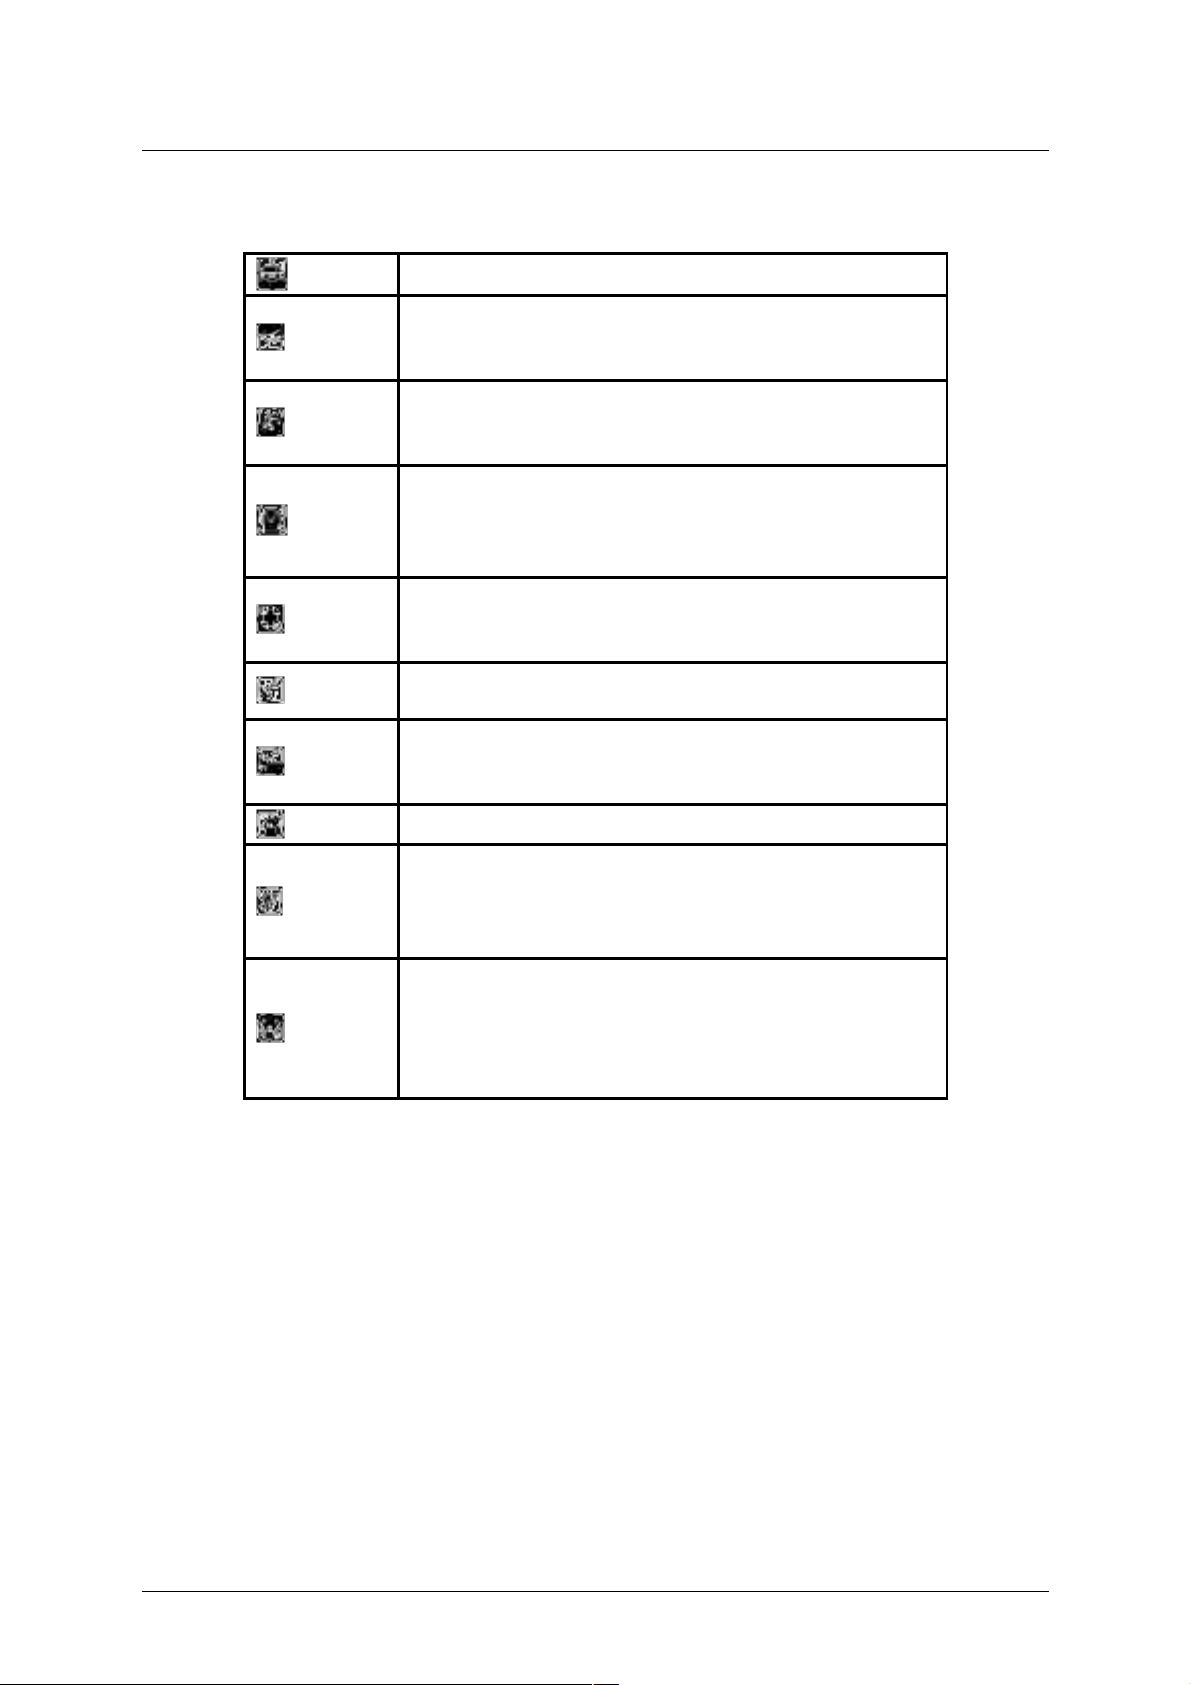
1.3 Iconos
Icono Especificación
Intensidad de la señal de red
Raya recta es más , la señal de red es más fuerte . Número de arriba a
la derecha indica la línea de uso. Número inferior izquierda indica
actual SIM Card
Bluetooth
El teléfono abre la función Bluetooth.
Mensaje
Recibir nuevos mensajes SMS.
Recibir nuevo mensaje MMS.
Bloqueo del teclado
El teclado está bloqueado.
Tarjeta T
T-tarjeta está insertada.
Auriculares
El teléfono es auricular insertado.
Alarma
Ajustar la hora de la alarma y activar la función.
Tipo de alerta de llamada entrante
Es el "Anillo".
Es "Vib. sólo".
Es "Vib. Y el anillo".
Es "Vib. luego el aro".
Batería
Raya recta es más , la batería es más.
Patentada y Confidencial -7-
Page 8
i125(verykool) Usuario Manual_V1.0
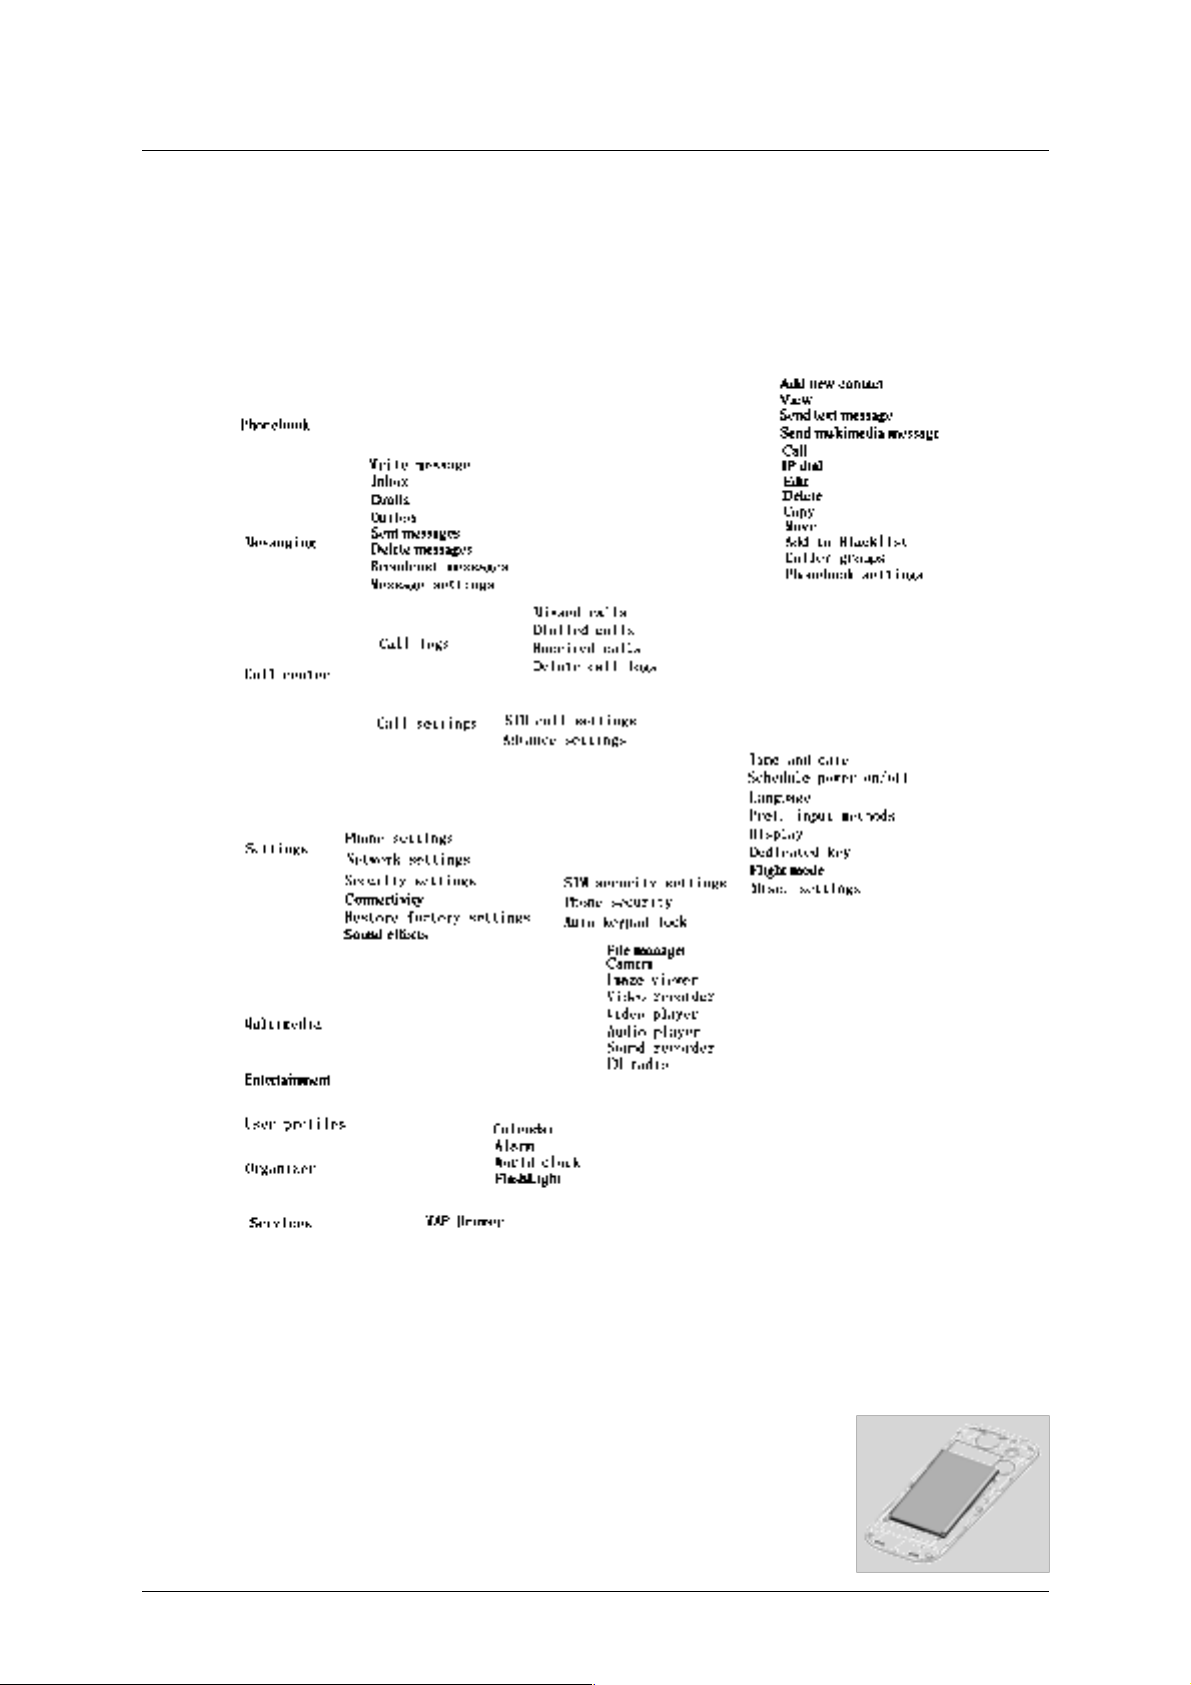
2 Función de menú
En modo de espera, pulse Tecla OK para acceder al menú. Desplazarse por las opciones
pulsando navegación teclas y pulsar tecla suave izquierda para acceder a la opción
seleccionada.
※ Nota:
(a) Cuando el móvil tiene una tarjeta SIM válida, no se mostrará el menú correspondiente SIM.
(b) Parte de secundaria menú y el submenú no aparecen en la anterior. ※
3 Introducción
3.1 Instalación de la batería
1) Coloque los electrodos metálicos de la batería hacia abajo y al
ras con puntos de contacto de metales en el compartimento de la
batería y, a continuación, inserte la parte inferior de la batería en
Patentada y Confidencial -8-
Page 9
i125(verykool) Usuario Manual_V1.0
el compartimento de la batería.
2) Coloque la tapa trasera de la batería en el teléfono directamente y empuje hacia arriba hasta
que encaje.
※ Nota: Instale la batería como el diagrama así como evitar el parche contacto de la batería
se dañe. ※
3.2 Carga de la batería
Su teléfono es alimentado por una batería recargable. Cuando la batería está baja, el sensor
de batería le informará.En este momento, es necesario cargar la batería. Cuando la batería se
vuelve demasiado débil para el teléfono para funcionar, se apaga
automáticamente.
1) Conecte el cargador a una toma de corriente.
2) Conecte el cargador a la toma del cargador en el teléfono.
3) Espere hasta que la batería está completamente cargada. Durante la
carga, el icono de carga se muestra en la animación. Cuando se
convierte en el icono de carga estático, la batería está
completamente cargada.
4) Desconecte el cargador del teléfono. Desconecte el cargador de la toma de corriente.
5) Conecte el cargador a un poder tomas se muestra en la imagen.
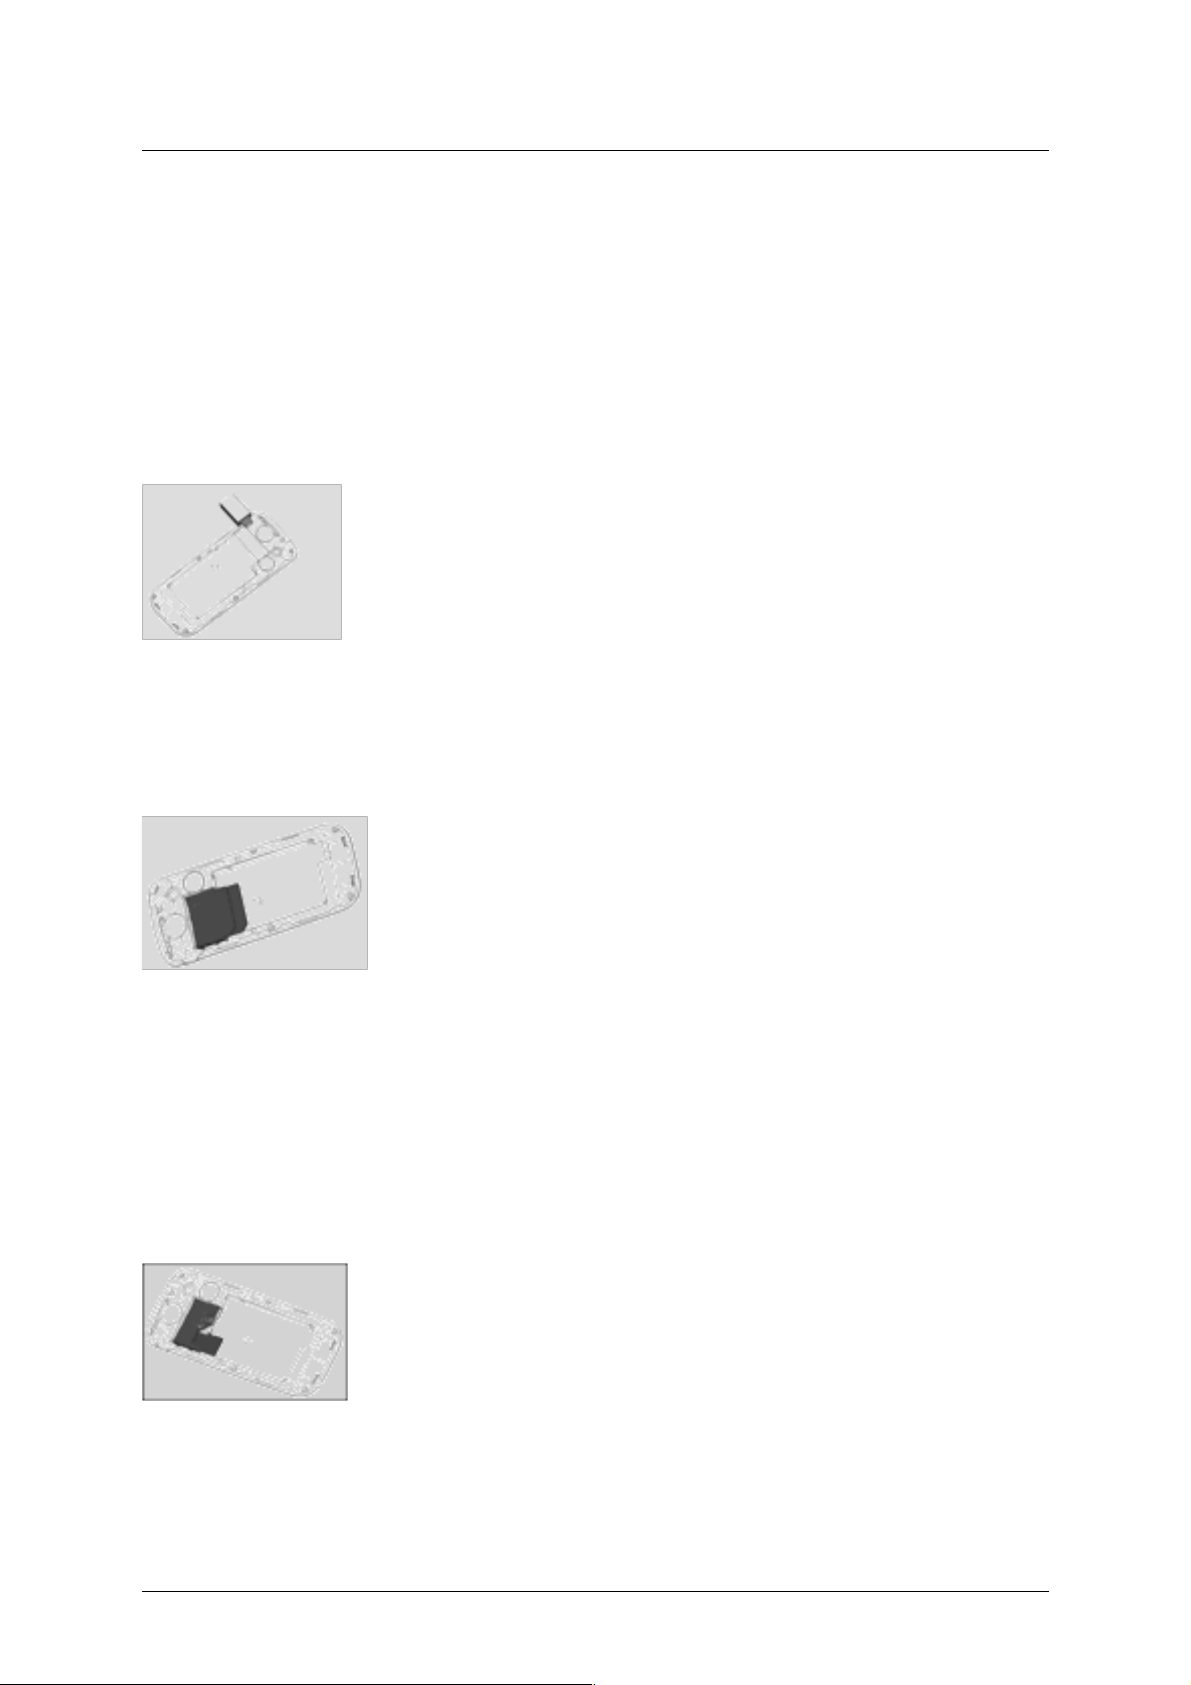
3.3 Insertar la tarjeta SIM
1) Apagar el teléfono; Retire la batería y otra conexión de
alimentación externa, como se muestra en la imagen.
2) Tarjeta SIM Inserte en toma de tarjeta SIM.
3) Cuando se necesita quitar la tarjeta SIM, por favor apague y
encienda el teléfono primero, batería, desmonte el Cardenal
※ Nota:
(a) Tenga cuidado al manejar, insertar o retirar la tarjeta SIM, fricción o flexión puede dañar la
tarjeta SIM
(b) Si se deja sin usar, mantener la tarjeta SIM fuera del alcance de niños pequeños.
(c) Tarjeta SIM fuera estática, polvo y agua.
(d) Al insertar o extraer la tarjeta SIM, asegúrese siempre que el teléfono esté apagado antes de
retirar la batería. O se ha dañado la memoria de la tarjeta SIM. ※
3.4 Uso de la tarjeta T-Flash
3.4.1 Instalación de tarjeta T-Flash
Este móvil soporta la función de tarjeta T-Flash. Asegúrese de que la
tarjeta T-flash ya insertado en el móvil. Ranura de tarjeta T-flash se
ubique en la parte superior derecha de la tarjeta SIM.
1) Apagar el teléfono, retire la batería y otra conexión de alimentación
externa.
2) Inserte la tarjeta de memoria en la ranura de la tarjeta como se muestra en la imagen.
※ Nota: ninguna tarjeta micro SD es entregada en el paquete del producto. Se vende por
separado la tarjeta micro SD. ※
3.4.2 Uso de la tarjeta T-Flash
Patentada y Confidencial -9-
Page 10

i125(verykool) Usuario Manual_V1.0
1) Especificación de la operación de archivo
La música y el archivo de vídeo se guardan en la tarjeta T-Flash. Si usted necesita operar
con los archivos, los archivos deben guardarse en primer lugar en la tarjeta. Acto siguiente:
# Conecte el puerto de PC y puerto USB con una línea específica de USB. Puerto USB
está en la parte inferior del teléfono.
# Después de insertar la línea USB, la pantalla muestra información de punta. Seleccione
"Almacenamiento masivo".
# O inserte inicial T-Flash card lector de tarjetas específicas y luego inserte el lector al
puerto USB.
# Seleccione "Mi PC: disco móvil", puede utilizar la función T-Flash. Agregar o eliminar
archivos de la música / video doble en la tarjeta.
# Detener la función USB en el ordenador; Desconecte la línea USB con el móvil. (* Nota:
debe detener la función en el equipo en primer lugar, a continuación, desconecte la línea
con el móvil, de lo contrario los datos se perderán *).
2) Especificación de directorio de tarjeta T-Flash
# Mi música : Guardar el MP3 de música en la carpeta. La longitud del archivo de música
no es límite. La cantidad depende de la capacidad de la tarjeta T-Flash.(La carpeta se
establecerá automáticamente cuando se selecciona la música, tales como agregar
música, reloj de alarma y así sucesivamente)
# Fotos : Guardar las fotos a través de la cámara (la carpeta se establecerá
automáticamente cuando se toma la foto).
# Videos: Guardar. 3GP y.Archivos de vídeo MP4 y la película grabaron.(La carpeta se
establecerá automáticamente cuando haciendo un vídeo)
# Audio : Guardar el audio grabar archivos. ()La carpeta se establecerá automáticamente al
realizar un registro de audio)
3.5 Encendido o apagado
Asegúrese de que la batería ya está insertada:
1) Power On: Hold down end key until the phone-on image display. After power on, you can select
SIM card mode and set the basic settings about date, time and daylight saving. Then
the phone searches for your network automatically. Some SIM card is protected by the
PIN number, if you are asker for inputting the PIN number, please enter it, then
press left soft key.
2) Power Off: Hold down end key until the power-off image display.
※ Note:
(a) PIN is provided by your service provider. If the PIN is entered incorrectly three times, the SIM
card is barred.
(b) If the phone asks for an unlock code when switched on, enter the unlock code and press left
soft key. ※
4 Call Functions
4.1 Making a Call
When you want a call, press the phone keypad to input the area code and phone
number. Click left soft key to save, select To SIM, or To phone.
Press and hold down * key until character “+” appears, and then you can dial an international
number. (The ‘+’ stands for international dial code.) Press dial key to dial the number. If the
Patentada y Confidencial -10-
Page 11

i125(verykool) Usuario Manual_V1.0
number is stored with a name, it appears on the display when you dial the number.
Only in GSM system coverage, you can make an emergency call, even though the phone is
locked, without SIM card, or cannot enroll to the system.
※Note: This phone, like any wireless phone, operates using radio signals, wireless, and
landline networks as well as user programmed functions, which cannot guarantee connection in
all conditions. Therefore, you should never rely solely on any wireless phone for essential
communications like medical emergencies. Check with local service providers to make an
emergency call.※
! Quick making a call
i) Enter [Menu]- [Phonebook], select Browse and find the required number;
ii) Enter [Menu]-[Call center]-[Call logs], select corresponding SIM card, select Missed calls,
Dialed calls, Received calls list. Scroll the navigation keys to find the required number;
iii) In standby mode, press right soft key to enter phonebook.
iv) In standby mode, press dial key to display the last number dialed.
v) Press dial key to make a call.
※Note: You can quickly search numbers from [Phonebook] via navigation keys and
alphanumeric keys. Use navigation keys to move through pages; Use alphanumeric keys to
search by keywords. ※
4.2 Answering a Call
When somebody calls you, the phone rings, and displays the incoming call area. If the caller
can be identified, the caller’s phone number (or name if stored in your phonebook) is displayed.
When a call is coming, Answer the call by pressing dial keys. The missed incoming calls
appear on the display. Press left soft key to check the details of the missed calls or press dial
key to call the number.Press end key to end the call.
※Note: To answer a call, the function of call forwarding should be disabled, nor is unconditional
divert. ※
4.3 H-Free/H-Held
When you are driving, you can enable the phone hands free function during a call. The
phone sound will be heard from the speaker. During a call, press right soft key to select “HFree”, then the speaker is enabled. To disable the hands free function, press right soft key to
select “H-Held”, then the receiver is enabled.
※Note : The speaker sound volume maybe loud, so please not use the speaker beside
ear.※
4.4 Call Waiting
You can answer an incoming call while you have a call in progress, if this service is
supported by the network and you have set the Call Waiting menu option to activate. You will be
notified of an incoming call by a call waiting tone.
4.5 Call Options
4.5.1 During a call
Call with one party, press left soft key to select:
# Hold/Retrieve single call: pause the call, the caller will not be heard the sound. If you
want to retrieve the call, select “Retrieve”.
# End single call: Disconnect the call.
Patentada y Confidencial -11-
Page 12

i125(verykool) Usuario Manual_V1.0
# New call: input new phone number, press left soft key to save number to
phonebook, and press dial key to call the new number. During a call, press
middle key to input the number.
# Phonebook: enter phonebook menu.
# Call history: enter the call history menu.
# Messaging: enter message menu.
# Sound recorder: during the call, record the sound.
# Mute: turn on/off microphone.
# DTMF: activate the sending of the DTMF signal, or clean the sending.
4.5.2 Making a Multiparty Call
A multiparty call is a network service that allows up to six people (require network support) to
take part simultaneously in a multiparty or conference call. For more information, contact your
service provider.
Making a Conference Call:
1) Call the first participant in the normal way.
2) Call the second participant in the normal way. The first call is automatically put on hold.
3) To join the first participant to the multiparty call, press left soft key to access <Option>:
# Conference: add incoming callers or a new person to the multiparty call.
# Swap: swap the speaking party.
# End single call: end the specific connected call.
# End all calls: end all calls.
# Transfer: assign the specific call to divert.
# New call: input new phone number, press left soft key to save number to phonebook,
and press dial key to call the new number. During a call, press OK key to input the
number.
# Phonebook: enter phonebook menu.
# Call history: enter the call history menu.
# Messaging: enter message menu.
# Sound recorder: during the call, record the sound.
# Mute: turn on/off microphone.
# DTMF: activate the sending of the DTMF signal, or clean the sending.
4) To add a new person to the multiparty call, call the person in the normal way, then
press left soft key to access <Option>, and select “Conference”.
5) You can add incoming callers by answering the call and pressing <Option>, followed by
“Conference”. Repeat as required.
6) During the conference, press left soft key to select:
# Hold/Retrieve conf.call: during the conversing with multiparty, if new call comes, hold
the conversing call, answer the new call
# Split: separate one part from multiparty calls for alone converse.
# End single call: end the specific call.
# End conf. calls: end all the calls.
# New call: input new phone number, press left soft key to save number to phonebook,
and press dial key to call the new number. During a call, press OK key to input the
number.
# Phonebook: enter phonebook menu.
# Call history: enter the call history menu.
# Messaging: enter message menu.
# Sound recorder: during the call, record the sound.
# Mute: turn on/off microphone.
# DTMF: activate the sending of the DTMF signal, or clean the sending.
※ Note: Multiparty Call requires network support. ※
Patentada y Confidencial -12-
Page 13

i125(verykool) Usuario Manual_V1.0
5 Phonebook
This feature allows you to store phone numbers and their corresponding names in the
memory of your SIM card and phone’s memories, at the same time, provides browsing, adding,
managing functions. Your phone can store up to 300 contacts, while SIM card memory depends
on various SIM card.
5.1 Add new contact
Add new entry and related information to phonebook.
1) Press navigation key to move the cursor to “Add new contact”, first, confirm the storage
media in <Preferred storage>: To SIM, To phone.
2) If preferred storage is phone, then input Name, Number, Caller picture, Caller ringtone.
※Note:If add new entry to SIM card, there only need input name and number.※
Press corresponding alphanumeric keys to search for a number by name. Enter the first
letter of the name that you want to find. The phonebook entries are listed, starting with the first
entry matching your input. For example, you want to find the number named “zhang san”, then
press 9 key four times, the display will show the name list starting with “z”.
You can finish the following operations with the find number:
5.2 View
View the detailed information of the selected number.
5.3 Send text message
Send SMS to the selected number.
5.4 Send multimedia message
Send MMS to the number.
5.5 Call
Call the number you select.
5.6 IP dial
Make an IP dial to the selected number by SIM card.
5.7 Edit
Edit the selected number.
5.8 Delete
Delete the number from phone or SIM card.
5.9 Copy
Copy the number from the SIM card to phone, or copy from phone to SIM card.
5.10 Move
Move the number from SIM to phone or move from phone to SIM.
5.11 Add to Blacklist
Add this contact to the blacklist. You can view the lists in the <Call settings>-<Advance
settings>-<Blacklist>.
5.12 Caller groups
Patentada y Confidencial -13-
Page 14

i125(verykool) Usuario Manual_V1.0
1) Press navigation key to move the cursor to “Caller groups”, confirm to enter, the display
will show: Friends, Family, VIP, Business, Others.
2) Select group name by navigation key, press left soft key to view members, then pree
left soft key to view, add, remove the members.
3) Select group name by navigation key, press left soft key to send SMS.
4) Select group name by navigation key, press left soft key to select group settings, select
ring tone, associate picture, associate video, which can discriminate the caller group.
5.13 Phonebook settings
Set the phonebook parameter.
# Preferred storage: set the preferred storage media: SIM, Phone or all.
# Speed dial: on or off the function. Allows you to assign up to eight phone numbers from
Phonebook that you use most frequently to the number keys (2~ 9), and then dial them
easily whenever you want, by pressing and holding the associated number key.
# My number: edit and send my number.
# Extra numbers: the menu is used to save the mobile used SIM owner number, fixed dial. It
can set owner number of current using. The menu can set the name and number of SIM
card. It can be operated: Edit. If your SIM card support, you can set the fixed dial number.
If the function is activated, you can only dial the number in the fixed dial list. Before enable
the feature, need input PIN2.Enter fixed dial list, you can add, edit the number. When save
the number, need input PIN2.
※Note: For avoiding change the fixed dial status by others, after setting, please power off then
power on. ※
# Memory status: show the used storage and total storage of SIM card and phone.
# Copy contacts: copy the number from the SIM card to phone, or copy from phone to SIM
card.
# Move contacts: move the number from SIM to phone or move from phone to SIM.
# Delete all contacts: delete all the numbers from phone or SIM card.
6 Messaging
User can send text and multimedia messages.
6.1 Write message
6.1.1 Text meaasge
Each text message has limitation in length, that is 1224 English characters. If exceed the
limitation, the message will be cut to many messages for sending.
Screen icon that displays in standby mode refers to any new message just received and
unviewed. You can set the message tone to remind you of receiving any new message. No more
messages can be received when the Inbox is full. You can receive the new message after you
have deleted some old ones to release memory space.
Write new message for sending. During editing the message, press left soft key to operate:
# Send to: enter number or add from phonebook. You can add many numbers.
# Input method: select input method.
# Advanced:
! Insert object: select multimedia object into the text.
! Insert number: insert the contact number from phonebook into message.
Patentada y Confidencial -14-
Page 15

i125(verykool) Usuario Manual_V1.0
! Insert name: inset the contact name from phonebook into message.
! Insert bookmark: insert bookmark into text.
! Text format: select text style, alignment and new paragraph.
# Save to Drafts: save the message to draft.
After editing the message, select “Send to” and select the number, press left soft key to
access:
# Send: send the message to the selected numbers.
# Edit recipient: edit the number.
# Remove recipient: delect this number.
# Remove all recipients: delect all the numbers.
# Save to Drafts: save the message to draft.
6.1.2 Multimedia meaasge
You can write a new MMS message through the menu, such as insert text, image, audio and
video. Before using MMS, you need set the MMS parameter, for details please contact with your
service provider to confirm that if you can use the MMS service and how to apply it. Single MMS
message limitation is 100KB, if the MMS message is out of the limitation, the phone will can not
receive it. If you insert image, audio or video that make the MMS message is out of limitation, the
phone will show the prompting information.
You maybe can not copy, update, send or forward some image, picture, ring or other
multimedia content that is protected by copyright.
After enter writing message interface, press left soft key to operate as following:
# Send to: enter number or add from phonebook. You can add many numbers.
# Input method: select input method to write the message.
# Add picture: insert picture that saved on the phone or memory card into the message.
After adding the picture, there will show the “Edit picture” and “Remove picture” after
the menu.
# Add sound: insert the audio file that saved on the phone or memory card into the
message. After adding the audio, there will show the “Edit audio” and “Remove
audio” after the menu.
# Add video: insert the video file that saved on the phone or memory card into the
message.
# Add subject: input the message subject. After adding the subject, there will show
the “Edit subject” after the menu.
# Preview MMS: view the edited MMS message.
# Slide options:
! Add slide before: add new slide before the current slide, and edit new message
content. After add the slide, there will show “Delete slide” and “Next slide” after the menu.
! Add slide after: add new slide after the current slide, and edit new message
content. After add the slide, there will show “Delete slide” and “Next slide” after the menu.
! Slide timing: set the slide time.
# Advanced:
! Add attachment: insert the attachment that saved on the phone or memory card
into the message. After adding the attachment, there will show the “Edit
attachment” and “Remove attachment”after the menu.
! Add bookmark text: add website address into the message.
Patentada y Confidencial -15-
Page 16

i125(verykool) Usuario Manual_V1.0
# Save to Drafts: not send the message, and save it on [Drafts] folder.
After editing the message, select “Send to” and select the number, press left soft key to
access:
# Send: send the message to the selected numbers.
# Send options: set the sending parameter, such as validity period, Delivery report, Read
report, Priority.
# Edit recipient: edit the number.
# Remove recipient: delect this number.
# Remove all recipients: delect all the numbers.
# Change to Cc: change the send mode of this number to Cc.
# Change to Bcc: change the send mode of this number to Bcc. If you input bcc number,
the MMS message will send by encryption mode.
# Save to Drafts: save the message to draft.
6.2 Inbox
Through the menu you can read received SMS and MMS messages. To the message list,
select one and open it, press left soft key:
# View: view the message content.
# Reply by SMS or MMS: replay the message.
# Call sender: call the number that sends this SMS.
# Forward: send the message to others.
# Delete: delete the selected message.
# Delete all: delete all messages.
# Save to Phonebook: save this new number to the phone or replace existing.
# Advanced(SMS):
! Copy to phone/Copy to SIM: copy the message to phone/SIM.
! Move to phone/Move to phone: move the message to phone/SIM.
! Copy all: select the copy mode then copy all the messages.
! Move all: select the move mode then move all the messages.
# Details(MMS): show the details of the MMS message.
6.3 Drafts
Select a draft message, press left soft key to select the menu: View, Send, Edit, Delete,
Delete all, Advanced. The operation details please refer to [Write message].
6.4 Outbox
The outbox stores any messages that you have failed to delivery. For the messages in this
box, you can access options: View, Resend, Edit, Delete, Delete all, Advanced. The details refer
to [Inbox].
6.5 Sent messages
Show the sent messages you saved.
6.6 Delete messages
Delete messages in inbox, drafts, outbox, sent messages or all messages.
6.7 Broadcast message
This network service allows you to receive text messages on various topics, such as the
Patentada y Confidencial -16-
Page 17

i125(verykool) Usuario Manual_V1.0
weather or traffic. Messages are displayed immediately as they are received, you can directly
read the messages. At present, only a few networks support this feature. For further information,
contact your service provider.
Press OK key to access.
# Receive mode: power on or off the function.
# Channel settings: select, add, edit or delete the old channel.
# Languages: select the message language.
# Read message: read the broadcast message.
6.8 Message settings
6.8.1 Text meaasge
Set the SMS parameter.
# Profile settings
i) Confirm to access, the display show “Profile 1”、“Profile 2/3/4”.
ii) “Profile 1” operation:
$ Profile name: edit the profile name.
$ SMSC address: set short message center number. Only input the number, the
message can be sent or received.
$ Valid period: if messages can not be delivered from your message center due to
some reason (i.e. your phone is switched off). Select the period in which the
service center tries to deliver the message.
$ Message type: select the message send type.
iii) “Profile 2/3/4” is same with “Profile 1”.
# Voice mail server
Voice mail server is provided by ISP. It will make you not missing any call. It likes message
machine, you can check the message at any time. In standby mode, long press 1 key. Before
use the function, please apply with ISP.
! Call voice mail:connect to voice mail number, if successfully connect, you will hear
the message.
! Edit: edit the voice mail name, input name and voice mail number.
# Common settings
Set the message sending parameter.
$ Delivery report: Informs you whether or not your message has been delivered. To
enable or disable this option, choose the On or Off.
$ Reply path: allow the recipient of your message to send you a reply via your message
center, if your network supports this service. To enable or disable this option,
choose the On or Off.
$ Save sent message: save the sent message in the “Sent message”.
# Memory status: show the storage status of SIM card and phone.
# Preferred storage: set the preferred storage media.
# Preferred connection: select prefer GPRS, GSM or GSM only.
6.8.2 Multimedia meaasge
Set the MMS parameter.
# Data account: select server to send or receive MMS message.
# Common settings:
Patentada y Confidencial -17-
Page 18

i125(verykool) Usuario Manual_V1.0
! Compose: set creation mode is free or restricted, set whether resize the picture, set
whether close the auto signature function.
! Sending: set send parameter.
! Retrieve: set retrieve parameter, including: home network immediate / rejected /
delayed setting, roaming as home / delayed / rejected setting, Filter: allow or reject
anonymous, or advertisement to filter received message. set read report parameter,
set delivery report on or off.
! Preferred storage: set the preferred storage media.
! Memory status: show the usage, used space and free space of the phone memory.
6.8.3 Service message
Set enable push and service loading.
7 Call center
In this menu, you can view the calls you missed, dialed and received, as well as the length of
your calls.
7.1 Call logs
7.1.1 Missed calls
This menu lets you view the SIM card missed call number, there is showing most 20
numbers. You can View, Call, Send SMS, Send MMS, Save to Phonebook, Add to Blacklist, Edit
before call, Delete.
7.1.2 Dialed calls
This menu lets you view the SIM card recent numbers you dialed, there is showing most 20
numbers. You can View, Call, Send SMS, Send MMS, Save to Phonebook, Add to Blacklist, Edit
before call, Delete.
7.1.3 Received calls
This menu lets you view the SIM card recent numbers you received, there is showing most
20 numbers. You can View, Call, Send SMS, Send MMS, Save to Phonebook, Add to Blacklist,
Edit before call, Delete.
7.1.4 Delete call logs
This menu lets you delete the SIM card missed call, dialed call, received call, or all the calls.
7.2 Call settings
7.2.1 Call waiting
This feature means you are informed of a second incoming call by an audible tone in the
earpiece. Activating this feature enables you to specify whether or not answer the second
incoming call. Deactivating this feature, you are not informed of a second incoming call by an
audible tone in the earpiece, and the caller will hear a busy tone (If the divert feature is
activated, the second incoming call is automatically diverted to another phone.)
7.2.2 Call divert
This network feature allows you to divert your incoming calls to another number. If you can
not answer the phone, forward your incoming calls.
Patentada y Confidencial -18-
Page 19

i125(verykool) Usuario Manual_V1.0
1) Divert All Voice Calls: when activated, all of your incoming calls will be diverted. You
can Interrogate, Activate or Deactivate this feature.
2) Divert If Unreachable: when power off or not in the network covering area, the call will
be diverted into specific number. You can Interrogate, Activate or Deactivate this
feature.
3) Divert If No Answer: when activated, calls will be diverted if you do not answer your
phone. You can Interrogate, Activate or Deactivate this feature.
4) Divert If Busy: when activated, calls will be diverted when you are already in a call. You
can Interrogate, Activate or Deactivate this feature.
5) Divert All Data Calls: divert all incoming calls into new number, or voice mail. You can
Interrogate, Activate or Deactivate this feature.
6) Cancel All Divert: when activated, calls will be diverted if your phone is off or if you are
out of coverage. You can Interrogate, Activate or Deactivate this feature.
7.2.3 Call barring
The call barring network service allows you to restrict your calls. This feature needs call
barring password supplied by your service provider.
1) Outgoing Calls: calls cannot be made except emergency call.
2) Incoming Calls: calls cannot be received.
3) Cancel All: cancel all the limitation, it need input barring password.
4) Change Barring password: change the barring password.
※ Note: The call barring password is provided by your service provider. ※
7.2.4 Line switching
This is a network service. If your SIM card supports one card two number functions, you can
select line 1 or line 2 for making a call. If your card does not support the service, select “line 1” to
dial/ receive calls. When select “line 2”, you cannot dial calls.
7.2.5 Advance settings
7.2.6 Black list
1) Mode: on/off this function.
2) Black list number: input the numbers you want to shield, then you cannot get this
number’s call.
7.2.7 Auto redial
If activate the function, when dial failed, the phone will dial the number automatically.
7.2.8 IP dial
Set IP prefix number. Enter the IP number, press <Option> and select Accept. Selecting
Discard rejects your setting.
7.2.9 Call time reminder
If activate the function, during the calling, there is voice prompt to show the call time.
7.2.10 Answer mode
set answer mode, Any key or Auto answer when headset mode. Press left soft key to set On
or Off.
Patentada y Confidencial -19-
Page 20

i125(verykool) Usuario Manual_V1.0
8 Settings
Many different features of your phone can be customized to suit your preferences.
8.1 Phone settings
Set the phone parameter.
8.1.1 Time and date
Set the time and date of the phone.
# Set home city: select the home city in the list.
# Set time/date: edit the time or date, and set daylight saving is on or off.
# Set format: set the time format or date format.
# Auto update time: select on/off the function, or select first confirm.
8.1.2 Schedule power on/off
Set the phone scheduled powering on or off. When the set time arrive, the phone will power
on or off automatically. Press left soft key to select:
# Status: enable or disable the function of powering on/off.
# Power on/off: select power on or off.
# Edit power on/off: set the scheduled time of power on/off.
8.1.3 Language
It allows you to select language for the display text.
8.1.4 Preferred input method
It allows you to set the default input mode. Use navigation keys to select input mode and
press left soft key to confirm.
8.1.5 Display
Set the display parameter in standby mode.
# Wallpaper: set the wallpaper in standby mode. The image can be selected from system, or
from the file manager menu.
# Screen saver: enable or disable the screen saver. If enable the screen saver function,
select waiting time, and the animation of the screen saver.
# Show date and time: select on or off. If enable the function, the date and time will be shown
on the standby display.
8.1.6 Dedicated key
Set the navigation keys’ function in standby mode. Select the dedicated navigation key, such
as “Down”, press OK key to access shortcuts list, and then select the preferred one. By the same
way, set the “Up”, “Left”, “Right”.
8.1.7 Flight mode
After setting the flight mode, you need not power off the phone on the plane, at the same
time cannot make a call.
8.1.8 Misc. settings
Set LCD backlight.
8.2 Network settings
Patentada y Confidencial -20-
Page 21

i125(verykool) Usuario Manual_V1.0
Set the network selection mode.
# Network selection
$ New Research: search new network.
$ Select network: search new network, and show the network list.
$ Selection Mode: set “Automatic” or “Manual”.
# Preferred networks: set the preferred network.
8.3 Security settings
The menu allows encrypting with some phone functions. It can avoid your phone or SIM card
misused. When you input password, the password will be shown with “*”. If input wrong number,
press end key to clean. You can change PIN1, PIN2, or phone lock password and so on.
8.3.1 SIM security
8.1.1.1 8.3.1.1 PIN lock
If activate PIN lock, before you use SIM card, you need input correct PIN.
8.1.1.2 8.3.1.2 Change PIN/PIN2
The menu can change SIM card PIN, PIN2 password. After input correct password, enter
new password for two times.
8.3.2 Phone security
8.1.1.3 8.3.2.1 Phone lock
If activate Phone lock, before you use phone, you need input correct phone password.
8.1.1.4 8.3.2.2 Change password
Change phone password.
8.3.3 Auto keypad lock
Set the keypad lock mode. You can activate or disable the function.
8.4 Connectivity
8.4.1 Bluetooth
The phone support Bluetooth communication mode.
# Power: set the function on or off.
# Visibility: Select On or Off. If disable the feature, the phone will not be used as a BT
device.
# My device: show my BT device list. If the list is null, press OK key to search the new
device. Select one device, press left soft key to access:
$ Connect: connect to this device.
$ Set as default audio device: set this device as default audio device.
$ Service list: show the device service list.
$ Rename: edit the device name.
$ Authorize: select Always ask, Always connect or Always reject.
$ Delete: delete the selected device.
$ Delete all: delete all online devices.
# Search audio device: Before search Bluetooth device, power on Bluetooth function. After
Patentada y Confidencial -21-
Page 22

i125(verykool) Usuario Manual_V1.0
searching new device, connect the new device in pairs according to the display
information. When successfully connected, the devices can communicate.
# My name: edit the device name.
# Advanced: set Bluetooth parameter。
$ Audio Path: set the audio path, you can select leave in phone or forward to BT device.
Example: if connect the BT headset, you can set forward to BT headset.
$ Storage: select storage location of transfer file from Bluetooth.
$ Sharing permission: set the right as Full Control, or Read Only.
$ My address: show the device address.
8.4.2 Data account
It can support to view Internet webpage and MMS service. Select one account from the list,
press left soft key to edit:
$ Account name: edit account name.
$ APN: edit APN name.
$ User name: input the network connection account (provided by your network
service provider).
$ Password: input your account password (provided by your network service
provider).
$ Auth. type: select authentication type: normal or secure.
$ SIM selection : select the using SIM card.
$ Advanced settings
8.5 Restore factory settings
In this menu enter your phone code (the initial value is 1122) and press <Accept> to reset
your phone to its default settings.
8.6 Sound effects
Set audio effect.
9 Multimedia
9.1 File manager
For saving more information, the phone support memory card. The card can be installed at
any time. The menu can manage the files on the phone.
Enter File Manager menu, show storage media list. Select one, the total storage and used
storage will be shown on the up display, and an icon shows use proportion on the left-up.
9.1.1 Phone
1) Select “Phone”, press left soft key to access [Options]:
# Open: open the folder and show the file list.
# Format: format the phone memory.
※Note: After formatting, all date saved on the phone will be lost forever.※
2) Select one folder, press left soft key to access:
# Open: open the folder and show the file list.
# New folder: create a new folder under the current folder.
# Rename: Rename the selected folder.
# Delete: delete selected folder.
Patentada y Confidencial -22-
Page 23

i125(verykool) Usuario Manual_V1.0
# Sort by: sort the selected folder.
3) Select one file under the folder, press left soft key to access:
# View: view the photo, the menu is valid to image file.
# Play: play the video file. The menu is valid to audio, video file.
# Open ebook: open the e-book file. The menu is valid to e-book file.
# Use: if the selected file is a ring, then send it to profile.
# Send: send it to MMS or bluetooth.
# Details: show the file details.
# Rename: rename the selected file.
# Copy: copy the file to specific folder.
# Move: move the file to specific folder.
# Delete: delete the selected file.
# Delete all files: delete all files of the folder.
# Sort by: sort the file on the current folder.
9.1.2 Memory card
If the phone is inserted into memory card, the display will show “Memory Card”. The
operation of the folder and file, please refer to the details of chapter “Phone”.
※Note:Our phone supports USB2.0 standard. If your computer system is Windows2000 or
Windows XP or above, the computer will recognize the USB automatically without installing
driver. ※
9.2 Camera
With the phone camera feature, you can take picture at any time without carrying digital
camera. Enter the menu, the display shows the preview image.
Press left soft key to access:
Photos To view the saved photos.
Camera Settings
Shutter Sound: sound 1, sound 2, sound 3, Off.
EV: EV-2 ——EV+2.
Anti—flicker: 50Hz(default), 60Hz.
Contrast: High, Medium, Low.
Delay Time: 5s, 10s, 15s or Off.
Cont.Shot: 1 Shot , 3 Shot , 5 Shot and Off.
Image Settings
Size: 640*480, 320*240,128*160,160*120,80*60.
Image Quality: High, Normal, Low.
White Balance Auto, Daylight, Tungsten, Fluorescent, Cloud, Incandescence.
Scene Mode Auto, Night.
Effect Settings Normal, Grayscale, Sepia, Sepia green, Sepia blue, Color invert.
Storage Phone, Memory Card.
Patentada y Confidencial -23-
Page 24

i125(verykool) Usuario Manual_V1.0
Restore Default You can restore the recorder to factory settings.
Keys Functions
Left Soft Key (LSK) To open Options menu
Right Soft Key (RSK) Back to main menu
Navigation key
Left : to reduce EV (Brightness)
Up: to zoom in
Right : to increase EV (Brightness)
Down: to zoom out
OK key To take a picture
Shortcut
“1” button: To set the image size: 640*480, 320*240,128*160,160*120,
80*60
“2” button: To set the image quality: Good (G), Low (L) and Normal (N).
“4” button: To set the white balance.
“6” button: To set the delay timer : 5s, 10s, 15s and Off.
“7” button: To set continue shot (1,3,5) each take a picture and off.
“#” button : Show/hide the icons.
All of the features above can be seen on the top of the capture screens.
9.3 Image viewer
Show image list, press left soft key to do: View, Image information, Browse style, Send, Use
as, Rename, Delete, Sort by, Delete all files, Storage.
9.4 Video recorder
Through the menu, you can record video by yourself. Press OK key to start recording. During
scanning, press left soft key to access:
# CamCorder settings: set the record parameter.
$ White balance: set white balance mode.
$ EV: set the light compensate value.
$ Night Mode: set night on or off.
$ Anti-flicker: set frequent.
# Video Setting: set the video quality.
# White Balance: set the white balance value.
# Effect Setting: set the video effect.
# Storage: select the video storage path.
Patentada y Confidencial -24-
Page 25

i125(verykool) Usuario Manual_V1.0
# Restore Default: restore default value.
Press OK key to start recording. During recording, press right soft key to end, start next
recording. The file is saved as *.avi file.
9.5 Video player
The menu supports play video file. When the file list is null, select the storage path first,
and then select the video folder. There will update the video file list, select one file from the list,
press left soft key to play. Press end key to exit and return list. The phone supports the AVI, 3GP
and MP4 video files.
Select one video file, press OK key to operate:
# Play: play the file.
# Send: send file as MMS or via Bluetooth.
# Rename: rename the file.
# Delete: delete the selected file.
# Delete all files: delete all video files.
# Sort by: sort the file by name, type, time, size or none.
# Storage: select file from phone or T-Flash card.
9.6 Audio player
Through the menu, you can play music or ring tone file. Press left soft key to access music
list, press left soft key to operate:
# Play: play the music file.
# Details: show the file details.
# Refresh list: refresh the list.
# Settings: set the parameter.
! Pre. play list: select the storage media.
! List audio gen: set On or Off.
! Repeat: set the play repeat mode.
! Shuffle: set whether play music stochastic.
! Background play: power on or off background play.
! Bluetooth settings:
$ BT stereo output: set BT stereo output: on or off.
$ BT stereo headset: set whether output from headset.
! Audio effect: set audio effect and equalizer.
During playing the music, press left or right navigation key to next music file; long press left
or right navigation key to fast forward or Rewind; press OK key to pause/play the playing file;
press up and down navigation key to adjust volume.
9.7 Sound recorder
You can record sound through the menu. The sound recorded can be set as ring tone for call
or message. Press left soft key to access:
# New record: begin a new recording.
# List: show all the recording files.
# Settings: set the storage media, saving format.
Select “New record” to begin recording. During recording, the display shows record time.
Press left soft key to pause recording, and then press again to restore. Press right soft key to
stop recording, then select whether to save it. The record file is saved as .amr format. After
Patentada y Confidencial -25-
Page 26

i125(verykool) Usuario Manual_V1.0
recording, press left soft key to select “List”, select the file and press OK key to access:
# Play: play the record.
# Append: begin a new record, and the new record is after the selected record, they
are saved on one file.
# Rename: rename the record.
# Delete: delete the record.
# Delete all files: delete all records.
# Use as: use to User profiles.
# Send: send the file as MMS or via Bluetooth.
9.8 FM radio
Before starting FM radio, insert the earphone into left side of the phone. The earphone line
equates in FM radio antenna. Please let it hang freely. Open the FM radio, the phone will show
the channel frequency that the phone searched automatically. You can press left/right navigation
keys to change the channel frequency. Press up and down navigation key to adjust volume.
Press OK key to on/off the loudspeaker. And press right soft key to exit, and press left soft key to
operate:
# Channel List: show all radio channels. Press OK key to edit the frequency, the value is
among 87.5MHZ and 108.0MHZ.
# Manual Input: input channel manually.
# Auto Search: search channel automatically.
# Settings: set the radio player parameter
1 0 Entertainment
For making some funny, the phone designs some games. The details of operation please
refer to game help file.
11 User profiles
The menu allows setting different prompt mode for call and message in different
environment. Press left soft key to access, select profile through up/down navigation key.
11.1 General
Set the phone ring tone and other prompt mode as your prefer.
1) Activate: activate and set as default mode.
2) Customize: Set Alert type, Ring type, SIM incoming call, Power on, Power off, SIM
Message tone, Keypad tone and the volume of Ring tone, Key tone.
3) Reset: reset to default settings.
11.2 Silent
Activate silent mode.
11.3 Meeting
Operation details are same with [General].
11.4 Outdoor
The ring tone volume is 7 levels, and Ring type is “Repeat”. Operation details are same
with [General].
Patentada y Confidencial -26-
Page 27

i125(verykool) Usuario Manual_V1.0
11.5 My style
Set your own style settings, and rename it.
1 2 Organizer
12.1 Calendar
Through the calendar, you can view the date. Press left soft key to access:
# Jump to date: directly jump to a specific date.
# Go to today: return to today.
# Go to weekly/monthly view: view the calendar through weekly or monthly mode.
12.2 Alarm
Through the menu, the phone sends out the noisy bell sound at specific time. If the specific
time arrives, the phone will ring even if the phone is powered off. Press left soft key to access:
# On/Off: power on or off the alarm through left or right navigation key.
# Edit alarm: set the alarm time.
# Repeat: select the ring mode: Once, Everyday, Custom.
# Alarm tone: set the alarm audio, tone or FM radio, and select the tone.
# Snooze: set continuous alarm time.
# Alert type: select the alert type.
12.3 World Clock
The menu allows inquiry time of world each place. When you are outside the country, you
can change the system time into the locating place time.
Press left/right navigation key to view the country date and time at different longitude. The
country name displays on the upper screen, and the date and time displays below. A world map
displays in the middle. Select the country, press left soft key to access “Daylight saving time for
foreign city”. Set the feature is On or Off.
12.4 Flashlight
On or off the flashlight function. The flashlight is on the front of the mobile.
1 3 Services
13.1 WAP Browser
Wireless Application Protocol, a kind of browse Internet webpage mode. It makes you
browse the webpage in any place and time. You can enjoy the resource of Internet, and grasp
any information through your mobile. You need apply the service to your network service provider
before you use the service.
# Homepage: browse the homepage.
# Bookmarks: enter the network address set advanced.
# Input address: input a new address.
# Recent pages: enter the network address history list.
# Settings: set the WAP browser connection mode.
Patentada y Confidencial -27-
Page 28

i125(verykool) Usuario Manual_V1.0
1 4 Text input settings
14.1 Key functions for Input Mode
1) Digital key 1~9: show different character with different input mode.
2) Navigation key: move cursor.
3) 1 key: in ABC, abc Mode, input “.,-?!’@:#$/_1” in turn.
4) 0 key: in Input Mode, press to enter space. In Number Mode, press to enter 0; In
ABC/abc Mode, press one time to enter enter space, press 2 times continuous to 0.
5) * key: open punctuation mark list.
6) # key: change input mode.
14.2 Multitap ABC mode
When typing in Multitap ABC or abc mode, press the key which corresponds to the desired
letter several times until the letter you want appears.
Example: input “how”, in Multitap abc mode, you press numeric key 4 two times to show “h”;
press numeric key 6 three times to show “o”; press numeric key 9 once to show “w”.
ABC means to enter uppercase letters; abc means to enter lowercase letters.
1 5 Guidelines for safe and efficient use
15.1 Care and maintenance
Your phone is a product of superior design and craftsmanship and should be treated with
care. By following the warranty obligations and by caring for your mobile, you can enjoy it for
many years:
1) Keep the phone dry. Precipitation, humidity and liquids containing minerals will corrode the
electronic circuits;
2) Do not use or store the phone in dusty areas as the dust could obstruct or damage the
moveable parts;
3) Do not store the phone in hot areas. High temperatures can shorten the life of electronic
devices, damage batteries and warp or melt certain plastics;
4) Do not store the phone in cold areas, because moisture can form inside the phone when
temperature rises, which may damage the electronic circuits;
5) Do not drop, knock, bump or shake the phone. Rough handling may damage the internal
circuits. Put the phone in a safe place when you do not use it;
6) Use a slightly cloth damping with clean water or neutral soap to clean your phone housing.
Never use any chemical or abrasive cleaners, as they could damage the phone;
7) Do not paint your phone as the paint could obstruct any moving parts and prevent normal
use;
8) Use only approved batteries and accessories. Use of any unauthenticated batteries and
accessories could damage your phone and may be dangerous;
9) If there’s something wrong with your phone or its accessories, do not attempt to dismantle
the phone. Contact qualified service personnel to repair your phone.
15.2 Battery maintenance
1) A new battery will require two or three times full charge/discharge cycles in order to achieve
its optimum performance.
Patentada y Confidencial -28-
Page 29

i125(verykool) Usuario Manual_V1.0
2) Batteries typically have several hundreds charge cycles in their life span. When the talk time
and standby time decrease obviously, replace a new battery.
3) If left unused, a fully charged battery will discharge itself in approximately 24 hours.
4) To extend the life of the battery, you can get the battery fully discharge until the phone turns
itself off. Do not attempt any other unapproved discharge ways.
5) When the battery level is low and only a few minutes talk time remain, a warning signal will
sound. When the battery is completely discharged, your phone will turn off.
1 6 Troubleshooting
If problems occur when using the phone, try to find a solution here first.
Problems Reasons and Solutions
Can’t switch on
" Press and hold end key until image appears on the display.
" Check the battery contacts. Remove and insert battery and switch your
phone on again.
" Check the battery charge level.
Can’t connect
to network
" Move into an area of better coverage.
" Beyond the network cover area;
" Contact your service provider if your SIM card is invalid.
The audio quality of
the call is poor
" Press navigator key to increase the volume when you are in a call.
" Check the signal strength indicator on the display.
" The line is busy and can not be connected to network; you can not
make a call.
Standby time
too short
" When failing to connect to network, the phone will keep searching
base station that consumes much battery and reduces standby time.
Move to an area with stronger signal strength or switch your phone off
temporarily.
" Replace the battery.
SIM card error
" Make sure that the chips in SIM card are not damaged; use the clean
cloth to scratch it.
" Make sure that SIM card is inserted correctly.
" SIM card invalid. Contact your service provider.
Can not dial calls
" Make sure that the number you dialed is available and the dial key has
been pressed.
" Make sure that there is enough money to make a call.
" Make sure that SIM card is valid.
" Fixed Dial is set or has call barring feature turned on. Deactivate fixed
dial function or call barring.
Can not receive calls
" Make sure that your phone has connected to network (Check if the
network is too busy or invalid).
" Make sure that there is enough money to receive the call.
" Make sure that SIM card is valid.
" Check call divert settings and incoming call barring settings.
The battery
won’t charge
" Make sure that the battery is inserted correctly. Securely connect the
charger to the phone.
" Only charge the battery in an environment where the temperature does
not go below -10℃ or above 55℃.
" The battery or charge need to be changed.
Cannot set
some functions
" The operation is wrong.
" The network providers do not support the function, or you don’t apply
the function.
Patentada y Confidencial -29-
Page 30

i125(verykool) Usuario Manual_V1.0
17 FCC RF Explosure Information and Statement
The SAR limit of USA (FCC) is 1.6 W/kg averaged over one gram of tissue. Device types i125
(FCC ID: WA6I125) has also been tested against this SAR limit. The highest SAR value reported
under this standard during product certification for use at the ear is 0.742W/kg and when
properly worn on the body is 1.589W/kg. This device was tested for typical body-worn
operations with the back of the handset kept 1.5cm from the body. To maintain compliance with
FCC RF exposure requirements, use accessories that maintain a 1.5cm separation distance
between the user's body and the back of the handset. The use of belt clips, holsters and similar
accessories should not contain metallic components in its assembly. The use of accessories
that do not satisfy these requirements may not comply with FCC RF exposure requirements,
and should be avoided.
18 FCC Warning
This device complies with Part 15 of the FCC Rules. Operation is
subject to the following two conditions:
(1) this device may not cause harmful interference, and
(2) this device must accept any interference received, including interference that may cause
undesired operation.
NOTE 1: This equipment has been tested and found to comply with the limits for a Class B digital
device, pursuant to part 15 of the FCC Rules. These limits are designed to provide reasonable
protection against harmful interference in a residential installation. This equipment generates,
uses
and can radiate radio frequency energy and, if not installed and used in accordance with the
instructions, may cause harmful interference to radio communications. However, there is no
guarantee that interference will not occur in a particular installation. If this equipment does cause
harmful interference to radio or television reception, which can be determined by turning the
equipment off and on, the user is encouraged to try to correct the interference by one or more of
the following measures:
- Reorient or relocate the receiving antenna.
- Increase the separation between the equipment and receiver.
-Connect the equipment into an outlet on a circuit different from that to which the receiver is
connected.
-Consult the dealer or an experienced radio/TV technician for help.
NOTE 2: Any changes or modifications not expressly approved by the manufacturer could void
the user’s authority to operate the equipment.
NOTE 3: The manufacturer is not responsible for any radio or TV interference caused by
unauthorized modifications to this equipment. Such modifications could void the user’s authority
to operate the equipment.
Patentada y Confidencial -30-
 Loading...