

Page 1

ONES
ONES
Check www.verve.life for
latest product QSG and details
en
Page 2
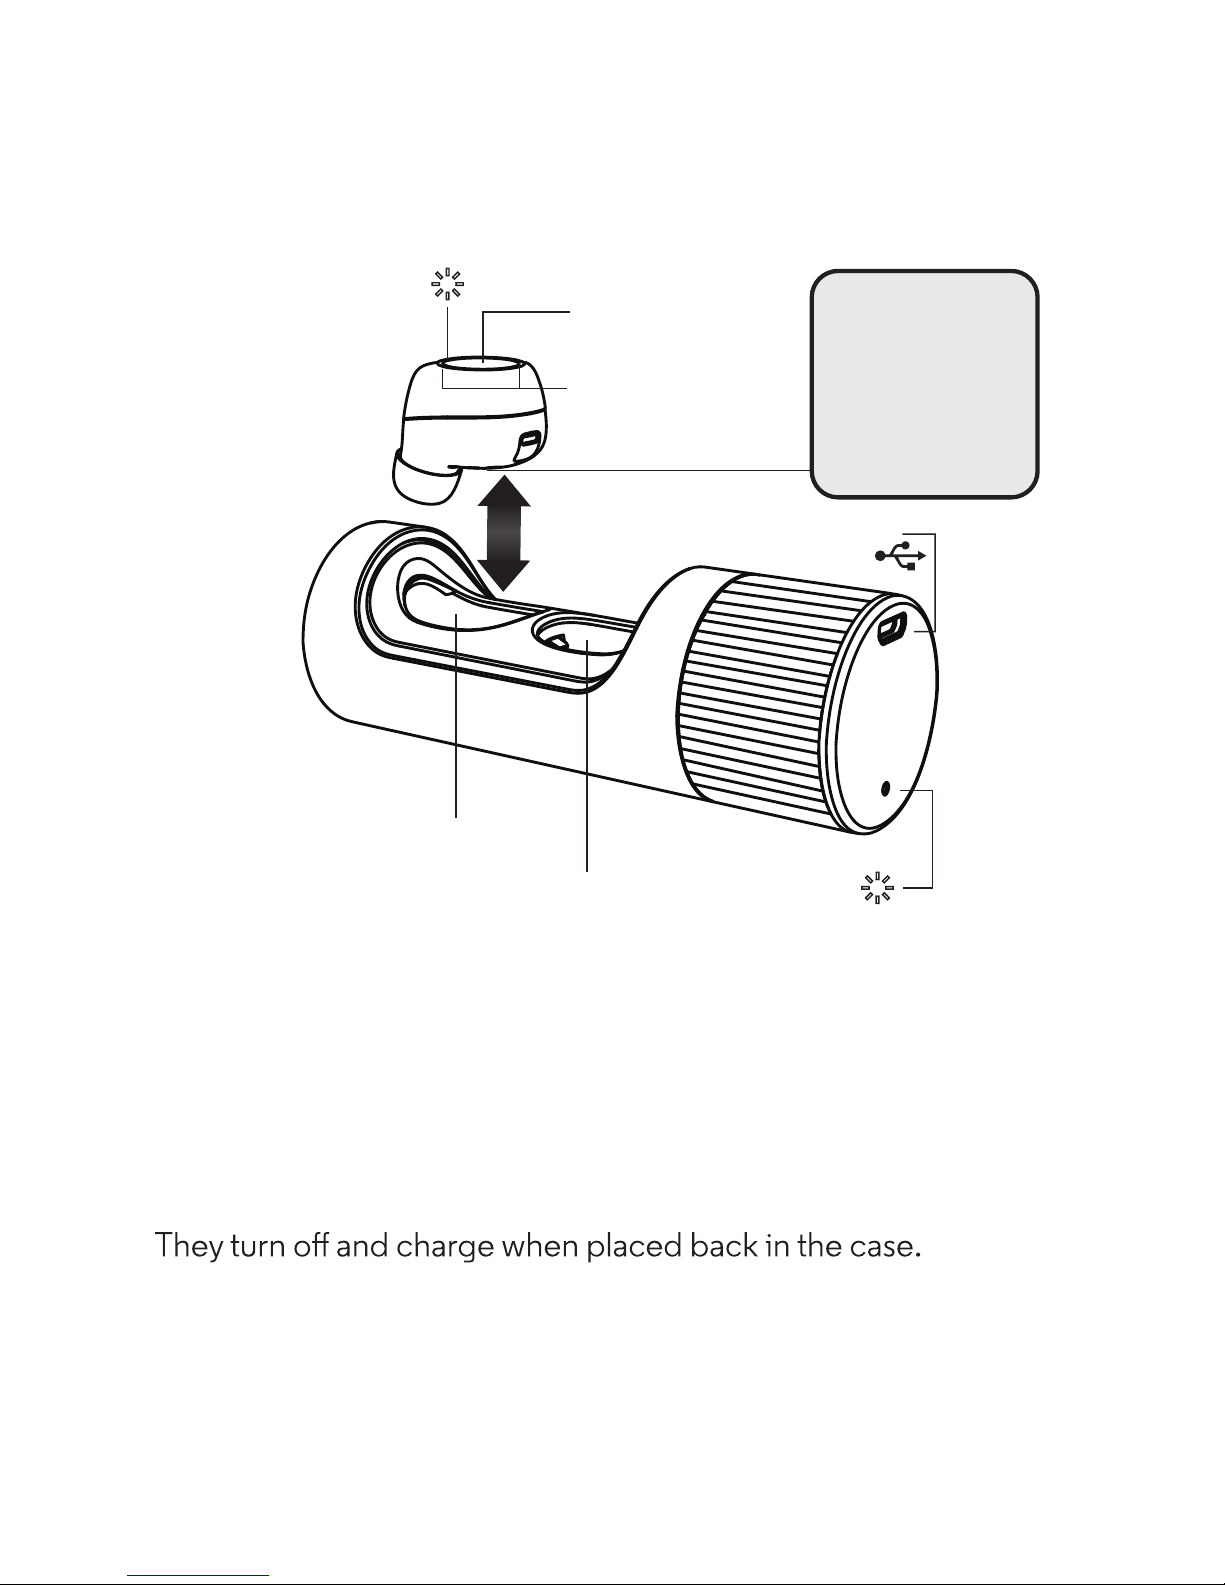
Your wireless earbuds and charge case
Your wireless earbuds and charge case
1en
Note: Twist the case to open it. The case indicates which
earbud is left and right. Left will be the master earbud and
connect to your device, the right will automatically connect to
the left.
Earbuds automatically turn on when removed from the case.
L
R
Light
Micro USB
Charger
Music & Call/Voice
Button
Microphones
Right charging pocket
Light
Left charging pocket
Please remove
isolation stickers
and charge
headset for at
least 2 hours
before rst
time use.
Page 3
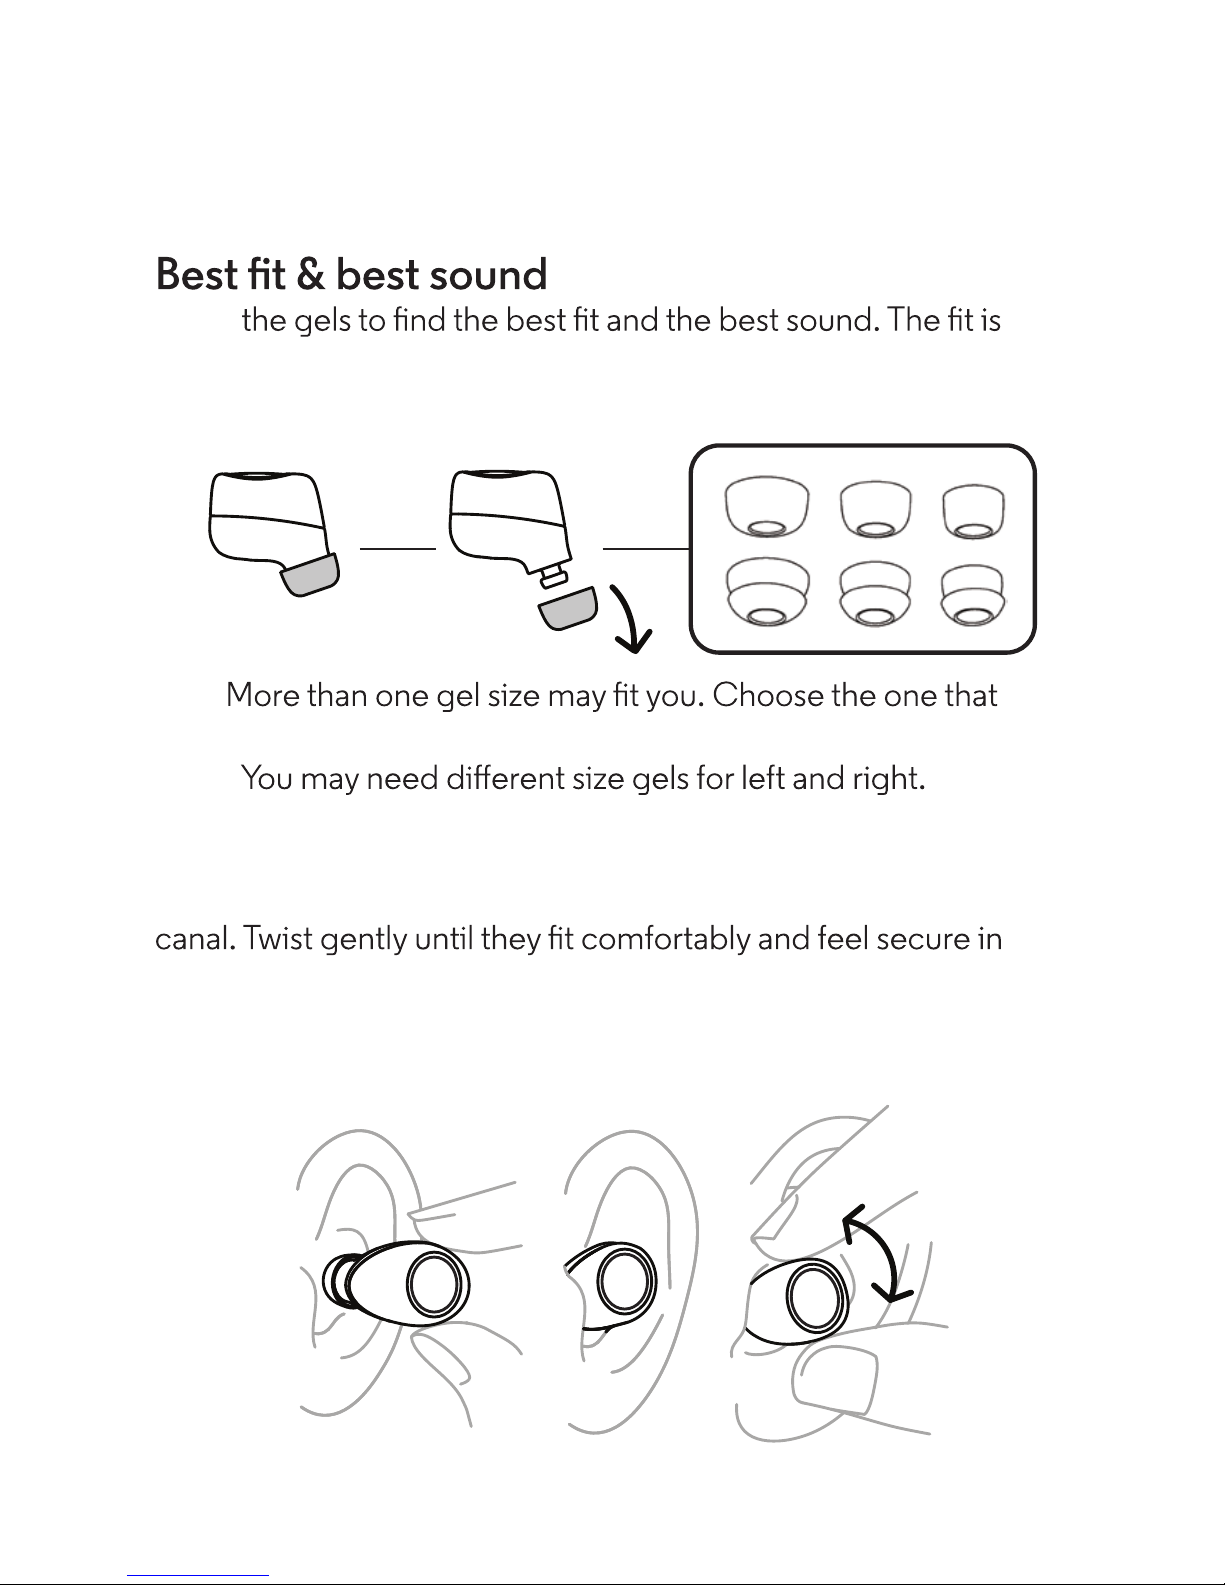
Step 1: Wear
Step 1: Wear
2 en
Tip:
completely seals your ear canal for the best sound.
Note:
Wear
Insert the earbuds with the ear gel directed towards your ear
your ear.
Note: When you take the earbuds out of the case, you have 5
minutes to put them on, or they go dormant. Put them in the
case to wake them back up.
Try all
right when you get a complete seal, the gel feels comfortable,
and you get the best quality and loudest sound.
Page 4
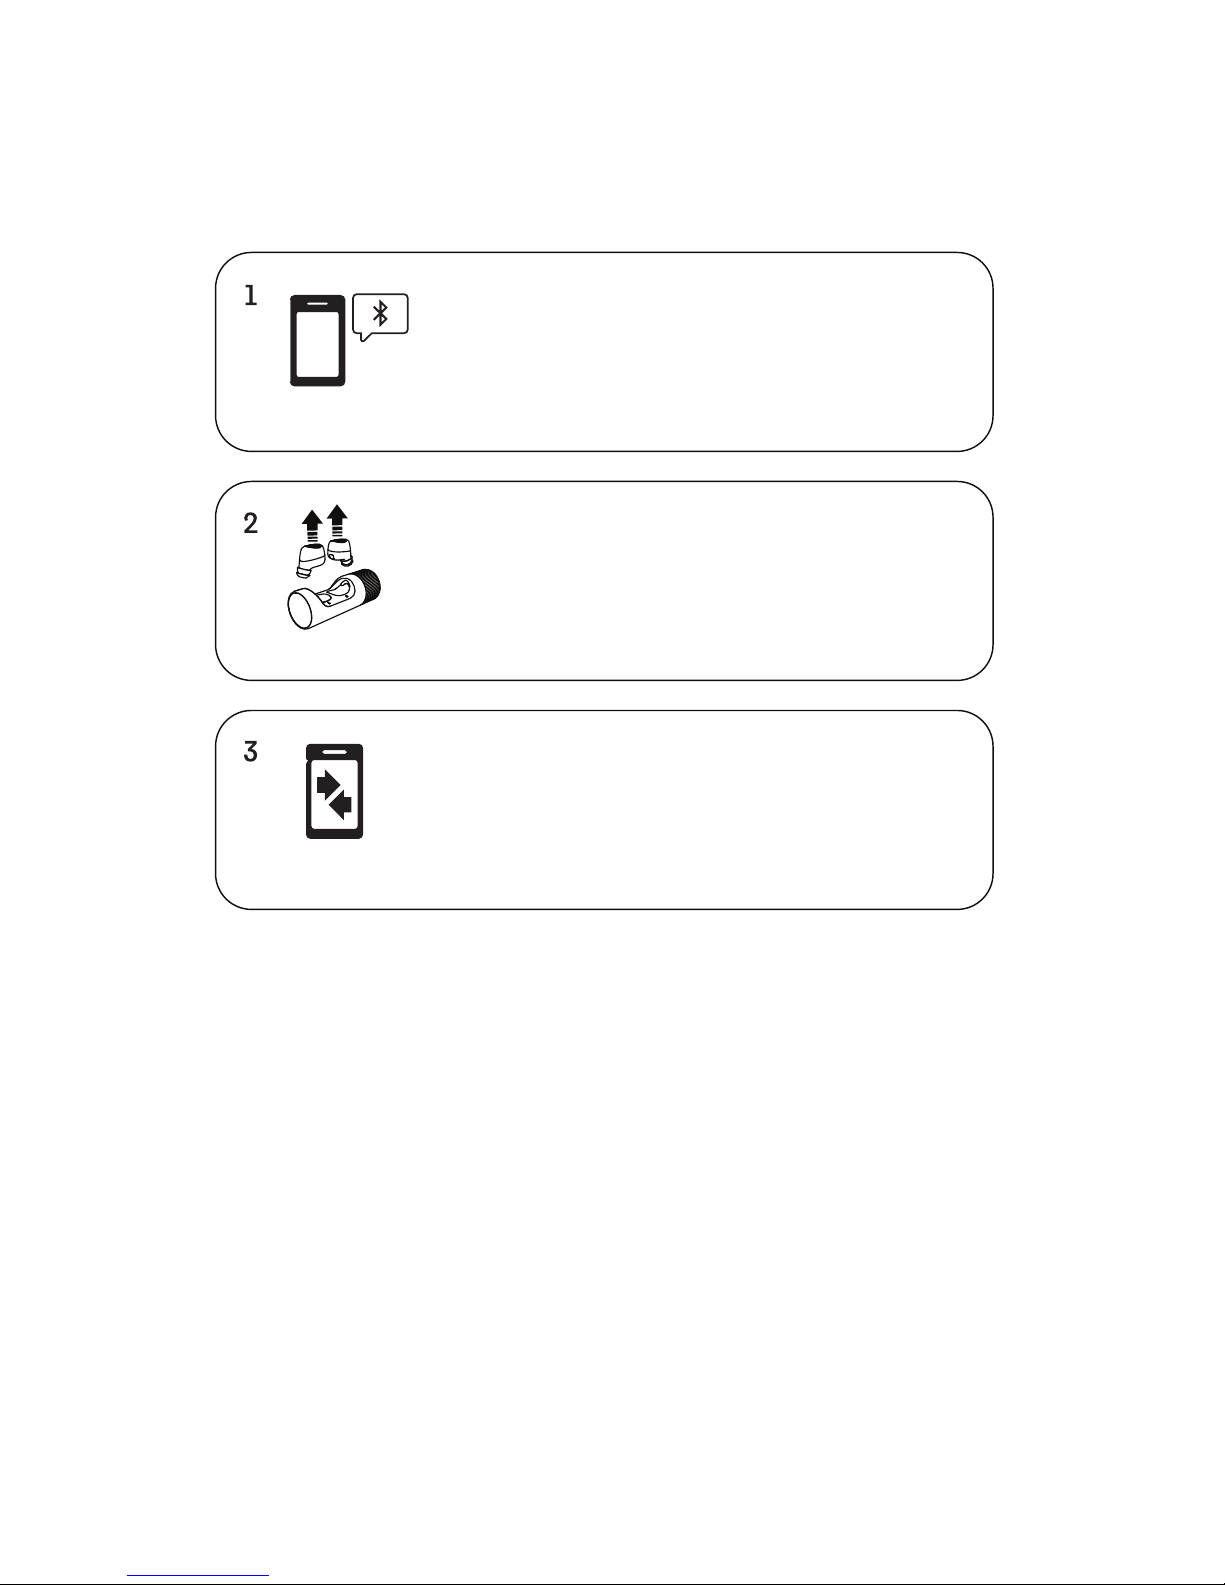
Turn on Bluetooth on your device.
Take both wireless earbuds out of case,
and put them in your ears.
On your device, go to the Bluetooth menu,
select for VerveOnes or VerveOnes+, pair &
connect. You will hear "Paired" when pairing
is complete.
Step 2: Pair with Bluetooth
Step 2: Pair with Bluetooth
3en
Note: Only the left earbud will connect to your device. The
right will connect to the left. The left earbud may also be used
as a single headset. Certain versions of this headset may only
have tones and no voice prompts.
Some devices may request permission to access your contacts
and call history. You may choose to allow or deny this request
if you wish to have caller name readout
Tip: When you hear “Earbuds linked” both earbuds are
connected for stereo use. When you hear “ VerveOnes
connected” your earbuds are connected to your device.
Page 5
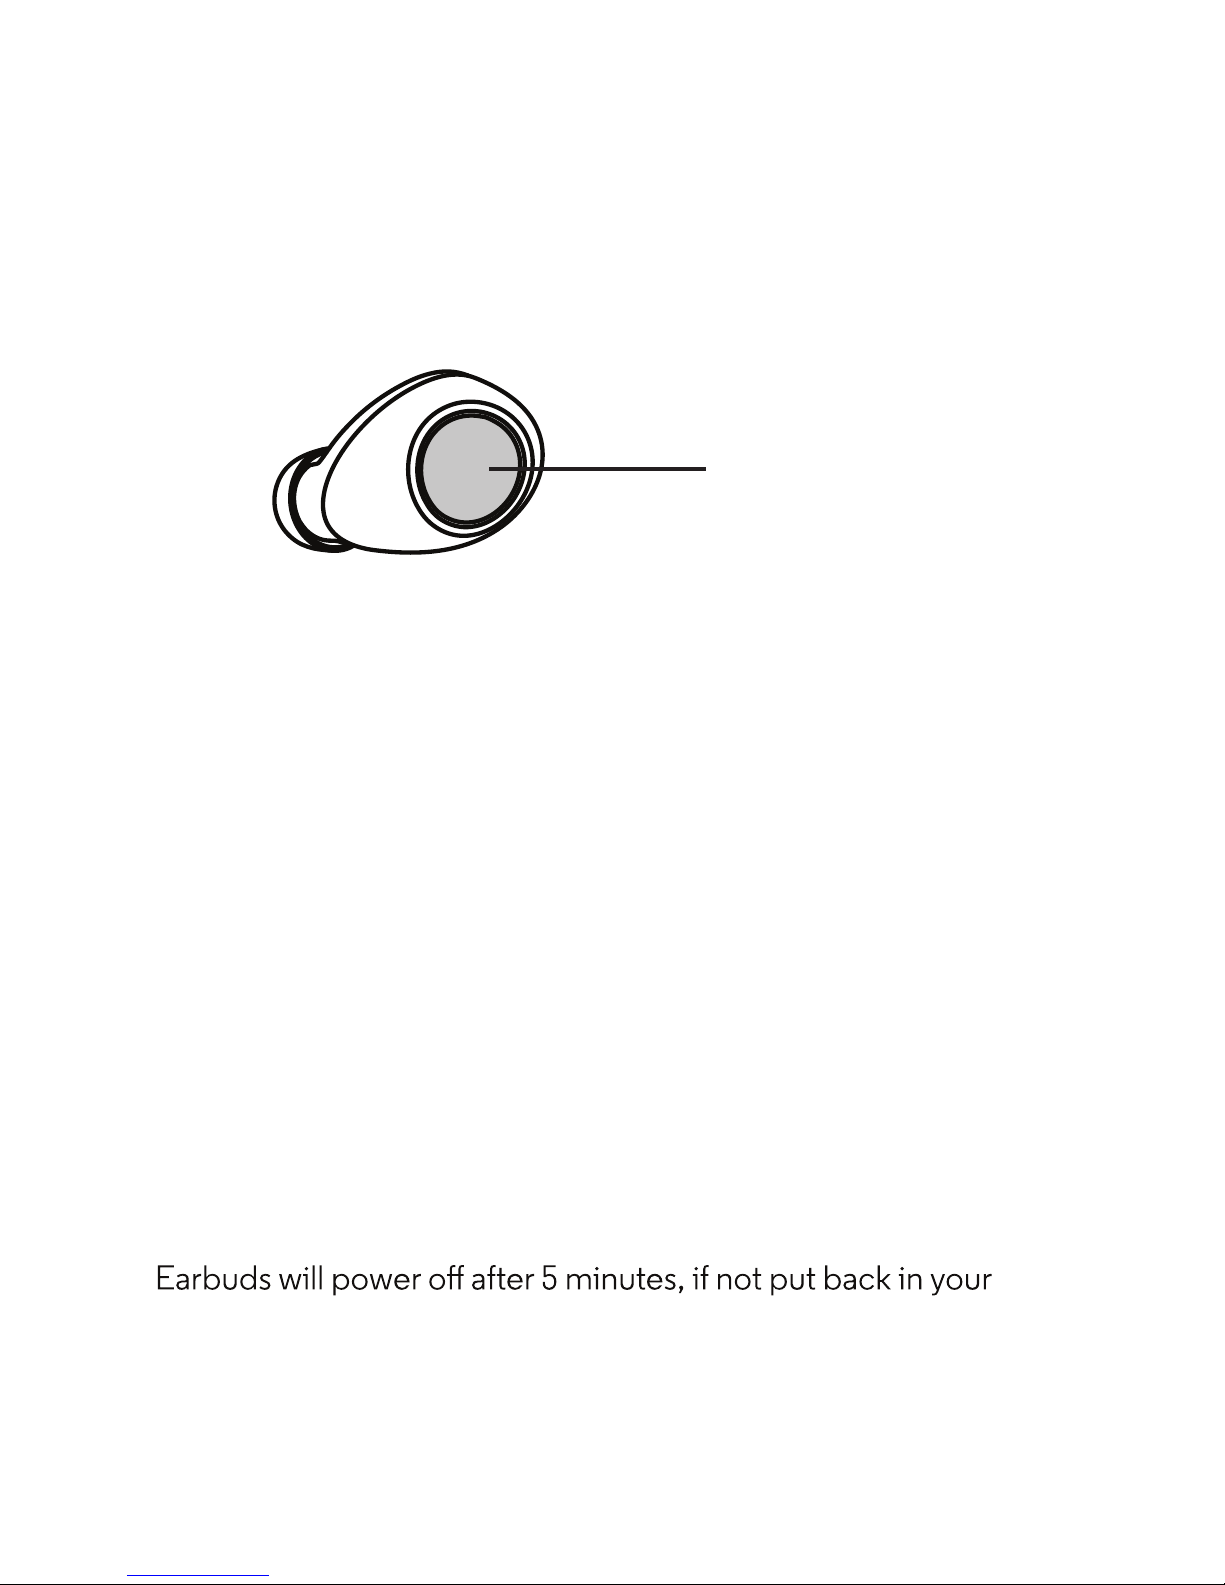
Music
Music
4 en
• Press once to pause a track. Press again to resume.
• Double-press to go to the next track (depending on your
music player).
• Triple-press to go back one track (or start the song over).
• Press and hold until you to hear the Equalizer options
(between 3-6 seconds). Press again to select a preferred
setting.
Note: Playing the next or previous track depends on your
music player or app.
Tip: With Ear Detect ON (Default), if you take one earbud out
of your ear, music will continue to play. If you take out both
earbuds from your ears they will disconnect from the device.
ears.
Start playing music on your music player and then control it
with either earbud.
Music Control
Button
Page 6
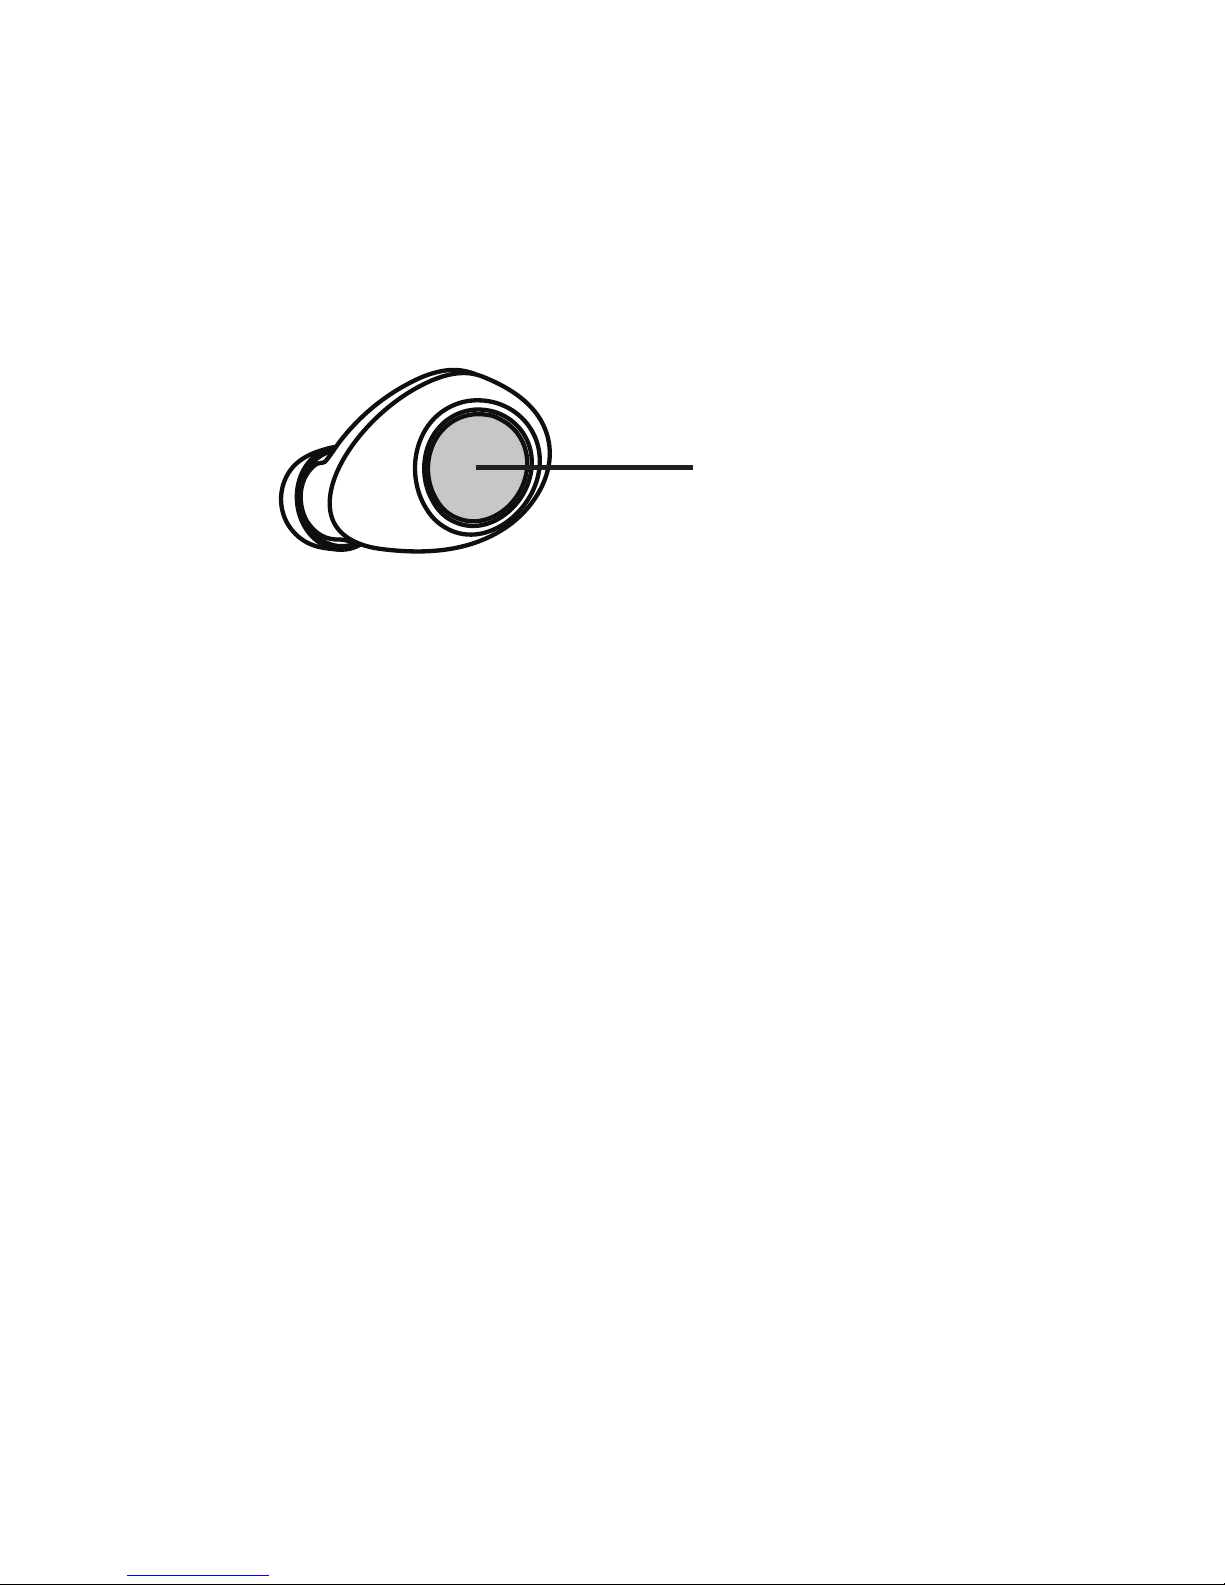
Calls & Voice Commands
Calls & Voice Commands
5en
• Press once to answer an incoming call, or double-press to
reject it. You may also say “Answer” or “Ignore” for an
incoming phone call if prompted
• Press once to end a call.
• When not in a call and not playing music, press and hold to
start voice commands. You'll hear a tone. Release the button.
You'll hear a second tone from your phone. Say your
command. (Press and hold again to cancel a voice
command.)
Note: All calls will be heard in the left earbud only.
Voice commands use your phone’s voice control app and may
not be available in all countries.
Tip: When Ear Detect is ON, a call will automatically transfer to
the phone when both earbuds are removed.
When Ear Detect is OFF, a call will remain in the headset until
transfered to the phone via phone keypad.
When making and answering calls or using voice commands,
you can press either earbud.
Call/Voice Control
Button
Page 7
Charge
Charge
6 en
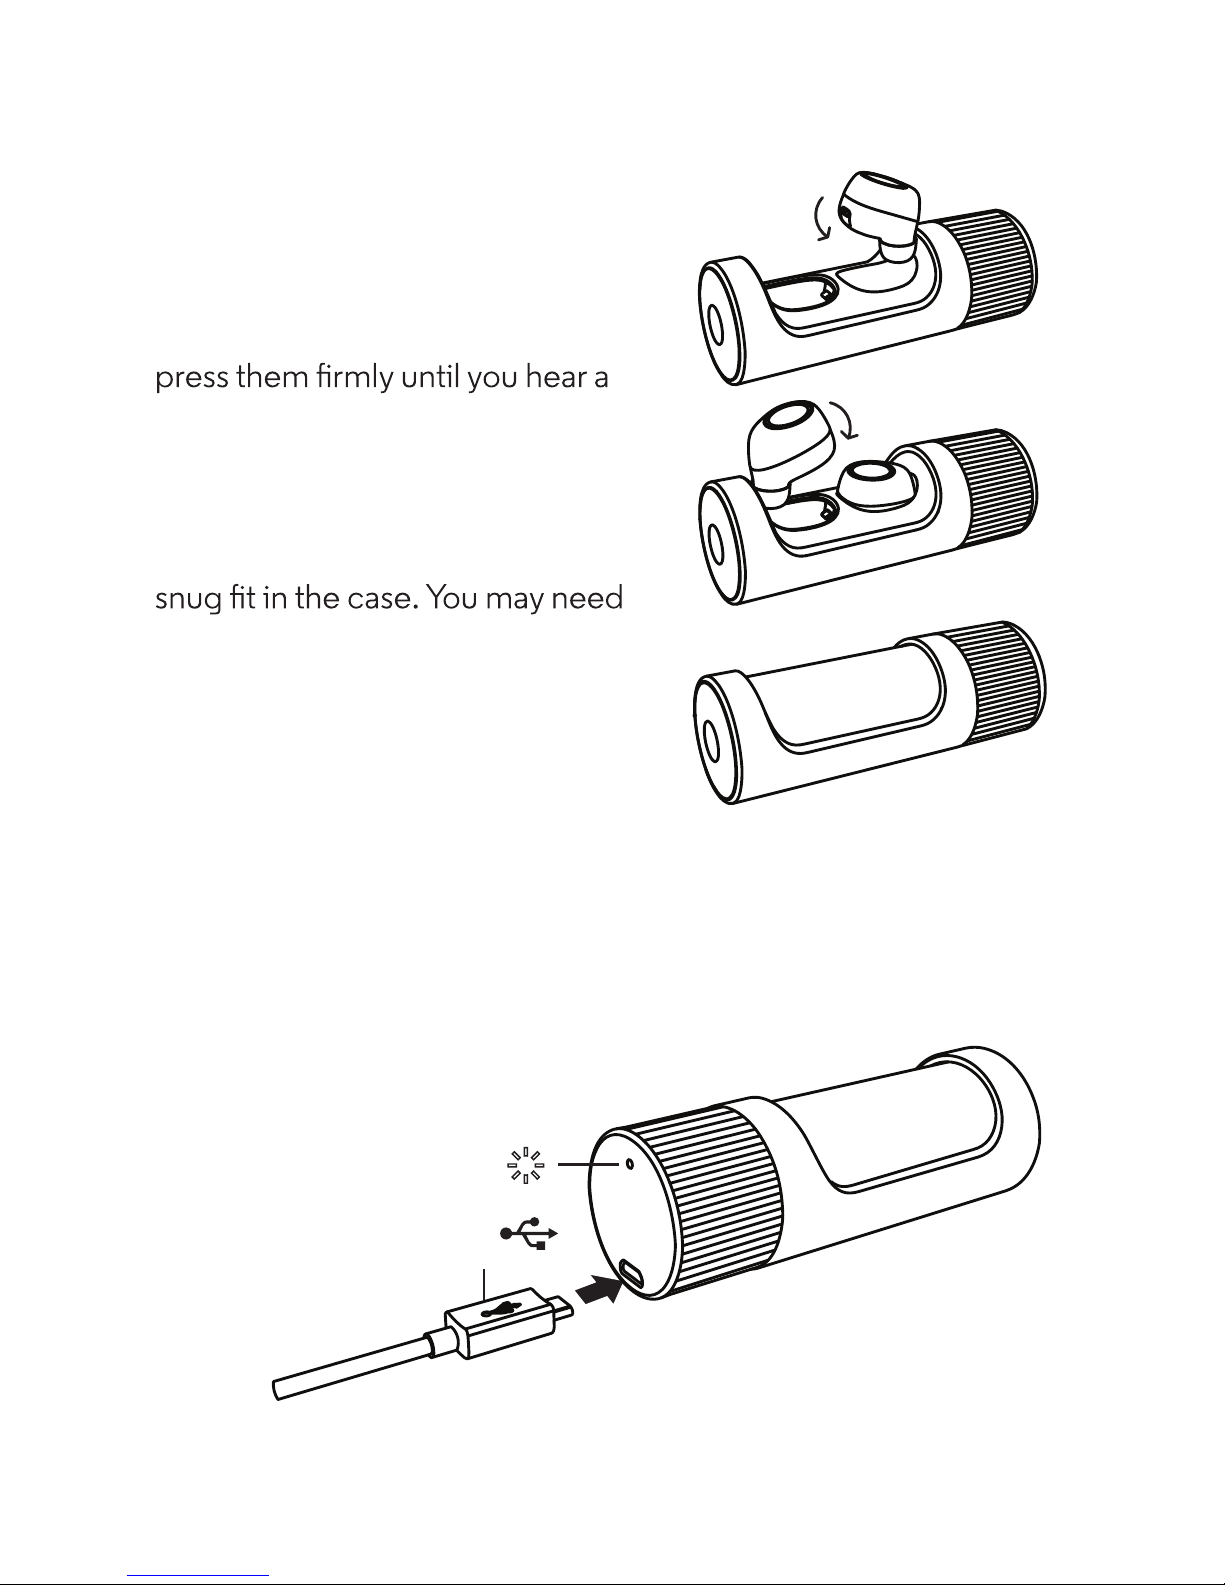
Charge the earbuds
Put the earbuds into the case and
click and the earbud lights turn on.
Twist the case until it’s completely
closed.
Tip: Earbuds are designed to be a
to push earbuds from the side to
remove.
Charge the case
Charge the case and earbuds by
plugging in the charging cable. The
case light turns on when it’s
charging.
Micro USB
Charger
Light
Page 8
Charge level
Charge level
7en
Note:
conserve battery. The earbuds will continue to charge until full.
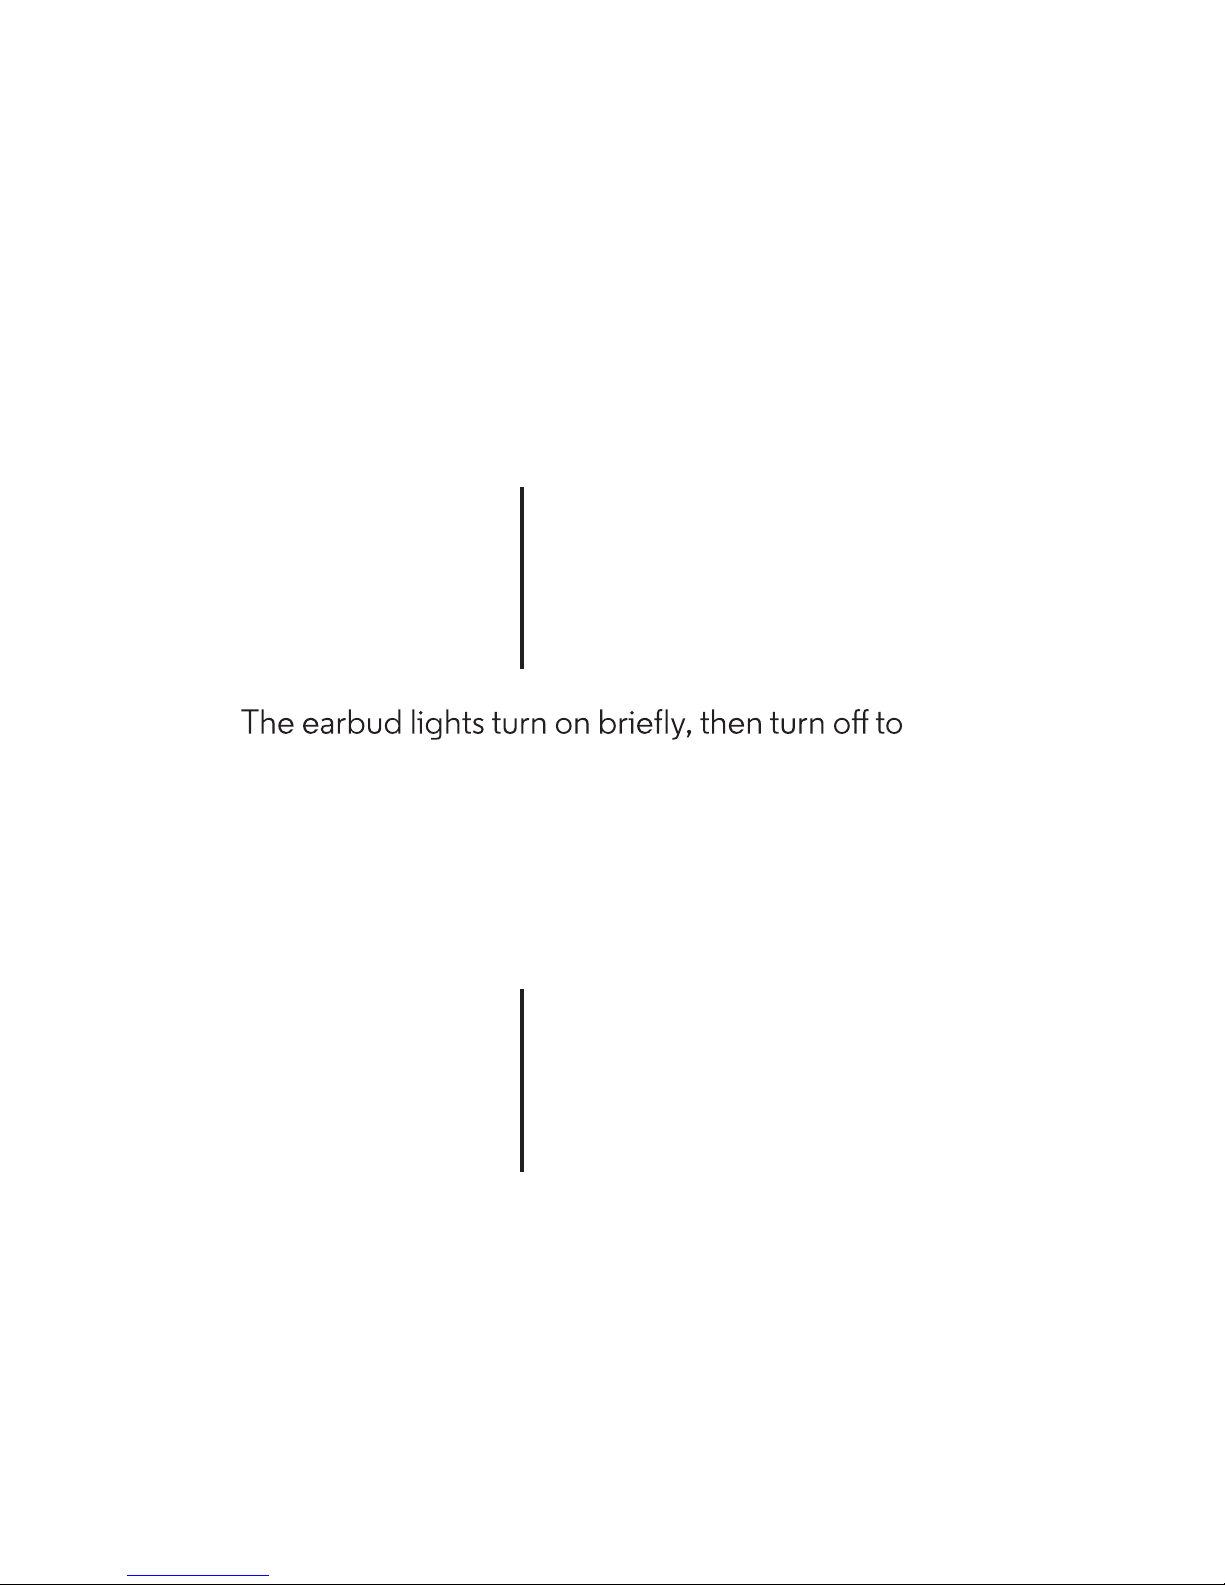
Case status lights
When your case is plugged into a wall charger, you’ll see
charging lights.
Charging
Full charge
Needs charging
Slow blinking white
Steady white
Blinking red
Note: Your battery is designed to last the life of the product. It
should only be removed by a recycling facility. Any attempt to
remove or replace your battery will damage the product and
void your warranty.
Your earbuds let you know when your battery level is low. You’ll
hear a message when there is 15 minutes of battery left.
Earbud status lights
Charging
Full charge
Needs charging
Slow blinking white
Steady white
Blinking red
Page 9
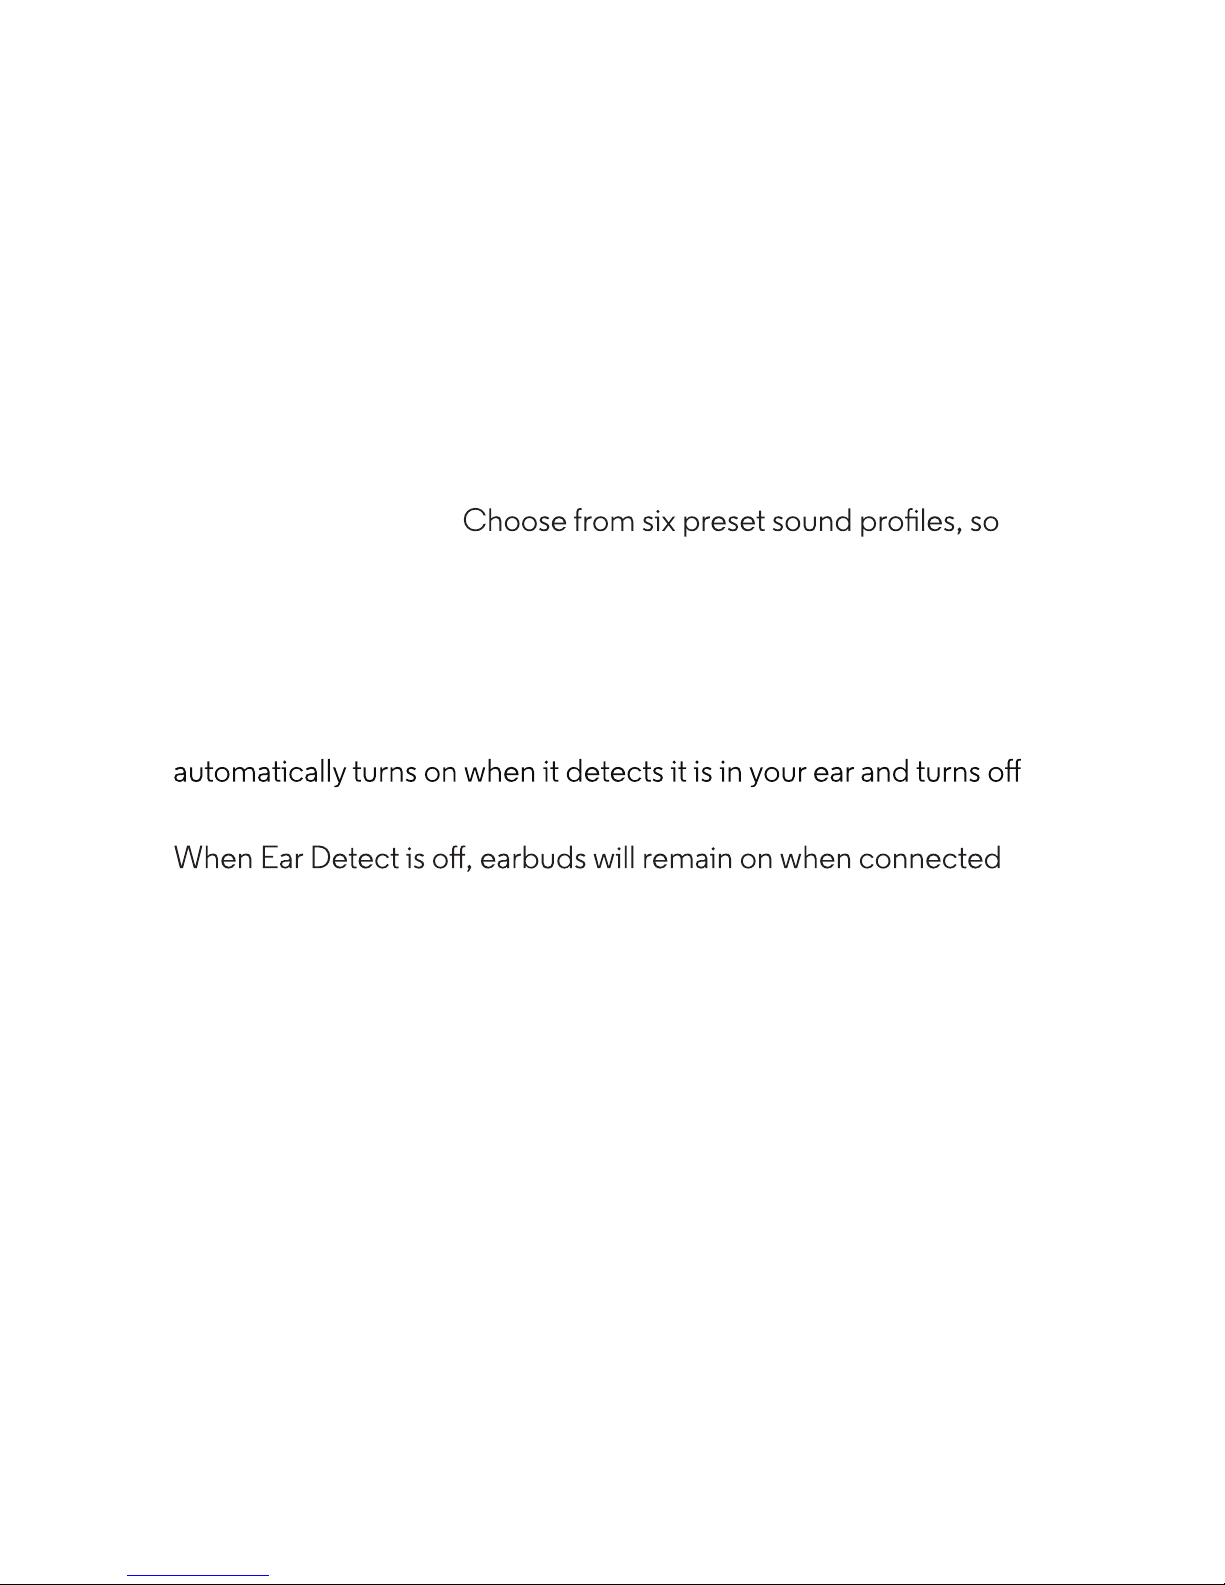
Hubble Connect for VerveLife8 en
• Locate a lost earbud: Locate on a map the last time your earbud
was connected to your device.
• Adjust the equalizer:
your tunes sound the way you like.
• Pass-Through Audio (default OFF): Stay in tune with your
surroundings by turning Pass-Through on to hear noises around
you.
• Ear Detect (default ON): When Ear Detect is on, the earbud
when both earbuds are removed from your ears.
to your device until you put them in the case.
• Voice Prompts: Choose a new language for Voice Prompts from
the available selection.
• Help: Get answers.
Hubble Connect for VerveLife can greatly enhance your earbud
experience. Download app for free at the App Store
®
or Google
Play
TM
(Android
TM
4.4.4 or higher)
Note: Both earbuds must be in the case to make changes to
these settings via the app (Does not apply for the location or help
feature).
Application feature may change over time, please download the
latest version of the app to see all current features supported.
Hubble Connect
TM
for VerveLife
TM
Page 10
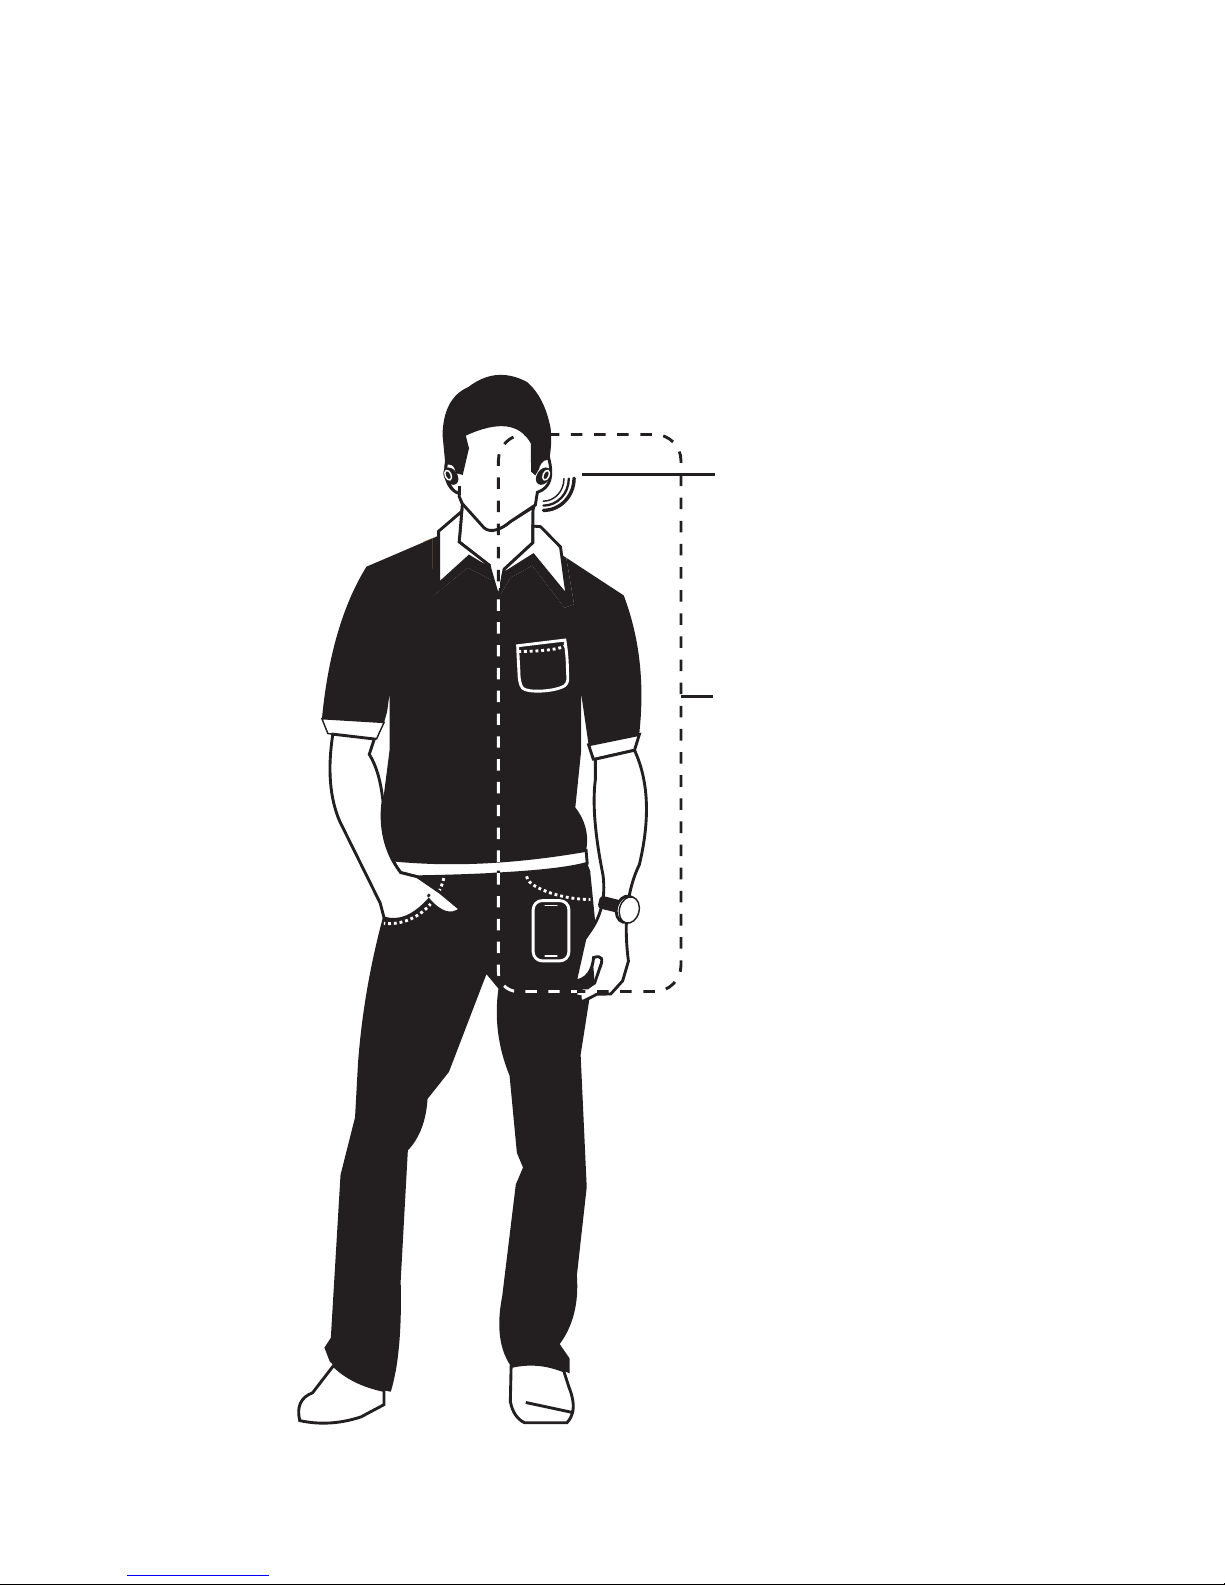
Get best connection 9en
Optimal RF Zone
for pocket and wrist
worn devices
Left master earbud
Get best connection
To optimise bluetooth connection and minimize drops, keep
your device in the optimal RF zone.
Page 11

Use this product responsibly
Use this product responsibly
10 en
VerveOnes are designed to give the user great sounding
wireless earbuds. However the product should be used
responsibly.
Safety instructions for use
To avoid hearing damage, keep the volume at a moderate
level. Avoid listening to music at loud volume levels for
prolonged periods of time as this may cause permanent
hearing damage or hearing loss.
Your hearing is delicate and highly sensitive so please listen to
your music responsibly. For more information visit the
Deafness Research Foundation www.drf.org
Don't use VerveOnes when it is unsafe to do so. For example,
while operating a vehicle, cycling, crossing a road, or any
activity which requires your attention and ability to hear.
You should be aware of your surroundings and use VerveOnes
responsibly.
Page 12

Help & more
Help & more
11en
Manufactured, distributed, or sold by Binatone Electronics International LTD.,
trademarks or registered trademarks of Motorola Trademark Holdings, LLC.
and are used under license. Apple logo is a trademark of Apple Inc.,
registered in the U.S. and other countries. App Store is a service mark of Apple
Inc. Google Play and Android are trademarks of Google Inc.
All other trademarks are the property of their respective owners.
© 2016 Motorola Mobility LLC. All rights reserved.
Product ID: SH001
Bluetooth ID: D029680
FCC ID: VLJ-SH001
IC ID: 4522A-SH001
• Get help: Visit www.motorolahome.com/support or visit
www.verve.life for help videos, FAQ's and more.
• Find accessories at: www.motorolahome.com or
www.verve.life
Note: If you’re watching video while using your earbuds, your
audio may be slightly out of sync with your video.
 Loading...