

Verve CAM User Manual

en
VERVE
CAM
VERVE
CAM+
User Guide
We aim to provide you with the best user
experience. Please check out the latest
software and user manual update from our
website: www.verve.life

1 Here’s what you can do
en
1. Here’s what you can do
The MOTOROLA VerveCam Ultra Portable Lifestyle
Video Camera is packed with the following features:
• Video recording in 2.5K at 30 fps and 135° field
of view
• Share videos in real time via Youtube live
stream
• Free
Hubble Connect for VerveCam app with
photo/video editing and social sharing
• Loop Recording within a set time frame
• Capture your favorite sequence over a set
period of time
• Take it 25m deep with included IP68 water
proof sports case

Box Contents 2
en
2. Box Contents
VerveCam
•1 x Camera
• 1 x Micro USB cable
• 1 x Quick Start Guide
VerveCam+
•1 x Camera
• 1 x Micro USB cable
• 1 x Quick Start Guide
•1 x Waterproof Case
•1 x Clip Mount
• 1 x Bumper & Lanyard
•1 x Universal Mount
Additional accessories for other home or outdoor
activities can be purchased separately from
www.verve.life
3 Your Camera at a Glance
en
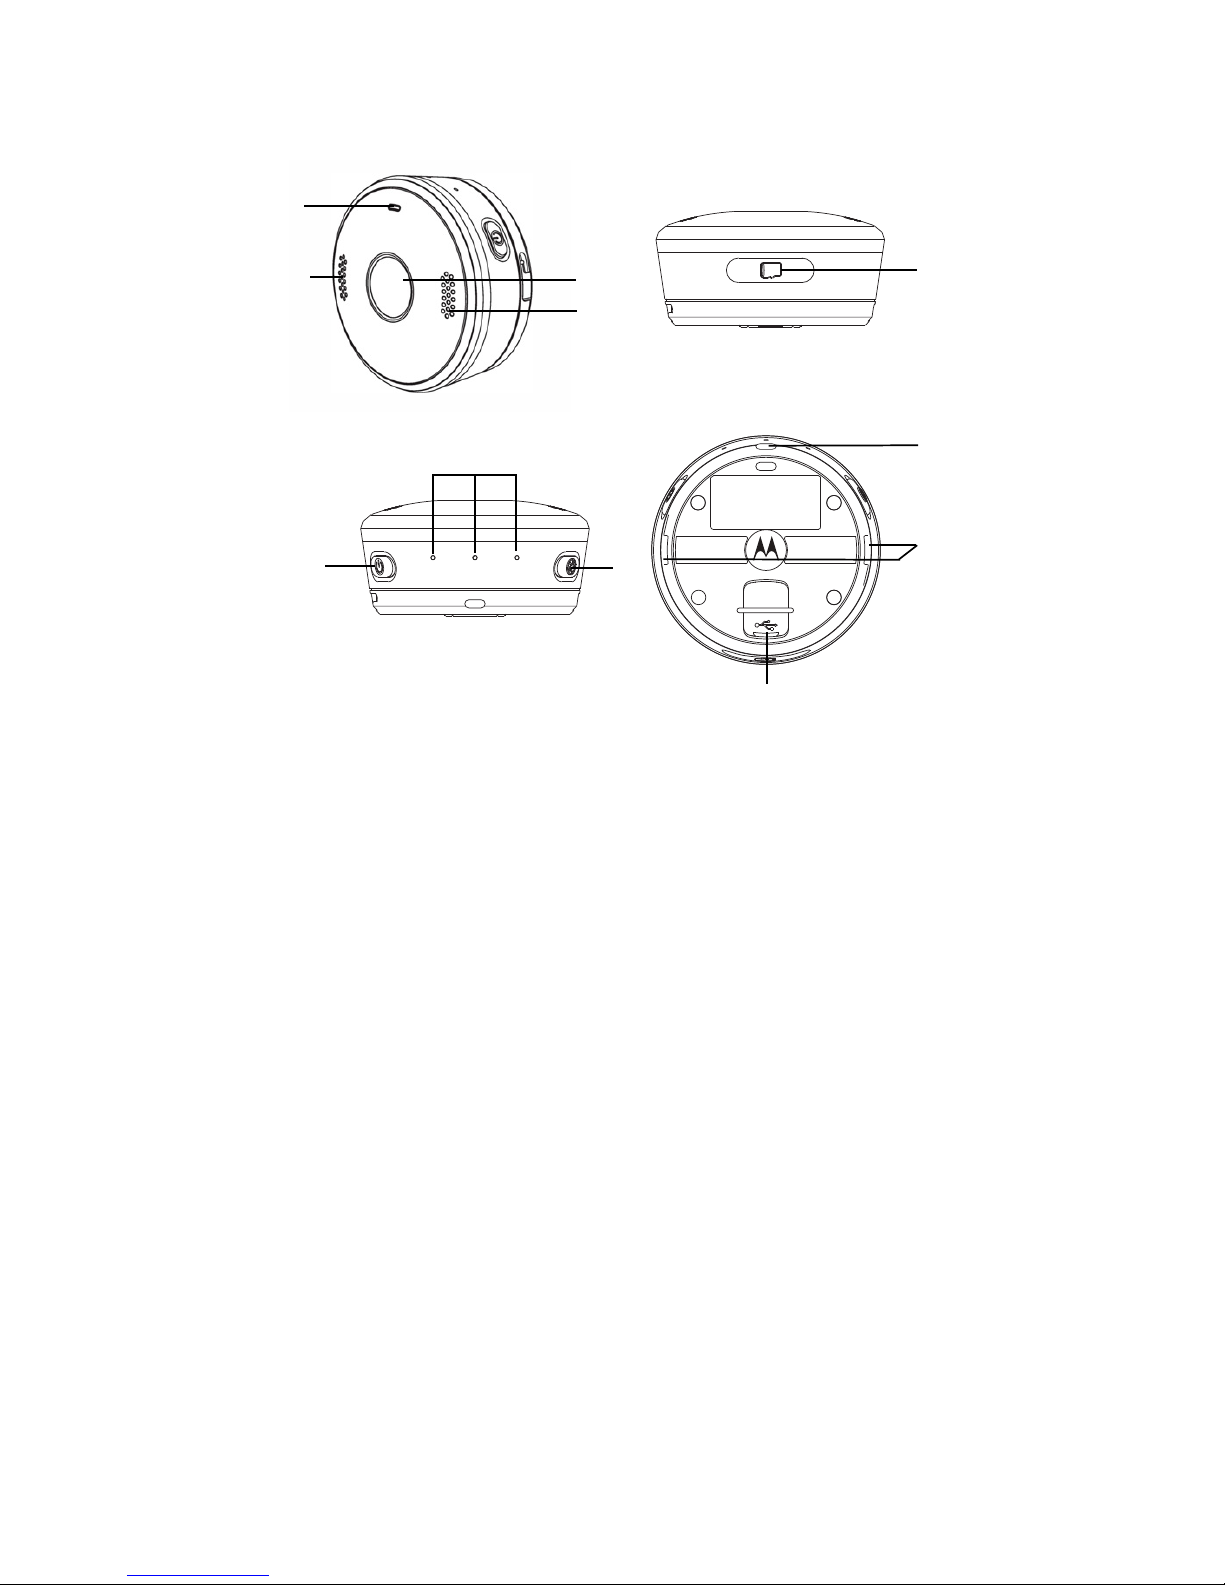
3. Your Camera at a Glance
1. LED Indicator - Blue / Red
2. Microphone
3. Camera Lens
4. Speaker
5. micro SD Card* Slot and Reset Button (micro SD
Card is not included.)
6. Power / Mode Button
7. Mode Indicators - White (Photo / Video /
Streaming)
8. Shutter / Select Button
9. Lanyard Hole
10. Locking Holes
11. micro-USB socket
* supports microSD cards up to 32GB.
3
5
6
7
4
8
9
10
11
1
2

Safety Instructions 4
en
4. Safety Instructions
WARNING
The Camera is compliant with all relevant
electromagnetic field standards and is, when
handled as described in the User’s Guide, safe to
use. Therefore, always read the instructions in this
User’s Guide carefully before using the product.
• Avoid letting the USB port come into contact with
liquid substances such as liquid soap or detergent.
• Do not immerse the Camera in water without its
waterproof case.
• Do not jump into water with the Camera or
subject it to high water pressure conditions such
as rapids or waterfalls, as this may affect its
waterproof performance.
• Keep the Camera away from excessive dust,
smoke, steam and sand.
• Do not charge the Camera when it is wet.
• Do not open the microSD slot cover underwater.
• Do not insert a wet microSD card into the Camera.
• Do not drop or use excessive force when handling
the Camera as this may cause damage to the
camera.
• Only use a power adapter with the suggested
rating of 5V 1A.
• Never use extension cords with power adapters.
• Do not touch the plug contacts with sharp or metal
objects.
• Keep this User's Guide for future reference.
5 Charge the Battery
en
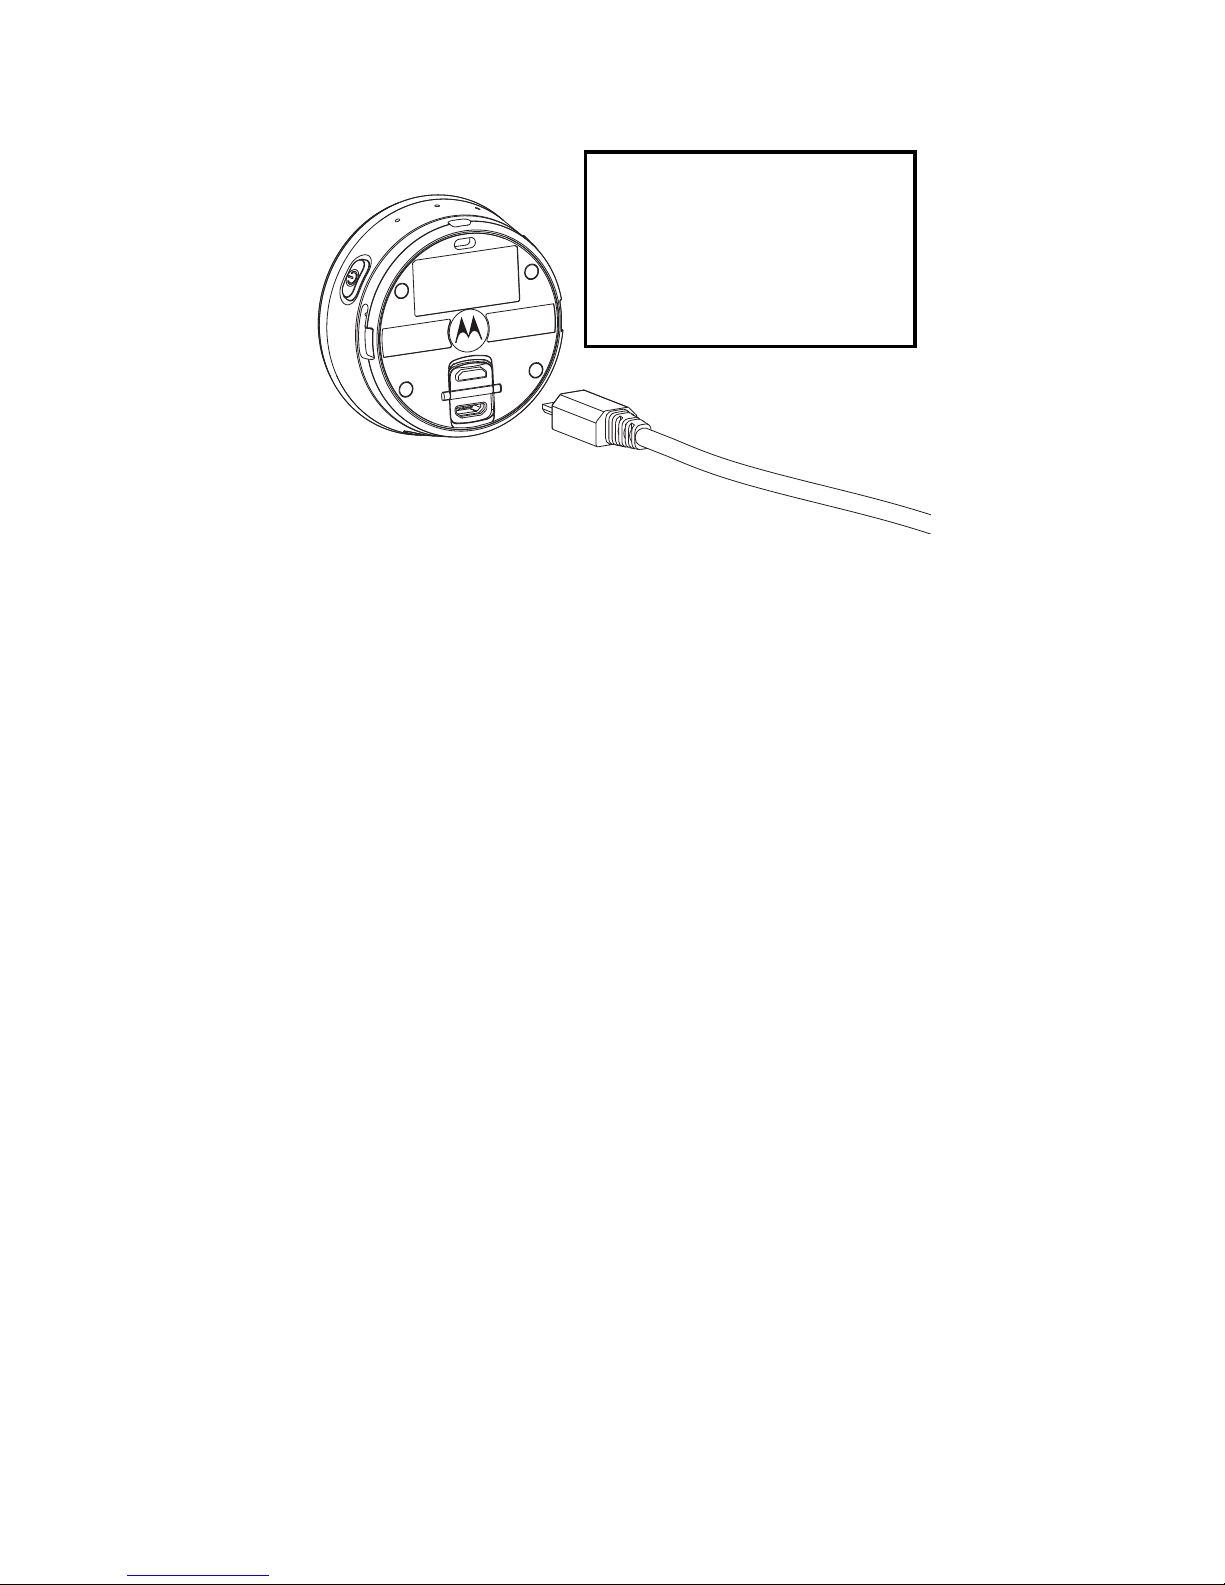
5. Charge the Battery
Connect the power adapter to a mains power
socket and insert the plug into the micro-USB socket
on the underside of the Camera. Only use the
power adapter (5V 1A) with the micro-USB plug.
Note: If the Camera is OFF, the LED indicator lights
up in red when charging and goes off when the
battery is fully charged.
It takes about 6 hours to fully charge the battery for
the first time.
You can continue to take photos or record videos
when the Camera is charging.
The Camera will issue a voice prompt to warn you
that it is powering off when battery is low.
5.1 Check Battery Status
You can check the battery status of the Camera
from Hubble Connect for VerveCam app. The
battery status icon is shown on the top right corner
of the Viewfinder screen.
Battery life is about
1.5 hours when not
connected to Wi-Fi,
and 1 hour when
connected to Wi-Fi.

Power On & Off the Camera 6
en
6. Power On & Off the Camera
To power O N th e Came ra, hold down the POWER /
MODE button
0 for 3 seconds. The LED indicator
lights up in blue.
To power OFF the Camera, hold down the POWER
/ MODE button
0 for 3 seconds. You will hear a
voice prompt indicating that the Camera is
powering off before the LED indicator goes off.

7 Standby Mode
en
7. Standby Mode
When the Camera is not connected to the power
supply or not connected to Hubble Connect for
VerveCam app for more than 3 minutes, it will enter
standby mode. The LED indicator flashes in blue
once every 3 seconds.
Press any button on the Camera to exit standby
mode.
Connecting Devices 8
en
8. Connecting Devices
System Requirements:
Smartphone: iOS 8.3 (or higher) or Android™ 4.3 (or
higher)
Not supported on iPad and Android tablets.
Wi-Fi® requirements:
At least 2Mbps upload bandwidth per camera. Test
your Internet speed at: http://www.speedtest.net/
1. Download & Install Hubble Connect for Verve-
Cam app on your smartphone for free at the
App Store
®
or Google PlayTM.
2. Open the App.
3. Follow the in-app instructions to connect the
Camera with your smartphone.
4. The Camera ID is printed on the back of the
Camera. YOUR CAMERA’S DEFAULT
PASSWORD IS “00000000”.
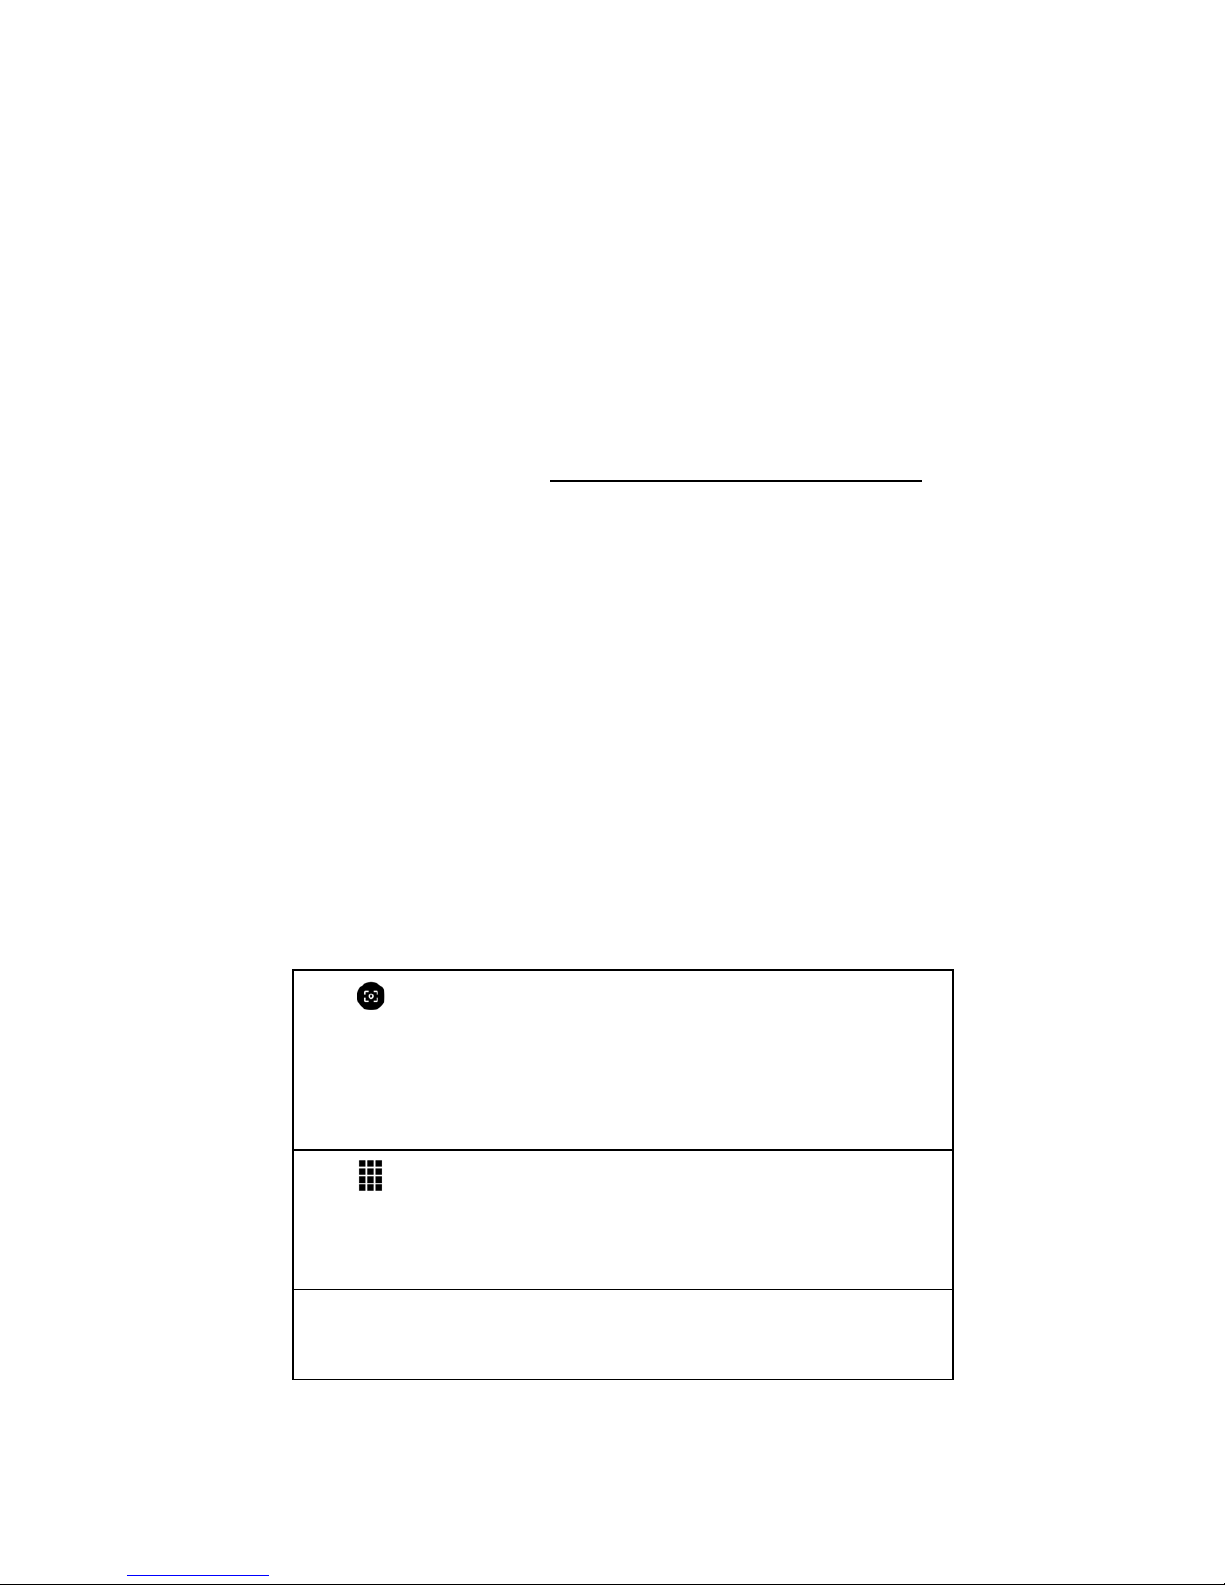
5. When connected, you will see the home
screen.
Tap to enter Viewfinder screen where you
can take photos, record videos, record timelapse video, do loop recording or stream live
video.
Tap to enter the Camera roll, where you can
view, download, edit, share or delete photos
and videos.
To return to the home screen from any mode,
tap < on the top left of the screen.

9 Insert microSD Card (not included)
en
9. Insert microSD Card (not included)
Your Camera supports microSD cards with storage
capacities of up to 32GB.
1. Remove the waterproof cover, then insert a
microSD card with the gold-plated side facing
down into the card slot.
2. To remove the microSD card, push the card in to
eject it.
Note:
The Camera will stop recording automatically and
issue a voice prompt to warn you when the memory
card is full.
The memory available will be displayed on the top
right corner of the Viewfinder screen.
Remove
waterproof
cover

Transfer files from the Camera to your Computer 10
en
10. Transfer files from the Camera to
your Computer
Power on the Camera and make sure that the
Camera is disconnected from Hubble Connect for
VerveC am App.
To disconnect the Camera from the App, you can
close the App or turn off the Camera and turn it on
again.
Connect the Camera to your computer’s USB port.
Your computer will recognize the Camera as a mass
storage device. You can then drag and drop your
files, just like other external devices.
To exit mass storage mode, unplug the USB cable.

11 Basic Operation of your Camera
en
11. Basic Operation of your Camera
11.1 Take a picture using the Camera
1. Hold down the POWER / MODE button 0 for
3 seconds to power ON the Camera.
The LED indicator lights up in blue.
2. Press the POWER / MODE button 0 to switch
to photo mode.
Photo mode indicator lights up in white.
3. Press the SHUTTER/SELECT button to take
photo.
You will hear a shutter sound and the blue LED
indicator flashes once.
Note:
Photos will be stored on the Camera’s memory
card.
You can also choose to save the photos to your
smartphone automatically. See “General Settings”
on page 25 to turn autosave to phone memory On
or Off.
The Camera will issue a voice prompt to warn you
when the memory card is full.
Whether you are taking a photo in bright sunlight or
a dimly lit room, you can change Camera settings
by selecting a specific mode via Hubble Connect
for VerveCam app. (see page 13)
 Loading...