

Versapers EMOTION 4G User Manual
ENG
Terms of parts How to assemble How to use
Precautions for safe use Cautions during operation
Before requesting for repair
0201 04
05 06 08
09 10 11
Versapers Slowjuicer for Household Use
1. Read ‘Precautions for safe use’ (Page 6) and use the appliance properly.
2. After you finish reading the manual, keep it in a convenient location for future reference.
3. Use this apliance only in areas which have the correct power supply and voltage.
4. Any quality improvements are subject to change without notice.
Juice Cap and
Extraction Packing
When squeezing screw
stops during operation
Product Specifications /
Warranty
14
15
10
5
7
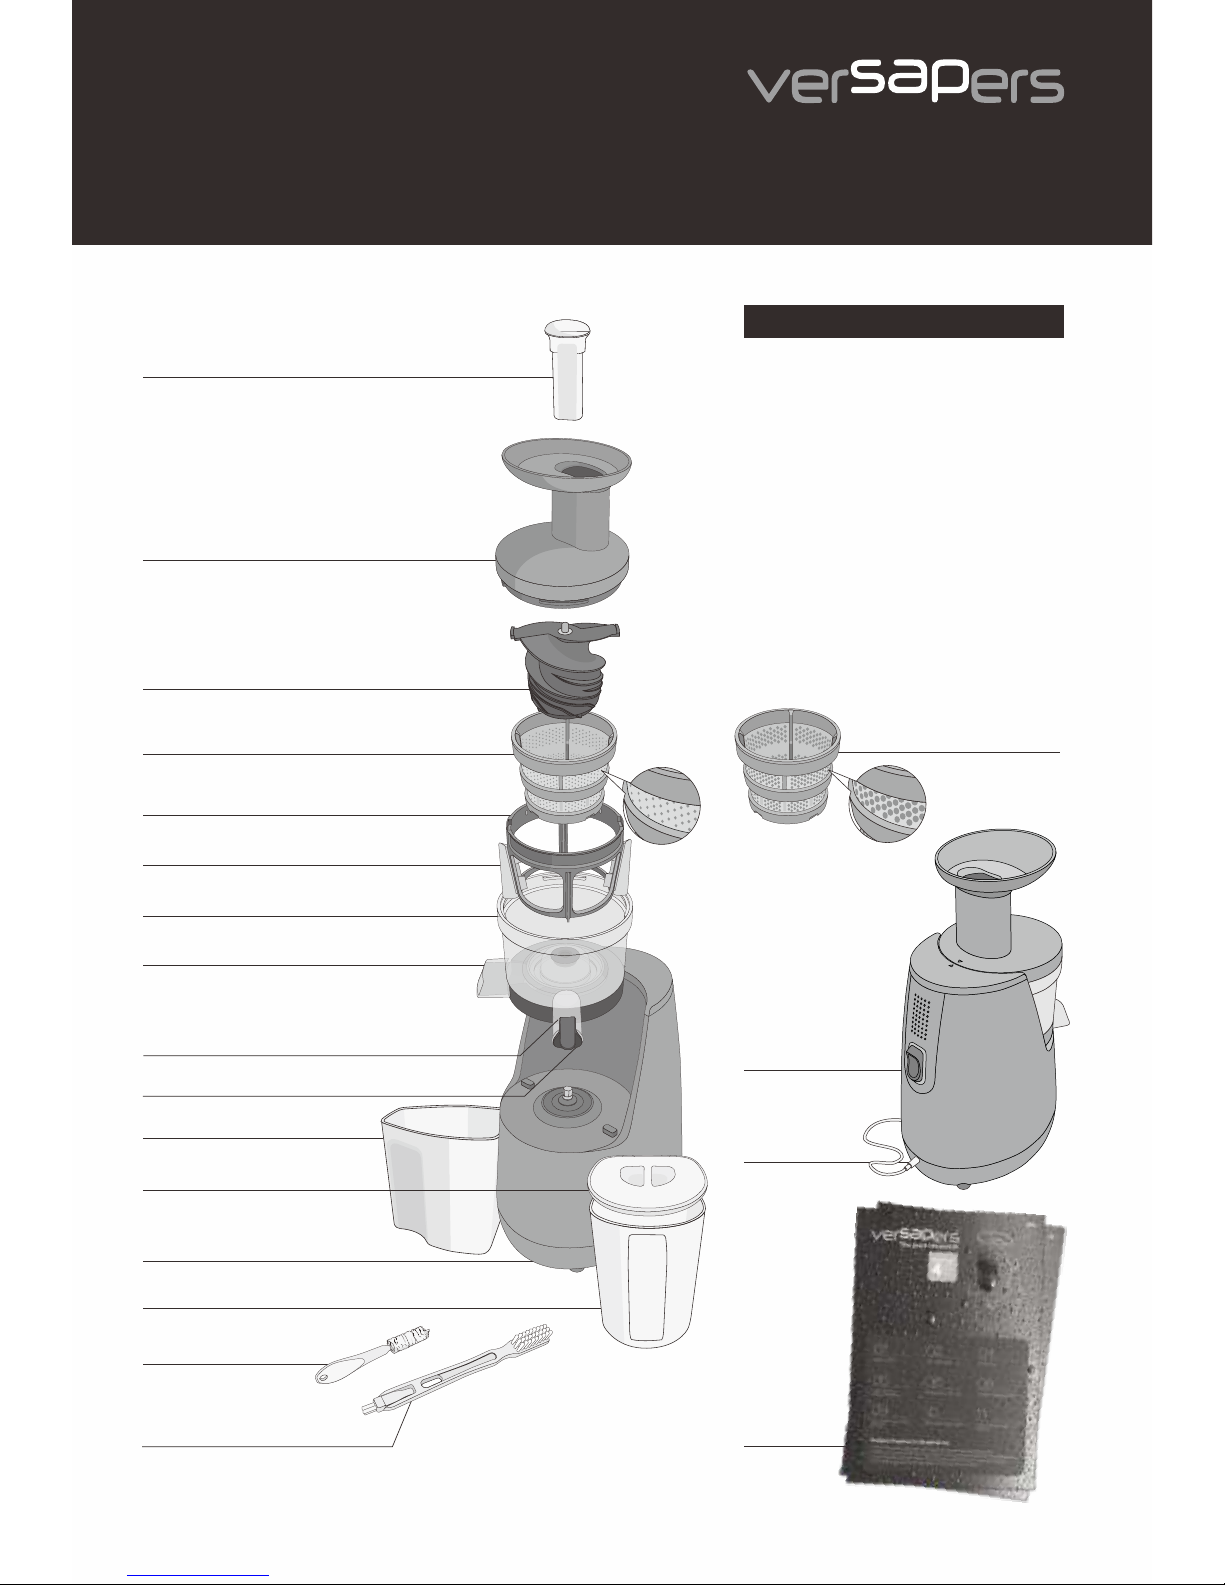
Pusher
Hopper
Squeezing screw
Fine Strainer
Coarse Strainer
Spinning Brush
Silicon Brush
Chamber
Pulp Outlet
Juice Outlet
Juice Cap
Pulp Container
Juice Container Lid
Base
Juice Container
Small Cleaning Brush
Cleaning Brush
Operating Switch
9
10
11
12
13
14
15
16
Power Cord
17
18
1
2
3
4
5
6
7
8
8-1
8-2
1
2
3
4
6
8
8-1
9
11
13
17
16
Terms of parts
18
Terms of parts
8-2
12
Instruction Manual
EN/NL
02 03
1
2 3 4
!
!
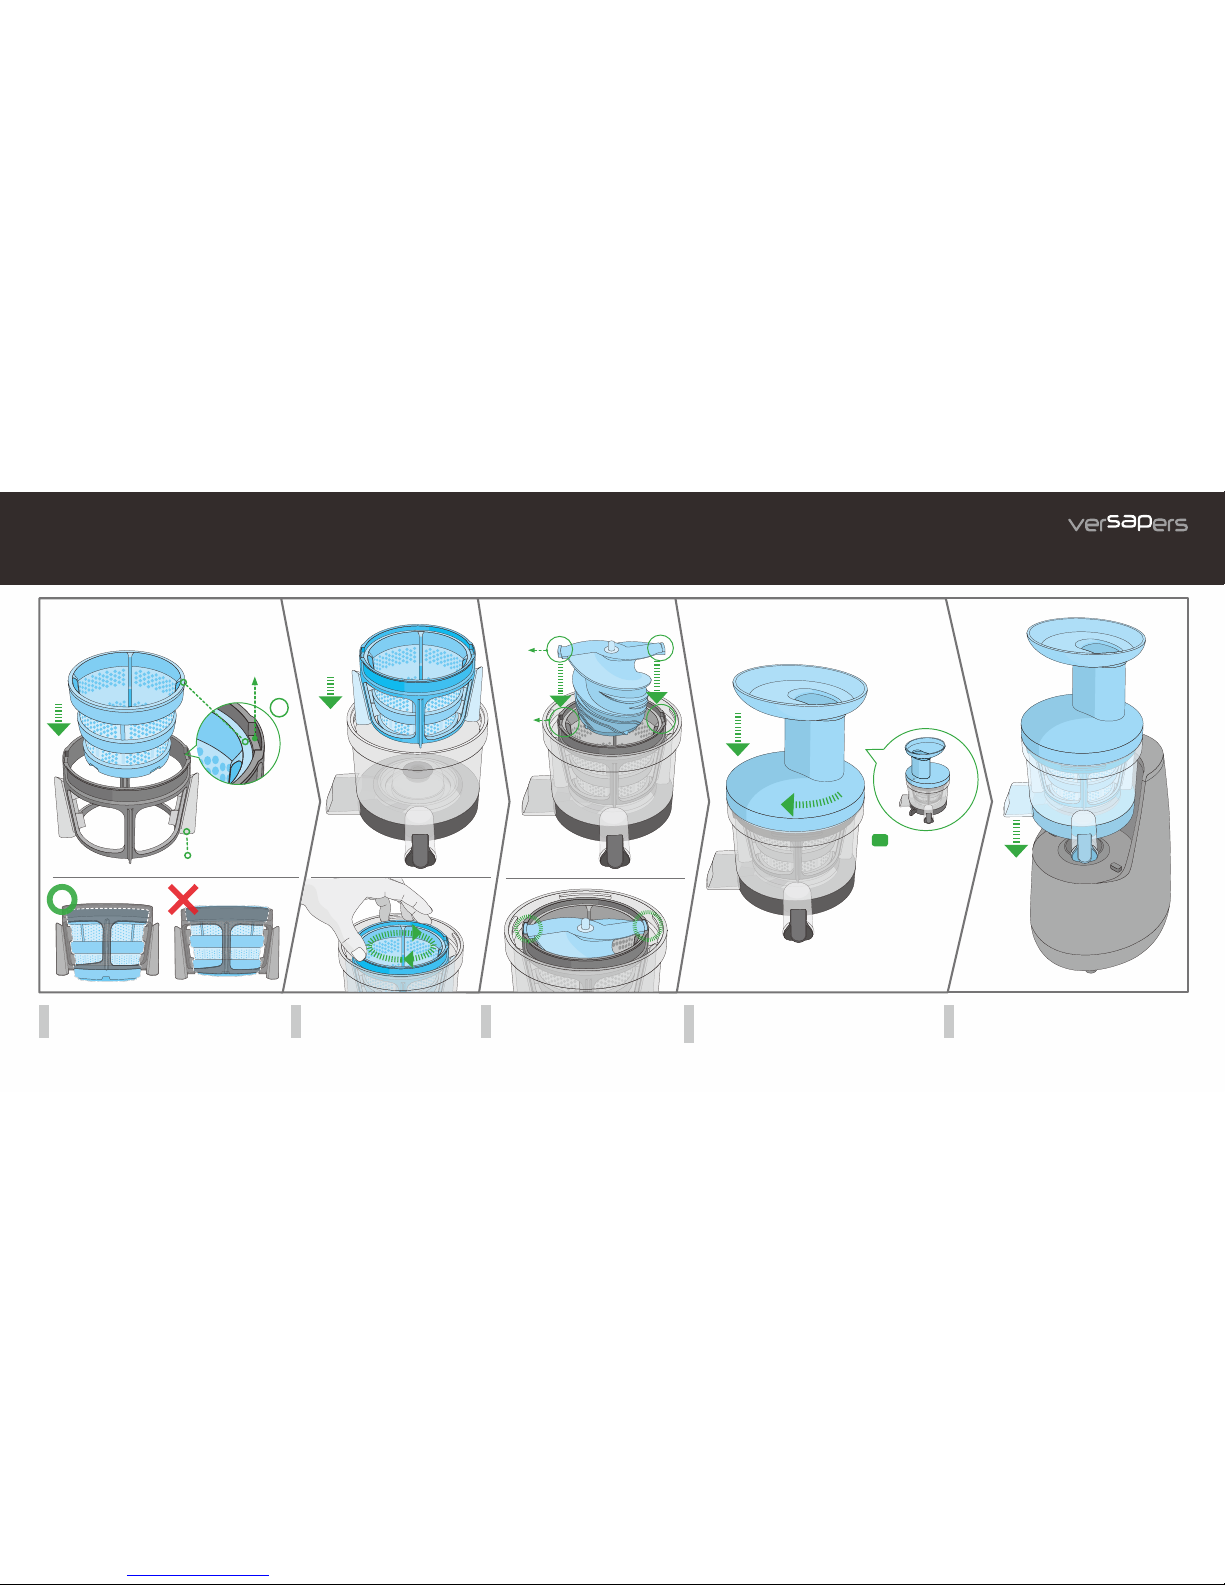
How to assemble
5
TIP
Assemble the strainer under the groove of spinning brush
just as in the picture.
After fitting the hopper on the chamber, turn it clockwise
until it is locked completely.
Mount the chamber set on the base.Assemble each part in its proper place by
turning it left and right in the chamber just
as in picture no.1.
Spinning
brush
grooves
Squeezing
screw
Spinning brush groove
Assemble the squeezing screw as in the
picture above.
Lock the squeezing screw by turning it and push it in
the spinning brush grooves.
If the chamber set is not correctly assembled, the chamber can not be closed.
* If the strainer is not placed
below the groove, the hopper
can not be locked.
Even if the hopper is
assembled in the
opposite direction,
the juicer can still be
operated.
The silicone packing can be
detached and cleaned.
04
1
3
2
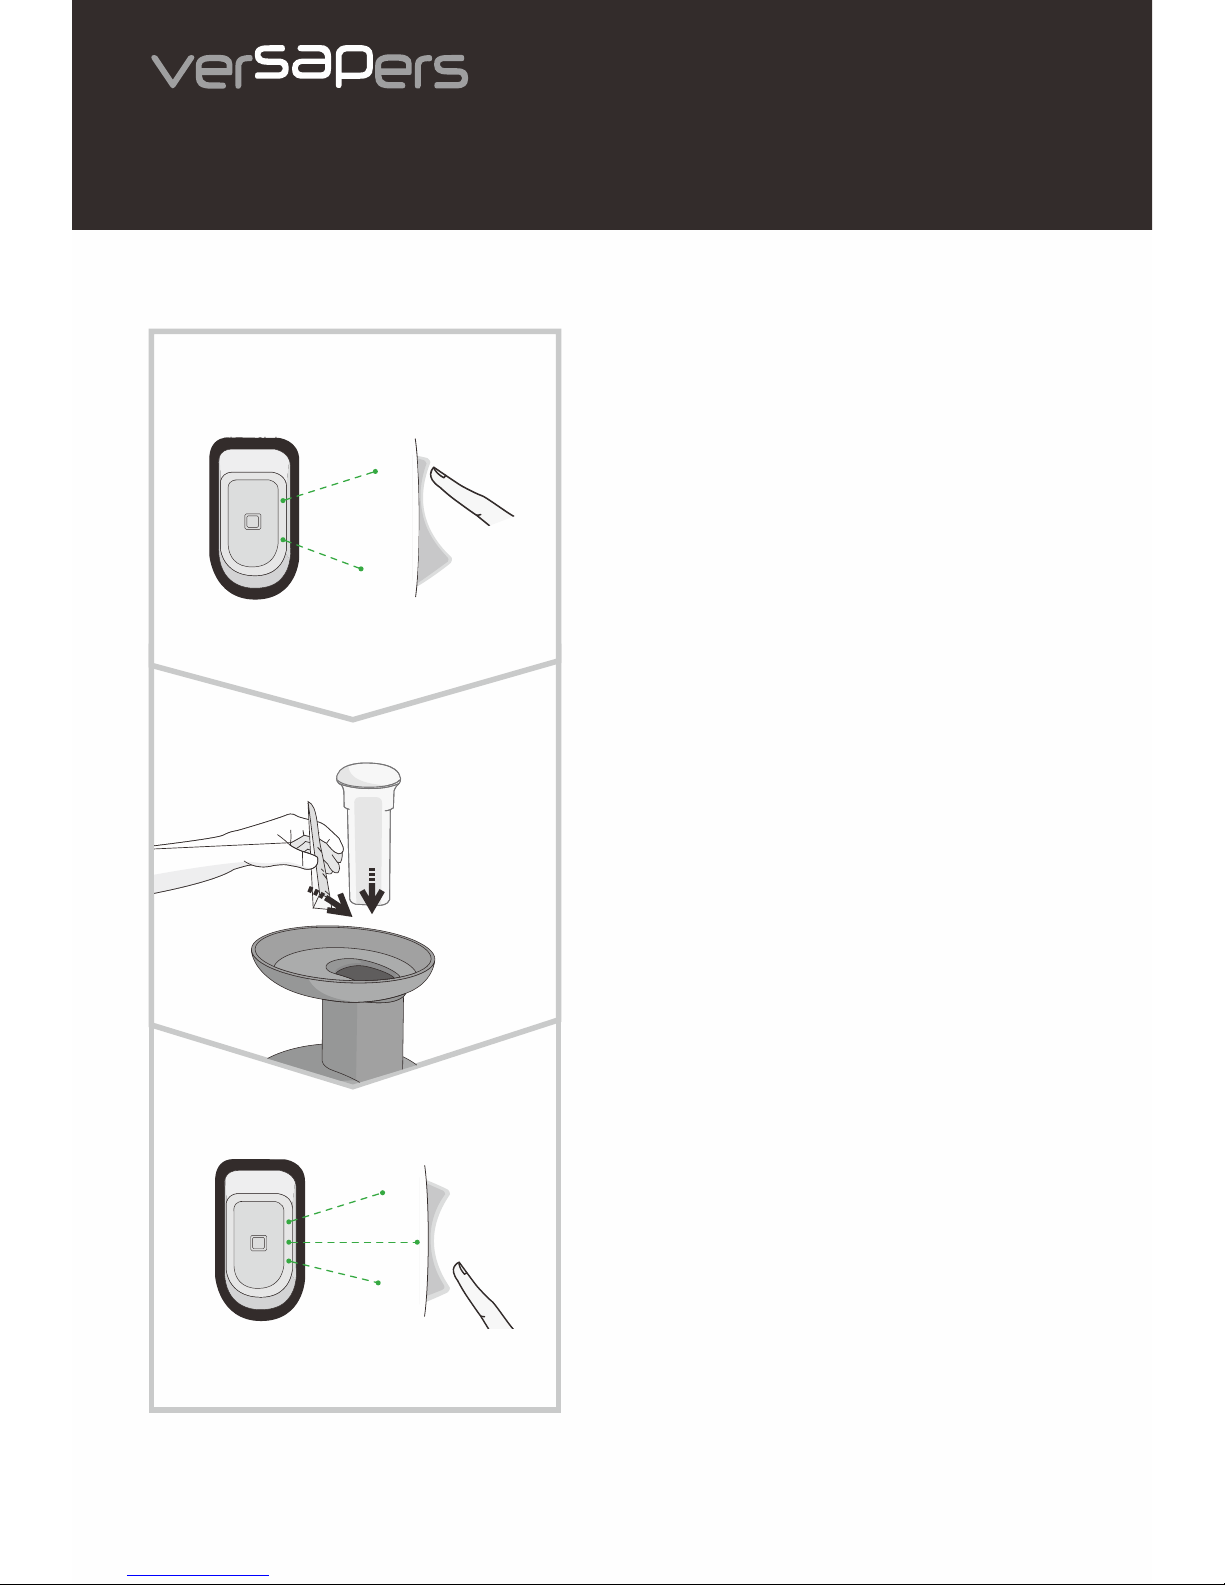
How to use
ON
REV
정지상태
Stop
[On]
On
[Rev]
Reverse
누름
작동스위치
ON
REV
[On]
On
[Rev]
Reverse
Press
Press the [ON] button to start.
Insert ingredients gradually in the hopper
chute and gently press with the pusher.
After extraction is completed, place the
switch in stop position to stop.
 Loading...