

Page 1
1
M3 Grinder User's Manual rev.7
Unpacking & Installation
Included with the grinder is a
power cord and a bag of hex.
Also a dowel pin for holding the
shaft when changing burrs.
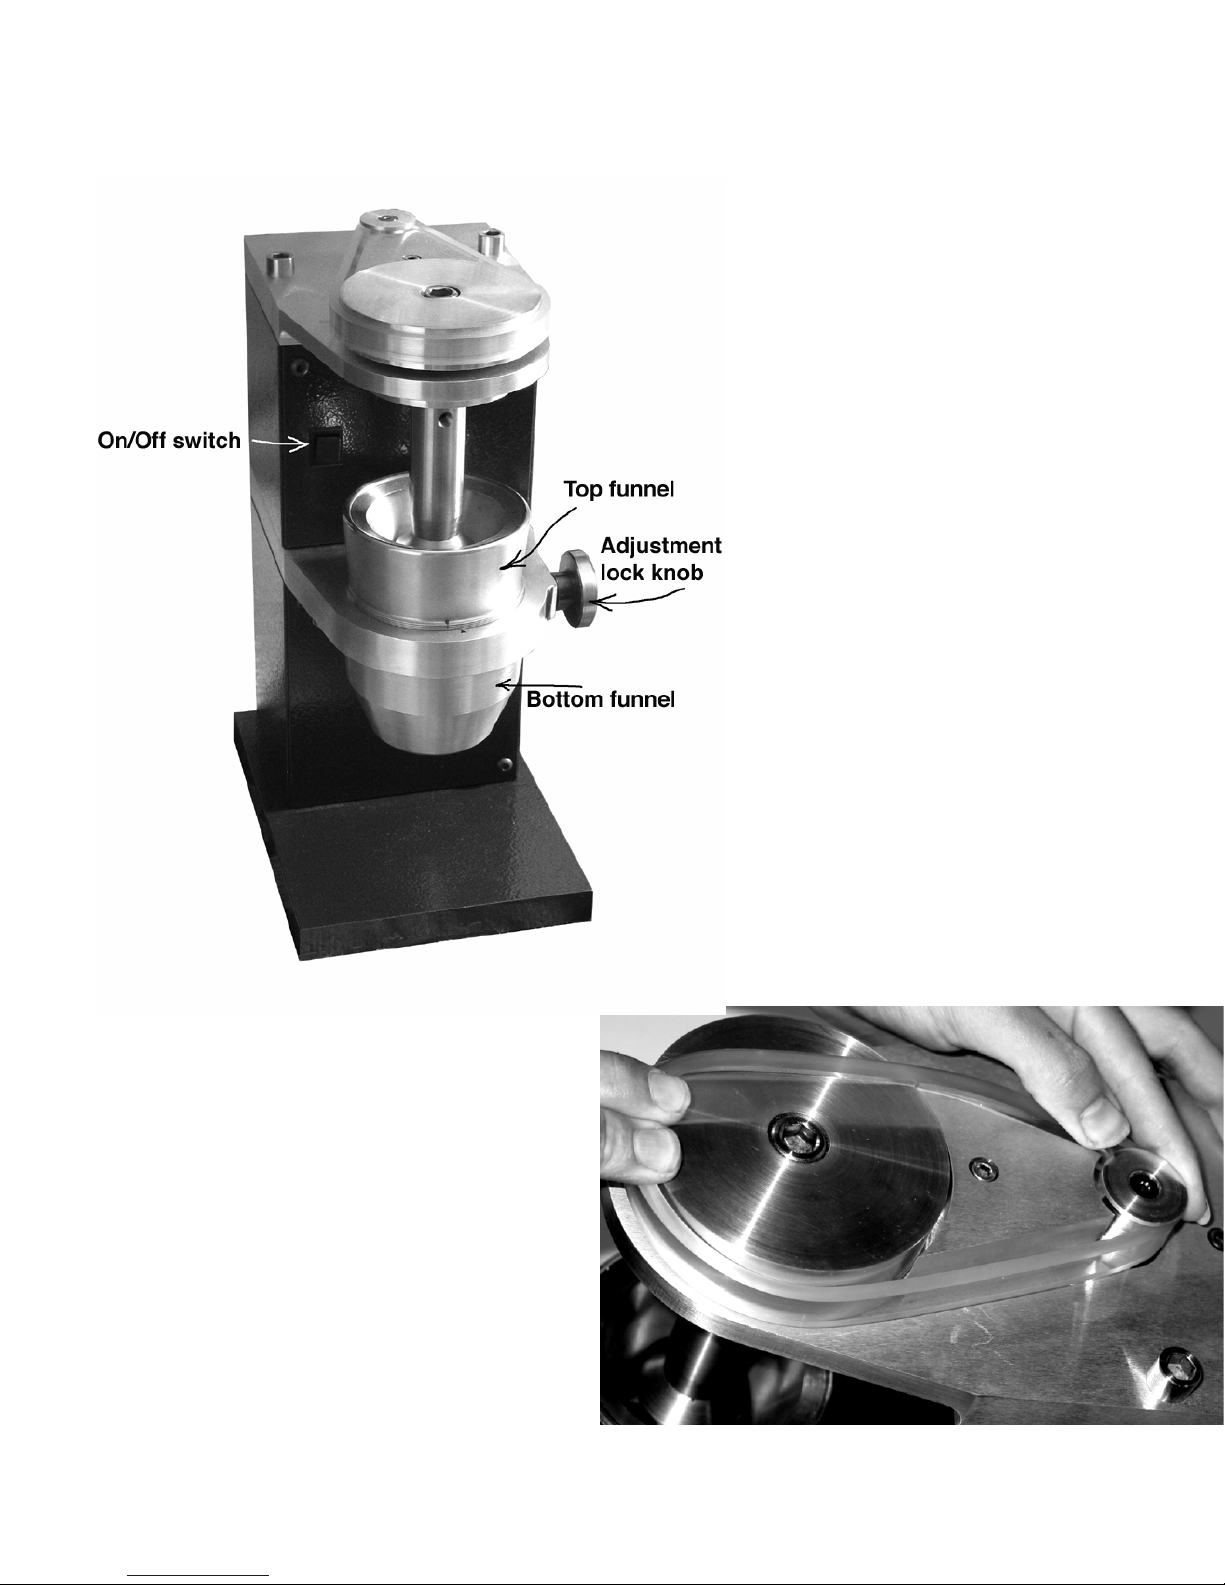
Drive belt. The Grinder ships with the
belt installed. If you should
need to reinstall it, place the
drive belt into the groove of
the small pulley on top of the
grinder and stretch it around
the large pulley. This will take
some effort as the belt has
plenty of tension. It will
simplify the process of getting
the belt around the large
pulley if you begin by getting
the belt around one side of the
large pulley and then start to
rotate the large pulley in a
manner so as to drag this
around the front. This will drag the belt around the pulley.
Page 2
2
Fuse. There is a fuse installed as shipped, and a spare included. Both are accessible
in a small plastic drawer in the connector where the power cord is inserted. Further
spares should be 5x20mm 2 amp slow-blow fuses. These are widely available at
local stores including Radio Shack. The only reason that a fuse may blow is if the
burrs are firmly touching, or a stone has got between the burrs. Stones are not
unusual in coffee beans.
Initial adjustment. The Grinder is shipped with the burrs adjusted so they are
touching. This does no harm to the burrs and ensures the center shaft is stabilized
in the event the Grinder receives a hard knock during shipping. Loosen the
adjustment lock knob by rotating it counterclockwise 1/4 turn or so. Now back the
Top Funnel counterclockwise a bit over 1/4 turn and
tighten the lock knob
. This
should be a starting point for a hand packed short pour.
The lock knob does need
to be
snugged down or it can loosen during grinding and cause the funnel to
rotate and lock down the burrs
.
Use. Turn on the grinder and then pour your measured amount of beans into the
top funnel.
Maintenance and Cleaning
General cleaning. Use a soft cloth or paper towel with alcohol or mild detergent
and water to clean the outside of the machine. The internal parts can stand
stronger solvents. Do not rub crossways on the bare grained aluminum parts! Do
not use abrasives anywhere!
The drive belt and the pulleys will get coated with dust and coffee grounds. They
will then occasionally slip instead of grinding. Remove the belt and clean it and the
pulleys with acetone - available from hardware stores.
Accessing the burrs.
The following might best be done with the power cord
removed and the grinder laying on its back.
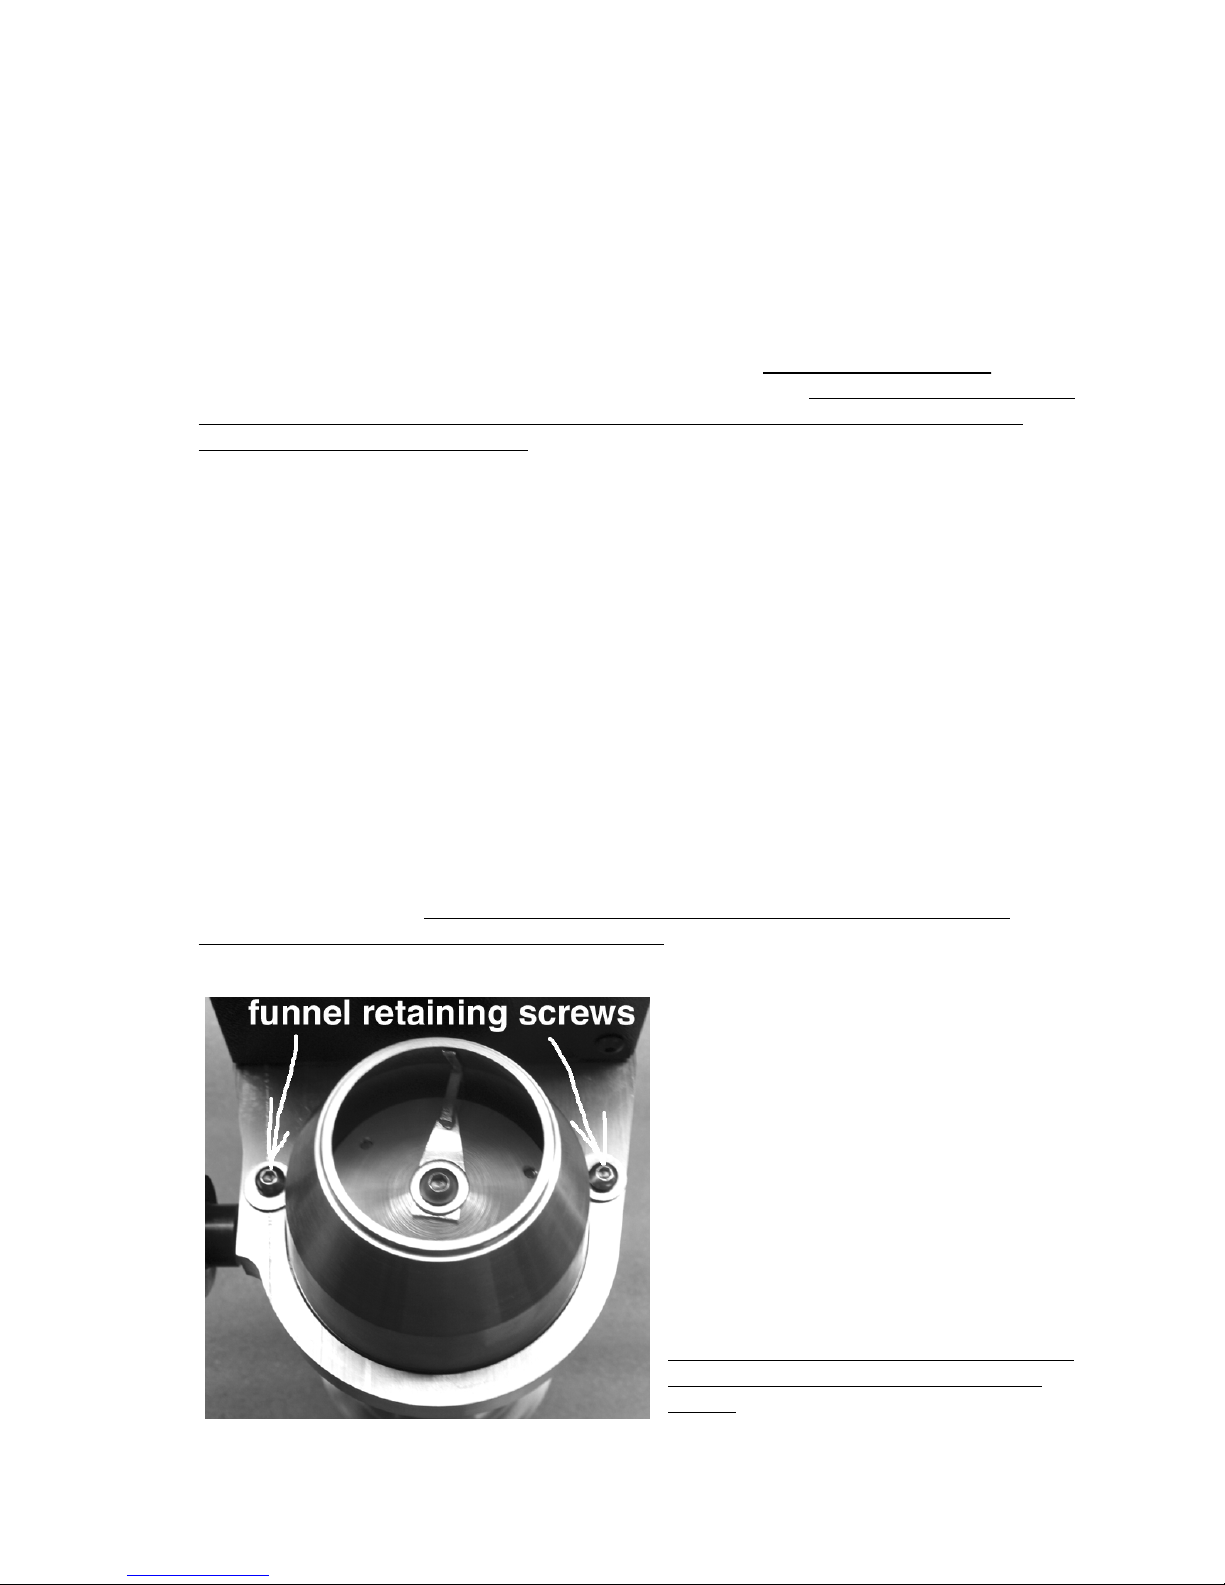
Two screws and washers hold the
bottom funnel in place. These are
underneath the plate that holds the
top and bottom funnels - just to the
side of the bottom funnel where it
enters the aluminum plate. Remove
the screws and washers.
These views are looking at the bottom
funnel area with the grinder upside
down.
Page 3
3
Be very careful!
When you lower the bottom funnel, lower it almost all the
way to the baseplate, before bringing it forward. If you do not, it is possible to
bend the "moving wiper" which sticks down as far as the bottom opening in the
bottom funnel. Because this rotates with the bottom burrs and may stop at any
position with them, it is not always be visibly obvious. This wiper is critical to the
proper action of the grinder. If it is bent there may be quantities of grounds left on
the side of the bottom funnel.
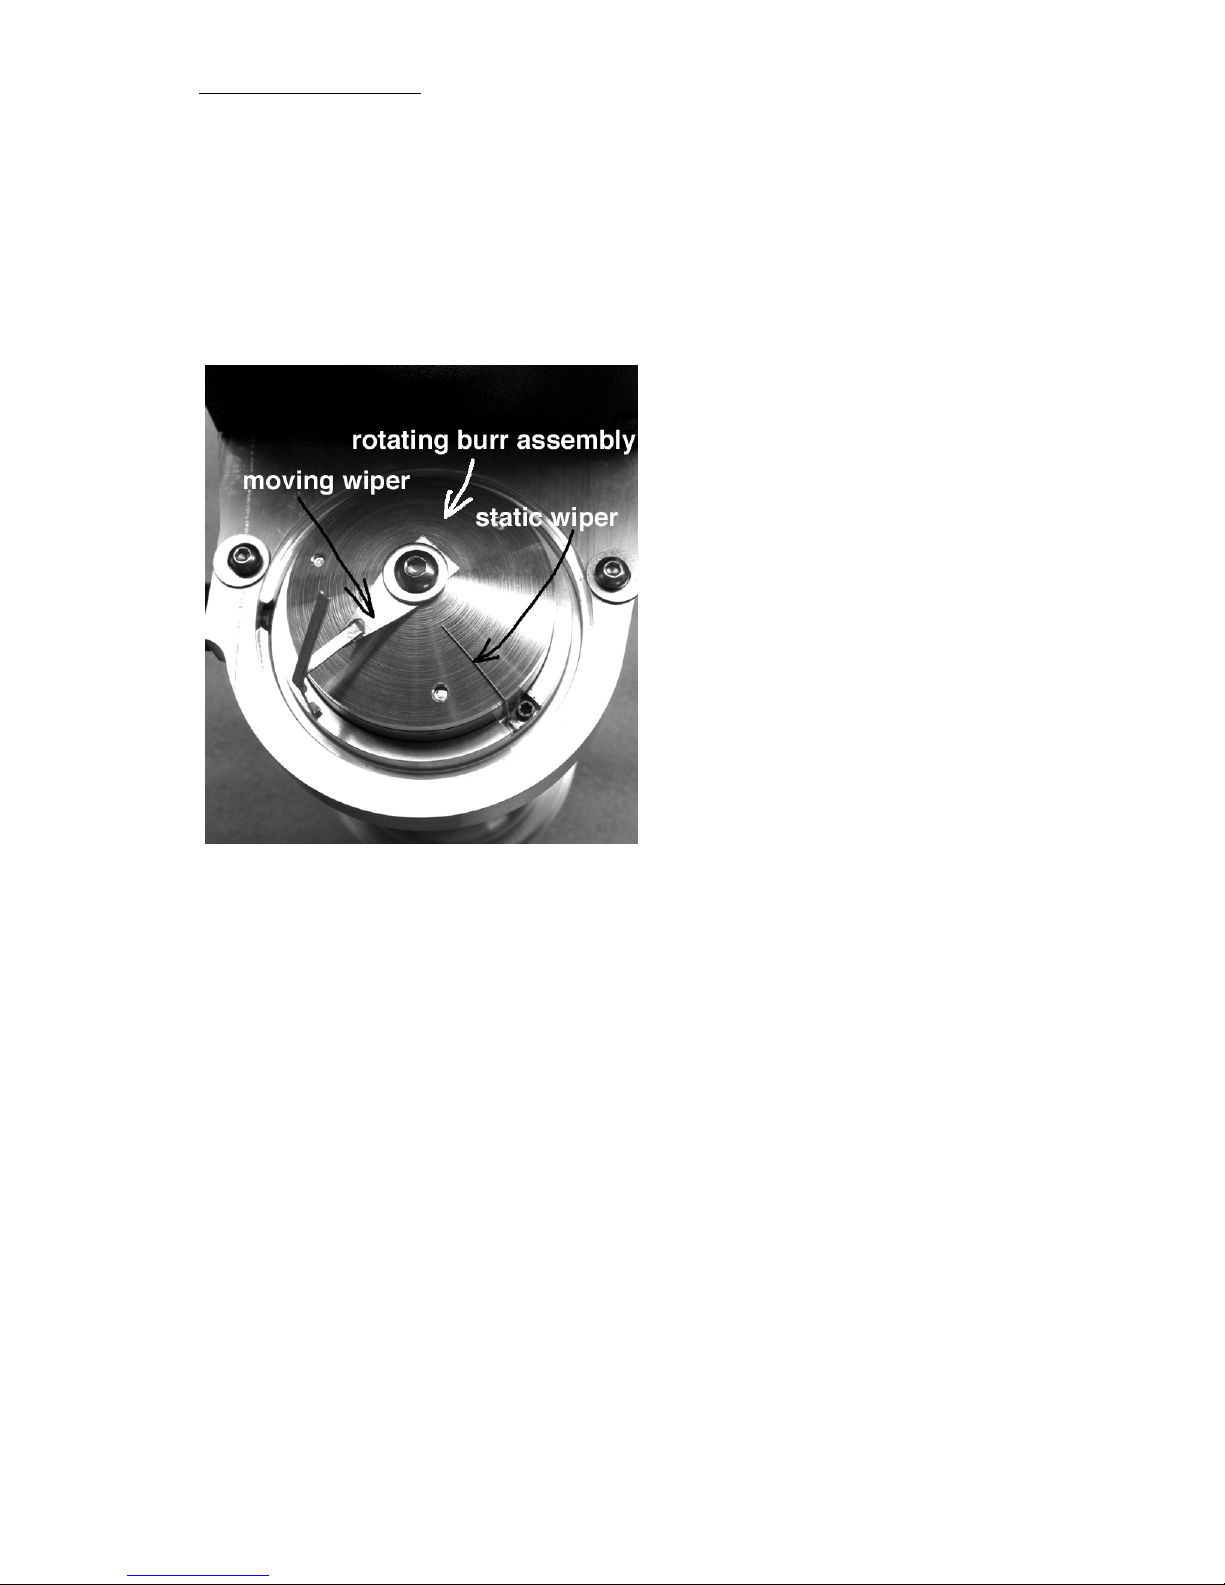
Remove the static wiper.
Included with the tools is a small tool
similar to a hex (or Allen) wrench that
fits into the retaining screw for the
"static wiper". This wrench is of the
"Torx" type, and instead of being a hex
shape, has splines or fins, that fit into
the screw head. The static wiper (which
is now shorter than the one pictured
here) is fastened to the bottom of the
top funnel right adjacent to the outside
of the flat burrs, and wipes grounds off
the moving parts inside the bottom
funnel. The whole area around the
retaining screw will be covered in dense
grounds that require brushing out of the
way in order to remove and reinstall this
wiper.
Remove the moving wiper.
In the center of the rotating burr assembly is a stainless steel button head screw.
This retains the moving wiper to the rotating burr assembly and also holds the
rotating burr assembly to its shaft. There is a hole in the shaft near the top plate of
the grinder. The pin that came with the grinder tools fits this hole and is used to
prevent the shaft from turning while removing the screw. Remove the screw. If
the grinder is sitting vertical rather than on its back, be certain that the rotating
burr assembly does not fall.
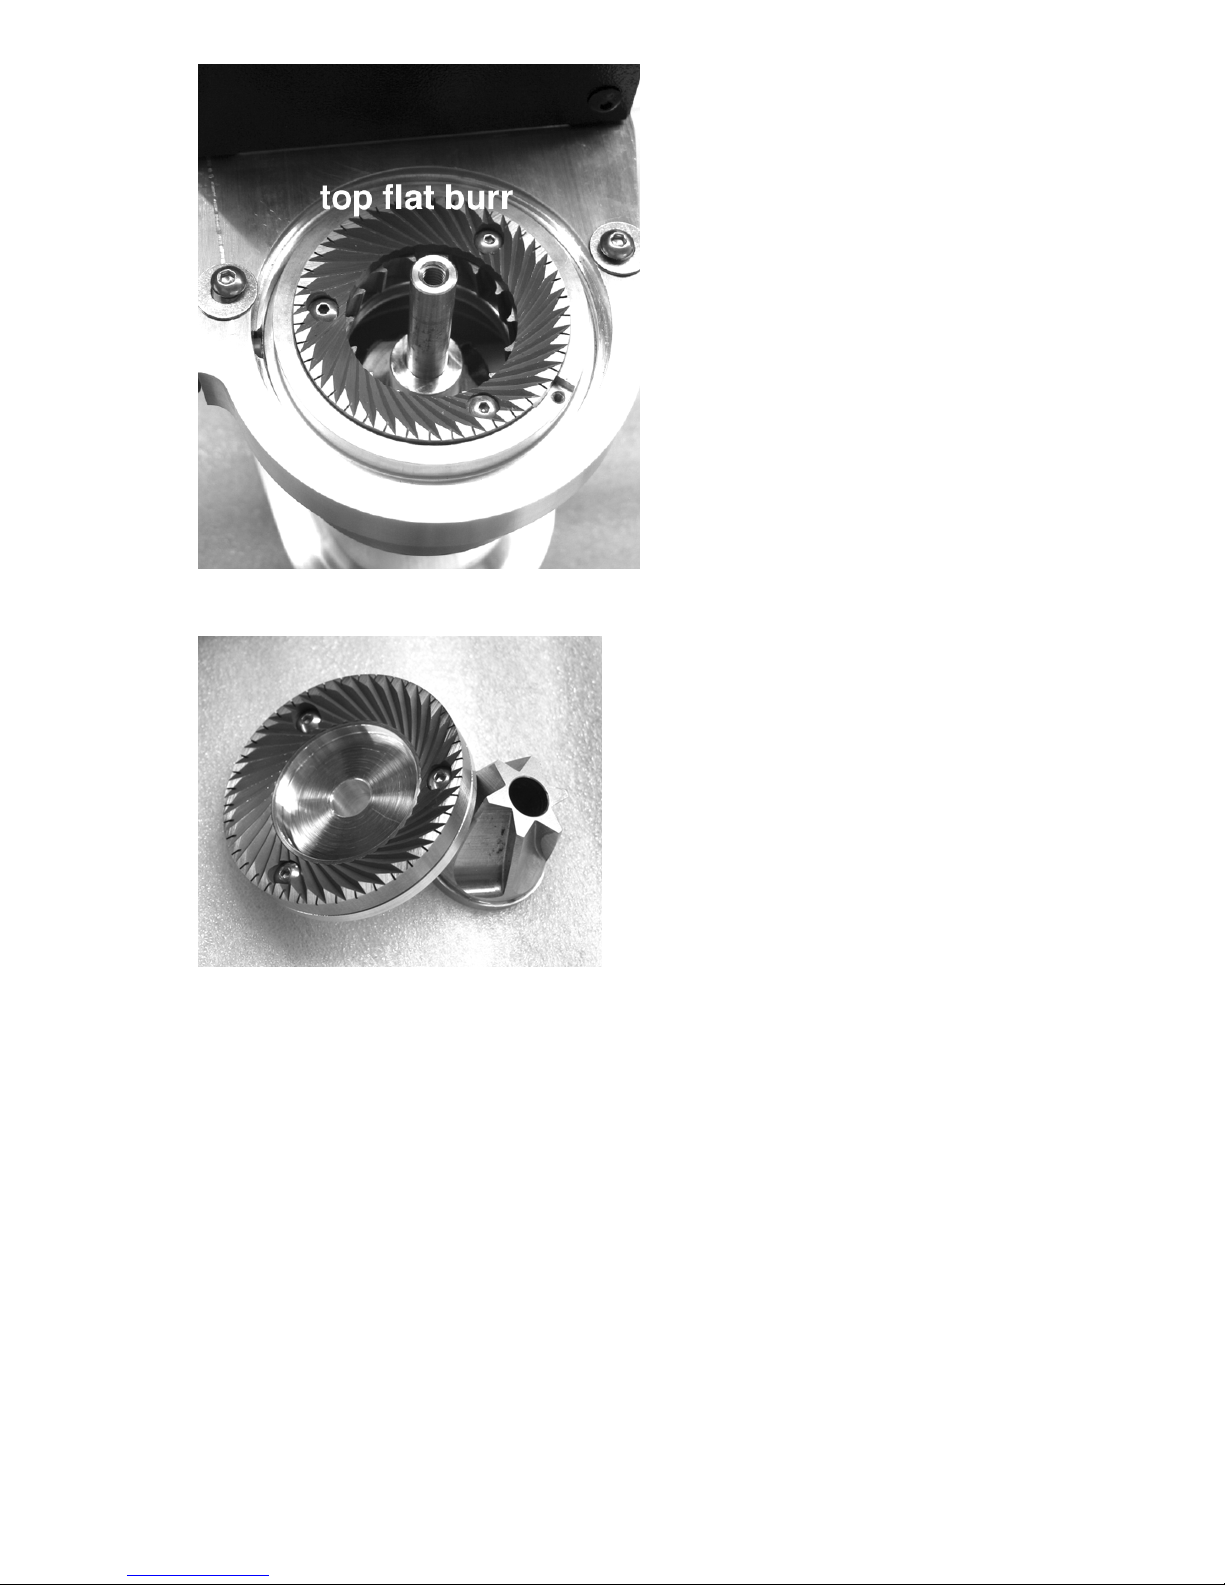
Remove the burr assembly from its shaft. You now have access to the two flat burrs
and the lower, or inner, conical burr. To get to the top conical burr, remove the
three hex button head screws that retain both the top flat burr and the top, or
outer, conical burr.
Page 4
4
Reassembly
is simply going through this
procedure in reverse, with some
cautions.
In order to work properly, the burrs
need to be carefully aligned - so certain surfaces must be VERY clean.
For the top burrs, the surfaces are
obvious, the mounting face in the top
funnel, and all mating surfaces of the
top conical and top flat burrs. For the
bottom burrs there are four surfaces to
clean. The controlling surface on the
shaft is the round face (visible in the
photograph at left) that abuts the top of
the bottom conical burr. Then the top
and bottom of the conical burr, and the
flat area in the middle of the aluminum
holder for the bottom flat burr (we call
this the 'burr driver"), which abuts the
bottom face of the bottom conical burr.
In all cases of precision reassembly, the
technician should rotate mating parts
against each other and by doing this make
certain by sound and feel that contaminants
haven't fallen into mating surfaces.
Install the screw in the center of the
rotating burr assembly (and moving wiper).
Tighten the screw while holding the shaft
still by use of the pin.
Install the static wiper. The latest wiper is
slightly different in design than shown here,
but functions the same. When tightening its screw you should make certain that
the wiper is just clear of the moving burr and burr driver. If it rubs it will eventually
break. To function correctly it must be about two credit card thicknesses clear of
the moving parts. Make certain that the moving wiper does not hit it.
When you reinstall the bottom funnel, you should likewise rotate it against the
mating surface at the top of the funnel. Then gently tighten the two funnel
retaining screws, keeping the retaining washers in the funnel slot.
The moving wiper should run just clear of the inside of the bottom funnel. The
clearance should be about the thickness of two business cards. This is a precision
part and was checked on assembly. If the wiper has much too great clearance or
rubs against the bottom funnel, it has been bent out of shape. With some
patience, and good lighting, you should be able to return it to its original form.
Happy Grinding!
Questions?
Versalab Inc. tel. 970.622.02
40
email [email protected]
 Loading...