

Versaclean 200, 200H, 500, 500H, 1200MS User Manual
User Manual
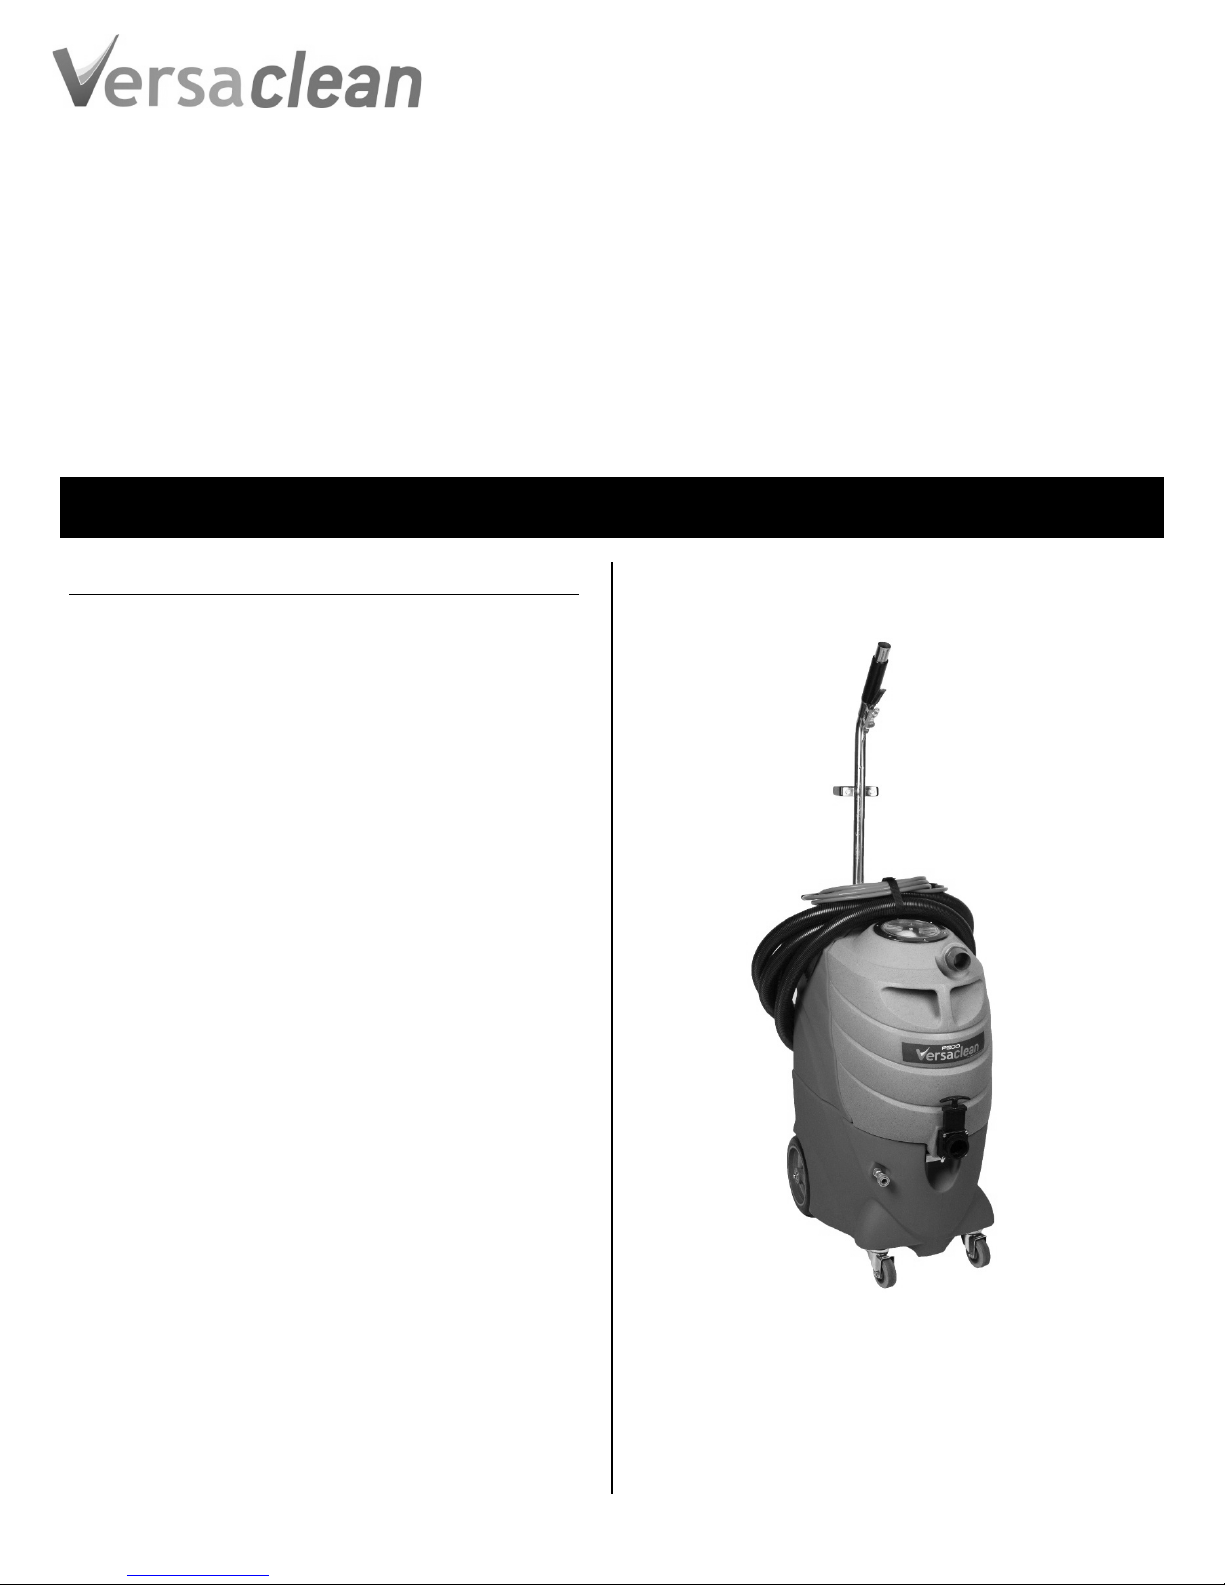
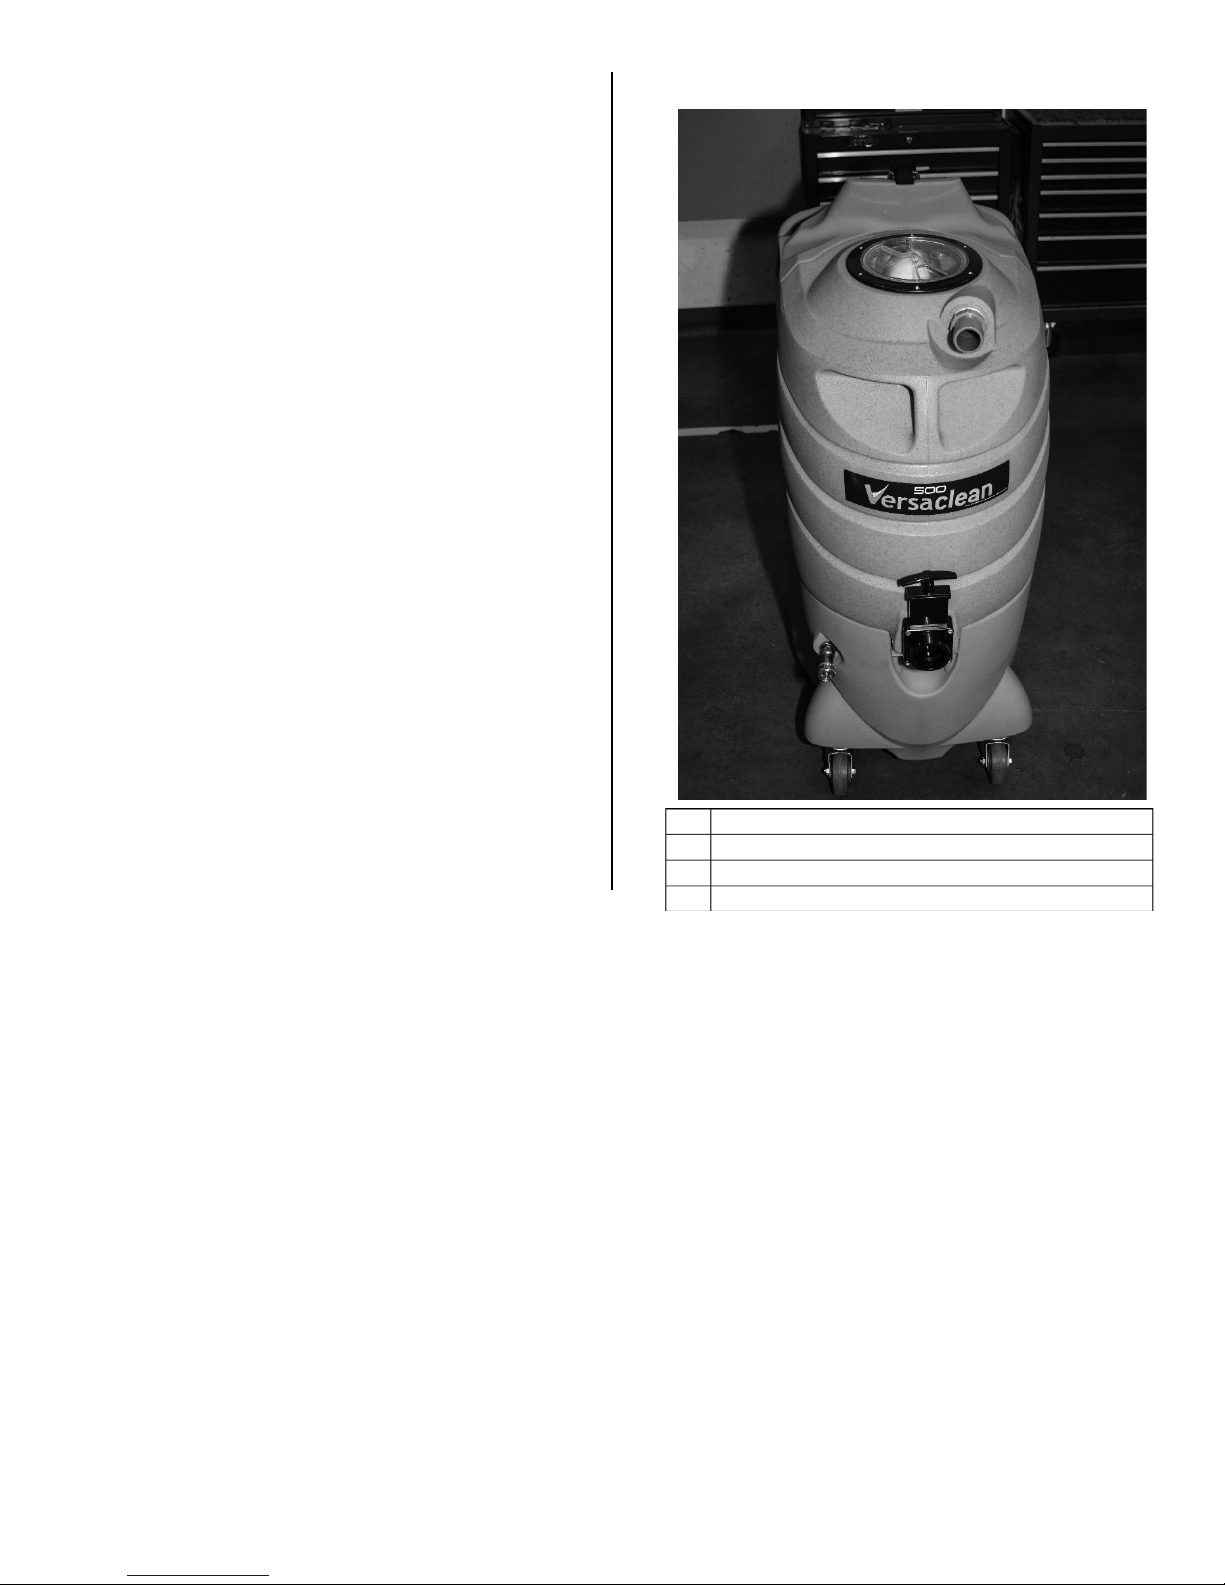
VersaClean Portable Extractor
Portable Extractors
Models 200, 200H, 500, 500H, and 1200MS
VersaClean
15180 Josh Wilson Road
Burlington, WA 98233
800-932-3030 www.VersaCleanSystems.com
VersaClean Portable Extractors provide deep, rapid cleaning of carpets, upholstery and hard
surfaces. Heated models provide additional cleaning power. Lightweight, easy to use, and
adjustable for a wide range of carpet types and soiling conditions, the VersaClean Extractors
produce cleaner, drier carpets and surfaces.
Patents: http://www.LBpatents.com
READ AND SAVE THESE INSTRUCTIONS
Important Safety Instructions: Read All
Do not leave appliance when plugged in. Unplug
cord from outlet when not in use or servicing
machine.
Shown with optional wand and hoses
Do not use outdoors. This machine is for indoor use
only.
Do not allow to be used as a toy. Close attention is
necessary when used near children.
Use only as described in this manual. Use only
manufacturer’s recommended accessory tools.
Operators shall be adequately instructed on the use
of this machine.
This machine is not intended for use by persons,
including children, with reduced physical, sensory
or mental capabilities, or lack of experience and
knowledge.
Do not use with damaged cord or plug. If appl iance
is not working as it should, has been dropped,
damaged, left outdoors, or dropped in water , return
it to a service center for repair.
Do not pull or carry by cord, use cord as a handle,
close a door on cord, or pull cord around sharp
edges or corners. Do not run appliance over cord.
Keep cord away from heated surfaces.
Do not pull cord to unplug. To unplug, grasp the
plug, not the cord.
Do not handle plug or appliance with wet hands.
Do not put any object into openings. Do not use with
any opening blocked; keep free of dust, l int, hair and
anything that may reduce airflow.
Do not use without ball float screen in place.
Turn off all controls before unplugging.
07-02052E 1 VersaClean
Do not use to pick up flammable or combustible
liquids, such as gasoline, or use in areas where they
may be present.
Do not pick up any type of hazardous dust or toxic
materials.

Do not pick up anything that is burning or smoking,
such as cigarettes, matches, or hot ashes.
Do not point spray at yourself or in the direction of
others
Do not use this machine for dry vacuuming.
Do not operate machine in standing water.
Immediately unplug power cord from outlet if
machine leaks solution/foam or if machine tips over
while operating.
Release water pressure at accessory tool spray
nozzle before disconnecting solution hose.
Always stop machine on a level surface.
Use extra care when cleaning on stairs. Do not
wheel machine up or down stairs.
Connect to a properly grounded outlet only.
Extension cord must be 12/3 gauge and no longer
than 40 feet. Replace cord if ground plug becomes
damaged.
Do not use additional extension cords with machine.
Do not use machine if not in proper operating
condition.
Do not modify machine from its original design.
Get assistance when lifting machine.
All repairs must be performed by a qualified service
person. Use only manufacturer-supplied or
equivalent replacement parts.
Cautions: Risk of property damage
The warranty is valid from the date of purchase for one
year. This will cover parts and labor at an authorized
VersaClean or Sapphire Scientific distributor. The
warranty is only valid to the orginal purchaser and proof
of purchase is required. Modifying this unit or not
maintaining the machine as outlined in this manual will
void the warranty. See the full Limited Warranty
document for details.
GROUNDING INSTRUCTIONS
This appliance must be grounded. If it should
malfunction or break down, grounding provides a path of
least resistance for electric current to reduce the risk of
electric shock. This appliance is equipped with cords
having equipment-grounding conductors and grounding
plugs. The plugs must be inserted into an appropriate
outlet that is properly installed and grounded in
accordance with all local codes and ordinances.
WARNING! Improper connection of the equipme n tgrounding conductor can result i n a risk of electric
shock. Check with a qualified electrician or service
person if you are in doubt as to whether the outlets
are properly grounded. Do not modify the plu gs
provided with the appliance – if the plugs do not fit
the outlets, have proper outlets installed by a
qualified electrician.
This equipment is for use on a circuit or circuits having a
nominal rating no more than 120V and is factoryequipped with a specific electric cord and plug to permit
connection to a proper electric circuit. Make sure that the
appliance is connected to outlets having the same
configuration as the plugs. No adaptor should be used
with this appliance. If the appliance must be reconnected
for use on a different type of electric circuit, the
reconnection should be made by qualified service
personnel.
CAUTION: Protect from freezing. Freezing may
damage internal components and will void warranty.
CAUTION: Do not use with water with over 3 grains
per gallon (51 miligrams per liter) of hardness. Use
with hard water could result in the formation of
mineral deposits inside pumps and fitting s. Damage
caused by mineral deposits will void warranty.
CAUTION: Use only to extract moisture. Do not
immerse end of vacuum hose in liquid.
CAUTION: Do not use as a dry vacuum. Dust
particles will damage the vacuum motors. Damage
caused by dry vacuuming will void the warranty.
CAUTION: To prevent the growth of mold and
mildew inside the tanks, always drain waste tank
completely and empty solution tank after use.
WARRANTY
Visit www.VersaCleanSystems.com to register your
purchase. Registration allows us to better assist you with
using, maintaining or servicing your equipment, as well
as to contact you in case we have important safety
information concerning your product.
CONTROLS
ON THE CONTROL PANEL (Fig. 3)
Includes rocker-type switches control blower, solution
pump, heat (on select models) and pumpout (on select
models).
ON THE BACK PANEL (Fig. 2H)
Pressure regulator. Select models. Turn clockwise to
increase solution pressure; turn counterclockwise to
decrease solution pressure.
200, 200H, 500 and 500H
OPERATING INSTRUCTIONS
For 1200MS operating instructions, see p. 4.
07-02052E 2 VersaClean
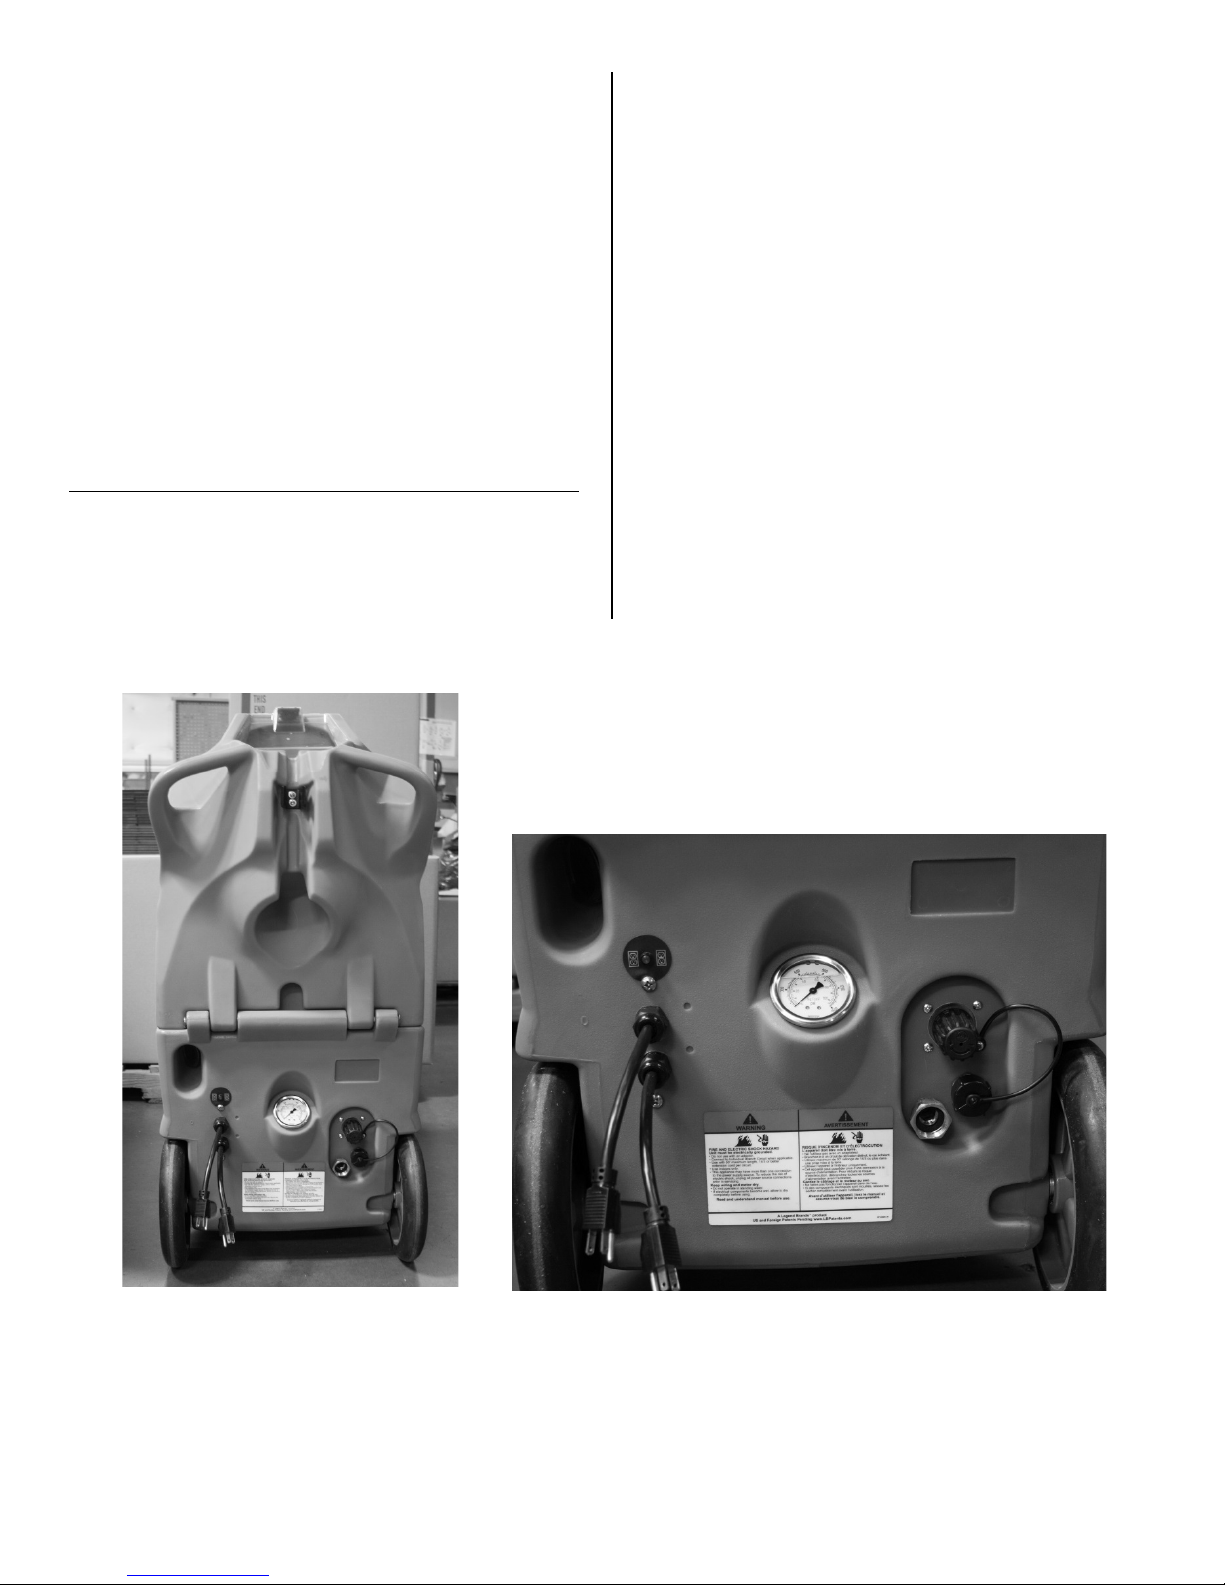
A
D
B
C
FIG. 1: Front View
A
Recovery tank cover
B
Vacuum hose attachment
C
Recovery tank gravity drain and gate-type valve
D
Solution hose quick-connect
IMPORTANT: Make sure to control the amount of foam
in the recovery tank. Excessive foam can allow moisture,
carpet fiber and other debris to be drawn through the
vacuum cutoff valve and cause damage to the vacuum
motors. Damage caused by moisture or debris will void
the product warranty. To help reduce foaming, use a
low-foam detergent. Foaming may also occur because of
residues left from previous cleanings . If this happens,
use a defoamer additive. Follow defoamer manufacturer
instructions for proper application.
1. Pre-mix cleaning solution with hot water in a
separate container. Pour mixed solution into the
solution tank of the machine.
2. Connect vacuum and solution hoses to machine and
attach to extraction wand or hand tool.
3. Plug power cord into a 3-pin grounded circuit. Keep
cords clear of your cleaning path. IMPORTANT:
Heated units have two cords and each cord should
be plugged into separate 3-pin grounded circuits.
The separate circuit indicator light will glow green
(Fig. 2F) when the cords are properly connected.
4. Switch on vacuum.
5. Switch on solution pump.
6. Switch on heat for heated solution (heated units
only).
7. Begin cleaning. Refer to industry-approved
procedures. NOTE: For heated units, it may require
several minutes for the solution to reach the
maximum temperature.
8. If equipped, solution pressure may be adjusted with
the pressure regulator knob (Fig. 2H). Monitor the
pressure gauge to ensure pressure is adequate.
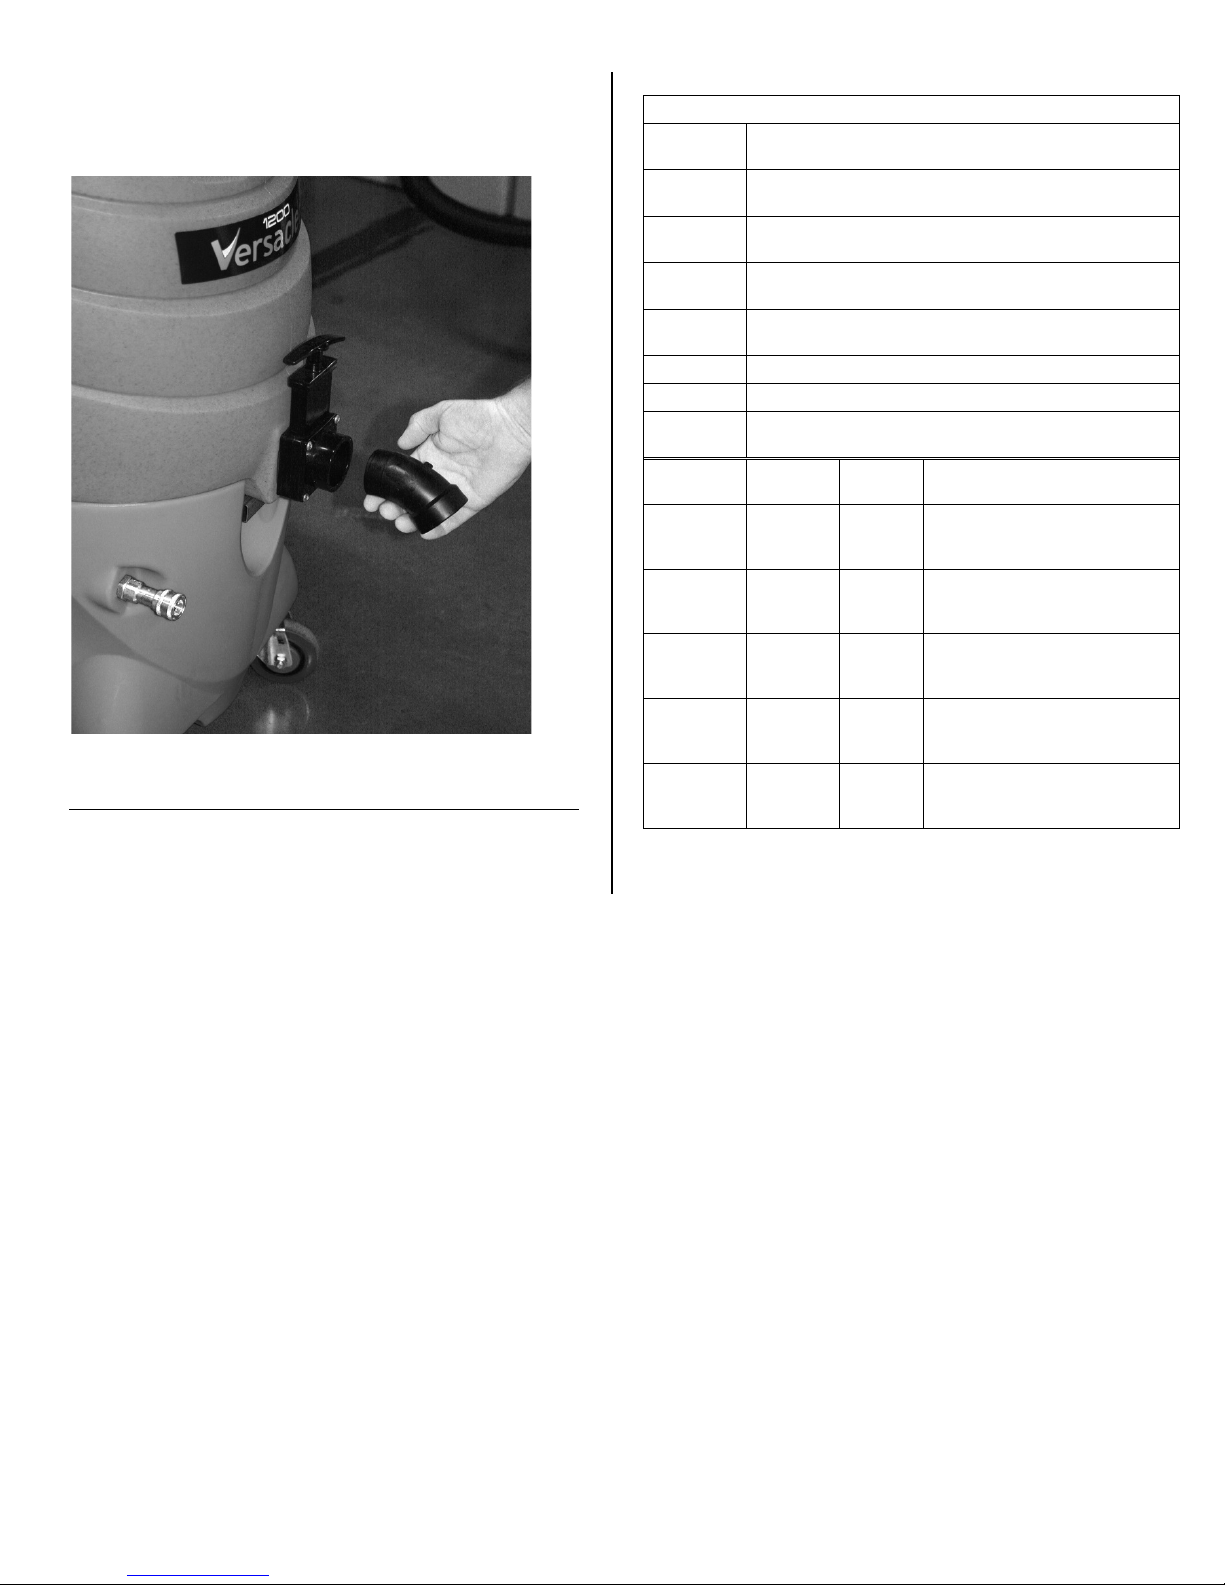
9. Use gravity drain to drain waste tank when full.
Attach diverter to direct flow downward (F ig. 7 ).
07-02052E 3 VersaClean
A
D
B
G
C
F
H
E
FIG. 2: Rear View
(Fig 2 detail)
A
I
J
A
Solution tank with clear hinged cover
F
Dual-circuit indicator light (select models)
B
Wand retention clip
G
Pressure gauge (select models)
C
Vacuum exhaust. Keep clear.
H
Pressure regulator (select models)
Auto-pumpout coupling (select models). Keep capped when not
in use.
E
Dual cords (select models)
J
Auto-Fill coupling (select models)
CAUTION: When the recovery tank reaches capacity,
an automatic float valve blocks vacuum intake (Fig.
5) and the vacuum motors will make a high pitched
noise. When this occurs, switch the machine off
immediately to prevent damage to the vacuum
motors.
10. When cleaning is completed, rinse solution tank with
clear water to ensure no detergents or rinse age nts
remain in the tank.
11. Empty and rinse the waste tank thoroughly. This will
help to prevent the formation of damaging deposits
and reduce the growth of odor-causing bacteria.
12. Turn on vacuum motor and allow it to run for 15
minutes to help remove any moisture from the
vacuum motors and help ensure long vacuum life.
1200MS OPERATING INSTRUCTIONS
IMPORTANT: Make sure to control foaming in the
vacuum system. Excessive foam can allow moisture,
carpet fiber and other debr i s to be drawn throu gh the
vacuum cutoff valve and cause damage to the vacuum
motors. Damage caused by moisture or debris will void
the product warranty. To help reduce foaming, use a
low-foam detergent. Foaming may also occur because of
residues left from previous cleanings . If this happens,
use a defoamer additive. Follow defoamer manufacturer
instructions for proper application.
1. Pre-mix cleaning solution with hot water in a
separate container. Pour mixed solution into the
solution tank of the machine or apply solution
directly to the cleaning surface as directed by
chemical manufacturer.
2. Connect vacuum and solution hoses to machine and
attach to extraction wand or hand tool.
3. Drain waste tank when full using gravity drain and
diverter (Fig. 7), or use the automatic pumpout
feature described below.
4. For auto-fill operation, attach fresh water supply to
freshwater inlet (Fig. 2J) and turn on water supply at
faucet. Tank will begin filling and automatically shut
off when full.
5. If auto-pumpout operation is desired, attach a
regular garden hose to auto-pumpout coupling (Fig.
D Product label and serial number I
07-02052E 4 VersaClean
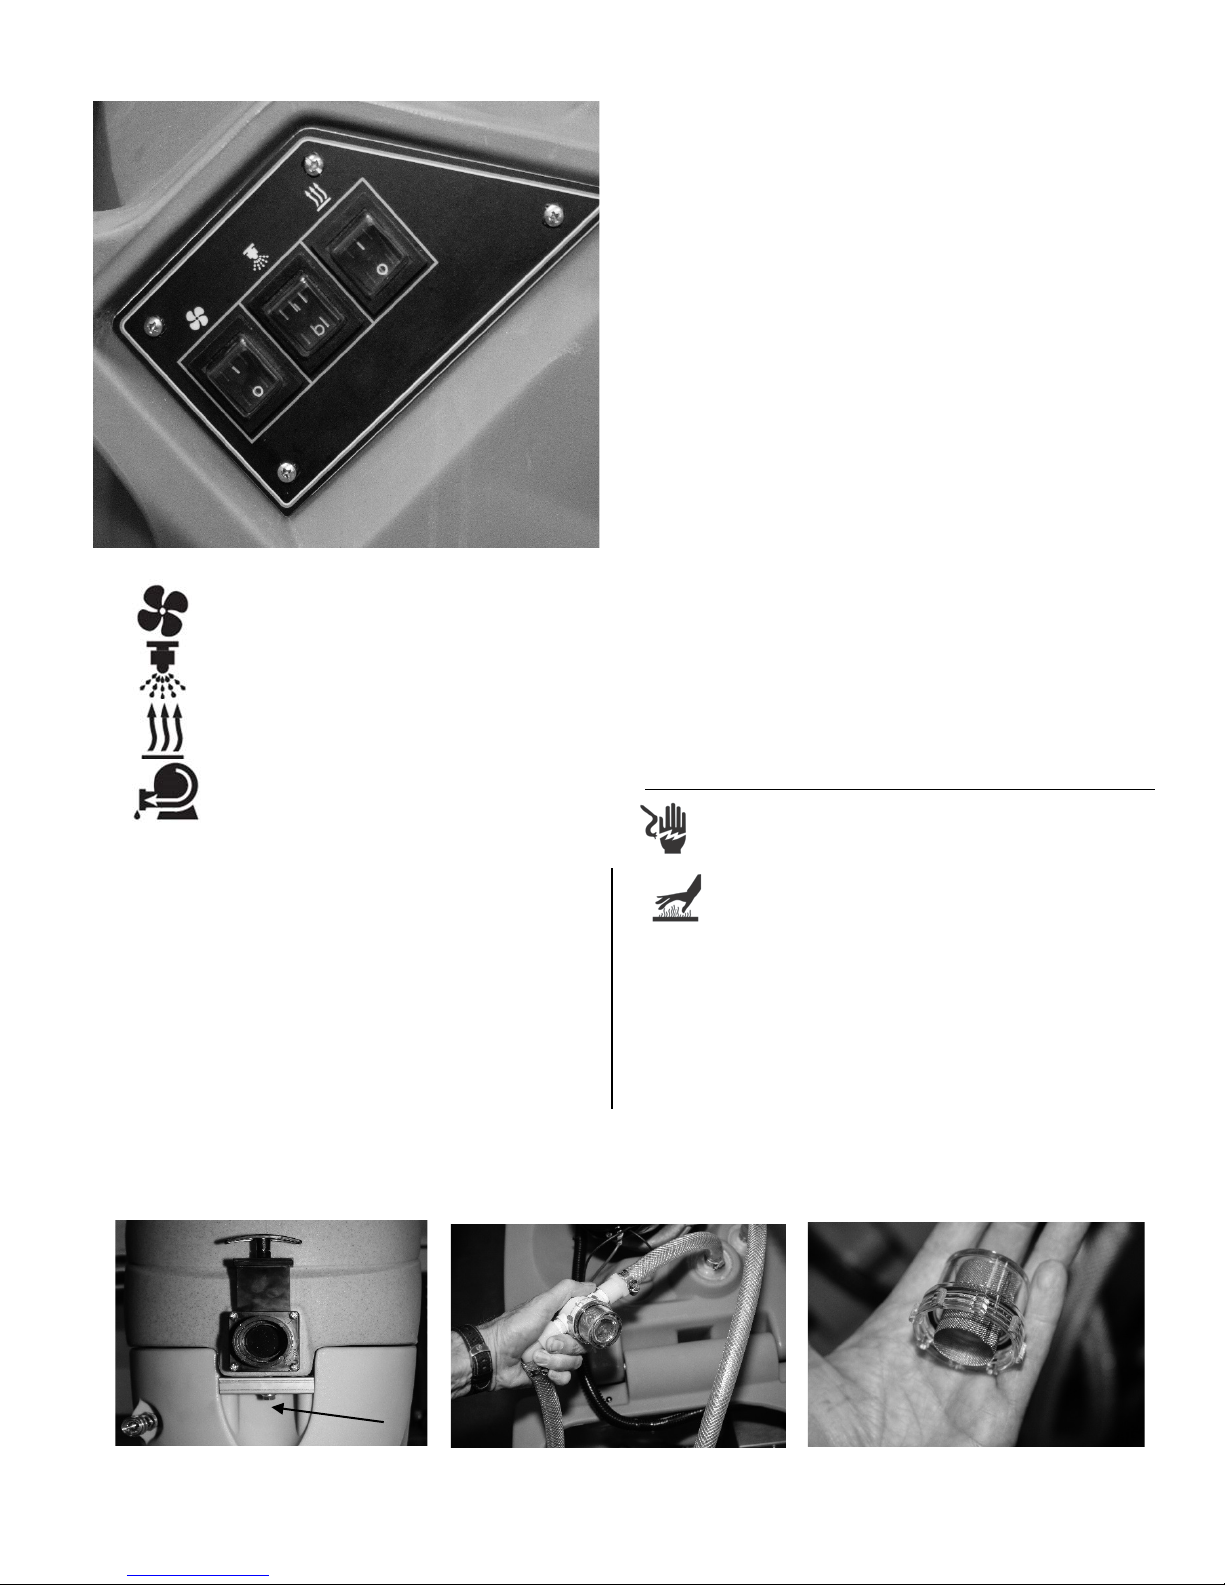
A
D
B
G
C
F
FIG. 3: Control Panel
E
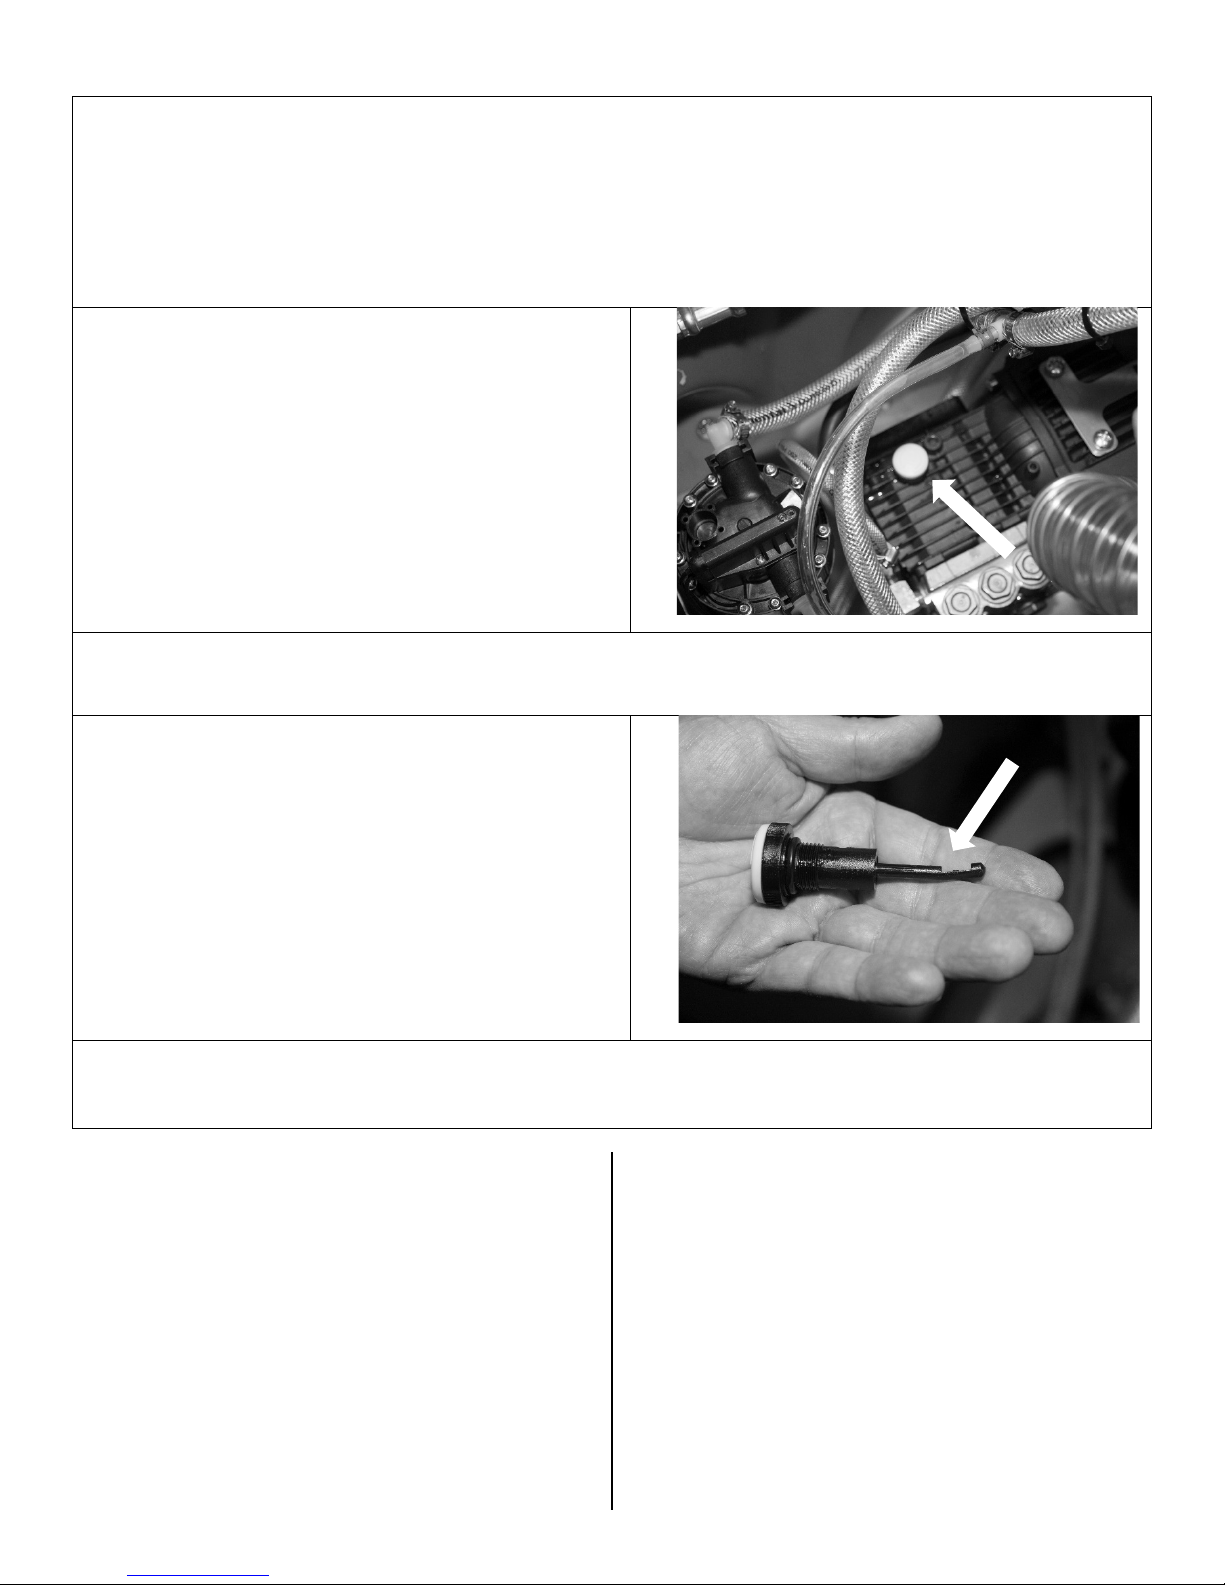
FIG. 4: Solution inlet filter cleaning
Remove
Unscrew
Rinse cap
9. If using the auto-pumpout feature, press the autopumpout switch (Fig. 3) to the On position.
10. Begin cleaning. Refer to industry-approved
procedures.
11. Solut ion pr es sur e m a y be adjusted w ith the pres s ure
regulator knob (Fig. 2H). Monitor the pressure gauge
to ensure pressure is adequate.
12. If not using the auto-pumpout feature, use the
gravity drain with divert er in place to empty waste
when tank is full (Fig. 7).
CAUTION: When the recovery tank reaches capacity,
an automatic float valve blocks vacuum intake (Fig.
5) and the vacuum motors will make a high pitched
noise. When this occurs, the machine should be
turned off immediately to prevent damage to th e
vacuum motor.
13. When cleaning is completed, rinse solution tank with
clear water to ensure no detergents or rinse agents
remain in the tank.
14. Empty and rinse the waste tank thoroughly. This will
help to prevent the formation of damaging deposits
Power ON/OFF
Solution pressure pump ON/OFF
Solution heater ON/OFF (select models)
and reduce the growth of odor-causing bacteria. Use
gravity drain to drain waste tank when full. Attach
diverter to direct flow downward (Fig. 7).
15. Turn on vacuum motor and allow it to run for 15
minutes to help remove any moisture from the
vacuum motors and help ensure long vacuum life.
Auto pumpout ON/OFF (select models)
2H), and place other end in suitable drain or large
container.
6. Insert both plugs into separate 3-pin grou nde d
circuits. Keep cords clear of your cleaning path. The
1200MS unit has two cords and each cord shou ld be
plugged into separate 3-pin grounded circuits. The
separate circuit indicator light will glow green (Fig.
2F) when the cords are properly connected.
7. Turn on VAC.
8. Turn on solution pump.
9/16 in.
nut with
wrench
and lift
open top.
MAINTENANCE (ALL UNITS)
WARNING: Unplug machine before servicing.
Possibility of electrical shock.
WARNING: Interior components may be hot
after operation. Let unit cool completely
before servicing.
DAILY OR AFTER EACH USE
Clean the solution inlet filter (Fig. 4) Loosen tank
attachment screw (Fig. 1) and open unit. Remove filter
cover and strainer screen (Fig. 4). Rinse strainer screen
clean in warm water. Replace strainer and retighten filter
cover.
inline filter
cap assembly
and remove.
and filter
assembly
clean and
reinstall.
07-02052E 5 VersaClean

FIG. 5: Vacuum cutoff valve removal and cleaning
FIG. 6: Recovery tank strainer
Slide filter upward to remove. Rinse
filter clean with water and reinstall.
Clean vacuum ball float valve (Fig. 5). Empty recovery
tank, then open recovery tank lid. Grasp valve assembly
and pull gently toward the front of the unit, taking care
not to distort the strainer screen. Rinse assembly clean
and make sure float ball moves freely inside assembly.
Clean recovery tank strainer (Fig. 6, pumpout models
only). Remove strainer by gently rotating it and lifting
upward. Rinse filter clean with water and reinstall.
Reinstall strainer and vacuum ball float valve assembly
securely.
AS NEEDED
Lubricate pressure regulator O-ring (if equipped).
Access O-ring by unscrewing and removing pressure
regulator knob (Fig. 2H). Lubric ate wit h a suitable O-ring
lubricant.
Lubricate the solution line quick-connect coupling
(Fig. 1D) with a small amount of rust-inhibiting oil such
as LPS-3 or WD-40.
To maintain appearance, wipe interior and exterior
surfaces with a damp cloth. For deep cleaning and a
lasting, protective shine, use an aut omotive vinyl
cleaner/protectant produc t.
MAINTENANCE (1200MS ONLY)
IMPORTANT! Pump crankcase oil must be changed
after an initial 50-hour break-in period. Thereafter, oil
must be changed every 3 months or at 500 hour
intervals thereafter. Replace only with General Pump Oil
according to the pump model numbers listed below. SAE
30W. Order part no. 13-030/24-00490.
To change the oil, see "Changing the 1200MS Pressure
Pump Oil" below.
(pumpout models only)
07-02052E 6 VersaClean
Remove oil fill cap on pressure pump
Insert suction tube of transfer pump into oil fill hole. Pump out oil to a suitable waste / recycling receptacle.
After placing approximately 8 oz. of oil into the pump, check
t.
CHANGING THE 1200MS PRESSURE PUMP O IL
Tools required:
Manual transfer pump
Clean cloths
Suitable oil waste/recycling container
Verify both tanks are empty. Use a cloth to wipe out any residual moisture. Place clean cardboard or a pad behind unit
to protect handle. Remove retaining nut, hinge open unit and rest on pad.
Insert suction tube of transfer pump into bottle of fresh oil and pump approximatel 8 oz. of oil into pressure pump.
the oil level with the dipstick. Level should be within the
notched area on the dipstick. If necessary, add oil and
recheck with the dipstick until oil is at the correct level.
When filling is complete, reinstall install oil cap, close unit and reinstall retaining nu
The 1200MS is now ready for use.
07-02052E 7 VersaClean
Dispose of used oil appropriately.
ALL MODELS
Vacuum
motor
Solution / recovery tank 12 gal. | 37.9 l
Recovery tank: 10 gal. | 37.9 l
Rotomolded polyethylene housing and handle; 10 in. semipneumatic wheels.
Closed water
lift
One 25 ft. cord (non-heated units)
Two 1 ft. cords (select units) and two 14/3 25 ft. ext. cords
Drain valve
Gate type
Float shut-off
Ball type
Dimensions
(H × L × W)
Model
Features
Dry
weight
Amp draw
200
F439
200 PSI
73 lbs.
Circuit 1 13.5A
200H
F440
200 PSI
heater
80 lbs.
Circuit 1 14.2A
500
F441
500 PSI
94 lbs.
Circuit 1 13.5A
500H
F442
500 PSI
heater
102 lbs.
Circuit 1 14.2A
1200MS
F443
1000 PSI
111 lbs.
Circuit 1 12.5A
FIG. 7: Gravity drain diverter
SPECIFICATIONS
Capacity
Construction
Power cord
78-001
78-002
78-003
6.6 Ametek producing 659 peak air watts
137 in. | 348 cm
41.5 × 30.25 × 19.75 in. | 105.4 × 76.8 × 50.2 cm
33 kg
1750W
36 kg
42 kg
Circuit 2 12.5A
OPTIONS (PURCHASED SEPARATELY)
Wand and Vacuum Hose Kit (48-103): Wand, 25 ft. ¼ in.
solution hose and 25 ft. 1½ in. vacuum hose. HOSS-700
Rotary Cleaning Tool (67-025). Upholstery Pro (67-019)
78-004
78-005
1750W
43 kg
50 kg
Circuit 2 12.5A
Circuit 2 13.0A
07-02052E 8 VersaClean
 Loading...