

Page 1
1
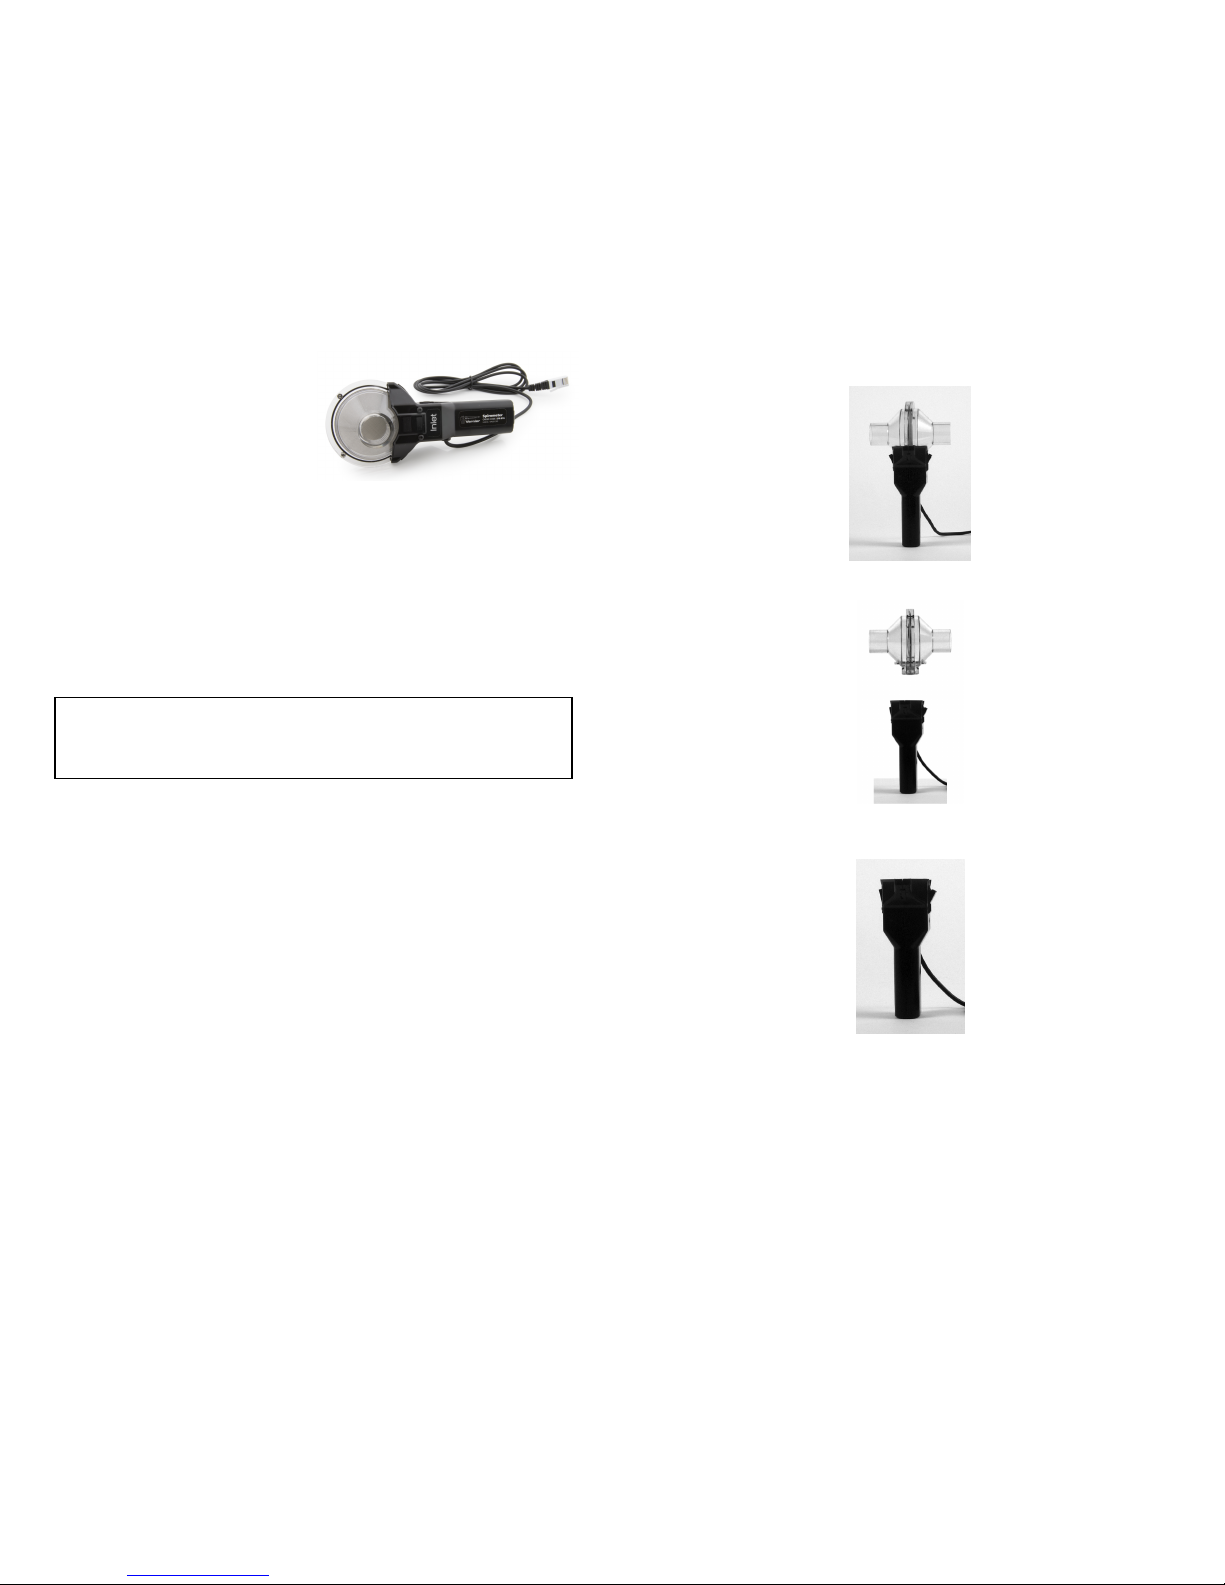
Detaching the Flow Head from the Handle
Push on the latches at the top of the handle until they splay outward.
Pull up on the Flow Head and remove it from the handle.
Attaching the Flow Head to the Handle
Push in the two latches at the top of the handle so that they splay outward.
Spirometer
(Order Code SPR-BTA)
The Spirometer can be used to perform a
variety of experiments related to air flow
and lung volume. The sensor handle can
be held manually, or it can be attached
to a tripod or stand using the threaded insert in the bottom of the handle. The
sensor is composed of a removable Flow Head for easy cleaning and
sterilization and a differential pressure transducer. The Spirometer can be used to
perform a variety of tests, including:
l FEV (forced expiratory volume). FEV is the volume of air exhaled after a
short period of constant effort. When this test is done over a one-second
interval, it is known as FEV1.
l FVC (forced vital capacity). FVC is the volume of air exhaled by a forced
maximal exhalation after a full inhalation.
l TV (tidal volume). TV is the volume of air inhaled and exhaled at rest.
Note: Vernier products are designed for educational use. Our products are not
designed nor are they recommended for any industrial, medical, or commercial
process such as life support, patient diagnosis, control of a manufacturing
process, or industrial testing of any kind.
What's Included
Check to be sure that each of these items is included with your Spirometer:
l Spirometer (includes sensor handle and Flow Head)
l 5 disposable mouthpieces
l 1 disposable bacterial filter
l 2 nose clips
Compatible Software
See www.vernier.com/manuals/sp r-bt a for a list of software compatible with the
Spirometer.
Assembly
The Spirometer comes with a detachable Flow Head that can be removed for
sterilization or replacement.
Page 2
2
Taking Measurements with the Spirometer
l Ensure that the person being tested is breathing only through his/her mouth.
The person can use a nose clip or hold his/her nose.
l Connect a disposable bacterial filter and a disposable mouthpiece to the
clear plastic Flow Head on the side labeled "Inlet".
l Hold the Spirometer vertically and still during use.
l For best results, zero the spirometer before use and start data collection
during exhalation.
Suggested Experiments
Here are a few examples of experiments that can be conducted with the
Spirometer.
Breathing Patterns
A student’s normal, resting breathing pattern is measured by a Spirometer. A
graph of the data shows the student breathing in (inspiration) and breathing out
(expiration). The graph shows typical results of the flow rate during a normal
breath and a deep breath.
Tidal Volume
A student’s normal, resting breathing pattern is measured. A graph of the data
shows the volume of air the student breaths in (inspiration) and breaths out
(expiration). The overall process is referred to as ventilation. Tidal volume is the
amount of air that a person breathes in with a normal breath.
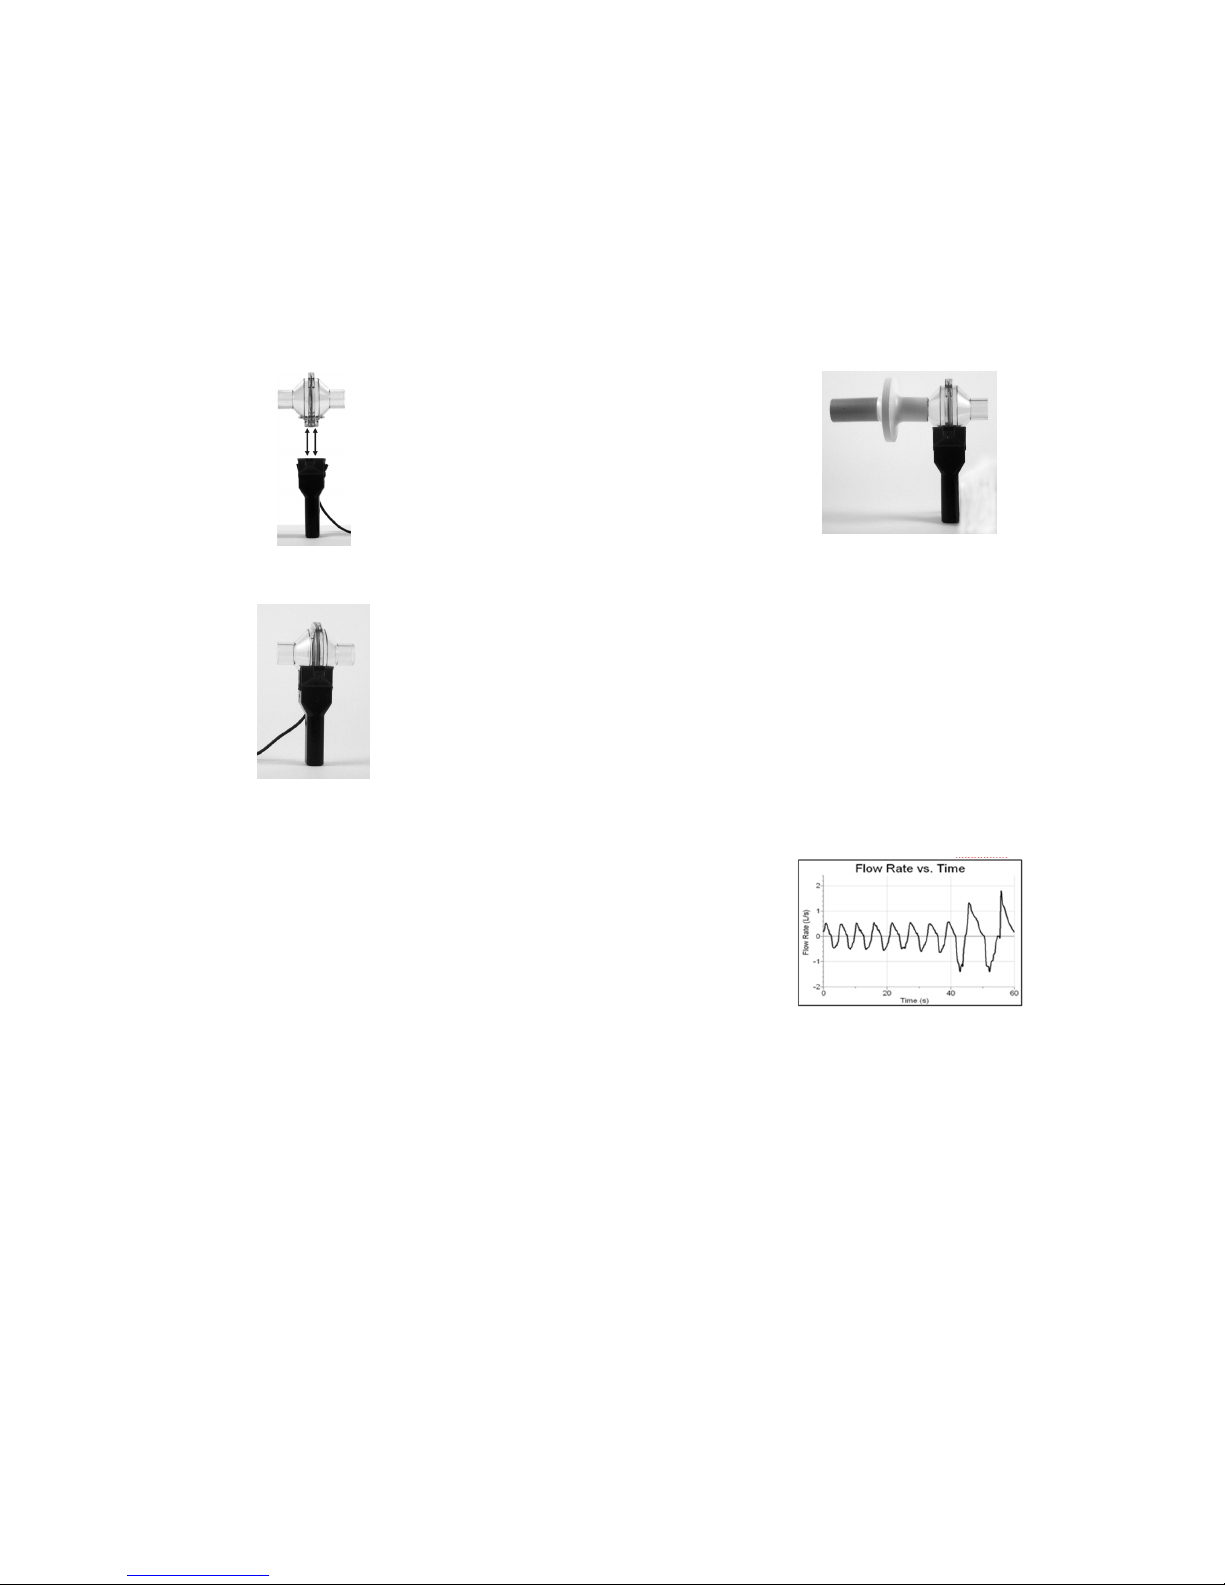
Line up the two small holes on the base of the Flow Head with the two ports
inside the top of the handle.
Press down firmly on the Flow Head until it securely attaches to the handle.
Push the latches in to lock the Flow Head in place.
Getting Started
1. Connect the sensor to the interface (LabQuest Mini, LabQuest 2, etc.).
2. Start the appropriate data-collection software (Logger Pro, Logger Lite,
LabQuest App) if not already running, and choose New from File menu.
See the following link for additional connection information:
www.vernier.com/start/sp r-bta
Using the Spirometer
The Spirometer can be used for inspiratory and expiratory experiments. Use the
following mouthpieces, filters, and Flow Heads for the type of experiment you
are doing.
Inspiratory/Expiratory
Use a disposable cardboard mouthpiece and a disposable bacterial filter with the
Spirometer for experiments in which the students inhale and exhale through the
Spirometer. Attach the bacterial filter to the side of the Flow Head marked
“Inlet” and attach the cardboard mouthpiece to the bacterial filter.
In an ideal situation, every student would have his or her own bacterial filter
and disposable mouthpiece. According to the manufacturer’s specs, the
MicroGard®filters out more than 99% of bacterial and viral aerosols.
Page 3

3
Specifications
Flow Rate ±10 L/s
Dead Space 93 mL
Nominal output 128 mV/[L/s]
Detachable flow head Dimensions: 80.5 mm (diameter) × 101.5 mm
(length)
Mass: 80 g
Construction: Clear acrylic plastic
Handle Dimensions: 127 mm × 23 mm × 35 mm
Mass: 85 g
Construction: Black ABS plastic
Cable length 1.5 meters
Stored calibration
Slope: 7.8 (L/s)/V
Intercept: –17.55 L/s
Note: This sensor is equipped with circuitry that supports auto-ID. When used
with LabQuest 2, LabQuest, LabQuest Mini, LabPro, Go!Link, SensorDAQ, TINspire LabCradle, EasyLink, or CBL 2, the data-collection software identifies
the sensor and uses pre-defined parameters to configure an experiment
appropriate to the recognized sensor.
Care and Maintenance
Do not wrap the cable tightly around the sensor for storage. Repeatedly doing
so can irreparably damage the wires and is not covered under warranty.
Cleaning the Flow Head
The manufacturer recommends three methods, in the following order, with
which to sterilize the Flow Head.
1. Wash the detachable Flow Head in a dishwasher. It is dishwasher safe. This
method provides the longest life for the Flow Head and is the method most
recommended by the manufacturer.
2. Cold sterilize the Flow Head with a surface disinfectant such as Cidex®or
Technical Tincture of Green Soap®. These are available from medical supply
or janitorial supply companies.
3. Autoclave the Flow Head. This method provides the shortest life span for
the Flow Head.
We recommend that you sterilize the Flow Head using one of these methods
after each school day, at the very least, and that you always use the Spirometer
with a disposable mouthpiece
The nose clips should be wiped clean between uses and soaked in a mild
detergent after each experiment.
Forced Vital Capacity (FVC)
In this activity, the student exhales forcefully and very quickly into the
Spirometer, and then inhales. The graph of this event, shown here, allows the
student to determine his/her forced vital capacity. The graph is a plot of lung
volume (x-axis) vs. flow rate (y-axis). The data may also be examined to
determine Forced Expiratory Volume after 1 second (FEV1).
Videos
View videos related to this product at www.vernier.com/sp r-bta
Calibrating the Sensor
You should not have to perform a new calibration when using the Spirometer.
We have set the sensor to match our stored calibration before shipping it. You
can simply use the appropriate calibration value that is stored in the datacollection program.
For the most accurate measurements with this sensor, we recommend adjusting
the calibration using a 2 L syringe. This is a simple process that takes only a
few minutes.
For further calibration information, see www.vernier.com/til/3353
Page 4

4
Battery recycling information is available at www.call2recycle.o rg
Do not puncture or expose the battery to excessive heat or flame.
The symbol, shown here, indicates that this product must not be disposed of
in a standard waste container.
Vernier Software & Technology
13979 SW MillikanWay • Beaverton, OR 97005-2886
Toll Fr ee ( 888) 837-6437 • (503) 277-2299 • Fax (503) 277-2440
info@vernier.com • www.vernier.com
Rev. 10/23/ 18
Logg er Pro, Logger Lit e, Vernier LabQuest, Verni er LabQuest Mini , and other marks shown are our trademarks
or registered trad emarks in the Unit ed States.
All ot her marks not own ed by us that app ear herein are t he property o f their respectiv e owners, who may or may
not be affili ated wit h, connected to, or spo nsored by u s.
How the Spirometer Works
In the center of the Flow Head is a mesh screen. As air is forced through the
Flow Head a slight difference in pressure occurs between the front and the back
of the screen. A tube in front of the screen and a tube behind the screen pass the
pressures to a differential pressure transducer. The greater the airflow passing
through the screen, the greater the pressure differential. Airflow rate (L/s). is
measured directly. Volume (L) is calculated by integrating the flow rate (L/s) as
a function of time (s).
Troubleshooting
For troubleshooting and FAQs, see www.vernier.com/til/1409
Repair Information
If you have watched the related product video(s), followed the troubleshooting
steps, and are still having trouble with your Spirometer, contact Vernier
Technical Support at support@vernier.com or call 888-837-6437. Support
specialists will work with you to determine if the unit needs to be sent in for
repair. At that time, a Return Merchandise Authorization (RMA) number will be
issued and instructions will be communicated on how to return the unit for
repair.
Accessories/Replacements
Item Order Code
Dispo sable Bact erial Filter (pkg. of 10)
SPR-FIL
Dispo sable Mou thp iece (pkg . of 30)
SPR-MP
Noseclip (pkg. of 10)
SPR-NOSE
Spirometer Flo w Head
SPR-FLOW
Warranty
Vernier warrants this product to be free from defects in materials and
workmanship for a period of five years from the date of shipment to the
customer. The replaceable Flow Head, manufactured by BIOPAC Systems, Inc.,
carries a 12 month warranty and is not subject to a separate warranty by Vernier.
This warranty does not cover damage to the product caused by abuse or
improper use. This warranty covers educational institutions only.
Disposal
When disposing of this electronic product, do not treat it as household waste. Its
disposal is subject to regulations that vary by country and region. This item
should be given to an applicable collection point for the recycling of electrical
and electronic equipment. By ensuring that this product is disposed of correctly,
you help prevent potential negative consequences on human health or on the
environment. The recycling of materials will help to conserve natural resources.
For more detailed information about recycling this product, contact your local
city office or your disposal service.
 Loading...