

Page 1
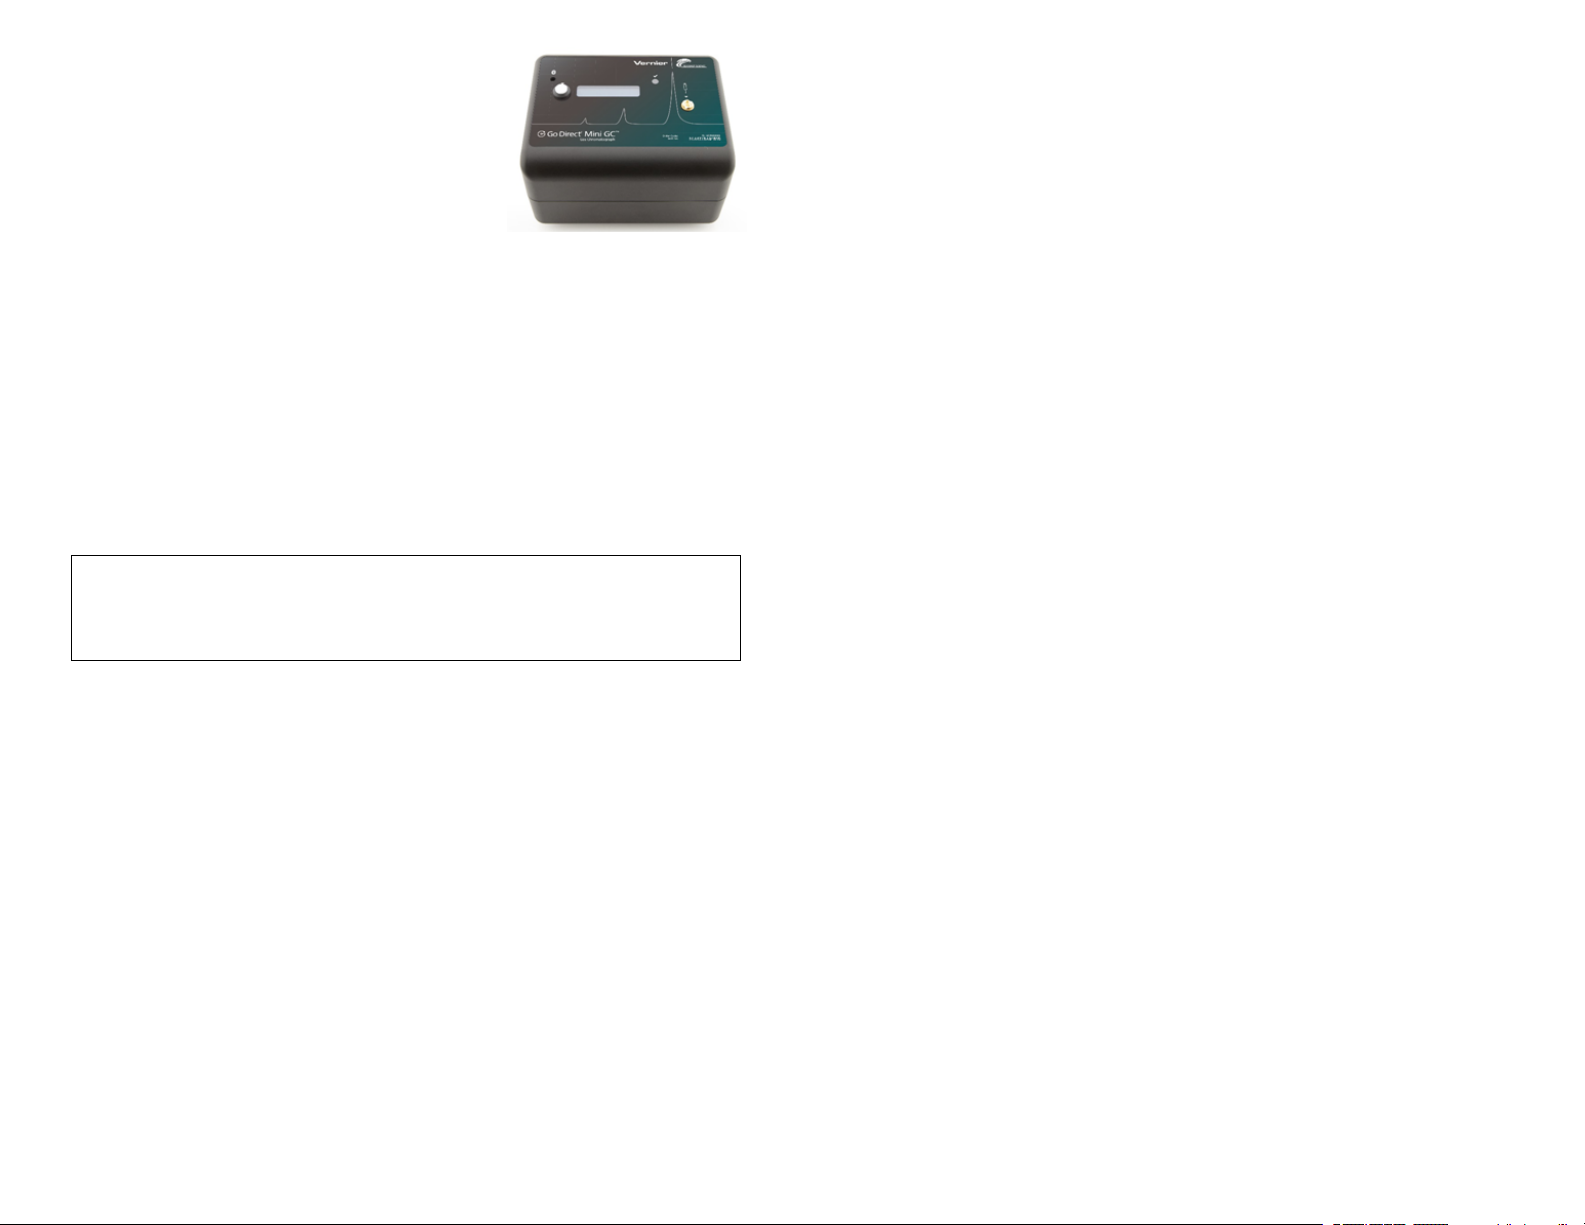
Go Direct®Mini GC™
(Order Code GDX-GC)
Use Go Direct Mini GC and the free Vernier
Instrumental Analysis™ app to teach students
chromatography with a portable gas chromatograph
that detects polar and nonpolar compounds.
Students can separate, analyze, and identify
substances contained in a volatile liquid or gaseous
sample.
Go Direct Mini GC can connect via Bluetooth®wireless technology or wired
via USB to your device.
Developed with Seacoast Science, Go Direct Mini GC uses an efficient,
software-controlled internal pump system. Go Direct Mini GC uses room air as
the carrier gas, so there is no need to purchase an external carrier gas tank and
deal with the associated safety measures or to maintain a gas filtration system.
This gas chromatograph can also be used to identify unknown compounds,
monitor chemical reactions, and measure products from distillations and
chemical reactions.
Analysis™ on your computer,
Chromebook™, or mobile device.
See www.vernier.com/ia for
Instrumental Analysis availability.
2. Connect the Go Direct Mini GC to
AC power.
3. Turn on your Go Direct Mini GC
by switching the power button to
the On position. The Bluetooth
LED will blink red.
4. Launch Instrumental Analysis.
5. Click or tap Gas Chromatography.
6. Select your Go Direct Mini GC
from the list of Discovered Wireless
Devices. Your sensor's ID is located
near the barcode on the sensor. The
Bluetooth LED will blink green
when it is successfully connected.
7. Click or tap Done. You are now
ready to continue your experiment.
Analysis on your computer or
Chromebook. See
www.vernier.com/ia for
Instrumental Analysis availability.
2. Connect Go Direct Mini GC to AC
power and to the USB port.
3. Launch Instrumental Analysis.
4. Click or tap Gas Chromatography.
5. You are now ready to continue
your experiment.
Note: Vernier products are designed for educational use. Our products are not
designed nor are they recommended for any industrial, medical, or commercial
process such as life support, patient diagnosis, control of a manufacturing
process, or industrial testing of any kind.
What's Included
l Go Direct Mini GC
l USB mini cable
l AC power supply
l Hamilton Syringe (1.0 µL volume)
l Two extra septa (a third septum is already installed)
l Chromatography Experiments with the Go Direct Mini GC™, an e-book
with five investigations, available as a free download from your Vernier
account
l Carrying case
Compatible Software
See www.vernier.com/manuals/gdx-gc for a list of software compatible with the
Go Direct Mini GC.
Getting Started
Please see the following link for platform-specific connection information:
www.vernier.com/start/gdx-gc
Bluetooth Connection USB Connection
1. Install Vernier Instrumental 1. Install Vernier Instrumental
Safety
Important: We strongly recommend that you read the entire manual thoroughly
before using Go Direct Mini GC for the first time. There are precautions and
usage suggestions throughout this manual that are important to know, prior to
doing your first data collection. Please wear the appropriate personal safety
equipment and use the instrument in accordance with the instructions in this
manual to prevent injury.
Caution: Go Direct Mini GC is designed to analyze volatile compounds. These
compounds may be toxic or highly flammable; therefore, follow the
manufacturer’s instructions when operating this instrument. Serious personal
injury may result from improper use of this instrument. Misuse of this instrument
may cause injury to the user and should be avoided. All analytes recommended
for use with this instrument are flammable and potentially toxic. However, less
than a microgram of analyte is released during normal use. Due to the small
amounts of analytes, there is no hazard that exhaust from the chromatograph
could cause a fire when used according to the instructions. To minimize
exposure to vapors, use this instrument in well-ventilated areas. Refer to the
Safety Data Sheet for each compound to be injected into the chromatograph. For
personal protection, we recommend that open reagent containers be handled in a
hood or well-ventilated area. All users or observers should wear appropriate
personnel protective equipment when operating this instrument, at a minimum
eye protection and protective gloves. Users are cautioned to avoid spills and to
clean up spill immediately.
1
Page 2
Connecting Go Direct Mini GC
See the following link for up-to-date connection information:
www.vernier.com/start/gdx-gc
Connecting via Bluetooth
Ready to connect Red LED next to Bluetooth icon flashes when
sensor is awake and ready to connect.
Connected Green LED next to Bluetooth icon flashes when
sensor is connected via Bluetooth.
Connecting via USB
Connected LED next to Bluetooth icon is off when sensor is
connected to Instrumental Analysis via USB.
Using the Product
Installation: The Go Direct Mini GC should be used in a room that is well
ventilated to allow for normal heating and cooling. Do not use the Go Direct
Mini GC in the presence of flammable vapors.
Unpacking and Setup: Open the lid of the Mini GC carrying case. Remove the
power supply, USB cable, and the Mini GC unit from the carton. Remove the
ties holding the electrical cords. (You may wish to store the two extra septa
separately for use at a later time.)
To avoid damage to the Mini GC, place the instrument on a flat surface away
from
l Excessive dust
l Liquids or mists
l Strong vibration
l Strong magnetic fields, electric fields, and/or high frequencies
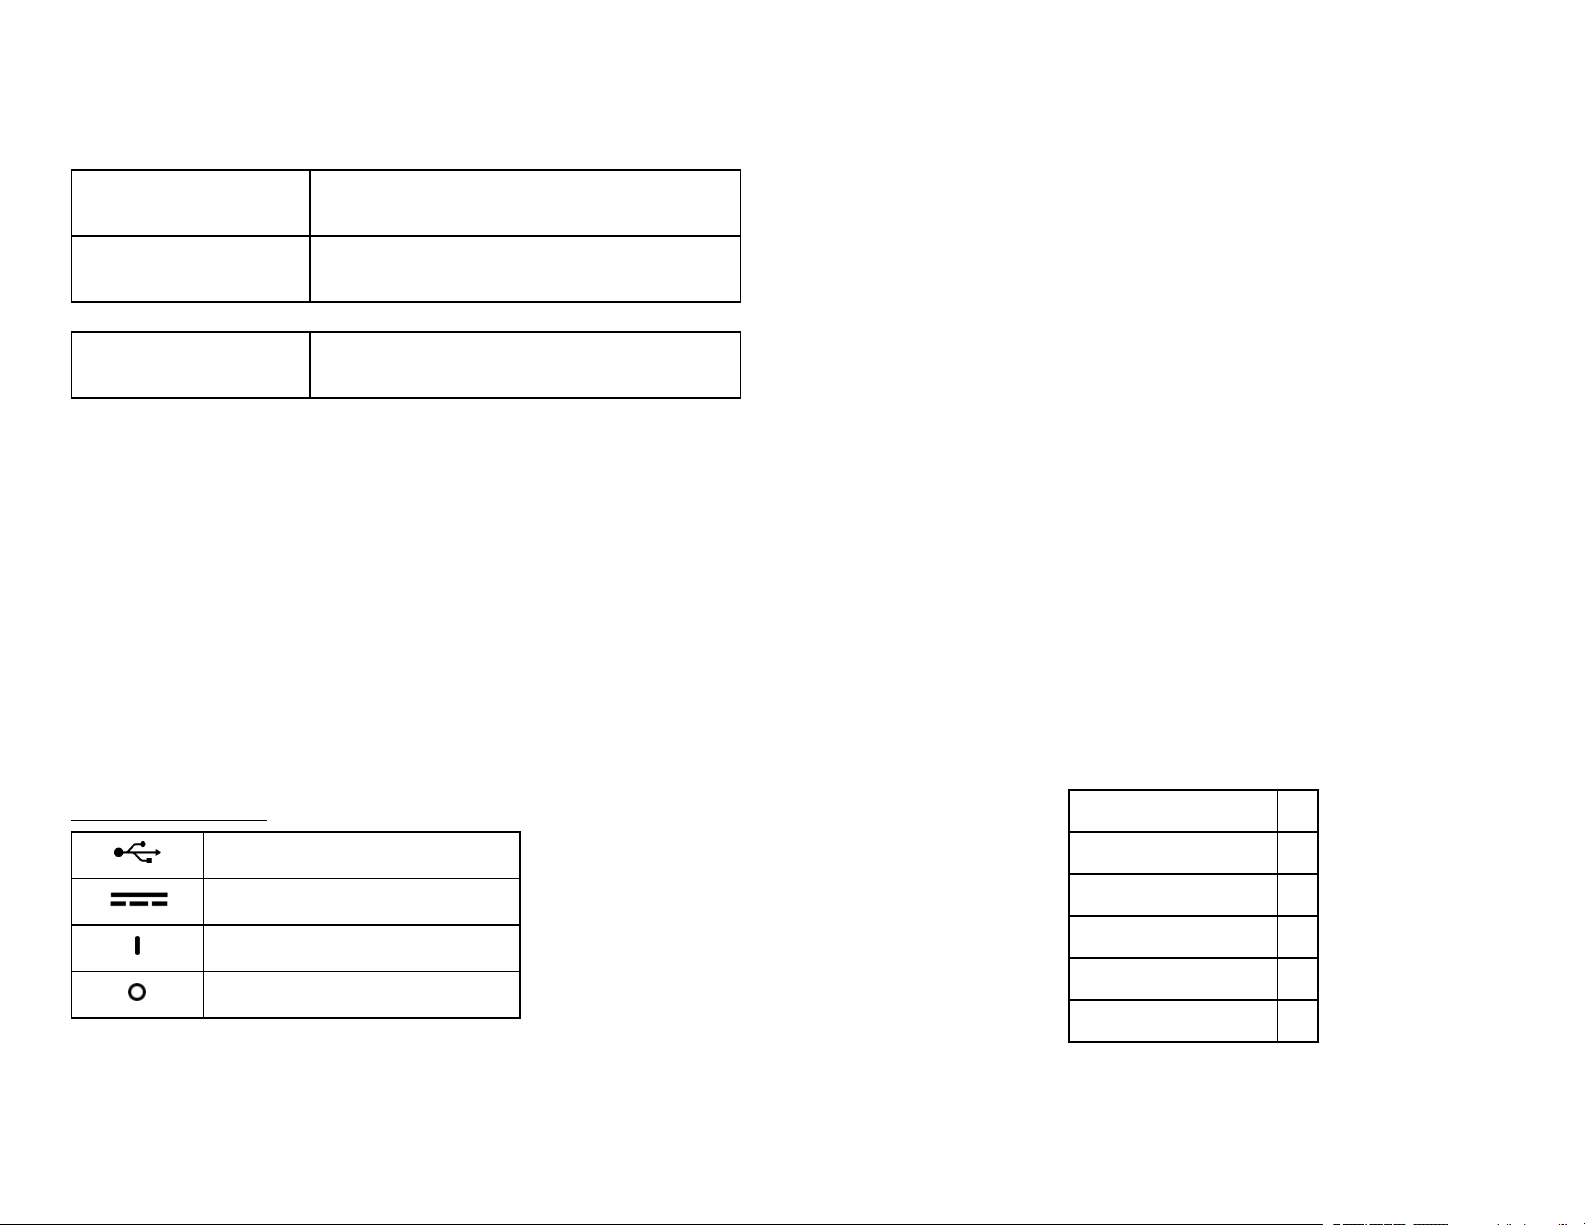
Powering up the Go Direct Mini GC
Explanation of symbols
Operation of Go Direct Mini GC is controlled through Instrumental Analysis.
With this software, you can
l Connect to the Mini GC via Bluetooth
l Set a temperature profile, either using the default settings, or as described in
®
wireless technology or USB.
student lab instructions.
l Set a desired pressure to run the system (maximum of 21 kPa).
l Start and stop a run.
l Name a run.
l Save and export the data.
l Integrate the peaks and determine retention time
Analytes are injected into the instrument through the injection port. Optimal
results are obtained using the supplied 1.0 μL syringe for liquid analytes.
Instructions for using syringes are provided in the Care and Maintenance
section.
Because the Go Direct Mini GC can connect via Bluetooth wireless technology,
there is also a button on the instrument itself that initiates data collection once
the Mini GC is equilibrated to the set temperature/pressure profile.
Follow these instructions to collect your first chromatogram:
1. Put on goggles and gloves.
2. Connect the Go Direct Mini GC to your platform according to the Getting
Started instructions. Note: The instrument runs a preheat cycle that sets the
temperature to 75°C when first connected to Instrumental Analysis. It will
remain at this temperature until a temperature/pressure profile is applied.
3. Set the temperature/pressure profile. Note: Below is the default
temperature/pressure profile. This is appropriate for most samples. However,
you may want to adjust these according to the student instructions in the
Chromatography Experiments with the Go Direct Mini GC™ e-book. Once
you have set the desired parameters, click or tap Apply. This initiates the
temperature/pressure profile.
Start Temperature (°C) 45
connector to computer via USB
Power connector (24 Volt DC, 3 A)
Power on
Power off
To operate the Mini GC, plug the low-voltage jack of the power supply into the
power socket on the side of the instrument; insert the 120 VAC plug into an
outlet. Connect the Mini GC to your platform according to the Getting Started
instructions above.
Hold Time (min) 2
Ramp Rate (°C/min) 5
Final Temperature (°C) 95
Final Hold Time (min) 8
Pressure (kPa) 11
4. While the Mini GC is equilibrating, follow the steps below to clean and
flush the syringe with acetone or n-hexane. Important: The glass syringe is
fragile and can be easily damaged. Be careful not to bend the needle or bend
2
Page 3
the plunger. If the plunger is accidentally pulled out of the glass barrel,
reinserting it is extremely difficult, sometimes impossible. Never pull the
plunger back more than 50% of its total volume. Be careful not to bend the
plunger as you press it down. Do not remove the plastic spacer on the
needle.
a. Depress the plunger fully.
b. Submerge the tip of the syringe needle into the vial of acetone or n-
hexane.
c. Pull back the plunger to fill the barrel about 1/3 full of acetone or n-
hexane. Examine the barrel of the syringe and estimate the amount of
liquid in the barrel.
d. Expel the liquid onto a lint-free tissue or a paper towel.
e. Repeat Steps a–d at least two times, until you are comfortable pulling up
a liquid into the syringe and measuring the volume in the syringe barrel.
Use a lint-free tissue or a paper towel to carefully pat around the tip of
the syringe needle.
5. Follow the process in Step 4 to clean and flush the syringe with a sample,
such as pentane, to be injected into the Mini GC.
6. Once the Mini GC has reached the correct start temperature and pressure, the
indicator LED should turn green and the software will display a message
that reads, “Inject, then press collect button on device.” Collect 0.2 µL of
your sample, such as pentane, for injection.
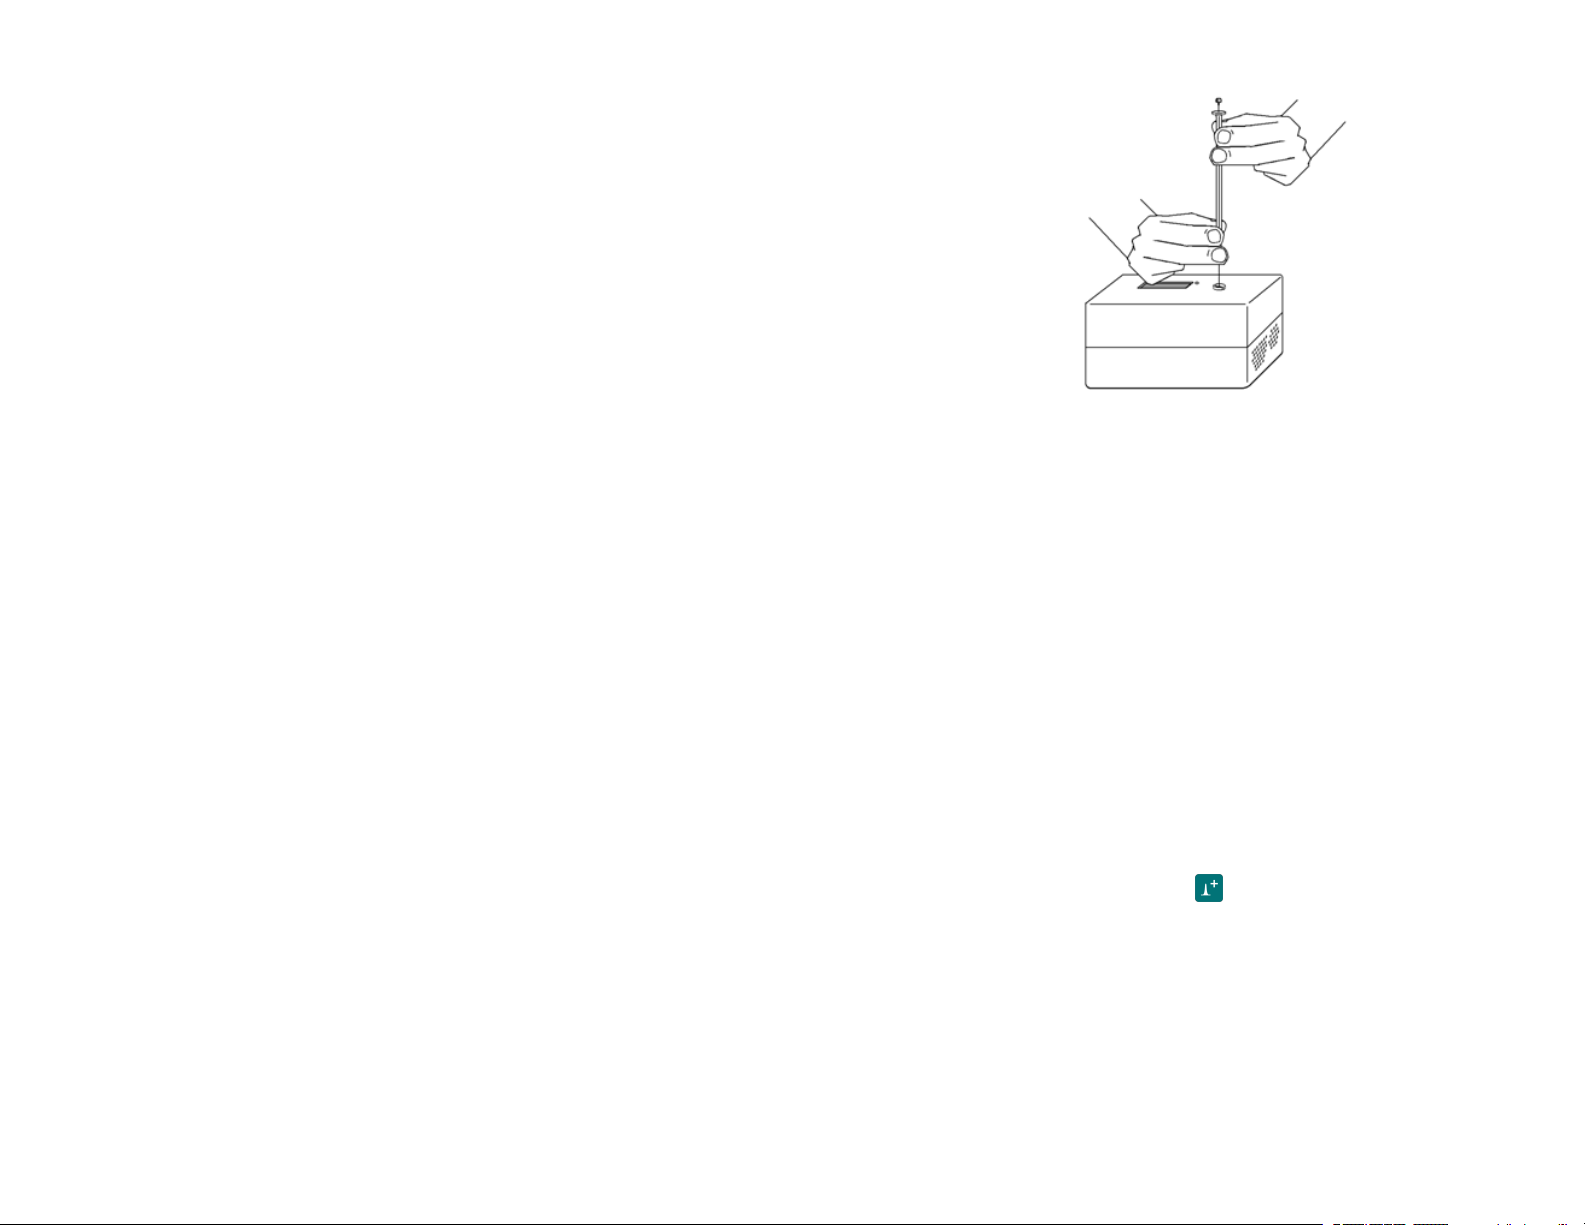
a. To insert the needle of the syringe into the injection port of the Mini
GC, hold the syringe with one hand and steady the needle with your
other hand. Important: Supporting the needle guard and the lower part
of the needle with two fingers, as shown in Figure 1, can prevent the
possible bending of the needle. Insert the needle into the injection port
until the needle stop is fully seated. If the needle sticks, rotate it slightly
while inserting. Do not move the plunger yet.
Figure 1
b. Depress the syringe plunger; immediately following, press the white
Collect button on the Mini GC to begin data collection. Be careful not
to bend the plunger as you press it down. Pull the needle out of the
injection port immediately. As you withdraw the syringe needle, lift
straight up to avoid bending the needle.
c. While the data collection proceeds, repeat Step 4 to thoroughly clean the
syringe and needle. It may take more than three flushes to feel the
syringe plunger move smoothly again, which is your indicator that the
syringe and needle are both suitably clean.
d. The run will automatically stop after the allotted time or you can choose
to end it early if you are satisfied that all analytes have eluted
completely.
7. Name your sample appropriately. To do this, click or tap on the y-axis label.
Click or tap on Dataset Options next to the data set you wish to rename.
Click or tap Rename Data Set. Enter a name for the sample and click or tap
Rename.
8. Analyze your chromatogram using Add Peak Integral.
a. Select the peak of interest, if necessary.
b.
Click or tap on Add Peak Integral, . The retention time (min), area,
and % area will automatically appear below the graph. Rename “Peak 1”
to the name of the compound injected, if known, in the table.
c. Repeat steps a–b for additional peaks. Note: To adjust your selection,
drag the edges of your previous selection. To delete a peak selection,
click or tap the X in the upper right corner.
9. Click or tap on the File Menu to Save or Export your data. Note: If a peak
integration table exists, the data table is saved with the file. Export will not
have the information from the data table available.
3
Page 4

10. When you are done with data collection, make sure to turn the power switch
to the Off position and disconnect the Mini GC from AC power. The Mini
GC should be turned off with the power switch when not in use. We
recommend unplugging and disconnecting the power supply and
disconnecting the USB cable while the instrument is not in use. The
chromatograph has a built-in timer to turn off heating of the column and
pressure from the pump after 2 hours with no communication via Bluetooth
wireless technology or USB.
Specifications
Column Restek MXT-502.2 Column - Siltek-treated stainless
steel with proprietary diphenyl/dimethyl polysiloxane
phase
Column operating
temperature
30°C to 160°C with a maximum heating ramp of
10°C/min
Detector Seacoast Science carbon-nanotube chemiresistive
detector
Dimensions and
108 mm height, 191 mm length, 133 mm width; 1.3 kg
weight
Power requirements 24 VDC, 2.5 A from an external power supply
Utility External power supply rated for 100–240 VAC, 1.5 A
50–60 Hz
Carrier gas Ambient air
Environmental
conditions
Liquid injection
Temperature: 5°C to 40°C Humidity: 95% or less, (noncondensing environment)
0.01 to 0.6 µL
volume
Operating pressure
1 to 21 kPa
(above ambient
pressure)
Care and Maintenance
To extend the life and ensure the proper functioning of the Go Direct Mini GC,
there are some routine cleanings and replacements that should be followed.
l DO NOT inject more than 0.6 μL liquid analyte; injecting excess liquid may
damage the sensor. Note: Much larger head-space gas volumes can safely be
injected, up to 1 mL.
l DO NOT inject the following liquids/substances into Go Direct Mini GC:
l Water, or compounds with significant amounts of water impurity
l Amines (or any other alkaline substances)
l Liquids containing compounds with large molecular weights, larger than
the molecular-weight ranges shown in Appendix A. These types of
compounds can become deposited in the column and degrade its
performance.
Column maintenance and/or Replacement
The Restek MXT®– 502.2 column is a general-purpose column that performs
very well for our recommended families of reagents and laboratory exercises. It
is a stainless-steel capillary column, 11 meters in length, and coated with
Siltek®to make the stainless steel unreactive. MXT- 502.2 is coated with a
proprietary diphenyl/dimethyl polysiloxane phase having selectivity for volatile
organic pollutants, light weight hydrocarbons, aromatics, and a wide range of
compounds. If separation efficiency deteriorates, conditioning the column with
0.3 μL of acetone or n-hexane, or running the chromatograph for 1–2 hours at
120°C and 20 kPa with air or an inert carrier gas may help to restore proper
function.
If you use our recommended procedures and substances with your Go Direct
Mini GC, you should get many years of use from the high-quality Restek
column. But, if performance deteriorates after time, such that the column must be
replaced, contact Vernier for an Return Material Authorization (RMA) number
(the column cannot be replaced by the user). You will then send the unit to an
RMA address, and be charged a fee for the replacement.
Cleaning the Exterior of the Case
Before cleaning the case, disconnect power. For routine cleaning of the exterior
of the case, use mild detergent and a damp cloth. Do not allow water to leak
inside of the case as this may result in electrical shock or shorts. Abrasive
cleansers should not be used to clean the instrument.
Replacing the Septum
The septum should be replaced after approximately 150 injections. The septum
may be replaced by unscrewing (counterclockwise) the septum retainer nut
using a coin or a large screwdriver. Note: Two additional septa were shipped
with your new Go Direct Mini GC (in a small Ziploc bag). With the retainer nut
removed, spear the defective septum with a syringe needle and lift it out. Place a
new septum flat in the cavity. Screw the retainer nut to snug tightness.
Overtightening the retainer nut will not give a better seal of the septum but will
damage the instrument. After you have used your original septum, and the two
replacements, you can order additional septa.
Vernier Order Information: Septa Replacement, pkg of 4, order code GC-SEP
Replacing the Chemiresistive Detector
The Seacoast Science carbon nanotube chemiresistive detector is a precisionetched sensor chip coated with a chemoselective polymer. The polymer absorbs
analytes exiting the column. Analyte absorption by the polymer coating is
measured by the detector.
4
Page 5

The carbon nanotube detector should last for more than 2000 hours of operation.
If performance deteriorates after time, such that the detector must be replaced,
contact Vernier for an RMA number (the sensor cannot be replaced by the user).
You will then send the unit to an RMA address, and be charged a fee for the
replacement.
Storing the Instrument
Proper storage of the Go Direct Mini GC will protect it from damage and
maintain the life of the instrument. The manufacturer recommends flushing the
column with 0.3 μL acetone or n-hexane followed by 15 min purge at 120°C
and 20 kPa. Store the instrument in the protective case provided with
instrument. Store it in a cool, dry environment.
How the Go Direct Mini GC Works
Figure 2 shows a side view of the Go Direct Mini GC. The power input jack,
power switch, USB connection to the Chromebook, or computer, and column
ventilation grill are shown in this view.
Principles of Operation: Go Direct Mini GC is designed to separate mixtures of
gases or volatile liquids and identify components of the mixtures by their
specific retention times. The chromatograph uses ambient air supplied from a
pump to carry a small sample of vapor through a stainless steel column.
The column is a nonpolar, general purpose capillary column made by Restek
(product code: MXT®–502.2). The column is heated using an electric current.
Temperature of the column is monitored by a built-in resistance temperature
detector (RTD) for accurate temperature measurement. The column assembly also
has an independent thermal fuse to protect against overheating.
At the effluent end of the column is a Seacoast Science chemiresistive sensor.
The sensor is a precision-etched sensor chip coated with a chemoselective
polymer-carbon nanotube composite. The composite absorbs analytes exiting the
column. Analyte absorption by the composite coating is measured by the
detector circuitry.
Troubleshooting
Error Possible Causes
Inconsistent flow, not
Check and replace septum
reaching set pressure
Inconsistent peak areas Check injection volume, septum, defective
syringe
Inconsistent retention times Check septum, pump
No communication Check cables. Or, make sure you are using
correct software versions.
No power Check to make sure power plugs are plugged
in properly.
For additional troubleshooting tips, see www.vernier.com/til/7281
Appendix A
Classes of Compounds That Can Be Used in Go Direct Mini GC
Compound Type Typical
Compounds
Alcohols C1–C
Aldehydes C1–C
Alkanes C4–C
Amides C3–C
Aromatics C6–C
Carboxylic Acids C1–C
Esters C2–C
Ethers C2–C
Heterocycles C5–C
Halogenated
8
C1–C
hydrocarbons
Ketones C3–C
Nitriles C2–C
8
5
Nitroalkanes/aromatics C1–C
Phosphonates C3–C
Sulfides C4–C
8
6
8
12
4
11
4
10
8
8
6
9
Range of Acceptable Boiling Points
(°C)
50 –175
50 –175
30–220
150 –250
80 –220
100–150
30 –200
30– 110
100 –150
30–120
50 –175
50 –120
100 –210
180 –210
90– 150
Figure 2
5
Page 6

Appendix B
To comply with certification requirements for this instrument, the manufacturer
provides the following risk assessment:
Leakage: There is no risk from reagent leaks when using this instrument as
intended.
Fire/Flammability: To minimize risk of fire, the exhaust from the
chromatograph is vented at the rear panel of the instrument. In the unlikely
event that a large injection (1.0 μL) of a very flammable material such as hexane
was to ignite by an ignition source placed near the sensor outlet barb, the
reaction would produce 3.5 calories of energy. This energy is enough to raise
the temperature of a gram of water 3.5°C or to raise the temperature of the
chromatograph (1.3 kg mass) by approximately 0.0035°C. This is very small
when compared against roughly 252 calories released from ignition of one blue
tip match.
Electrical shock: To minimize the hazard of electrical shock, the chromatograph
is powered at 24 V. Use only the power supply provided by the manufacturer to
power this instrument.
Warning labels:
Appendix C
Syringe Usage Instructions (1.0 μL GC Syringe)
Syringe Handling
l Never pull the plunger back more than 80% of its total volume. Warning:
Once the plunger has been pulled out, it is almost impossible to reinsert.
You may want to err on the side of caution, and never have students pull the
plunger back more than 50% (0.5 μL). This avoids having students
accidentally pull the plunger from the syringe body, a costly mistake.
l Exercise caution when depressing the plunger. Stickier chemicals can jam
the syringe and depressing the plunger too rapidly can cause the plunger to
bend. In the case of our 1.0 μL syringe, the plunger is a fine wire that
extends into the needle. A bend in the plunger of this syringe may not be
visible, but the plunger will begin to stick which can render the syringe
useless.
l If the plunger starts to catch in the syringe during sample collection or
injection, follow the procedure for cleaning the syringe. NEVER force the
plunger.
l If the syringe becomes clogged, do not pump the plunger or attempt to force
liquid or compressed air through it. The excessive pressure could cause the
barrel to crack.
l Avoid unnecessary movement of the plunger in a dry syringe.
l The plunger should only be grasped by the button since any abrasions,
scratches, or oil from one's fingers can interfere with proper plunger
operation.
l Always proceed carefully when inserting the syringe needle into the Go
Direct Mini GC. Occasionally, the needle will catch on the column;
inserting the needle with too much force will cause it to bend, which will
destroy the syringe. Rotating the syringe will alleviate this problem.
l When wiping the needle of the syringe, pinch a lint-free wipe around the
needle next to the barrel of the syringe and wipe in a single motion toward
the point of the needle. Never wipe the needle toward the barrel.
l Syringes should be regularly inspected for damage, including hairline cracks.
Be sure to check the needle tip for barbs, which tear the septum, and can
produce particles that clog the needle or the chromatograph’s column.
Cracked syringes should be discarded according to your sharps disposal
procedure. Needle burrs can be smoothed with a fine emery board or
carborundum.
l Before storing a syringe, rinse it with acetone. Wipe dry all external surfaces.
Store the syringe in original shipping container or shock-absorbing padding.
l NEVER soak the syringe for an extended period in a solvent. Doing so
could cause any adhesives used in the construction of the syringe to
dissolve.
Tips
l Greatest analytical accuracy is achieved when the injection volume is at
least 20% of the working volume of the syringe. If the optimal syringe size
is unavailable, be aware that your results will show greater variability.
l Prior to injection, moving the syringe plunger as slowly as possible during
all steps (whether liquid is involved or not) will help maintain the accuracy
of the injection volume.
l When collecting your sample, grip the syringe by the flange and plunger
button only, as your body heat can affect the volume collected.
l During insertion of the syringe needle into the gas chromatograph, support
the needle with one hand and hold the flange of the syringe in the other.
This reduces the chance of bending the needle.
l If the needle seems to catch when inserting it into the gas chromatograph,
turn the syringe a quarter turn and then try again.
l When injecting into the GC, you want to depress the plunger quickly
enough to ensure that the entire sample is delivered at once but carefully
6
Page 7

enough that you do not bend the plunger if the plunger sticks. The larger
injection sizes require greater care during the injection.
Rinsing the Syringe
1. Submerge the tip of the syringe needle in the rinse liquid, commonly
acetone or ethanol, and draw the plunger back to 50% of its total volume.
2. Remove the syringe from the rinse liquid and place the tip of the needle
over an appropriate waste receptacle such as a beaker or lint-free tissue.
3. Slowly depress the plunger, ejecting all of the solution from the syringe.
4. Wipe the needle of the syringe with a fresh lint-free tissue.
5. Repeat the above steps 3 times.
6. Remove the syringe tip from the solution, replace the cap of the vial of rinse
liquid, and wipe the needle of the syringe with a fresh lint-free tissue.
Collecting a Sample
1. Remove the cap from the sample container and rinse the syringe with the
solution to be injected, following the procedure outlined in the section
Rinsing the Syringe.
2. Submerge the tip of the needle in the solution to be injected and slowly
draw the plunger back by an amount larger than the intended injection
volume. This excess volume will typically be somewhere around 0.1 µL.
(Example: If you are attempting a 0.2 µL injection, you should withdraw
between the 0.25 and 0.3 µL.)
3. Remove the syringe tip from the solution and replace the cap on the sample
container.
4. Holding the syringe vertically at eye level, carefully depress the plunger
until the syringe holds only the desired injection volume.
5. Carefully wipe the syringe needle with a fresh lint-free tissue, making sure
the tissue does not absorb any sample from inside the needle.
6. When you are satisfied with the volume of your sample, proceed to
injection. If not, carefully eject the syringe contents into the appropriate
waste receptacle, wipe the needle with a fresh lint-free tissue, and begin
again at Step 2.
Injecting into the Go Direct Mini GC
1. Wait for the status indicator light on the Go Direct Mini GC to turn green
and the message “Ready for Injection” to appear before collecting your
sample into the syringe.
2. As soon as your sample is loaded into the syringe, grip the syringe by the
flange and pinch the needle about halfway along its length.
3. Aim the needle into the center of the brass needle guide at the top of the gas
chromatograph and slowly push the needle into the injection port, being
careful not to move the plunger. If the needle should catch, immediately stop
pushing and turn the syringe a quarter turn, then resume pressure.
4. As soon as the syringe is fully inserted against the needle guard, quickly
depress the plunger and simultaneously click Collect in the data-collection
software.
5. Immediately pull the syringe out of the gas chromatograph.
Cleaning the Syringe
l Never force the plunger.
l Clean the syringe following the procedure described in Rinsing the Syringe
using an appropriate solvent. Choose a solvent that will dissolve the
contaminating substances. Common choices include acetone, methanol,
methylene chloride, and acetonitrile, but other solvents may be used. Nonalkaline, non-phosphate, non-detergent solvents are preferred. Do not soak
the syringe in any solvent.
l If the plunger is catching during injection, it may need to be flushed with
multiple cleaning solvents.
Troubleshooting
If the syringe plunger will not fully depress
l Follow the procedure for cleaning the syringe.
l Inspect the plunger. If it is bent and cannot be straightened, dispose of the
syringe according to your sharps disposal procedure.
Appendix D
Relationship of Pressure and Column Flow Rate
If you are accustomed to setting flow rate rather than column pressure values in
a temperature-pressure profile, here is an equation (and a table of typical values)
representing the nearly linear relationship between these two variables:
Flow Rate (mL/min) = 0.54×Pressure (kPa)
Pressure (kPa) Flowrate (mL/min)
2.5 1.4
5.0 2.7
7.5 4.1
10.0 5.4
12.5 6.8
15.0 8.1
17.5 9.5
20.0 10.8
This relationship was determined by measuring the flow rate of the exiting gas
(air) when the column was heated at a constant 45°C temperature at various
pressures.
7
Page 8

Repair Information
If you have followed the troubleshooting steps and are still having trouble with
your Go Direct Mini GC, contact Vernier Technical Support at
support@vernier.com or call 888-837-6437.
Accessories/Replacements
Item Order Code
1 µL Hamilton Syringe GC-SYR-MIC
GC Septa (packag e of 4)
Replacement Power Supply
Mini USBCable
USB-C to Mini USBCable
GC-SEP
GC2-MINI-PS
CB-USB-MINI
CB-USB-C-MINI
Warranty
Warranty information for this product can be found on the Support tab at
www.vernier.com/gdx- gc
General warranty information can be found at www.vernier.com/warranty
Important: This warranty is void if Go Direct Mini GC is opened by the user.
Disposal
When disposing of this electronic product, do not treat it as household waste. Its
disposal is subject to regulations that vary by country and region. This item
should be given to an applicable collection point for the recycling of electrical
and electronic equipment. By ensuring that this product is disposed of correctly,
you help prevent potential negative consequences on human health or on the
environment. The recycling of materials will help to conserve natural resources.
For more detailed information about recycling this product, contact your local
city office or your disposal service.
The equipment complies with RF exposure l imits s et forth for an uncontrolled environment. The antenna(s) used for this transmitter must
not be co-loc ated or operating in conj unction with any other antenna or transmitter. You are c autioned that changes or modificati ons not
expressly approved by the party responsi ble for compl iance could v oid your authority to operate the equipment.
IC Statement
This devic e c omplies with Industry Canada l icense-exempt RSS standard(s). O peration is subject to the foll owing two conditi ons:
(1) this devi ce may not cause interference, and
(2) this devi ce must accept any i nterference, i ncluding i nterference that may caus e undesi red operation of the devic e.
Industry Canada - Class B This digi tal apparatus does not exceed the Class B limits for radio noise emis sions from digital apparatus
as set out in the interference-causing equipment standard entitl ed “Digital Apparatus,” ICES-003 of Industry Canada. Operation i s subjec t
to the foll owing two conditi ons: (1) this devi ce may not cause interference, and
(2) this devi ce must accept any i nterference, i ncluding i nterference that may caus e undesi red operation of the devic e.
To reduce potential radio i nterference to other us ers, the antenna ty pe and its gain should be so chosen that the equivalent i sotropically
radiated power (e.i.r.p.) is not more than that permitted for s uccess ful communicati on.
RF exposurewarning: The equipment compli es with RF exposure limi ts set forth for an unc ontrolled envi ronment. The antenna(s) used
for this transmitter must not be c o-located or operating in c onjunction with any other antenna or transmitter.
Le présent appareil est conforme aux CNR d’ Industrie Canada applicabl es aux appareils radio exempts de lic ence. L’expl oitation est
autorisée aux deux conditions s uivantes :
(1) l’appareil ne doit pas produire de brouillage, et
(2) l’appareil doit ac cepter tout interférence radioélectrique, même s i cela résulte à un brouillage sus ceptible d’en c ompromettre le
fonctionnement.
Cet appareil numérique respecte les limi tes de bruits radioélec triques appl icables aux appareils numériques de Clas se B prescrites dans
la norme sur le matériel interférant-brouill eur: “Appareils Numériques,” NMB-003 édictée par i ndustrie Canada. L’util isation es t s oumise
aux deux conditi ons suiv antes:
(1) cet appareil ne peut causer d’i nterférences, et
(2) cet appareil doit accepter toutes i nterférences, y comprises cell es susc eptibles de provoquer un disfoncti onnement du dispos itif.
Afin de réduire les i nterférences radio potentiel les pour l es autres uti lis ateurs, le ty pe d’antenne et son gain doivent être c hoisi e de tell e
façon que l ’équival ent de puis sance is otrope émis (e.i.r.p) n’est pas pl us grand que celui permis pour une c ommunication établie.
Avertissement d’exposition RF: L’équipement est conforme aux l imites d’ expositi on aux RF établies pour un envi ronnement non
supervisé. L’antenne (s) util isée pour c e transmetteurne doit pas être jumelés ou foncti onner en c onjonction avec toute autre antenne ou
transmetteur.
Note: This product is a s ensitiv e measurement dev ice. For best results, us e the cabl es that were provi ded. Keep the device away from
electromagnetic noise s ources, s uch as microwaves, monitors, electric motors, and appliances .
The symbol, shown here, indicates that this product must not be disposed of
in a standard waste container.
Federal Communication Commission Interference Statement
This equipment has been tested and found to c omply with the l imits for a Class B di gital devi ce, pursuant to Part 15 of the FCC rules.
These l imits are designed to provide reasonable protection against harmful interference in a residential install ation. This equipment
generates, uses and can radiate radio frequency energy and, i f not ins talled and used in acc ordance with the instructions, may c ause
harmful interference to radio communicati ons. However, there is no guarantee that interference will not oc cur i n a particul ar instal lation. If
this equipment does cause harmful interference to radio or televi sion reception, which can be determined by turning the equipment off and
on, the user is enc ouraged to try to correct the interference by one or more of the fol lowing measures:
Reorient or relocate the receivi ng antenna.
Increase the separation between the equipment and receiv er.
Connect the equipment into an outlet on a c ircuit different from that to which the receiver is connected.
Consult the deal er or an experienced radio/TV techni cian for hel p.
FCC Caution
This devic e c omplies with Part 15 of the FCC Rules. Operation is s ubject to the fol lowing two c onditions:
(1) this devi ce may not cause harmful i nterference and
(2) this devi ce must accept any i nterference receiv ed, i ncluding i nterference that may caus e undesi red operation
RF Exposure Warning
13979 SW Millikan Way • Beaverton, OR 97005-2886
Vernier Software & Technology
Toll Free (888) 837-6437 • (503) 277-2299 • Fax (503) 277-2440
info@vernier.com • www.vernier.com
Rev. 12/23/20 20
Go Di rect, Instrument al Anal ysi s, and ot her marks shown are our trademarks or registered trademarks i n the
United States. All ot her marks not own ed by us that appear herein are the property o f their resp ective owners,
who may or may not be affiliated with , con nected to, o r s pon sored b y us.
The Bluetoot h®word mark and logo s are regist ered trademarks owned by the Bluet oot h SIG, Inc. and any use of
such marks by Verni er Soft ware & Technolo gy i s under l icense. Other trademarks and t rade names are t hose o f
their resp ective owners.
8
 Loading...