

Page 1
Bottom Heat Shield
Installation Instructions
For the Defiant* (Models
0019/0027**), Vigilant*,
Resolute, Intrepid and
Intrepid II
Please read these instructions completely before
you begin the installation.
*NOTE: Defiant and Vigilant Owners - These instruc
tions are for stoves purchased after March 1, 1980.
Contact your Vermont Castings’ Authorized Dealer to
obtain the correct instructions and hardware for stoves
purchased before March 1, 1980.
Bottom heat shields must be used unless the stove is
to be situated on a completely noncombustible hearth,
such as unpainted concrete over earth.
Clean all heat shields as needed (or at least annually)
so they will continue to reflect heat adequately. In addition, check all leg bolts annually to be sure they are
secure. For complete information on floor protection,
refer to the installation section of your Owner’s Manual.
Tool needed:
Materials Provided:
Standard Legs
All Stoves: Bottom heat shield (1), C-brackets (4), 1/4-
20 x 1/2” wing screws (4)
Short Legs
Defiant / Vigilant: Bottom heat shields (2), C-brackets
(4), 1/4-20 x 2” threaded studs (4), 3/8” spacers (4), hex
nuts (4), wing nuts (4)
Resolute / Intrepid / Intrepid II: Bottom heat shields
(1), C-brackets (4), 1/4-20 x 1/2” wing screws (4)
Open end wrench, 9/16”
-
Preparation
1. Remove all accessories from inside the stove; lift off
the griddle, load door and front doors.
Defiants and Vigilants shipped from the factory have a
wooden wedge inside the stove to hold the damper
closed during shipment. Leave this wedge in place
until after the legs are installed.
2. With assistance, remove the stove from the pallet
and place it close to its installed location. If your
stove has a porcelain enamel finish, use a piece of
cardboard or a drop cloth to cushion the ash lip and
top plate.
3. If the stove is already installed, disconnect the chimney connector.
4. Tilt the stove into a secure reclining position. It will
require at least two people to tilt the stove and a
third to steady it from the front.
For the Defiant, Vigilant and Resolute, tilt the stove
forward over the ash lip until the top plate rests on
the floor.
For the Intrepid and Intrepid II, tilt the stove back to rest
on the pallet or wooden blocks.
One-half inch screws were installed in the leg bolt holes
to stabilize the stove during shipment. Remove and
discard them. The appropriate leg bolts are packed
with the stove legs.
Attach the Legs
Attach the legs to the stove loosely using one washer
per leg. They will be tightened firmly later in the installation.
For all stoves except the Vigilant, use the silver-colored
3/8” x 1” leg bolts. For Vigilants, use the silver-colored
3/8” x 1¹⁄₄” bolts.
Handle Holder
Bottom Heat Shield
**Not applicable to Defiant Model 1910, which has glass panels in its front doors. Defiant Models 0019 and 0027 do not
have glass panels.
2005095 8/08 Rev. 13
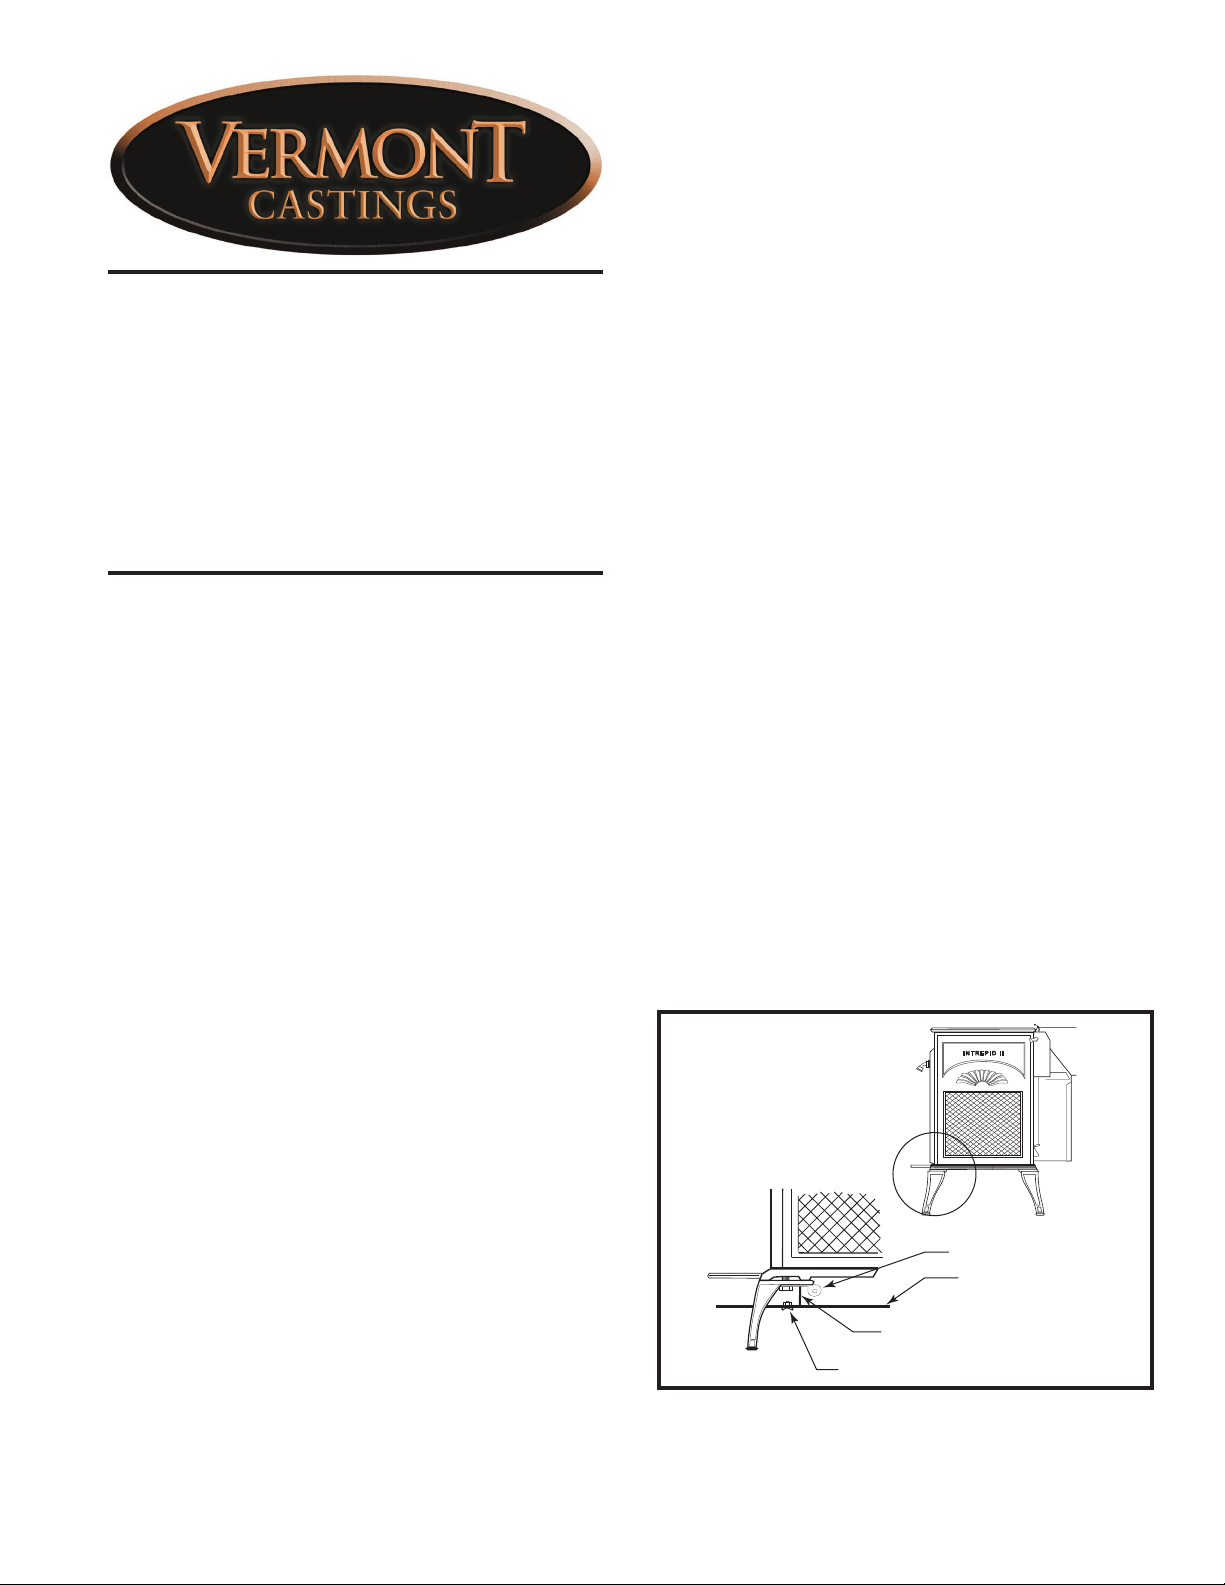
C-bracket
Wing Screw
Fig. 1 Rotate the two fornt C-brackets so that they slide over
the leg bolts between the washer (or handle holder) and the
legs.
ST514
Page 2
For all stoves, use the handle holder instead of a washer under the bolt that secures the right front leg. Pass
the bolt through the leg and handle holder, and loosely
thread the bolt into the bottom of the stove.
Installing the Single Bottom Heat Shield
Set the shield on the floor with the hemmed side up and
the tapered portion of the shield extending under the
ashlip.
NOTE: The Intrepid bottom heat shield is 10³⁄₄” across
the front edge and 9³⁄₄” across the back.
Insert the wing screws through the shield holes from the
shield’s hemmed side and hand-tighten them into the
C-brackets.
Lift the shield into position with the long, tapered portion
of the shield under the ash lip.
Rotate the two front C-brackets on the shields so that
they slide over the leg bolts between the washer (or
handle holder) and the legs, as shown in Figure 1.
Rotate one of the rear C-brackets into position. Hold the
corresponding leg in position and tighten the leg bolt.
Repeat this procedure for the other rear leg.
Hand-tighten the shield screws, then go back and
tighten all the leg bolts until firm.
CAUTION: Overtightening can strip the leg bolt
threads.
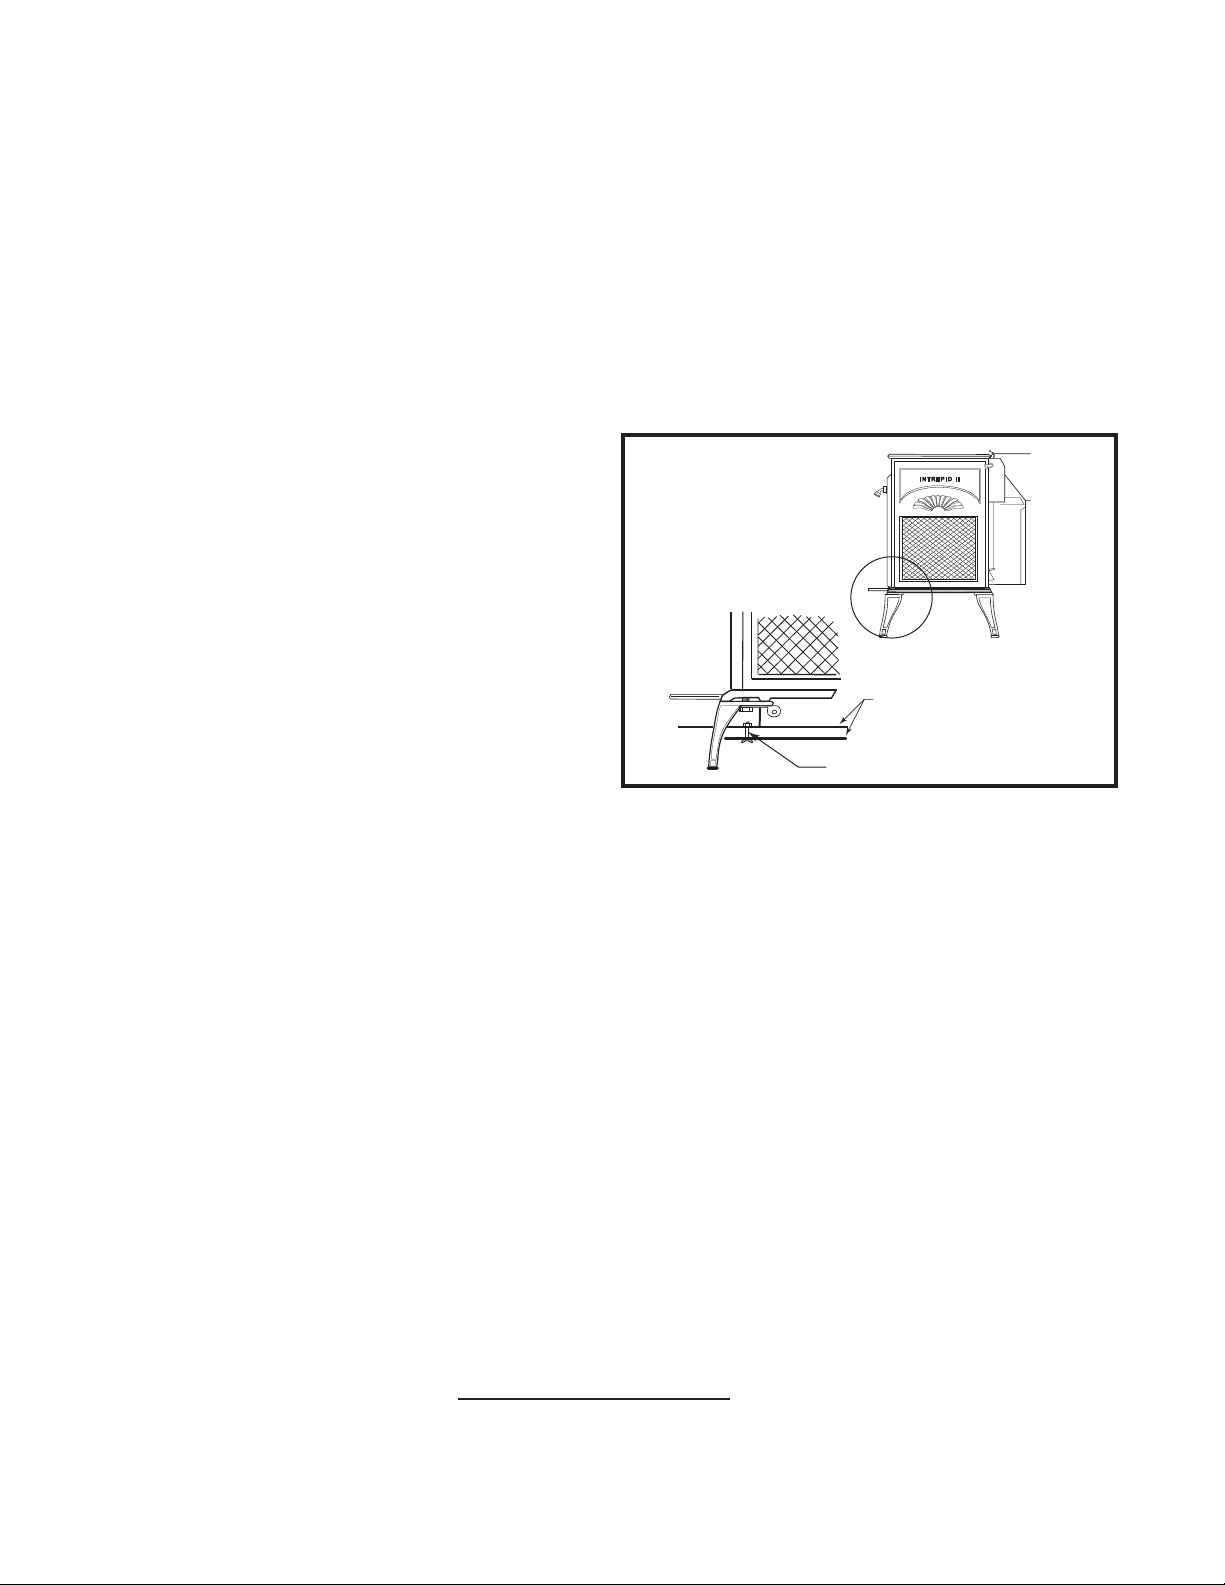
Installing the Double Bottom Heat Shields
Set the larger shield on the floor with the hemmed side
facing up. Set the smaller shield over the larger shield
(hemmed side up) and align the mounting holes.
From above, insert one of the 2” threaded studs and
slide a spacer over the stud. Insert the end of the stud
through the corresponding hole in the larger shield, and
then through the C-bracket; secure loosely with a hex
nut.
Repeat this procedure for the other hole positions so
that the two shields are held together loosely.
Lift the shields into place with the long, tapered portion
of the larger (upper) shield facing downward under the
front ash lip.
Rotate the two front C-brackets on the shields so that
they will slide over the leg bolts between the washer (or
the handle holder) and the legs. Hand-tighten each leg
bolt.
Rotate one of the rear C-brackets into position. Hold
the corresponding leg in position and tighten the leg
bolt.
Double Bottom Heat
Shield
Spacer
Fig. 2 With the shields in position, first hand-tighten the
shield screws, and then tighten the leg bolts securely.
KT330
Hand tighten the shield screws, then go back and
tighten all the leg bolts until firm. CAUTION: Overtightening can strip the leg bolt threads.
Short Legs Only
Screw the BLACK 3/8”-16 x 1¹⁄₂” levelling bolts all the
way into the threaded hole in the base of the legs.
Raise the Stove Onto Its Legs
With assistance, lift the stove carefully into the upright
position on the hearth; adjust the levelling bolts on short
legs if necessary.
MHSC
149 Cleveland Drive • Paris, Kentucky 40361
www.mhsc.com
 Loading...