

Vermeiren scooterpac User Manual

Canopy user
Mode d'emploi protection de pluie
Gebruikershandleiding regenscherm
Gebrauchsanweisung wetterschutzdach
Istruzioni per l'uso cappottina
Manual de instrucciones capota
Instrukcja obsługi dachu
manual

Come rain or shine
its fine out with
ScooterPac.
Take a read
of this manual
to get the most
out of your
folding canopy.

Contents
brighten
your day
UK
Warnings and safety notes
1
Using the canopy
2
Introduction to the canopy
3
Quick start guide
5
Contents delivery
7
Tools you will need
9
Technical specifications
10
Mounting the canopy to the scooter
11
Detailed guide to using the canopy
19
20
How to use the canopy
Folding the canopy away
30
37
How to care for the Scooterpac canopy

It
is strongly recommended that you read this section carefully before using the canopy.
These warnings and safety notes will ensure that you enjoy many years safe use of the
canopy. Keep this manual for future reference. ScooterPac cannot accept liability
for any injury which is caused by misuse or failure to follow this manual.
All images in this manual are representative and your canopy may differ from that shown.
ScooterPac reserves the right to amend or change this user manual without notice.
The canopy is only to be fitted by an able bodied person, using the tools specified.
In fitting the canopy to your scooter, you accept that the scooter has suitable securing
points. ScooterPac cannot accept liability for any loss, damage or personal injury to yourself
or others which occurs due to an unsuitable fitting point on the scooter, or due to the canopy
not being securely and safely secured to the scooter.
rnings and safety notes
Wa
1

Using the canopy
-
Ensure the canopy is correctly fixed to the scooter and that all installation steps have been
completed.
- Keep fingers away from moving parts and only operate from handling points listed in
this manual.
- Ensure the canopy is used appropriately and that both doors are fully closed when
being used.
- Only use the canopy on scooters which have all the necessary fixing points.
- Check all fixings are secure and do not use if damaged or faulty parts are found before use.
- To order spare parts for the canopy contact your local ScooterPac dealer.
- The canopy should only be used in the fully unfolded position or fully closed up with the
protective bag covering it.
- Do not try to fold or unfold the canopy while sitting on the scooter.
- Do not use the canopy folded out in winds above 25mph.
- The canopy is designed for pavement and road use only.
2
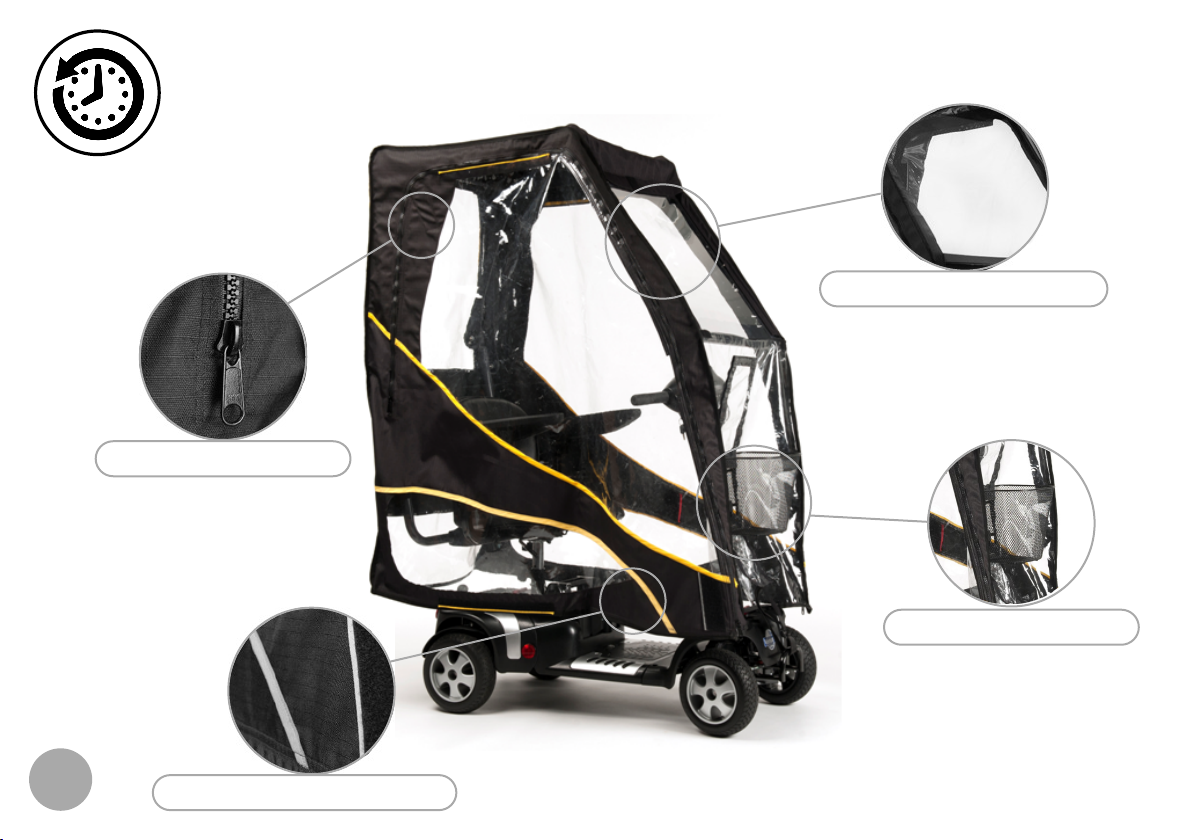
In
Lar
ge access zips
troduction to the canopy
Lu
xury Perspex screen
sket fixing access
Ba
3
our coded Velcro
Col
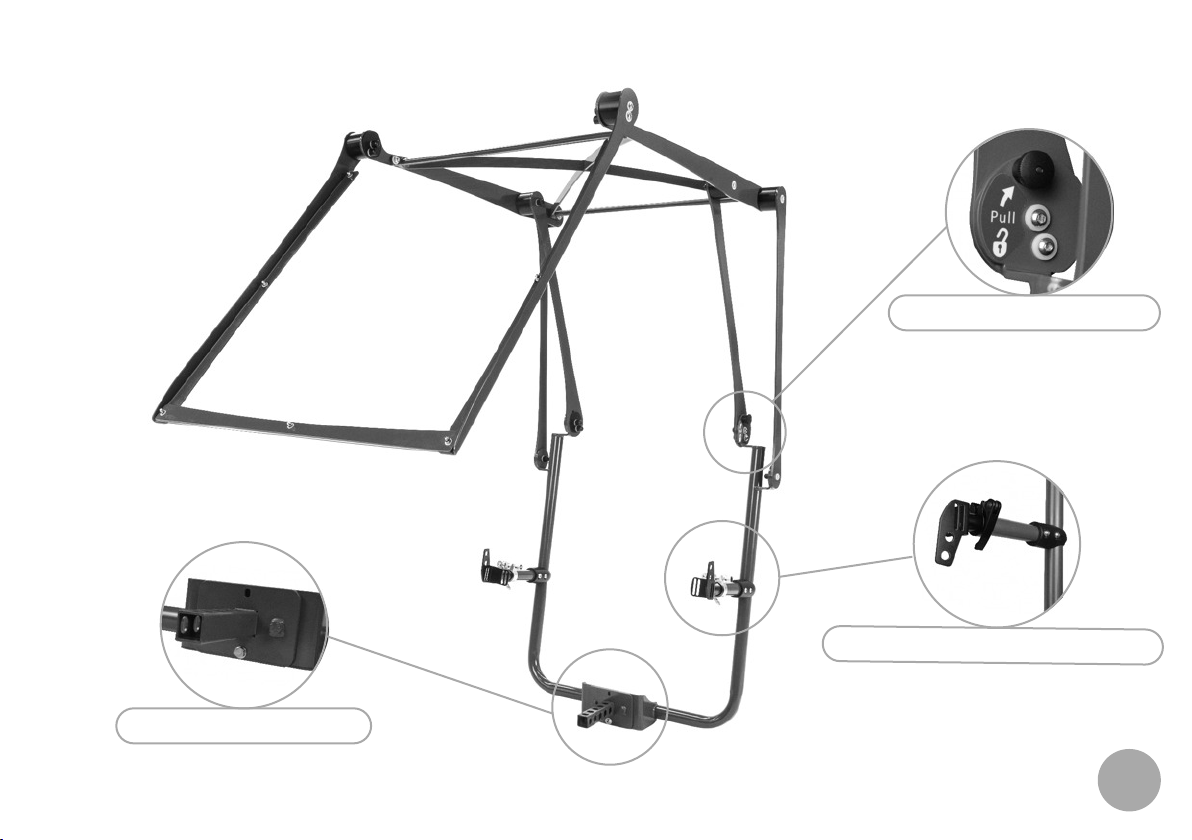
Mounting spigot
ocking mechanism
L
U
niversal mounting bracket
4
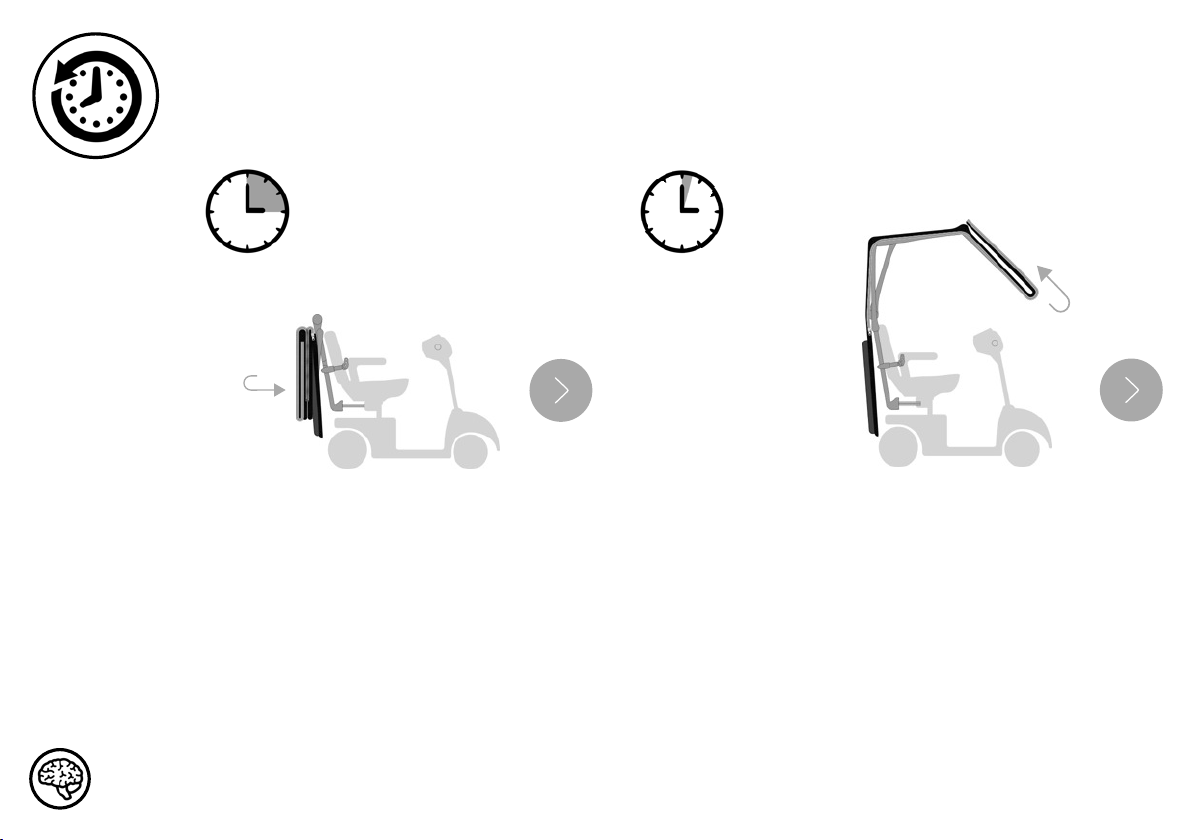
Quick start guide
Assemble
the canopy
onto your
scooter as
per instructions
in this manual
Tip: Ask your local dealer to fit the canopy or see page 11
15 mins
30 secs
Next fold out
the frame of
the canopy
for detailed step by step instructions

30 secs
30 secs
Unfold the
sides
Lastly zip up
the sides for
total protection!
6

Contents Delivery
What's in the box?
1. F
rame x 1
4. M8 washers x 2
2. Spigot x 1
M6 Hex bolt x 1
10.
3. M8 Nyloc nuts x 2
M6 Nyloc nut x 1
11.
7
ning contains small parts. Not suitable for children under 3 years.
War
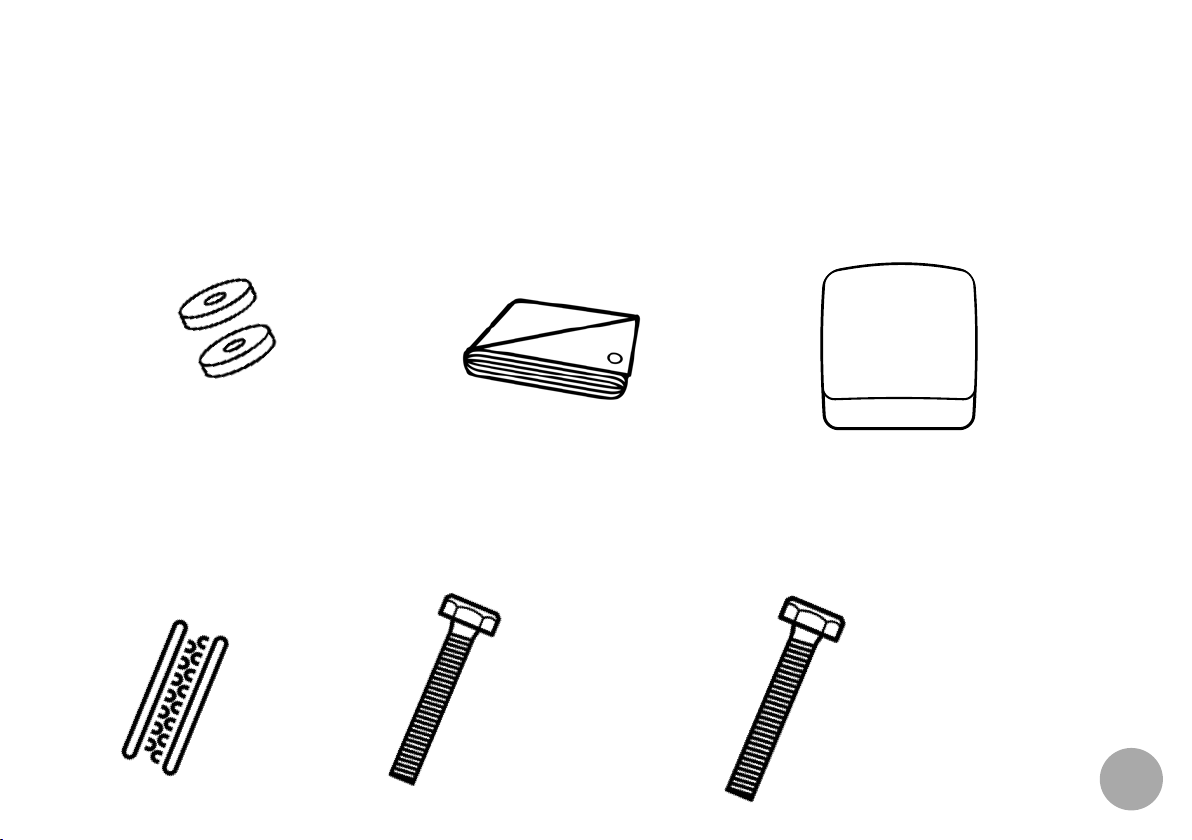
12. M
9. V
elcro
6 washers x 2
7. M10 x 45mm bolt x 1
5. Co
ver x 1
g x 1
4. Ba
8. M8 x 45mm bolts x 3
9. Fixing pack
8

Tools you will need
Allen key(s)
(4mm/5mm/6mm)
Tools you may need
Socket wrench
(10mm/13mm)
Spanner(s)
(10/13mm)
Sci
ssors

Technical specifications
Product
Antares 3/4
Venus 3V/4V
Venus 4 sport M 1500 mm
Ceres 3/4 DL
Carpo 2
Mercurius 4 LTD
Size Height
M 1500 mm
M
M
L
L
1630 mm
Length
1500 mm 610 mm
1500 mm 610 mm
Width
610 mm
610 mm
10

Mounting the canopy to the scooter
Step 1. Attach the spigot to the mounting plate on the frame by sliding it on.
Then insert the M6 bolt but do not tighten yet.
Next tighten the M8 nuts.
Lastly tighten the M6 nut.
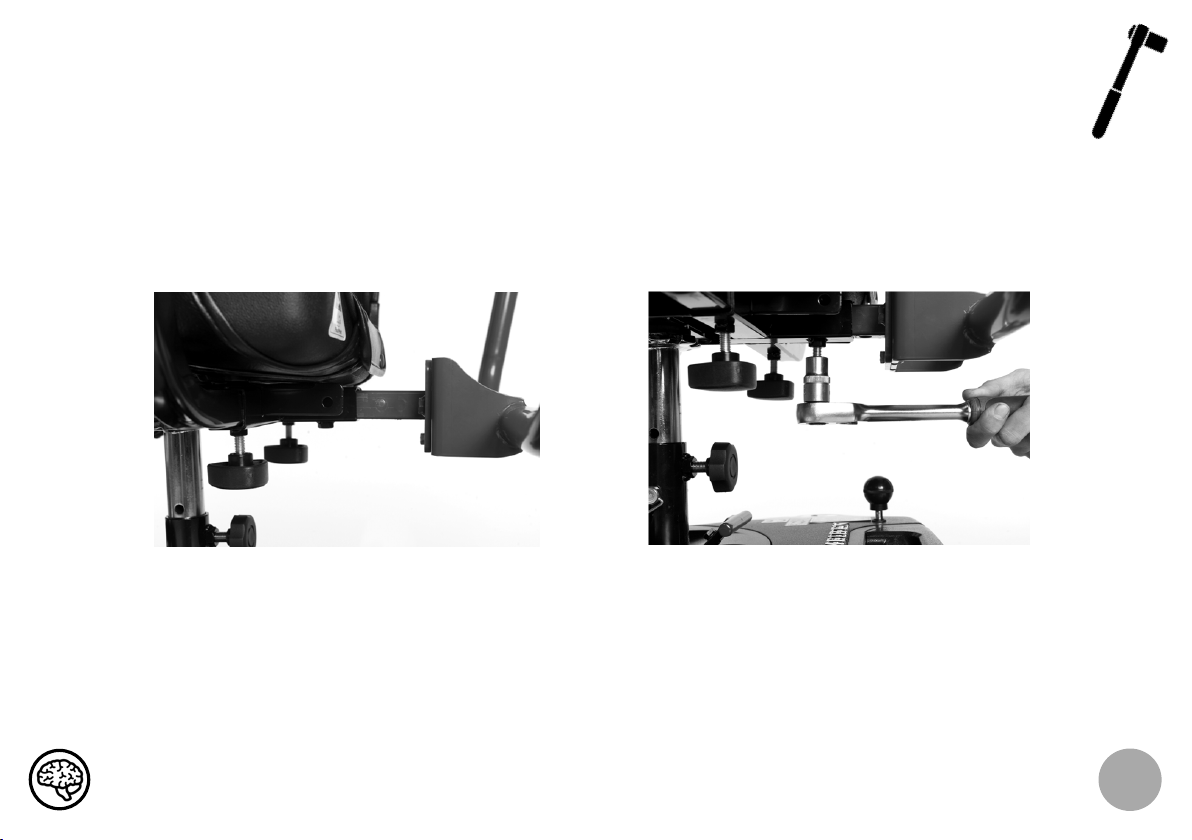
Step 3. A) Slide the spigot into the accessory bar then insert a 45mm M8 bolt (supplied)
onto the nut on the accessory bar and tighten up.
B) If there is no nut on the accessory bar you may need to bolt right through
(this may involve drilling an 8 mm hole through the accessory bar and spigot).
A
p: open out the universal mounting brackets on the frame first.
B
12Ti
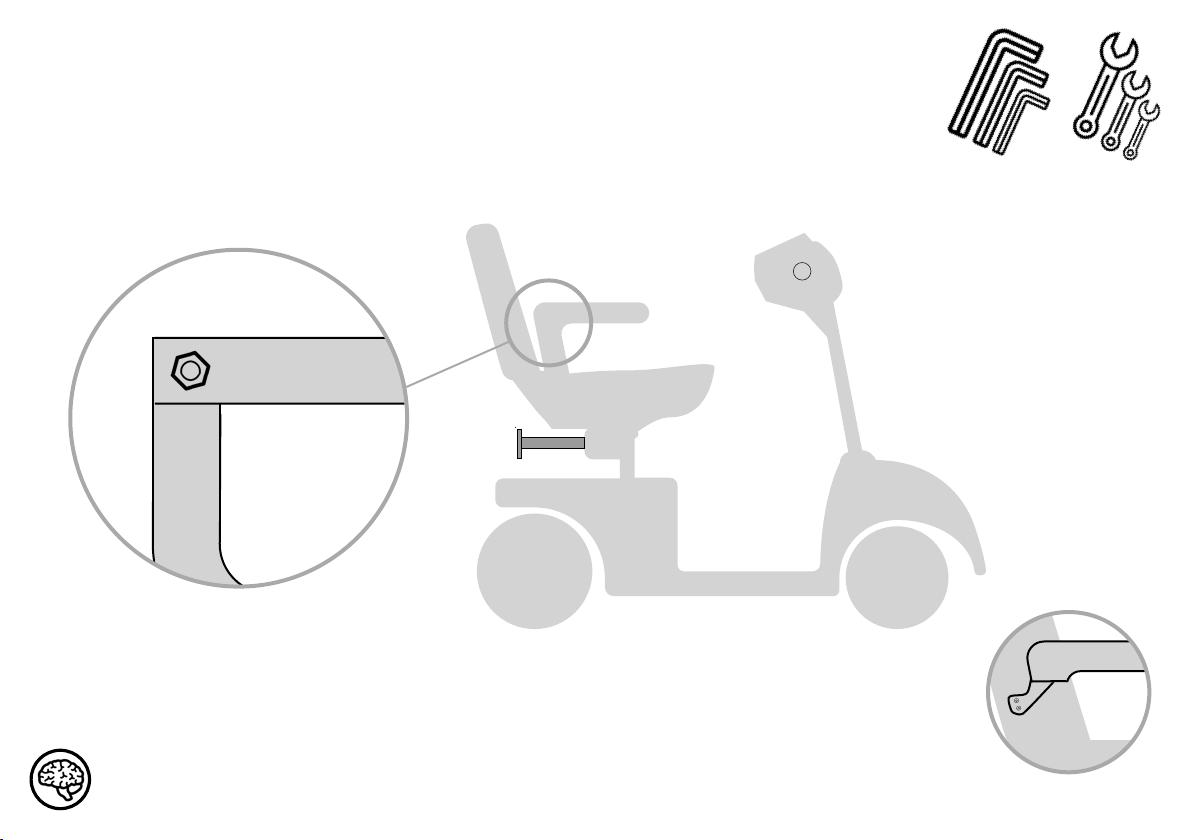
Step 4. Remove the bolts on the scooter armrests.
Tip: if the armrests are attached directly to the seat remove
the top bolt - see figure 1.
Figure 1.
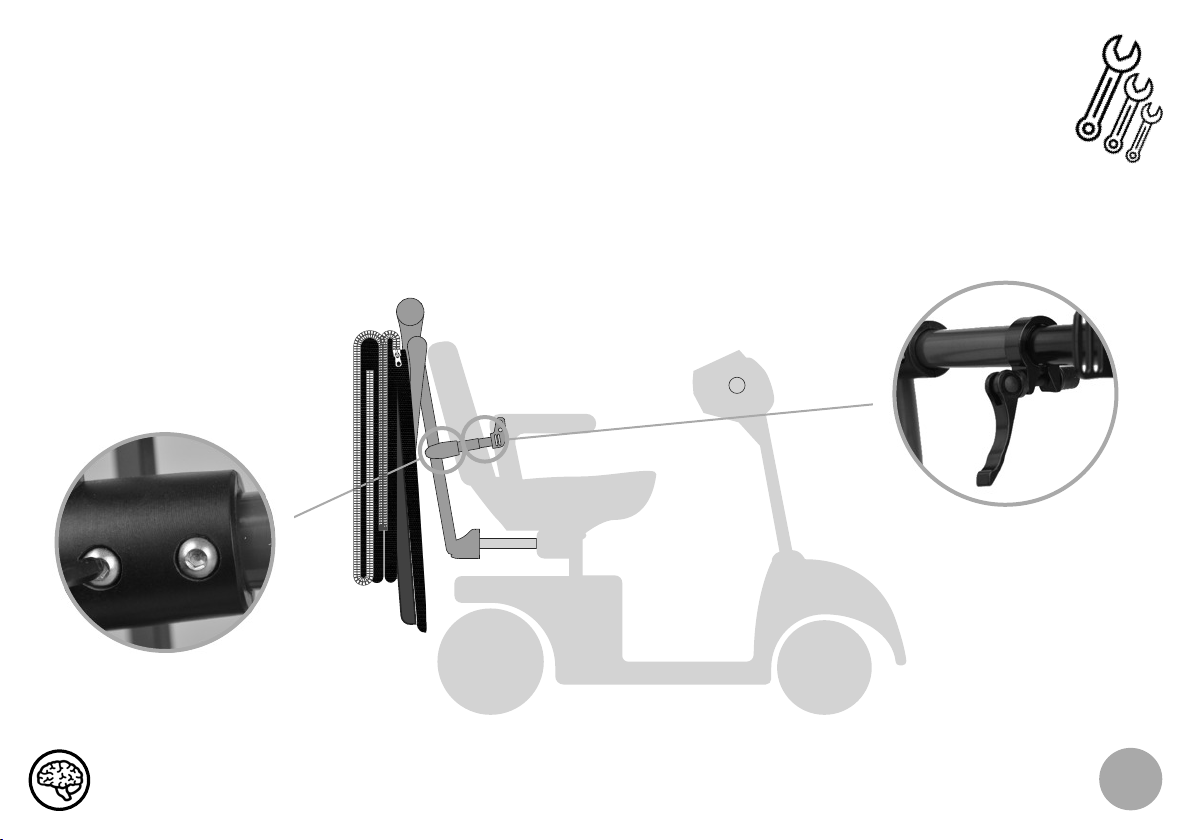
Step 5. N.B. refer to page 15 before attempting this step.
Loosen the quick release clamps (A) on the mounting bracket and loosen the allen
key bolts on the plastic clamps (B). Now attach the brackets to the armrests using
the bolts you removed earlier or the 45mm bolts supplied if required. Ensure any
Nyloc nuts have the bolt protruding by at least 2mm.
The brackets must be as near to level as possible and the allen bolts on the plastic
sleeves tightened.
A
B
ip: the mounting bracket ends can be orientated up or down, whichever fits
T
your scooter best.
1
4
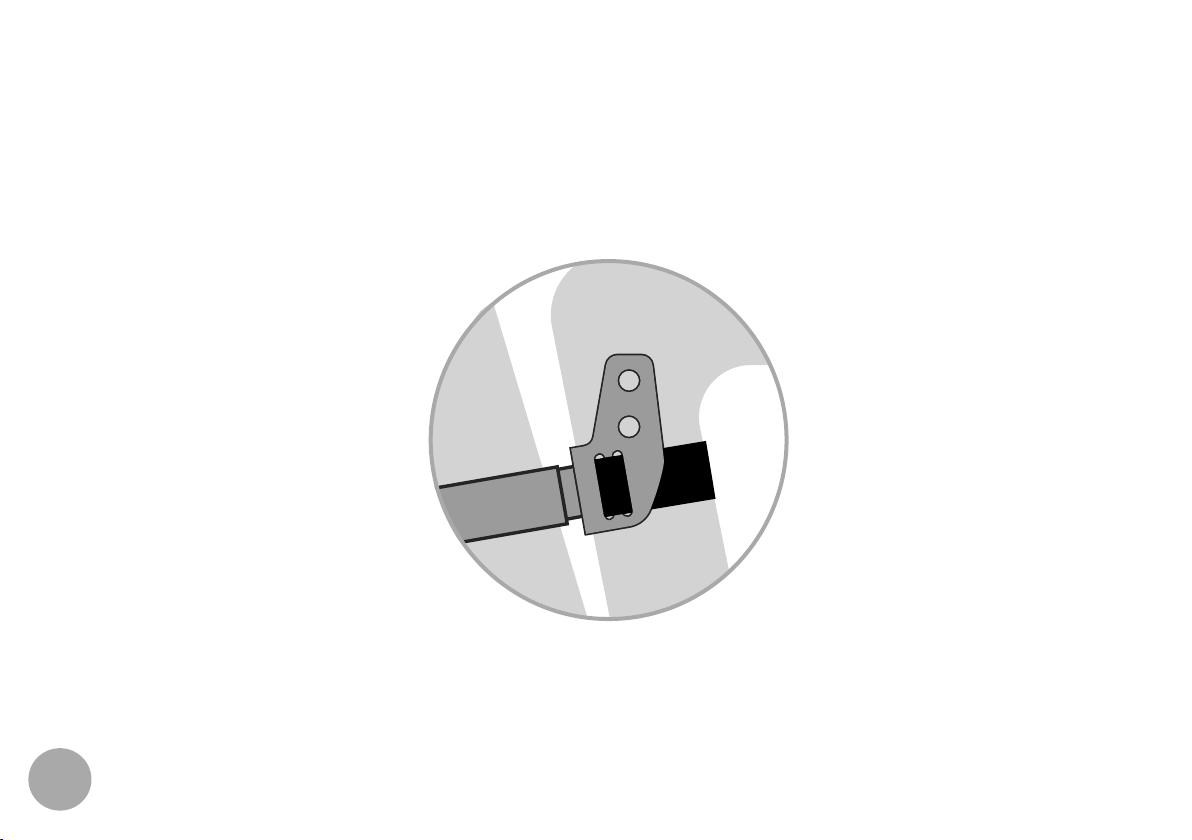
If you are unable to complete the previous step due to a lack of suitable bolts, or suitable fixing
points strong velcro straps are supplied to accommodate this. Feed the straps through the
brackets (Figure 2) and tightly strap around the scooter seat arms. Ensure the straps are tight so
there is no movement.
(F
igure 2)
15
Step 6. Once assembled the plastic clamp should be pushed up the main
frame before being tightened with the 3 allen bolts (figure 3).
Ensure the frame is held tightly and securely so there is no movement.
There must also be sufficient length of the telescopic arm within the outer tube to ensure
adequate clamping with the quick release clamp.
X
(Figure 4)
(Figure 3)
The canopy must be level when viewed from behind (figure 4), ensure this is so before
continuing. If necessary adjust the arms by loosening the allen bolts and sliding up or down.
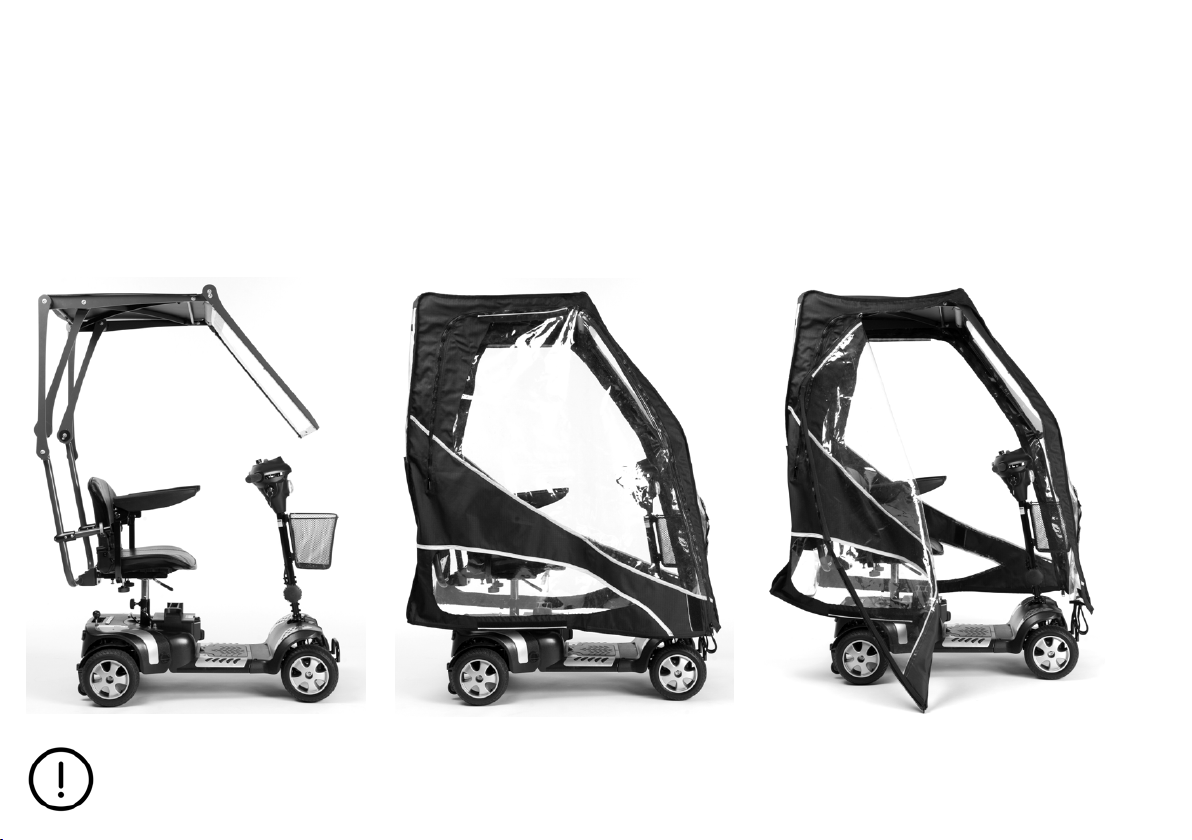
Step 7. You can now unfold your canopy frame and fit the weatherproof cover.
Lay the weatherproof cover on the roof of the frame, and unfold.
Zip up the sides of the canopy while positioning the velcro around the windscreen to ensure
correct placement.
Secure to the frame using all 6 velcro straps provided. (Open the left hand cover door to
secure the securing straps on the right side and vice versa).
You
may need to slide your seat slightly forward and reposition or remove the mirrors
to avoid them colliding with the sides of the canopy.
The canopy is now ready for use!
On some models of scooters the canopy may obscure lights.
Do not use your scooter on the road if the lights are obstructed.
18

Detailed guide to using the canopy
The ScooterPac folding canopy is as functional as it is beautiful.
To achieve this we included colour coded velcro and super flexible material amongst
other innovations to make it as easy as possible to use.
Follow this simple guide to get the most from your ScooterPac.
Tip: Refer to page 7 for parts diagrams
How to use the canopy
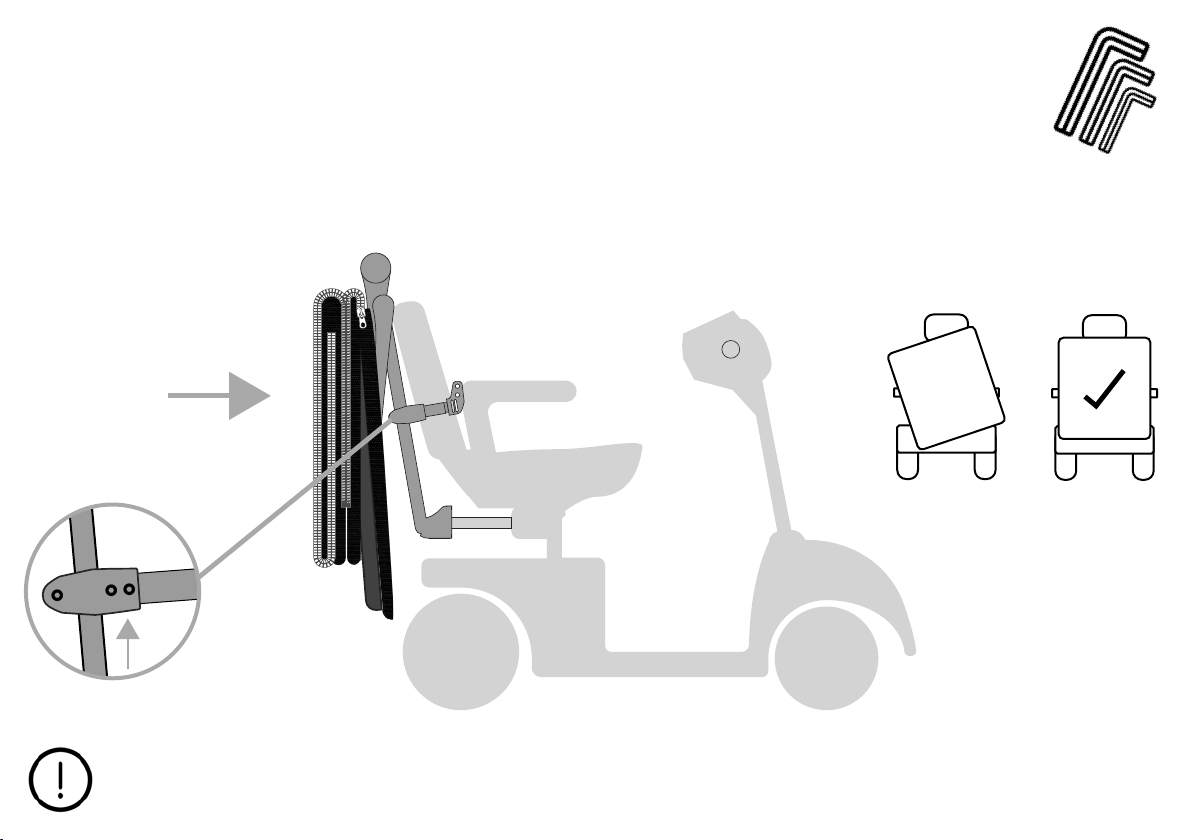
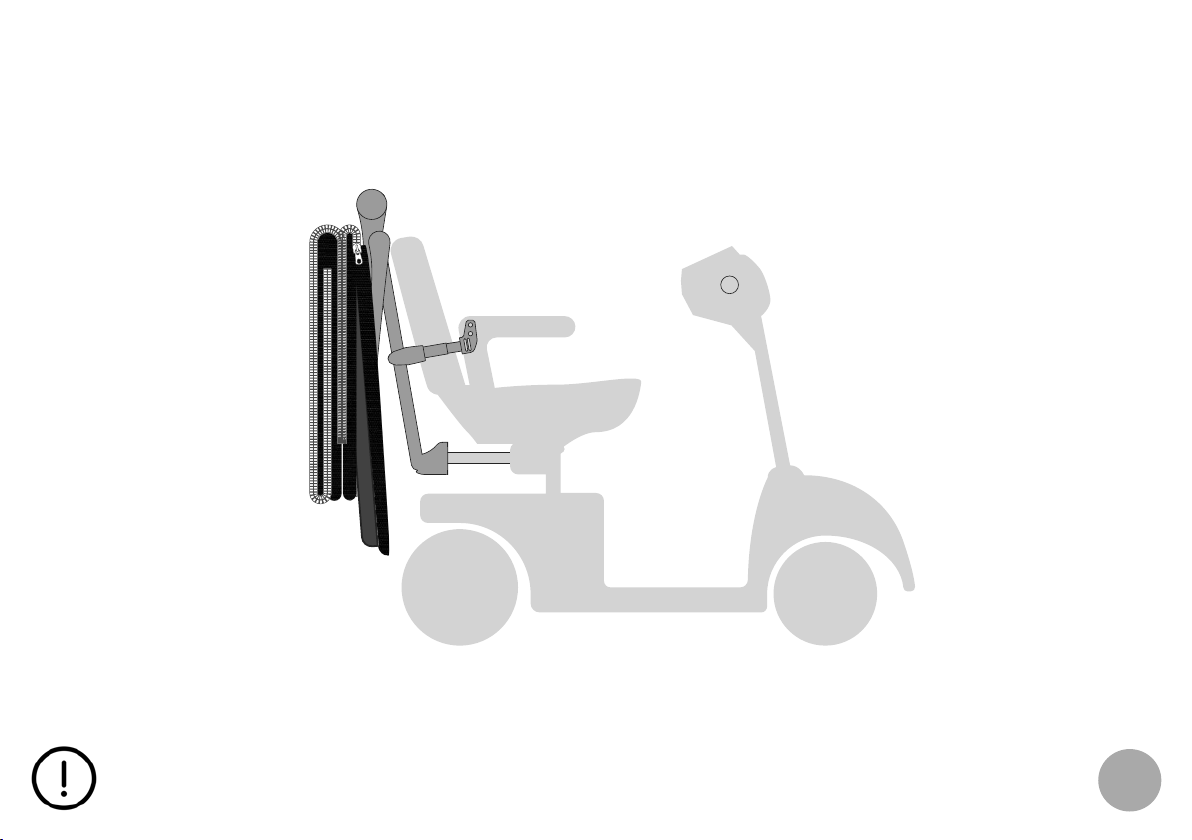
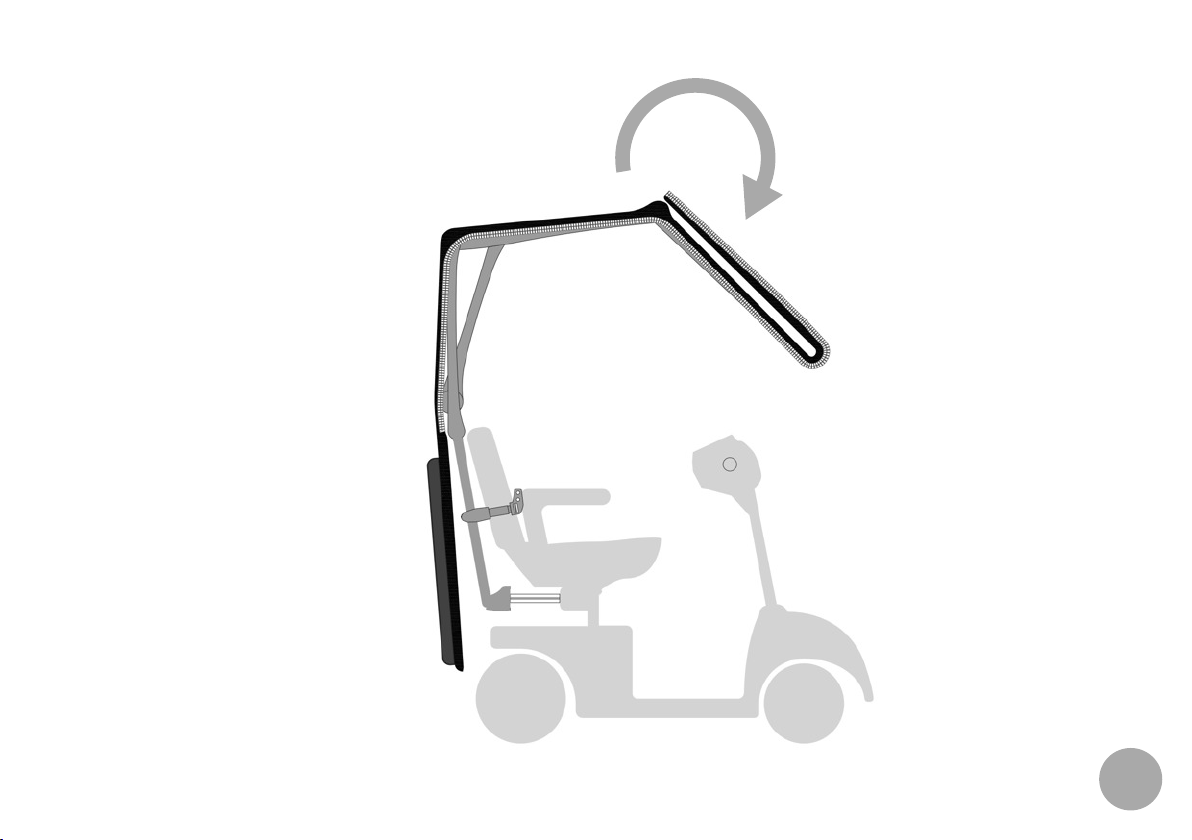
Step 1. Remove the storage bag by undoing the velcro at the bottom and lifting off. Then take
the main frame up and over into position.
20

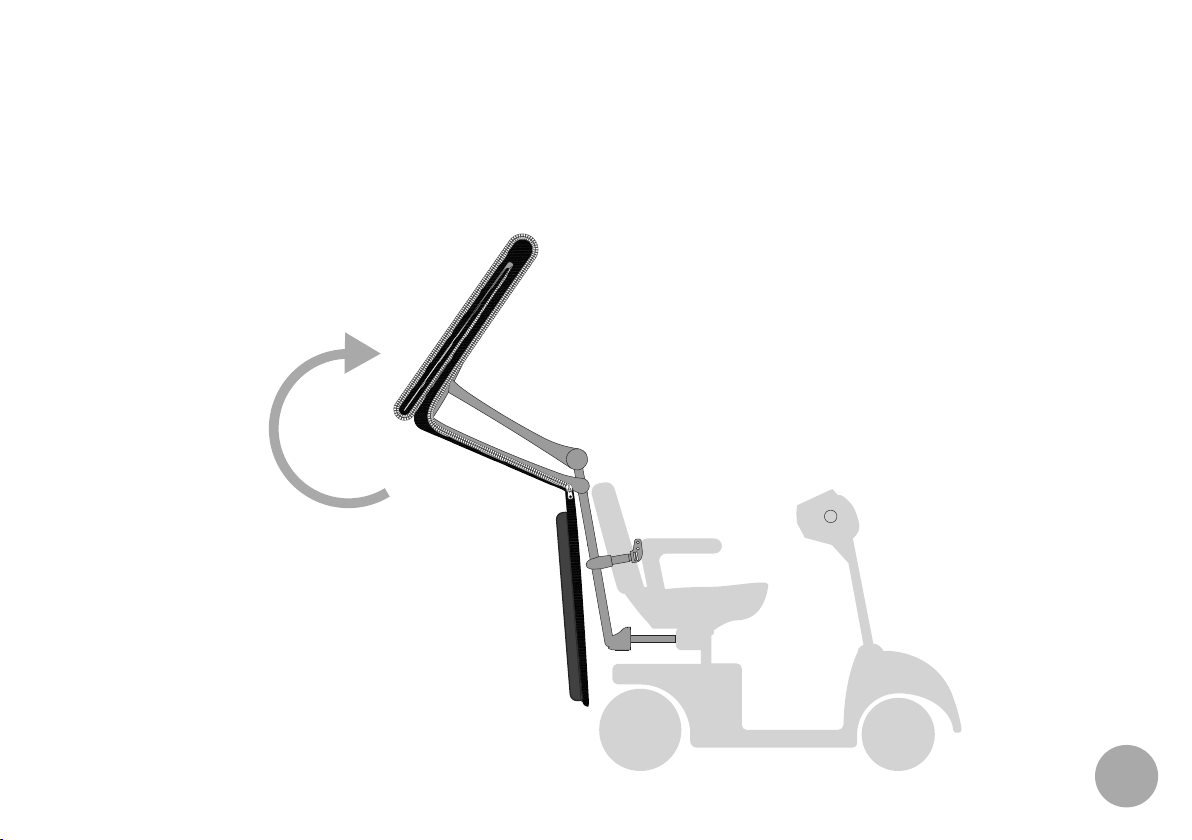
Step 2. The plunger on the side of the frame will engage.
click!
21
Step 3. Fold the windscreen down
22
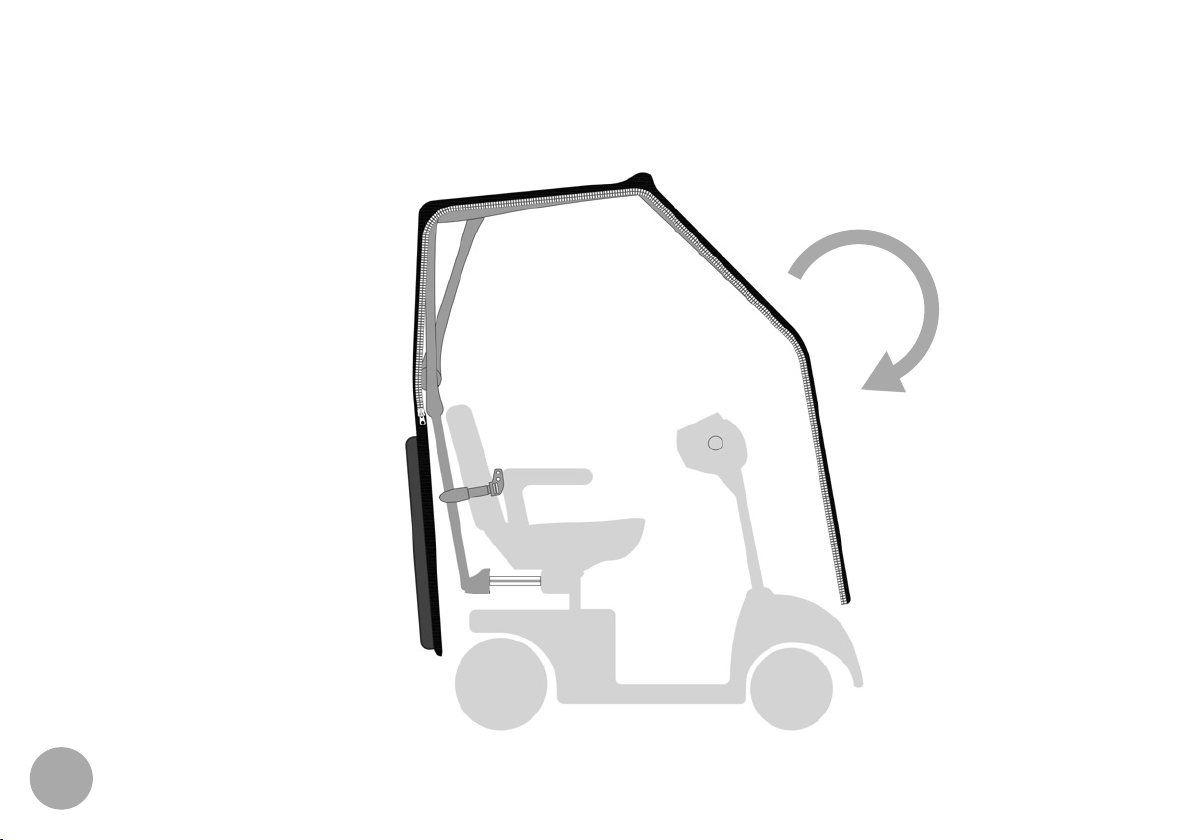
Step 4. Fold the front protection panel down to the front of the scooter
23

Step 5. The side protection panels can now be unfolded from the rear, around to the sides.
24
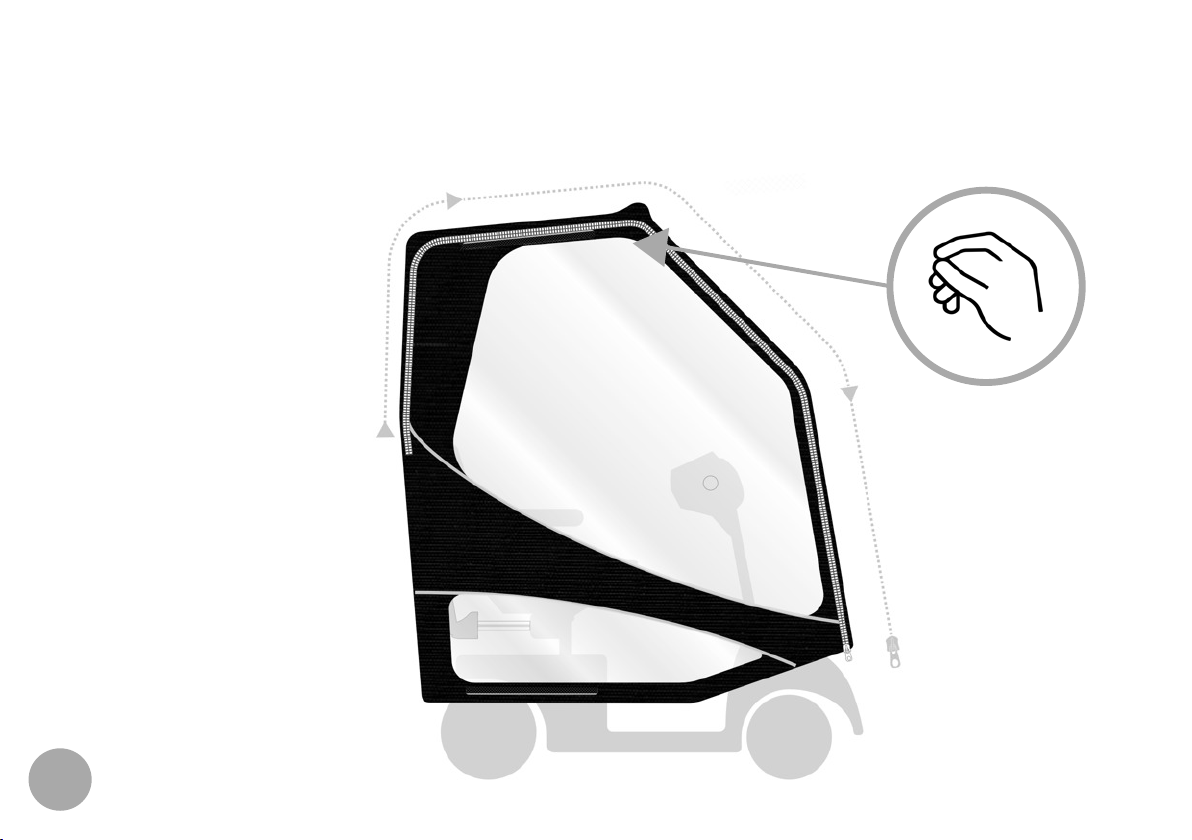
Step 6. While holding the top corner of the side panel pull the zip around
to the front of the scooter. Repeat to the other side.
25
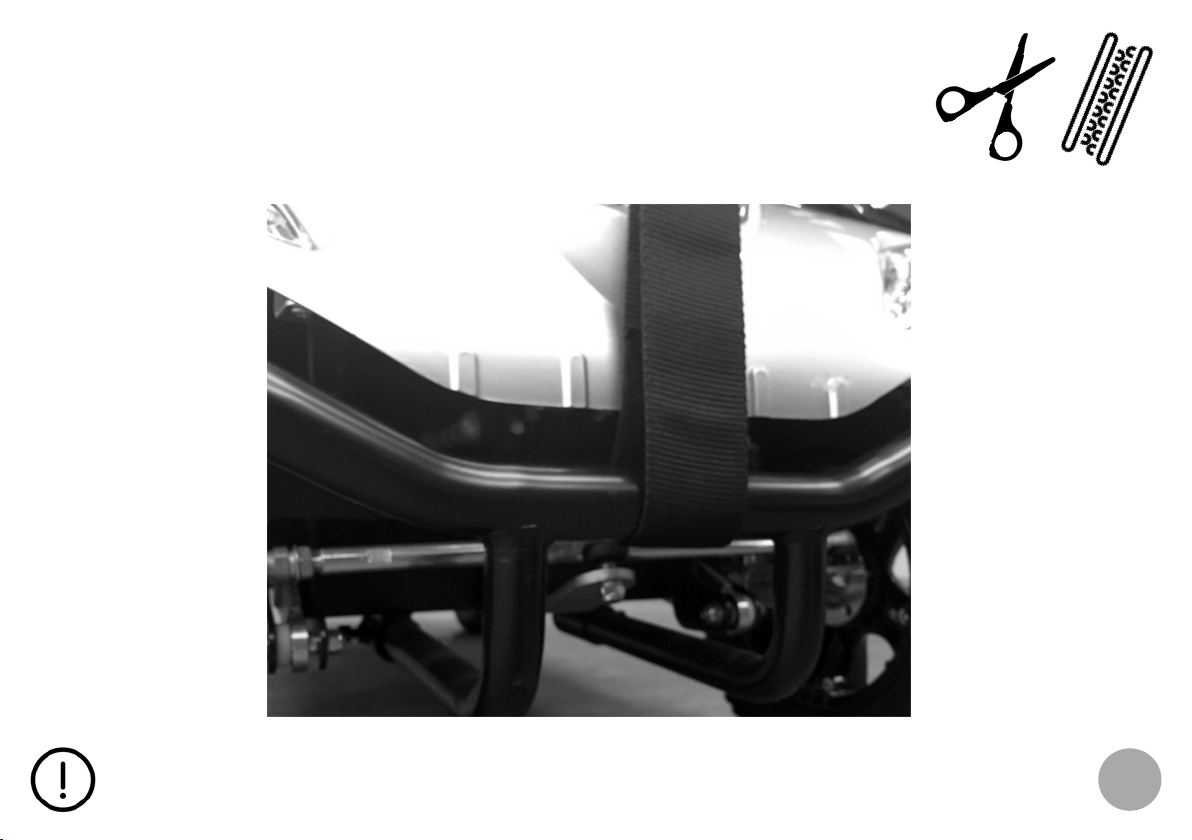
Step 7. The cover should now be secured to the front of the scooter by one
Central strap around bumper.
of the methods below;
1)
1.
Ensure
to avoid entanglement with the wheels.
the central strap is either secured out of the way or removed if not used
26

Step 8. The canopy is now ready for use. To access the scooter simply undo the zip from the bottom of the canopy.
2
7
 Loading...