


UM150 User’s Manual
VERIZON WIRELESS VZACCESS MANAGER

CONTENTS
CONTENTS
1. INTRODUCTION ......................................................................................1
1.1 Supported Services ................................................................................1
1.2 System Requirements ............................................................................2
1.3 Installation and Configuration .................................................................2
2. USING VZACCESS MANAGER ...........................................................11
2.1 Features ............................................................................................... 11
2.2 Getting Started .................................................................................... 12
2.3 Connecting ......................................................................................... 16
2.4 Warning Messages .............................................................................. 20
2.5 Using Dial Up Connections ................................................................. 21
2.6 TXT Messaging .................................................................................... 22
3. VZACCESS MANAGER PREFERENCES ..........................................25
3.1 WWAN Preferences ............................................................................. 25
3.2 Wi-Fi Preferences ................................................................................ 30
3.3 Options ................................................................................................ 35
3.4 Venturi Preferences ............................................................................. 37
3.5 TXT Messaging Preferences ............................................................... 38
3.6 Updates Preferences ........................................................................... 39
4. ADDITIONAL FEATURES ....................................................................40
4.1 The Status Bar ..................................................................................... 40
4.2 The Toolbar Buttons ............................................................................. 42
4.3 Minimizing the Interface ....................................................................... 43
4.4 The Tools Menu ................................................................................... 44
4.5 The Options Menu ............................................................................... 45
4.6 The Help Menu .................................................................................... 46
5. SETTINGS IN OTHER APPLICATIONS ..............................................47
5.1 Sync Applications ................................................................................ 47
5.2 Proxy Settings ...................................................................................... 49
5.3 Instructions for AOL Users .................................................................. 55
5.4 Using E-mail with VZAccess ............................................................... 63
6. TROUBLESHOOTING ...........................................................................67
6.1 WWAN Devices ................................................................................... 67
6.2 Wi-Fi Devices ....................................................................................... 72
6.3 Additional UMTS/GPRS Tips .............................................................. 75
6.4 Technical Support ................................................................................ 76
7. GLOSSARY ............................................................................................77
8. TRADEMARKS AND SERVICE MARKS ............................................82

1
UM150 User’s Manual
1
UM150 User’s Manual
1
UM150 User’s Manual
1. INTRODUCTION
VZAccessSM Manager from Verizon Wireless
Welcome to VZAccess Manager from Verizon Wireless. VZAccess Manager
provides easy access to the wireless Internet. It gives you the flexibility to connect
your notebook to the Internet anytime, anywhere.
1.1 Supported Services
VZAccess Manager supports the following Verizon Wireless services
1. GlobalAccess (VZGlobal) − This service requires a GPRS/EDGE/UMTS/
HSDPA-capable PC Card or ExpressCard and a SIM card. GlobalAccess
provides high-speed wireless Internet access in 50 countries throughout
Europe, Asia, Australia and Africa. The card runs on high-speed networks
with download capabilities of up to 384 Kbps.
Please visit www.verizonwireless.com/vzglobal for service availability and
additional details.
2. BroadbandAccess − This service requires a BroadbandAccess-capable
wireless device and provides a wireless broadband connection to the
Internet. Verizon Wireless BroadbandAccess is one of the fastest, fully
mobile wireless Internet data solutions available. Quickly download
complex files and view email attachments at broadband-like speeds
(typically 300-500 Kbps, capable of reaching 2 Mbps).
Visit www.verizonwireless.com/b2c/mobileoptions/broadband/index.jsp
for service availability and additional details.
3. NationalAccess − This requires a NationalAccess-capable wireless device
(supporting CDMA 1xRTT). NationalAccess delivers typical speeds of 60 to
80 Kbps, bursting up to 144 Kbps*. This service requires a subscription to a
NationalAccess plan. Additional information is available at
www.verizonwireless.com/b2c/mobileoptions/nationalaccess/index.jsp.
4. Dial-Up Data Service − This requires a wireless device capable of establishing
dial-up connections. This service allows you to use your wireless device to dial
into your corporate network or other services you normally dial into over a
regular phone line. This connection operates at 14.4 Kbps. Additional
per-minute charges apply.
NOTE: You do not need a separate Internet service provider (ISP) to access the
Internet when using NationalAccess or BroadbandAccess.
* Speed claim based on our network tests with 101 Kilobyte FTP data files.
Actual throughput speed and coverage vary.

2
UM150 User’s Manual
2
UM150 User’s Manual
1.2 System Requirements
In order to set up VZAccess Manager, you will need the following minimum
system requirements:
• A Verizon Wireless PC Card, ExpressCard, USB Modem or mobile phone (with
a Mobile Office Kit)
• A SIM card for your GPRS/EDGE/UMTS/HSDPA device
• Windows 2000 Professional, Windows XP (Home, Professional, Media Center
or Tablet PC Editions) or Windows Vista¹
• A Pentium 166 MHz or higher
• An optional Wi-Fi adapter for Wi-Fi access
• An Internet browser software for Internet access or the software used by your
company for network access
• A Verizon Wireless data service plan
¹ Some devices may not support Windows Vista.
1.3 Installation and Configuration
This section will guide you through the installation and setup process for
VZAccess Manager. Before getting started, you should become familiar with the
documentation that came with your wireless device.
CD's
You purchased a UM150, there is only one CD that contains VZAccess Manager
and USB modem drivers.
Installing VZAccess Manager
Follow these steps to install VZAccess Manager:
1. Turn on your computer and close all applications.
2. Insert the CD-ROM into your CD drive.
3. If set up does not automatically start, click the Start button on the taskbar and choose
Run. Type D:\Start (where D is the letter of your CD-ROM drive) and click OK.
4. Follow the steps in the next section.

3
UM150 User’s Manual
3
UM150 User’s Manual
IMPORTANT: If using a USB device, VZAccess Manager software must be installed
before you insert the USB device in to the computer for the first time. Only after
the software has been installed can Windows successfully install and configure the
USB device.
IMPORTANT: If you are planning to use a Global PC Card or ExpressCard outside
the U.S., the following installation must be performed within BroadbandAccess/
NationalAccess coverage area prior to leaving the US:
• You must use a PC Card, an ExpressCard or a USB Modem designed for the
BroadbandAccess/NationalAccess network, not the UM150.
• Your new GlobalAccess version of VZAccess Manager must be installed even if
you already have a previous version loaded.
• VZAccess Manager must be installed before you insert the card into the
computer for the first time. Only after the software has been installed can
Windows successfully install and configure the PC.
The VZAccess Manager Setup Program
STEP 1: Click the VZAccess Manager setup program. A “Welcome” Screen
appears. Click the Next button to continue with the installation process.

4
UM150 User’s Manual
4
UM150 User’s Manual
STEP 2: After the Welcome screen you will see the VZAccess Manager License
Agreement. In order to install and use this product you must agree with the terms of
this agreement. Select “I agree with this software license agreement,” then click the
Next button to continue. If you do not agree with this agreement, click the Cancel
button to exit.
STEP 3: You are now ready to select the location on your computer where the
VZAccess Manager should be installed. It is recommended that you do not modify
the default destination folder. Click the Next button to continue.

5
UM150 User’s Manual
5
UM150 User’s Manual
STEP 4: You are now ready to begin installing VZAccess Manager components
onto your computer. Click Next to continue.
STEP 5: During this step the components of VZAccess Manager are installed onto
your computer.

6
UM150 User’s Manual
6
UM150 User’s Manual
STEP 6: Installation is now complete. Click the Finish button to leave the VZAccess
Manager setup program and to begin using your new software.
The setup program will automatically create a VZAccess Manager shortcut on your
desktop.
The VZAccess Manager Setup Wizard
After you have successfully completed the installation process of VZAccess
Manager, you are ready to start the program and begin your initial setup. The steps
in the Setup Wizard are critical to the proper operation of VZAccess Manager when
using your WWAN or Wi-Fi device to connect to the Internet. Do not connect/insert
your wireless device until instructed to do so.
STEP 1: Click the Start button, select the Programs menu and choose the
VZAccess Manager menu item to start the VZAccess Manager program.

7
UM150 User’s Manual
7
UM150 User’s Manual
STEP 2: The first time you open VZAccess Manager, the Setup Wizard will run
automatically. You will be presented with a Welcome screen.
If you have an Internet connection, it is recommended that you check to see if you
are running the latest version of VZAccess Manager. Click the “Check for Updates”
button to perform this check.
Click Next to continue.
STEP 3: In this step of the Setup Wizard you must specify the type of wireless
device that you intend to use with VZAccess Manager. Select either “Detect WWAN
device only” or “Detect both Wi-Fi and WWAN.” For the purposes of this guide,
“Detect WWAN device only” will be used. Please note that your experience in Step
4 may be different if you use a different selection. After making the appropriate
selection, click Next to continue.

8
UM150 User’s Manual
8
UM150 User’s Manual
STEP 4: The VZAccess Manager will now detect and setup your WWAN device.
“WWAN” (Wireless Wide Area Network) denotes any UMTS, GPRS, 1xEVDO,
1xRTT or CDMA connection to the Verizon Wireless or partner networks such as
VZGlobal, BroadbandAccess or NationalAccess.
STEP 5: In this step you need to select the type of connectivity you wish to use with
your wireless device. For the purposes of this guide, we will select “USB Modem.”
Please note that this selection may not be appropriate for your type of wireless
device. Once you have selected your connectivity option, click Next to continue.

9
UM150 User’s Manual
9
UM150 User’s Manual
STEP 6: USB device users would insert their USB device now, and wait for
Windows to detect and install drivers for the device.
NOTE FOR HANDSET USERS: If you selected USB (to connect a phone) and
have not already installed the data cable drivers supplied with the cable, you must
install them now. To install the data cable drivers click the Cancel button below to
exit the Setup Wizard and then refer to the documentation included with the cable.
Please plug the data cable into your wireless phone and then plug the cable into
your computer. If your wireless phone is not turned on, do so now.
If the USB device is detected, you will see the following screen.

10
UM150 User’s Manual
10
UM150 User’s Manual
STEP 7: The detection and configuration process for your wireless device is now
complete. In this step you can elect to run the VZAccess Manager automatically
every time you start up your computer. To do so, check the “Run VZAccess
Manager at Startup” checkbox. Click Finish when complete.
Please familiarize yourself with the information in the “Using VZAccess Manager”
and “Connecting to the Internet” sections of this guide.

11
UM150 User’s Manual
11
UM150 User’s Manual
2. USING VZACCESS MANAGER
2.1 Features
WWAN (Wireless Wide Area Network) Specific Features
• Configures your PC to use your wireless device as a modem.
• Creates a NationalAccess connection if you are using a NationalAccess-capable
wireless device which does not support BroadbandAccess.
• Creates BroadbandAccess connection if using a BroadbandAccess-capable
device. This connection will automatically fall back to NationalAccess if
BroadbandAccess is unavailable.
• Copy utility to create wireless copies of your dial-up connections, if supported by
your device.
• Controls the Venturi compression software when using BroadbandAccess or
NationalAccess.
• Signal strength and battery level display for most wireless phones.
• Features a test function for your WWAN device.
Wi-Fi Features
• Configures your Wi-Fi adapter (Optional) to work with VZAccess Manager.
• Displays Wi-Fi connections and signal strength when in a Wi-Fi coverage area.
• Supports both built-in Wi-Fi adapters (Optional) and USB devices.
Other Features
• VZAccess Manager can be used to launch all of your dial-up networking
connections, if desired.
• VZAccess Manager can launch your browser, e-mail client, VPN or a program of
your choice upon connection.
• The application logs connections used, duration and bytes sent and received.
• It also supports TXT messaging.

12
UM150 User’s Manual
12
UM150 User’s Manual
2.2 Getting Started
Launching VZAccess Manager
• Double click the icon on your desktop, or
• Open the Windows Start menu, select “Programs” and “VZAccess
Manager”
The VZAccess Manager Setup Wizard
The first time you launch VZAccess Manager, you will see the VZAccess Manager
Setup Wizard:
Stepping through this wizard is critical to properly setting up your WWAN or Wi-Fi
device. Please follow the on-screen instructions, or, for step-by-step guidance, refer
her e.
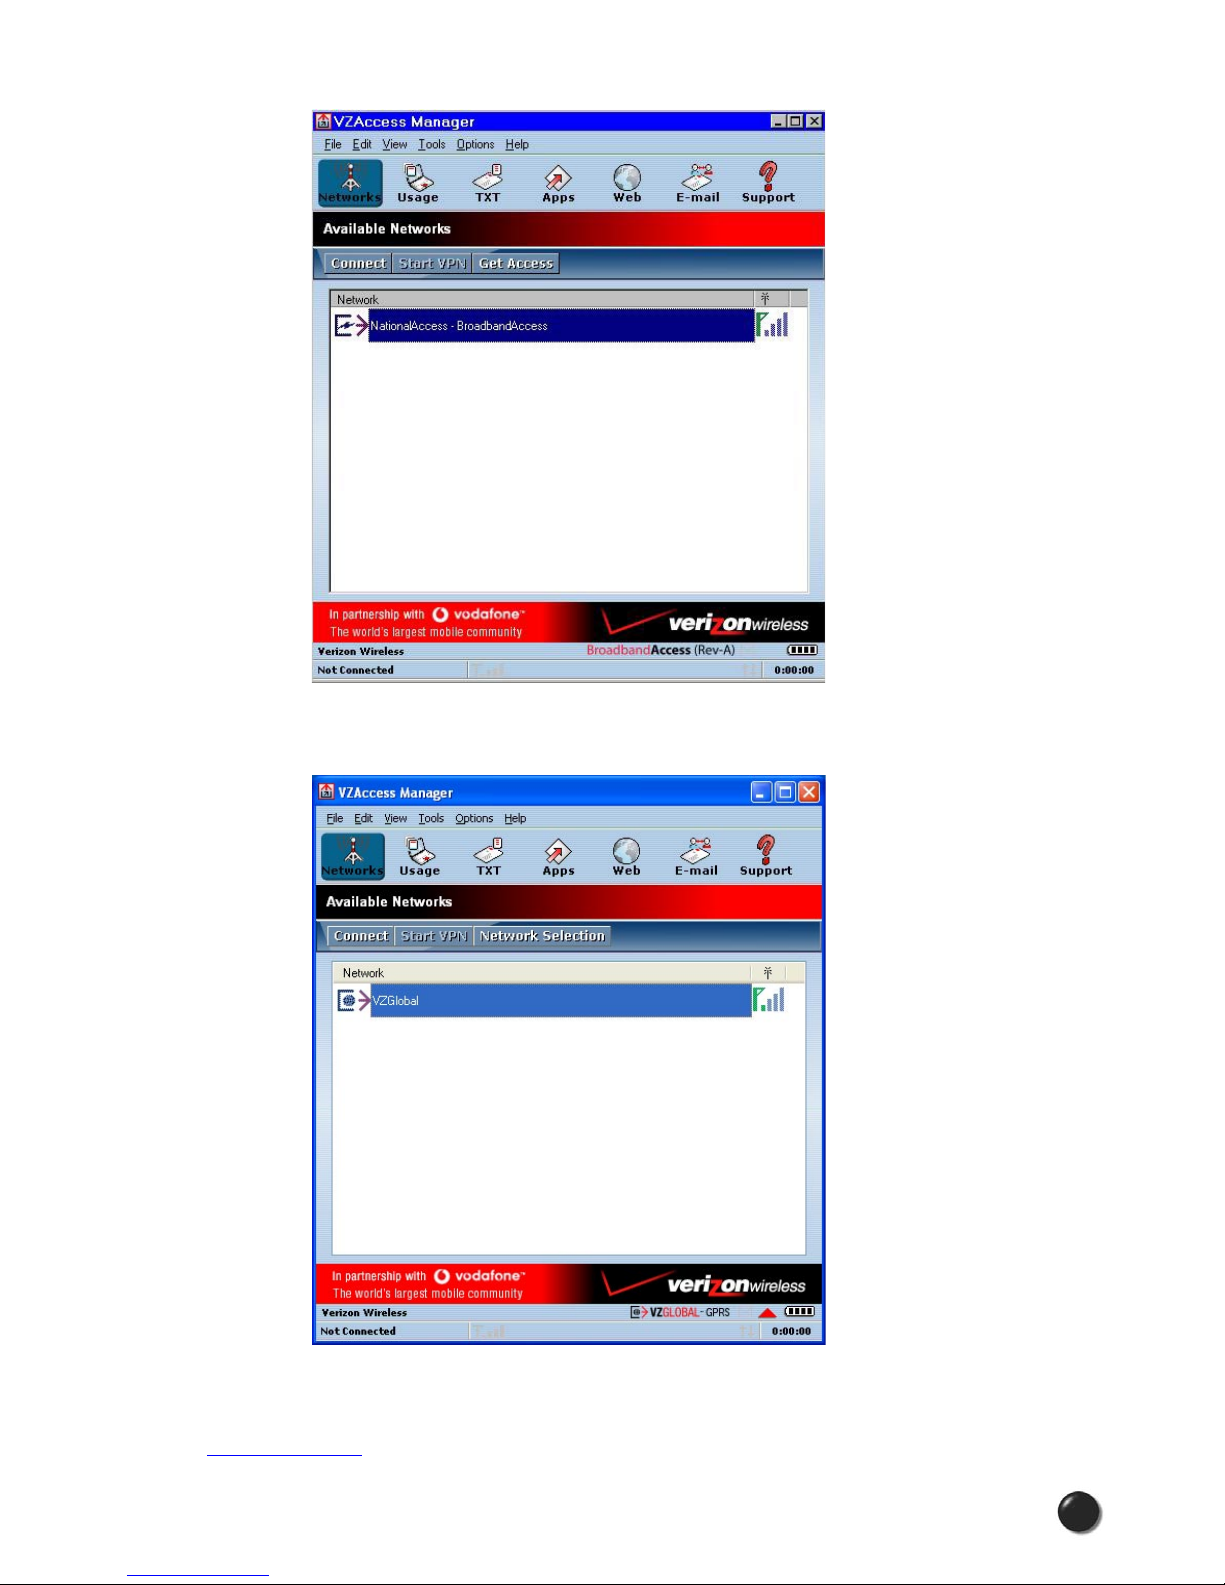
The Networks View
When the Setup Wizard is complete, VZAccess Manager displays the “Networks”
view. This view lists all currently available network connections and indicates their
respective signal strengths:
13
UM150 User’s Manual
13
UM150 User’s Manual
VZGlobal users may also see the following version of the main panel:
The status bar along the bottom of the window displays your current connection
state and the elapsed time of any connection. Additional information is available in
“The Status Bar” topic.

14
UM150 User’s Manual
14
UM150 User’s Manual
Connecting For the First Time
To connect to Verizon Wireless for the first time:
• Select “National Access–BroadbandAccess.”
• Click the “Connect” button.
• If your device has not yet been activated, you will be directed to a Verizon
Wireless website to set up an account. (To later purchase additional access, click
the “Get Access” button.)
• Important: Once your account is set up on the Verizon Wireless website, please
click the “Disconnect” button to ensure your account is set up properly.
• If you wish to begin using the service, click “Connect” again (or simply doubleclick the network name).
Disconnecting
To disconnect, either click the “Disconnect” button, or double-click the network
name again.
Other Notes
If your expected connection does not appear: Select “Refresh Networks” from
the “Options” menu. This will cause VZAccess Manager to look for your wireless
device(s) and verify network availability.
Changing Wireless Devices: If you change wireless devices, you will need to
run the Setup Wizard again. To do this make sure that your phone and cable are
connected, then select “Run Wizard” from the “Options” menu.
Wi-Fi networks:
• If you have any Wi-Fi networks you manually added because they do not
broadcast their SSID, they will always be displayed, and you will have to refer
to the signal strength displayed to know when you are in range. See the section
“Wi-Fi Specific Settings” for additional details.
• Note that with certain Wi-Fi adapters, the signal strength for Wi-Fi networks is not
accurate until you connect to the network.
NationalAccess and BroadbandAccess Connections:
• The NationalAccess connection is only created when the WWAN option is
selected during setup and if you are using a NationalAccess capable device that
does not support the Verizon Wireless BroadbandAccess service.

15
UM150 User’s Manual
15
UM150 User’s Manual
• If you are using a BroadbandAccess capable device, a BroadbandAccess
connection will be created.
• This connection will use BroadbandAccess if available and will automatically
attempt a NationalAccess connection when BroadbandAccess is not available.
The VZGlobal Service:
• VZGlobal will only be listed as an available connection if (a) you used the wizard
to setup your WWAN device, (b) you are using a VZGlobal-capable device, and
(c) a VZGlobal signal is available in your area.
For further troubleshooting tips, please refer to Troubleshooting.
About the Networks View
By default, VZAccess Manager opens to the “Networks” view. The Networks view
displays all currently available network connections.
At a glance you can see the signal strength and battery level (if applicable) of your
WWAN or Wi-Fi network. Your current connection state and the elapsed time of the
connection are displayed along the bottom of the status bar.
If your expected connection does not appear after starting VZAccess Manager,
select “Refresh Networks” from the “Options” menu. This will cause VZAccess
Manager to look for your wireless device(s) and verify network availability. If you
have any Wi-Fi networks you manually added because they do not broadcast their
SSID, they will always be displayed, and you will have to refer to the signal strength
displayed to know when you are in range.
NOTICE: Note that with certain Wi-Fi adapters the signal strength for Wi-Fi
networks is not accurate until you connect to the network.
NOTE: The NationalAccess connection is only created when the WWAN option is
selected during setup and if you are using a NationalAccess capable device that
does not support the Verizon Wireless BroadbandAccess service. If you are using a
BroadbandAccess capable device a BroadbandAccess connection will be created.
This connection will use BroadbandAccess if available and will automatically
attempt a NationalAccess connection when BroadbandAccess is not available.
NOTICE: If you change wireless devices, you will need to run the Setup Wizard
again. To do this make sure that your wireless device and cable are connected,
then select “Run Wizard” from the “Options” menu.

16
UM150 User’s Manual
16
UM150 User’s Manual
2.3 Connecting
Once your Wi-Fi or WWAN device is properly configured, connecting to the Internet
is as simple as selecting the network connection type shown in the list and clicking
the Networks button. Note that the Networks button immediately above the list
will change to “Connect” or “Connect Wi-Fi” based on the current selection in the
networks list.
Following installation of the VZAccess Manager application, launch VZAccess
manager and click the Connect button. The application will automatically detect
whether the device is activated. If you have not already signed-up for service on
your device, when you attempt to connect to the network for the first time you will be
directed to the Verizon Wireless activation site. You will be presented with options to
activate a preference and follow the online screens to complete the order.
If you are outside the BroadbandAccess service area, or cannot complete the
activation online, you will be presented with a phone number to call for assistance
and completion of your order.
If you activate a daily session, you will be returned to the Verizon Wireless
activation site the next time you attempt to access the network after your session
has expired. The same activation options will be presented.
1. If you are outside the US, Canada or Puerto Rico and using the USB device,
select the “VZGlobal” connection. If in the US and using the device for the
domestic network, select one of the following connections: “NationalAccess −
BroadbandAccess” or “NationalAccess.”
2. Click the “Connect” button when it becomes enabled.
Once connected, the “Connect” button will change to “Disconnect.” Simply click this
to end your current connection. To connect to any other network shown, select it,
and then select “Connect.”

17
UM150 User’s Manual
17
UM150 User’s Manual
The Status Bar
Information regarding your current network connection can be seen in the status
bar along the bottom of the VZAccess Manager interface. For more information
on this status bar, see the section “The Status Bar” in the “Additional Features”
section.
NOTE: If you are using a WWAN device that supports the Verizon Wireless dial-up
data service and you made wireless copies of your dial-up accounts, they will also
appear. See the section “Creating Wireless Copies of your Dial-Up Connections.”
Optionally you can have all dial-up connections appear in VZAccess Manager and
use it to launch any dial-up networking connection.
If you are in the presence of a private Wi-Fi network (such as one at work or
at home) it will also appear if you selected the Wi-Fi option during setup. If the
number of connections exceeds what can be displayed, a vertical scroll bar will
appear to the right of the connections. Scroll down to see them all.
NOTICE:
The first time you connect to GlobalAccess, BroadbandAccess, NationalAccess,
or a private Wi-Fi connection,a connectivity warning message will appear. You have the option
to suppress these warning messages when they are displayed.
VZAccess Manager will display status information at the bottom of the window
during the connection process as well as while connected. When not connected,
the status text in the lower left corner will display “Not connected” for the currently
selected network. The timer will display “00:00:00.” Once connected, the status text
will display “Connected” and the elapsed timer will begin to run. When a connection
is active, its name will appear as bold text.
The status is also reflected in the Task Tray icon.
Connected
Idle - Not Connected
Connecting
Disconnecting
A window will also slide out of the tray showing
when you connect and disconnect from
networks.
18
UM150 User’s Manual
18
UM150 User’s Manual
The pop up status can be turned off, if desired, by selecting “Tools,” “Preferences,”
“Options” tab, and un-checking “Show pop-up status windows by tray.” Right clicking
on the tray icon provides various options and double clicking on it will always show
the application. Placing your cursor on it will display the current connection status.
Based on your preferences, your browser or e-mail or VPN program can be
launched automatically, or you can launch whatever software you want to use.
You can also determine if all connections show in the drop down list or only your
wireless ones.
NOTE: Always use VZAccess Manager when connecting via BroadbandAccess or
NationalAccess.
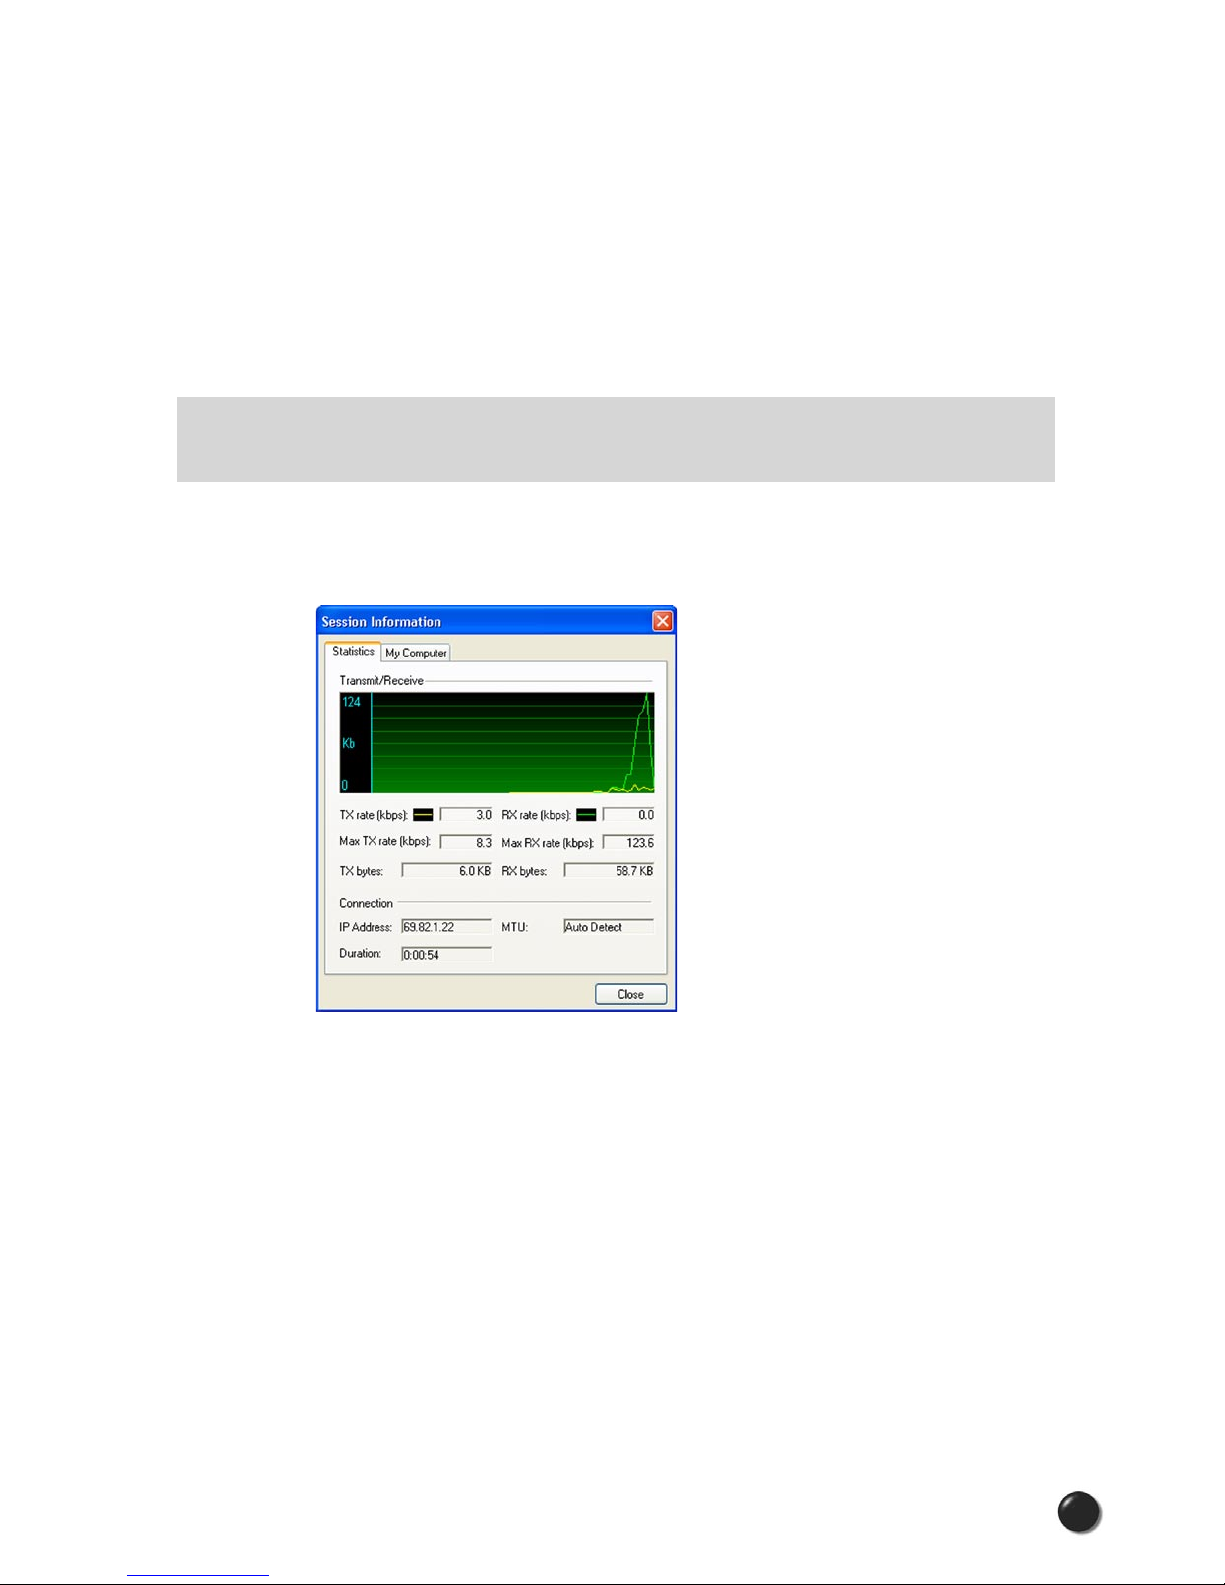
At any time during your connection you can check your current connection speed
and throughput stats in the Statistics tab of the Session Information window.
To see this window, select “Statistics” from the “Options” menu.
The Session Information window will also contain a My Computer tab and a
Statistics tab. The My Computer tab contains detailed information about your
computer. This information is helpful when troubleshooting a problem.
Additional information when using the NationalAccess connection:
By default, VZAccess Manager enables the Venturi compression software for the
BroadbandAccess and NationalAccess connections.
If you are using the BroadbandAccess or NationalAccess connection and the call
fails when you try to connect, with VZAccess Manager returning to its idle state,
you should try to connect again. If you feel you may have incorrectly entered your
wireless account number during initial setup, select “Options,” “Run Wizard.”

19
UM150 User’s Manual
19
UM150 User’s Manual
Dormancy:
NationalAccess and BroadbandAccess data sessions become dormant if you are
not sending or receiving any data. As soon as you resume sending or receiving
data, the data session will return to an active state.
Depending on your device and your NationalAccess or BroadbandAccess plan,
your data session may disconnect during a dormant state. See your Verizon Calling
Plan brochure for details or visit www.verizonwireless.com. If this happens, select
disconnect, and then connect again.
While dormant your wireless device may be able to receive a voice call. If you leave
your wireless phone connected to your PC, after you finish your voice call you may
be able to resume your data session as you normally would.
Activating your USB Modem for the first time:
The application will automatically detect if the USB Modem is activated. If you
have not already signed up for service on your USB Modem, when you attempt to
connect to the Internet for the first time you will be directed to the Verizon Wireless
activation site. You will be presented with options to activate a two-year contract or
to sign-up for daily session service (no commitment required). Select your activation
preference and follow the online screens to complete the order.
If you are outside the BroadbandAccess service area, or cannot complete the
activation online, you will be presented with a phone number to call for assistance
and completion of your order. If you activate a daily session, you will be returned to
the Verizon Wireless activation site the next time you attempt to access the network
after your session has expired. The same activation options will be presented.
Once your account is set up on the Verizon Wireless website, please click the “Quit”
button to ensure your account is set up properly. If you wish to begin using the
service please wait approximately 10 minutes for the account to be validated, then
click “Connect” again (or simply double-click the network name).
To purchase additional connectivity, click the “Get Access” button. You will be
returned to the Verizon Wireless activation site.

20
UM150 User’s Manual
20
UM150 User’s Manual
2.4 Warning Messages
NationalAccess
The first time you connect via NationalAccess, the following warning message will
be displayed:
ATTENTION:
You are about to establish a NationalAccess (1xRTT) data connection. Charges
apply in accordance with your subscription to Verizon Wireless' NationalAccess.
To see our current pricing for NationalAccess, please visit http://www.
verizonwireless.com/b2c/mobileoptions
This message will display each time you go to connect via the NationalAccess
connection until you select “Do not show this warning again.”
BroadbandAccess
The first time you connect via BroadbandAccess, the following warning message
will be displayed:
ATTENTION:
You are about to establish a BroadbandAccess or NationalAccess data connection.
Charges apply in accordance with your subscription to Verizon Wireless'
NationalAccess/BroadbandAccess.
To see our current pricing for BroadbandAccess, please visit http://www.
verizonwireless.com/b2c/mobileoptions
This message will display each time you go to connect via BroadbandAccess, until
you select “Do not show this warning again.”
Dial-Up
The first time you connect via dial-up, the following warning message will be
displayed:
ATTENTION:
Dial-Up connections may be charged differently than NationalAccess sessions.
Please check your Calling Plan for details.
21
UM150 User’s Manual
21
UM150 User’s Manual
This message will display each time you go to connect via a wireless dial-up
connection, until you select “Do not show this warning again.”
Wi-Fi
The first time you connect to a Wi-Fi network (with an optional WiFi adapter), you
will see the following warning:
You are about to establish a connection to a Wi-Fi network. Verizon Wireless does
not support problems associated with Wi-Fi networks.
Verizon Wireless Customer Care will not be able to assist you. Please see the Help
file for details.
In most cases connecting to a private Wi-Fi network is a simple process and you
can use VZAccess Manager instead of the Wi-Fi client you would normally use. If
you have any problems doing this try the recommendations in the section on Wi-Fi
Troubleshooting.
2.5 Using Dial Up Connections
This section is only applicable if you are using a WWAN Device that supports
dial-up connections.
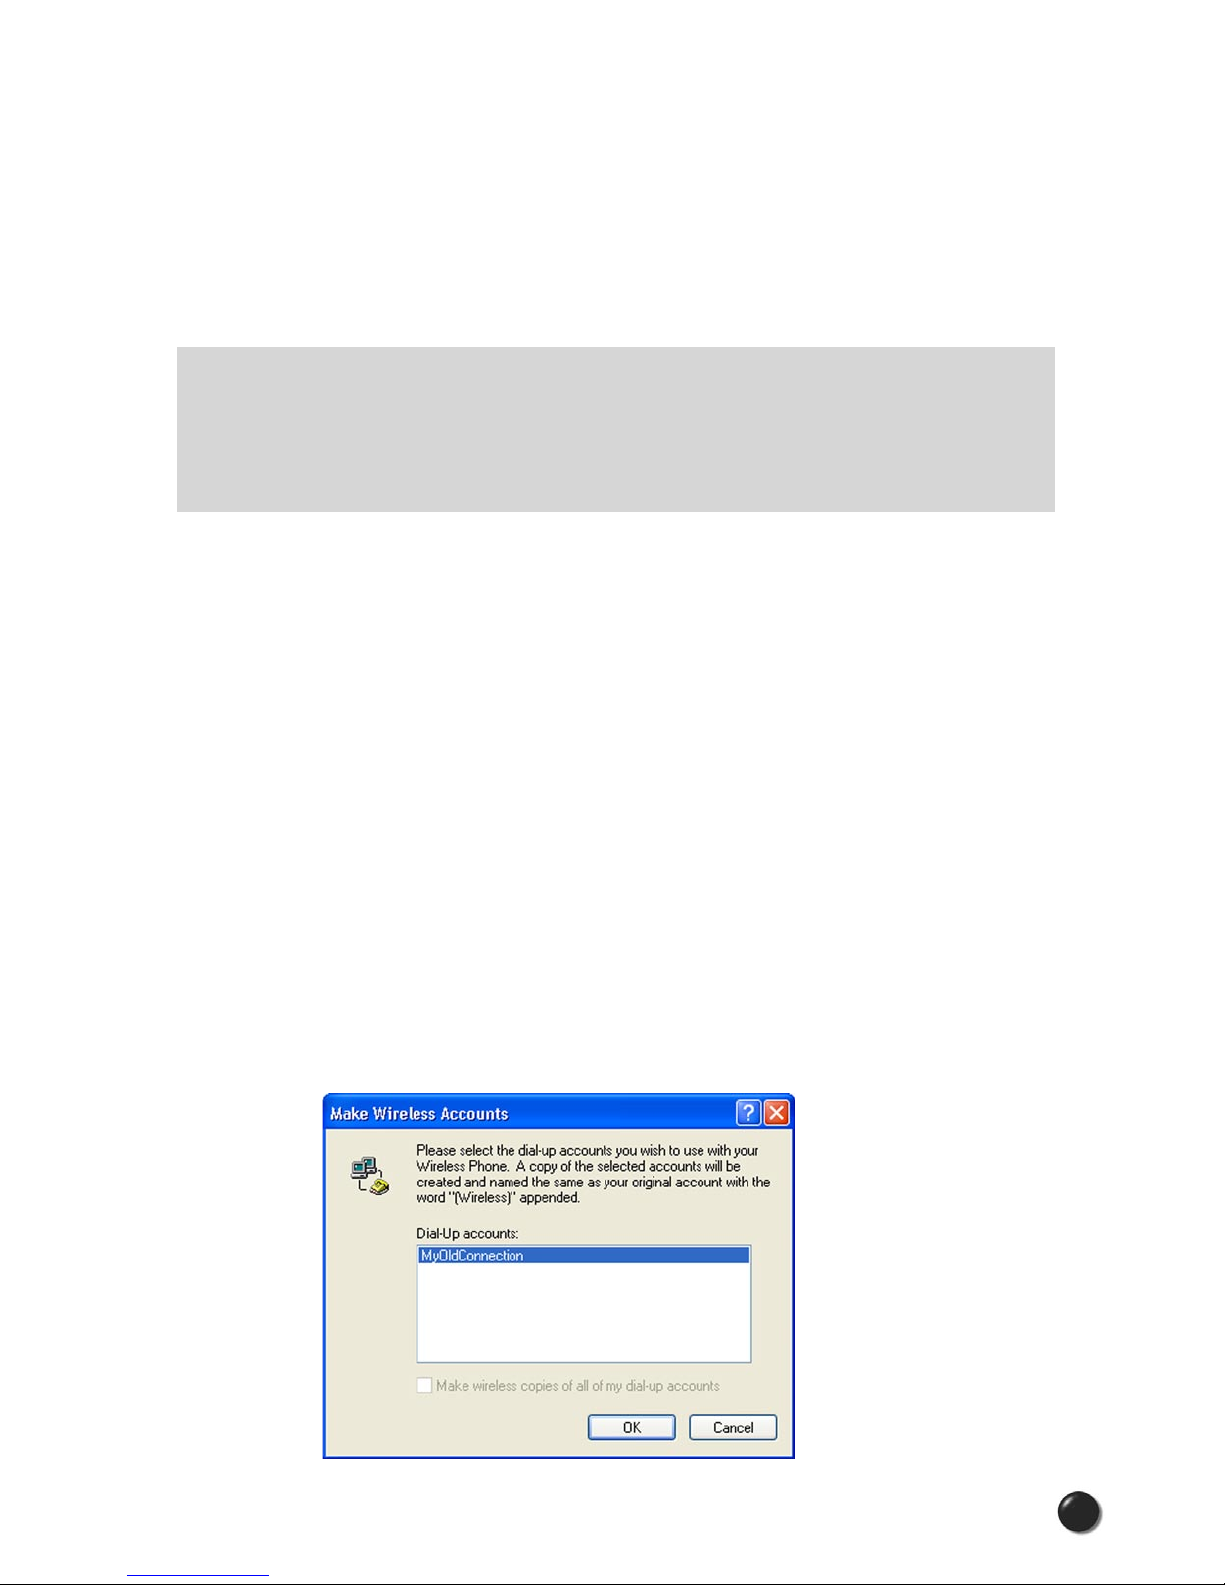
You can make wireless copies of existing dial-up accounts on your system. This will
wirelessly enable them and allow you to connect to them wirelessly.
To launch the copy utility, select “Tools,” “Dial-up Accounts” then “Copy.”
Click on the connection or connections you want to copy and click on the “OK”
button.

22
UM150 User’s Manual
22
UM150 User’s Manual
The new connection will have a suffix of “(Wireless)” and will be set to use your
wireless device as the modem. If the utility is unable to automatically recognize
your existing area code and number, the existing number will be displayed, and you
will be prompted to enter the area code and number. The utility configures the new
wireless connections to always dial 11 digits, so that they will work locally and also
in other digital data coverage areas.
If it is determined that the connection might benefit by further optimization, an
additional connection with a “(Wireless Optimized)” suffix, will also be created.
This connection may connect faster. If you have trouble with the “(Wireless
Optimized)” connection, you can delete it from your dial-up networking folder and
use the “(Wireless)” connection.
NOTE: Some applications, such as AOL and JUNO, have dial-up networking
connections that can't be used directly from VZAccess Manager or Dial-Up
Networking. Copies of these connections will not work with your wireless device,
since the original connections do not work by themselves. In most cases the
original connections or the software can be configured to use your wireless device
as a modem. For the easiest way to configure AOL to work with your wireless
device, see the section on Configuring AOL.
To delete connections:
Windows 2000, XP and Vista users can access Dial-Up Networking from VZAccess
Manager by selecting “Tools,” “Control Panels,” “Network and Dial-up Connections,”
right click on the desired connection and select “Delete.”
2.6 TXT Messaging
VZAccess Manager supports TXT Messaging for certain wireless devices only.

23
UM150 User’s Manual
23
UM150 User’s Manual
Receiving TXT Messages
• All of your TXT messages will appear in the list box at the top of the TXT
messaging view. By default, all sent and received messages will appear.
• To view only certain messages, click on the “View” toolbar button and select
“Received Messages,” “Sent Messages” or “All Messages.”
• If you are in the TXT Messaging view and a new message arrives, the message
will automatically appear in the list formatted in bold.
• To view a long TXT message, select the message in the list view. The details of
the message will appear below the list.
• If you are not in the TXT Messaging view and a new message arrives, a TXT icon
will appear in the status bar showing that new messages are available. There is
also a TXT preference option that can automatically switch VZAccess to the TXT
view when new messages arrive. By default, this feature is turned off.
• To reply to an inbound message, select the message and press the “Reply”
toolbar button. The phone number of the sender will be populated in the send
area below. Enter your new message and press the “Send” button to send the
message.
• To forward an inbound message, select the message and press “Forward” toolbar
button. The message will be populated in the send area below prefixed with a
“FW:.” Press the “Send” button to send the message.
• To resend a sent message, select the message and press the “Resend” toolbar
button. The phone number and message will be populated in the send area
below. Press the “Send” button to send the message again.
Sending TXT Messages
• While using the UM150, to send a text message to:
a US-based wireless number, enter: +, 1, then the wireless number.
a wireless number outside the US, enter: +, 011, the country code, then the
wireless number.
NOTE: Users can dial either a “+” or the specific exit code prefix required to
dial out of your current country.
• To send a TXT message to one or more Verizon Wireless subscribers, enter
their 10-digit mobile numbers separated by semi-colons in the “To...” field.
(Ex: 516-555-5555; 516-555-5556). If you use commas, the application will
automatically replace them with semi-colons.

24
UM150 User’s Manual
24
UM150 User’s Manual
• With some devices that support TXT messaging contact lists, you may be able to
click on the “To...” button to open your contact list.
• If contacts storage is supported by your device, to send a TXT to one of the
entries in your Contact List, click the “To” button to open the Contacts window.
Simply double click on the name of the user and that individual will automatically
be added to the “Send To” field. Holding down the “Ctrl” key while you click
names from the lists will allow you to select multiple names at once.
• The phone number and the message fields are required.
• The Character counter counts up from 0 to 160 and counts all of the characters
typed in the message field.
• Click the “Send” button.
TXT Contacts
If supported by your wireless device, the Address Book allows you to store the
names and mobile numbers of your personal contacts.
To create a personal contact:
• From the Contact List dialog, press the “Add” button.
• Enter the full name of the contact into the “Name” field.
• Enter the 10-digit mobile number into the “Mobile 1” field.
• The “Mobile 2” field can be used to enter a second mobile phone number. This
is used if the individual sends you a message from this number. You will see the
user’s name next to the inbound message instead of the phone number.
• Click the “OK” button. The contact name will now display in the list.
To edit a personal contact:
• Click a name from the list and press the “Edit” button.
• Make the necessary changes and click the “OK” button.
• Clicking the “Cancel” button will not save any changes you have made.
• Clicking the “Delete” button will remove that name from your list.

25
UM150 User’s Manual
25
UM150 User’s Manual
3. VZACCESS MANAGER PREFERENCES
3.1 WWAN Preferences
To access the WWAN preferences, click on the “Tools” menu, then “Preferences....”
Connect Options
The “Set Options...” Button: This is used to set various connect options. See
below.
Automatically Connect: If desired, you can select to have VZAccess Manager
automatically connect at application startup.
“Do not allow connectivity when roaming:” Enabling this option will prevent
you from connecting when roaming. This option is disabled if using NDIS mode.
VZAccess Manager only supports this feature with certain devices; if not supported,
the option will not appear.
NDIS Mode: Enables/disables the NDIS feature. Please note that NDIS is
only supported by some USB devices. It also requires either Verizon Wireless
BroadbandAccess or NationalAccess coverage, and either Windows 2000 or XP
or Vista. When enabled, NDIS provides an “always on” Internet connection similar
to a standard Network Interface Card (NIC). Please note that an NDIS broadband
connection will remain active even if you exit VZAccess Manager.

26
UM150 User’s Manual
26
UM150 User’s Manual
Account Options
Show non-wireless accounts in list: If you select this option, all of your dial-up
accounts will show up in VZAccess Manager's list of accounts, allowing you to use
VZAccess Manager to launch them instead of Dial-Up Networking. With this option
unchecked, the only connections that are displayed in VZAccess Manager's list of
accounts are Verizon Wireless connections and any other connections you have
created. If VZAccess Manager is also configured for Wi-Fi, these connections will
also be displayed when in coverage of the hot spot.
Do not prompt for user name and password: If you are only using VZGlobal,
BroadbandAccess or NationalAccess, this setting has no effect. If you created
Wireless connections to dial into other networks or have existing connections
you are going to launch using VZAccess Manager, checking this option will skip
the screen that normally asks for your user name and password. For this to work
you will have had to connect previously, successfully saving your user name and
password.
Security Options
The “Security Setup...” Button: Available only with some wireless devices, this
button is used to lock/unlock the wireless device as well as change its lock code.
Device Options
Show wireless device battery instead of PC battery: (This option will only
appear if you are using VZAccess Manager with a handset.) If you are using a
WWAN device and this option is selected, the battery level of your WWAN device
will be displayed when your device is connected and detected by VZAccess
Manager, as well as when you connect and disconnect using your WWAN device.
Battery Status cannot be updated while you are connected to a Wireless Wide
Area Network (WWAN). You can refresh the status when you are not connected,
by selecting “Tools,” from VZAccess Manager's main window. Some phones fail
to accurately report their battery level to VZAccess Manager and some WWAN
devices such as USB devices do not use batteries, so you can use this option to
display the PC/notebook's battery instead.

27
UM150 User’s Manual
27
UM150 User’s Manual
The “Set Options” Button & Its Dialog
The Connect Tab
When you select the “Set Options” button from the screen above, the
following options will appear (“Tools,” “Preferences,” “WWAN tab,” “Set
Options...”):
Do not open my browser: With this option selected, when you connect to a
WWAN network, VZAccess Manager will not automatically launch your default web
browser.
Open my browser to my default home page: With this option selected, when you
connect to a WWAN network (VZGlobal, BroadbandAccess or NationalAccess),
VZAccess Manager will automatically launch your default web browser and your
home page will load.
Open my browser to this URL: With this option selected, when you connect to
a WWAN network (VZGlobal, BroadbandAccess or NationalAccess), VZAccess
Manager will automatically launch your default web browser but do it in such a way
that the URL you specify will load instead of your home page.
Turn off graphics: If you select this it will turn off graphics in Internet Explorer.
With these options off, web pages will load faster but you will have to right click
and select “show picture” for any pictures you want to see. With the added
performance of the Venturi compression software when using BroadbandAccess
or NationalAccess, most users prefer to see graphics, so the default setting for this
option is unchecked.

28
UM150 User’s Manual
28
UM150 User’s Manual
Run program on connection: This allows you to automatically run a program
when you use VZAccess Manager to connect to a WWAN network. Select the
browse button, , to browse to the desired application you want to run when you
connect to a WWAN network using VZAccess Manager. The application will run for
all WWAN connections made from VZAccess Manager.
The VPN Tab
The following options exist on the VPN tab (“Tools,” “Preferences,” “WWAN” tab,
“Set Options...,” “VPN” tab):
VPN Client: VZAccess Manager automatically detects if certain VPN clients like
Microsoft, Cisco, CheckPoint, etc, are installed on the computer and allows you to
select the one you wish to use. Check with your network administrator to setup your
VPN connection.
If the VPN client you wish to use does not appear in the list, you can select Other
VPN Application
Other VPN Application: This allows running a VPN program when VZAccess
Manager connects to a network. Enter the full path to an executable, or select the
browse button, , to find the path to the desired application.

29
UM150 User’s Manual
29
UM150 User’s Manual
Security Setup
Available with some wireless devices, when you select the “Security Setup” button
from the screen above, the following options will appear:
Lock code: Enter your 4 digit lock code (the default lock is the last four digits of
your device's phone number) and select OK to lock or unlock the wireless device.
Warning: If you plan to use this device feature, we recommend you change your
lock code to a new number.
Change Lock Code: This is used to change the 4 digit lock code on the wireless
device.
Current lock code: Enter your current 4 digit lock code.
New lock code: Enter your new 4 digit lock code.
Confirm new lock code: Re-type the new 4 digit lock code.

30
UM150 User’s Manual
30
UM150 User’s Manual
3.2 Wi-Fi Preferences
To access the Wi-Fi preferences, click on the “Tools” menu, then “Preferences....”
and select the “Wi-Fi” tab.
The following options are available if you selected “Detect Wi-Fi” device during
setup. If you have added a Wi-Fi device after having installed VZAccess Manager,
you can select “Options,” “Run Wizard” to run the setup wizard again.
If you connect your Wi-Fi device after VZAccess Manager has been started and
you are in coverage of a Wi-Fi network, selecting “Options,” “Refresh Networks” will
allow VZAccess Manager to recognize your Wi-Fi device (and WWAN if connected)
and scan for available networks.
Windows Vista users will see the following Wi-Fi preferences dialog:
Windows 2000 & XP users will see the following Wi-Fi preferences dialog:

31
UM150 User’s Manual
31
UM150 User’s Manual
Wi-Fi Preferences in Windows Vista
Wireless adapters: In the rare case you have more than one Wi-Fi adapter, you
can select the Wi-Fi adapter you are using. If your adapter does not appear, try
upgrading to the latest available drivers from the Wi-Fi device manufacturer.
Automatically switch from WWAN to Wi-Fi: Requires that “Automatically connect
to preferred networks” is selected. When you select this option to automatically
switch from WWAN to Wi-Fi, VZAccess Manager will disconnect your WWAN
connection (VZGlobal, BroadbandAccess or NationalAccess) and automatically
connect via Wi-Fi when a preferred Wi-Fi network is detected.
Preferred Networks: When you connect to or add Wi-Fi networks they will appear
in this list. If using the “Automatically connect” feature VZAccess Manager will try to
connect to the networks in the order they appear in this list.
Manage Wireless Networks: Press this button to launch the following native
Windows Vista WLAN client.
You can use this Windows Vista WLAN client to manage your preferred network
options.
Set Options: Press this button after selecting a Wi-Fi network in the list to bring
up the “Wi-Fi Connection” dialog. This dialog gives you access to additional options
for each SSID beyond what is offered by the Windows Vista WLAN client pictured
above.
NOTE: If you attempt to connect to a secured Access Point for which no network
profile has yet been created, you will see a pop-up balloon such as this appear over
your system tray:

32
UM150 User’s Manual
32
UM150 User’s Manual
Clicking on the balloon opens a dialog allowing you to enter additional information.
This includes the WEP key and/or WPA user credential. The SSID name and WEP
key you enter will be automatically saved once you’ve successfully connected to the
WLAN network. User credentials (login name, password and domain) will only be
saved if your computer is part of the domain you’re trying to access. (See your IT
administrator for details.) If you don’t click the balloon, the connection will simply
be terminated.
Wi-Fi Preferences in Windows 2000 & XP
Wireless adapters: In the rare case you have more than one Wi-Fi adapter, you
can select the Wi-Fi adapter you are using. If your adapter does not appear, try
upgrading to the latest available drivers from the Wi-Fi device manufacturer.
Automatically connect to preferred networks: If desired, you can select to have
VZAccess Manager automatically connect to your preferred Wi-Fi networks when
they are detected.
Automatically switch from WWAN to Wi-Fi: Requires that “Automatically connect
to preferred networks” is selected. When you select this option to automatically
switch from WWAN to Wi-Fi, VZAccess Manager will disconnect your WWAN
connection (VZGlobal, BroadbandAccess or NationalAccess) and automatically
connect via Wi-Fi when a preferred Wi-Fi network is detected.
Preferred Networks: When you connect to or add Wi-Fi networks they will appear
in this list. If using the “Automatically connect” feature VZAccess Manager will try to
connect to the networks in the order they appear in this list.
Move Up: Changes the priority of the Wi-Fi networks you have added or connected
to in the past. This option is only available when you have two or more Wi-Fi
networks in the Preferred list.
Move Down: Changes the priority of non Verizon Wireless Wi-Fi networks you have
added or connected to in the past. This option is only available when you have two
or more Wi-Fi networks in the Preferred list.
Add: Use to manually add a Wi-Fi network. If you select “Add” you will have to
enter the network's name and indicate if it is password protected. The only time you
would need to use the “Add” feature would be if the Access Point providing the WiFi coverage does not broadcast its network name (SSID). The easiest way to add a
network that broadcasts its network name is to select the Wi-Fi network connection
when it appears, and then select “Connect.” If it is password protected you will be
prompted to enter your WEP (Wired Equivalent Privacy) key.
NOTE: If you manually add a Wi-Fi network, when VZAccess Manager finds it, its
signal strength will be displayed to the right of the network name when you are
within coverage of that network. If you incorrectly entered the name, the signal
strength will never indicate any signal.

33
UM150 User’s Manual
33
UM150 User’s Manual
NOTE: Note that with certain Wi-Fi adapters the signal strength for Wi-Fi
networks is not accurate until you connect to the network.
Edit: If you select a connection in the Preferred Network list, the Edit button will
become active. Pressing it will provide you with three additional tabs that will be
discussed below.
Remove: This will remove any other Wi-Fi networks you have added or connected
to in the past. Just select the network, then select “Remove.”
Network Tab
From the Wi-Fi tab (above, “Tools,” “Preferences,” “Wi-Fi” tab) if you select a network
listed under “Preferred Networks” then select the “Edit” button or if you select the
“Add” button, one of the following options will be displayed:
The following options exist on the Network tab:
Network Name: On the Network tab, for private networks you can edit or enter
the Network name and specify if it is a closed network. Note: The name has to
match the network to work. If the network broadcasts its SSID, instead of manually
adding it, select the Wi-Fi network connection when it appears, and then select
“Connect.” If it is password protected you will be prompted to enter your WEP
(Wired Equivalent Privacy) key.
NOTE: The name has to match the network to work. Note that this name is case
sensitive when entering it.
Set Password: This option allows you to modify, delete or enter your Wi-Fi WEP
keys for a private Wi-Fi network.

34
UM150 User’s Manual
34
UM150 User’s Manual
Connect Tab
The following options exist on the Connect tab (“Tools,” “Preferences,” “Wi-Fi”
tab, select “Add” or a network in the “Preferred Network” list, select “Edit,” then
“Connect”):
Do not open my browser: With this option selected, when you connect to a Wi-Fi
network, VZAccess Manager will not automatically launch your web browser.
Open my browser to my default home page: With this option selected, when you
connect to a Wi-Fi network VZAccess Manager will automatically launch your web
browser and your default home page will load.
Open my browser to this URL: With this option selected, when you connect to a
Wi-Fi network, VZAccess Manager will automatically launch your web browser but
do it in such a way that the URL you specify in the field will load instead of your
home page.
Disable IE Proxy settings for this connection: This option provides an automatic
method to turn off proxy settings when connecting to a Wi-Fi network. This would
typically be used if you normally use proxy settings at work to access the Internet
and you wanted to access the Internet directly via Wi-Fi without using VPN (Virtual
Private Networking) software.
Run program on connection: This allows automatically running a program when
you use VZAccess Manager to connect to a Wi-Fi network. Select the browse
button to browse to the desired application you want to run when you connect to
a Wi-Fi network using VZAccess Manager. The application will run for all Wi-Fi
connections made from VZAccess Manager.

35
UM150 User’s Manual
35
UM150 User’s Manual
VPN Tab
The following options exist on the VPN tab (“Tools,” “Preferences,” “Wi-Fi” tab, select
“Add” or a network in the “Preferred Network” list and “Edit,” then “VPN”):
VPN Client: VZAccess Manager automatically detects if certain VPN clients like
Microsoft, Cisco, CheckPoint, etc, are installed on the computer and allows you to
select the one you wish to use. Check with your network administrator to setup
your VPN connection.
If the VPN client you wish to use does not appear in the list, you can select Other
VPN Application.
Other VPN Application: This allows automatically running any VPN program when
you use VZAccess Manager to connect to the Wi-Fi network you added or edited.
Select the browse button to browse to the desired VPN application you want to
run when you connect to the Wi-Fi network you added or edited, using VZAccess
Manager. If you have a shortcut you normally use to launch your VPN application
you may want to right click on it and select properties to see where the program is
located and how it's named.
3.3 Options
To access the Options tab, click on the “Tools” menu, then “Preferences....” and
select the “Options” tab.

36
UM150 User’s Manual
36
UM150 User’s Manual
Network Display Options
Only show preferred wireless networks at start up: This only applies to Wi-Fi
networks. If checked, at startup, only networks in your Preferred list on the WiFi tab are displayed (networks you have connected to in the past) otherwise, all
detected networks are displayed.
Display advanced Wi-Fi network information: This only applies to Wi-Fi
networks. If checked, additional information will be displayed for Wi-Fi networks
such as the channel, MAC address and type of security.
Run Options
Minimize Application into tray: With this option selected, when you minimize
VZAccess Manager, instead of taking up space in your taskbar, it will just
disappear. You can get it back by double clicking on the tray icon , alternatively
you can right click in the icon and select “Show Application.” You can minimize the
main window of VZAccess Manager by selecting the minimize icon ( ) in the
upper right corner of the main window.
Show pop-up status windows by tray: Enables status notification in a pop up
window above the task bar that displays for a few seconds whenever connection
status changes.
Run VZAccess Manager at Startup: Selecting this option adds VZAccess
Manager to the Windows Startup group, unchecking it removes VZAccess Manager
from the startup group.

37
UM150 User’s Manual
37
UM150 User’s Manual
Automatically close conflicting applications: With this option selected,
VZAccess Manager will automatically close any application it recognizes that is
known to prevent it from working correctly. For example, it may close the client
software that was supplied with your Wi-Fi card, if it's known to conflict with
VZAccess Manager controlling your Wi-Fi card.
3.4 Venturi Preferences
The Venturi tab will only appear if the Venturi client has been installed. To access
the Venturi preferences, click on the “Tools” menu, then “Preferences....” and select
the “Venturi” tab.
Venturi Options
The Venturi compression software (if installed) works in the background between
your computer and Venturi compression servers on the Verizon Wireless network to
improve your performance when using BroadbandAccess or NationalAccess. This
option is selected by default and allows VZAccess Manager to automatically turn
the Venturi compression software on when you use VZAccess Manager to connect
via BroadbandAccess or NationalAccess, and off when you disconnect.
Unselecting “Compress and accelerate WWAN connections” will cause
VZAccess Manager to no longer toggle the Venturi compression software on and off

38
UM150 User’s Manual
38
UM150 User’s Manual
when using BroadbandAccess or NationalAccess. The recommendation is to leave
this option selected because it helps in most cases. There are some rare situations
where you may get better performance by turning the compression software off, so
the option is available. You can also control the compression client through its user
interface.
3.5 TXT Messaging Preferences
To access the TXT preferences, click on the “Tools” menu, then “Preferences....” and
select the “TXT” tab.
VZAccess Manager supports TXT Messaging for certain wireless devices only.
Incoming Message Options
• Open TXT window on arrival of new message: VZAccess Manager will
automatically switch to the TXT view when a new message arrives.
• Play sound on arrival of new messages: A sound file (.WAV) can be selected
to play when new messages arrive.
Outgoing Message Options
• Message delivery duration: The duration of time that the Verizon Wireless
network will attempt to deliver the message. The default is a duration of 1 week.
Confirmations
The following confirmation dialogs can be turned on or off:
• Warn before deletion of messages.

39
UM150 User’s Manual
39
UM150 User’s Manual
• Confirm deletion of messages.
• Confirm sent messages.
3.6 Updates Preferences
To access the Updates preferences, click on the “Tools” menu, then “Preferences...”
and select the “Updates” tab.
This feature allows VZAccess Manager to automatically check for software updates.
If you are using NationalAccess or BroadbandAccess and an update is available,
you will be notified of its size and approximate download times.
You will be given the choice to download or cancel. If you select download, you will
be presented with a display that shows the progress as the update is downloading
with the option to cancel if desired. You do not need to download the updates
wirelessly; you can use any connection to the Internet. Note: If you download the
updates wirelessly, normal usage charges apply.
You can allow the software to check automatically for updates, daily, weekly
(default), or monthly. It only checks when the application is running and when it
detects that you are connected and able to access to the Internet. If desired, you
can select “Manually” and the software will only check for updates when you select
“Update Now” (pictured above), or you when you select, from VZAccess Manager's
main screen, “Help,” then “Check for Updates.”

40
UM150 User’s Manual
40
UM150 User’s Manual
4. ADDITIONAL FEATURES
In addition to the basic features mentioned in previous sections, VZAccess
Manager has the additional features listed below.
4.1 The Status Bar
The details of your current connection can be seen in the status bar at the bottom
of the VZAccess Manager interface. This status bar is always visible when the
interface is fully expanded. For information on minimizing the VZAccess Manager
interface, see the section “Minimizing the Interface.”
Most users will see the following “NationalAccess - BroadbandAccess” version of
the status bar:
Those who are using the “VZGlobal” service will see the following version:
Connection Status
The text on the bottom left portion of the status bar below the “Verizon Wireless”
text reflects your current state. During an active connection, this text will change to
“Connected.” If you are not connected, it will display “Not Connected.”
WWAN Device Status Area
The text that reads “Verizon Wireless” can change to the following:
• Device not inserted - Your wireless device (PC Card, ExpressCard or USB
Modem) is removed from the notebook.
• Device not activated - Your wireless device needs to be activated. Select Activate
from the Options menu.
Coverage
An icon is displayed if you are in VZGlobal, NationalAccess or BroadbandAccess
coverage. Move the mouse pointer over these icons to see the tool tip showing the
name of the current service.
40
UM150 User’s Manual

41
UM150 User’s Manual
41
UM150 User’s Manual
NDIS
The following icons also appear on the status bar to indicate your device’s NDIS
status:
NDIS is enabled and connected
NDIS is enabled but disconnected
(No NDIS image) NDIS is disabled.
New TXT
If VZAccess Manager supports TXT messaging on your device, an icon appears on
the status bar to show that you have a new TXT message waiting. Double click on
the icon to jump to the TXT view to see the message.
Throughput
The amount of data that you have sent and received since the current network
connection was initiated can be seen by holding the mouse over the green up and
down arrows on the right side of the status bar.
Battery Level
The current battery level of your mobile phone or laptop can be seen on the right
side of the status bar.
Elapsed Time
The amount of time that has elapsed since the current network connection was
initiated is tracked on the lower right side of the status bar.
Roaming Status
The following icons may be displayed on the status bar:
Icon Status
Roaming
Extended Network
No icon displayed Home Network

42
UM150 User’s Manual
42
UM150 User’s Manual
4.2 The Toolbar Buttons
The “Networks” button
Displays all of your available wireless connections and networks. Please refer to the
Connecting section earlier.
The “Usage” button
Provides a concise session log of your network activity. Click on a column heading
to sort the log. This window also displays the total number of sessions as well as
the total time connected.
The information displayed in the Usage log can be customized using the controls
that appear just below the list.
To view only the connection history of a specific network type, check the “Selected
connection” checkbox and select the desired type from the drop-down list. To
view only the connections made during a specific interval, check the “Date range”
checkbox and specify the date in the “From:” and “To:” fields.
To export this log as a CSV file, click the Export button that is immediately above
the log. To clear the log, press the Clear button. Note that clearing the log cannot be
undone.
The “Apps” button
Add applications here that you want easy access to while connected to the wireless
Internet. VZAccess Manager will pre-load into this view links to Verizon Wireless
web sites, and any Microsoft Office applications you have loaded on your computer.

43
UM150 User’s Manual
43
UM150 User’s Manual
The “TXT” button
The TXT button allows you to send short text messages to any other wireless
device that supports SMS. Note that this button is only available if VZAccess
Manager supports TXT messaging on your device.
The “Web” button
Launches the default web browser on your computer.
The “Email” button
Launches the default email application on your computer.
The “Support” button
Displays a variety of help options available to you. Click this button to find
assistance with a problem, to explore the full range of VZW products and services,
or to contact Verizon Wireless.
4.3 Minimizing the Interface
The VZAccess Manager interface can be minimized to take up as little screen real
estate as possible. To minimize the interface, select “Minimum” from the “View”
menu.
Clicking on the “Connect” button in Minimum view will establish a connection with
NationalAccess-BroadbandAccess. To connect to a Wi-Fi network, please exit the
Minimum view.
To exit the Minimum view, you have the following options:
• In the top, right-hand corner, click the “Maximize” button (to the left of the Exit
button)
• In the View menu, de-select “Minimum”
• Select any other option on the View menu.

44
UM150 User’s Manual
44
UM150 User’s Manual
4.4 The Tools Menu
Preferences...
Provides access to the Preferences dialog box. For details, please refer to the
VZAccess Manager Preferences section.
Network Selection...
This feature is only available for GPRS/UMTS devices. This menu option
launches the dialog box pictured below. This screen allows you to view or change
your current registered GPRS/UMTS network.
Preferred Service...
This feature is only available for GPRS/UMTS devices. This menu option
displays the dialog box pictured below. This screen allows you to select the
particular service through which you will access the wireless network. You can
select “Auto,” “GPRS only,” or “3G only” as your preferred service. If the service you
selected is not available at your location, the status bar will continually display
“Searching for Network….”

45
UM150 User’s Manual
45
UM150 User’s Manual
Control Panels
From this menu you have access to your system’s “Modem,” “Network and Dial-Up
Connections,” and “Internet” control panels. You can also see all control panels by
selecting “All.”
Dial-Up Accounts: Add, edit, or copy wireless dial-up accounts.
• Add Wireless: This is used to create a wireless dial-up connection from scratch.
• Add Other: This is used to create a regular dial-up connection from scratch.
• Edit: This is used to edit properties of any dial-up connection.
• Copy: See section on “Using Dial-Up Connections.”
NOTE: The “Dial-Up Accounts” menu option is not available for GPRS/UMTS
devices. Dial-up account options are only applicable if using a WWAN device that
supports dial-up accounts.
4.5 The Options Menu
Refresh Networks: This causes VZAccess Manager to verify devices connected
and to scan for available Networks. Use this feature if you connected your
equipment after launching VZAccess Manager. Pressing the F6 function key can
also access this option.
Refresh Signal Levels: Available only with handsets, this causes VZAccess
Manager to query signal levels and update its display. This will also update the
battery display for your WWAN device if it is not in an active data session. Signal
levels are automatically refreshed when you launch VZAccess Manager, connect or
disconnect. Pressing the F5 function key can also access this option.
Statistics: If you selected to detect and install Wi-Fi during installation, there will
be a Wi-Fi statistics tab with additional information and tools that are helpful in the
event any troubleshooting of the connection is required. You can view key statistics
including bandwidth and your IP address information, release your IP address,
renew your IP address. If you selected to detect and install a WWAN device during
installation, there will be a Statistics tab that will show data speeds during a session
when using the WWAN device. NationalAccess delivers typical speeds of 60 to 80
Kbps, bursting up to 144 Kbps. BroadbandAccess provides broadband-like speeds
(up to 1.54 Mbps). There is also a “My Computer” tab; this tab has key information
about your computer that may be helpful in troubleshooting any problems that
may occur. It also has the option of being e-mailed to Verizon Wireless Technical
Support.

46
UM150 User’s Manual
46
UM150 User’s Manual
Test WWAN Device: Retrieve and display detailed information about your WWAN
device such as manufacturer, model, version, etc. With some devices - not PC
Cards or ExpressCards - you will also see indicators for the wireless network’s
signal strength and your notebook’s battery strength.
Run Wizard: Runs the Setup Wizard again. Useful if you need to reconfigure
VZAccess Manager to use a new wireless device. This option does not appear for
GPRS/UMTS devices.
Power Off WWAN Device: Allows you to turn off your WWAN device.
4.6 The Help Menu
Contents: Launches this help file.
Check for Updates: Can be used with any connection to the Internet to check for
software updates for VZAccess Manager. Note: If downloading an update wirelessly,
normal usage charges apply - see Update Options in Setting Your Preferences.
Device Support Page: Takes you to the Verizon Wireless device support page that
contains information about wireless devices, useful tips and hardware manuals.
E-mail Verizon Wireless Support: This option will attempt to launch your mail
client with the default address to e-mail Verizon Wireless Support.
About VZAccess Manager: Displays the software version.

47
UM150 User’s Manual
47
UM150 User’s Manual
5. SETTINGS IN OTHER APPLICATIONS
This section describes special settings that might be required to use other
applications over the Verizon Wireless network.
5.1 Sync Applications
Palm Inc. HotSync® and Microsoft Corporation’s ActiveSync® are used for
Personal Digital Assistants (PDAs) and smartphones. These programs are used to
synchronize files between a notebook or desktop PC and the PDA. These programs
may conflict with your WWAN device. If you have any problems using your WWAN
device, try turning these programs off as explained below:
To turn HotSync On & Off
Right click on the HotSync® icon in your task tray and the menu below will appear.
Click on “Local” or “Local USB” to remove the check marks. This effectively disables
HotSync® and if it is causing a conflict this will allow your WWAN device to work.
You can repeat this process to put the check marks back to re-enable HotSync®.
If you are using an early version of HotSync®, you may not be able to uncheck the
“Local” options without first checking “Modem” or “Network.” If this is the case, you
can always select “Exit” to close HotSync® and launch it from the Start Menu the
next time you need it.
To turn Windows CE Services On & Off
For the original Windows CE services: Right click on the Windows CE Services icon
in your task tray and select/deselect “Enable Serial Connection.” Make sure it is
unchecked for Mobile Office and checked when you want to sync your Windows CE
based PDA.

48
UM150 User’s Manual
48
UM150 User’s Manual
For Microsoft ActiveSync®:
Right click on the ActiveSync® icon in your task tray and select “Connection
Settings.”
Select/deselect “Allow serial cable or infrared connection to this COM port:” and
“Allow USB connection with this desktop computer.” Make sure they are unchecked
if you are having trouble connecting with your WWAN device and restore them to
their original settings when syncing your PDA. Click “OK” when finished.

49
UM150 User’s Manual
49
UM150 User’s Manual
5.2 Proxy Settings
Proxy settings effect the way your computer and browser connect to other
computers on the Internet and local networks. It is highly recommended that you
consult your network support staff before changing these settings described here.
Most corporations go through a proxy server to access the Internet via the
corporate network. If you wish to access the Internet directly through VZGlobal,
BroadbandAccess or NationalAccess, proxy settings must be turned off. If you are
connecting to your corporation’s network using VPN (Virtual Private Networking)
and your corporation uses proxies, then you would need the correct proxy settings
to be able to access the Internet. For exact details on the proxy settings needed
when accessing your corporate network, contact your corporate network technical
support department if you need additional assistance.
When accessing the Internet directly,performance is improved because you
eliminate VPN client overhead. Also, for BroadbandAccess and NationalAccess,
if the Venturi compression software is installed, it will also increase performance
when you are accessing the Internet directly. When using a VPN client, it creates a
secure connection to your corporate network and prevents accessing the Venturi
compression servers on the Verizon Wireless network, so Venturi is of no value
when you are using VPN.
Proxy settings if using Internet Explorer (version 5 and newer)
If you are using proxy settings, when connected to a corporate network via your
Network adapter, they will be entered under LAN settings. These settings apply to
devices that appear to Windows as Network adapters - this includes Wi-Fi adapters
as well as your Network adapter. You can access the LAN Settings by doing the
following:
STEP 1: In Internet Explorer, select “Tools,” “Internet Options.”

50
UM150 User’s Manual
50
UM150 User’s Manual
STEP 2: Then select the “Connections Tab” and “LAN Settings.”
If your company uses proxy settings they will appear here.

51
UM150 User’s Manual
51
UM150 User’s Manual
STEP 3: If you are only using Wi-Fi connections without VPN and you want to
access the Internet directly, you would uncheck the first three options to turn proxy
settings off. If using VPN and if the settings are present you would leave them.
To restore the settings you would navigate back to this screen and recheck any
boxes you had unchecked. If using a WWAN device, you will find that VZGlobal,
BroadbandAccess and NationalAccess have no proxy settings associated with
them by default in VZAccess Manager. This means you can access the Internet
directly using these connections but if you connect via VPN and your company
requires proxy settings, you will not be able to access the Internet when connected
via VPN. Performance is better if you drop your VPN connection when you want to
access the Internet directly, but, if desired, you can record all the settings on the
“Local Area network (LAN) Settings” screen and on the screen that appears when
you select the “Advanced” button (Step 5), enter these settings in the properties for
your WWAN connections (VZGlobal, BroadbandAccess, NationalAccess). Note:
If desired, you can have proxy settings automatically turned off when you connect
using Wi-Fi connections − See Wi-Fi Specific Settings.
STEP 4: If you need to enter proxy settings for the connections used by VZAccess
Manager, you would use the “Connections” tab in the previous step, highlight
the connection − ex. NationalAccess − and then select “Settings.” (If you need to
navigate to this tab, from Internet Explorer’s main screen, select “Tools,” “Options”
as shown in Step 1 and then the “Connections” tab.)

52
UM150 User’s Manual
52
UM150 User’s Manual
STEP 5: The settings will be displayed. You can now enter the same proxy settings
you recorded in Step 3, if you desire to use VPN and your proxy settings with these
connections. If necessary also enter the information recorded from the screen that
appears after selecting the “Advanced” button. To disable proxy settings for these
connections you would have to uncheck the “Use proxy server...” box. Proxy settings
must be disabled to access the Internet directly when using these connections
without VPN.
Proxy Settings if using Internet Explorer 4.x
In Internet Explorer 4.x, proxy settings are global and have to be turned off when
accessing the Internet directly through BroadbandAccess or NationalAccess
and back on if required by your company when using their network to access the
Internet or when using VPN.
STEP 1: Right-click on the Internet Explorer icon and go to properties (or if Internet
Explorer is already open go to View then Internet Options...).

53
UM150 User’s Manual
53
UM150 User’s Manual
STEP 2: Click on the “Connection” tab. Uncheck the box labeled “Access the
Internet using a proxy server” then click “OK” or “Apply.” You may now access the
Internet through BroadbandAccess or NationalAccess.
When you wish to access the Internet through your corporate network proxy server,
you must repeat these steps, checking the box labeled “Access the Internet using
a proxy server.” If your proxy setting is incorrect for the connection you are
using, you will get an error whenever you try to go to any site.
Proxy Settings if using Netscape Navigator 4.0 and higher
In Netscape Navigator 4.0 and higher, proxy settings are global and have
to be turned off when accessing the Internet directly through VZGlobal,
BroadbandAccess or NationalAccess and back on if required by your company
when using their network to access the Internet or when using VPN.

54
UM150 User’s Manual
54
UM150 User’s Manual
STEP 1: From within your browser, go to “Edit” then “Preferences.”
STEP 2: Click on the “+” beside “Advanced” then “Proxies.” Next select “Direct
connection to the Internet” and click “OK.” You may now access the Internet through
VZGlobal, BroadbandAccess or NationalAccess.
Reminder: When you wish to access the Internet through your corporate network
proxy server, you must repeat these steps, selecting “Manual proxy configuration”
then clicking “OK.” If your proxy setting is incorrect for the connection you are using,
you will get an error whenever you try to go to any site.

55
UM150 User’s Manual
55
UM150 User’s Manual
5.3 Instructions for AOL Users
AOL supports using other connections to the Internet, so it can be used
with the Verizon Wireless VZGlobal, BroadbandAccess or NationalAccess
connections.
NOTE: When using the AOL interface, Venturi (if installed) is unable to compress
your Internet traffic, however, Venturi compression will occur if you launch and use
your web browser.
Configuring AOL Version 9
STEP 1: Right click on the AOL icon in your task tray, and then click on “Auto Start
Options...”
STEP 2: Select “Don’t use any Auto Start options,” and then click the “OK” button.
(We have found it to be more reliable to manually launch AOL, rather than to use
the Auto Start options.)

56
UM150 User’s Manual
56
UM150 User’s Manual
STEP 3: The first time you run AOL (version 9), after setting your wireless device,
you may get the following screen; select “OK” to proceed.
STEP 4: AOL will attempt to detect how it might be able to connect.
STEP 5: Once AOL detects a way to connect, select “Cancel”

57
UM150 User’s Manual
57
UM150 User’s Manual
STEP 6: From the sign on screen select “Sign On Options”
STEP 7: Select “Expert Setup”
STEP 8: Select “Add Location”

58
UM150 User’s Manual
58
UM150 User’s Manual
STEP 9: For the location name enter “Verizon Wireless” and then select “Next.”
STEP 10: If “Other Dial-up ISP or LAN” is available select it then select “Next” and
go to Step 10. If this option is not available, select “(Manually add a connection
device)” and then select “Next.”

59
UM150 User’s Manual
59
UM150 User’s Manual
STEP 11: Select “Other Dial-up ISP or LAN” then select “Next.”
STEP 12: Select “Next”

60
UM150 User’s Manual
60
UM150 User’s Manual
STEP 13: Select “Next”
STEP 14: Even though AOL reports the location has been created, you must
click on “Sign On to AOL Now” to save the changes. Since you are not actually
connected to the Internet, AOL will not actually be able to sign on, but it will save
your changes.

61
UM150 User’s Manual
61
UM150 User’s Manual
STEP 15: Select “Close” when you get the following error message. This
completes configuring AOL to work with any connection to the Internet, including
BroadbandAccess and NationalAccess.

62
UM150 User’s Manual
62
UM150 User’s Manual
Using AOL Version 9 with your Mobile Office Connections
To use AOL with the Verizon Wireless VZGlobal, BroadbandAccess or
NationalAccess, select the desired connection from VZAccess Manager’s main
window and select “Connect.”
Once connected, launch AOL. From your sign on screen, select “Verizon Wireless”
for the location and sign on.
(Note: You can set VZAccess Manager to automatically launch AOL when you get
connected. For further help details, see the “Run program on connection” section on
the Wi-Fi Specific Settings page and the WWAN Specific Settings page. Check the
box to “Run program on connection:,” then click the button to browse and select aol.
exe, it should be located in your “C” drive in an America On Line folder, under the
“Program Files” folder).
Note: If you normally use a landline modem rather than connecting wirelessly,
just remember to change the location back to the one you normally use. Then
change it back to “Verizon Wireless” when you use VZGlobal, BroadbandAccess or
NationalAccess.
Reminder: To disconnect from VZGlobal, BroadbandAccess or NationalAccess,
click on the “Disconnect” button in VZAccess Manager. (Signing off AOL will not end
the call.)

63
UM150 User’s Manual
63
UM150 User’s Manual
5.4 Using E-mail with VZAccess
POP3 E-mail
You can use VZGlobal, BroadbandAccess or NationalAccess to access your POP3
e-mail account if your e-mail provider allows access through other providers (many
do). If your provider restricts access to their outgoing mail server you will get an
error message similar to the one below if you are attempting to send mail.
Most send mail servers are not accessible from various connections to the Internet.
You usually have to be connected to the e-mail provider’s network to access their mail
server and most e-mail providers require authentication (a user name and password).
The reason everyone has had to resort to this is that without these measures, anyone
can use a send mail server to send massive amounts of unwanted junk e-mail. If you
are having trouble sending e-mail - this also includes replying and forwarding, and
you are getting an error message similar to that shown above, then your send mail
server can not be accessed from the Verizon Wireless network.
For customers in this situation, Verizon Wireless has made available a send mail
server that you can use in place of the one you normally use. All that is required
is that you have a TXT messaging capable Verizon Wireless device and TXT
messaging service, visit www.vtext.com and establish a profile there by selecting
“Join Up” and completing the form. You will be asked to enter your 10 digit mobile
number. A TXT message will be sent to your wireless device and will be used
to establish your password. Most Verizon Wireless devices can receive TXT
messages. Most Verizon Wireless phones are TXT messaging capable. If you
have an external wireless device that is not capable of receiving TXT messages
and you have a Verizon Wireless phone that is, you can use it to establish a profile
on www.vtext.com as described above.

64
UM150 User’s Manual
64
UM150 User’s Manual
To use the Verizon Wireless Send Mail Server, you will edit your existing Mail
account settings and change the outgoing mail server you are currently using. In
place of your existing Send Mail Server, enter smtp.vzwmail.net, select “My server
requires authentication” and using the 10 digit mobile number you used to establish
your profile on www.vtext.com, enter the 10 digit mobile number@vzwmail.net (i.e.
6145551212@vzwmail.net) for the Send Mail Server user name. For the password,
use the password you established for www.vtext.com. You will also be able to use
this server when connected to the Internet from various providers eliminating the
need to change this setting when you switch from being connected to the Internet
through Verizon Wireless and by various other means. If you need to know where
these settings normally are in your e-mail client, check with your e-mail provider.
For your convenience the settings for Outlook Express® are as follows:
STEP 1: Select “Tools,” “Accounts.”
STEP 2: Select your default account, then “Properties.”

65
UM150 User’s Manual
65
UM150 User’s Manual
STEP 3: Select the “Servers” tab. In the “Outgoing mail (SMTP):” field enter “smtp.
vzwmail.net” without quotes. In the “Outgoing Mail Server” section at the bottom,
select “My server requires authentication,” then select “Settings.”
STEP 4: Select “Log on using,” then using the 10-digit mobile number you used to
establish your profile at www.vtext.com, enter the 10-digit mobile number@vzwmail.
net for the account name (i.e. 6145551212@vzwmail.net). For the password, enter
the password you established on www.vtext.com. Select “Remember password.”
Select “OK,” “Apply,” “OK,” “Close” to get back to the Outlook Express® main screen.
It may take up to two hours for your www.vtext.com credentials to be valid on the
smtp.vzwmail.net server. Once they are valid, you should be able to send mail using
the Verizon Wireless Send Mail Server (also referred to as a SMTP - Simple Mail
Transport Protocol Server), when you are connected to the Internet, wirelessly or
via other means.

66
UM150 User’s Manual
66
UM150 User’s Manual
Additional important notes about the Verizon Wireless Send Mail
Server
• There is no monthly charge for this service.
• Message Limits are as follows: 2MB Message Size, 100 Recipients per message.
• Customers that are identified as using this server to generate SPAM messages
(what most would consider unsolicited junk e-mail) will be denied access to this
server (e-mail messages will not be sent).
• If you are using an e-mail client other than Outlook® or Outlook Express® and
it fails to work with the Verizon Wireless Send Mail server, it may not support
authentication correctly. Try using Outlook Express® if you have any problems. If
it works and your e-mail client does not, check to see if any updates are available
for your e-mail client.
• NOTE: Credentials established on www.vtext.com may take up two hours
before they will work on the smtp.vzwmail.net server. If your credentials work on
www.vtext.com but not on the smtp.vzwmail.net server, try again after two hours.
Web Based E-mail
If you currently do not have e-mail software, or if you do not have Verizon Wireless
device capable of text messaging, you can sign up for web based e-mail at any of
the popular portal sites, such as http://www.yahoo.com, or http://www.msn.com.
You may also search for other e-mail providers from any of these pages.

67
UM150 User’s Manual
67
UM150 User’s Manual
6. TROUBLESHOOTING
6.1 WWAN Devices
When installing VZAccess Manager, it was not able to find the WWAN
device (For a UMTS/GPRS/1xEV-DO/1XRTT/CDMA device).
• If using a wireless phone and cable make sure it is powered ON and securely
connected.
• If using a wireless phone and cable, try powering it OFF, then ON again.
• If using a WWAN (UMTS/GPRS/1xEV-DO/1XRTT/CDMA) PC Card or
ExpressCard, try removing it and reinserting it. For UMTS/GPRS devices, check
that the SIM is inserted correctly. You may need to close Wizard and rerun or
reboot PC after removing your card. It is important to ensure that the card is
removed properly using “Unplug or Eject Hardware” process.
• Identify any software that uses the serial port on your computer or other
USB devices (such as Microsoft Windows CE services, ActiveSync and Palm
HotSync) and exit all of these programs. See Turning Sync Applications On and
Off.
• Make sure that the auto-answer feature of any fax software you are using is
disabled.
• Check with your computer manufacturer to verify your serial port or USB port is
enabled and properly configured.
• If using a USB cable be sure to follow the documentation supplied with it to get
it installed as a serial port or USB modem, before installing VZAccess Manager.
If you have done this, also try disconnecting the USB cable from the PC and the
wireless phone, then reconnect it and try again.
• If you are using a NationalAccess capable wireless phone and cable, verify
the serial port speed setting on the phone is set to 19,200 or 115,200. If your
serial port supports 115,200 or 230,400, VZAccess Manager will automatically
set the phone to the best speed setting. See your wireless phone’s manual for
instructions on how to do this. If your wireless phone does not have a speed
setting, power it OFF, then ON again.

68
UM150 User’s Manual
68
UM150 User’s Manual
Cannot connect using the UM150 overseas − Not finding network
“Searching for network” message in VZAccess. LED on wireless USB
Modem is solid RED
• Verify that your UM150 USB Modem is inserted in your notebook’s USB port.
(A BroadbandAccess/NationalAccess PC Card will not work abroad.)
• Check that your UM150 USB Modem is inserted correctly and SIM is installed
correctly.
• Ensure that the wireless network’s coverage extends to your current location.
You may be in a non-covered service area.
Cannot connect using the UM150 overseas − VZAccess Manager
finds a network, however “Connect” button cannot be selected.
• Re-run device wizard. Click on “Options” tab, Run Wizard or hit CRTL-N
• Shutdown VZAccess Manager and reboot PC
Cannot connect using UM150 overseas − Constant “Powering on
device message” in bottom left corner. LED on USB Modem is
flashing RED
• Close VZAccess Manager
• Remove external card and reboot PC
• Check that SIM card is correctly inserted into UM150
I get connected, but I can’t get to any web sites.
• If you are using VPN (Virtual Private Networking) you may require proxy settings
on VZGlobal, BroadbandAccess and NationalAccess if you wish to access the
Internet when connected to a corporate network through VPN. To see if this is the
case disconnect from your VPN and see if you can access the Internet directly.
For additional information see Turning Proxy Settings On and Off.
• If you are using a PC provided by your employer it’s possible they might be using
Microsoft’s Winsock Proxy or a similar program that enforces Proxy settings
without having to enter any proxy settings in your web browser. If this is the
case, you will only be able to access the Internet when using VPN. To access
the Internet directly you will have to disable the Winsock Proxy. Usually these
applications have an icon in Control Panel that allows turning them on and off.
Check with your Network Administrator if you think this might be the case.

69
UM150 User’s Manual
69
UM150 User’s Manual
I can receive e-mail but cannot send e-mail using my e-mail program.
• Some Internet Service Providers require that you be connected through them to
access their mail server to send e-mail. See section on E-mail Options.
My computer locks up or crashes when attempting to connect.
• Refer to your computer manual for help in managing your serial COM ports and
USB ports, to resolve potential resource conflicts.
• Exit any applications that may use serial ports or USB ports, that might be
causing a conflict and try again.
• While trying to use your wireless device, remove any unrelated PC USB modems
from your computer.
My connection fails immediately, or I get a “Call Failed” message on
the display of the wireless phone.
• If using a wireless phone and cable, check the battery strength indicator on the
display of your wireless phone. Low power may cause loss of signal.
• Raise the antenna on your wireless phone, and verify that there is a “D” on the
display to indicate digital coverage. If you are not within the digital coverage area,
wait until you are back in Verizon
Wireless digital coverage to place your call. Try to connect again.
• Try powering the wireless phone OFF, then ON again. If using a PC Card or an
ExpressCard you can remove it and reinsert it. Then try to establish your session
again.
My connection fails, and I am getting a “Signal Faded” message on
the display of my wireless phone.
• Raise the antenna on your wireless phone, and verify that there is a “D” on the
display to indicate digital coverage. If you are not within the digital coverage area,
wait until you are back in the Verizon Wireless digital coverage area to place your
call.
• Try to establish your session again.

70
UM150 User’s Manual
70
UM150 User’s Manual
My communication software shows that I am connected, but my
wireless phone does not.
• Depending on your device and your NationalAccess or BroadbandAccess plan,
your data session may disconnect during a dormant state. See your Calling Plan
brochure for details. Select disconnect, then connect again
• Your call may have been disconnected due to a network anomaly. Disconnect
and try to establish your session again.
I get disconnected while using Mobile Office, or while dialed in to my
corporate network.
• If possible, raise the antenna on your wireless device, and verify that there is
a “D” on the display to indicate digital coverage. If you are not within the digital
coverage area, wait until you are back in the Verizon Wireless digital coverage
area to place your call.
• Check the battery strength indicator on the display of your wireless phone. Low
power may cause loss of signal.
• Try to establish your session again.
• Make sure the data cable between your wireless phone and your computer is
securely connected to both devices.
• Your corporate network or Internet service provider may have disconnected
you. If the problem persists, contact your Internet service provider or corporate
network administrator for support.
• Check your application software setup to see if it has an inactivity timeout.
Increase the timeout to match your needs.
When I launch VZAccess Manager:
1. my wireless phone powers off.
2. the levels reported for Battery or Signal level are incorrect.
• Some wireless phones do not support the commands used to determine the
battery and signal levels. If the display of the phone differs with what is displayed
in VZAccess Manager use the information displayed on the phone.
• You can set VZAccess Manager to display the notebook’s battery level instead of
the battery level of the wireless device. This will resolve the powering off issue if it
is occurring. See WWAN Specific Settings.

71
UM150 User’s Manual
71
UM150 User’s Manual
• Also keep in mind the battery levels in VZAccess Manager cannot update when
the wireless phone is in use. The default setting is to query the wireless phone
when the program starts, right before you establish a session and when you
disconnect. So the levels are a snapshot; they do not constantly update. You can
refresh the levels when you are not in a session by selecting “Tools,” “Refresh
Signal Levels” from VZAccess Manager’s main screen.
I get “There is no dial tone” while trying to connect, using my
wireless phone or it seems as if the wireless phone is not being
recognized at all.
• Try powering the wireless phone OFF, then ON again. If using a PC Card or
ExpressCard you can remove it and reinsert it. Then try to establish your session
again.
• Raise the antenna on your wireless phone, and verify that there is a “D” on the
display to indicate digital coverage. If you are not within the digital coverage area,
wait until you are back in the Verizon Wireless digital coverage area to place your
call.
• If you are using a NationalAccess capable wireless phone and cable, verify
the serial port speed setting on the phone is set to 19,200 or 115,200. If your
serial port supports 115,200 or 230,400, VZAccess Manager will automatically
set the phone to the best speed setting. See your wireless phone’s manual for
instructions on how to do this. If your wireless phone does not have a speed
setting, power it OFF, then ON again.
• If using a USB cable, be sure you connected it to the same port it was connected
to when you configured VZAccess Manager. You can reset the USB drivers
by unplugging and reconnecting the USB cable. If necessary, from VZAccess
Manager’s main screen you can select “Tools,” “Run Wizard” to run the setup
wizard again to redetect and configure the phone.
Every time I try to establish a BroadbandAccess or NationalAccess
connection, it fails.
• If you feel you may have incorrectly entered your wireless telephone number
during initial setup, from the menu bar select “Options” and then “Run Wizard.”
After the wizard finishes, try connecting again.

72
UM150 User’s Manual
72
UM150 User’s Manual
6.2 Wi-Fi Devices
When installing VZAccess Manager, it was not able to find the Wi-Fi
device.
• Verify that the client that came with the Wi-Fi device can talk to it. If it can’t,
contact the Wi-Fi device manufacturer for assistance getting it to work with the
client it comes with. Then try VZAccess Manager again.
• Check with the Wi-Fi device manufacturer to see if newer drivers are available.
If they are, download and install them.
• If using a Wi-Fi PC Card or ExpressCard, try removing it and reinserting it.
• On Windows 2000 and XP, this can happen if you do not have administrative
rights. Check with your IT department, if you have one, to see if they limited your
user rights. If they have, you will need their assistance to run the setup wizard
with administrative rights. You can access the setup wizard from VZAccess
Manager’s main screen by selecting “Tools,” “Run Wizard.”
When installing VZAccess Manager, a dialog appeared stating that a
feature in the Cisco® Aironet® Client needed to be enabled.
• A simple configuration change is required to the Cisco® Aironet® Client to allow
VZAccess Manager to work properly. Select, “Start,” “Programs,” “Cisco Systems,”
“Aironet Client Utility (ACU),” “Select Profile,” then select “Use Another Application
to Configure My Wireless Settings,” and “Apply.”
When installing VZAccess Manager, a dialog appeared stating “You
will need to upgrade your Wi-Fi card drivers before running this
program...”
• Check with the Wi-Fi device manufacturer to see if newer drivers are available. If
they are download and install them.
I get connected, but I can’t get to any web sites.
• If you are using VPN (Virtual Private Networking) you may require proxy
settings to access the Internet when Wi-Fi connections. To see if this is the case
disconnect from your VPN and see if you can access the Internet directly. Also
if you are not using VPN and you have proxy settings set, they will prevent you
from accessing web pages. For additional information see Turning Proxy Settings
On and Off.

73
UM150 User’s Manual
73
UM150 User’s Manual
• If you are using a notebook provided by your employer, it’s possible they might
be using Microsoft’s Winsock Proxy or a similar program that enforces Proxy
settings without having to enter any proxy settings in your web browser. If this
is the case you would only be able to access the Internet when using VPN. To
access the Internet directly you would have to disable the Winsock Proxy. Usually
these applications have an icon in Control Panel that allows turning them on and
off. Check with your Network Administrator if you think this might be the case.
I’m unable to connect using Wi-Fi.
• A low signal can cause this. Try moving within the Wi-Fi hot spot to improve your
signal and try connecting again.
• This can happen when your computer fails to successfully obtain an IP address.
Try performing a release and renew by selecting the following from VZAccess
Manager’s main screen: “Session,” “Statistics,” “Wi-Fi” tab. The “Address type”
should show “Assigned by DHCP.” If it shows “Automatic Private Address” you
have not been assigned an IP address from the Wi-Fi network. Select “Release,”
then “Renew.”
• Try selecting “Disconnect” and then connect again.
I can receive e-mail but cannot send e-mail using my e-mail program.
• Some Internet Service Providers require that you be connected through them to
access their mail server to send e-mail. See section on E-mail Options.
I connected OK, everything was working, then everything stopped
working.
• A low signal can cause this. Try moving within the Wi-Fi hot spot to improve your
signal and try connecting again.
• If necessary, try disconnecting and reconnecting.
My connection was lost.
• A low signal can cause this. Try moving within the Wi-Fi hot spot to improve your
signal and try connecting again.

74
UM150 User’s Manual
74
UM150 User’s Manual
I can’t get VZAccess Manager to work with my private Wi-Fi Network.
• First verify that the client that came with the Wi-Fi device works with your private
network. If it doesn’t, contact your Wi-Fi device provider and or the device
provider of your network equipment.
• In the section on Wi-Fi specific settings there are options to manually add a WiFi network if it does not broadcast its Network ID (SSID) which would prevent it
from appearing in VZAccess Manager. There is also an option to enter / edit your
WEP (Wireless Equivalent Privacy) password if your network requires one. If it
was incorrectly entered, it could prevent you from connecting.
• The issue may be related to using WEP security and your specific Wi-Fi adapter.
You may want to temporarily test your network without WEP to determine if this
is the case. If it works without WEP and fails using WEP, please e-mail Verizon
Wireless Tech support with your computer and Wi-Fi device info by doing the
following: From VZAccess Manager’s main screen select “Session,” “Statistics,”
“My Computer” then “E-mail Technical Support.” Please also include in the body
of the e-mail your computer brand, model and any Wi-Fi device information
you have - built in device or external card, brand and model. We will pass this
information on to Smith Micro for consideration in a future version. Use the client
that came with your device if you have this issue. Also please be aware that
Verizon Wireless does not support problems associated with Wi-Fi networks.
Customer Care will not be able to assist you.
Wi-Fi Statistics Support Tool
• From VZAccess Manager’s main screen select “Session,” “Statistics,” then the WiFi tab.

75
UM150 User’s Manual
75
UM150 User’s Manual
This tool displays signal strength, all relevant IP address information with additional
details by selecting “Details.” It also provides the ability to release your existing
IP address and request a new one by selecting “Release,” then “Renew.” This
procedure is a common troubleshooting STEP as explained in some of the
symptoms and solutions listed above.
The “Details...” option will display the following information:
6.3 Additional UMTS/GPRS Tips
The following tips will help solve many common problems encountered while using
GlobalAccess.
General Tips
• Make sure you are using the appropriate card in the correct geographic region:
a BroadbandAccess/NationalAccess card in the US, Canada or Puerto Rico or
your UM150 USB Modem in rest of world
• Ensure that the wireless network’s coverage extends to your current location.
• Ensure that you performed an over-the-air with your BroadbandAccess or
NationalAccess PC Card or ExpressCard prior to leaving the US.
• Confirm that you have an up-to-date version of VZAccess Manager.
• Confirm that your SIM card is properly inserted in the UM150.
• If your connection speed seems slow, please keep in mind the fact that neither
GPRS nor UMTS will provide a connection speed as fast as EVDO:
°
GPRS operates at: 20-40 Kbps up/down
°
UMTS operates at: 64 Kbps up, max. 384 Kbps down

76
UM150 User’s Manual
76
UM150 User’s Manual
Cannot connect using UM150 overseas − Not finding network “Searching
for network” message in VZAccess. LED on the USB Modem is solid RED
• Verify that you are not trying to connect with a BroadbandAccess/NationalAccess
card while outside the US.
• Check that the card is inserted correctly and that the SIM is installed correctly.
• Ensure that the wireless network’s coverage extends to your current location. You
may be in a non-covered service area.
Cannot connect using UM150 overseas − VZAccess Manager finds a
network, however “Connect” button cannot be selected.
• Re-run device wizard. Click on “Options” tab, Run Wizard or hit CRTL-N.
• Shutdown VZAccess Manager and reboot your PC.
Cannot connect using UM150 overseas − Constant “Powering on
device message” in bottom left corner. LED on
the USB Modem
is
flashing RED
• Close VZAccess Manager
• Remove external card and reboot PC
• Check that SIM card is correctly inserted into the UM150
6.4 Technical Support
For additional information and technical support for VZAccess Manager and Verizon
wireless devices, please visit Verizon’s Data Technical Support page at:
http://www.verizonwireless.com/b2c/support/data.jsp

77
UM150 User’s Manual
77
UM150 User’s Manual
7. GLOSSARY
1xRTT
Short for single carrier (1x) Radio Transmission Technology. A high speed wireless
technology based on the CDMA platform. 1xRTT has the capability of providing
broadband-like speeds of up to 144 Kbps. 1xRTT is also referred to as CDMA2000.
1xEVDO
Part of a family of CDMA2000 1x digital wireless standards. 1xEVDO is a “3G”
standard. EVDO stands for “EVolution, Data-Optimized.” 1xEVDO is based on a
technology initially known as “HDR” (High Data Rate) or “HRPD” (High Rate Packet
Data), developed by Qualcomm. The international standard is known as IS-856.
1xEVDO has the capability of providing broadband-like speeds of average speeds
of 300-600 Kbps.
Access Point
An interface between a Wi-Fi network and a wired network.
bps
Bits per second – rate of data flow.
Broadband
High-capacity high-speed, transmission channel with a wider bandwidth than
conventional copper telephone
lines. Broadband channels can carry video, voice, and data simultaneously.
COM Port
Defines a serial/RS-232 port within the Windows environment. May be physical or
virtual.
Dial-Up Connection
A switched network connection established by a computer using an analog data
modem over ordinary copper telephone lines.
Dormancy
A network state that occurs when no data has been transmitted or received after
a given amount of time. A network connection may disconnect during a dormant
state.
Firewall
A hardware or software boundary that protects a network or single PC from
unwanted outside traffic.

78
UM150 User’s Manual
78
UM150 User’s Manual
GPRS
General Packet Radio Service. A packet-switched technology that enables highspeed wireless Internet and other data communications. GPRS offers a tenfold
increase in data speed over previous technologies, up to 115kbit/s (in theory).
Typical real-world speeds are around 30-40 Kbps. Using a packet switching,
subscribers are always connected and always on-line, so services will be easy
and quick to access. GPRS is considered a “2.5G” technology, meaning it is more
advanced than standard 2G digital technology, but does not meet the requirements
of a full-fledged 3G technology.
HTTP
Hypertext Transfer Protocol
ISP
Internet Service Provider
IP
Internet Protocol. The mechanism by which packets are routed between computers
on a network.
Kilobyte
1024 bytes
Kbps
Kilobits per second – rate of data flow
LSP
Layered Service Provider – a Microsoft feature
LAN
Local Area Network. A data network confined to limited area with moderate to high
data rates. Does not use common carrier circuits, although may have gateways or
bridges to other public or private networks.
Mbps
Megabits per second
PC
Personal Computer

79
UM150 User’s Manual
79
UM150 User’s Manual
PC Card
A card having physical and electrical characteristics specified by PCMCIA providing
extra functionality when inserted into a mobile PC. Typical examples are modems
and network cards. A PC Card type refers to the thickness of the card.
PC Card Slot
A physical slot on a mobile computer, usually located on the side of the machine,
which accepts standard sized PC Cards to enhance the functionality of the
machine.
PCMCIA
Personal Computer Memory Card International Association. Defines specifications
used for PC Cards. www.pcmcia.org
PDA
Personal Digital Assistant. A handheld device used for organization, notes, address
books, etc.
POP3
Post Office Protocol v3. A standard transport protocol used send and receive email.
Proxy
A firewall mechanism that replaces the IP address of a host on the internal
(protected) network with its own IP address for all traffic passing through it.
Serial Connection
A network connection established by a serial device such as a modem. Serial
communication between your PC and modem or other serial devices adhere to the
RS-232 standard.
SMS
Short Messaging Service. Short text messages of generally no more than 140-160
characters sent and received by wireless devices.
SSID
Service Set Identifier. An SSID is also referred to as a Network Name because it is
a name that identifies a Wi-Fi network. Most access points broadcast their SSID.
Sync
To compare and synchronize two or more sources of data.

80
UM150 User’s Manual
80
UM150 User’s Manual
TCP/IP
Transmission Control Protocol / Internet Protocol
UMTS
Wideband CDMA (WCDMA) is an approved 3G standard that uses 5 MHz channels
for both voice and data, offering excellent voice capacity and a peak data rate of
384 Kbps. NTT DoCoMo launched the first WCDMA service in 2001 and now has
millions of 3G subscribers.
URL
Uniform Resource Locator
USB
Universal Serial Bus. A connection type for computer peripherals such as a printer,
mobile phone, etc.
VPN
Virtual Private Network. A way to communicate through a dedicated server securely
to a corporate network over the Internet.
VZGlobal
The GlobalAccess connection made when in GPRS/UMTS coverage.
WAN
Wide Area Network. A network which uses common carrier-provided lines.
Contrasts with LAN.
WCDMA
Wideband Code Division Multiple Access. Wideband CDMA is a third generation
(3G) wireless standard which utilizes one 5 MHz channel for both voice and data,
initially offering data speeds up to 384 Kbps. WCDMA is also referred to as UMTS
- the two terms have become interchangeable. WCDMA is the 3G standard that
most GSM carriers are moving to. Parts of the WCDMA standard are based on
GSM technology. WCDMA networks are designed to integrate with GSM networks
at certain levels. Most WCDMA phones include GSM as well, for backward
compatibility. WCDMA borrows certain technology ideas from CDMA, as the name
implies, but is in fact very different and incompatible with phones and networks
using “CDMA” technology. In Europe and Asia, WCDMA is being deployed in the allnew 2100 MHz frequency band. In North America, WCDMA is being deployed in the
existing 1900 MHz (PCS) and 850 MHz (cellular) bands.

81
UM150 User’s Manual
81
UM150 User’s Manual
WEP
Wired Equivalent Privacy. A security protocol for wireless local area networks
(WLANs) defined in the 802.11b standard. WEP is designed to provide the same
level of security as that of a wired LAN.
Wi-Fi
Wireless Fidelity. A generic term used to describe any type of 802.11 (a, b, g)
network.
WWAN
Wireless Wide Area Network
WWAN Device
Wireless Wide Area Network device. (Examples include: embedded wireless
devices, wireless handsets and PC Cards.)
WWW
World Wide Web

82
UM150 User’s Manual
82
UM150 User’s Manual
8. TRADEMARKS AND SERVICE MARKS
Verizon Wireless is a trademark of Verizon Trademark Services LLC, and the other
trademarks, logos, and service marks (collectively the “Trademarks”) used in this
help file are the property of Verizon Wireless or their respective owners. Nothing
contained in this help file should be construed as granting by implication, estoppel,
or otherwise, a license or right of use of Verizon Wireless or any other Trademark
displayed in this help file without the written permission of Verizon Wireless or its
respective owner.
VZAccessSM is a service mark of Verizon Wireless
Venturi™ is a trademark of Venturi Wireless.
QuickLink
®
is a registered trademark of Smith Micro Software, Inc.
Microsoft
®
, Hotmail, MSN
®
, ActiveSync
®
, Outlook
®
, Outlook Express
®
and
Windows
®
are either registered trademarks or trademarks of Microsoft
®
Corporation in the United States and/or other countries.
Netscape and the Netscape N and Ship’s Wheel logos are registered trademarks of
Netscape Communications Corporation in the US and other countries.
AOL
®
is a registered trademark of America Online, Inc
Aironet
®
, Cisco
®
, Cisco Systems
®
are registered trademarks of Cisco Systems,
Inc. and/or its affiliates in the US and certain other countries.
HotSync
®
is a registered trademark of Palm, Inc.
The names of actual companies and products mentioned in this help file may be the
trademarks of their respective owners.
Copyright 2006-2007 Verizon Wireless, all rights reserved.
 Loading...