

Page 1
Field Reference Guide—pH Manager
Keep with pH System and refer to daily.
(Refer to Operating Instruction Manual for complete instructions)
PRIOR TO MAPPING: PERFORM ROUTINE DAILY
MAINTENANCE
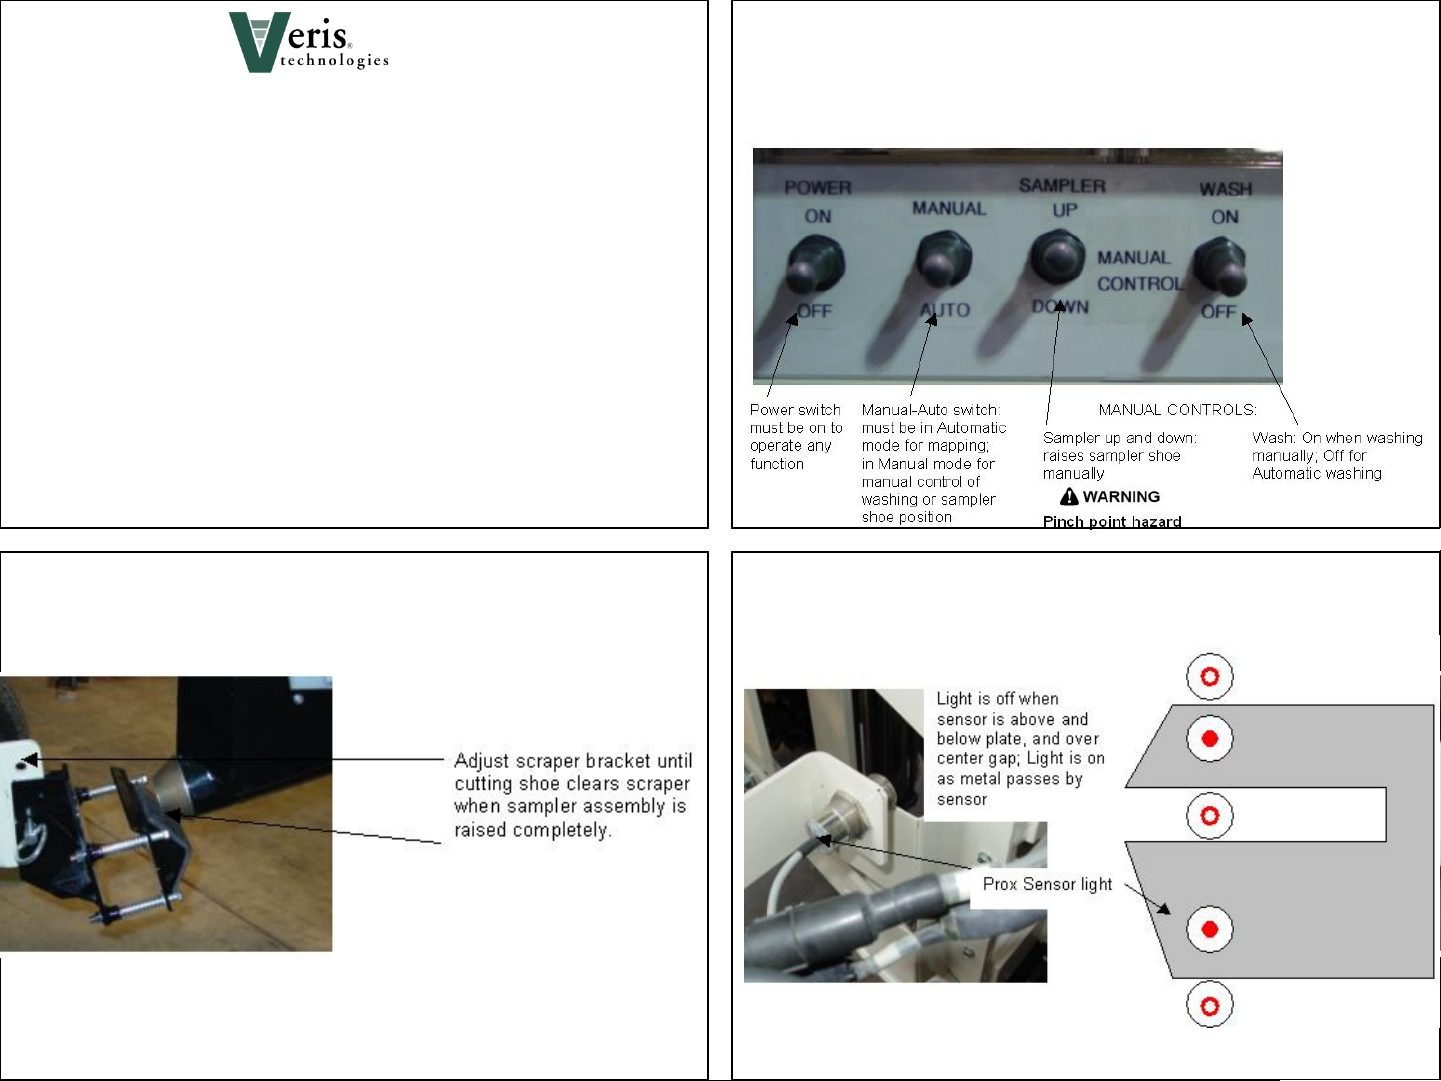
3. In Manual Mode test each function
(washing, raising and lowering):
1. Inspect unit for loose
or missing bolts, other
obvious problems
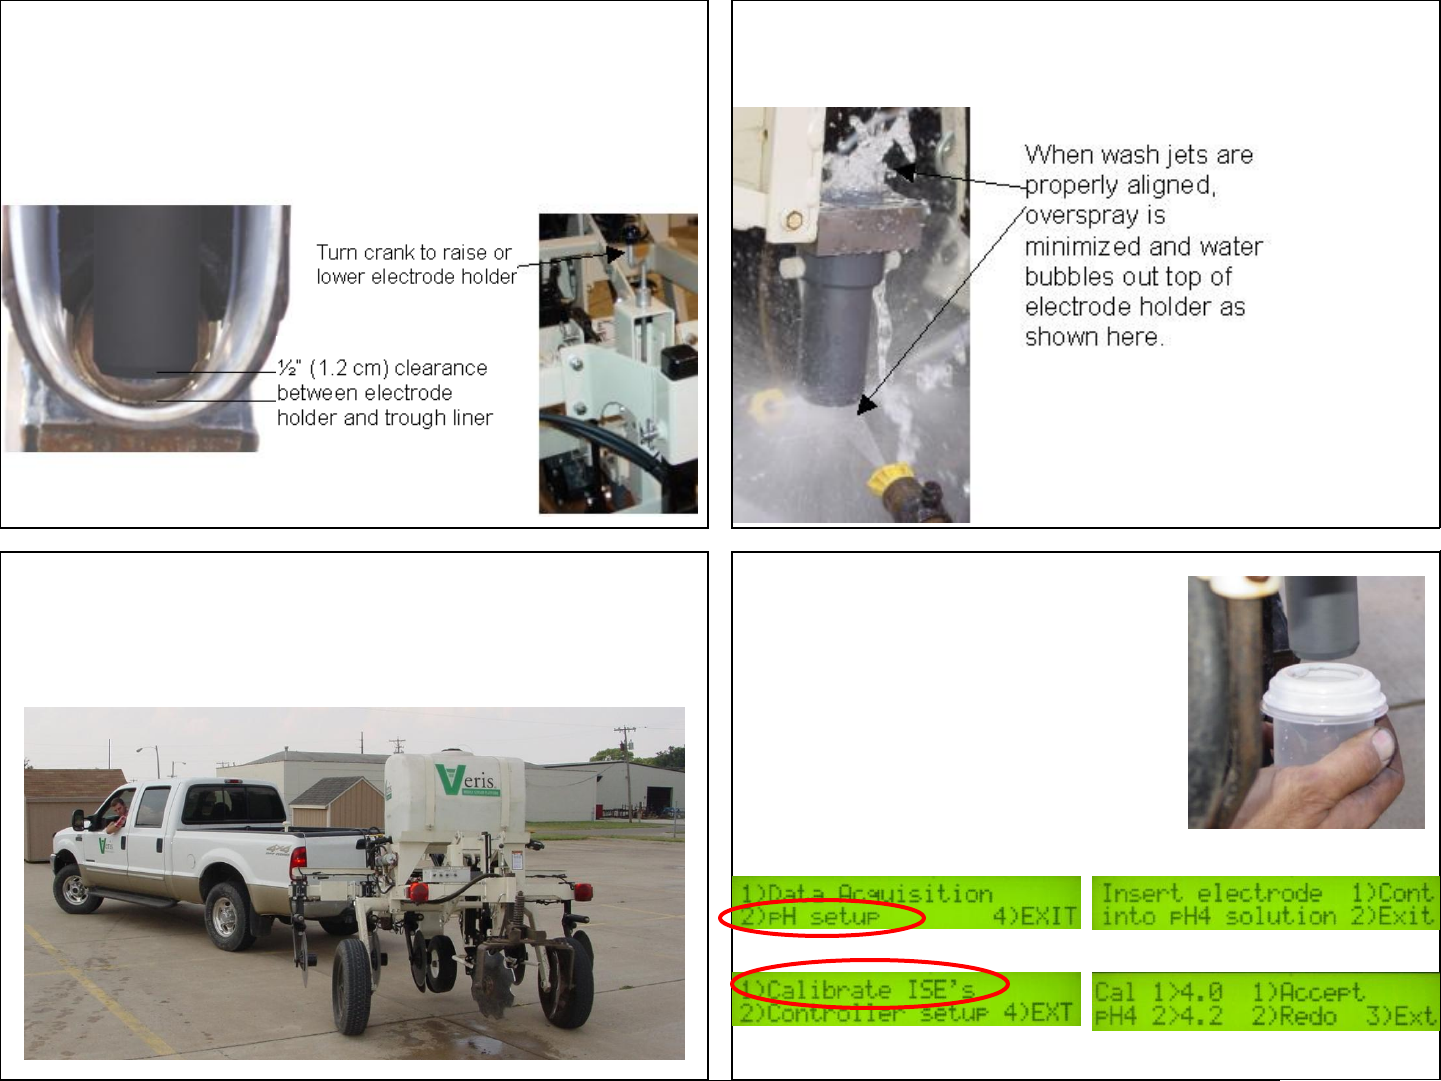
4. Raise and lower sampling shoe—check scraper for
appropriate contact:
2. Are sampling shoe and
trough completely clean of
soil?
5. Inspect prox sensor light during manual cycling:
Adjust hydraulic flow so cycling time is 1.5-2 seconds
Page 2
6. Raise sampling shoe—check for ¼” to ½” clearance
between electrodes and trough; make sure this is where
the shoe will stop in automatic mode (see prox sensor
adjustment section in Operating Instructions)
7. Operate wash jets and check alignment; does water
bubble out of top when electrodes are removed?
9. Calibrate electrodes
8. Raise unit and drive slowly in semi-circle with unit cycling
to check automated functions
Insert electrodes into holder and fingertighten set screws. Follow menu
prompts to “pH Setup”. The instrument
will prompt for the electrodes to be
inserted into pH buffer 4 solution; Slide
pH 4 buffer solution container onto
electrode holder. Press 1 to continue
with calibration or 2 to exit. Repeat with
pH 7 buffer solution.
Page 3

10. Set operating depth: 2-3” of cylinder stops (21” length
of ratchet, machine level, sampler shank in 2ndor 3rdhole
typically.
DATA QUALITY TIPS
-All pH mapping requires calibration samples to be collected from the field.
-Before logging any data, make sure the SD card in the Datalogger is clear of any files that are not Veris .dat files.
-During „Cycling‟ phase, do both pH electrode readings get close to the wash water pH? If not, one or both electrodes may not be
cleaning properly.
11. Cycle unit in soil at desired field speed (4-8 mph) and
inspect sampler shoe for core. Slow down if full core was
not retained.
-During „Recording‟ phase, do both electrode readings move to expected soil pH level? If they stay near wash pH level and/or
require more than 10 seconds to settle, one of the following may have occurred: 1) shoe may have plugged, so no new soil is
entering, and the shoe is slowly filling up with wash water; 2) Excessive speed may have allowed soil core to shoot out the back, or
3) gap between electrodes and shoe may be excessive, so thinner soil cores aren‟t contacting pH electrodes.
-Operators who monitor the screen, and are alert to pH values that aren‟t appropriate for the Cycling or Recording phase, generate
better maps.
-Whenever the final pH readings at a sample location are >.50 apart, an alarm will sound indicating data for that sample location will
likely be eliminated during data extraction. If more than an occasional reading is rejected, inspect the sampler assembly for possible
plugging or other malfunction, and the electrodes for proper cleaning.
-The speed you travel and your transect width directly affects the sample density: 6 mph (9.6 km/hr) on 50‟ (15 m) transects provides
approximately 10 samples/acre (24/ha). 5 mph (16 km/hr) on 75‟ (23 m) transects results in approximately 5 samples/acre (12/ha).
-If a soil core is not present in trough, slow down and inspect again. Excessive field speed can cause core to eject before sampling.
-If possible, double your transect width and fill back in to return to starting point. ISE drift will be evident and should be correctable.
-Make map as soon as possible and inspect for quality; map should have spatial structure and minimal streaks or lines
 Loading...