

Page 1
Veris P4000 Vis-NIR-EC-Force
Spectrophotometer
QUICK REFERENCE CARD
(Refer to Operations Manual for complete instructions, including
software installation, safety, maintenance, and troubleshooting.)
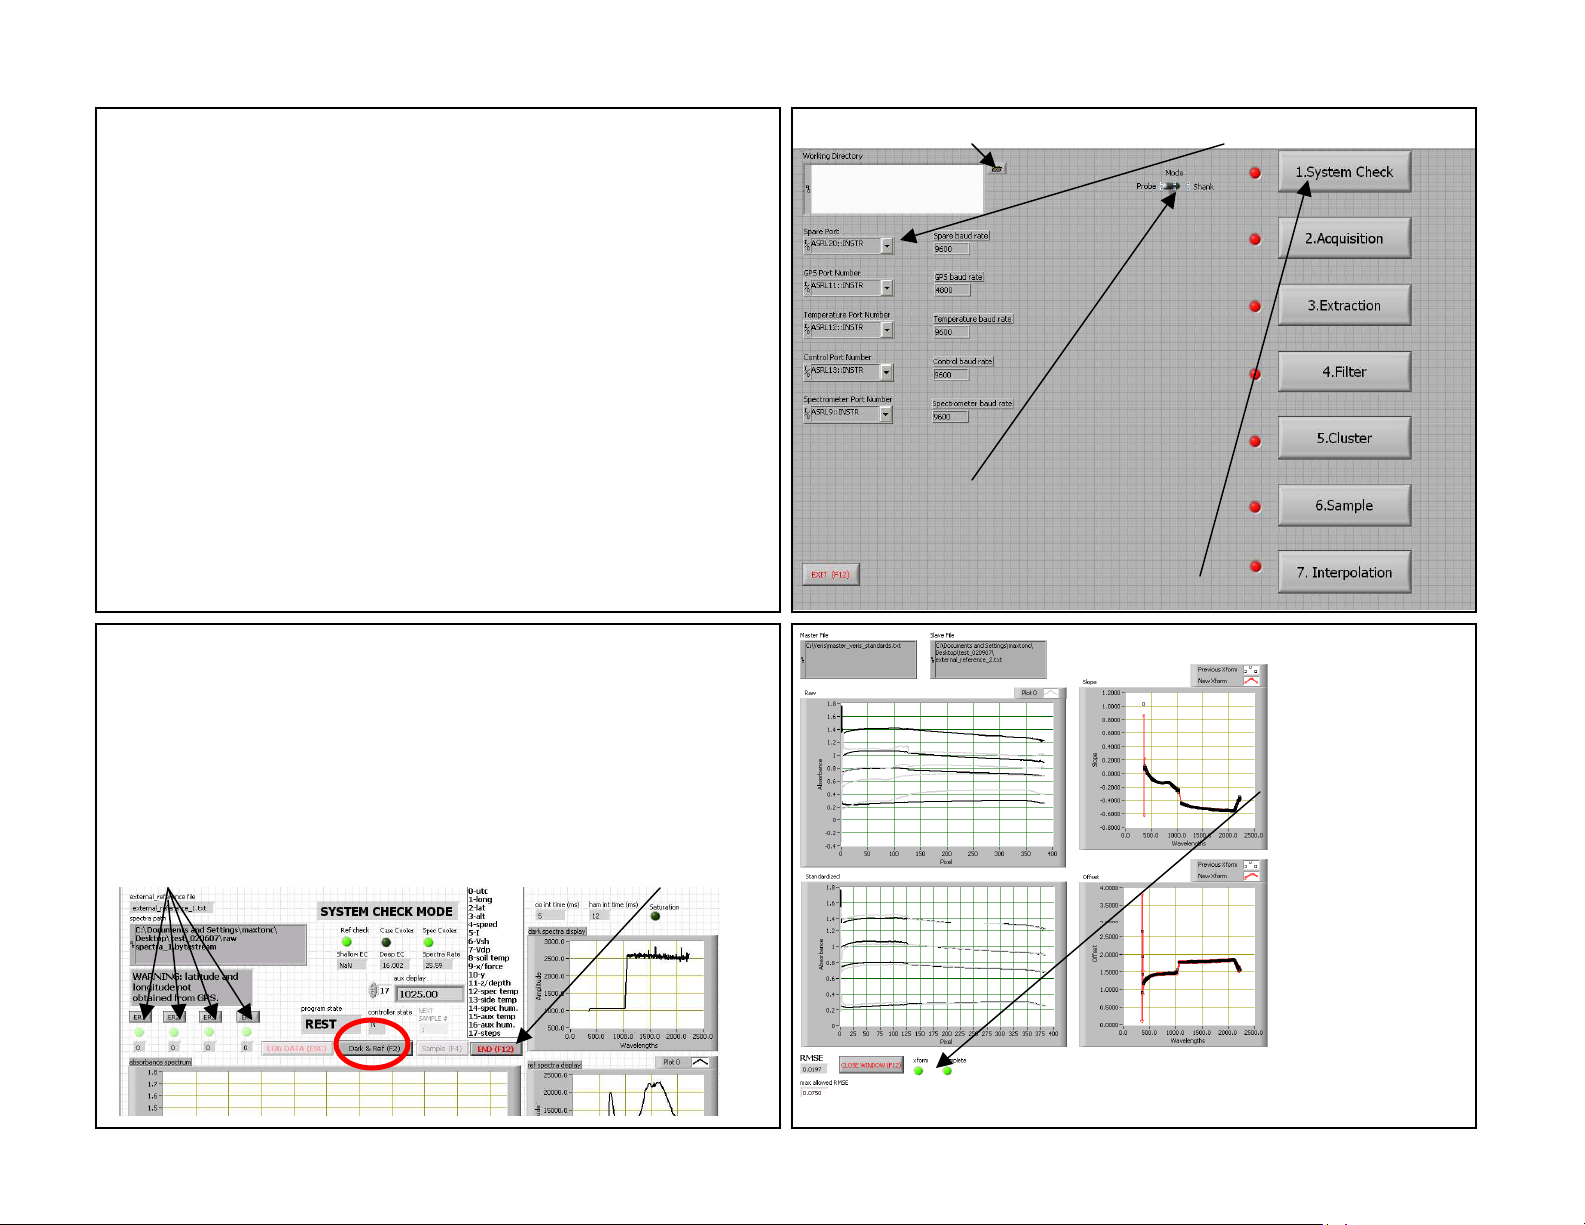
3. Select field folder 4. Set port order (if changed)
1. Start up spectrometers 20
minutes before using. Leave
vehicle running to keep battery
charged. (amperage draw is 10
amps if cooler is running; 1 amp
otherwise)
7. Clean window, and place reference block against
window. Press Dark and Reference button (F2). Multiple
Dark and Reference readings may need to be collected
8. Press external references (ER)
against window. Press
corresponding button when Program
State reads REST. Continue until all
ER lights are green or yellow.
2. Start software.
Refer to Operating
Instructions for
software installation
procedure.
9. Press End
(F12) to transform.
5. Toggle to Probe mode
6. Press System Check button
10. Green light
indicates when
transform is
complete.
TO MOVE TO
NEXT STEP—
DATA
ACQUISITION.
Press Close
Window/F12 to
move back to
main interface
screen.
READY
Page 2
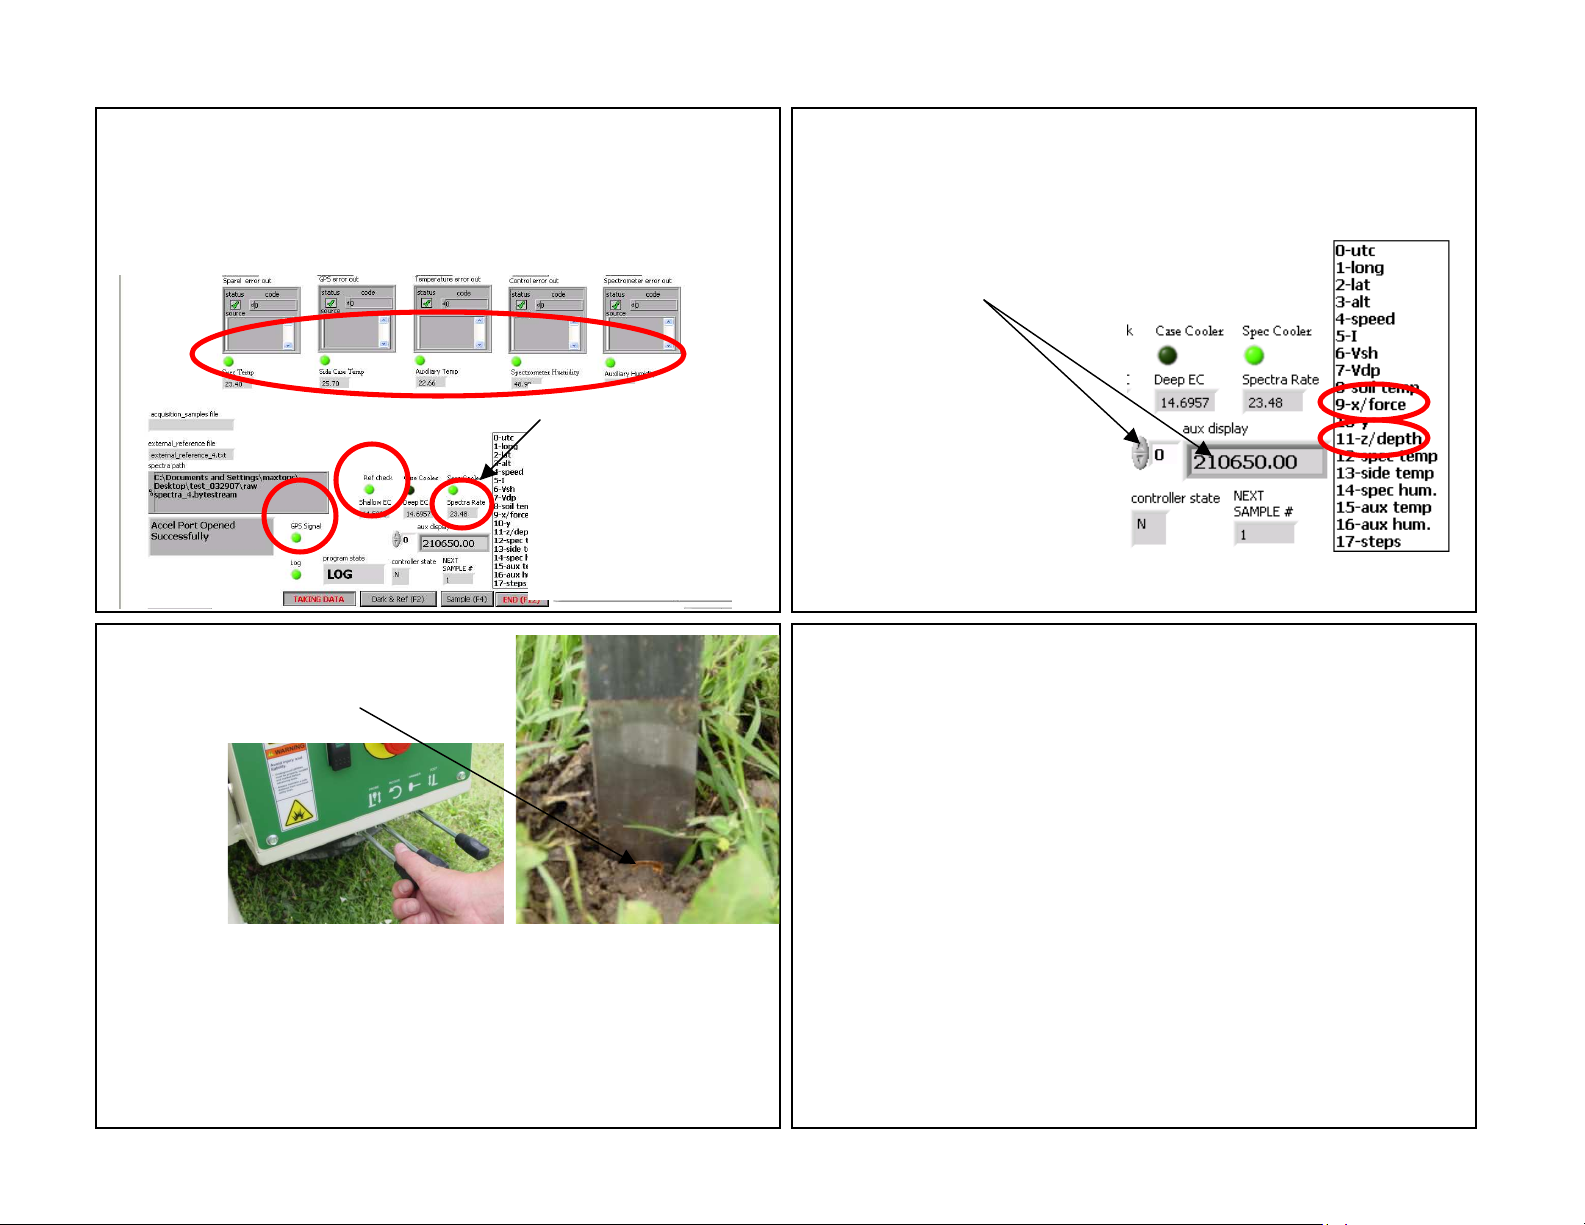
11. Before probing complete all steps above. Make sure
Reference Check (Ref Check) and GPS signal lights are
green, and all Auxiliary Case lights are green. Additional Dark
and References may need to be collected. Ref check light will
turn green when sufficient references have been collected.
12. Verify spectra
rate is changing;
this shows
communication with
auxiliary and
spectrometer cases
is maintained.
13. The Auxiliary (Aux display) window
provides user-selectable information about
the system. For Probing, select No. 9-force
or No. 11-depth
14. Begin probing: with probe mast
vertical, insert probe into soil until top
of window is not visible.
15. Pressing Probe button begins storing spectrum data and
auxiliary data until probe is stopped or raised. Once insertion
is initiated, do not stop or reverse unless problem has
occurred or desired depth is achieved. Data recording stops
when probe is raised. GPS and Log lights must be green for
data to be recorded.
16. While probing: watch display for following:
-Log light must be green while collecting data; if not green
stop immediately and determine problem
-GPS data light is green
-auxiliary case information—green lights and data
-system will ask to collect a dark and reference every 10
minutes—several dark and references may be required
-if system fails to respond, inspect spectra window (see
Step 12) to check if system has lost communication with
auxiliary and spectrometer cases. If system has locked,
reboot software in the following sequence: 1) exit software,
2) turn off power to cases, 3) disconnect USB’s from
computer then reconnect, 4) turn on power to cases, 5)
restart software. If restarting computer is required, exit
software, shut down computer and follow steps 2-5.
Page 3

17. Operational tips:
-Use side-shift function to move probe to new, adjacent
probing location
-Don’t let stringpot cable snap back into spool; factory
stringpot repair will be required if cable retracts too rapidly
-For best results, clear plant residue from probe insertion
area
-In sticky clay soils, it may be
necessary to remove soil from
window before reinserting.
18. Safety
-Keep hands and feet from underneath probe and sideshift
track area.
-Do not probe where utility lines or other underground
hazards may be present. Use ‘Call before you dig’ services.
- Wear protective gloves and safety glasses or goggles
when working with hydraulic systems.
-Be careful when touching the probe after use; the sapphire
window temperature may cause burns.
-Watch probe deflection and stop probe insertion before
damage occurs. Maximum pressure varies, but can be as
high as 15 mPa. This may occur suddenly if a rock or other
restriction is encountered.
19. When all data have been acquired press F12 or End to
return to the main interface screen, shown below. The
extraction routine (button #3) will extract all the bytestream
files and output the data into a single text file.
Refer to Operations Manual for
information on steps 4-7
20. After each bytestream file has been extracted, the
message “EOF” will appear. Press enter to continue on to
the next file. Once all the data have been processed,
indicated by a green complete light, click on close window or
F12 to return to main interface.
 Loading...