

Verint S5020BX-DN, S5003BX-DN Quick Installation Manual
All users should read the related user manuals for complete details on installation, usage and functionality.
Quick Installation Guide
S5000 Series - BX Models
Version 1.0
Nextiva
1
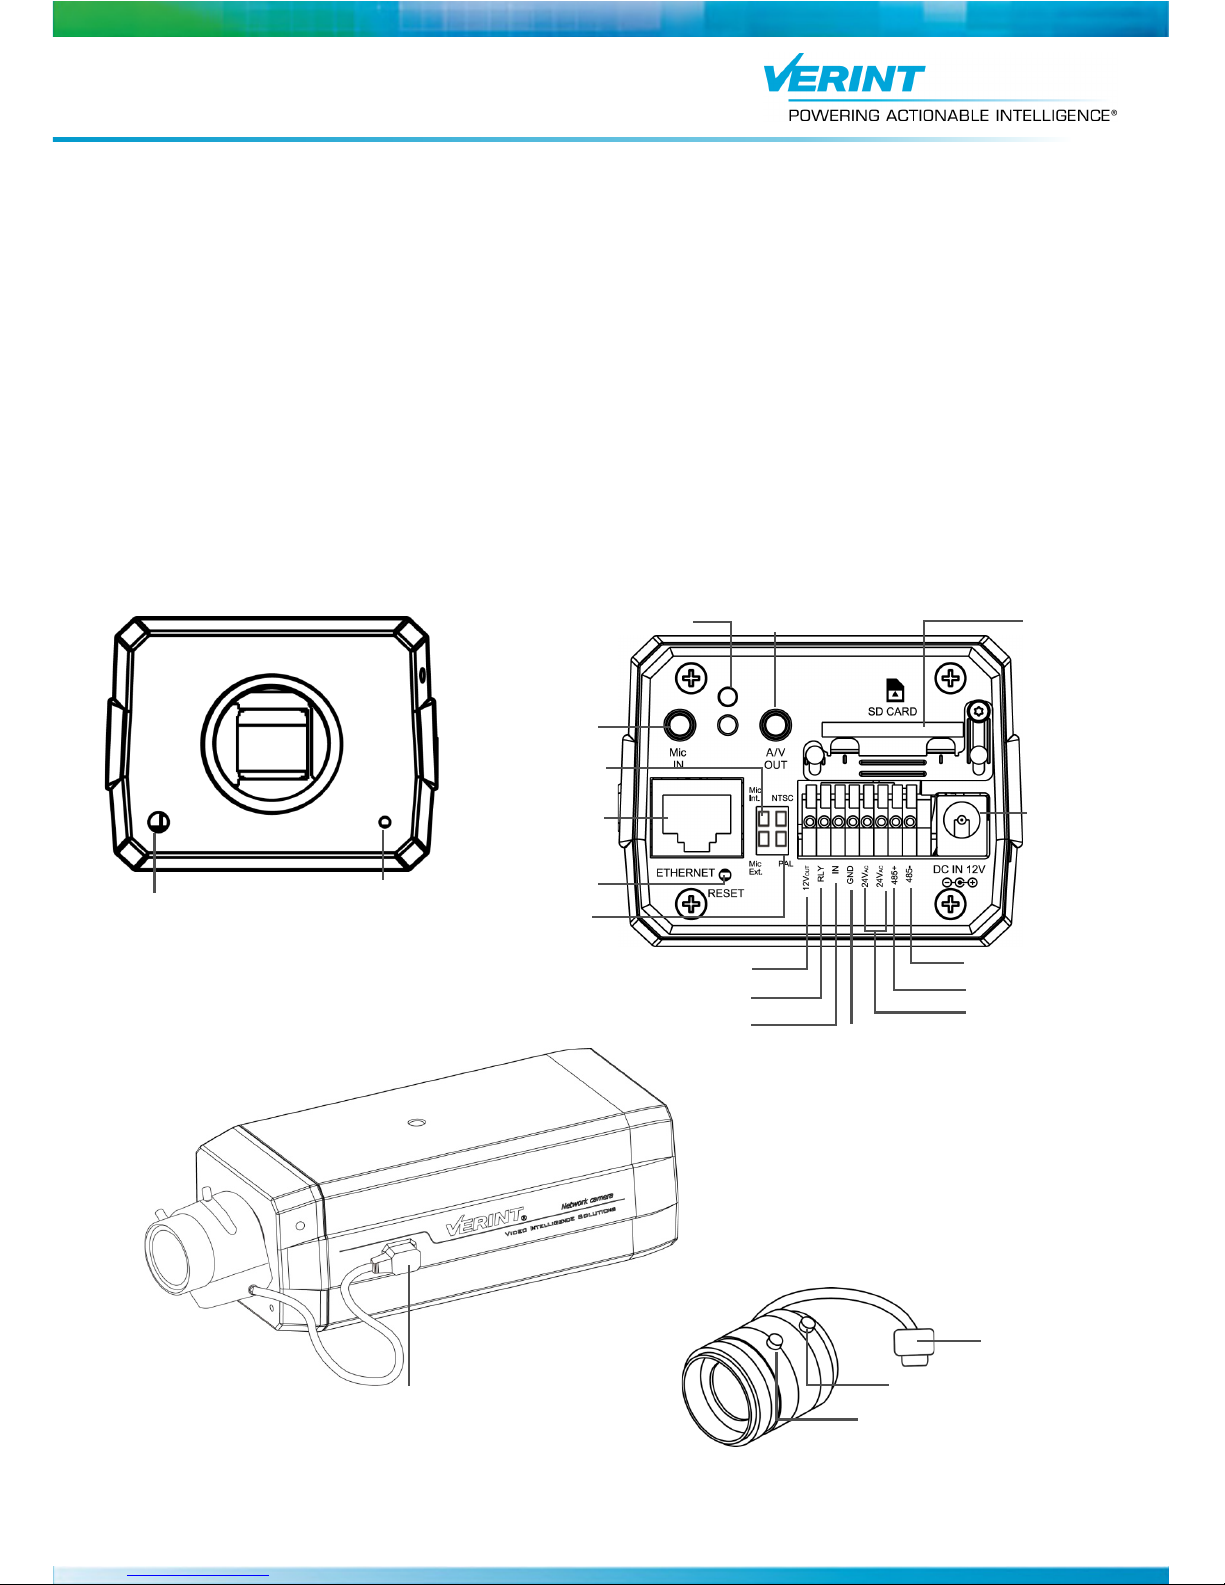
Hardware Overview
The Nextiva S5000BX is available in two models S5003BX-DN and S5020BX-DN. The S5003BX-DN
features a VGA sensor and the S5020BX-DN features a 2-Megapixel sensor.
Lens are not included with the camera, but Verint offers multiple lenses that are available for purchase. If
you choose to purchase a lens elsewhere, ensure it has the following characteristics:
Aspherical
CS mount, 1/3 inch format
Manual or DC auto iris
Day/Night support
Light Sensor
Built-in
Microphone
SD/SDHC
Card Slot
Audio/Video out,
1/8in (3.5mm) jack
Status LEDs
External
Microphone In
12V DC
Power Cord
Connector
NTSC/PAL
Switch
External/Internal
Mic Switch
RJ-45 Network
Connector
DC-Iris Control
Cable Connector
Hardware Reset
Button
12V DC Output
Relay Output
Dry Contact Input
Ground
24V AC Input
RS-485 +
RS-485 -
Focus Controller*
Zoom Controller*
Auto Iris Cable
Front View Rear View
*The position of the zoom and focus controllers will vary depending on
the lens manufacturer.
2
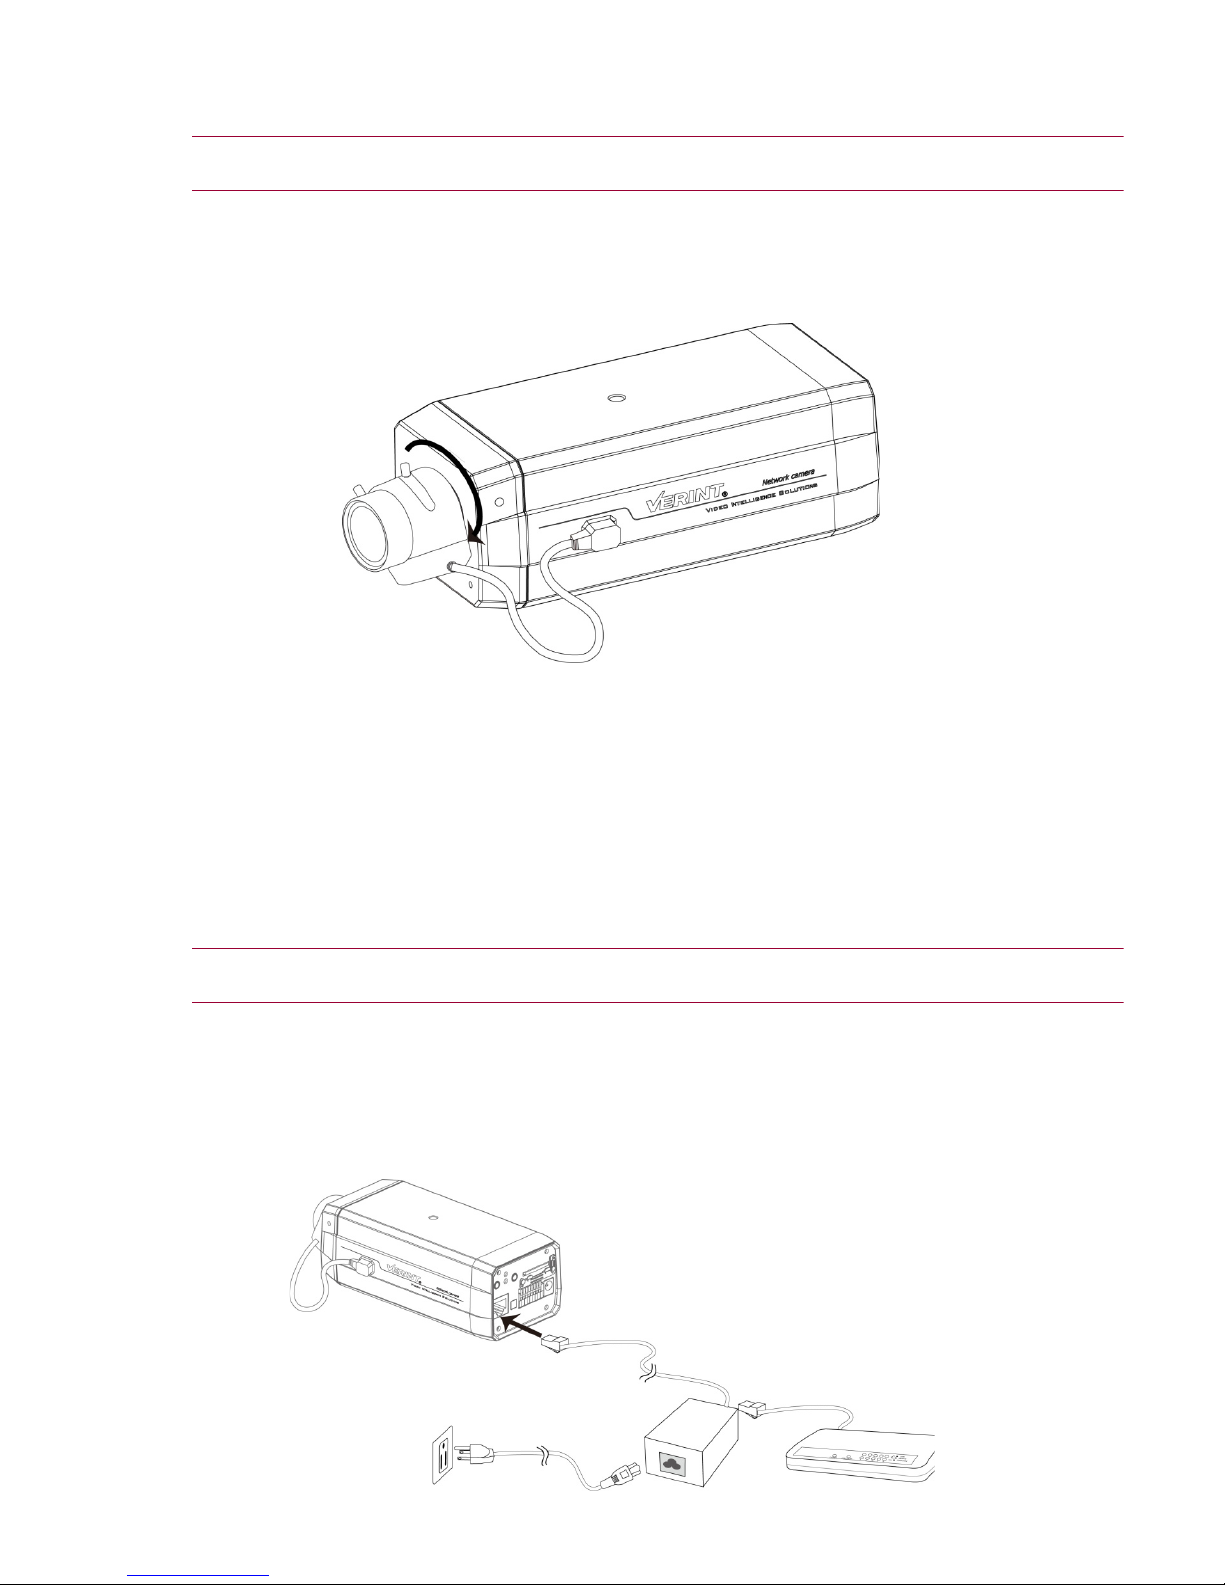
Installing the Nextiva S5000BX Models
This section explains how to mount and connect a lens onto the Nextiva S5000BX models.
CAUTION: Verint will not be held liable for damages to persons or property due to the improper installation
of the Nextiva S5000 series IP cameras.
To mount the lens:
1. Mount the lens by turning it clockwise onto the camera mount until it stops.
2. Connect the lens cable plug to the camera DC-Iris Control connector.
Setting the Video Standard
The Nextiva S5000FDW can run in one of two video standards (NTSC or PAL).
To set the video standard:
1. Move the DIP switch to NTSC or PAL.
Connecting the Nextiva S5000BX Models
This section explains how to connect the power and network cables to the Nextiva S5000BX models. A
power supply is not included with the Nextiva S5000BX models and must be purchased separately.
CAUTION: Never use a PoE power connection and a 12V DC power connection at the same time. This may
damage the device.
To power the Nextiva S5000BX models using a 802.3af compliant PoE kit:
1. Plug a straight-through ethernet cable into the RJ-45 connector on the back of the IP camera.
2. Plug the other end of the cable into a POE ethernet switch or to the Data&PWR port of a POE injector. If
you use a PoE injector, make sure the Data port of the injector is properly connected to the ethernet
switch.
 Loading...