

Verint S1801e, S1801e-POE, S1801e-R, S1802e, S1801e-R-HD Quick Installation Manual
Nextiva
Video Out Audio
In Out
In Out
Audio
Audio
AudioVideo In
Video In 1 Video In 2
In
Out
In Out
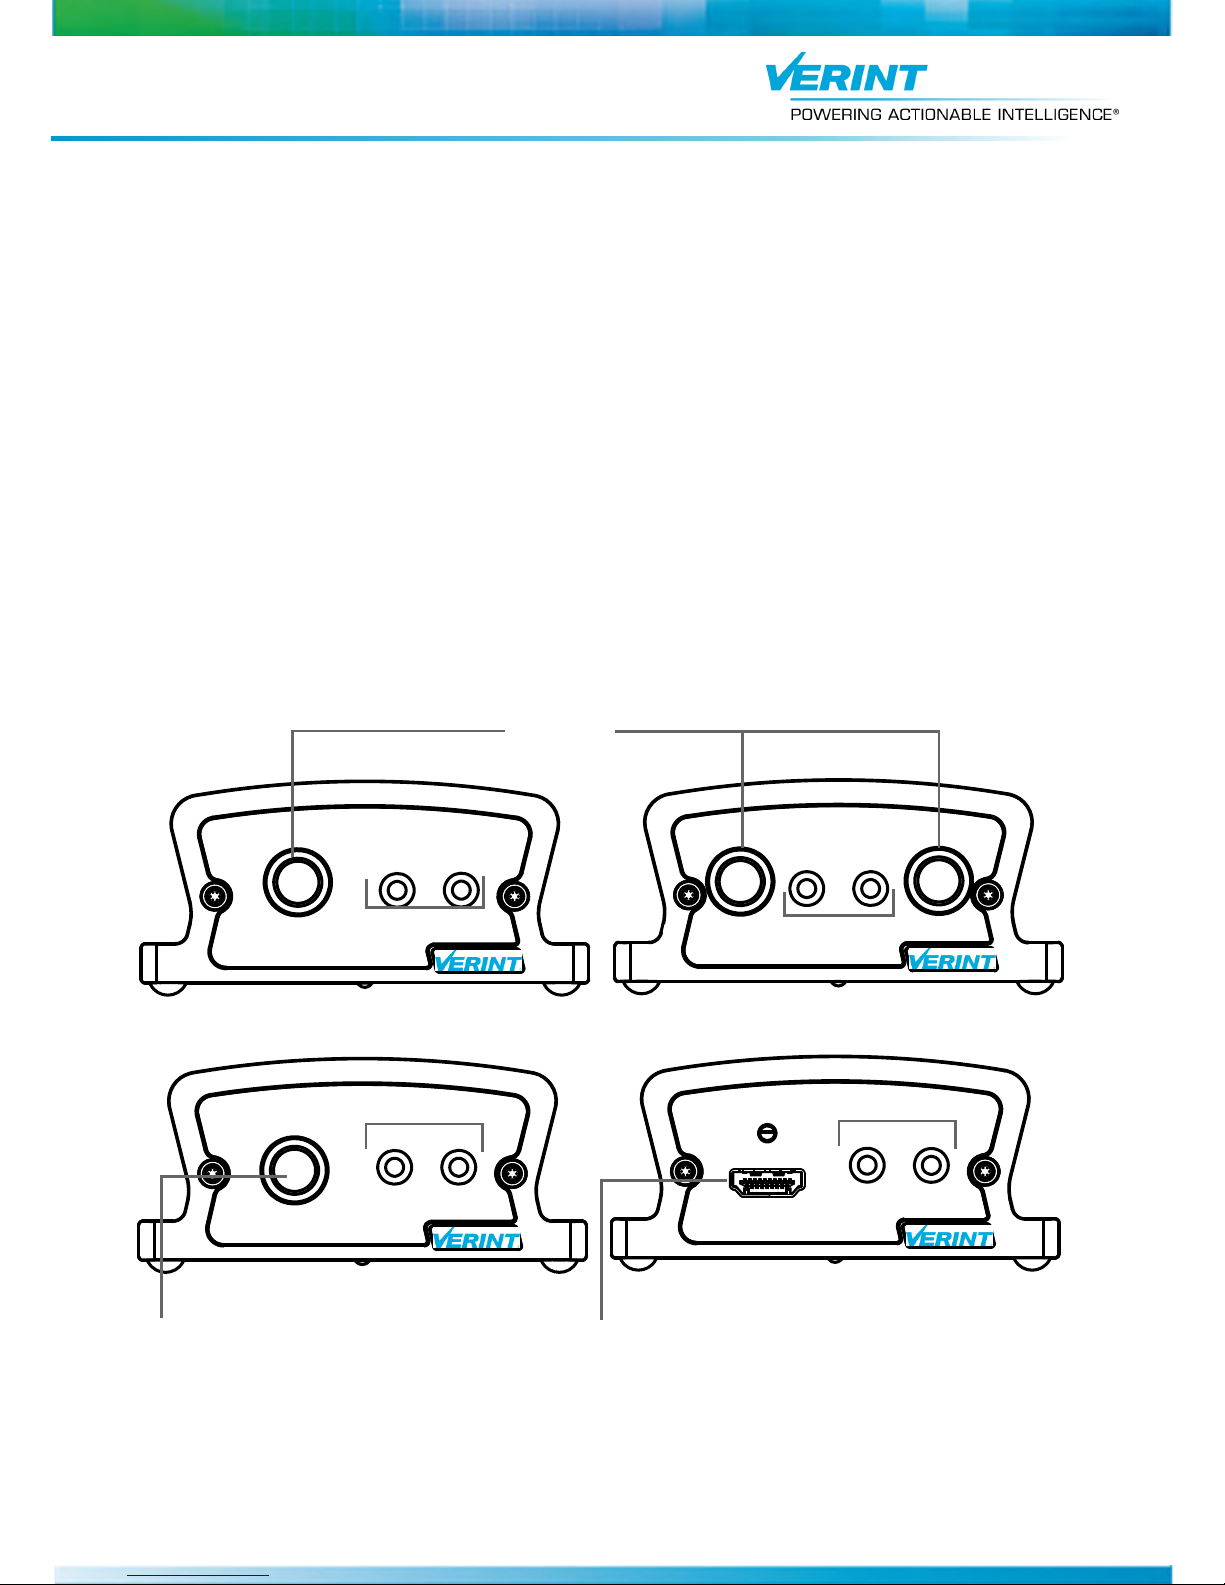
S1801e or S1801e-POE
S1802e
S1801e-R
S1801e-R-HD
Video Input
Video Output
HDMI Output
HD Video Out
S1800e Series
Version 2.0
Quick Installation Guide
for Single/Dual-Port Devices
This installation guide provides instructions for installing and performing the initial configuration. All users
should read the user manuals for complete details on installation, usage and functionality.
Contents of the Package
One S1801e, S1801e-POE or S1802e video encoder or One S1801e-R or S1801e-R-HD video decoder
One Nextiva S1800e Series Quick Installation Guide
PS121: ENERGY STAR
except the S1801e-POE.
Optional Accessories
VRM8: 19-inch rack mount panel for eight Nextiva S1800e series single and dual port devices.
PSPOE: 802.3af compliant Power over Ethernet injector.
Hardware Overview
The Nextiva S1800e series single/dual-port devices are available in five models: S1801e, S1801e-POE,
S1801e-R, S1801e-R-HD or S1802e.
Nextiva S1800e Series Single/Dual-Port Front View
®
qualified power supply for Nextiva S1800e series single and dual port devices
1
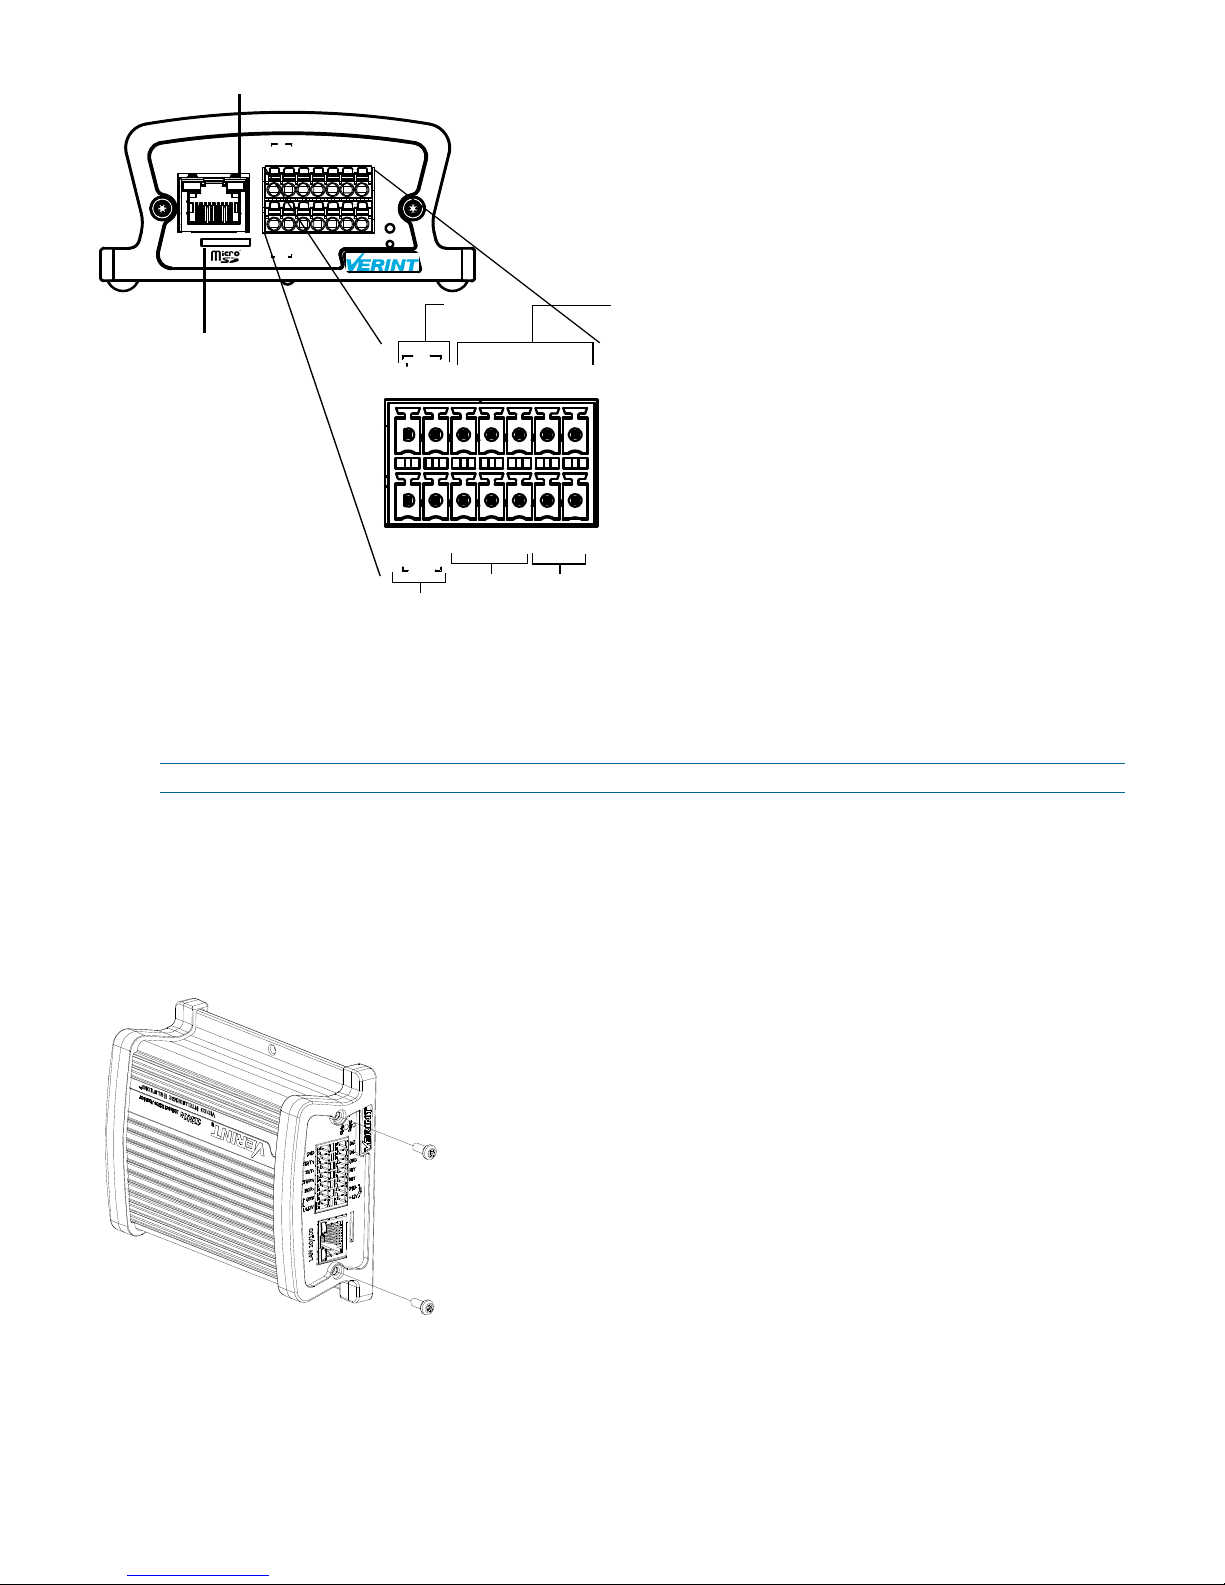
Nextiva S1800e Series Single/Dual-Port Rear View
+12V
GND
RLY
In1
GND
In2
RLY
RX/R-
RTS/T+
TX/T-
CTS/R+
GND
GND
+12V
In
Out
LAN 10/100
+12V+12V
GNDGND
GND
GND
RLY
RLY
In1
In2
RX/R-
CTS/R+
RTS/T+
TX/T-
In
Out
Status
Reset
12V DC
Input
RS-232/422/485
Input
1 Relay
Output
2 Dry Contact
Inputs
12V DC
Output*
* Only available on the S1801e-POE
1 Network Connector (RJ-45)
1 MicroSD card slot
(available on Encoders)
Installing the Nextiva S1800e Series Device
This section explains how to install a Nextiva S1800e series device on a desktop or flat surface and mount
the device in a rack.
NOTE: This equipment must be used in compliance with local laws and regulations.
To install the Nextiva S1800e series device on a flat surface:
1. Remove any debris and dust from the surface as well as the surrounding area.
2. Place the device on the flat surface.
3. Ensure that you have access to both the front and rear of the device.
To install the Nextiva S1800e series device on a rack:
1. Remove the two screws from the Nextiva S1800e series device.
2
 Loading...