

Veon VN2906VMS-IPH, VN2903CR-IPH Instruction Manual

Model : VN2906VMS-IPH
Instruction Manual
VERTICAL CD MICRO SYSTEM WITH iPhone/iPod DOCK

2
1. Read, Keep and Follow these instructions, heeding all Warnings.
2. Keep out of reach of young children. This apparatus is not suitable for use by young
children or infirm persons without supervision. Young children must be supervised to
ensure that they do not play with the apparatus.
3. WARNING. Do not insert any objects into any openings of an electrical apparatus.
4. WARNING. Do not touch any moving parts of any electrical apparatus.
5. WARNING! Where the mains plug or an appliance coupler is used as the disconnect
device, the disconnect device shall remain readily operable
6. WARNING. Do not use this apparatus near water. To avoid the risk of fire or electric shock,
do not expose this apparatus to rain or moisture. The apparatus shall not be exposed to
dripping or splashes.
7. WARNING. No objects filled with liquid, such as vases, shall be placed on any electrical
apparatus.
8. Do not immerse in any liquid whilst in use or in cleaning. Clean only with a damp cloth, dry
with a dry towel. Do not use harsh abrasives as these may damage plastic parts.
9. DO NOT block any ventilation openings. Keep away from curtains, newspapers and
restricted areas. Install in accordance with any specific manufacturer’s instructions. Always
allow a sufficient gap around the apparatus to avoid overheating.
10.DO NOT install near any heat sources such as radiators, gas heaters, stoves or other
apparatus (including amplifiers) that produce heat. Do not leave in direct sunlight.
11.WARNING. Do not place any naked flame source, such as lighted candles on any
electrical apparatus.
12.WARNING! Connect to a suitable 100-240V ~ 50-60 Hz power supply only. If a class 1 product
it must be connected to a suitably earthed mains socket.
13.Always unplug from the power source when any electrical apparatus is not in use.
14.Do not abuse or damage a power cord. If any power cord is damaged, it must be replaced
by the manufacturer, its service agent or a similarly qualified person in order to avoid a
hazard. A replaceable cord must be replaced with an authorised replacement from an
authorised service agent only.
15.Only use attachments/accessories specified by the manufacturer.
16.Unplug this apparatus during lightening storms or when unused for long periods of time.
17.Attention is drawn to the environmental aspects of disposing of any battery.
18.Refer all servicing to qualified personnel. Servicing is required when the apparatus has
been damaged in any way, such as when the power supply cord or plug is damaged, liquid
has been spilled or objects have fallen into the apparatus, the apparatus has been
exposed to rain or moisture, does not operate normally, or has been dropped.
19.Do not attempt to service any double insulated apparatus. Double insulated apparatus
requires specialist servicing and knowledge to retain the safety of the apparatus.
20.WARNING. Do not use any electrical apparatus outdoors. If any electrical apparatus is to
be used outdoors, use a suitable Isolating transformer or Electrical Safety Switch (RCD).
21.For household use only, this apparatus is not intended for commercial use.
22.If this apparatus is to be used by a third party, please supply these instructions with it.
23.No liability will be accepted for any personal injury or damage caused by failure to follow
these instructions.
When using any electrical apparatus always observe safety regulations and use basic safety
precautions to reduce the risk of fire, electric shock and personal injury, including the following.
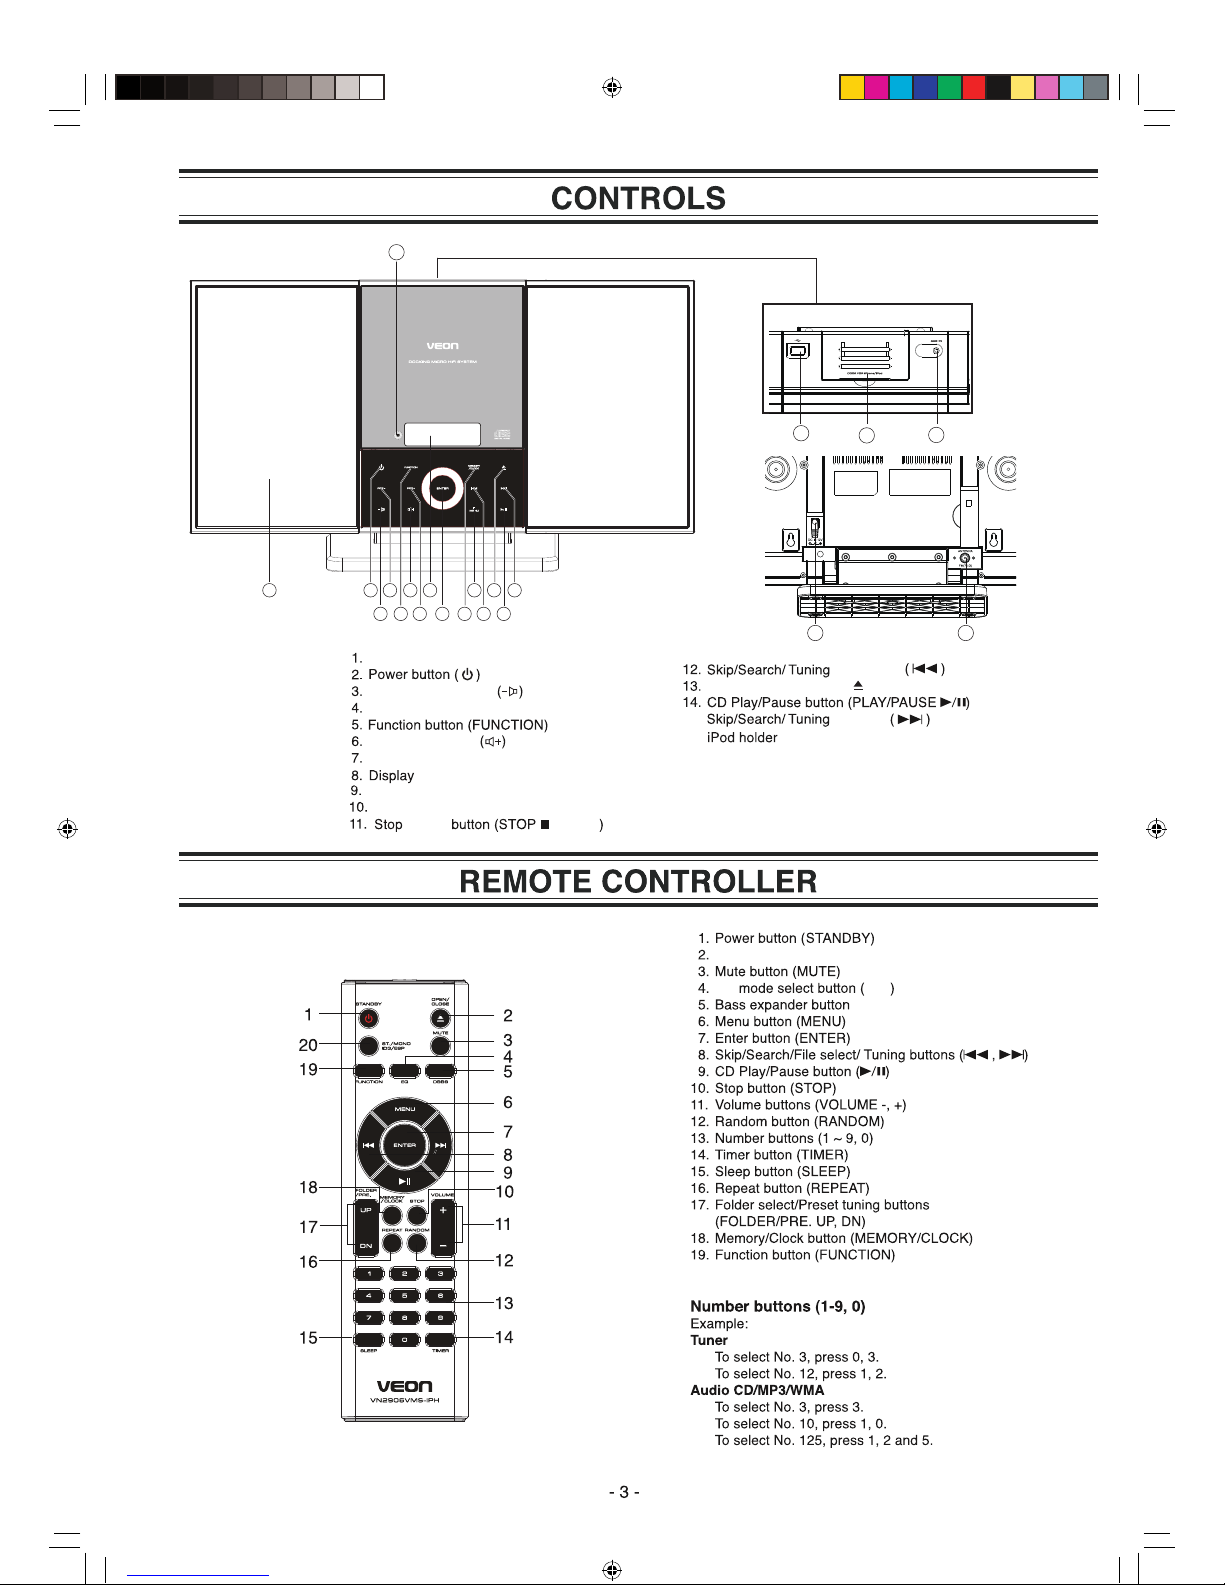
Enter button (ENTER)
backwards
forwards
Memory/Clock button (MEMORY/CLOCK)
Open/Close CD door button (OPEN/CLOSE)
(DBBS)
20. Stereo/Mono/ID3/ESP display button (STEREO/MONO/
ID3/ESP)
EQ EQ
OPEN/CLOSE button ( )
Preset up button(PRE +)
Preset down button(PRE -)
/MENU /MENU
1
3 5 7 9 10 12 14
2 4 6 8 11 13 15
Speaker
Volume down button
15.
16.
17. USB port (USB)
18. AUX IN jack (AUX IN)
19.DC input
20. FM 75ohm jack
21. Remote sensor
Volume up button
17
16
18
Top panel
19 20
21
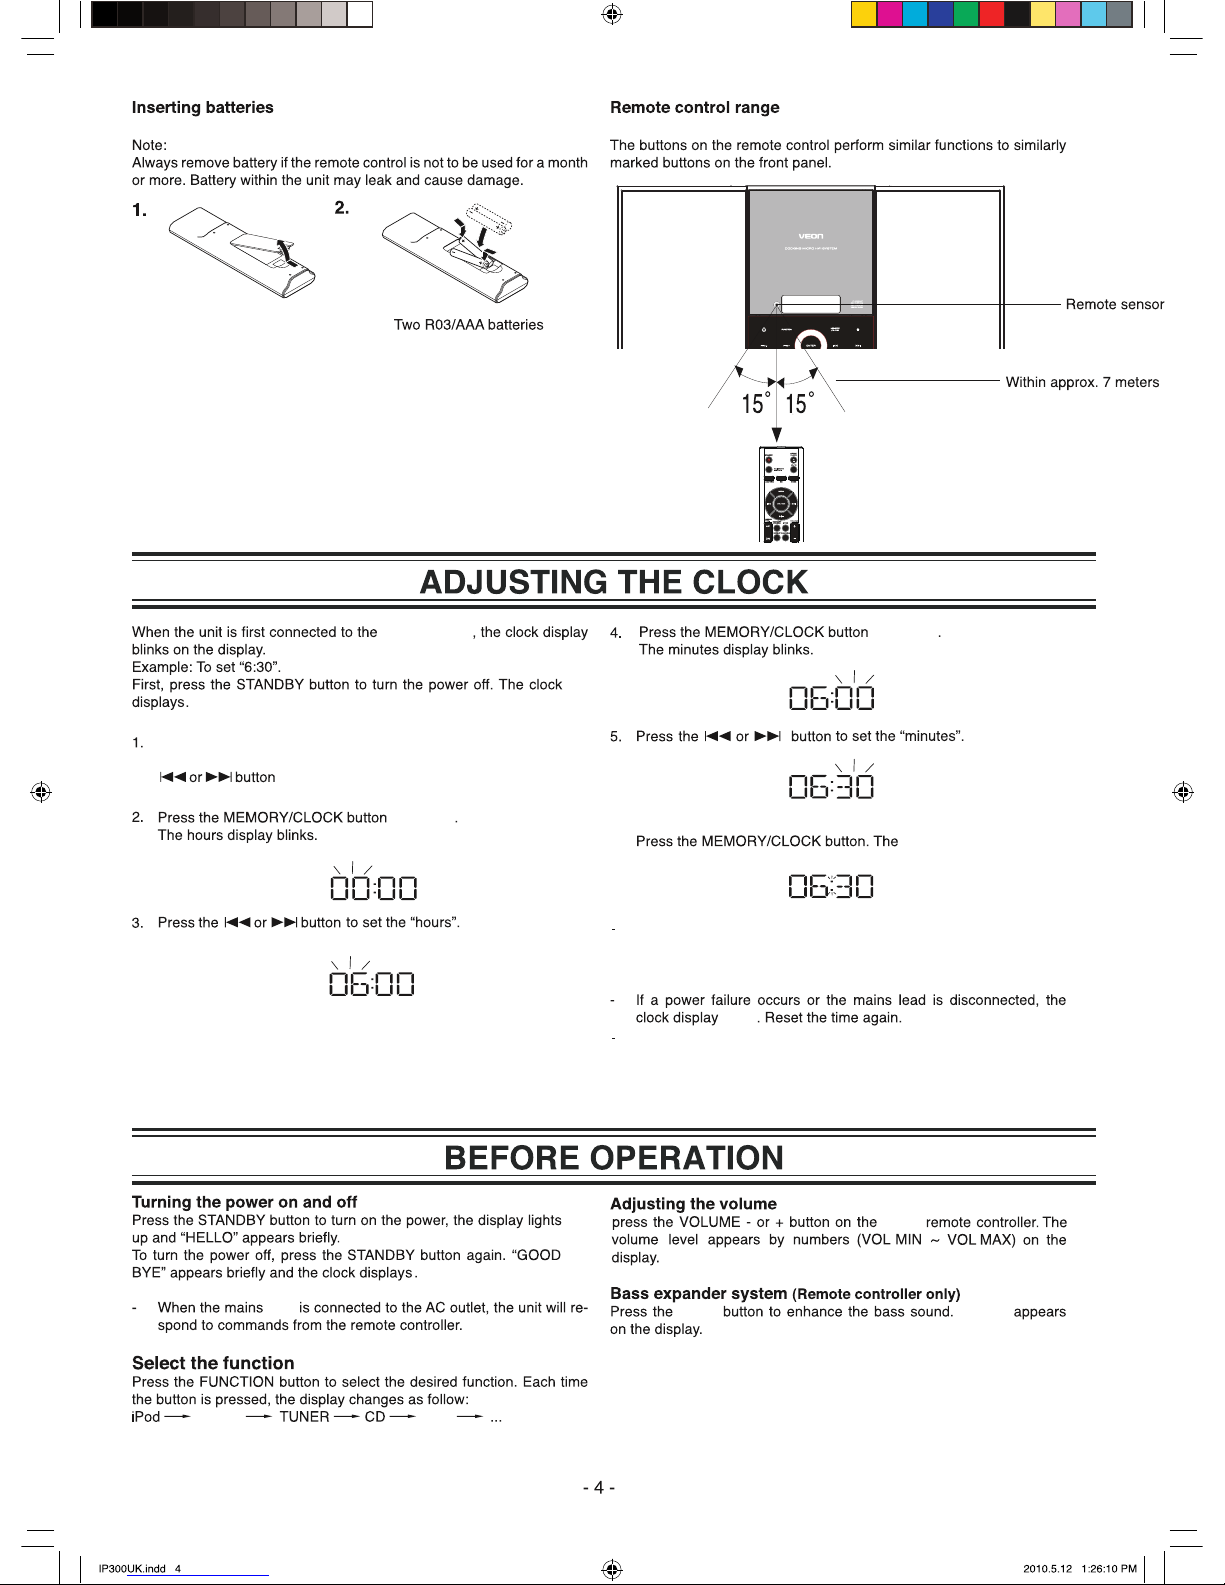
Press the MEMORY/CLOCK button for at least 2 seconds.
“12 HOUR” display with the digits 12 flashing. Press the
to set 24 hour mode.
6.
AUX IN
USB
unit or
to confirm
to confirm
current clock displays.
The clock can be synchronized automatically when inserting the
The clock will be 12 hour mode at the first synchronizing. If you want
to set 24 hour mode, please change the hour mode at clock setting
at STANDBY mode.
iPhone/iPod at the first time affer 60s. It can also be set later by
pressing and holding the MEMORY/CLOCK button at iPod mode
with iPhone/iPod docked when a time signal is received affer 60s.
plug
DC connector
dims
“DBBS”
DBBS
 Loading...