

Page 1
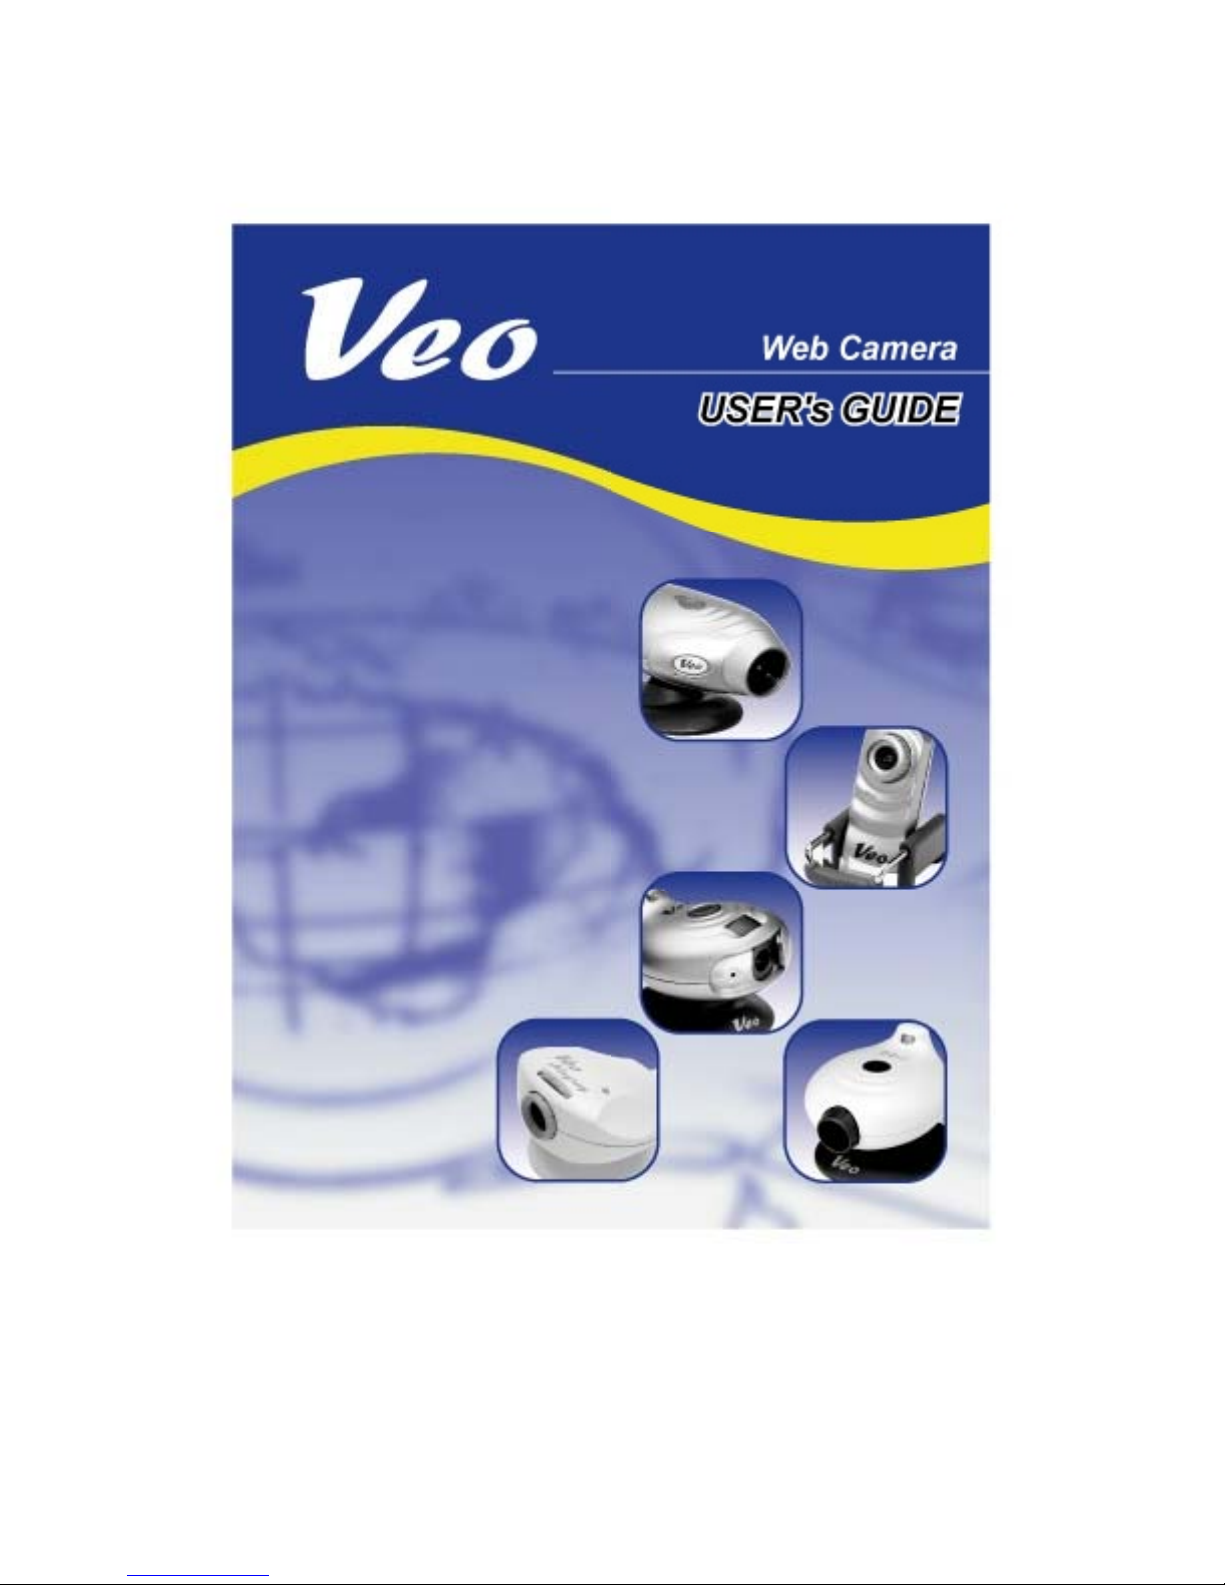
Page 1 of 44
Page 2

Table of Contents
Welcome to the Veo™ Web Cameras ………………………………………………………… … 3 - 4
A Quick Look at the Veo Web Cameras ...………………………………....……………………. 5 - 6
Minimum System Requirements …………………………..…………………………………………. 7
Software and Installation ………………………………………………………………..………… 7 - 8
How to connect your Veo Web Camera to your computer ………...……….………...…….. 8 - 9
How to connect the microphone to your computer ………………………….…………………… 9
The Veo Creative Studio Application ………………………………………………..…………….. 10
Taking a Snapshot ………………………………………………………….………...…………. 10 - 11
Recording a Video ……………………………………………………………………………….. 12 - 13
Recording an Audio Clip ……………………………………………………….…………………….. 13
Importing Pictures from another Source ………………………………………...……………….. 14
Importing Files to a Folder in the Veo Creative Studio …………………………………………. 14
Viewing Pictures in the Gallery …………………………………………………………..…………. 14
E-Card Creator – Creating an E-Card ………………………………………………………… 1 5 - 16
Movie Maker – Making or Editing a Movie …………………………………………………… 17 - 19
Homepage Designer – Designing a Home Page …………………………….……………… 19 - 23
Applying Text, Images, Videos, and Animated Characters ……………………….……… 23 - 25
Game Generator – Create Fun Games with Your Photos ………………………………… 26 - 29
Configuring Your E-mail Program to Send Files …………………………………………… 29 - 31
Video Meeting ……………………………………………………………………………..……… 32 - 40
Troubleshooting ………………………………………………………………………………..… 39 - 42
Additional Help and Resources ……………………………………………………………… …….. 42
Veo Statement of Limited Warranty ………………………………………………………...… 42 - 44
Page 2 of 44
Page 3

Welcome to the Veo™ Web Cameras
•
•
•
Veo is a brand of exceptionally user-friendly digital imaging products that enable people around
the world to instantly communicate.
The Veo web cameras will easily allow you to share photos, create home movies, build
personalized puzzle games, craft unique greeting cards and much more...all with intuitive, easy to
use software. Once you have created your custom project, share it with the world by placing it on
the Internet on your own web site, email it to a friend in a universal PC format, export it to create
a CD-ROM or simply print it for off screen viewing. Veo web cameras can even help you keep in
close contact with friends and family around the world through video instant messaging. No
matter how you use your camera, you are about to communicate in a whole new way...welcome
to Veo!
The Velocity Connect package includes:
Velocity Connect camera
• Spider Clip Base
• Easy Tilt Desktop Base
• User’s Guide
• Velocity Connect CD-ROM
• Quick snap lens cover
• Omni-directional microphone
The Mobile Connect package includes:
Veo Mobile Connect Web Camera
• 18” USB Cable
• Brushed Aluminum Travel Case
• User’s Guide
Veo Mobile Connect CD-ROM
Page 3 of 44
Page 4
The Advanced Connect package includes:
•
•
•
Veo Advanced Connect Web Camera
• Veo Spider Clip
• User’s Guide
• Veo Advanced Connect CD-ROM
The Connect package includes:
The Stingray package includes:
Veo Connect Web Camera
• User’s Guide
• Veo Connect CD-ROM
Page 4 of 44
Veo Stingray Web Camera
• User’s Guide
• Veo Stingray CD-ROM
Page 5
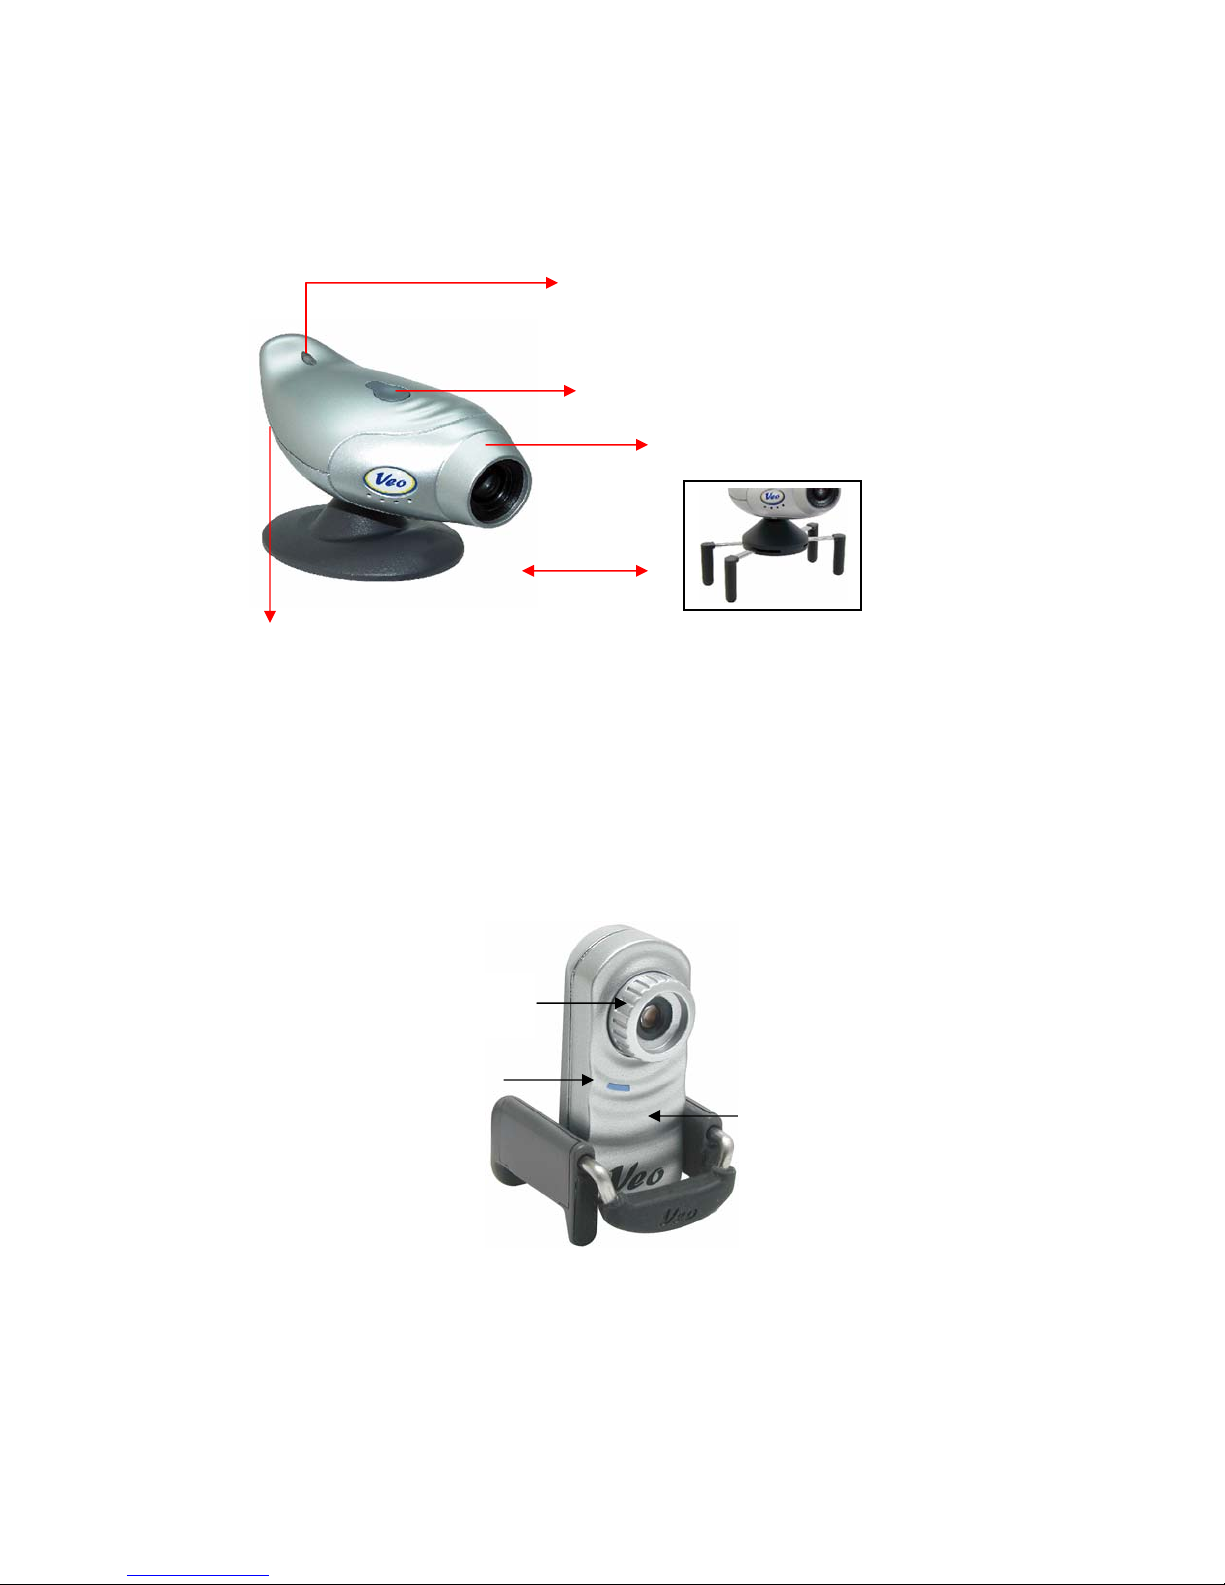
A Quick Look at the Veo Web Cameras
Velocity Connect
Veo Blue On/Off LED
Easy-touch
Snapshot Button
Refined Focus Dial
Lightning Fast Connection
USB 2.0 allows for
faster frame rates
Mobile Connect
Focus Ring
(Rotate to focus)
Power light
Interchangeable
Spider Clip
Attach the camera to LCD
monitors, cubicle walls or
anything 1-3 inches thick.
Built-in microphone
Page 5 of 44
Page 6

Advanced Connect
Connect
Stingray
Page 6 of 44
Page 7

Minimum System Requirements
Hardware
• 300 MHz Intel
(For Velocity Connect only) 750 MHz Intel
• 32 MB RAM or better
(For Velocity Connect only) 256 MB RAM or better
• 200 MB of available hard disk space
(For Velocity Connect only) 300 MB available hard disk space
• One available USB port
(For Velocity Connect only) Available USB 2.0 Port. (Backward compatible with USB 1.1
with functionality and performance compromises.)
• SVGA 800 x 600 Resolution Monitor
• 16-bit color
(For Velocity Connect only) 24-bit color, DirectX Compatible 16 MB Video Card
• 12x speed CD-ROM drive or better
• (For Connect, Stingray, and Velocity Connect only) Standard microphone for sending video
mail and videoconferencing messages
Software
• (For Advanced Connect, Connect Mobile Connect, and Stingray) Microsoft
98SE, Me, 2000 or XP
• (For Velocity Connect) Microsoft
• Internet browser application, i.e. Microsoft Internet Explorer, AOL
• E-mail program, i.e. Microsoft Outlook Express, Yahoo! Mail, AOL
Note: To find the version number of your Windows operating system, select Settings from the
Windows Start menu. Open Control Panel, and double-click on the System icon. The System
Properties dialog box indicates the version number.
®
Pentium®, AMD® or better
®
Windows® 2000 or XP
®
Pentium® III, AMD® Athlon™ or better
®
Windows®
Software and Installation
Install the software and restart your computer before connecting your Veo web camera!
If you have already plugged the camera into the computer, please unplug it before installing the
software.
1. Insert the CD-ROM into your CD-ROM drive.
2. Autorun will display the installation screen corresponding to your camera model. De-select any
additional software you do not wish to install. Click Install.*
Page 7 of 44
Page 8
3. Follow the instructions to finish the driver installation.** Restart your computer for the new
hardware and settings to take effect.
4. After your computer restarts, you may plug your camera into the USB port.
*Note: If Autorun does not start, choose Run from the Windows Start Menu. Assuming your CD-
ROM drive is the D drive, type “d:\Autorun” in the Run dialog box. If Autorun still does not start,
consult your computer manual or manufacturer to locate the CD-ROM drive.
**Note: On Windows 2000, Windows Media Player will be installed after the bundled software is
installed. Make sure if you are running Windows 2000, you wait for the Windows Media Player
installation to finish.
Note: Veo Creative Studio must have DirectX installed to operate properly (pre-installed in
Windows XP). You will be prompted to install DirectX upon initial use of the Creative Studio
software. Please install and restart your computer to complete the installation.
How to connect your Veo Web Camera to your computer
If you have the Mobile Connect, connect the USB cable to the camera first.
Page 8 of 44
Page 9
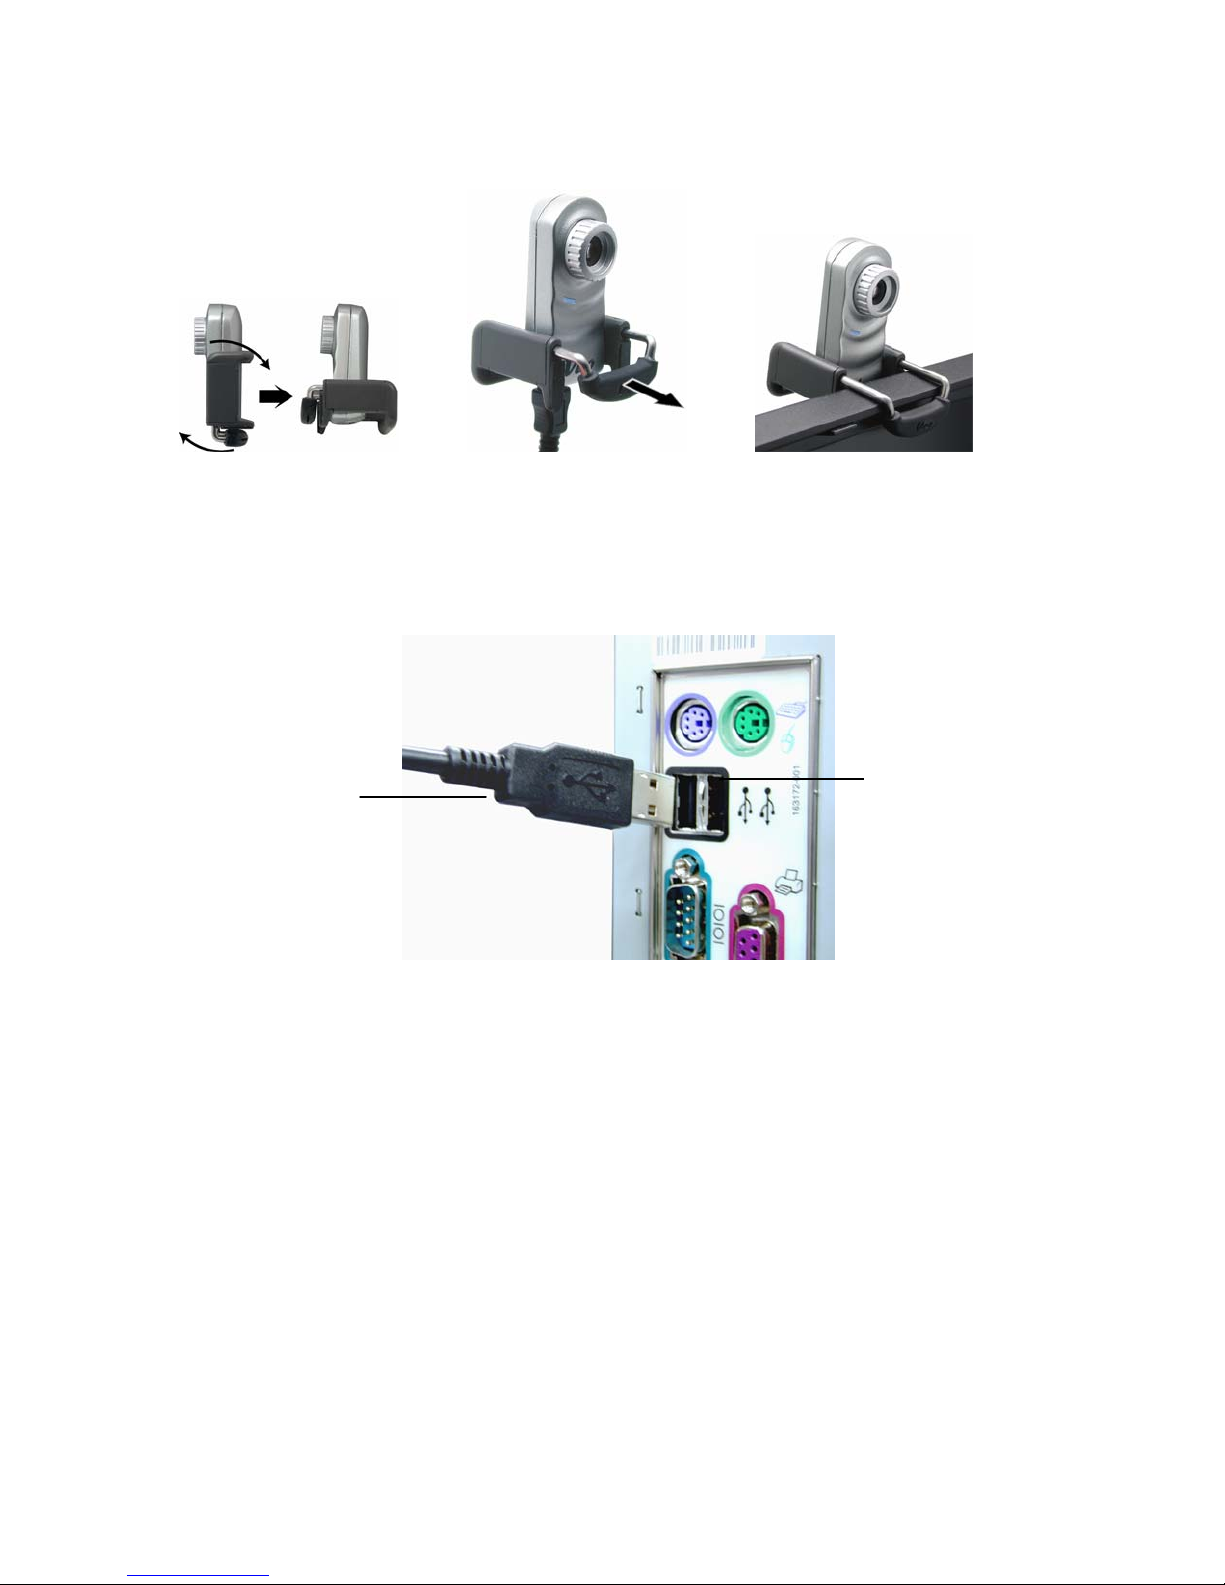
To mount the camera:
Rotate Clip Pull Clip Clip to Laptop Screen
Plug the USB connector into any available USB port (USB 2.0 port if you have the Velocity
Connect) on your computer. A window should appear and recognize a new d evice being installed.
USB connector
Note: If your computer does not recognize the new device, please refer to “Troubleshooting” on
pages 39-42 of this User’s Guide.
USB ports
How to connect the microphone to your computer
Locate the microphone jack on the back of your computer. On newer computers/sound cards, the
microphone jack will be pink or have a microphone symbol next to the microphone jack. Plug the
included microphone into the microphone jack and make sure it fits snugly.
Page 9 of 44
Page 10
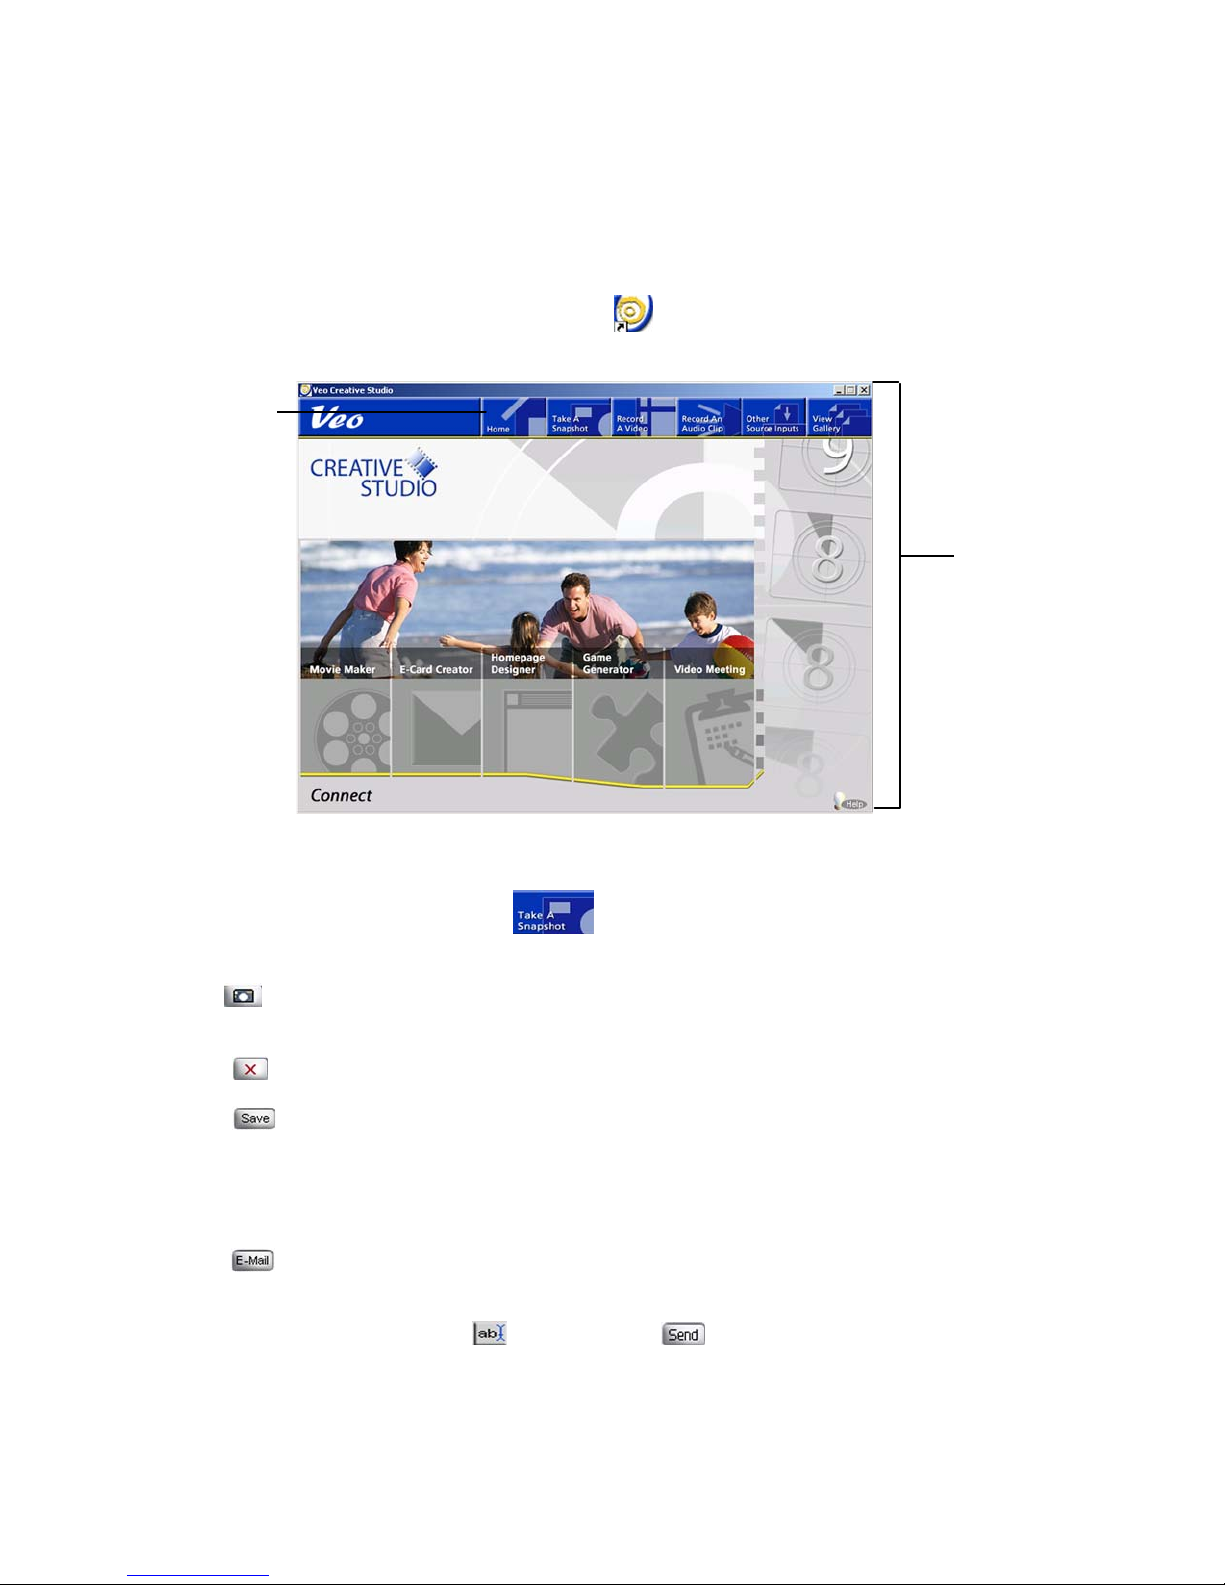
The Veo Creative Studio Application
The Veo Creative Studio is an easy-to-use application that comes with your Veo Web Camera. It
enables you to take snapshots, record videos, audio clips, and manage your Veo Web Camera
files. It also provides useful tools for your pictures and videos by allowing you to make movies,
create E-cards, design homepages, create games, and hold video meetings.
To start Veo Creative Studio, double-click on the
(All) Programs > Veo > Creative Studio - Connect.
Click to
return to
Home
screen
Taking a Snapshot
icon on your desktop or click on Start >
Creative Studio
Home screen
1. Click the Take A Snapshot button to launch your Veo Web Camera.
2. Use the Small, Medium, Large, and Extra Large buttons to select the desired resolution, then
click
3. Click:
a)
b)
Note: Depending on your settings, snapshots are captured in either the JPEG or BMP file format.
c)
Note: If you are experiencing difficulties emailing your pictures, please refer to “Configuring Your
Email Program to Send Files” on pages 29-31.
[Take a Snapshot].
[Retake Snapshot] - To take another snapshot.
- To save your picture. Select the destination folder and rename the picture if desired.
If left unchanged, the picture will be saved in the default directory C:\Program Files\Veo
Creative Studio for Connect\Gallery\Photographs.
- To send your picture to another person, type in the required information. The default
name given to the snapshot is MyPictureXXX.jpg. Note: XXX determines the picture counter.
To rename the snapshot before sending, click on the words “MyPicture XXX.jpg” in the
attachment text box and click
[Rename]. Click to send your snapshot.
Page 10 of 44
Page 11
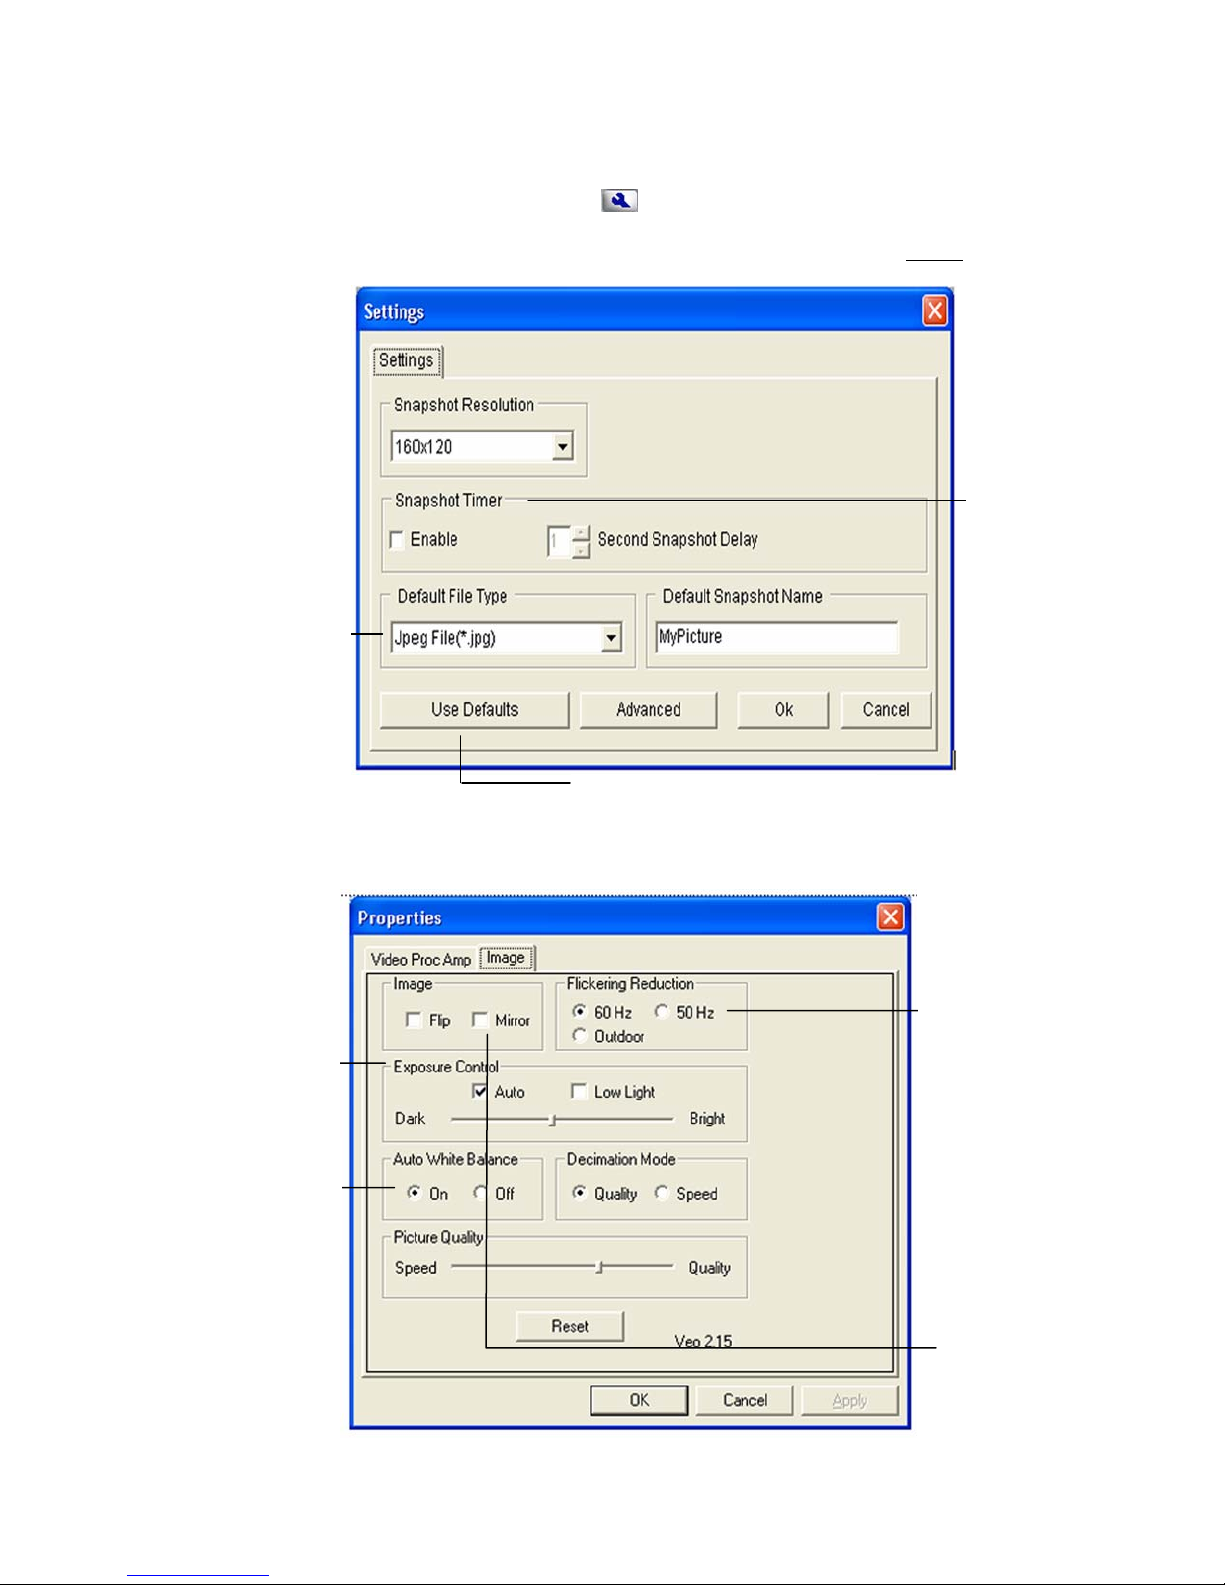
Snapshot Settings
A
A
To change the settings of your snapshots, click
[Settings].
Note: In order for the settings to take effect, you must apply the new settings before
snapshot.
Choose un-compressed
BMP or compressed
JPG file formats to
capture pictures in.
taking a
When Snapshot Timer
is enabled, you may
select the amount of
time to delay your
snapshots.
Restore all settings to default
for best overall image quality.
Advanced Settings (Depending on your camera model, some options may not be available)
Select the lighting
djust Exposure
Control for added
type used in your
environment.
customizing.
djust the white
balance to fine
tune the camera
to your lighting
conditions.
Check box to flip
images horizontally
(mirror image).
Page 11 of 44
Page 12

Recording a Video
1. Click the Record A Video button
2. Choose:
Standard Video - To record and save the video clip to your computer in .avi file format
for use in the Movie Maker application or one of the other Creative Studio applications.
Video Mail (Compressed Video for E-mail purposes) - To record and send a video clip
via email the file is recorded in Microsoft’s universal .wmv file format.
Note: Windows Media Player 7.1 or higher is required to play back .wmv files.
3. Use the Small, Medium, and Large buttons to select the desired resolution.
4. Adjust the volume using the Microphone Volume Adjustment Bar.
5. Click
button at any time to finish recording.
6. After the recording stops, the following buttons will appear on the bottom of the screen:
[Remove Audio] - Remove sound from the video.
[Save Frame] - Save the current frame as a picture file.
[Trim Video] - Trim the video to the selected size and length.
[Play] - Play the video.
[Rerecord Video] - Rerecord the video if you are not satisfied with the one you just recorded.
Note: Since Video Mail is compressed you may not remove the audio, save frames or trim the
video.
7. If recording a Standard Video, click
8. If recording a Video Mail, click
information. The default name given to the video is MyVideo.wmv. To rename the video before
sending, click on the words “MyVideo.wmv” in the attachment text box and click
Click
Note: If you are experiencing difficulties emailing your video, please refer to “Configuring Your
Email Program to Send Files” on pages 29-31.
Video Settings
[Settings] - Click this button to change the settings of your videos.
[Record] to record your video. The button turns into [Stop]. Click the Stop
Drag to select starting/ending point of video
to save your video as an .avi.
to email your video. Type in the required email address
[Rename].
to send your video.
Page 12 of 44
Page 13
Video Resolution: Select the size of the video to make it smaller or larger.
Preferred Device: Select your sound card that your microphone is connected to.
Maximum Video Size: Specify the maximum file size for your videos. Note that most Internet
Service Providers have a file size limitation when sending large files.
Maximum Video Time: Specify the time limit that you want to record your video for.
Default File Type: Select the video format that you want to record with.
Default File Name: Specify the default file name of the video you have recorded.
Note: In order for the new settings to take effect, you must apply them before
recording a video.
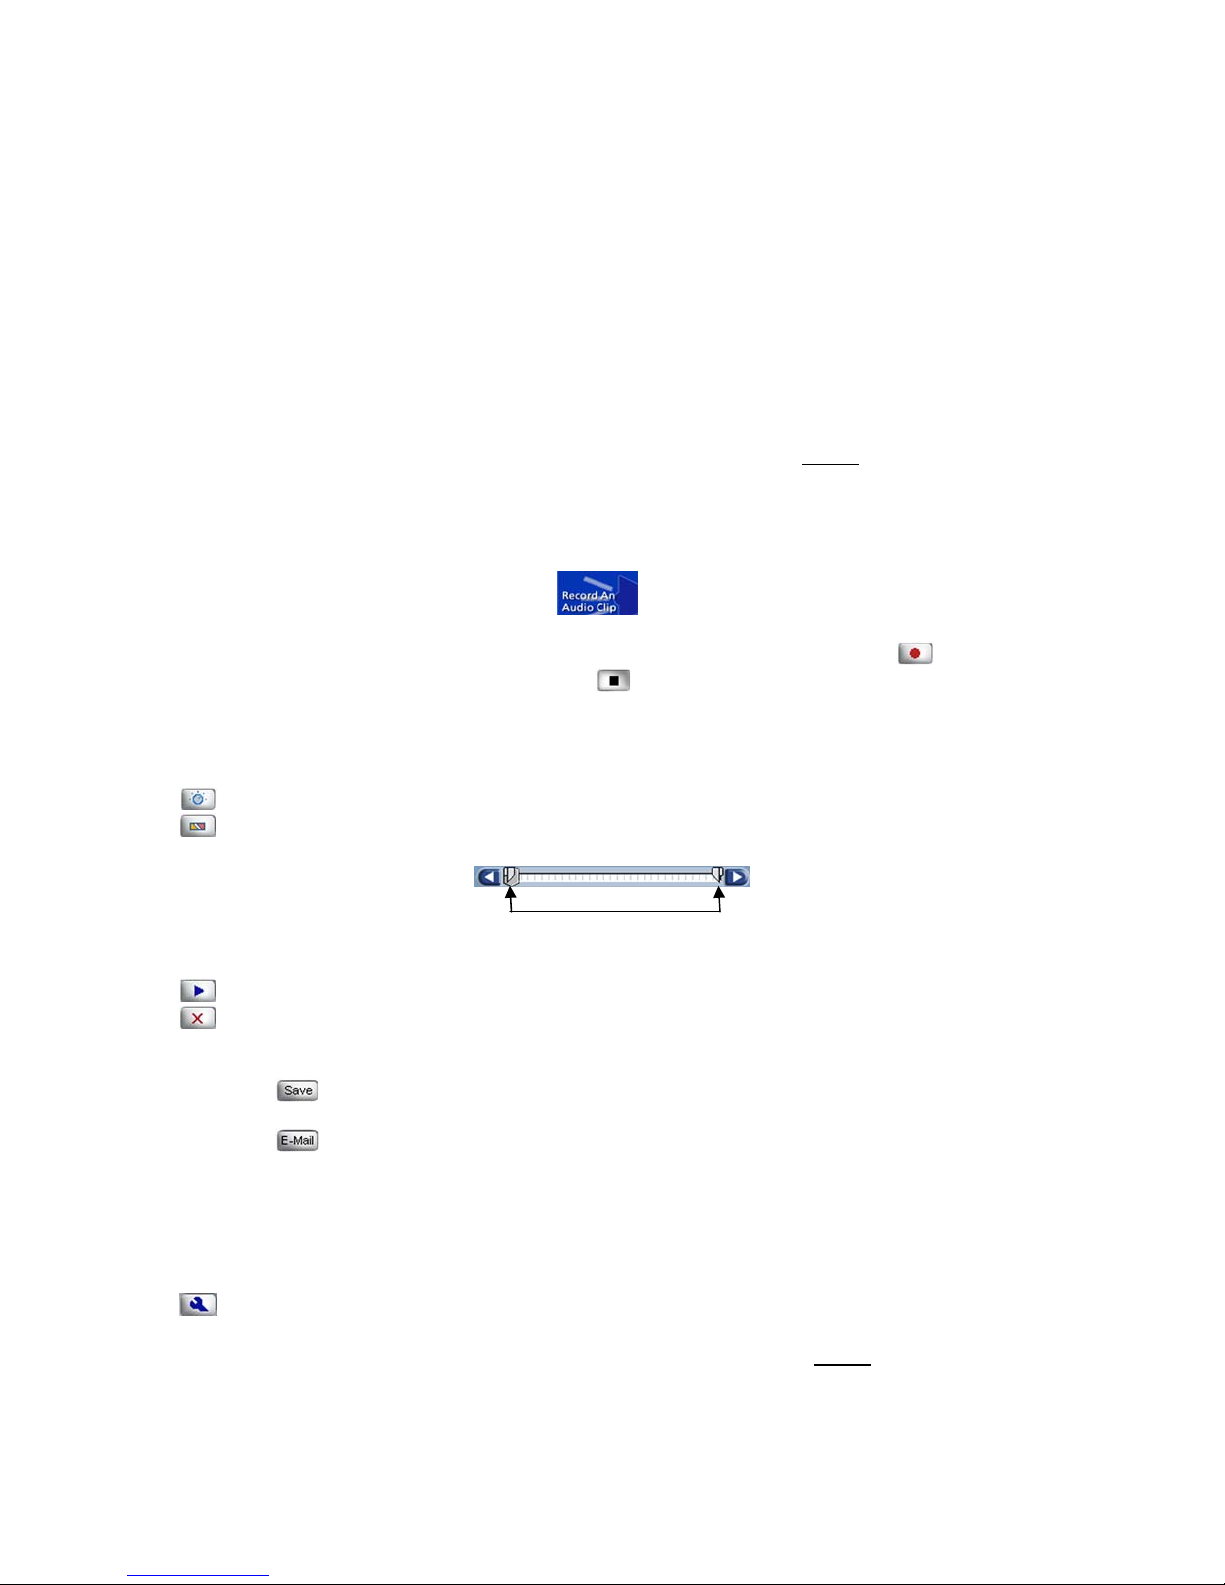
Recording an Audio Clip
1. Click the Record An Audio Clip button
2. Adjust the volume using the Microphone Volume Adjustment Bar. Click
record your audio clip. The button turns into
finish recording.
3. After the recording stops, the following buttons will appear on the bottom of the screen:
[Adjust Volume] - Adjust volume of audio clip.
[Trim Audio] - Trim the audio clip to the selected size and length.
[Play] - Play the audio clip.
[Rerecord Audio] - Record another audio clip.
4. Click:
a)
b)
Note: If you are experiencing difficulties emailing your audio clip, please refer to “Configuring
Your Email Program to Send Files” on pages 29-31.
Audio Settings
[Settings] - Click this button to change the settings of your audio.
Note: In order for the new settings to take effect, you must apply them before
clip.
- To save your audio clip.
- To email your audio clip to another person.
Drag to select starting/ending point of audio
[Record] to
[Stop]. Click the Stop button at any time to
recording an audio
Page 13 of 44
Page 14
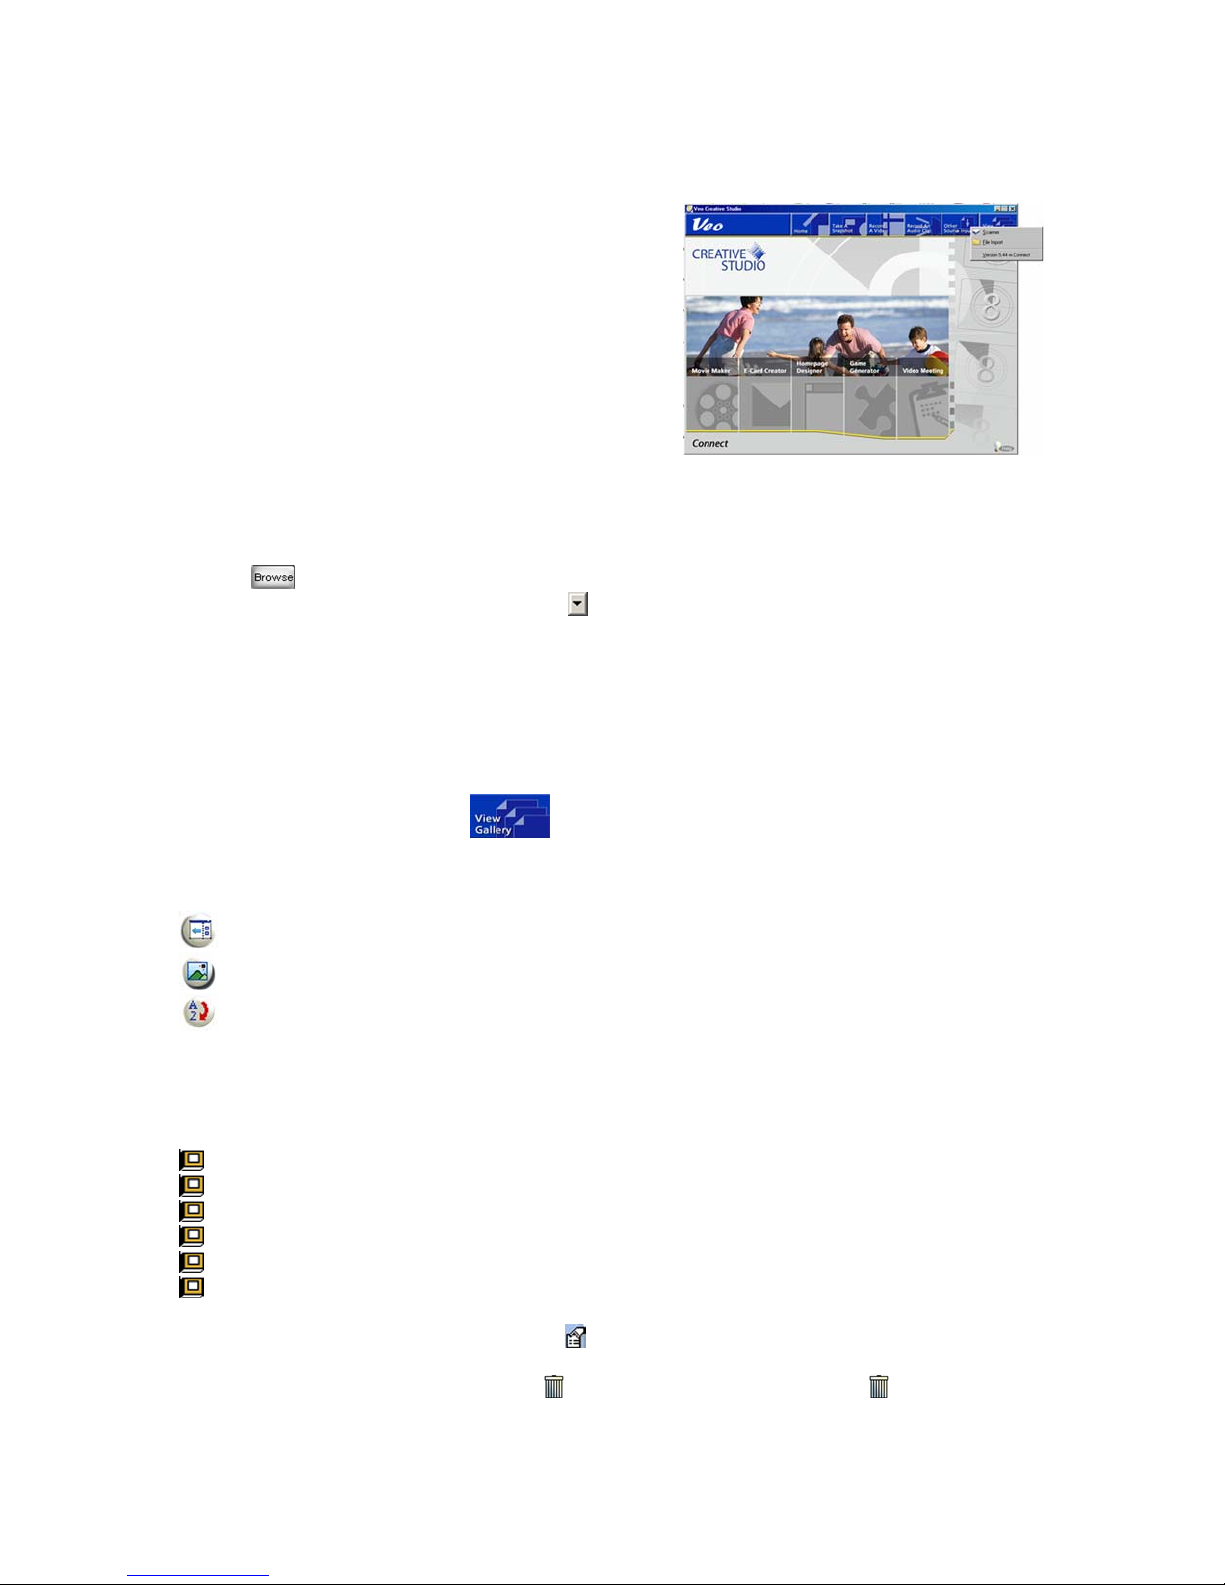
Importing Pictures from another Source
1. Click Other Source Inputs > Scanner or File
Import.
2. Select your source, then click to select. Your
scanner (or other TWAIN compatible device)
software will start.
Importing Files to a Folder in the Veo Creative Studio
1. Click Other Source Inputs > File Import.
2. Click
3. In the Destination pull-down menu, click
file to be imported to.
4. Click OK to import the file to the destination folder.
Note: You may need to refresh the folder if your newly imported image does not appear
immediately.
to locate the file you want to import.
to select the folder or sub-folder that you want the
Viewing Pictures in the Gallery
1. Click the View Gallery button
2. The following are buttons and folders used in the Gallery display panel along with their
description:
[Min/Max Gallery] - Toggle button used to minimize or maximize the Gallery Display Panel.
[Thumbnail Size] - To change the size of the thumbnails displayed in the gallery.
[Sort By] - To sort the thumbnails by type, time, or name. You can also use this to search for
a file in the Creative Studio Gallery. When the search is complete all matching files will be stored
in a “Search Results” folder.
Default Folders:
Animations - Contains animated character files.
Photographs - Contains still pictures.
Graphics - Contains background graphics.
Videos - Contains video files.
Music - Contains audio clips.
Projects - Contains all your previously saved projects.
To display the details of a specific file, click
To delete a file, click on the file and click
to view the minimized Gallery.
[Properties].
[Delete]. DO NOT drag it into the .
Page 14 of 44
Page 15

E-Card Creator – Creating an E-Card
g
1. Click on the E-card Creator button on the Creative Studio Home Screen.
2. Choose to Create A New Card or Find A Previously Saved Card Project.
If you choose to open a previously saved project, you may click on
options:
3. If you are creating a new card, select a theme from the left panel, then select the background
for your E-Card. Click Continue.
4. Edit your card.
Refer to “Applying Text, Images, Videos, and Animated Characters” on pages 23-25 for more
information on editing a card.
If you have selected an E-card template, it may appear similar to the one below:
to view the following
Double-click to
chan
e image
Page 15 of 44
Double-click to
edit text
Page 16

Click Continue when you are done.
5. Define your animated characters’ path.
Refer to pages 37-38 for more information on how to define the path of an animated character.
Click Continue when finished.
6. Select the background music. Click
selected audio files from the Gallery.
7. Selecting background music. To listen to the music before selecting, place your cursor on any
one of
without clicking.
[Set Background Music] or click and drag the
Click
Note: When the Mute button
just not be able to hear it during the creation process. To remove the music entirely, click
Background Music] and choose
After you select your music, click Continue.
8. Click
effect without clicking.
9. Choose the opening effect (how you want the E-Card to open up). Click Continue after you
select your opening effect.
10. Preview the E-Card by clicking
11. Type in the required information. In the Attach Card As pull-down menu, select A Video
(*.wmv) if the person you are sending the card to has Windows Media Player.
12. The default name given to the E-Card is *.wmv where (*) is the name of your E-card
background you picked in step 3. To rename the E-Card before sending, click on *.wmv in the
attachment text box, then click
music will not play. To have the background music play, send the file as *.exe.
13. Click
If you are experiencing difficulties emailing your card, please refer to “Configuring Your Email
Program to Send Files” on pages 29-31.
[Mute] to turn background music on and off.
is selected it does NOT remove the background music, you will
[Set
.
[Transition Effect]. Sample the effects by placing your cursor on each individual
[Preview].
Save the E-Card to the Creative Studio Projects Folder for future editing by clicking
Save the E-Card as a new template by clicking
Export the E-card out of Creative Studio by selecting the Export button and the save location.
[Rename]. If you send the file as *.wmv, the background
[Send This Card] to send your E-Card.
[Save As].
[Save].
Page 16 of 44
Page 17

Movie Maker – Making or Editing a Movie
1. Click on the Movie Maker button on the Creative Studio Home Screen.
2. Choose to Create A New Movie or Open An Existing Movie Or Project. If you choose to
open an existing movie, you can click on
Save the movie to a
specified location
3. Simply drag and drop videos or pictures from the Gallery Display Panel into the Movie Maker.
The following are buttons used in the Movie Maker along with their descriptions:
[Back] - Go back to previous screen.
[Continue] - Continue to the next screen.
[Save Finished Movie] - Save your movie at any time in the process.
[Preview Complete Movie] - Preview the movie you have created.
to display the following options:
Preview the movie
[Add A New Scene] - Add a new video or picture to your movie. You can either add an
existing video/picture from your computer or record a new video/picture from your Web Camera.
In order to add/record a new scene from your camera, make sure it is connected and functioning
properly.
For more information on how to take snapshots or record videos, refer to “Taking a Snapshot” on
pages 10-11 and “Recording a Video” on pages 12-13 of this User’ s Guid e.
Page 17 of 44
Page 18

[Add Background Music] - Add music to your movie.
[Remove Music] - Remove music from your movie.
When you are done, click Continue.
By default, still pictures will be shown in the movie for three (3) seconds. To change this duration
or view other options, click
for the following options:
Edit selected scene
Change duration of scene
and other options
Duplicate the scene
Delete the scene
Select Scene Duration.
Select Duration Time
Option:
- Remove Audio
(Video files only)
- Set background color
- Zoom to fit screen
Save changes
Video (.avi) files also have a
length of the video. Refer to page 12 for more information on how to trim video.
Click Continue when you are done.
4. Select a scene from the bottom and click
5. Sample the effects by placing your cursor on each effect. Select the transition effect you would
like to use by double clicking or clicking “OK”.
6. Double-click on the remaining scenes in the Movie Maker, then repeat steps 4 and 5 above to
apply transition effects to the remaining scenes. Click Continue when you are finished.
7. Select a scene to edit by double-clicking on the scene in the Movie Maker.
8. Edit the selected scene.
Page 18 of 44
[Trim Video] feature that allows you to adjust the size and
[Transition Effect].
Page 19

See “Applying Text, Images, Videos, and Animated Characters” on pages 23-25 for more
information on editing a scene.
Click Continue when you are done.
9. Repeat steps 7 and 8 to edit the remaining scenes. When you are finished, click Continue.
10. a) To preview the final movie, click
b) To save the movie for future editing, simply click
[Preview].
[Save].
c) To save the movie for future editing, with a new name click
d) To save the movie as a locked template, click
finished movie out of Creative Studio, select Export Movie and select the save location.
e) To send your movie to a friend:
1) Click E-mail Movie To A Friend.
2) Type in the requested information.
3) The default name given to the movie is Default.wmv. To rename the movie
before sending, click on the words “Default.wmv” in the attachment text box and
click
4) Click
If you are experiencing difficulties emailing your movie, please refer to “Configuring Your Email
Program to Send Files” on pages 29-31.
[Rename].
to send your movie.
Save Finished Movie. To Export the
[Save As].
Homepage Designer – Designing a Home Page
1. Click on the Homepage Designer button on the Creative Studio Home Screen.
Page 19 of 44
Page 20

2. Choose to Create A New Homepage or Open A Previously Saved Homepage Project. If
you choose to open a previously saved homepage project, you may click on
following options:
Save webpage to
your computer
Publish webpage
to your Internet
Service Provider
to get the
3. If you are designing a new homepage, select a theme from the left panel, then select the
background for your homepage. Click Continue.
4. Edit your homepage.
See “Applying Text, Images, Videos, and Animated Characters” on pages 23-25 for more
information.
To add a new page at any time, click
[Add A New Page].
Click Continue when you are done.
5. Define your animated characters’ path.
Click Continue when you are finished.
6. Select a picture or animated character.
[Link All Pages] - Check the box to the left if you want all pages to be linked. Notice that if
you check the box to the left of the Link All Pages icon, it will turn into
. It means that all
your pages are successfully linked. When you preview the webpage, you will see that there are
two arrow buttons on the bottom for easy navigation between pages. If you have text or pictures
on the very bottom, they may be partly covered. Try placing the text/pictures higher on the page.
Click to go to the
previous page
Page 20 of 44
Click to go to the
next page
Page 21

[Page Link] - Link an object/image/page to another page.
Linking to Another Page
If you want to include a function on your page that allows you to click on a text/picture to link to
other web pages, follow the steps below:
a) Select the text or picture on the Main Screen that you want to link.
b) Click on
[Page Link].
c) Select to link to an existing page or to a page on the Internet. If linking to a page on the Internet,
type in the address (URL) of the website, then click OK.
Alternatively, you can click on
[Actor Interaction].
Anchor Actors
Container
Storyboard
Container
URL – Link to a page on the Internet
Use the Up and Down buttons next to the Anchor Actors Container to select the image/text you
want to link. Then:
a) Drag a page from the bottom panel into the Storyboard Container to link to one of your existing
pages.
-ORb) Click
[URL], type in the address of the webpage on the Internet, then click OK.
When using Homepage Designer, animated characters DO NOT automatically travel along their
animation path by default. The character must be clicked on in order to activate the effect. Please
refer to the next section on how to automate this process.
Page 21 of 44
Page 22

Automating Animated Characters in Homepage Designer
a) Click
[Actor Interaction].
b) Make sure the Anchor Actors Container has AutoPlay selected. If not, use the Up and Down
arrows to select it.
Autoplay
c) Select the animated character that you want to automate and drag it from the right panel into
the Storyboard Container. Repeat the same procedure for other animated characters. Click Exit
when you are finished.
7. Select the background music. Click [Set Background Music].
8. Choose your background music. To listen to the music before selecting, place your cursor on
without clicking.
You may click
[Mute] button to mute the background music.
When the Mute button
not be able to hear it while in the design process. To remove the music entirely, click
Background Music] and choose
is selected, it does NOT remove the background music, you will just
[Set
.
After you select your music, click Continue.
9. Select an opening effect by clicking
[Transition Effect].
10. Choose the opening effect (how one page changes to another).
11. Double-click on the remaining pages in the Homepage Designer, then repeat steps 9 and 10
above to apply the opening effect to the remaining scenes. Click Continue when you are finished.
12. a) To preview the page, click
b) To save the page for editing later, click
c) To save the page as a separate file, click
[Preview].
[Save].
[Save As].
13. Choose:
Add a New Page - To add and edit a new page.
Edit Next Page - To edit the next page.
Publish Now - To publish the homepage to your Internet Service Provider.
Page 22 of 44
Page 23

Publishing the webpage to your Internet Service Provider
To publish your webpage, you need to have a web site hosting arrangement with your internet
service provider. The below information should be provided to you by your ISP and can easily be
input for publishing. Fill in the requested information, then click Publish. You will be prompted to
type in your user name and password to access the site for publishing.
Site name
Full Internet name
Enter sub-directory name
Enter default name
of homepage
Publishing the webpage to your computer
a) Click on Publish The Files To The Hard Disk.
b) Select the destination and rename the file if desired. The webpage along with all supporting
files (i.e. images, music, etc.) will be saved as a folder instead of a single file.
c) Click View A Local Copy of the Page Just Published to view your webpage. Alternatively,
you can open the folder that you saved, and double-click on the file named index.
Do not move or delete any items in the web folder or you may experience problems viewing the
pages.
New site
Edit selected site
Remove selected site
Applying Text, Images, Videos, and Animated
Characters
Adding and Editing Text
a) Click [New Text] to add new text to the scene/page.
Page 23 of 44
Page 24

b) Double-click on the text to edit it. A screen similar to the one below appears:
p
Preview font
Type text in here
Select font color
Select font
Apply effects to font
The following are the application buttons and their description:
[Insert Video] - Insert a new video clip.
[Insert Image] - Insert a new image.
Alternatively, you can drag and drop images/videos from the Gallery into the main screen.
[Animation Path] - Define the path for the images or animated characters to travel along.
[Sequential Animation Sequence] - Animations move one after another depending on
which animation was inserted first.
[Simultaneous Animation Sequence] - All animations move at the same time.
Editing an Image or Animated Character
Return image to
original size
Flip image horizontally
(mirror image)
Display more commands
Flip image
side-down
u
Page 24 of 44
Drag to resize image
Page 25

When you click , the following box appears:
Duplicate the image
Delete the image
When images overlap, select to push image to the back
When images overlap, select to bring image to the front
Add a sound effect to the image
Change to another image
Adding Sound Effects to an Animated Character
You can add a sound effect to an animated character either by inserting a .wav file from the
Sound Effects folder or from your microphone (i.e. if you want to record your voice).
To insert sound from the microphone, click the From Microphone tab.
See “Recording an Audio Clip” on page 13 for more details on how to record and edit audio clips.
When you are done, click
.
Note: Sound Effects are only applied when the animated character is moving along its defined
path. If you have not defined a path, the sound effect will be disabled.
Defining the Path of an Animated Character (also works with a still picture)
a) Select the image or animated character that you would like to move.
b) Click
[Animation Path]. The animated character now follows the mouse cursor.
c) Select the animation starting point. Hold the left mouse button down, then freely drag the
character along a path you specify to the ending point.
The selected
character will
follow the
specified path
Page 25 of 44
Page 26

Game Generator - Create Fun Games with Your Photos
1. Click the Game Generator button on the Creative Studio Home Screen to launch the
application.
2. Choose to Create A Jigsaw Puzzle, Make A Photo Scrambler, Build A Memory Tester or
Open the Gallery of My Games.
3. When creating any photo game, you may simply drag-and-drop pictures from the Gallery into
the Game Generator,
image directly from the camera.
Page 26 of 44
[Insert Image] from another folder on your hard drive or capture an
Page 27

The following are buttons used in the Game Generator along with their descriptions:
[Black] – Go back to the previous screen.
[Continue] – Continue to the next screen.
[Insert Image] – Import images from external files or capture a new image from the camera.
[Puzzle Settings] – Select the desired configuration of your puzzle.
[Set Background Music] – Add background music to be played while the puzzle is being
solved.
When you are done, click Continue.
4. Add a personal touch to the back of your Memory Tester Cards by “Drag & Drop” or clicking
the below button to emboss the cards:
[Set Back of Card Image]
5. Set the completion message properties by typing in your completion message as well as
setting other features mentioned below:
[Insert Completion Image] – Import or “Drag and Drop” an image into the photo window to
be slowly revealed as matches are made and pairs are removed (Only applicable to the Memory
Tester game).
[Set Completion Music] – This is a brief audio clip that will be played in celebration of the
completion of the puzzle.
[Preview] – This will provide a glimpse of the message and audio track the user will see
upon completion.
When you are done, click Continue.
Page 27 of 44
Page 28

6. Once you have completed the Game Generator process, you can play your creation, send it to
a friend to play or save it for later using the below buttons:
[Play The Game] – Play your newly created game without saving.
[Email My Game] – Email your game to a friend as an executable file (a light version of the
application is wrapped into the email to allow the recipient to play it without having to download
additional software).
[Save] – Save your puzzle into the Creative Studio Gallery for future playing or modifications.
[Export From Creative Studio] – If your email application does not support MAPI, you can
export the game and manually attach it to your email.
For more information on MAPI, please refer to “MAPI Settings” on pages 29-30 of this User’s
Guide.
When you are done, click Continue.
7. After you have finished playing, saving, and emailing your new game, continue on to the exit
page where you may easily jump back to create another game or make edits to your saved game
using the below buttons:
[Edit or Make Changes] or [Create a New Game]
8. You may also easily access previously created games through the “Gallery of My Games”
button
or looking in the Gallery listed under “Projects>Game Generator”.
9. The following icons have been placed in the upper left corner of the thumbnail to help you
easily recognize the type of game:
Jigsaw Puzzle Icon
Photo Scrambler Icon
Memory Tester Icon
Page 28 of 44
Page 29

10. In the Gallery view, the following features may be accessed by clicking the button:
[Open] - Open the game for modifications.
[Rename] - Rename the game.
[Delete] - Permanently delete the game.
[Play] - Play the game.
[Email] - Encapsulate the game as an executable and email to a friend.
[Export] - Save the game outside of Creative Studio.
Configuring Your E-mail Program to Send Files
In order to send your files directly from the Veo Creative Studio, you must change your default
mail agent, otherwise known as Messaging Application Program Interface (MAPI). For E-mail
programs that do not support MAPI (i.e. AOL, web-based E-mail programs), you need to attach
the files manually. For further assistance on how to attach files to your E-mail, contact your E-mail
or web-based E-mail provider.
Using MAPI with Microsoft Outlook Express 6
1. Start Microsoft Outlook Express.
2. Go to Tools > Options.
3. Click Make Default under Default Messaging Programs - This application is NOT the default
Mail handler.
4. Restart your computer.
Page 29 of 44
Page 30

Using MAPI with Microsoft Outlook
Microsoft Outlook automatically sets up your MAPI E-mail program during installation. Make sure
your Microsoft Outlook E-mail application is properly set up with the right POP account name,
password, SMTP mail host account, and other requirements. For further assistance, contact your
Internet Service Provider (ISP) or systems administrator.
How to e-mail pictures/videos with America Online, Hotmail, or Yahoo Mail
1. To send pictures/videos using America Online, Hotmail, or Yahoo Mail, please follow the steps
below, depending on which version of Windows you are using:
If you are using Windows 2000: Click on Start->Settings->Control Panel->Internet
Options.
If you are using Windows XP: Click on Start->Control Panel->Switch to Classic View
->Internet Options.
2. Select the “Programs” tab.
3. Under “E-mail”, select the e-mail provider that you normally use to send e-mail. (i.e. America
Online, Hotmail, Yahoo Mail)
4. After you have selected your e-mail provider, click the “OK” button and then close the Control
Panel.
5. Sign on to America Online or connect to the Internet and log into your web-based e-mail
account.
6. Minimize America Online or the web browser window (if using Hotmail or Yahoo Mail).
7. By default, your pictures are saved in the ‘Photographs’ or ‘Videos’ folders in the Veo Creative
Studio. To find the pictures/videos for e-mailing, go to the ‘C:\Program Files\Veo Creative Studio
for Connect\Gallery’ folder.
Page 30 of 44
Page 31

If you saved a picture (JPG), it will be located in the Photographs folder.
If you saved a Standard Video (AVI), it will be located in the Videos folder.
If you saved a Video Mail (WMV), it will be located in the ‘My Documents’ folder on your desktop.
8. After going to the corresponding folder for your picture/video, right-click on the picture/video
you want to e-mail and then select Send To->Mail Recipient.
9. This will automatically attach the picture/video to your e-mail. Note that most e-mail providers
have a maximum file size limitation for sending attachments, so if your picture/video file size is
too large, you may not be able to send the picture/video. If this is the case, try to use a smaller
picture size or recording a shorter video.
10. In America Online, click the “Send Now” button or on your web-based e-mail screen, click the
“Send” button to send your e-mail.
Manually attaching a picture with America Online
If you were unable to use the “Send To->Mail Recipient” feature in the previous steps, you can
use these alternative directions to manually attach your pictures and videos to your e-mail.
1. Sign on to America Online (AOL) and then minimize AOL.
2. Start the Veo Creative Studio software.
3. In the Veo Creative Studio, take a picture or record a video. If you choose to save the file, the
picture will be saved in C:\Program Files\Veo Creative Studio for Connect\Gallery\Photographs or
the video will be saved in C:\Program Files\Veo Creative Studio for Connect\Gallery\Videos.
4. Click the Save button to save your picture/video.
5. Switch back to America Online and under Mail, click the Write button.
6. Write your e-mail message, making
sure to type in the Send To, Subject,
and your message.
7. Click on the “Attachments” button in
the lower left corner of the window and
an Attachments window will appear.
8. Click on the “Attach” button and
change the folder to C:\Program
Files\Veo Creative Studio for
Connect\Gallery.
If you saved a picture (JPG), it will be
located in the Photographs folder.
If you saved a Standard Video (AVI), it will be located in the Videos folder.
If you saved a Video Mail (WMV), it will be located in the ‘My Documents’ folder on your desktop.
Page 31 of 44
Page 32

Video Meeting
There's an exciting world of Internet communications waiting for you to explore.
Video Instant Messaging allows you to keep in touch with family, friends and business associates
in real-time. The Veo Web Cameras are compatible with most major Video Instant Messaging
services.
Video Instant Messaging is also a very popular use for Veo Web Cameras. The following are
basic use guidelines for Microsoft's NetMeeting and Windows Messenger applications.
Microsoft NetMeeting Guide
Microsoft NetMeeting has been included with your camera to provide Video Instant Messaging
capabilities. As one of the most widely distributed and versatile Video Instant Messaging
applications on the market, you will be able to communicate with anyone in the world as long as
all parties are connected through Microsoft NetMeeting. As a result of its large distribution base,
you will find that most owners of a Web Camera will already have some exposure to the software
and probably own a copy.
Although this is an excellent program to become acquainted with, it can be rather complicated the
first time you set up a conference. To ensure that you obtain the most from your camera
experience, we have compiled this brief instruction guide to help you get started.
However, since this is a Microsoft program we cannot offer any support for this product beyond
what is outlined in this guide. To obtain additional assistance with Microsoft NetMeeting, directly
from Microsoft, please refer to the NetMeeting web site at:
http://www.microsoft.com/windows/netmeeting
How to use Microsoft NetMeeting
Once you have all the necessary components of Microsoft NetMeeting installed and tested to
ensure it is working properly, this section of the guide will provide some basic tips on Video
Instant Messaging.
IMPORTANT: Make sure all other video camera applications are closed before starting Microsoft
NetMeeting.
1. Click Video Meeting on the Creative Studio Home screen. This will minimize the Veo Creative
Studio window and launch Microsoft NetMeeting.
2. If you have Microsoft NetMeeting already set up, you will see a window similar to the one
shown on the next page.
Page 32 of 44
Page 33

A
y
Adj
)
3. Turn your camera on by clicking the Play/Pause button to initiate the video stream (this may
take up to a minute depending on your computer). Adjust the camera angle and focus to ensure a
clear picture of you for your Video Instant messaging partner.
The following are the buttons you will use with NetMeeting:
Play/Pause your video
Picture-in-Picture (Only available when connected to another user
ust microphone and speaker volume
Place a call
End a call
ccess the Microsoft Internet Director
Advanced Buttons – These advanced features include Sharing a
Program, Chat, Whiteboard, and File Transfer. Please refer to the
NetMeeting webpage for more details and assistance with these
features.
Page 33 of 44
Page 34

Connecting to another NetMeeting user using an IP address
To have a direct connection with another user, you must first obtain an IP address. IP addresses
for most dial-up connections will change every time you log on to the Internet. For this reason,
you must get the IP address from the person you are trying to contact each time. You can also
determine your IP address and then send it to the other person who will use NetMeeting to call
you.
To obtain your IP address, first connect to your Internet Service P rovider. Then use either Method
A or B to determine your IP address.
Method A:
Start NetMeeting and then click on Help > About Windows NetMeeting. You can see your IP
address here (as shown below).
Method B:
Whether you are using Windows 2000 or XP, click on the Start button > Run > then type:
IPCONFIG
You can send your IP address to the people who are calling or they can send you their IP
address by e-mail or through an Instant Messaging application such as MSN Messenger.
To connect to a person using their IP address, you can enter it into the highlighted area (as
shown below). After you type in the person’s IP address, press Enter on your keyboard to
connect.
Page 34 of 44
Page 35

How to use MSN Messenger with your Veo Web Camera
Make sure that you are using the latest MSN Messenger software. You can find the latest version
of MSN Messenger from Microsoft at http://messenger.msn.com
1) Start MSN Messenger and sign-on. (Fig. 1)
Fig.1 - MSN Messenger Contact List Fig. 2 - Audio/Video Tuning Wizard menu selection
2) Click on Tools->Audio/Video Tuning Wizard. (Fig. 2) The Audio and Video Tuning Wizard
will appear. You will be able to verify that your camera, speakers, and microphone are working
properly during the next few screens.
3) The following screen will appear. (Fig. 3) Make sure that you close all other programs that
show video, or play or record sound. For example, make sure that the Veo Creative/Digital Studio
is not in use and is closed. Also ensure that the camera, speakers, and microphone are plugged
in and turned on. Click [Next] to continue.
Fig. 3 - Audio and Video Tuning Wizard Fig. 4 - Selecting the camera source
Page 35 of 44
Page 36

4) From the camera drop down list, select Veo PC Camera (or Veo Web Camera). (Fig. 4) This
will ensure that the proper Veo camera driver is selected for use with MSN Messenger. Note: If
you have a selection for Veo PC Camera (VFW Mapper for Messenger) DO NOT
select this
driver, otherwise you’ll get a black screen in your webcam chat window. Click [Next] to continue.
5) On the next screen (Fig. 5), you’ll see a ‘Camera Error’ screen that will indicate that the
camera is not working properly or may already be in use by another program. You can ignore the
message and just click [Next] to continue.
Note: You’ll be able to adjust your camera settings later, by going back to the main MSN
Messenger screen and selecting Tools->Web Camera Settings->Advanced. You’ll then be able
to adjust the brightness, contrast, gamma, exposure, and color settings (depending on your
camera model).
Fig. 5 - Camera Error screen Fig. 6 - Speaker and Microphone Adjustment screen
6) Next, you can adjust your microphone and speaker volumes on the following screens. (Fig. 6)
Click [Next] to continue.
7) Select your Microphone and Speakers from the drop down menu. (Fig. 7) Optional: If you have
the Veo Advanced Connect web camera, make sure to select USB Imaging Device (or USB
Audio Device) from the drop down menu to ensure that MSN Messenger utilizes the camera’s
built-in microphone.
Fig. 7 - Selecting the Microphone and Speakers Fig. 8 - Testing your speakers
Page 36 of 44
Page 37

8) You can test the level of your speakers by clicking on [Click to Test Speakers]. (Fig. 8) You
can adjust the speaker volume by moving the slider left (to increase the volume) or right (to
decrease the volume). Click [Next] to continue.
9) Adjust your microphone volume by speaking into your microphone (or if you have the
Advanced Connect, speak into the camera’s built-in microphone). (Fig. 9) You can manually
adjust the microphone volume by moving the slider left (to increase the volume) or right (to
decrease the volume). MSN Messenger also will automatically adjust the volume for you if you
leave the slider alone. Click [Next] to continue.
Fig. 9 - Testing your microphone volume Fig. 10 - Completing the Audio and Video Tuning Wizard
10) You have now completed the Audio and Video Tuning Wizard. Click [Finish] to close the
Audio and Video Tuning Wizard. You will now be ready to use your camera with MSN Messenger.
11) In the main MSN Messenger window, double-click on the person’s name who you’d like to
have a Webcam chat with. (Fig. 11).
Fig. 11 - MSN Messenger Contact List Fig. 12 - Inviting another person to share your camera
Page 37 of 44
Page 38

12) This will open a conversation window so you can chat with the other person. To invite the
other person to view your webcam, click Webcam to turn your webcam on. (Fig. 12) This will
send an invitation to the other person, inviting him/her to start a webcam conversation.
13) If the other person accepts your webcam invitation, you will see your own image in the lower
right corner of the conversation window. (Fig. 13). You can also use a microphone to talk instead
of typing, by clicking on Audio to turn on your microphone. This will send an audio conversation
invitation to the other person. If the other person accepts the invitation, you can start using your
microphone.
Fig. 13 - Connected with another person
14) To view the other person’s webcam, the other person must invite you to view his/her webcam.
If the other person invites you to view their webcam, you will get an invitation in the chat window.
Click Accept to accept the Webcam conversation when you are invited.
Video Instant Messaging and NetMeeting Support Resources
This section has been intended to provide a brief introduction to Video Instant Messaging and
Microsoft NetMeeting.
For more in-depth information or to obtain technical support, please refer to the contact
information below. The resources listed are third-party sources and have been provided as
references only. They are neither endorsed nor supported by Veo.
Microsoft Windows NetMeeting
http://www.microsoft.com/windows/netmeeting
(800) 936-5700 [Toll Free/Pay per incident]
(425) 635-7123 [Toll Call/No charge support]
MSN Messenger
http://messenger.msn.com
Page 38 of 44
Page 39

Troubleshooting
Problem: The power light does not come on when the camera is plugged in.
Solution: The light will come on when you run any of the camera applications, but will not turn on
if the camera is just plugged in.
Problem: Missing Windows system files.
Solution: The Windows system files can be found on the Veo CD. Place the Veo CD into your
CD-ROM drive and browse in the D:\Microsoft\WinXXXX folder (where D:\ is the letter of your
CD-ROM drive and XXXX corresponds to your version of Windows). Select the files that Windows
is asking for and copy them into C:\Windows\System. Some files may still require the Windows
CD. Contact your computer vendor to obtain a copy of the Windows CD if one did not come with
your computer.
Problem: Windows doesn’t detect the camera when you plug it into the USB port.
Solution: When you plug in the camera after installing the drivers and software, Windows will
detect the camera and begin installing the drivers for the Veo Web Cameras. If you are getting no
response from Windows when you plug the camera in, this can be a sign that your USB port is
not configured properly, is disabled, or has malfunctioned.
If your motherboard requires a cable to connect the USB port, make sure that it is plugged in
correctly. If you are not sure of the proper configuration, please contact your system or
motherboard manufacturer. If your USB controller is not listed in the Device Manager, enable it in
your system BIOS. Try using the camera on another system to verify that the camera is working
properly.
Problem: “Web Camera is not connected to this computer”
Solution: The camera may not be plugged into the computer or may have a driver conflict. Make
sure the camera is snugly plugged into the USB slot on your computer, then try the camera
software again. If this doesn’t help:
If you are using Windows 2000: Click on Start->Settings->Control Panel ->System->Hardware>Device Manager.
If you are using Windows XP: Click on Start->Control Panel->Switch to Classic View->System>Hardware->Device Manager.
Check to see if you have a Universal Serial Bus Controller category. Under this category should
have a USB Host Controller and a USB Root Hub. If you do not have this category, please
contact your computer manufacturer for assistance on enabling your USB ports.
If you do have this category, check for another category in the Device Manager named Imaging
Device. Under this category should be the Veo Web Camera.
If the Veo Web Camera has a yellow “!” or red “X” next to it, this means it may have a problem
with the software driver. Double-click on the Veo Web Camera with the yellow “!” or red “X” to
check the Device Status.
Page 39 of 44
Page 40

Problem: When you plug the Velocity Connect into the USB port, this message appears: “HI-
SPEED USB Device Plugged into non-HISPEED USB Hub”
Solution: This message will appear if you plugged the camera into a USB 1.1 port. Make sure
that you have a USB 2.0 port on your computer and the camera is plugged into a USB port. The
camera will function in a USB 1.1 port, however, some of the camera functions and resolutions
will not be available.
Problem: When you start the Veo Creative Studio, this message appears: “Screen resolution is
fewer than 800 x 600!”
Solution: Adjust your screen resolution to at least 800 x 600. Right-click on your desktop and
then select Properties. Click on the “Settings” tab and move the screen area/resolution slider to
at least 800 x 600 or higher. Also, make sure the number of color/color quality is set to at least
High Color (16-bit) or higher. Then click “OK” to save your settings.
Problem: The microphone is not working or no sound is being recorded.
Solution:
Windows 98/Me/2000
1) Make sure your microphone is plugged in correctly to your sound card. The microphone jack
on your sound card is usually labeled MIC or shows a symbol of a microphone. If you are not
sure which jack is for your microphone, you may try plugging the microphone into the other jacks.
Make sure it is not plugged into the speaker or output jack.
2) Next, double click on the yellow speaker icon located on the taskbar. This should bring up a
Volume Control window. Next, click on Options->Properties. Under "Adjust Volume for" select
the Recording button. Then click OK. Under "Microphone" make sure that it is selected and the
volume is adjusted to an appropriate level. Finally, click the X to close the window.
3) Next, load Sound Recorder. Sound Recorder can usually be found under Start->Programs>Accessories->Entertainment. Next, click on the red Record button and begin speaking into the
microphone. Press Stop to stop recording. Then playback your sound to see if you can hear
yourself. Make sure that the speakers have already been turned on.
4) Also, you may adjust the playback volume by double clicking on the yellow speaker icon
located on the taskbar. Under "Wave", move the slider up. Then click the X to close the window.
Windows XP
1) Make sure your microphone is plugged in correctly to your sound card. The microphone jack
on your sound card is usually labeled MIC or shows a symbol of a microphone. If you are not
sure which jack is for your microphone, you may try plugging the microphone into the other jacks.
Make sure it is not plugged into the speaker or output jack.
2) Click on Start->Control Panel->Sounds and Audio Devices.
3) Click on the Audio tab and then look for the Sound Recording section. Make sure that your
microphone/sound card is selected and then hit the Volume button. (If you have the Veo
Advanced Connect which has a built-in microphone, make sure that 'USB Imaging Device' is
selected and then hit the Volume button.)
4) Move the volume slider bar all the way to the top and then click the X to close the window.
5) Click OK to save your settings and exit.
Page 40 of 44
Page 41

6) Next, load Sound Recorder. Sound Recorder can usually be found under Start->All Programs>Accessories->Entertainment. Next, click on the red Record button and begin speaking into the
microphone. Press Stop to stop recording. Then playback your sound to see if you can hear
yourself. Make sure that the speakers have already been turned on.
Problem: Why doesn't the background music playback when I create an E-card?
Solution: If you export or send the e-card as a WMV file, the background music will not playback.
In order for the other recipient to hear the background music, export the e-card as an EXE file.
This will ensure that the background music is included in your e-card.
Problem: When starting the Veo Creative Studio the message "Class not registered" appears.
Solution: You are using an older version of Microsoft DirectX. Follow the steps below to resolve
the issue:
1) Visit Microsoft's DirectX webpage at: http://www.microsoft.com/directx
2) Download and install the latest version of DirectX.
3) After the installation has finished, restart the computer.
4) Try the Veo Creative Studio again.
Problem: When starting the Veo Creative Studio the message "Supplied user buffer" appears.
Solution: You are using an older version of Microsoft DirectX. Follow the steps below to resolve
the issue:
1) Download and install the Windows System Files Utility from our webpage at:
ftp://ftp.veo.com/downloads/sysutility.exe
2) Locate the file you downloaded and double-click on it to install the updated system files. Note
that this utility is only for Windows 98 and Windows Me.
3) After the installation has finished, restart the computer.
4) Try the Veo Creative Studio again.
If you still get an error, follow these additional steps:
1) Visit Microsoft's DirectX webpage at: http://www.microsoft.com/directx
2) Download and install the latest version of DirectX.
3) After the installation has finished, restart the computer.
4) Try the Veo Creative Studio again.
Problem: The image is blurry, washed out, or dark.
Solution: First, adjust the focus ring/dial on the front/top of the camera to ensure that the camera
is focused properly.
1) Make sure that the lighting in the room is sufficiently bright. A low lighting condition may wash
out the colors.
2) Start the Veo Creative Studio and then click on the "Take a Snapshot" button.
3) This will display the video on the screen. Click the "Settings" button.
4) Click on "Advanced Settings" and then uncheck "Auto Exposure Control." Adjust the
"Exposure" slider to improve the frame rate.
5) You can also adjust the contrast and gamma to brighten up the picture to help increase the
frame rate.
6) Make sure that the light source you are using is selected correctly. For example, if you are
using a regular lamp, you should select "Incandescent"
Page 41 of 44
Page 42

7) For manual color adjustment, uncheck "Auto white balance." There will be up to three sliders
(depending on camera model) for Red(R), Green(G), and Blue(B) which you can adjust to
improve the color quality. You can also adjust other picture quality options here as well.
8) Finally, click OK to save the settings.
Problem: Nothing happens after I click the Send button or the program locks up.
Solution: You need to configure your email program to be the default MAPI client correctly. You
can also manually attach your files to your e-mail. Please refer to “Configuring Your E-mail
Program to Send Files” on pages 29-31 for more information.
Problem: “No e-mail agent found on this PC. Do you want to continue with video mail disabled”?
message.
Solution: You will get this message if the e-mail application you are using does not support MAPI
functions such as America Online, CompuServe, Prodigy, Yahoo Mail, and other web-based
email service. Programs such as Outlook Express, Netscape Mail, and Eudora support MAPI.
However, your mail server needs to be able to use these programs. Contact your Internet Service
Provider for assistance on configuring your outgoing mail server.
Problem: You cannot play back an AVI/WMV video file.
Solution: The Windows Media Player you are using may not be working correctly. Download the
latest Windows Media Player from Microsoft at http:// www.microsoft.com/windows/mediaplayer
Additional Help and Resources
For detailed Technical Support, Frequently Asked Questions, and resources about the Veo Web
Cameras, the website is accessible directly by clicking the
lower right hand corner of the Creative Studio Application. The website is also accessible at the
following URL address: http://www.veo.com/support
[Online Help] button on the
Veo Statement of Limited Warranty
Veo warrants the Veo Web Cameras to be free from defects in material and workmanship for a
period of one (1) year from the date of original purchase.
If this product proves to be defective in material or workmanship during the warranty period, Veo
will, at its sole option, repair or replace the product with a similar product. Replacement product or
parts may include remanufactured or refurbished parts or components.
Who the warranty protects:
This warranty is valid for the original consumer purchaser only.
What the warranty does not cover:
1. Any Veo product on which the serial number has been defaced, modified or removed.
2. Damage, deterioration or malfunction resulting from:
Page 42 of 44
Page 43

A. Accident, misuse, neglect, fire, water, lightning, or other acts of nature, unauthorized
product modification, or failure to follow instructions supplied with the product.
B. Repair or attempted repair by anyone not authorized by Veo.
C. Any damage of the product due to shipment.
D. Removal or installation of the product.
E. Causes external to the product, such as electric power fluctuations or failure.
F. Use of supplies or parts not meeting Veo's specifications.
G. Normal wear and tear.
H. Any other cause which does not relate to a product defect.
3. Removal, installation and set-up service charges by any third party.
4. Costs associated with shipping and/or transporting the product for repair, replacement, or
exchange.
Obtaining service:
1. For information on obtaining warranty service, fill out a technical support form on the Veo web
site, located at http://www.veo.com/support.asp
2. You will be required to provide:
A copy of the original dated sales slip or sales invoice
Your name
Your address
The serial number of the product
A description of the problem
3. A technical support representative will determine if your problem is covered under this warranty
agreement. If the problem is covered, you will be issued a Return Merchandise Authorization
number (RMA) with specific instructions regarding how the product must be returned to Veo for
repair or replacement.
Limitation of implied warranties:
THERE ARE NO WARRANTIES, EXPRESS OR IMPLIED, WHICH EXTEND BEYOND THE
DESCRIPTION CONTAINED HEREIN INCLUDING THE IMPLIED WARRANTY OF
MERCHANTABILITY AND FITNESS FOR A PARTICULAR PURPOSE.
Exclusion of damages:
VEO'S LIABILITY IS LIMITED TO THE COST OF REPAIR OR REPLACEMENT OF THE
PRODUCT. VEO SHALL NOT BE LIABLE FOR:
1. DAMAGE TO OTHER PROPERTY CAUSED BY ANY DEFECTS IN THE PRODUCT,
DAMAGES BASED UPON INCONVENIENCE, LOSS OF USE OF THE PRODUCT, LOSS OF
TIME, LOSS OF PROFITS, LOSS OF BUSINESS OPPORTUNITY, LOSS OF GOODWILL,
INTERFERENCE WITH BUSINESS RELATIONSHIPS, OR OTHER COMMERCIAL LOSS,
EVEN IF ADVISED OF THEIR POSSIBILITY OF SUCH DAMAGES.
2. ANY OTHER DAMAGES, WHETHER INCIDENTAL, CONSEQUENTIAL OR OTHERWISE.
3. ANY CLAIM AGAINST THE CUSTOMER BY ANY OTHER PARTY.
Effect of local law:
Page 43 of 44
Page 44

This warranty gives you specific legal rights, and you may also have other rights which vary from
locality to locality. Some localities do not allow limitations on implied warranties and/or do not
allow the exclusion of incidental or consequential damages, so the above limitations and
exclusions may not apply to you.
All Veo Web Cameras are registered trademark of Veo. All other products and company names
mentioned herein are the trademarks or registered trademarks of their respective owners.
Page 44 of 44
 Loading...