

Venue Lighting Effects Dual Scanner User Manual
DUAL SCANNER USER MANUAL
www.venuelightingeffects.com

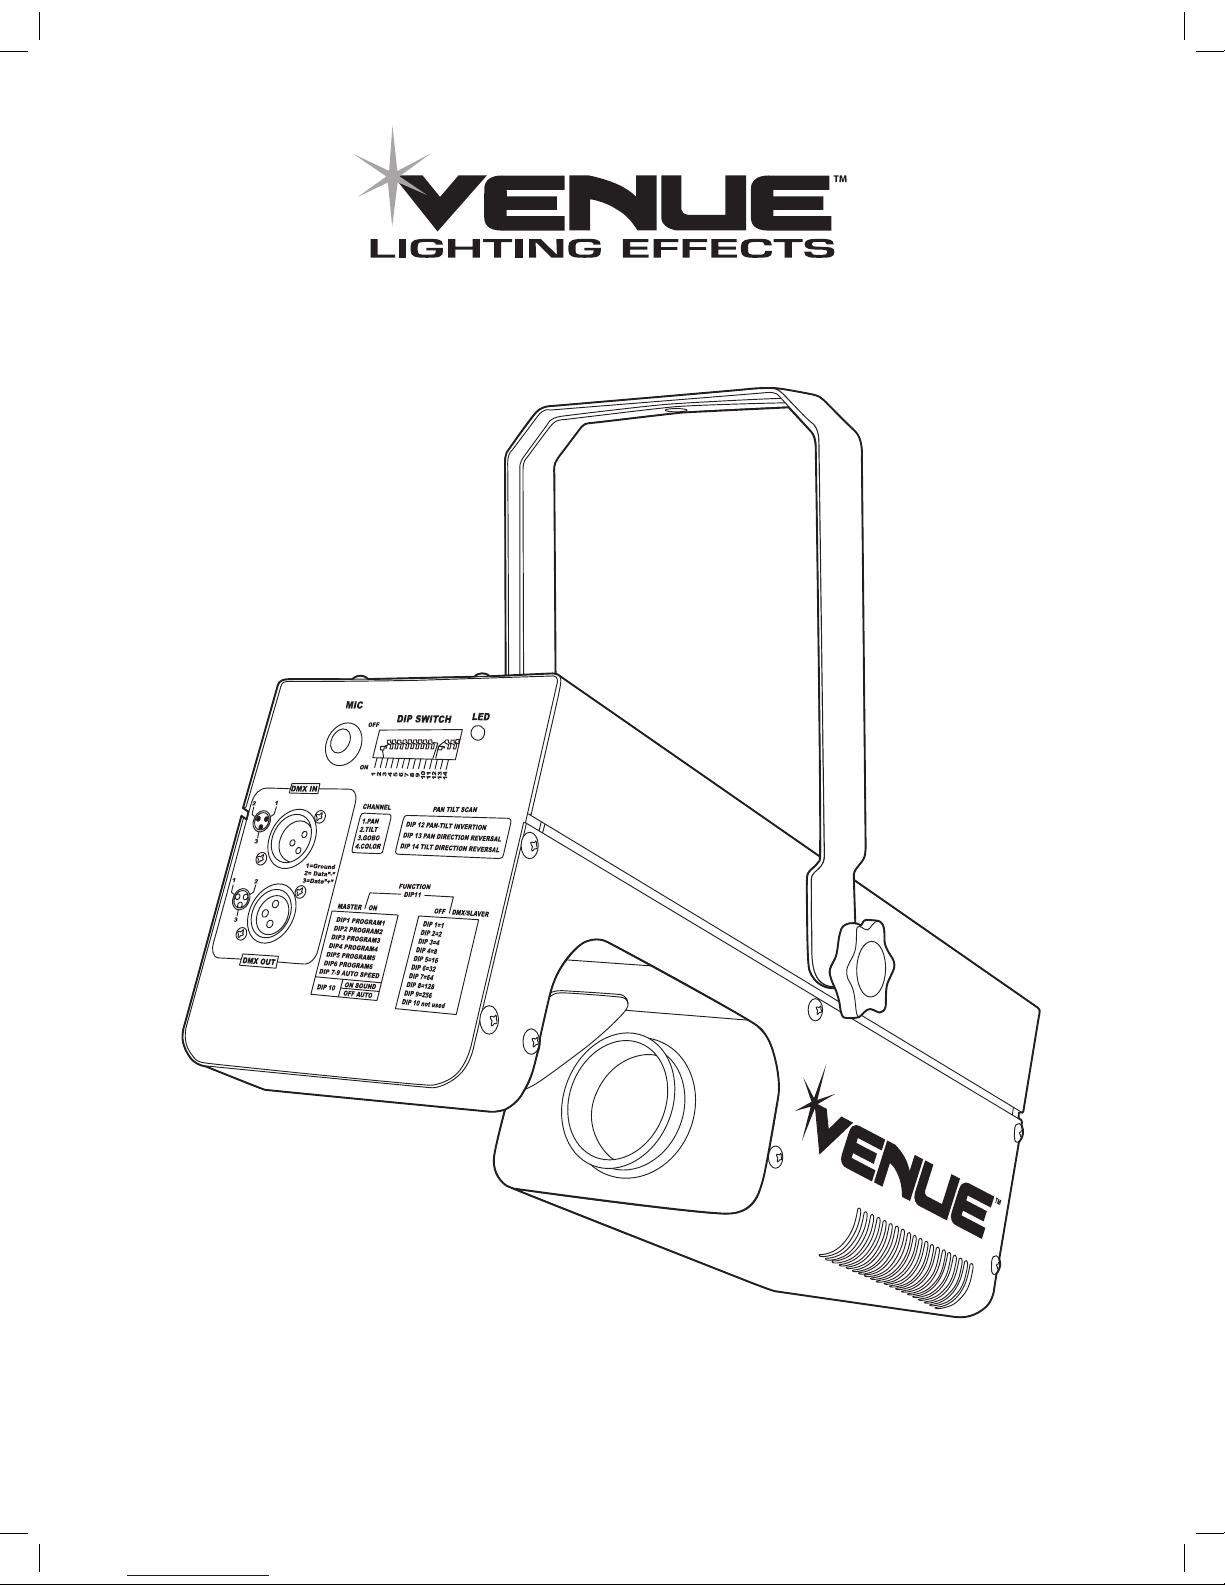
SPECIFICATIONS
Lamp: ELC 24V 250W
Motor(s): 4 Precision micro-stepping motors 1.8/step
Gobos: 13
Color: 10 solid colors, 10 bi-color combinations plus open
Modes of Operation: Stand-alone Auto, Sound Active, Master/Slave, DMX
DMX Channels: 4
Pan: 165°
Tilt: 114°
Cooling: Fan
Input Power: 120VAC 60Hz
Dimensions: L 17.7” x W 6.2” x H 6.1”
Weight: 16.5 lbs. / 7.5 kg
SAFETY INSTRUCTIONS
Read user manual before connecting or operating your dual scanner.
• Always completely disconnect the scanner and allow to cool down for 15 minutes before replacing the lamp or fuse.
• Do not use the scanner near water.
• Do not block fan or exhaust vents in area of scanner use.
• Do not install scanner anywhere near heat sources such as radiators, heat registers, stoves or other apparatus
that produces heat.
• Unplug your scanner when unused for long periods of time.
• Refer all servicing to authorized service personnel.
• Room temperature when scanner is in use should not exceed 104° F.
INSTALLATION AND SET UP
To hang the fixture, install a “C” or “S” clamp to the yoke through the 1/2” hole, the head is now ready for permanent
installation. Hang the unit and position it as necessary and tighten the hex bolt. When the required angle is reached,
lock the fixture with the thumbscrew.
CAUTION:
• Do not mount the unit near curtains or any ammable objects.
• The scanner is for indoor use only. Using the scanner outdoors will void the warranty.
• Cables conforming to the DMX standard (USITT DMX512/1990) must be used.
REPLACING LAMP
1. Unplug the scanner completely from the electrical outlet and wait for the unit to cool, about 15 minutes.
2. Unscrew the xing screw of the lamp window cover on the rear of the unit.
3. Take the lamp and socket out of the unit body gently. Do not touch the bulb with bare hands. Use gloves or handle
the lamp by its base only.
4. Place the new lamp and socket into the unit and then fasten the lamp cover screws.
OPERATION
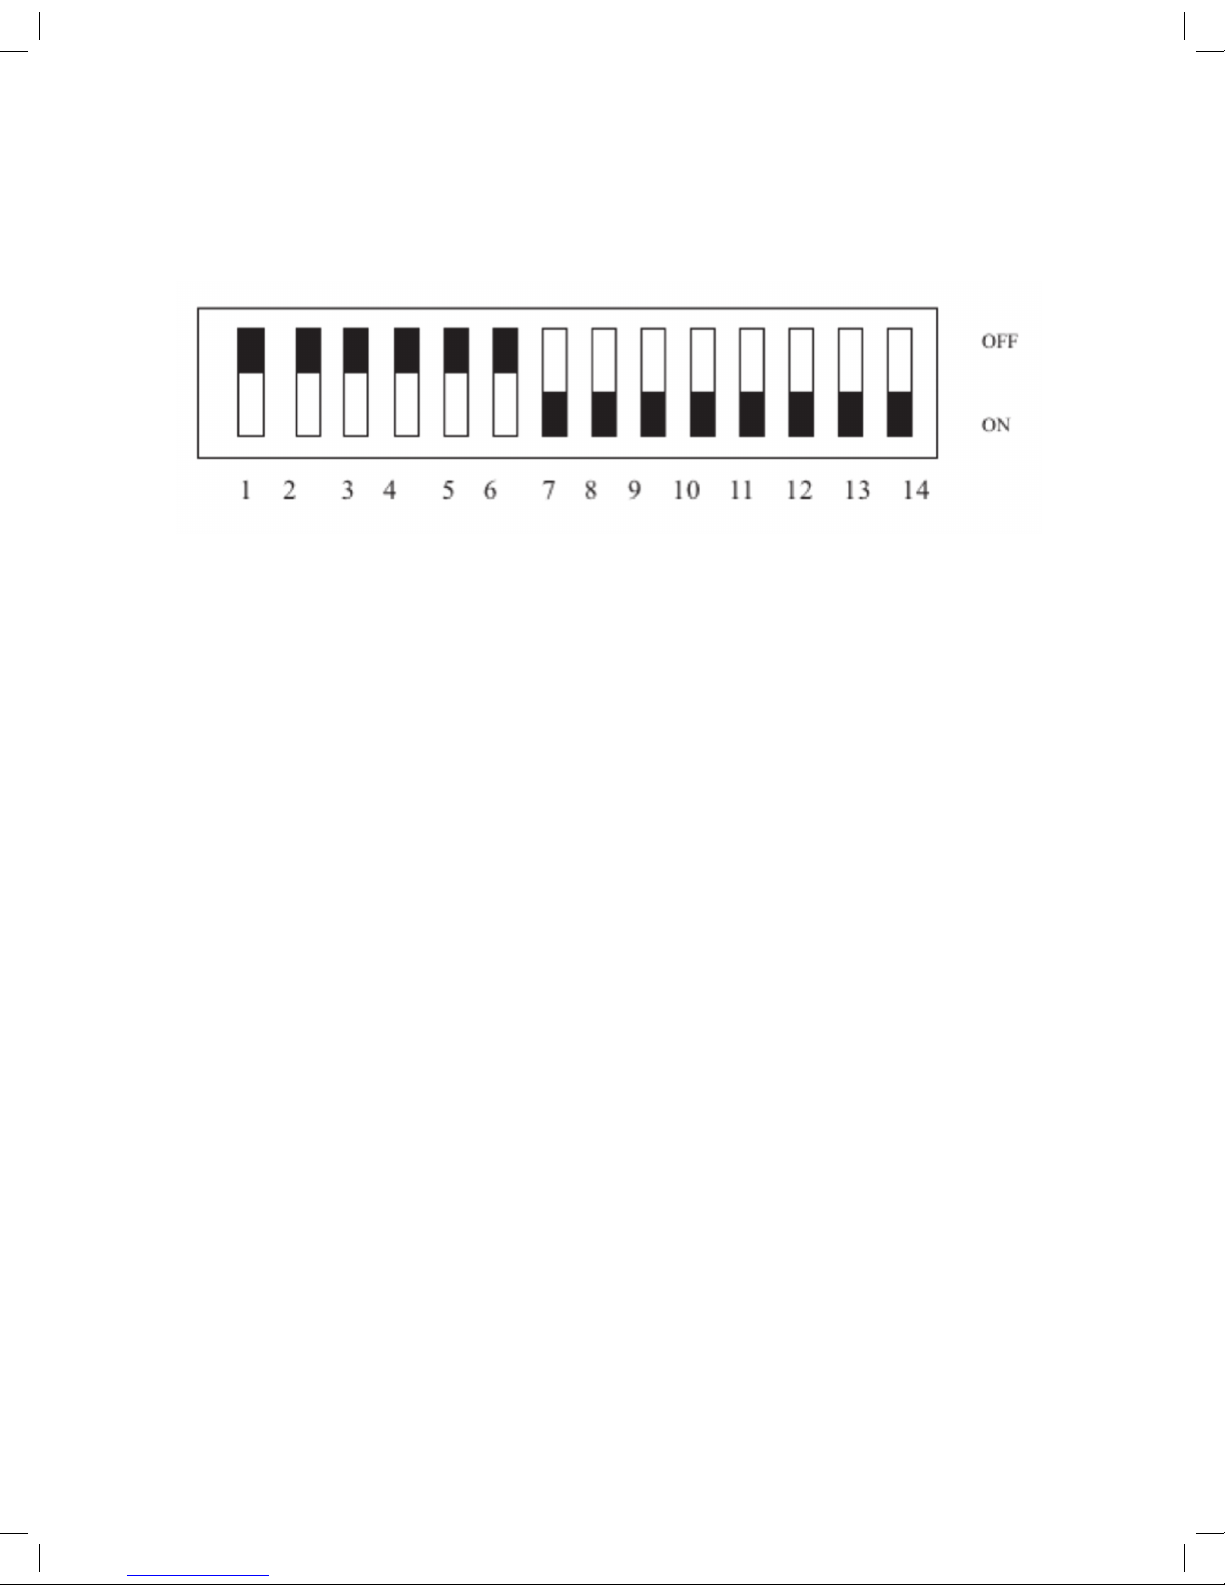
DIP Switch Settings:
This product utilizes a DIP switch address block to select the mode of operation, such as DMX Mode, Standalone-Auto
(Master/Slave), or Sound Active (Master/Slave).
About DIP Switches:
DIP Switch #1 through #9
The DMX receipt mode: Address code
The Master/Slave mode: 1 – 6 controls setup program in the fixture.
7 – 9 controls speed
DIP Switch #10
The DMX receipt mode: No function
The Master/Slave mode: Exchange between Automatic and Sound Activates
DIP Switch #11
Exchange between DMX receipt mode and Master/Slave mode
DIP Switch #12
Exchange the assignment of Tilt Channel and Pan Channel
DIP Switch #13
Exchange the direction for Pan Channel
DIP Switch #14
Exchange the direction for Tilt Channel
 Loading...