

VentureCraft Go-Dap TT User Manual

User's Guide
Headphone Amplifier
Tube Headphone Ampli er
CONTENTS
■ Features of this Product _________________________________ 2
■ Contents of Package ___________________________________ 3
■
Compatible Models of iPod/iPhone and PC (OS)_________________3
■ How to Use this Product ________________________________ 3
1.
Checking the Remaining Battery of this Product ______________ 3
2. Charging the Built-in Battery of this Product _______________ 4
3. Charging iPod/iPhone by this Product's Built-in Battery ______ 5
4. Connecting with iPod/iPhone __________________________ 5
5.
Listening to Music in iPod/iPhone in "AMP" Mode ______________ 6
6. Synchronizing with iPod/iPhone and iTunes on Computer ____ 6
7. Listening to Music on Computer in "USB DAC" Mode ________7
8. Connecting to Other Audio Devices _____________________ 8
9. Setting Other Functions _____________________
_________ 8
10. Setting Gain _______________________________________ 9
Troubleshooting ______________________________________9
Specications __________________________________________ 10
Cautions on Use ________________________________________11
Product Support _______________________________________14
Trademarks and Registered Trademarks _____________________ 14
2
Thank you for purchasing VentureCraft product. Please read
this user's guide thoroughly before using.
Keep this document available for your future reference.
Disclaimer
●
VentureCraft is not responsible for any damages caused
by natural disasters and re, actions or damages caused by
third parties, criminal or accidental use by individuals, or
any other damages caused by other irregular usage.
●
VentureCraft is not responsible for any changes or losses
to recorded data, losses of commercial pro t, interruption
of business operations, or any resultant damages or losses
caused by use or malfunction of this product.
●
VentureCraft is not responsible for any damages caused by
failure to follow instructions in this user's guide.
Dear Valued Customer,
Before using this product, please make sure to read
"Cautions on Use" found on the page 11 of this document.
■
Features of this Product
Go-Dap TT has cer tainly inherited the great features of the
successive products and is a flagship model in the Go-Dap
series. Go-Dap TT integrated the contemporary semiconductor
technology in the rich and soft tube sound and has succeeded
to eliminate thoroughly the microphonics noize, the tube's
weakest point.
Go-Dap TT is the best-suited tube headphone ampli er to play
digital audio sources in the highest quality sound.
To enjoy Go-Dap TT for many year to come, the easily-replaceable
socket-typed "Raytheon 6111 Sub MT Tube" is mounted.
●
The large capacity battery (3500mAh) makes possible the
longer playback time.
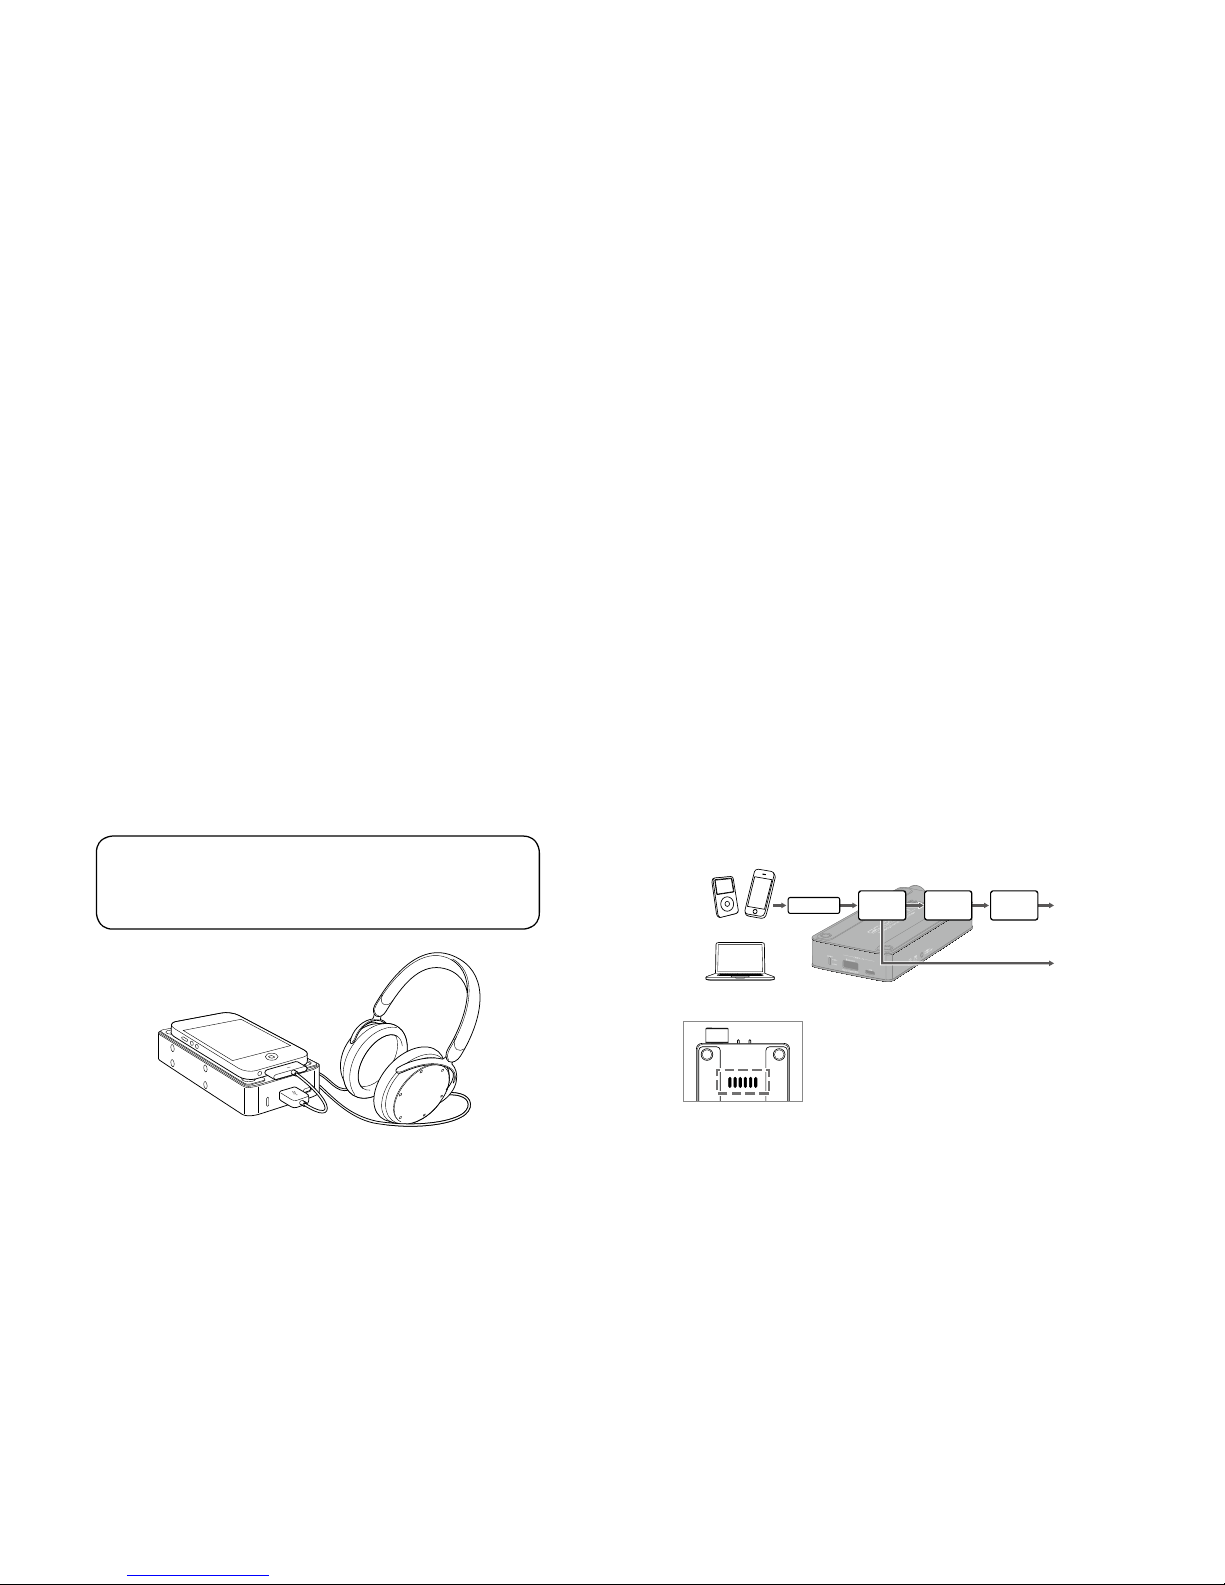
●
Digital audio signal is converted to S/PDIF by the (DIT built-
in)D/A converter and output from the 3.5mm round optical
digital terminal to connect with
other audio devices.
Headphone
Output
SPDIF OUT
(OPT OUT)
Front end
DAC
AK4353
Tube Pre
6111
Final
OP-AMP
iDevice
PC
On the model with a preheat supporting
tube substrate, when the power gets ON,
a blue LED turns on for about 5 seconds
while preheating the tube heater. This can
be seen in the heat rejection slits.
3
■
Contents of Package
●
Go-Dap TT main unit
●
USB cable (USB2.0 compatible[A connector - micro B
connector type])
●
Customer card & Warranty(Japan only)
■
Compatible Models of iPod/iPhone and PC (OS)
●
iPod:
iPod classic (160GB, 2009)/iPod nano (Sixth generation)/
iPod touch (Forth generation)
●
iPhone:
iPhone 5 / 4S / 4 / 3GS
●
PC(OS)
Windows:
8 / 7 / Vista / XP SP3 or later (32 bit/64 bit)
Mac
:
OS X v10.5 Leopard or later
■
How to Use this Product
Please follow operational procedures 1 to 10 below.
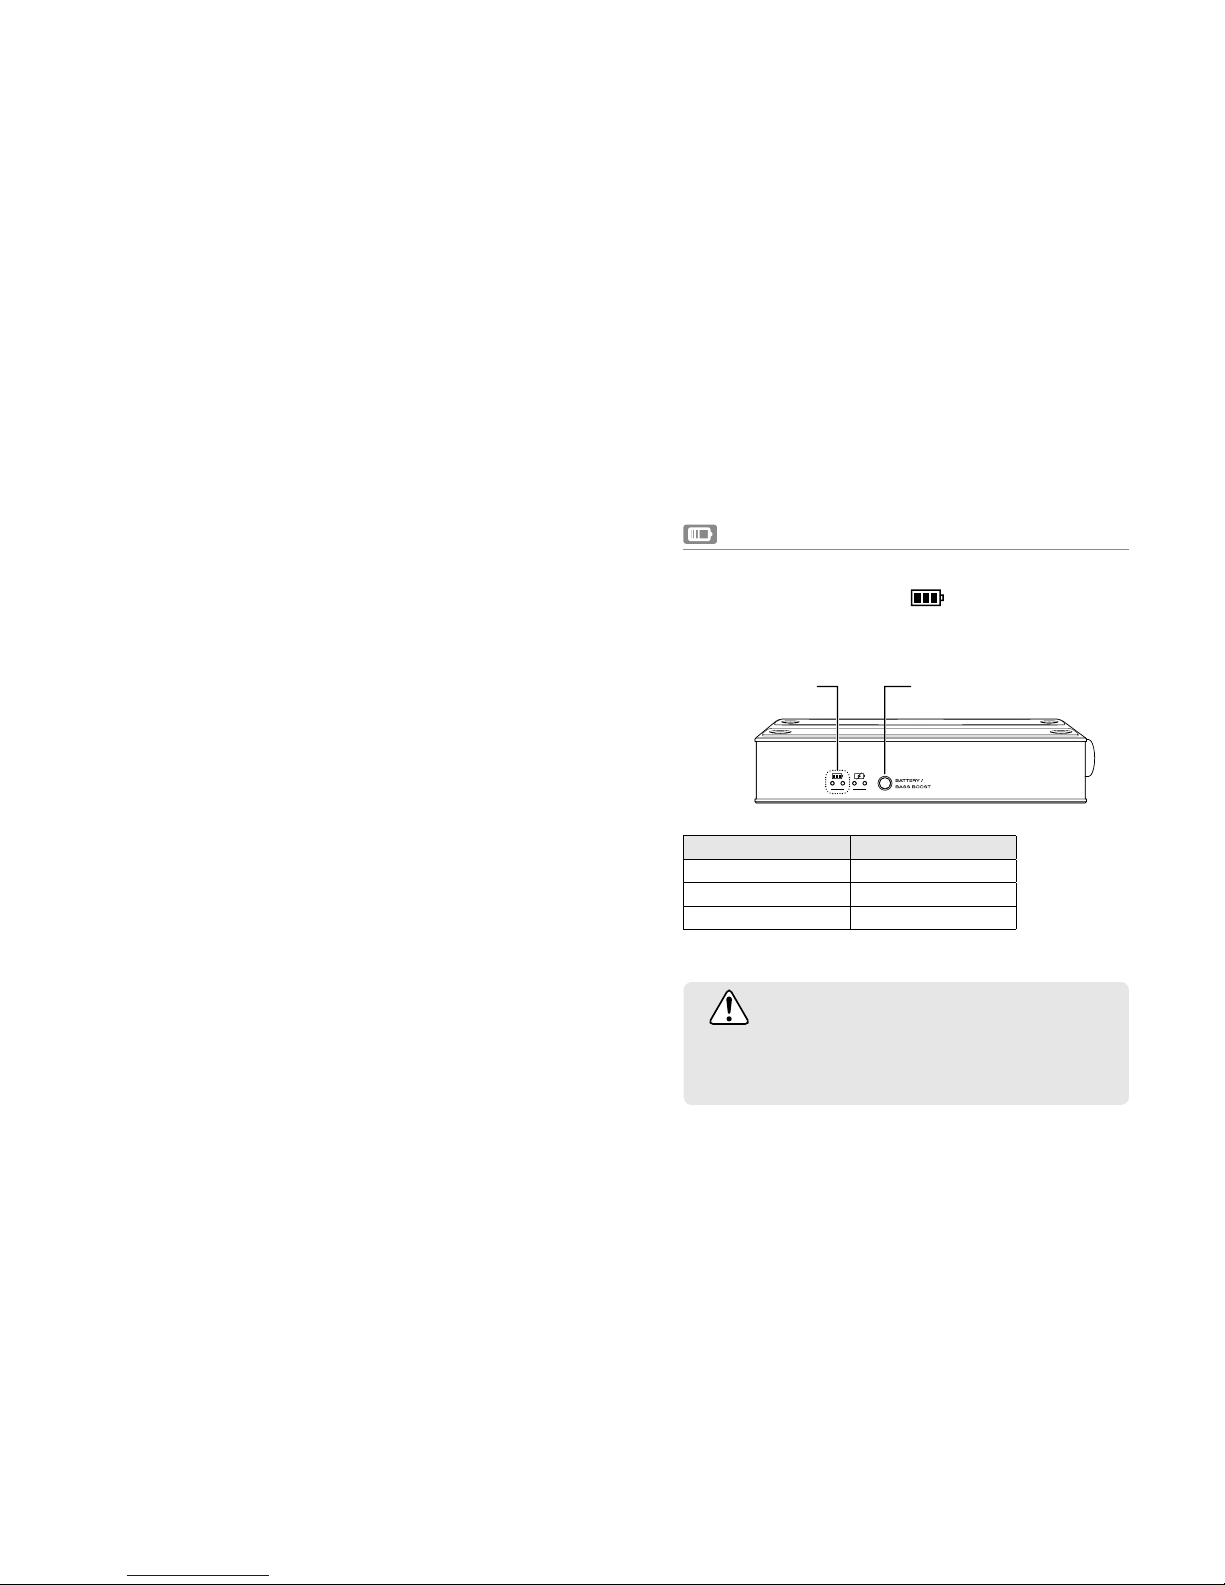
1.
Checking the Remaining Battery of this Product
The remaining battery can be checked by the color of the
remaining battery indicator LED
located on the side panel.
The LEDs will light up in accordance with the remaining battery
when the BATTERY / BASS BOOST button is pressed lightly.
BATTERY / BASS BOOST button
Remaining
battery indicator
Remaining battery LED
Full
○ ○
Low ○
Empty O
LED color
○:Orange
CAUTION
The battery at the time of purchase is not fully charged.
Charge the battery before using this product.

4
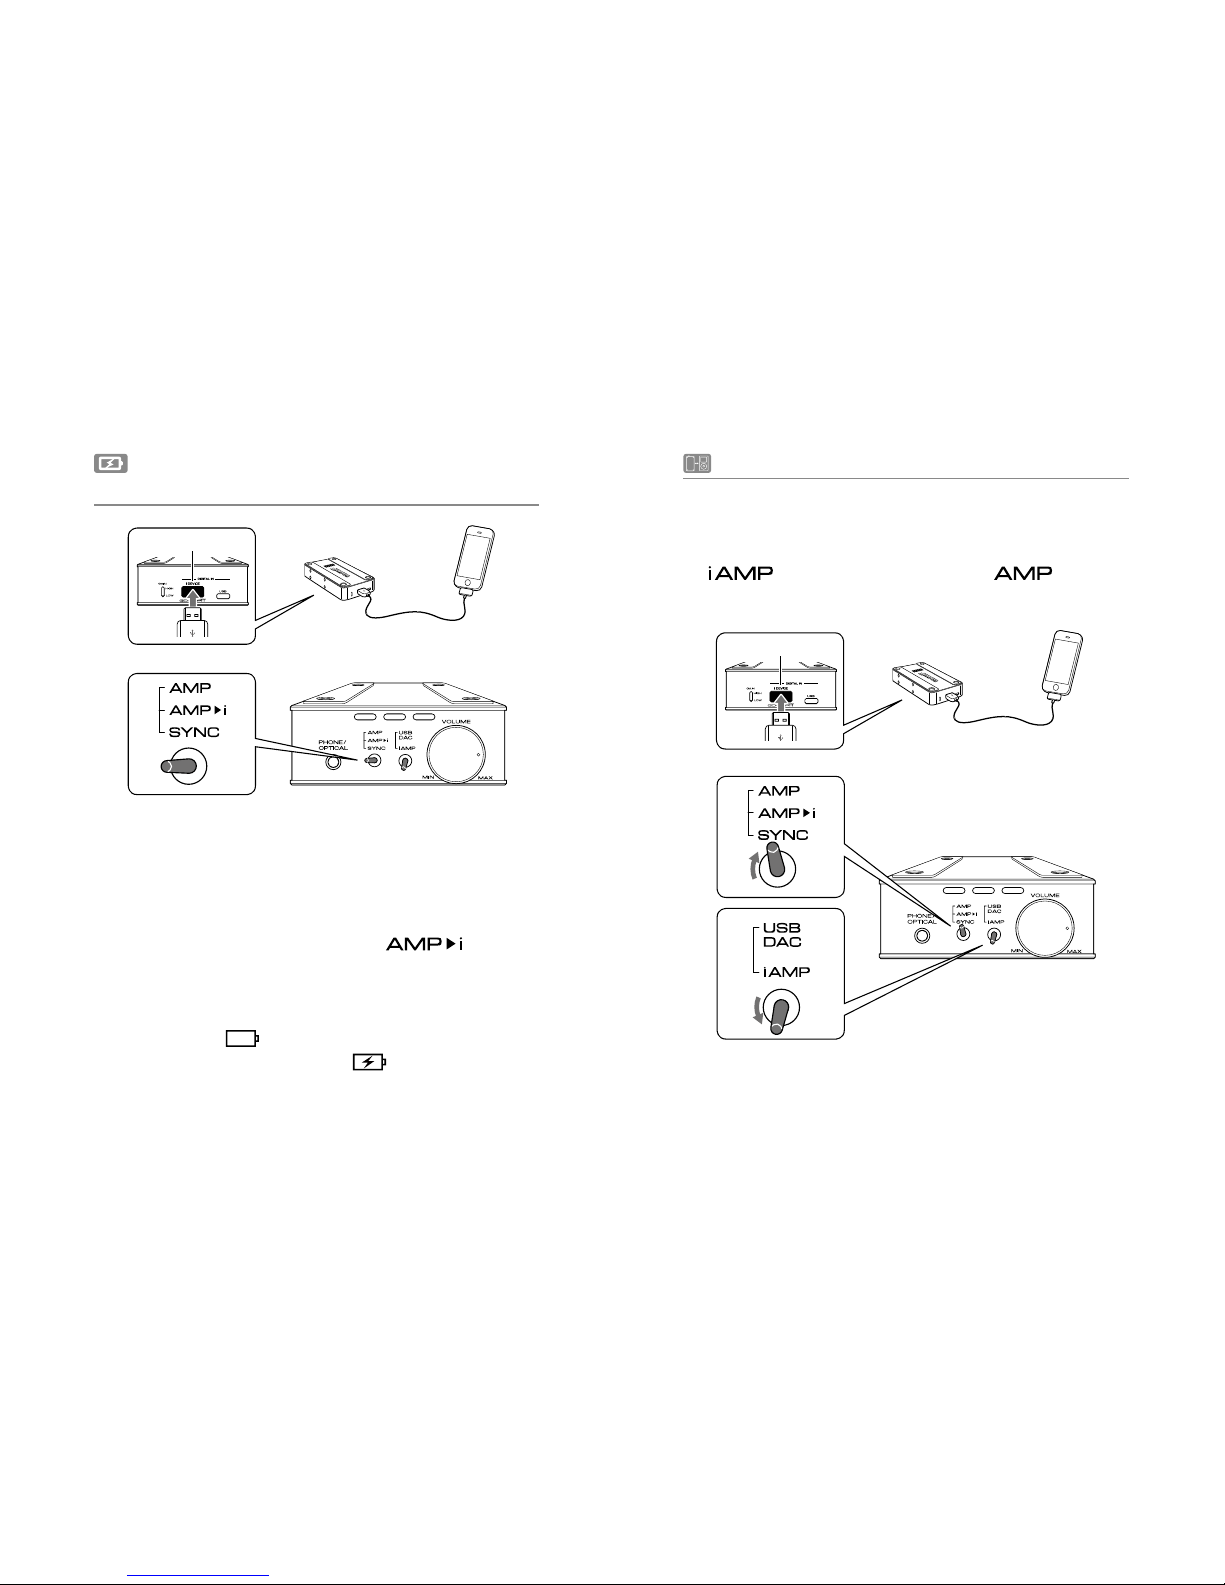
2. Charging the Built-in Battery of this Product
Connect the USB micro B connector on the rear panel of
this product and computer or the USB charging adapter
supplied with iPod/iPhone by using the supplied USB cable.
The built-in battery is charged by setting the toggle
switch (L) on the front panel to "
" or " "
mode. (Make sure the power is OFF.)
During charging, the charging status indicator LED
located on the side panel will light up.
* When the built-in battery of this product has been fully
charged, it will automatically start charging iPod/iPhone. It
takes approximately 6 hours to fully charge this product.
*
The charging status LEDs turn off when the USB cable is
disconnected.
1
2
Charging status indicator
Charging status LED
Pre charge
○ ●
Charge ○
Complete ●
LED color ○:Orange ●:Green
CAUTION
If both LEDs are o or become o when the USB
cable is connected, immediately disconnect the
USB cable and stop charging.
Please refer to "Troubleshooting" on page 9 of
this User's Guide and reset before reuse.
USB
5
3. Charging iPod/iPhone by
this Product's Built-in Battery
Connect by inserting the Apple genuine dock cable
supplied with iPod/iPhone into the i DEVICE (USB standard
A) connector of this product.
Turn the power ON by the power switch volume knob
and set the toggle switch (L) to "
" position.
iPod/iPhone will start to be charged from the builtin battery of this product after beep or vibration that
indicates the authentication is completed. The battery
mark located
at the top right of iPod/iPhone screen
will change to a charging mark
.
1
2
4. Connecting with iPod/iPhone
Connect by inserting the Apple genuine dock cable supplied
with iPod/iPhone into the i DEVICE (USB standard A) connector
of this product, and set the toggle switch (R) on the front panel
to "
" and the toggle switch (L) to " " mode for
headphone output/digital output.
i DEVICE
i DEVICE
 Loading...