

Page 1
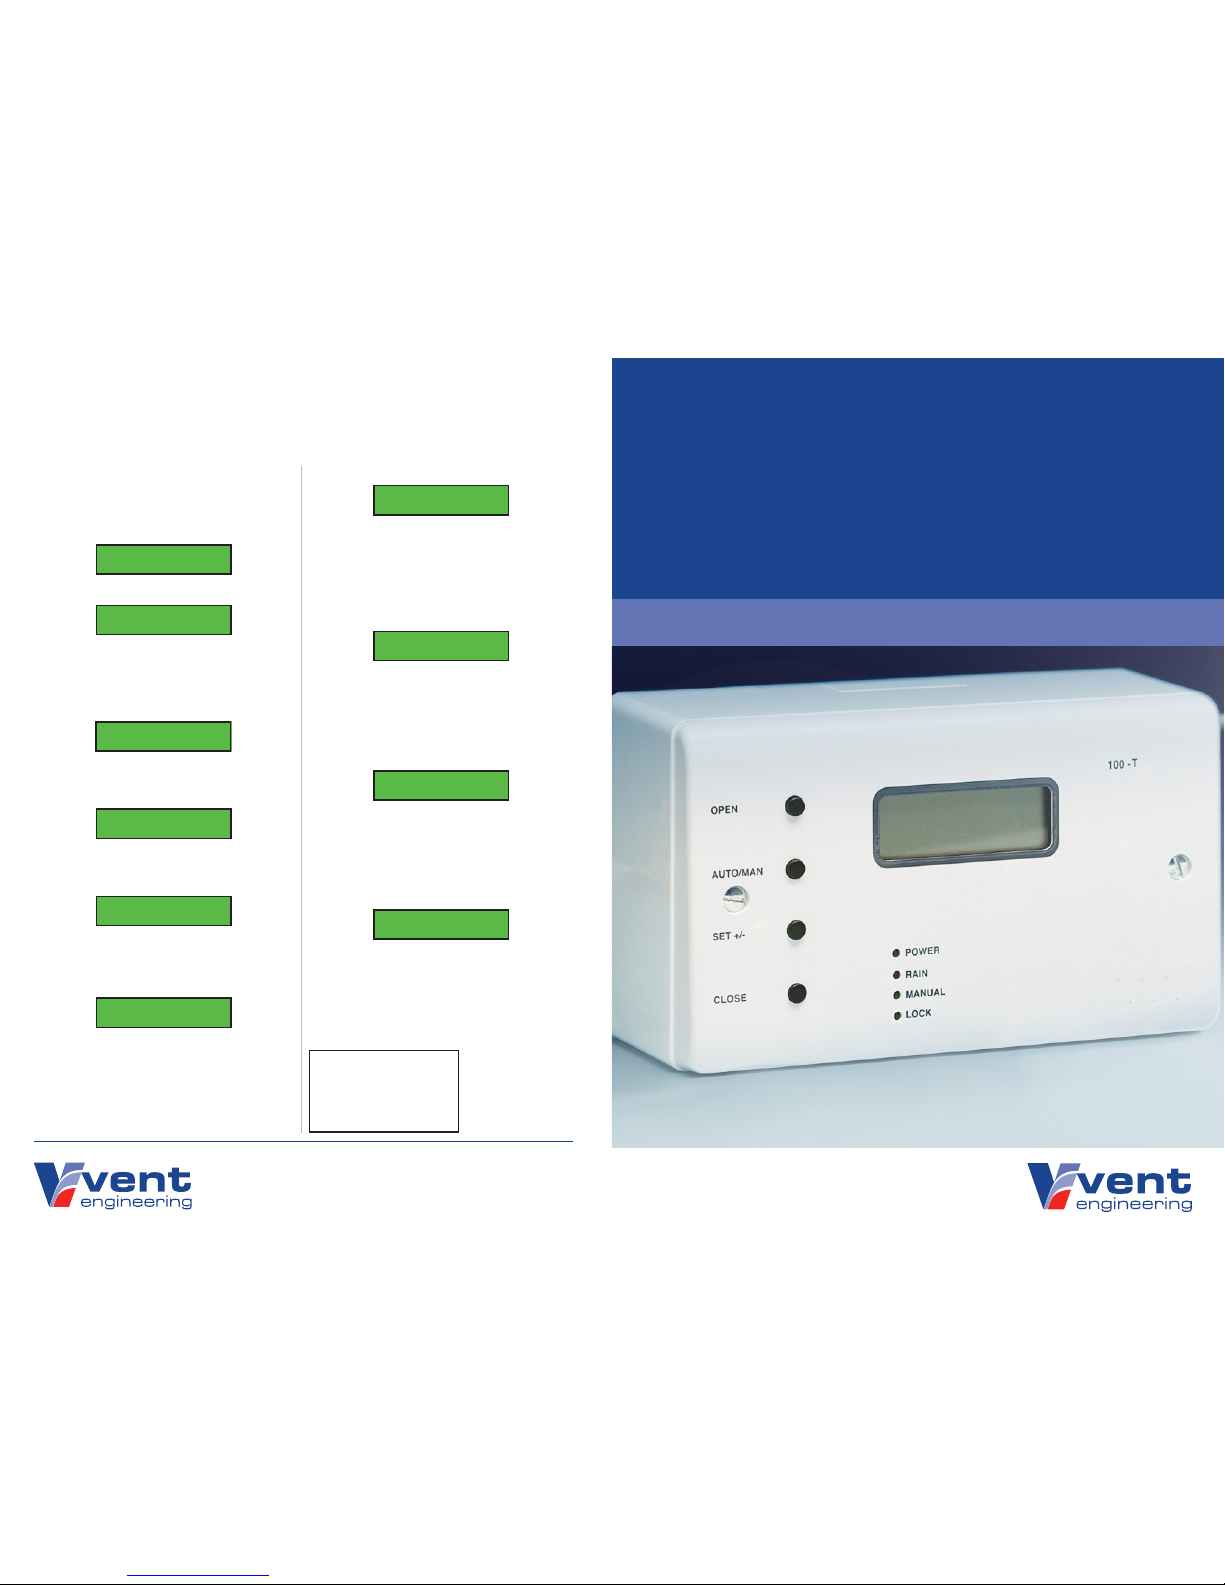
100 Series
Thermostatic and Rain Controller
Installation Guide
Unit 16c & 16f, Chalwyn Industrial Estate, Poole, Dorset BH12 4PE
To enter ‘advanced’ setup set your unit to “AUTO”
mode then press and hold the AUTO/MAN plus
SET +/- buttons simultaneously for 5 seconds.
Your screen should now read..
ADV
SETUP
After a moment the screen will change to display
To Advance
Press SET +/-
Using SET+/- is how you scroll through the
available options and saves each stage of any
alteration.
Now press “SET +/-”. The screen will read..
To + a value
Press Open
The Open button is used to increase any value.
Press “SET +/-” again. The screen will read..
To – a value
Press Close
The Close button is used to decrease any value.
Press “SET +/-” again. The display will read..
Proceed to
ADV Setup
Now you can proceed to the advanced setup
options.
Press “SET +/-” again. The display will read..
Room Temp
is now XXc
‘XX’ being the current temperature in your room.
By using Open(+) and Close(-) you can calibrate
the display temperature.
Press “SET +/-” again. The display will read
Full open
Cycle 013sec
013sec is the amount of time for the motor to
operate and fully open - in most cases this default
setting is adequate. You can of course, alter this
setting for your actuator by pressing the Open(+)
and Close(-) buttons.
Press “SET +/-” again. The display will read..
Opening
Temp =22c
This relates to the temperature that the room must
reach before the actuator will operate.
You can alter this setting by pressing the Open(+)
and Close(-) buttons.
Press “SET +/-” again. The display will read..
Closing
Temp =18c
This relates to the temperature that the room must
fall to before the actuator will operate.
You can alter this setting by pressing the Open(+)
and Close(-) buttons.
Press “SET +/-” again. The display will read..
AUTO LOCK
MODE OFF
Using autolock is a security feature that prevents
the unit from being used without entering a
passcode rst. You can turn this on or off by
pressing the Open(+) and Close(-) buttons.
Press “SET +/-” again will take you back to
AUTO MODE
The unlock sequence is:
Button 2
[ AUTO/MAN ]
Button 1
[ OPEN ]
Button 3
[ SET +/- ]
Button 4
[ CLOSE ]
100 Series Advanced Operations Guide
The default settings of our 100 series controller are suited to most user applications. However, if
you need to make advanced alterations such as; Thermostat, Actuator and Lock Calibration, then
please use the following guide.
fv10/100t/22092010
Page 2
2
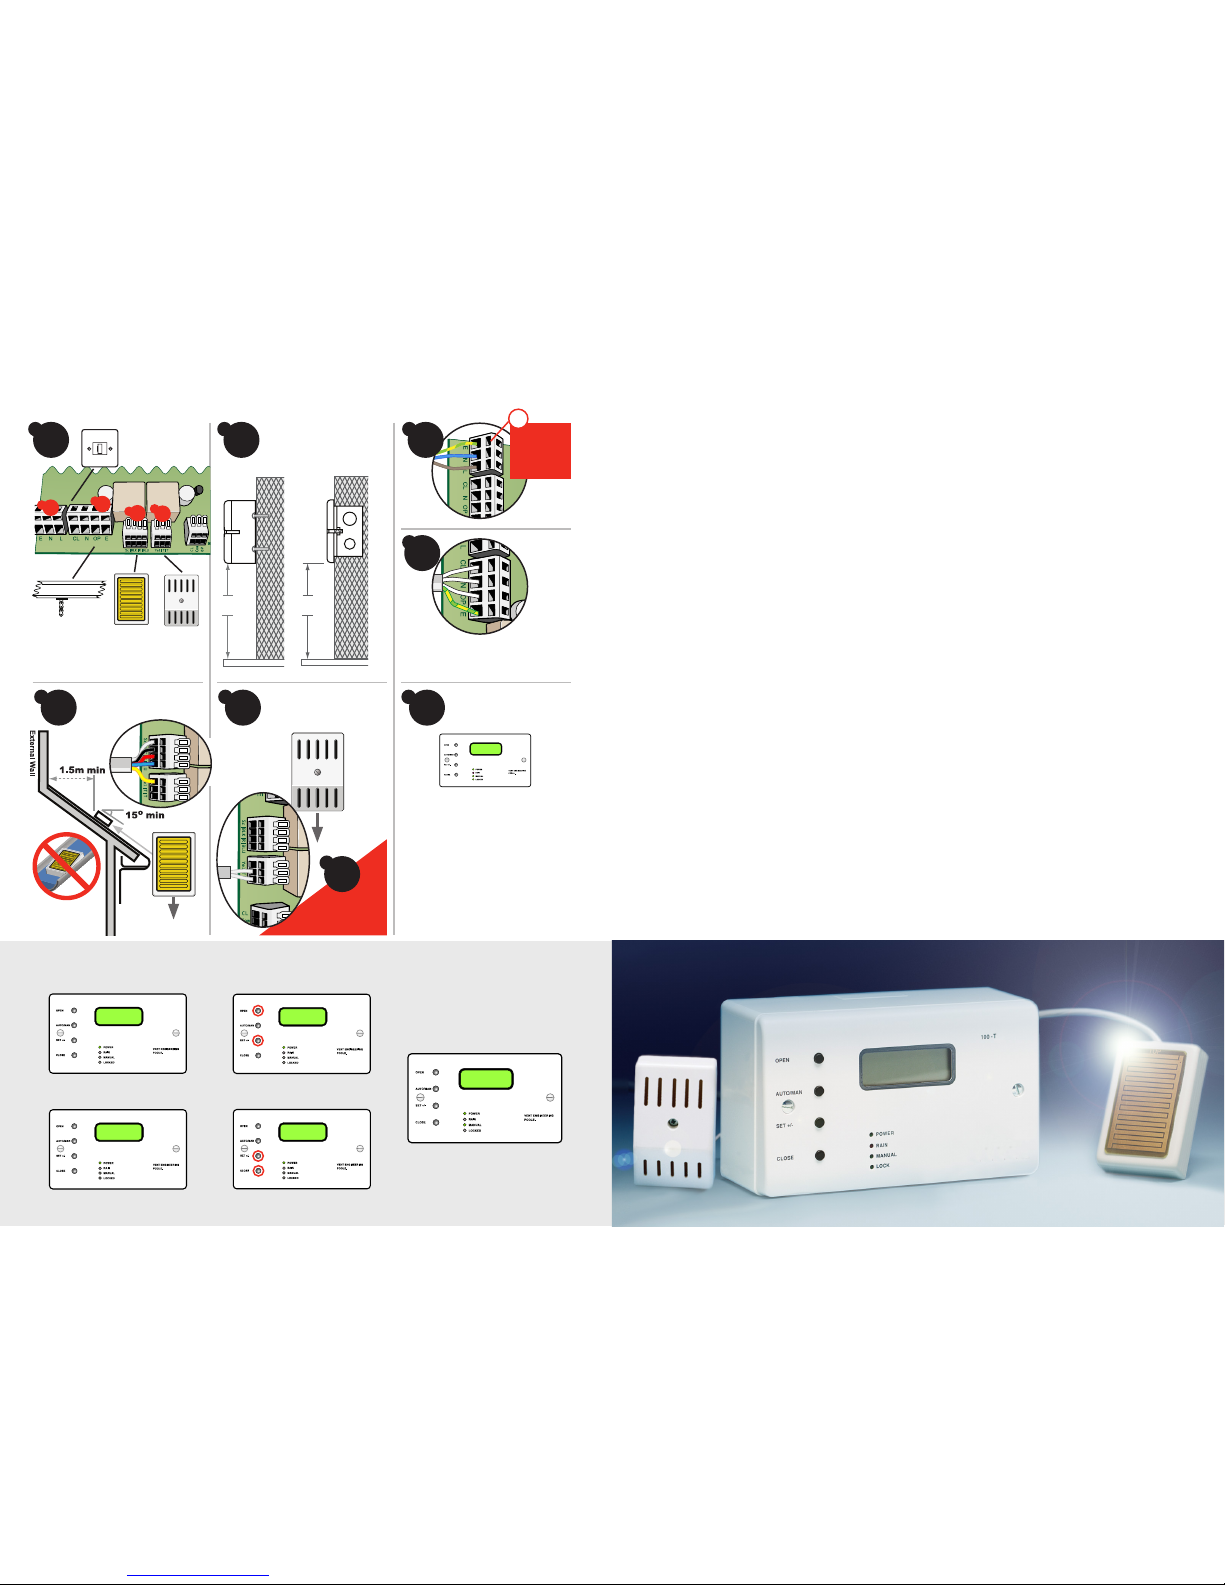
Surface
Install
Flush
Install
45mm recessed backbox
Actuator
connections
Mains in
3
5
Rain Sensor
Installation
Temp Sensor
Installation
Preset Opening Temperature
6
You can
now switch
the power on
2 core
screened
cable
8
Preset Closing Temperature
18
o
To adjust opening temperature
To adjust closing temperature
To manually open and close
23
o
A
B
In Auto mode, hold ‘A’ & repeat press ‘B’
17
o
A
B
See Actuator Installation Guide
for wiring information
7
Press and hold AUTO/MAN for 2
seconds until MANUAL light comes on
then use the OPEN or CLOSE buttons
to adjust the window position.
Press and hold AUTO/MAN for
2 seconds to return to automatic
mode.
Finished.
Your unit will now be fully set
up to work with its factory
settings.
Please read the following steps
to adjust basic optional settings.
1200mm
1200mm
Floor
Do not mount
sensor in guttering
nor under eaves
Additional user settings
In Auto mode, hold ‘A’ & repeat press ‘B’
manual
Floor
100 Series Installation Guide
100-T
Max 5amp
Fused Spur
Actuator Rain
Sensor
Temp
Sensor
3 core +
earth cable
4 core
screened
cable
2 core
screened
cable
4
1
22
o
i
Insert the tip of a
screwdriver into
these sockets to
expose the wire
terminals
Sensor cable MUST
point downwards
Q. It has recently stopped raining but my windows have not opened again?
A. In Auto mode the 100 series controller has a built in time delay of 5 minutes
between the rain sensor drying and the unit becoming fully operational. This will
be indicated by the presence of the Rain LED on the front panel. For the unit to
operate the current temperature will need to be higher than your desired opening
temperature. In manual mode you should have full control of the unit.
Q. Only the set+/- button on my panel does anything?
A. This means your panel has been locked. To unlock your unit see the instructions on
the back page.
Q. Can I change the default lock/unlock code?
A. No. The code has been preset to avoid the need for a complete system reset
should the new code be forgotten.
Q. My rain sensor seems to have become less responsive?
A. Check the unit has not slipped or fallen into an undesired position and try cleaning
the metallic head with a soft damp cloth. We recommend the rain sensor is cleaned
on a quarterly basis.
Q. Where do I mount my temperature sensor?
A. This location is entirely at your discretion. We would recommend a position that
gives a good average reading of the desired location, ideally at least 1300mm
from the oor.
You can choose to position the thermostat a maximum of 30m away from the control panel.
Q. My display shows 0.0 - Is this correct?
A. This indicates a problem with the thermostat wiring. Check the wiring and that all
connections have been correctly made.
Q. How many actuators will the 100 series operate?
A. The 100 series has a 5 amp capacity.
Frequently Asked Questions
We have compiled the following list of Frequently Asked Questions to assist you with any
troubles you may encounter.
We advise a difference of at least 2o between the opening and closing temperature.
3
4
5
6
fig.
fig.
fig.
fig.
fig. fig. fig.
fig.
fig.fig. fig.
fig.
 Loading...