

VenMill VMI 2500, VMI 2550i User Manual
Light to Mid-Commercial Use
Maximum recommended daily use of 50 repair cycles

This unit is intended to clean/repair the
following discs: Blu-Ray, CD-ROMs, Music
CDs, Data CDs, DVDs, HD-DVDs, Computer
Discs, Game Discs, Books on disc, all
recordable CDs and DVDs, double-sided
discs, & 3 Inch Discs (only with adapter).
SAVE ALL PACKING MATERIALS. FAILURE
TO USE PACKAGING DESIGNED FOR THIS
UNIT MAY CAUSE DAMAGE TO THE UNIT
AND WILL VOID WARRANTY. FOR MORE
INFO CONTACT SUPPORT@VENMILL.COM.
THANK YOU
For purchasing the VMI 2500/2550i Buer
TM
© 2014 VenMill Industries, Inc. All rights reserved. Under the copyright laws, this manual may not be copied, in
whole or in part, without the written consent of VenMill.
Every eort has been made to ensure that the information in this manual is accurate. VenMill is not responsible
for printing or clerical errors.
Names and designs are trademarks of VenMill Industries, Inc. Artwork and Design © 2014 VenMill Industries, Inc.
All Rights Reserved.
The maximum amount of repairs per bottle may vary based on cleaning cycle usage. See www.venmill.com for
more information.
CAUTION: Units and consumables are designed for use in specic regions. Your warranty will be voided if you
purchase the equipment and/or consumables outside of your designated region. Purchase only through Authorized
Distributors found on our website at www.venmill.com. If uncertain, please contact sales@venmill.com.
VenMill Industries, Inc
36 Town Forest Rd.
Oxford, MA 01540 USA
(866) 864-0210
Local: (508) 363-0415
Fax: (508) 363-0414
www.venmill.com
READ BEFORE OPERATING EQUIPMENT
SECTION 1
Unpacking .......................................................................................................................... 1
SECTION 2
Getting to Know Your Machine ................................................................................... 2
SECTION 3
Initial Setup ........................................................................................................................4
SECTION 4
Quick Start .......................................................................................................................... 5
SECTION 5
Modes of Operation ........................................................................................................7
SECTION 6
Standard Maintenance ................................................................................................ 10
Rubber Platter ........................................................................................................ 10
Bung Wheels ....................................................................................................... 11
C2 Chip ..................................................................................................................... 12
Machine Cleaning ................................................................................................. 13
Splash Guard .......................................................................................................... 13
Cleaner Disc ............................................................................................................ 14
Rubber Platter ........................................................................................................ 15
Fan Filter ..................................................................................................................15
SECTION 7
Repacking ........................................................................................................................ 16
SECTION 8
VMI 2500/2500i BuerTM FAQ s .................................................................................. 17
SECTION 8
Specications .................................................................................................................. 19
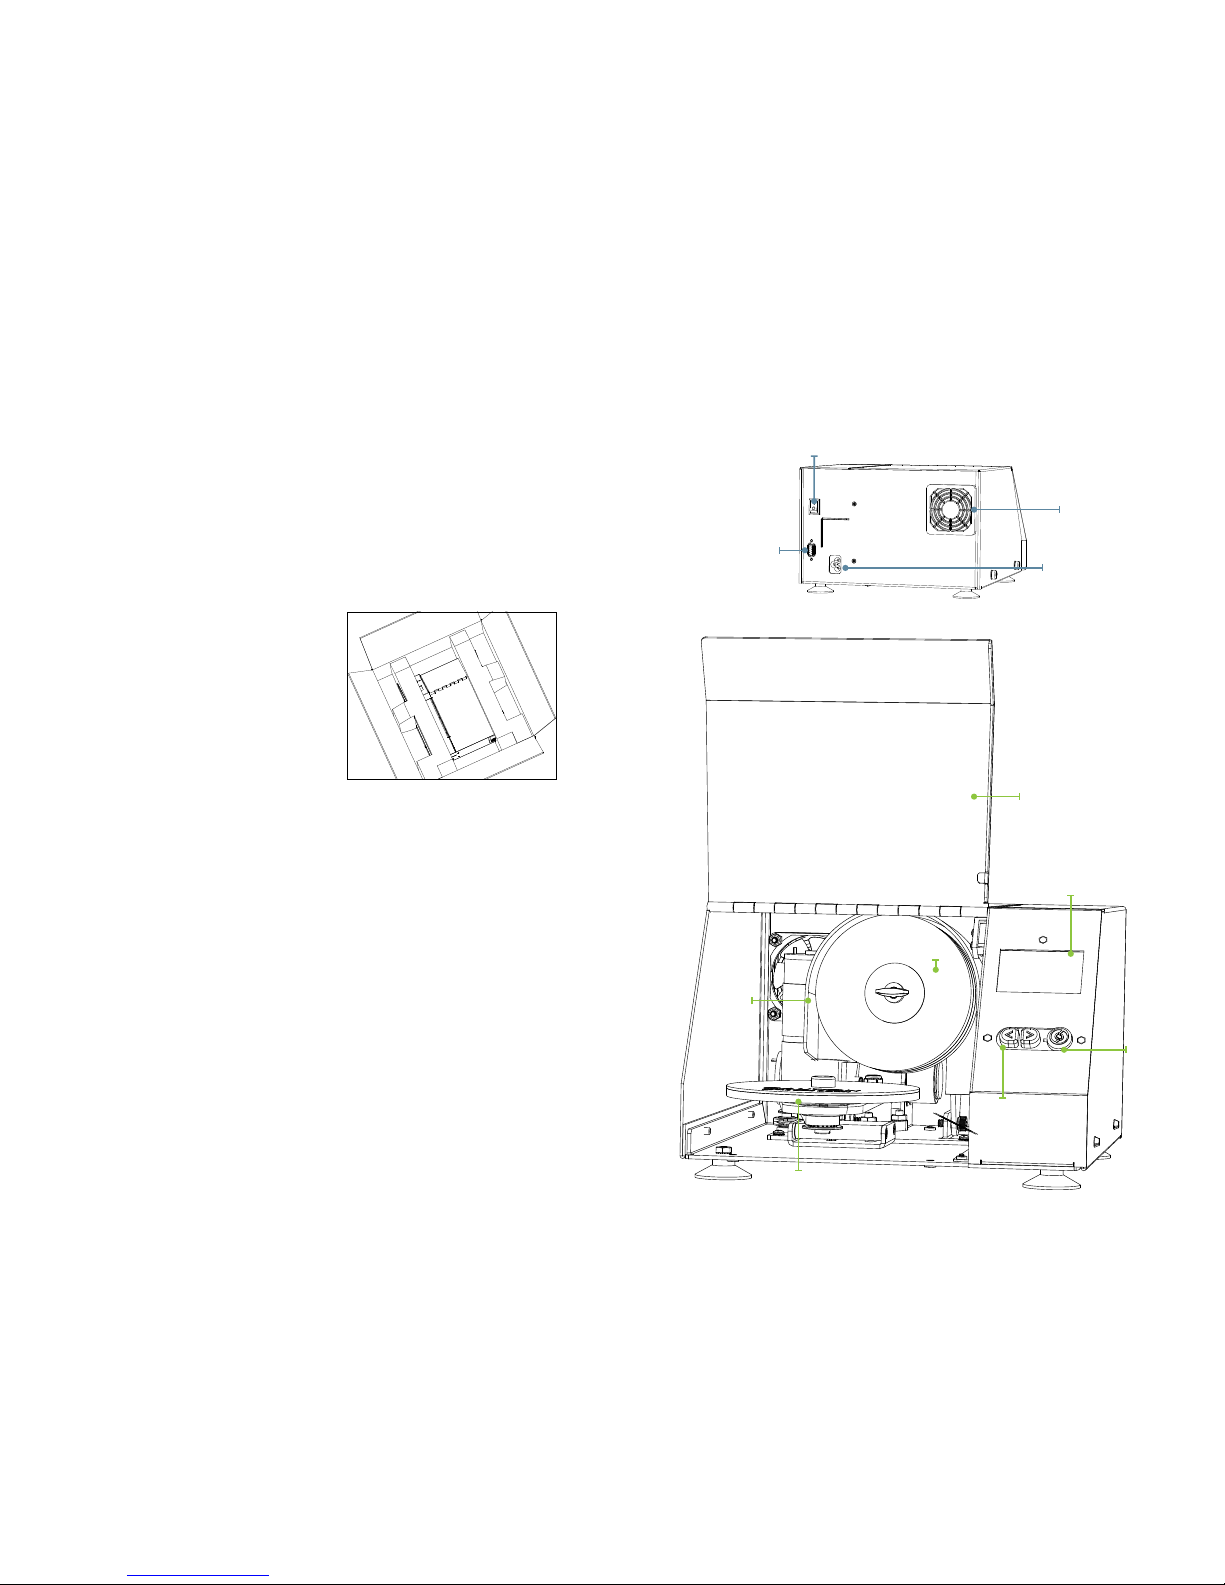
SECTION 1 Unpacking
1
Getting to know your machine SECTION 2
2
SAVE ALL PACKING MATERIALS. FAILURE TO USE PACKAGING DESIGNED
FOR THIS UNIT WILL CAUSE DAMAGE TO THE UNIT AND WILL VOID
WARRANTY.
Parts that need to be saved are as follows:
VMI 2500 Shipping Box | Internal Foams (2 foams total) | Outside Foam Left
Outside Foam Right | Protective Plastic Bag
There is a charge for replacement packing materials (plus S + H).
UNPACKING:
1. Open the Shipping Box.
2. Remove support documents /
accessories.
3. Remove the VMI 2500 from the
shipping box.
4. Remove the left and the right outside
foams.
5. Take the VMI 2500 out of the plastic bag.
6. Remove any green tape located on the
outside of the machine.
Top Cover
Start Button
Repair Option
Buttons
Bung Wheel
Disc Platter
Splash
Guard
Display
Fan
RS232 Port
On/O
Power Cord Inlet
3
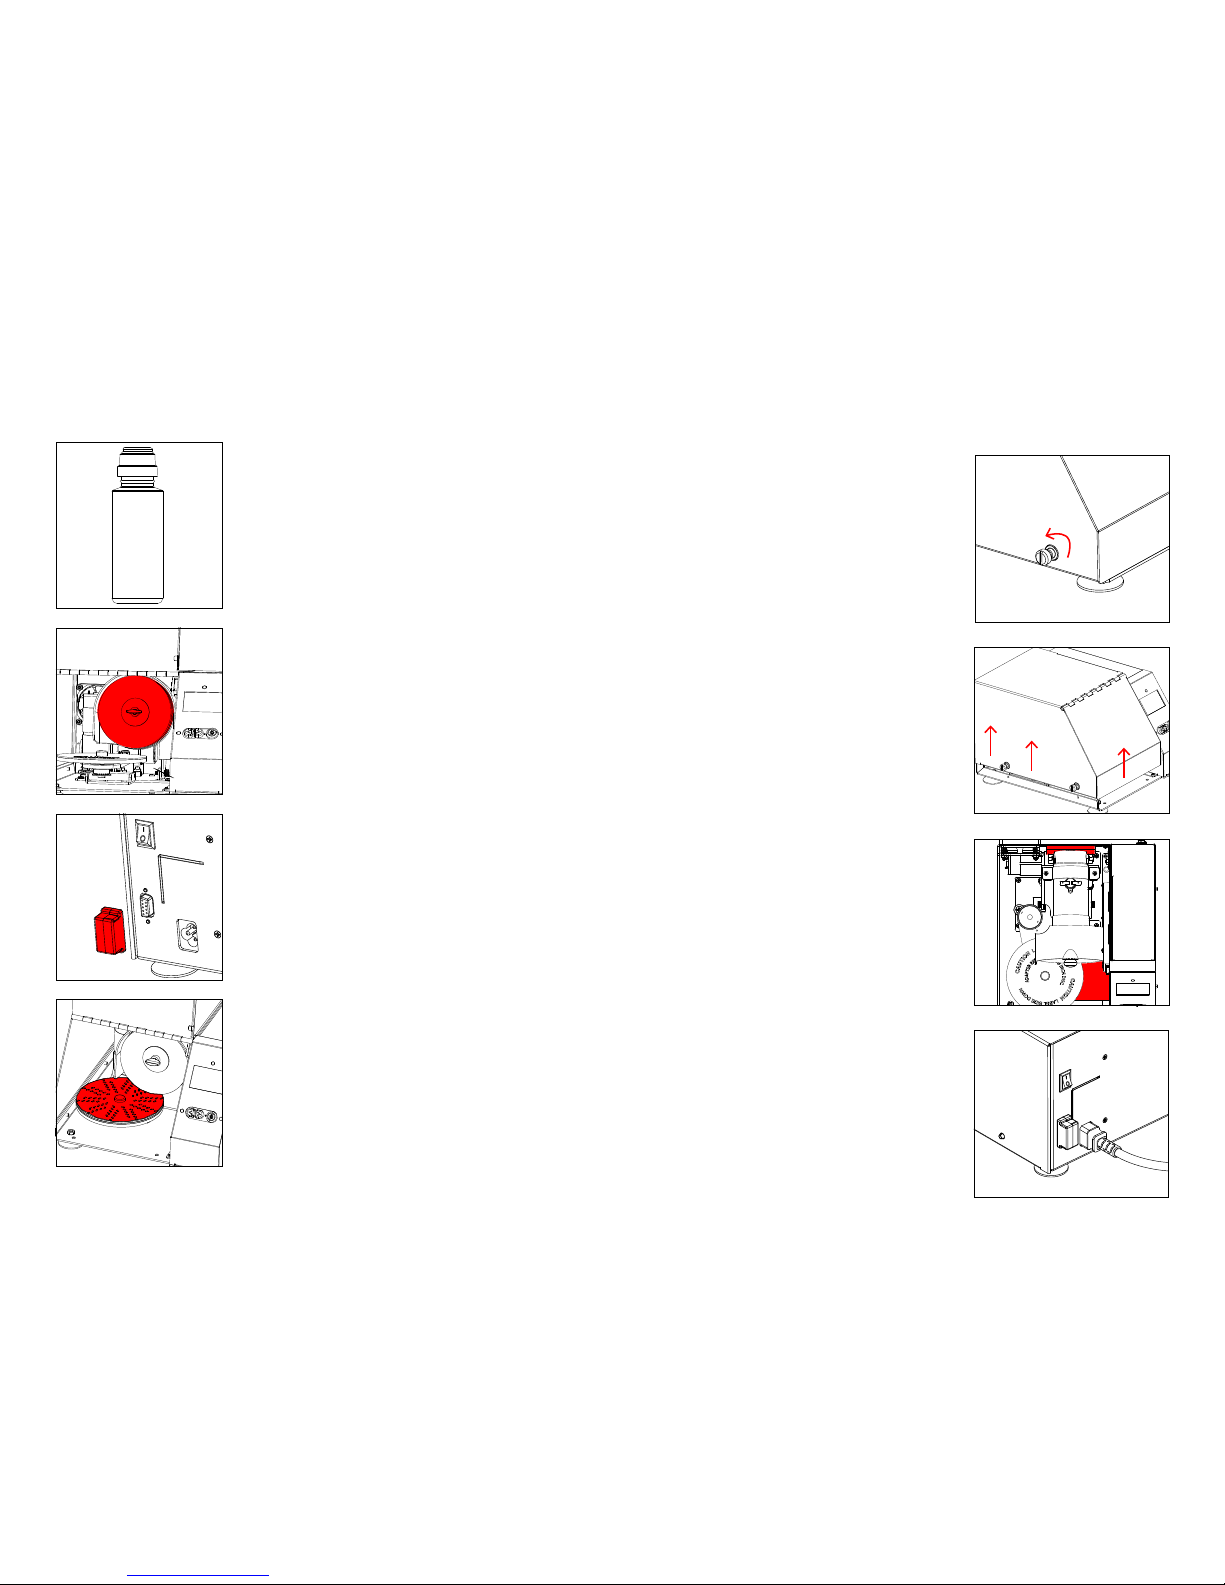
Initial Setup SECTION 3
Initial Setup
4
Remove Internal Packing Material
1. Locate the two side panel thumbscrews
and unscrew them.
2. Lift the side panel up and away from the
machine.
3. Locate and remove foam #2, which is
positioned in the front of the machine,
under the bung wheel.
4. Locate and remove foam #1, which is
behind the main motor.
5. Reinstall the side panel and secure with
the two thumb screws.
Install Power Cord
1. Insert the power cord into the power
inlet on the back of the machine.
2. Take the other end of the power cord and
plug it into a wall outlet.
3. Press the ON/OFF switch to the ON
position.
SECTION 2 Getting to know your machine
Bung Wheels:
500 minutes of operation
(pre-installed)
Bung Solution:
250 minutes of operation per bottle
C-2 Chip:
500 minutes of operation
(pre-installed)
Cleaner Disc:
Use every 20 minutes
2.
1.
 Loading...