

Venini VWM51, VWM71 User Manual

USER MANUAL FOR YOUR VENINI
VWM51, 5 kg
VWM71, 7 kg
Top Load
Washing Machine
NOTE: This User Instruction Manual contains important
information, including safety & installation points, which will
enable you to get the most out of your appliance. Please keep it
in a safe place so that it is easily available for future reference; for
you or any person not familiar with the operation of the appliance.
JW 09/11/12
2

Contents
Environmental note 4
Important safety information 5 – 6
Specifications 7 – 11
Specifications 7
Appliance dimensions 8
Control panel 9
Detergent drawer 10
Bleaching agents 10
Softener 11
Preparing the wash cycle 11 - 12
Preparing your garments for washing 11 - 12
A selection of wash care symbols 12
Selecting a wash program 13 – 17
Detergent 13
Choosing a wash program 13
Selecting a wash temperature 14
Setting the program features 14
Selecting a water level 15
Washing load size 16
Beginning the wash program 16
Delay start 16 - 17
Safety lock 17
Imbalance control 17
Maintenance and cleaning 18 - 23
In daily use 18
Control panel and washing machine cabinet 18
Detergent drawer 18
The washing machine drum 19
Cleaning the filter 19 - 20
Removing stains 20
Stain removal rules 21
Stain removal guide 21 - 22
Poor wash results 23
Installation 24 – 30
Locating your washing machine 24
Adjusting the height of the appliance 25
Installing the spacers 26
Installing the bottom cover 26
Connecting to the mains water supply 27
Connecting to the water outlet 28 - 29
Power supply 29 - 30
Before first use maintenance wash 30
Error code failure system 30 - 31
General troubleshooting 32 - 33
Contact details 36
3
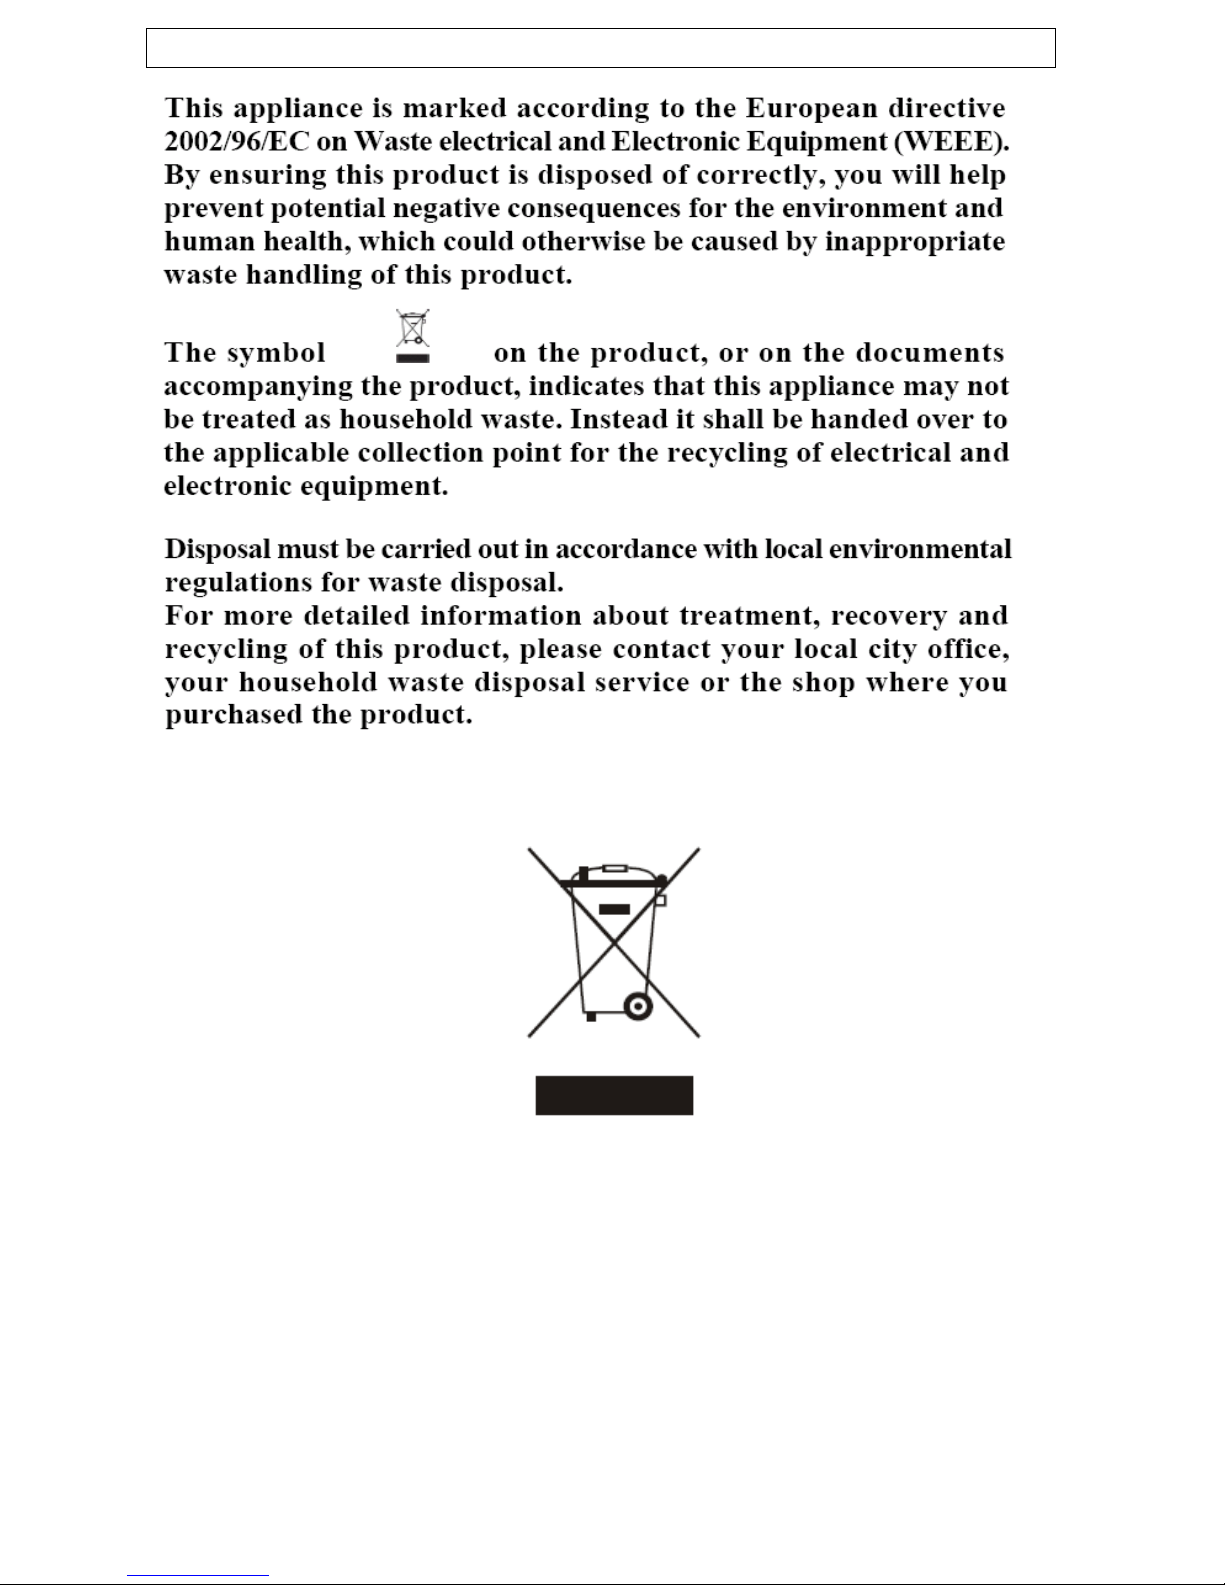
Environmental note
4

Important safety information
Your safety is of the utmost importance to us.
Please make sure that you read this instruction
booklet before attempting to install or use the
appliance. If you are unsure of any of the
information contained in this booklet, please
contact the Customer Care Department.
General Safety
o Repairs to your appliance must only be carried out by a
registered engineer or one of its authorised service agents. Any
attempt by an inexperienced person to repair the appliance,
could result in injury or damage to your washing machine.
o If you notice that the mains cable is damaged. The appliance
must not be used. The same applies if you notice that the
worktop, control panel or base area is damaged. As this could
allow access to the internal components of the machine.
o The appliance should be turned off and isolated from the mains
supply, before either cleaning or maintenance work is attempted.
o The mains cable must not be used to pull the plug out of the
electrical socket.
o The machine should not be sprayed with water.
o The machine should be allowed to cool before carrying out an
emergency drain or cleaning the drain filter.
o It is possible for small animals to chew either the mains cable or
water hoses, which could cause an electric shock hazard.
Installation
o The installation instructions contained within this user manual
should be followed.
o It is obligatory for the completed installation to comply with all
relevant building regulations and local water authority
requirements.
o The machine should not be installed near open flames or in wet
areas.
5

During Use
o It is recommended that the appliance is unplugged and the
water supply is turned off after the machine is used.
o This appliance is only designed to wash normal domestic wash
loads. If you use your washing machine in any other way or it is
incorrectly used, then we accept no liability for any damage that
might be caused and any guarantee will be void.
o No attempt should be made to alter or modify the specifications
of this appliance.
o The detergents that you place in this appliance should be
suitable for automatic washing machines. With regards to dosage
levels, the detergent manufacturer’s recommendations should be
followed.
o You should not wash garments that have been in contact with
flammable materials.
o You should not wash raincoats, bike covers, feather items,
stretch cotton products or other waterproof clothing in the
machine.
o Your washing machine should not be used for dry cleaning.
o If you use either dyes or bleaching agents inside this machine,
then you should consult with the manufacturer of these products
to make sure they are suitable for use in your washing machine.
We cannot be held responsible for any damage that may result.
o The lid should not be opened when the machine is spinning. The
machine will stop spinning when the lid is opened but the tub will
not stop turning immediately. DO NOT place any clothes,
objects or parts of your body in the tub while it is spinning.
Child Safety
o Your washing machine should only be used by adults. You should
not allow children in the area of the machine unsupervised. You
should not let them touch the controls or play with the appliance.
o It could be possible for a child or pet to gain access to the
washing machine through the porthole door. Therefore please
check the drum before using the appliance.
o Any packaging that is removed from the machine should be kept
away from children.
o All detergents should be kept out of a child’s reach and in a safe
place.
6

Specifications
1) Lid 8) Rear control board
2) Frame 9) Inlet valve
3) Filter 10) Power cord
4) Interior drum 11) Back cover
5) Machine body 12) Drain pipe
6) Control panel 13) Base
7) Adjustable feet 14) Drum
o 5 programs
o 5 kg wash load (VWM51)
o 7 kg wash load (VWM71)
o 660 rpm maximum spin speed (VWM51)
o 720 rpm maximum spin speed (VWM71)
o LED display
o Delay start
o Wash temperature control
o Safety lock
o Imbalance control system
o Adjustable feet
7

VWM71
Appliance dimensions
Height: 920 mm
Width : 560 mm
Depth: 565 mm
VWM51
Appliance dimensions
Height: 900 mm
Width: 540 mm
Depth: 545 mm
For future reference please record the following information which can
be found on the rating plate and the date of purchase which can be
found on your sales invoice.
Model Number ……………………………….
Serial Number ……………………………….
Date of Purchase ……………………………….
8
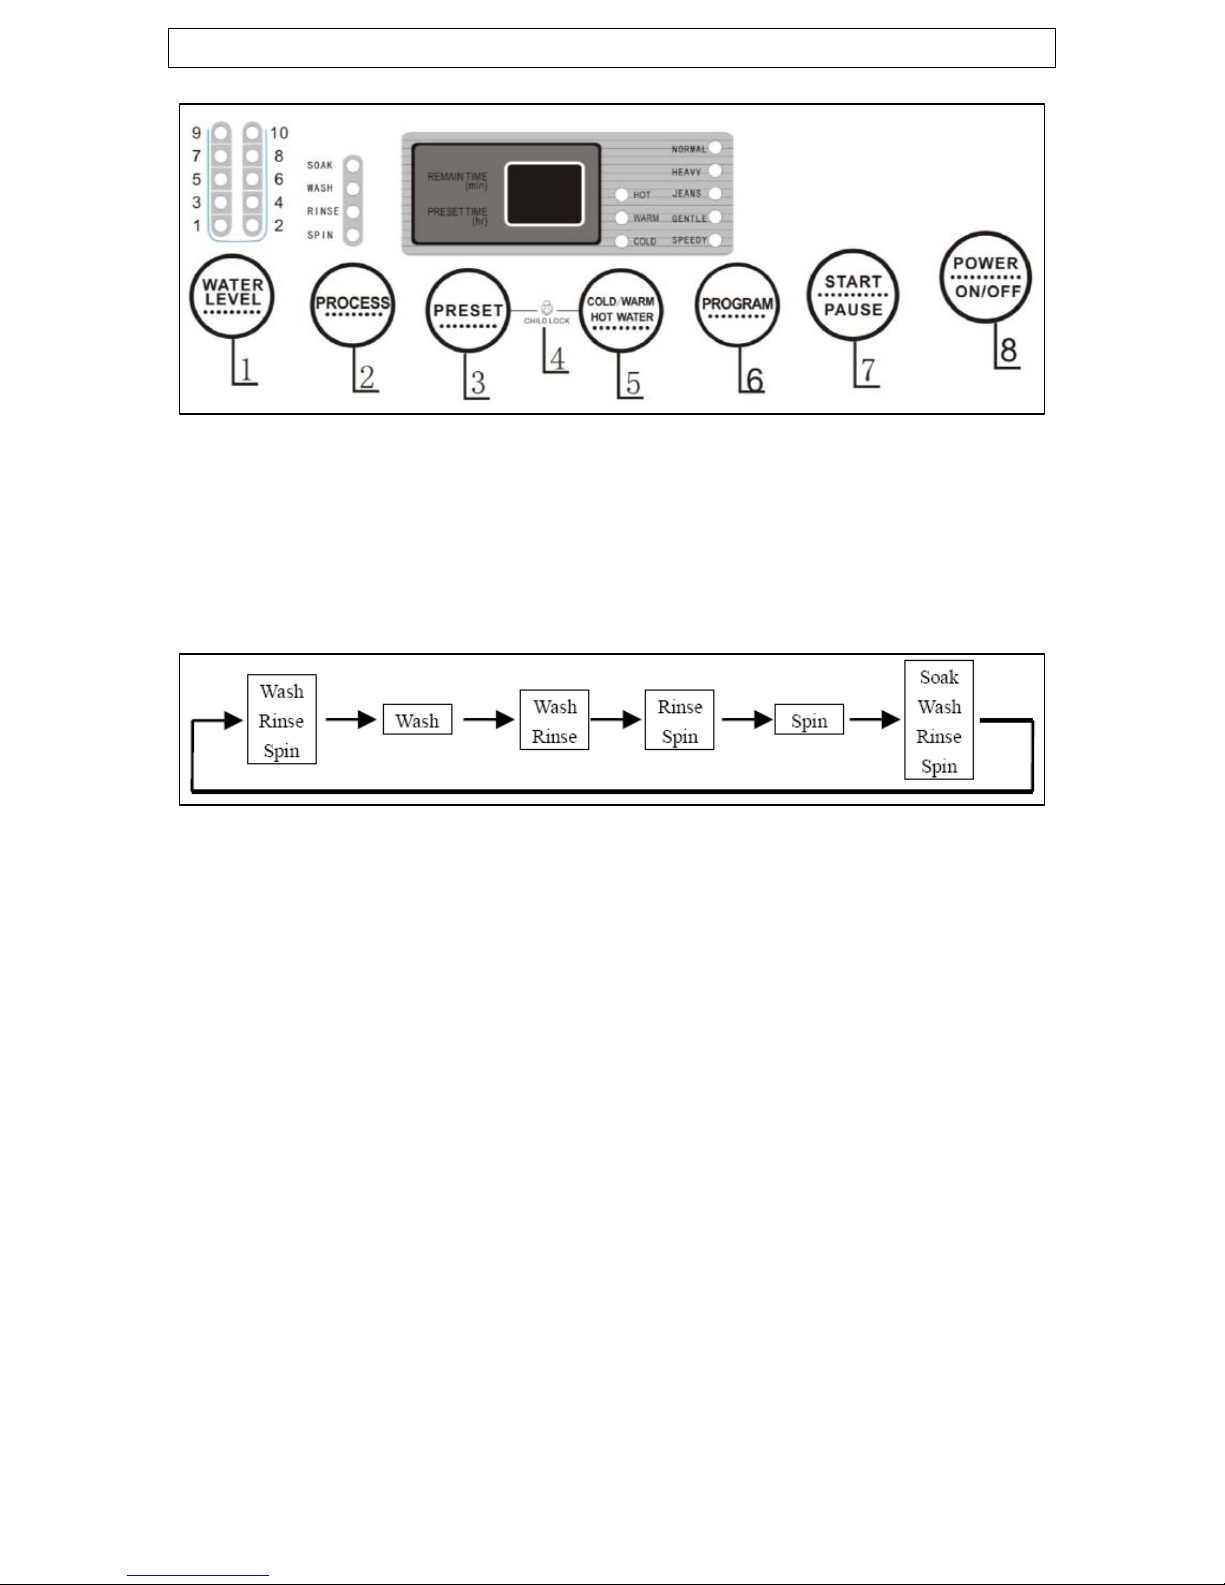
Control panel
1) Water level button: Use this button to select the appropriate
water level according to the volume of laundry.
2) Process button: Press this button to set the features of the
wash program. Each press of the button will scroll through the
following choices.
3) Preset button: Use this button to program a delayed start to
the wash cycle.
4) Safety lock buttons: Use these buttons simultaneously to
activate and deactivate the safety lock.
5) Water temperature button: Press this button repeatedly to
choose the required washing temperature. You can select COLD,
WARM or HOT.
6) Program button: Press this button repeatedly to set the
desired wash program. You can choose from the following
options.
SPEEDY GENTLE JEANS HEAVY NORMAL
7) Start / pause button: Press this button to begin a wash
program or to pause a program that is currently in progress.
8) Power ON / OFF button: Use this button to turn the washing
machine on and off. If a program is not set within 5 minutes of
turning the machine on, it will switch off automatically.
9
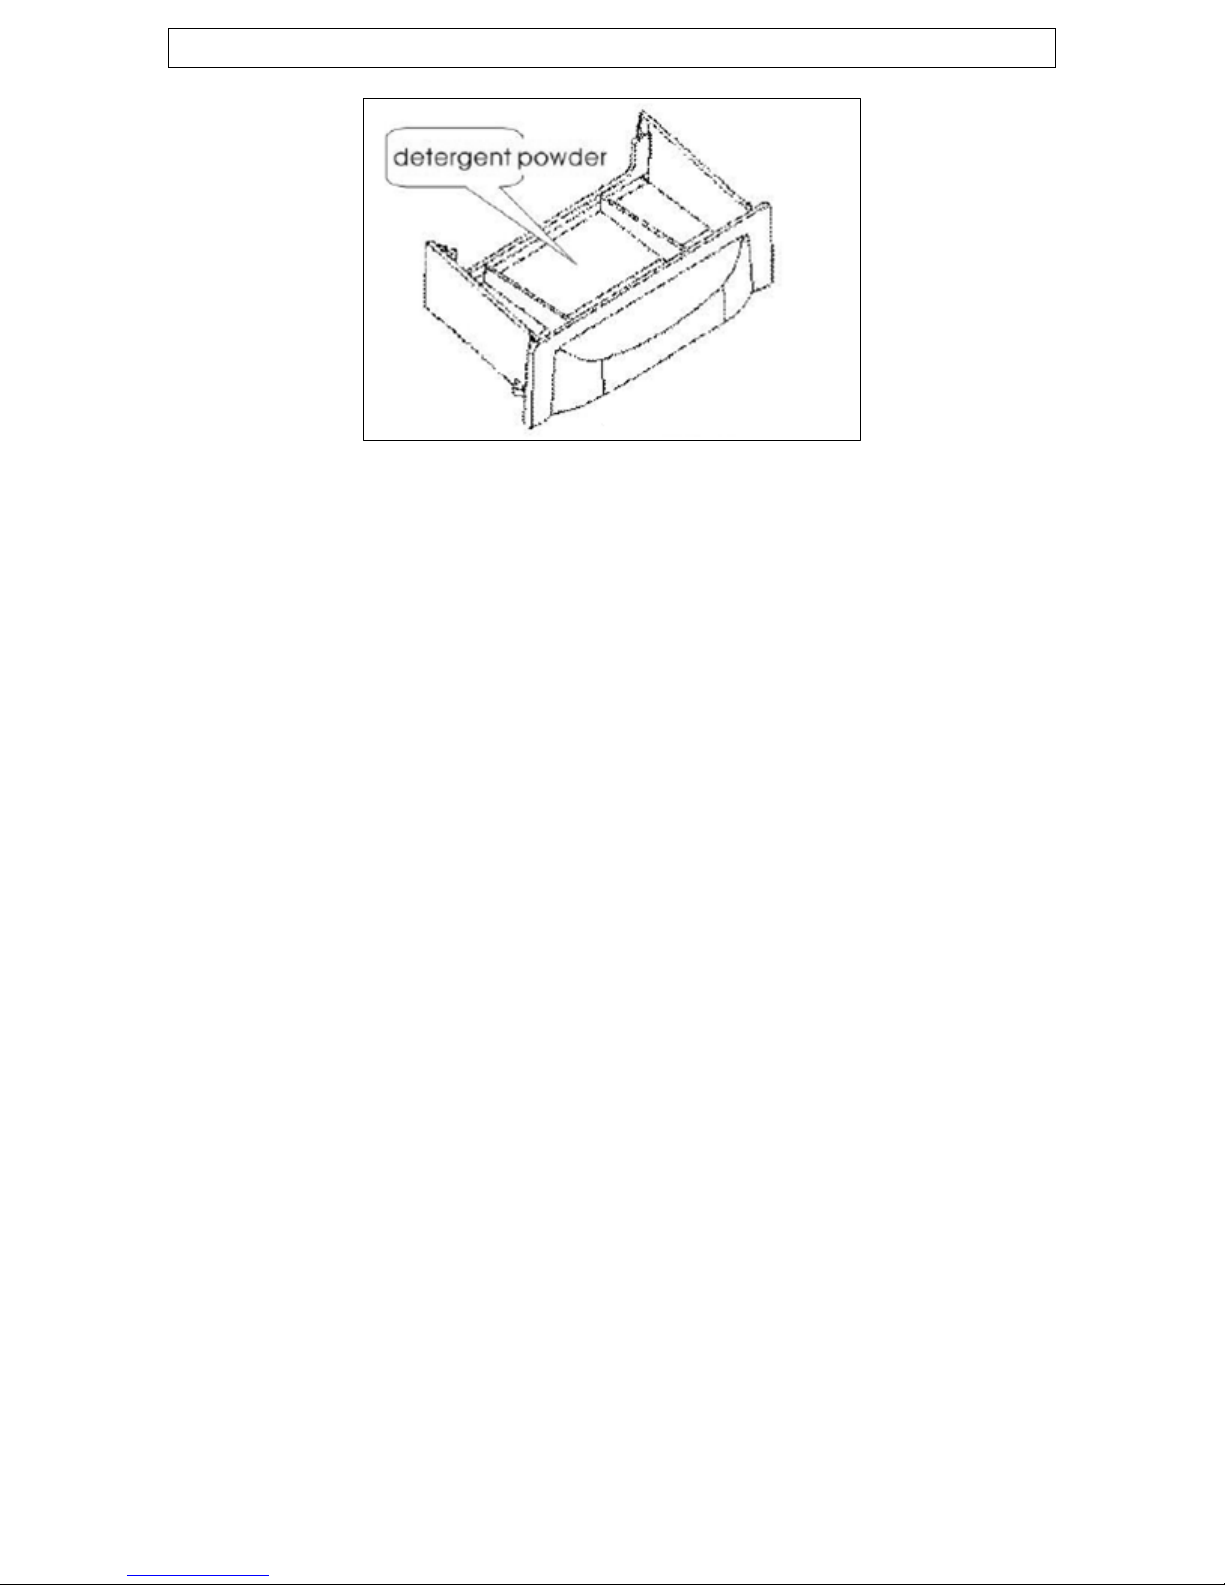
Detergent drawer
o Open the washing machine lid and pull out the detergent drawer
to add detergent powder to the wash program. Then push the
drawer back in before introducing laundry into the machine and
setting the wash program. Only powder detergents should
be placed in the drawer.
o If you wish to place detergent powder directly into the drum, you
should dilute it first in warm water. You can then place the
diluted detergent powder into the drum halfway through the
main wash fill. When you lift the lid to introduce the detergent,
you should ensure the machine has paused before doing so.
IMPORTANT: Do not place undiluted detergent powder directly
onto clothes as this can cause discoloration.
IMPORTANT: You should always use a low sudsing detergent in
your appliance.
o Liquid detergent can also be used if it is diluted first with a lot of
water and then placed into the drum. You should follow the same
procedure for detergent powder but choose a slightly higher
water level.
Bleaching agents
o A bleaching agent can be used if it first diluted with plenty of
water before pouring it into the drum.
o You should always follow the manufacturer’s directions when
using a bleaching agent to avoid damage to clothing.
o You should always wash the laundry as soon as possible after
the bleaching agent has been added. If the bleaching agent is
allowed to sit on clothes for a long period it can cause damage.
10
Softener
o An automatic softener input device is not available with this
machine, so if you would like to use it, you should pause the
wash program before the last bleaching operation and introduce
softener manually.
o You should always follow the manufacturer’s directions when
using softener to avoid damage to clothing.
The amount of detergent that you need to use in your appliance will
depend on:
o The degree of soiling. Lightly soiled garments in general
require less detergent.
o The size of the wash load. A smaller wash load will require a
reduction in the amount of detergent.
o The hardness of your tap water. The harder your water is,
then the more detergent you will need to use. The detergent
manufacturers normally give guidance as to how much extra
detergent should be used, depending on the hardness of the
water.
Preparing the wash cycle
Preparing your garments for washing
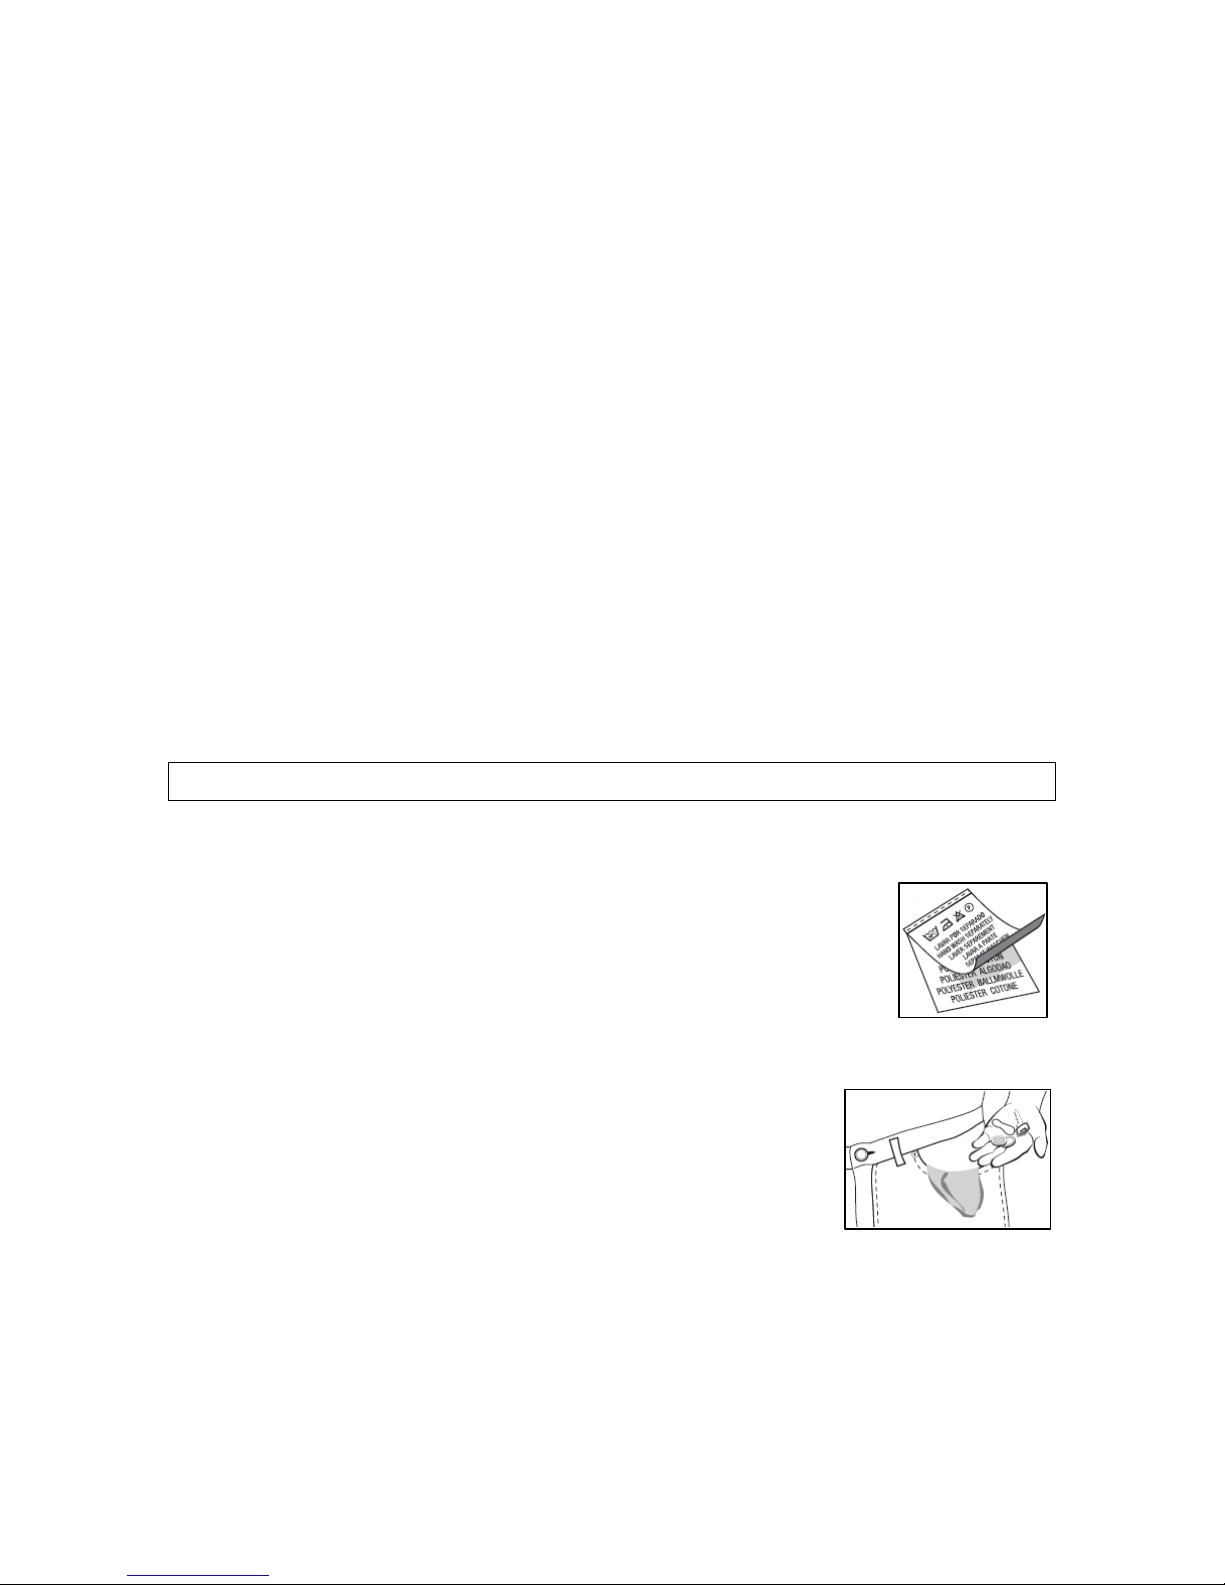
o Your washing should be sorted out, according to
the fabric type and the wash care symbol that is
printed on the garment’s wash care label (see
separate section on wash care symbols).
o Your washing should also be sorted out according to the degree
of soiling.
o Check all pockets on a garment to make sure
that they are empty.
o Remove any detachable metal items (badges, paperclips, safety
pins etc).
o Zips should be closed, duvet covers and pillow cases should be
buttoned up and any loose straps should be tied up. This will
help to prevent other garments from getting damaged during the
wash.
11
 Loading...