

Page 1
Venali Internet Fax Services | Microsoft® Office User Guide | www.venali.com
Desktop Fax Services: User Guide for
Microsoft® Office 2003
Version 1.0
Page 2

Contents
Introduction ................................................................................................................................. 4
Features for Microsoft® Office 2003 Users....................................................................................... 4
Requirements for using the Internet Fax service ............................................................................. 4
Registering for the Internet Fax service......................................................................................... 5
Sending Faxes............................................................................................................................... 5
Receiving Faxes.......................................................................................................................... 1 1
Account Management Center (AMC)................................................................................................ 1 2
Additional Resources.................................................................................................................... 1 6
Desktop Fax Services: User Guide for Microsoft® Office 2003 - 2 -
Page 3
Introduction
The purpose of this guide is to familiarize users with how the Venali Internet Fax Service works
within the Microsoft® Office System.
Venali Internet Fax Desktop Solutions are seamlessly integrated into Microsoft® Office 2003, enabling
you to send and receive faxes over a secure IP network from any email-enabled device. Messages can
be delivered to and received from anyone, worldwide.
With Venali Internet Fax service, individuals and companies optimize their business messaging
workflow, improve cost-efficiency, and are better able to manage their communications. Ultimately,
higher convenience, productivity and cost savings are achieved.
Features for Microsoft® Office 2003 Users
Send faxes from any email-enabled device and receive faxes into your email inbox
Choose a local fax number from over a thousand cities worldwide to receive faxes directly
into your email inbox
Custom cover sheets – select from pre-designed cover pages or customize your own
Calculate the cost of your domestic or international fax before sending it
Security Fax Tokens – ensures the validity and authentication of each delivered fax with an
extra layer of security during transmission
Venali Fax Protector - protects your fax number by blocking spam faxes from your email
inbox
Account Management Center –users can examine account information including change
password, account balance, billing address and payment information, activate/deactivate the
account, and modify inbound and outbound emails.
Requirements for using the Internet Fax service
There are two basic requirements:
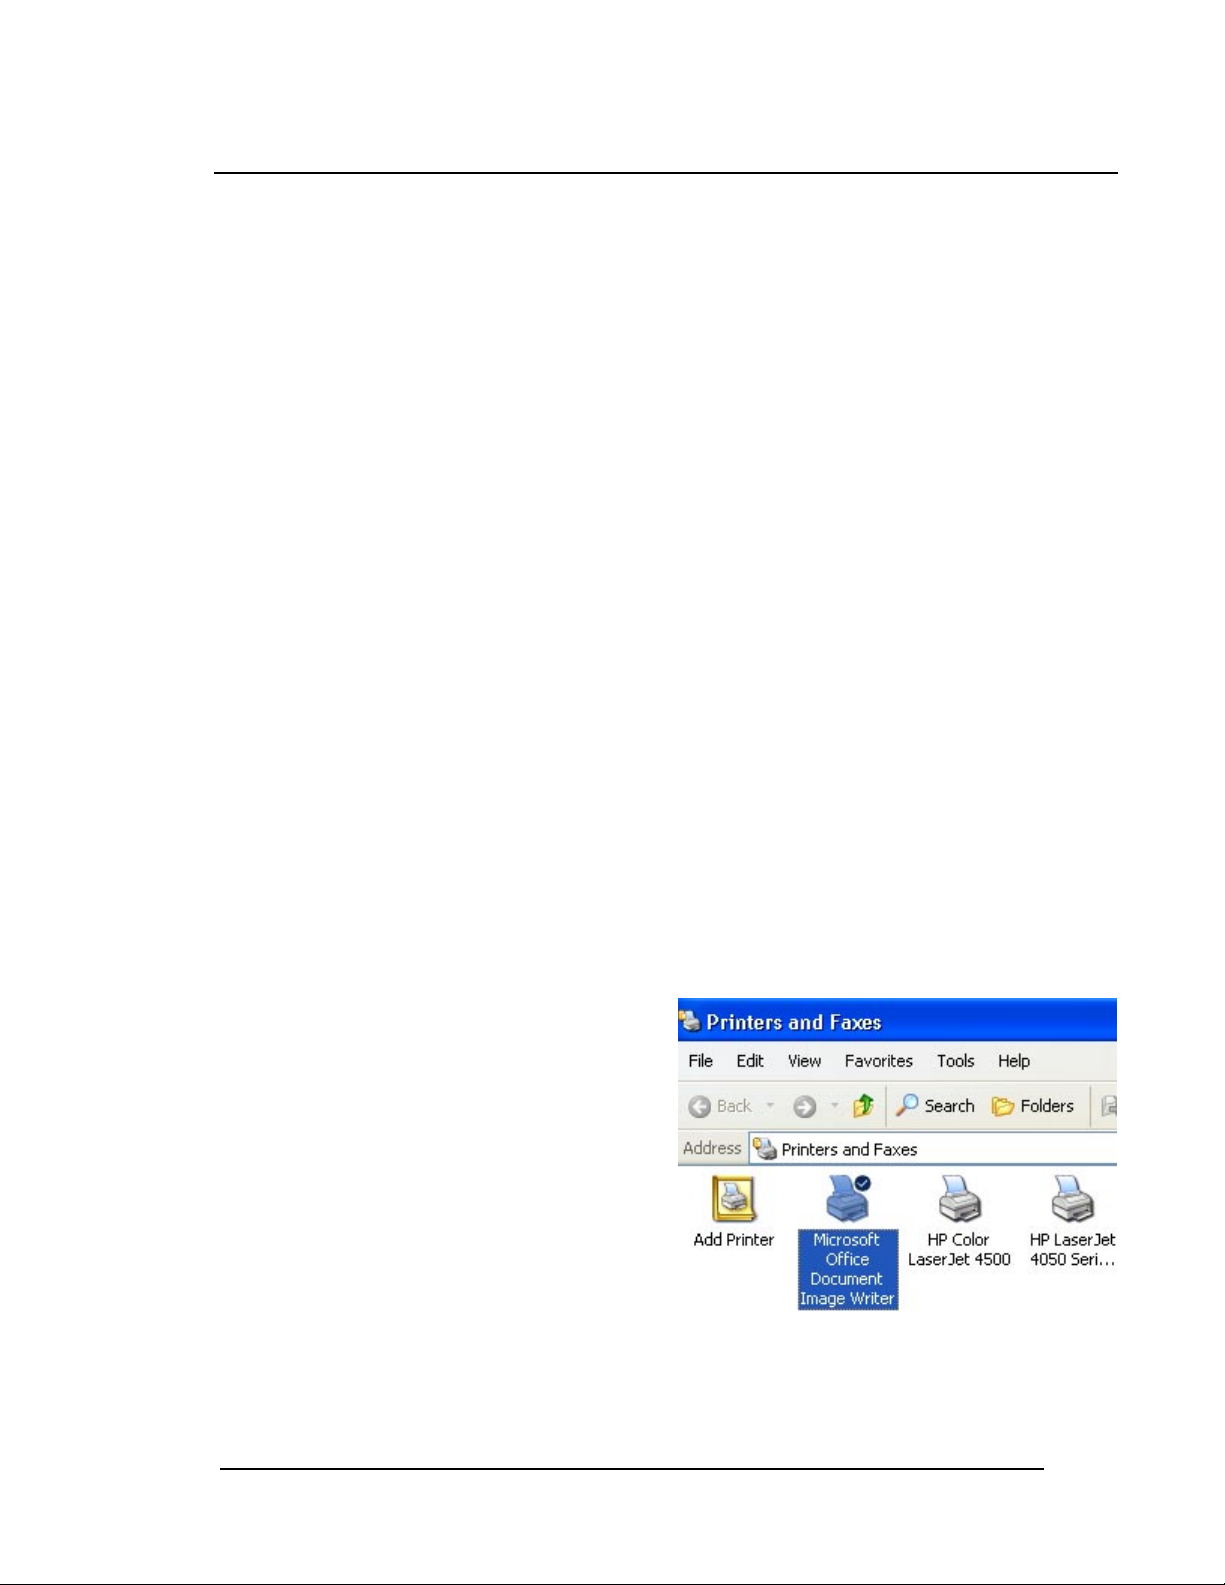
1. Microsoft® Office 2003 Software MUST be
installed
Printers folder must contain the Microsoft Office
Document Image Writer. (Note: If you installed
Microsoft® Office 2003 using the Administrator
account and are using another user account,
check the Printers folder to ensure that this
printer driver is installed.)
2. Valid Email Address
You must possess a valid email address to send faxes (no web-based email account.) Once you signedup for the fax service, you can add two more email addresses to your account using Venali Account
Management Center (AMC).
Desktop Fax Services: User Guide for Microsoft® Office 2003
Page 4

Registering for the Internet Fax service
The first time you're ready to fax a document using Microsoft® Office 2003:
1. Click "Sign-up for a FREE trial" on the Microsoft® Office 2003 sign-up page, select the type of
Internet Fax Package desired, and then click ‘Next’.
2. In the In-bound Fax Number Preferences section, select the type of number desired (metro
or toll-free). For metro, select the country, state and city, and click ‘Next’. (Note: toll-free
numbers are designated for usage within the continental U.S. Upon request, they may be enabled for
usage in Canada at an additional fee).
3. Enter a valid Email address (no web-based email account) for sending and receiving faxes,
and a password containing 6-12 characters, with at least one letter and one number. (Note: upon
completion of sign-up, you will be able enter additional email addresses for this account for use from
different computers, such as a laptop or home computer).
4. In the Venali Fax Services Agreement section, review the Terms and Conditions, select the
checkbox, and click ‘Next’.
5. In the Customer Registration section, enter your user information, and click ‘Next’. Follow
the same process in the Billing Information section, and select the checkbox if your billing address is
the same as your customer address.
6. In the Activate Account section, click Download Activation Program and OK to save
the program to a disk. Specify the file download location where you want to save the
Activation program, click Save and double-click Activate Venali Fax.exe program. Select
"Yes" when prompted to activate the Venali fax account. You will receive a dialog box
confirming that "Venali Fax Service has been activated on this computer. You may now send
faxes from Microsoft® Office 2003".
Sending Faxes
Faxes can be sent from a Tablet PC, laptop or the desktop simply by addressing an email message to
the recipient’s fax number and attaching the document(s) as you would an email.
There are two ways to send faxes: directly from any Microsoft Office 2003 application or from
Microsoft Outlook 2003.
Desktop Fax Services: User Guide for Microsoft® Office 2003
Page 5
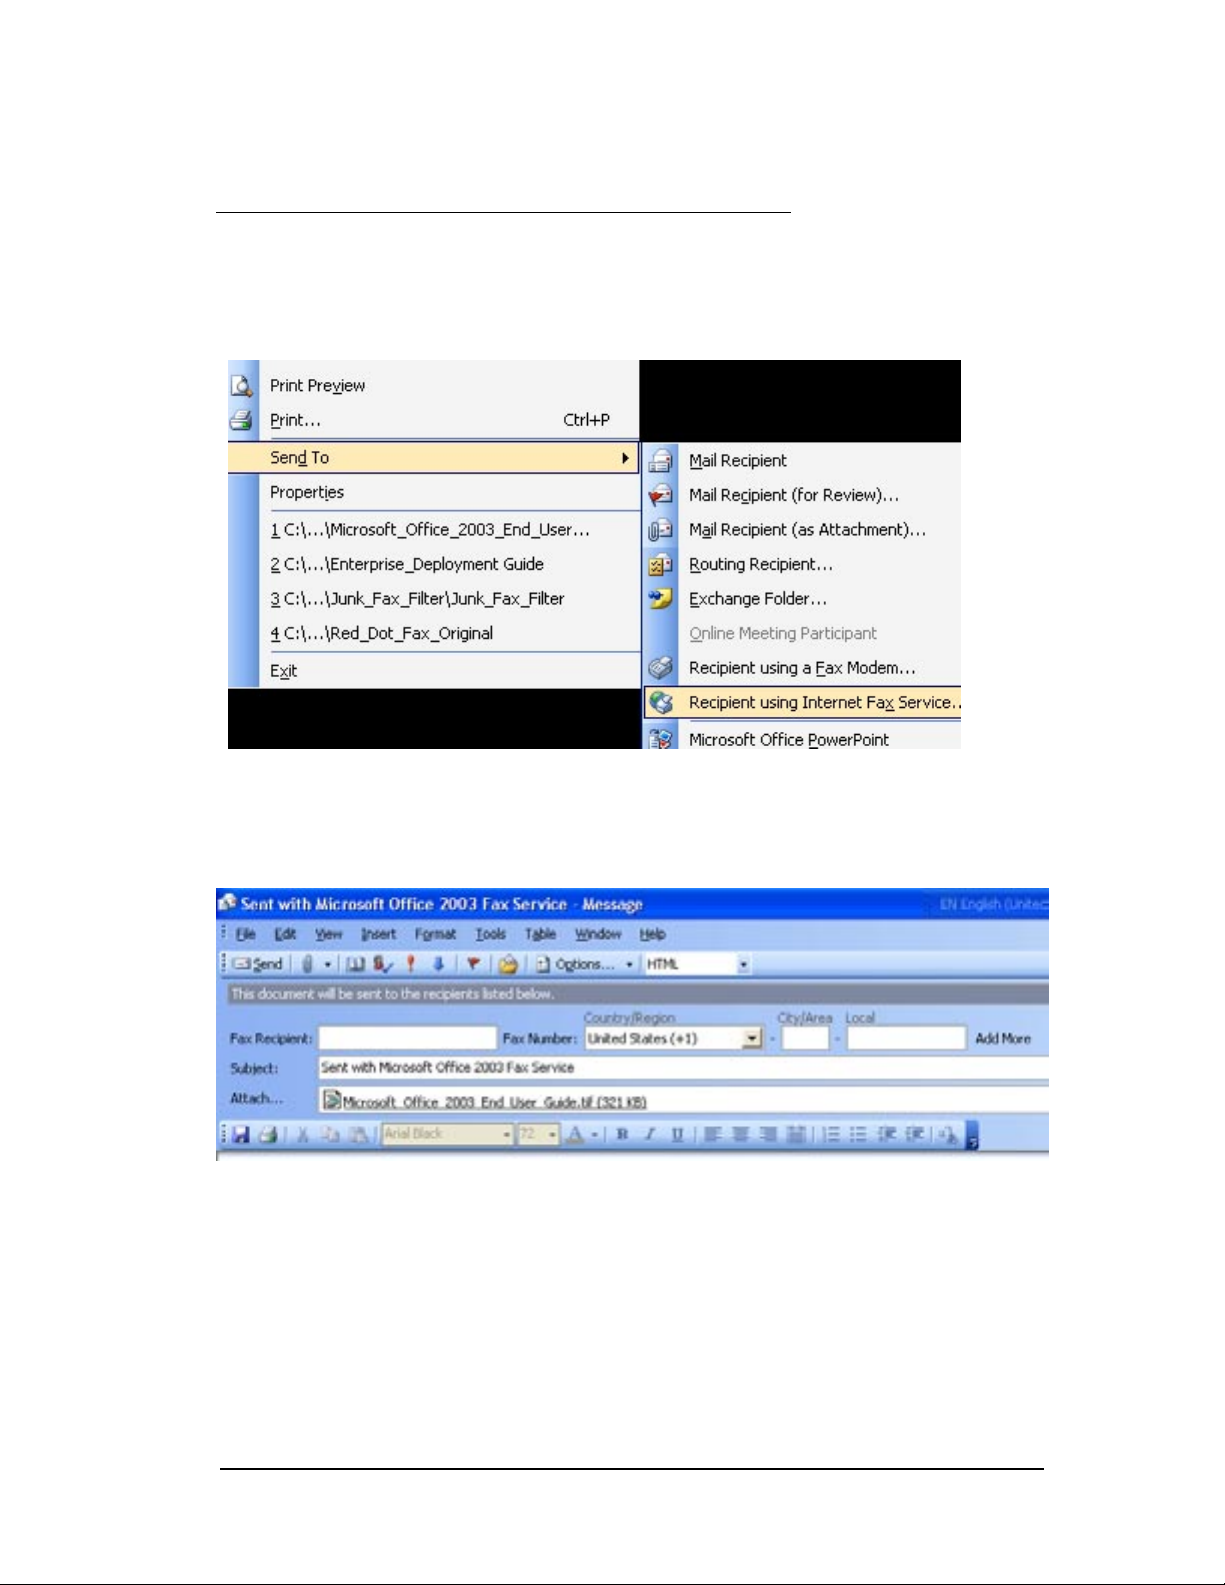
Instructions when faxing from Microsoft Office 2003 applications:
Select File > Send To > Recipient Using Internet Fax Service from the menu bar.
Microsoft Office 2003 will convert the document to an attachment to be faxed.
Address your fax: Enter the recipient's name in the “Fax Recipient” field, select the country of the
fax destination from the drop down menu, enter the city/area code and insert the fax number in the
“Local” field.
Select a cover sheet: From the task pane on the right-hand side, select the type of cover sheet you
would like to use: Business Fax, Personal Fax, or Standard Fax. To use a custom cover sheet, select
the “Custom” button to import a custom cover sheet saved on your hard drive into the menu bar.
Once you select the type of fax cover page, you can populate the necessary fields “Subject:”,
“Date:”, “To:”, “Phone Number:”, “Fax Number:”, “From:”, “Phone Number:”, “Fax Number:”,
and “Comments:.”
Alternatively, you can download variety of cover sheet templates for free from Office Marketplace
at:
Desktop Fax Services: User Guide for Microsoft® Office 2003
Page 6

http://officebeta.microsoft.com/templates/category.aspx?CategoryID=CT063477641033&CTT=4&Or
igin=CT063490451033
Note: The number of pages is calculated and printed on the cover page when the document is
attached – page one is the cover page and the attachments begin as page two. Any information
entered in the body of the email will appear on the cover page, including an email signature. If there
is footer to an email, such as a legal disclaimer, this will appear on the fax itself.
Send your fax to multiple recipients: To send a fax to more than one recipient, click Add More
and enter additional fax addresses in the “To” field as you would a regular email. Fax numbers should
be separated by a semicolon.
A fax can also be sent to both a fax number and an email address at the same time. There is no limit
to the number of recipients a fax can be addressed to; however, your company or internet service
provider (ISP) may place a limit on the number of recipients in one given fax transmission.
Desktop Fax Services: User Guide for Microsoft® Office 2003
Page 7

Attach additional documents: Documents are attached the same way as email attachments, simply
by clicking on the paperclip icon or selecting Insert > File from the Outlook menu bar. Multiple
documents can be attached to a single message.
Venali Internet Fax Service for Microsoft Office 2003 supports most file formats including: Microsoft
Word, Microsoft Excel, Microsoft PowerPoint, Adobe Acrobat PDF, Plain Text, TIFF (Groups 3 and
4), Postscript (Apple Laser Writer Plus), RTF, PCX, GIF, BMP, JPG, WMF, ASCII Files, HTML and
compressed documents/attachments (Win Zip).
There is a limit of 250 pages for any attachments. To extend the limit, please contact
support@venali.com with your account number and requested new page limits. Note: There may be
other limits imposed by either your IT department (for corporate customers) or other email policies
(ISPs).
Preview faxes before sending: Click the “Preview” button on the task pane to preview the fax
cover sheet before sending your fax. With a Tablet PC, you can also sign or annotate fax documents.
Desktop Fax Services: User Guide for Microsoft® Office 2003
Page 8

Calculate the cost of fax transmissions: The cost of the fax you’re sending is automatically
calculated once you click on the “Calculate Cost” button. Your customer ID number, total number of
fax pages, and the total cost of the fax, including all attachments will be displayed.
Note: a cost will be displayed even if those pages are included in the package selected by the user.
International traffic is always billed separately and is not included in the allocated pages or package
plans.
Security Fax Tokens: Security Fax Tokens are an authentication tool which provides an additional
layer of security. Each time a user sends a fax, a Security Fax Token is activated and sent along with
Desktop Fax Services: User Guide for Microsoft® Office 2003
Page 9

the fax. One Security Fax Token is used for each fax transmission, regardless of whether it was
successful or not.
Security Fax Tokens are a transparent process – they are installed when you first sign-up for service
with Venali and will automatically be replenished. If for some reason the automatic replenishment
mechanism fails, then you will be prompted to replenish the tokens manually.
Confirmation Report: Venali sends an email report confirming the delivery status for each fax sent.
Delivery reports usually take a few minutes unless there is a transmission error and retries are
necessary. If your email server is down for any reason, Venali will attempt to send your reports for
up to three days.
You will receive a confirmation report whether or not the fax was successfully delivered. The
confirmation report will specify why the fax did not go through. Your email confirmation will be
addressed from confirmations@ipfax.venali.net. The subject of the email will be whatever subject
was designated when the fax was sent.
Instructions when faxing from Microsoft Outlook 2003:
Select File > New > Internet Fax from the menu bar.
Desktop Fax Services: User Guide for Microsoft® Office 2003
Page 10

Address your fax: Enter the recipient's name in the “Fax Recipient” field, select the country of the
fax destination from the drop down menu, enter the city/area code and insert the fax number in the
“Local” field. Complete information in the “Subject” field, and attach the document(s) to fax. To
populate the cover sheet with information, click on each field and enter the requested information.
Note: Attachments will be delivered as page two, following the cover sheet.
Choose fax options: select a cover sheet, preview your fax, and calculate the cost of your fax. With
a Tablet PC, you can also sign or annotate fax documents.
Receiving Faxes
Fax correspondence sent to your individual fax number is received directly into your Microsoft
Outlook 2003 inbox as a TIFF or PDF email attachment. Faxes can be accessed immediately, or saved
for subsequent storing, printing or forwarding. Your fax number is never busy and multiple faxes
can be received simultaneously.
Receive Fax Notification: You will receive an email from emessaging@ipfax.venali.net notifying you
that a fax has been received. The sender’s fax number, if known, will appear in the Subject field of
the email message. The number of pages of the attachment will appear in the body of the email.
View Attachments: To open an attachment, double click on the TIFF/PDF icon under the
“Attachments” header of the email – the file will automatically open directly in the window using
imaging software. Note: Imaging software or any software supporting multi-page TIFF must be
installed on the user’s computer. In the case of PDF files, Adobe Acrobat must be installed.
Store Faxes and Attachments: You may opt to store the fax/attachment in a folder in Outlook or on
the hard drive of your computer. If the latter option is selected, right click on the attachment and
select the drive where the attachment should be stored and hit “Save”.
Multiple Recipients Receiving Faxes: Faxes to a single number can be sent to multiple users. The
total of three users can be assigned to a single in-bound fax number including the current user. You
can add or delete additional users through Accont Management Center (AMC)
Venali Junk Fax Filter: Your email inbox is protected from spam faxes when using the Venali Junk
Fax Filter, a patent-pending technology from Venali that detects and eliminates junk faxes from
cluttering your email inbox. This service is provided free of charge by Venali, and all you need to do
is setup email wizard or rules to filter out the spam to take advantage of this service.
Desktop Fax Services: User Guide for Microsoft® Office 2003
Page 11

Account Management Center (AMC)
Through the Account Management Center, users can examine account information including change
password, account balance, billing address and payment information, activate/deactivate your
account, and modify inbound and outbound emails.
Internet Fax Settings
Out-bound: You can assign upto three email addresses as your origin of your faxes. In the Account
Management Center, select "Out-bound" under Internet Fax Settings, click “Add” button. Enter first
and last name, additional email address. To “Add” a new email account, click “Update”.
In-bound: You can also add additional inbound fax number to your account (with additional fees).
Select "In-bound" under Internet Fax Setting, and under “In-bound Settings” click “Add” button nexto
to inbound fax number.
Desktop Fax Services: User Guide for Microsoft® Office 2003
Page 12

In the “Add In-bound Fax Number” section, select the type of number desired (metro or toll-free).
For metro, select the country, state and city. Enter the destination email address for receiving
faxes. If you'd like your faxes sent to you in PDF format, change the file type to PDF attachment.
When finished, click the “Add Fax Number” button to apply the setting.
Desktop Fax Services: User Guide for Microsoft® Office 2003
Page 13

To add additional recipient corespending to the inbound number you have been assigned to, select
"In-bound" under Internet Fax Setting, and under “In-bound Settings” click “Add” button nexto to fax
recipient. In the “Add Recipient to Fax Number” section, enter in destination email, file type (TIFF
or PDF attachment), and desired language setting. When finished, click “Add Recipient”.
Desktop Fax Services: User Guide for Microsoft® Office 2003
Page 14

(Note: toll-free numbers are designated for usage within the continental U.S. Upon request, they may
be enabled for usage in Canada at an additional fee).
Change password: Your User ID (account number) and Password is provided to the authorized
account contact at the time of account sign-up/registration. If you would like to change your
password, click "Change Password" under “Internet Fax Settings” menu. Enter your existing
password, then enter a new password, verify the new password and click "Update". Your new
password will be applied on your next login.
Cancel Account: You will always have the option of canceling our services thourgh the Account
Management Center. In the Account Management Center, select "Cancel Acount" under Internet Fax
Settings, and let us the reason you are canceling our service. Click “Cancel Account” to finalize the
cancellation process.
Customer Information
Desktop Fax Services: User Guide for Microsoft® Office 2003
Page 15

Personal Profile: Users can update their customer registration information by clicking "Personal
Profile" under Customer Information. Enter modified information and click "Update"
Billing information: Users can change the payment method and billing information. To change
information, click "Billing Information" under customer Information. Enter any new information and
click "Update".
Activate account: You must activate or re-activate your account to be able to use Microsoft Office
2003 Fax Service. Select "Activate Account" under Account Settings, then click "Download Activation
Program" and save the program to disk. Specify the file download location where you want to save
the Activation program, click Save, locate the program, and double-click the Activate Venali Fax.exe
program. Follow the prompts for installation, and then click "Finish". You will receive a dialog window
stating "All processes have completed successfully, thank you for using Venali Internet Fax". Click OK
to close the window.
You can also deactivate your account by selecting "Activate Account", then clicking the "Deactivate
your Account" button.
Log Out: Please log out when finished with modification of your account. If you have any other
questions, contact the venali support team and submit inquiries to the Venali Support team.
Questions will be answered within 24 hours.
Forgot password: Your User ID (account number) and Password is provided to the authorized
account contact at the time of account sign-up/registration. If you forgot your password, click
"Account Log-in", then click "Forgot Password" or click here. Please enter your User ID. A dialog
message will prompt you to answer the security question you previously entered. Click "Submit" and
your password will be sent to the email address that was registered with your account at time of
sign-up.
Additional Resources
Support
www.venali.com/support/index.asp
Covers support topics such as account information, customer service, fax to email, email to fax,
production fax, web to fax, security, and technology.
Desktop Fax Services: User Guide for Microsoft® Office 2003
Page 16

For any other issues, please contact support@venali.com.
♦♦♦
This document is provided for informational purposes only and Venali, Inc. makes no warranties, either express or implied, in this
document. Information in this document is subject to change without notice. The entire risk of the use or the results of the use of this
document remains with the user. Complying with all applicable copyright laws is the responsibility of the user. Without limiting the
rights under copyright, no part of this document may be reproduced, stored in or introduced into a retrieval system, or transmitted in
any form or by any means (electronic, mechanical, photocopying, recording, or otherwise), or for any purpose, without the express
written permission of Venali, Inc.
Venali, Inc. may have patents, patent applications, trademarks, copyrights, or other intellectual property rights covering subject
matter in this document and reserves sole ownership of all such rights.
” 2004 Venali, Inc. All rights reserved.
The Venali name and logo is either registered trademarks or trademarks of Venali, Inc. in the U.S.A. and/or other countries.
Desktop Fax Services: User Guide for Microsoft® Office 2003
 Loading...