

Page 1
VR2AR/VR2Tx Receivers
Field Communication Quick Guide
This Field Communication Quick Guide provides information on key acoustic transponding procedures. Full details for
transponding procedures are found in the VR100 user manual and at www.vemco.com. We strongly recommend you study the full
manual before using this quick guide.
Equipment and Setup
Acoustic transponding communication requires three elements:
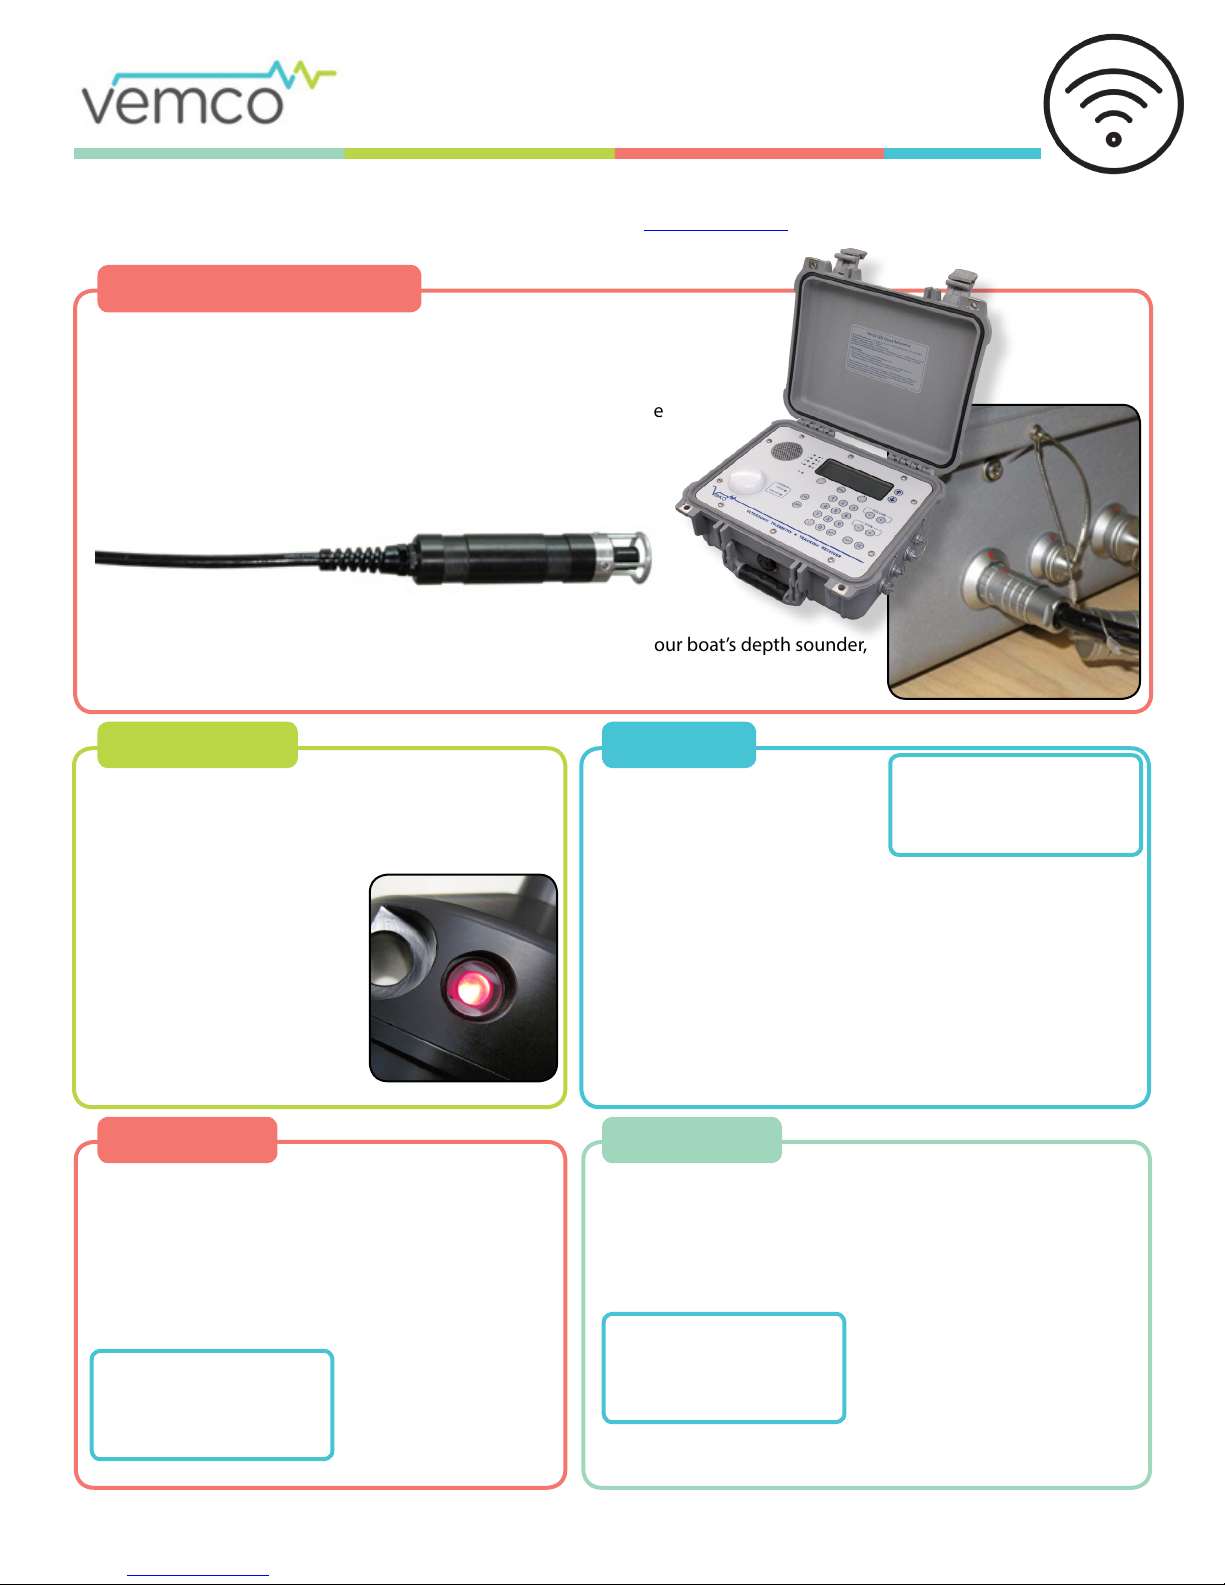
a receiver (VR2Tx or VR2AR), a VR100-200 receiver, and a 69kHz
transponding hydrophone like the one shown below.
Connect the transponding hydrophone to the rst connector on the
side of the VR100-200 case (see photo, far right).
Place the transponding hydrophone in the water so it is at least 5m
below the hull of the boat. The hydrophone needs line-of-sight to
the receiver.
Make sure the hydrophone doesn’t bang against the hull. Turn o your boat’s depth sounder,
and if possible, the engine. These can interfere with communication.
Status Light
Before deploying a VR2Tx or VR2AR receiver, watch
the Status Light for
seconds indicating receiver is in Recording Mode.
If there are no ashes, the
VR2Tx/VR2AR is not powered.
Green ashes indicate acoustic
pings were transmitted, but
only if the transmit feature is
enabled.
two quick red ashes every 5
Health
You are encouraged to use Get Health to establish
communications, as it takes less time (at 69kHz).
1. Select Status…
2. Select Get Health…
3. Wait while health information is gathered from
the receiver and then displayed. From top:
VR2AR:012345 170m
Batt: <25% * left
Mem: 0-30% used
Tilt: 0-11° Resend
• serial number & slant
range
• battery life
• memory used
• tilt angle from vertical
Connect
1. Turn on the VR100-200.
2. On the main menu, select
Transpond.
3. To scan for VR2Tx and VR2AR receivers in the area, select Auto
Scan or Manual Scan. Alternately, select Add Device and
enter the receiver serial number.
4. Wait while the “wake-up” command is broadcast, and again
for responses from units in the area. These wait times are xed
and displayed with a “T-_” counter. The VR100-200 will not
respond to user input until the wait times are completed.
5. Select the desired unit from those that responded. If your
desired unit is not listed, select Rescan to try again.
SCANNING....Found 3
VR2AR:012344 100m
T-13 63dB▐▐▐
M00 Mute
Range
1. Select Status…
2. Select Get Range…
3. Wait while range/depth information is gathered from the
receiver and then displayed.
VR2AR:012345 170m
hRange: 80m
Depth: 150m
Resend
From top:
• serial number & slant range
• horizontal range (AR only)
• depth (AR only)
To refresh the information
onscreen, select Resend.
* The remaining battery capacity displayed on the VR100 (Batt: xx%) is a soft counter intended to estimate the unit’s remaining battery life. For the counter to
display the correct battery capacity, you must connect to VUE and initialize the receiver each time the receiver battery is replaced (see receiver manual for details).
Page 2
VR2AR/VR2Tx Receivers
Field Communication Quick Guide
Detections
On the transponding Status menu, select Detections…(#3).
Make selection based on desired information:
Total Detects – amount of detections stored in the VRTx/
VR2AR receiver since last initialization
Since Ooad – amount of detections stored since data was last ooaded to VUE
Since Marking – amount of detections stored since the receiver was last “marked”
Detection amounts and times are rounded for easier transmission.
Marking clears the Since Marking counters (detections, pings, sync tag transmissions) as well as the entire Watch Table.
1 Get Range
2 Get Health
3 Detections...
Select
Acoustic Release (VR2AR only)
1. After selecting/adding a receiver, select Acoustic Release (#3).
2. Verify Status:
a. To view the VR2AR’s release status, select Release Status. It should report Unarmed at
this stage. Press MENU to go back to the menu.
1 Total Detects...
2SinceOfoad...
3 Since Marking...
Select
VR2AR:000001 170m
Detects: 91,072
Last: May26/14 17:02
TOTAL Resend
1 Status
2 Arm
3 Activate
Select
3. Arm receiver:
a. Select Arm and wait for the status to change to Armed.
NOTE: A VR2AR with rmware 1.2.5 and up does not require this arming step.
4. Activate release:
a. Select Activate to send the release command. After reading the conrmation screen, select
Activate again.
b. Wait while the mooring lug is ejected from the VR2AR. The status is reported as Opening until
the VR2AR’s motor has completed the task, at which time the status changes to Open.
5. Press MENU to go back a screen and then select Status. The current status is reported and
refreshing the information (Resend) allows you to view the progress to surface.
6. To refresh the depth value, select Resend and “watch” the VR2AR ascend. This also reports
the horizontal distance to the receiver for easier retrieval.
Trouble?
If receivers do not respond to commands, try the following suggestions:
• Move the research vessel closer to the VR2Tx/VR2AR.
• Check the power level setting of the VR100-200. On the main
screen, select Transpond and then Hydrophone Power
(#4). If the power is low,
increase the power level
and scan for receivers
again. If the power level is
high and you are working
in shallow water, decrease
the power level and scan again (high power may cause
echoes under certain conditions such as shallow water,
reective environments, or when too close to the receiver).
Transmit power level
1 2 3 4 5 6 7
*
Set
• Manually increase the Gain on the VR100.
• Check the receiver’s transmit power level (Settings > Power
Level) and increase it if possible. If power is high, lower
power to decrease echo eects.
• A successful release will report Opening and then
change to Open; all other values will warrant a Retry
(i.e. “Jammed”, “Unarmed”, “ERROR”).If you still don’t have
success, contact VEMCO.
• If Unarmed is reported when trying to release, select
Acoustic Release (#3) and then Arm (#2) to arm the
receiver and prepare it for release. Select Activate to
perform the release.
VR2AR:000001 150m
Status: Opened
hRange: 80m
Depth: 130m Resend
DOC-5570-04
+1 902-450-1700
www.vemco.com
 Loading...