

Page 1

PS47
Official User Guide
Page 2

TABLE OF CONTENTS
WELCOME
I. GET ACQUAINTED
II. HAND GESTURES
III. GETTING STARTED
IV. YOUR HOME SCREEN
V. CONNECTING TO WI-FI
VI. EMAIL SET UP
VII. SAVING BATTERY
VIII. MICRO SD CARDS
IX. DEVICE STORAGE
X. TRANSFER FILES
XI. FILE FORMATS
XII. KINDLE FOR ANDROID
XIII. READING EPUBS
XIV. CAMERA
XV. BLUETOOTH
XVI. INSTALLING APPS
XVII. PREINSTALLED APPS
XVIII. MULTIMEDIA
XIX. SYSTEM REQUIREMENTS
XX. OPEN SOURCE LICENSE
XXI. SUPPORT
XXII. CONTACT US
XXIII. FCC INFORMATION
3
4-6
7-8
9-10
11-12
13-15
16-17
18
19
20
21-22
23
24-25
26
27
28
29-30
31-32
33-34
35
36
37
38
39
2
Page 3
Thanks for Choosing Cruz
Thank you for purchasing a Velocity Micro CRUZ PS47! We appreciate your
business and know you’ll love your brand new multimedia device. This guide
is intended to help you with initial setup of your device and to familiarize you
with the Android operating system.
Stay Up to Date
For the latest updates, news, giveaways, downloads, and support tips, be
sure to follow CRUZ on facebook and twitter! Check out our homepage at
www.cruzreader.com for details!
Registration
Before we get started, we recommend that
you register your CRUZ PS47. This allows
you to get the most out of our CRUZ technical
support. To register your product, please
visit:
www.cruzreader.com/support
Page 4
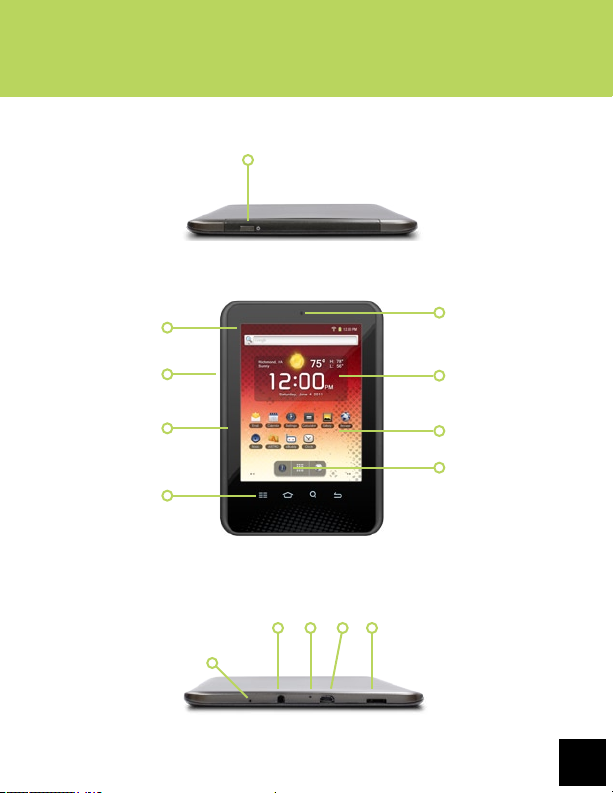
I. GET ACQUAINTED
Getting Acquainted
A
B
C
D
E
K L M
J
N
F
G
H
I
4
Page 5

I. GET ACQUAINTED
A. Power Button
The power button is located on the top left-hand corner of the device. While
running, this button is also used to send the CRUZ into “Sleep” mode, as well
as waking the device up.
B. Status Bar
The Status Bar is a black strip located at the top of the screen with several
icons on it. Primarily this bar is used to display notifications and statuses
concerning your Cruz and the applications it is running.
C. Volume Buttons
Exterior buttons that control the device’s volume (+/-)
D. Capacitive Touch Screen
Your Cruz is armed with an ultra-responsive capacitive touch screen. This
technology does not support standard styluses and requires the electrical
current in your finger tips to function.
E. Quick Launch Buttons
Under the touch screen, there are 4 quicklaunch buttons. These control common actions. From left to right, they are: Menu, Home, Search, and Return.
F. Camera
Forward-facing camera used for video-chat applications like Skype.
G. Widget Area
Widgets are small applications that have functionality and accessibility
directly from your home-screen.
Page 6

I. GET ACQUAINTED
Getting Acquainted
H. Applications
Your Home-screen is very much like the “desktop” on a computer. It is a
place for app shortcuts.
I. Nav Bar
The Nav Bar is a semi-transparent 3-button bar at the bottom of the home
screen. From left to right, the buttons are: “Settings,” “App Panel,” and “Web
Browser.”
J. Reset
The reset button is inset to avoid accidental activation. To reset the device,
use a thin, slender instrument to press down the button. Hold until the device
shuts off. Press the Power button to restart the device.
K. Headphone Jack
Connect earbuds through this port for a personal media experience.
L. Charging Indicator LED
When your Cruz is charging, this LED light will be on.
M. Micro USB Port
The Micro-USB port is used to tether your CRUZ PS47 to a computer for file
transfer as well as battery recharge.
N. microSD Slot
With the integrated microSD card slot, your CRUZ has up to 32 GB of
expandable storage. Carry tons of photos, videos, eBooks, music, and more
wherever you go.
6
Page 7
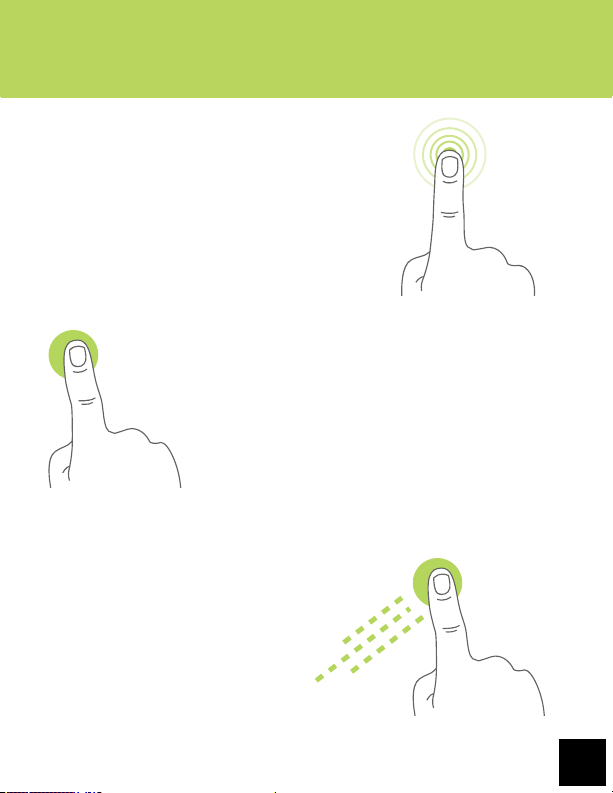
II. HAND GESTURES
Tapping
Touch your finger to the screen and remove
immediately to select an item on the screen.
This is the equivalent of a mouse “click” on
a computer.
Long-Pressing
Press and hold your finger on the screen
for 2-3 seconds. Oftentimes, this will open
menu options or perform an app-specific
function.
Dragging
Press and hold your finger on the
screen, then slide in the desired
direction.
Page 8
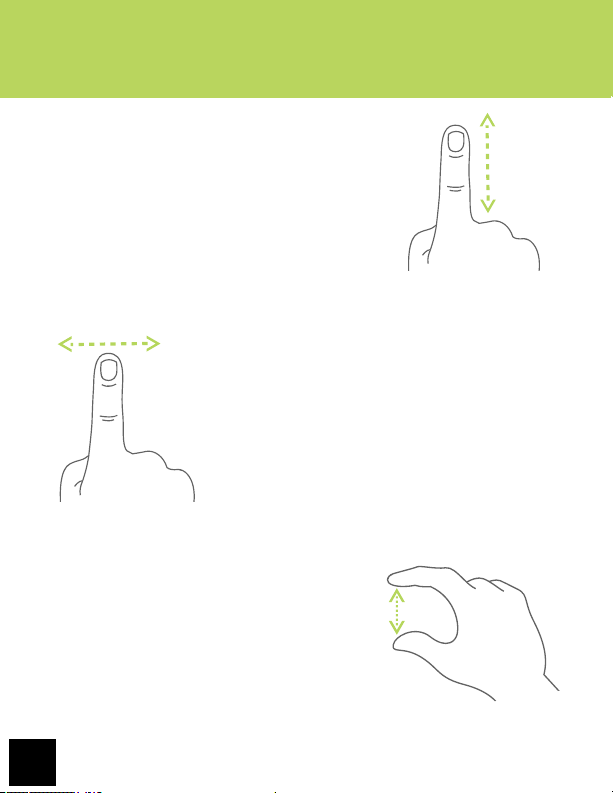
II. HAND GESTURES
Scrolling
Sliding your finger up and down in a vertical
motion scrolls through menus, websites,
and lists. The quicker you slide your finger,
the greater the momentum and speed of the
on-screen scrolling motion.
Swiping
Sliding your finger left and right scrolls
horizontally. Some eReader apps are
designed to turn the page in the direction
you swipe.
Pinching
Positioning your thumb and index finger
roughly 1-inch apart while “pinching” or
“spreading” them typically zooms in or out,
respectively.
8
Page 9
III. GETTING STARTED
To start your Cruz, press the on/off button located bottom-right corner of the
device. When you first turn on the Cruz, you will be greeted with a CRUZ
logo, then an ANDROID logo, and then your Home screen.
when using Wi-Fi and maximum screen brightness.
Getting Started
The display has a screen timeout by default
set to 10 min. If the unit is left inactive for
that period of time, the screen will go dark as
if turned off. However, it is simply in standby
mode. Tap the power button and a screen
will appear with a green padlock button on
the lower lefthand corner. This is your Lock
Screen. Drag the padlock to the right to
unlock.
The battery should have a nominal charge
on it out of the box and should charge fairly
rapidly. Charge your PS47 via micro-USB
cable connected to your PC. Battery life
will vary due to many conditions, especially
Sleep Mode and Powering Down
To save battery, you should put your Cruz in sleep mode by turning off the
LCD display. To do this, tap (not hold) the power button. Tap again to bring up
the lock screen. In standby mode, the battery still discharges as the device
continues to run. To turn off your Cruz completely, press and hold the power
button until the “Tablet options” dialog appears and tap “Power off.” You
should then see a dialog box that reads: “Your tablet will shut down.” Tap
“OK” and your device will proceed to shut down.
9
Page 10

III. GETTING STARTED
Getting Started
Quick Launch Buttons
There are four buttons along the bottom edge of the touch screen. These are
the Quick Launch buttons. They control the most frequently used functions in
the Android platform. From left to right:
MENU
Generally this button is utilized for accessing settings, options, or
preferences. It’s function varies from app to app.
HOME
Returns to the home screen. Keep in mind hitting the Home button does not
necessarily stop an application from running. Oftentimes apps will continue
to run in the “background” and bog down memory and performance.
SEARCH
Brings up a search box to find keywords and phrases.
BACK
Returns to the previously viewed page or option screen. If you tap this button
enough times, it will return to the Home Screen.
10
Page 11
IV. YOUR HOMESCREEN
Think of your home screen as your desktop. What goes on the home screen
is up to you. You can fill the space with any combination of shortcuts, widgets,
and folders you like. Some preinstalled shortcut icons will appear at the
bottom, and a Google Search Widget appears at the top. You have five
customizable home screens in total.
When you power up your Cruz for the first time, you’ll see the main homescreen panel. This panel is typically centered; you can access additional
panels on either side of the main one by sliding your finger left or right.
Tapping the dots in the bottom left and right screen will also shift home
screens.
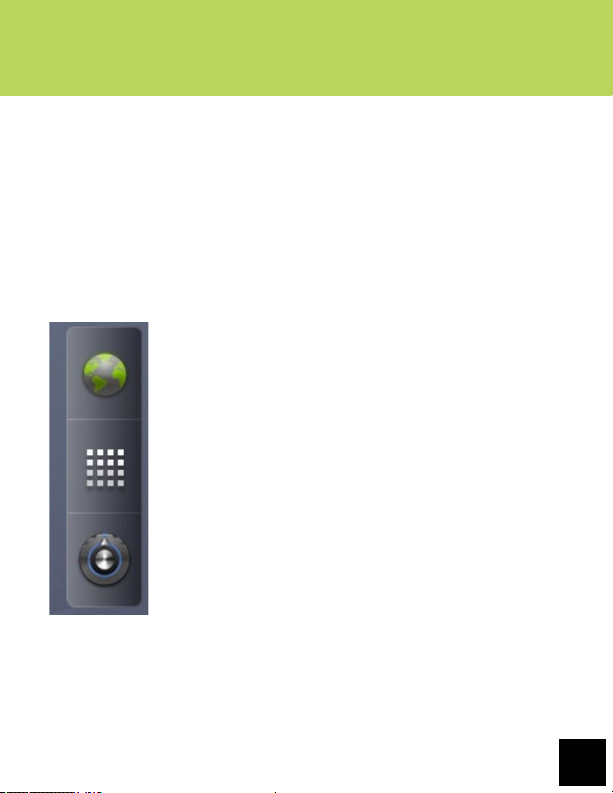
When in landscape view, there are 3 shortcut buttons
on the right hand side of the screen. When in portraitview, these buttons will appear on the bottom of your
screen. The first is shortcut button to your web browser.
It is designated by a globe. Next is a shortcut to the
application panel, which shows you all the apps you
currently have installed on the device. The icon for this
is 4 rows of tiny squares. The last button is a shortcut to
your settings panel, which is the same grey dial icon as
the Wi-Fi settings icon on the homescreen.
On either side of these nav buttons are small white
“dots.” Tapping these will cycle through your various
home screens. You have five (5) fully customizable “home
screens” in total.
Getting Started
11
Page 12
IV. YOUR HOME SCREEN
Getting Started
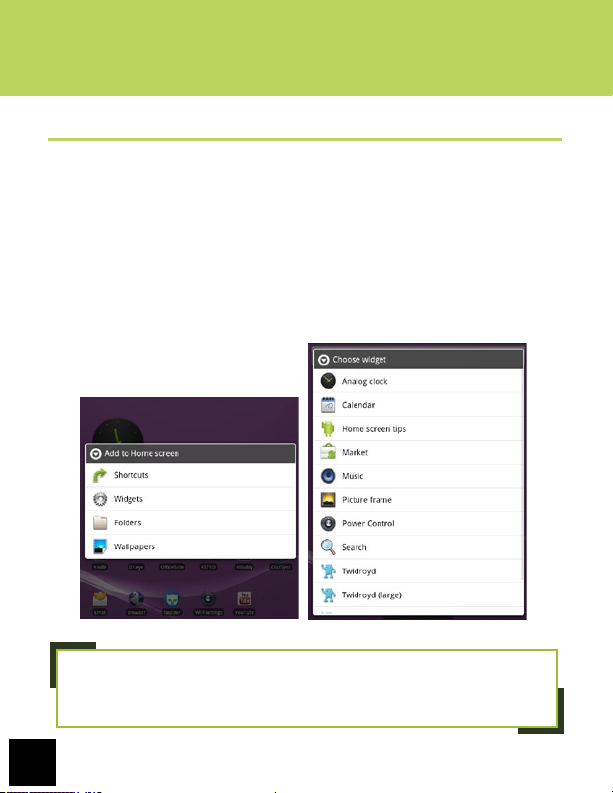
Adding Widgets to the Home Screen
Widgets allow you to place a function of an app onto your Home Screen. For
instance, you may add an Analog clock, calendar, picture frame, and other
useful widgets. To add a widget, long-press, or tap/hold your finger on any
open space on your home screen, and select Widgets from the context menu
that opens. From there, select any of the available widgets.
You may long-tap and drag any widget to move it to the desired location on
your Home Screen. To remove a widget, long-tap the widget, a trash can will
appear at the bottom of the Home Screen. Drag the widget into the trash can.
When it turns red, release the widget into the trash.
NOTE: Widgets that require web access are known to drain battery life. If
you choose to install a widget that does need web access, you may want
to consider switching it off when not in use for the best user experience
12
Page 13

V. CONNECTING TO WI-FI
Now that you’re familiar with the layout of the device and some of the
functions of the Home Screen, it’s time to set up your Wi-Fi. You will need
Wi-Fi access to download eBooks through the Kindle for Android app, as well
as web surfing and email.
For the sake of this guide, the assumption is that you are connecting your
Cruz to your home Wi-Fi Access Point (AP) or a free unsecured Wi-Fi
hotspot. To start, select the shortcut icon that reads “Wireless and Network”
on the bottom left of the Home Screen.
NOTE: The Wi-Fi settings icon is an image of a dial. It
should be located in the bottom-right of your screen upon
powering on the Cruz.
Once Wireless and Network opens, you’ll be presented with a screen that has
two check mark options at the top: “Wi-Fi” and “Network Notification.” Ensure
that both are enabled with green check marks. After a moment, your Wi-Fi
networks should populate. Detected networks will appear with a SSID to the
left, a status line beneath the SSID, and a signal strength icon to the right.
Those that are secure will display a padlock.
Getting Started
Secure
Unsecure
13
Page 14

V. CONNECTING TO WI-FI
Choose which network you want to connect to and tap the name of that
network. When dealing with an unprotected Wi-Fi network, a confirmation
box will flash on the screen. Tap “Connect” to continue. When dealing with
a secure Wi-Fi network, first check the box that says “Show Password.” This
makes it easier to see that you have entered the password correctly. Then
tap the password text field for the popup keyboard, and enter the security key.
Once the Cruz has successfully connected to any SSID, it is saved. The
unit will try to auto-connect to the most recent connection. When that SSID
is no longer available, it is listed in the Wi-Fi networks list as “Not in range,
remembered.”
Getting Started
Public Wi-Fi Hotspots
Follow the same steps as before to connect to public Wi-Fi networks.
Many public Wi-Fi hotspots are freely accessible, though some are secured.
Some require you to agree to a terms and conditions prior to connecting.
When these additional validations are required, seek assistance from the
business providing the Wi-Fi hotspot.
Wi-Fi Troubleshooting
If your connection attempt fails with the error message “Invalid Password,”
the password you entered does not match the Wi-Fi router password. Please
verify your password. Then tap on the router SSID, tap “Forget” to clear the
stored password, allow time for your router to be re-found, and then enter the
correct password.
If you change the password of your wireless network, be sure to also change
the “remembered” password.
14
Page 15

V. CONNECTING TO WI-FI
If the Wi-Fi router is not found automatically, you may need to scan again by
tapping Menu > Scan.
If scanning appears ineffective, turn off Wi-Fi and turn it back on again, then
scan again.
If your Wi-Fi seems to turn off when your device sleeps, you may disable this
under Menu > Wi-Fi Sleep Policy.
If your connection tends to drop frequently, be sure that the signal strength
is not too weak or not in range, understanding that other radio devices like
cordless phones may interfere with the signal quality.
Some Wi-Fi signals, though listed as unsecured, may still block connections
using MAC address filtering. This will need to be disabled in the Wi-Fi router,
or the device’s MAC address will need to be added to the router as an
acceptable device connection. You can find the CRUZ PS47’s MAC address
under the Wi-Fi settings > Menu > Advanced.
Some Wi-Fi signals (public hot-spots, hotels, hospitals, airports, etc) appear
to be unsecured, but require security credentials upon opening a new web
browser. You will need to agree to a terms of use before getting full web
access.
Getting Started
15
Page 16

VI. EMAIL SET UP
The pre-installed Email app is a simple but effective email client for both
POP3 and IMAP email services. Configuration is automatic for some email
services. For those that are auto-configured, you only need to enter the email
address and password then tap “next.” You may want to check the box that
reads “Send email from this account by default.” If this does not work, you’ll
need to manually configure your account. Details are below.
Prior to beginning, you will need detailed email configuration information
which is available from your service provider. You may have to locate the
server settings information at your Email Provider’s support website, or
you may need to call their support line. Unfortunately Velocity Micro cannot
provide assistance with this step. Below is the information you will need:
SERVER TYPE
You must select POP3, IMAP, or Exchange according to your email service
provider’s instructions. Typically this is POP3, but many are now allowing for
IMAP service. If you need to connect to an Exchange server, contact your
business systems Network Administrator for assistance.
USERNAME
This must be either your email alias (the part in front of the “@”) or your full
email address.
PASSWORD
The password is case-sensitive.
MAIL SERVER (INCOMING AND OUTGOING)
The addresses at which your incoming and outgoing mail is waiting for you.
PORT (INCOMING AND OUTGOING)
Specify a port number for both your incoming and outgoing mail servers.
SECURITY TYPE
You must specify if a security method is required for the incoming mail server.
Getting Started
16
Page 17

VI. EMAIL SET UP
Getting Started
Email Step-by-Step
1. Open the email app and enter your email address and password.
2. Complete the fields for the Incoming server portion of the manual setup.
Be sure your username is entered correctly, whether email address or alias.
If a security setting is not specified by your email provider, choose “None.”
3. Tap “Next,” and the app will test your settings. Wi-Fi is required to be
active for this step.
4. Complete the fields for the Outgoing server settings
5. Tap “Next,” and the app will test your settings. Wi-Fi is required to be
active for this step.
If everything is correct, your email will begin downloading to your inbox. Note
that some features, like custom folders, will not be available.
17
Page 18

VII. SAVING BATTERY LIFE
Getting Started
Helpful Tips
1. Streaming audio or video apps will use a lot of battery life.
2. Disable Wireless Network Positioning. You can turn it off from Settings >
Location & Security > Use wireless networks.
3. Switch off Wi-Fi if you are not close to a strong source for an extended
period of time.
4. Use a quick screen timeout. You can alter this option from Settings >
Display > Screen timeout.
5. Reduce brightness to comfortable level using a widget or at Settings >
Display > Brightness.
6. Use web widgets wisely. Widgets that access web consume more power
than widgets that do not.
7. Reduce automatic updates. Adjust settings within your apps that use an
auto-update feature to do so rarely or manually.
8. Consider a power management app that will regulate settings.
CAUTION: It is highly recommended that you use ONLY the provided
power adapter and USB cable. Third-party USB cables and power adapters
create a higher risk for over-heating.
18
Page 19

VIII. MICRO SD CARDS
There are two areas for storage on your CRUZ PS47. The first is a micro SD
card slot located on the bottom of your device. You may purchase micro SD
cards in a wide range of capacities, varying from 1 GB – 32 GB.
Getting Started
FRONT
To properly load the micro SD card, place your CRUZ flat on a surface with
the screen facing up. Then, with the FRONT of the micro SD card showing,
slowly and carefully push the card into the micro SD card slot located on the
side of the device. Gently push the card until you feel a “click.” The card
should be instantly recognized by the CRUZ. How to manage files on the
card will be covered next.
BACK
CAUTION:
If you try inserting the micro SD card in
the incorrect direction, both the micro SD
card and the CRUZ PS47 may become
damaged. Damages of this nature cannot
be covered by the 1 year limited warranty.
19
Page 20

IX. DEVICE STORAGE
Getting Started
There are two areas for storage on your CRUZ PS47
Name Capacity
microSD
Storage
Built-in Storage 2 GB total 960 MB
Supports 32
GB
Appears
in ASTRO
as
/sdcard
To protect your micro SD card’s file and directory
structure integrity, it should be unmounted before
removed. To do this, tap Menu > Settings >
Storage> Unmount SD card.
This best practice is not always followed by most
users, and generally no data loss occurs. When
this does happen, the Cruz may attempt to save
lost data to a folder called LOST.DIR. This folder
generally has useless data and can be ignored.
Storage Uses
The Android apps you
install will write file folders
and app content to this
removable storage. You
may copy content to this
location, but be careful of
what you delete as it may
impact the function of your
apps.
The Android operating
system is loaded onto this
internal embedded storage.
You can only access 960
MB of this storage
20
Page 21

X. TRANSFER FILES
Transfer Via USB Cable
Step 1
Step 2
Step 3
Step 4
Step 5
Step 6
Getting Started
Turn on your Cruz and connect a mini USB cable to
the Cruz device and to your PC.
Slide the notification panel down and tap the alert
that reads, “USB Connected Select to copy files
to/from your computer,” then tap “Turn on USB
Storage.”
This should only be required once. After doing this,
the alert should change to “Turn off USB storage ...”
This is normal when tethered.
Your micro SD card will appear within Windows with
a new drive letter assigned. The Autoplay feature
of Windows may or may not open asking you what
you want to do with the media. Click Open Folders
to view files. If not, navigate to the proper drive from
Windows Explorer by right-clicking the “Start” button.
You may now copy files to and from the device as
needed. You may create folders here to organize
content, or you may place content in existing folders
for use by the application that created the folder.
When you are done with file management tasks, You
may use the Windows application “Safely Remove
Hardware” to unmount the Cruz USB drives. You may
also tap “Turn off USB storage - Select to turn off
USB storage” on the Cruz device.
Step 7
You may now disconnect your USB cable from your
Cruz device. Cruz access to the micro SD card
returns.
21
Page 22

X. TRANSFER FILES
Transfer Via SD Card
Step 1
Unmount the micro SD card: Settings>SD and Device
Storage>Unmount SD Card
Getting Started
Step 2
Step 3 Transfer files as needed
Step 4
Eject your micro SD card and insert it into SD card
adapter. Then insert SD card adapter into your PC
Eject micro SD card from PC, remove micro SD card from
the SD card adapter, and reinsert into Cruz
Common Actions Using ASTRO File Manager App
Long click on the file name, select “Edit/Copy.” If there
Copy File(s)
Move
File(s)
are multiple files, first tap “Multi” button, then “Edit/
Copy.” Then navigate to the new directory and tap
Edit/Paste
Long click on file name, select “Edit/Move” then “Edit/
Paste” in new directory. If there are multiple files, tap
“Multi” first.
22
Page 23

XI. FILE FORMATS
The file formats that this device can support are numerous, but not infinite.
The pre-installed apps should allow you to view many Microsoft Office file
formats, including Word, Excel, and PowerPoint, as well as many eReader
file types, and music and video file types.
Most files should work, but not all files are encoded the same. For example,
some MPEG4 files will work but others may not, depending on how they
were encoded and compressed. It should be treated with a case-by-case
approach.
AUDIO
AAC,WAV,WMA,APE,OGA,OGG,FLAC,M4A,MP3
VIDEO
MPEG1/2,MPEG4,AVI,MKV,MP4,MOV,FLV
IMAGES
JPEG, JPG,GIF,PNG,JFIF
EBOOKS
PDF, TXT, HTML, EPUB
Getting Started
OFFICE
DOC, DOCX, XLS, XLSX, PPT, PPTX, PPS
23
Page 24

XII. KINDLE FOR ANDROID
personal Kindle account, browse an immense selection of literature, and
purchase/download books in an instant! There are even 100’s of free eBooks
available for download.
In this section, you will be walked through the initial set-up for the Amazon
Kindle for Android app. Before beginning, make sure that your Cruz has
made a successful connection with a Wi-Fi network. Without Wi-Fi access,
you will not be able to view the Kindle store or download eBooks.
You will need an Amazon account before continuing. If you do not have an
account with Amazon, please visit Amazon.com. At the top of the header, you
will see “Your Amazon.com.” Click it and then choose “New customer? Start
here.” Follow the on-screen prompts to finish creating your account. Then
resume following these instructions:
Getting Started
Your CRUZ PS47 offers the
remarkable opportunity of
carrying all your favorite books
in the palm of your hand. Each
Cruz comes pre-loaded with the
Kindle for Android application.
This application is a library portal
allowing users to sign into their
24
Step 1
Step 2
Step 3
Tap the Kindle icon located on the Home Screen or on
your App panel.
Once the application loads, sign into your Amazon
account. If you have forgotten your username or
password, visit Amazon.com to reset.
Once you are logged in, tap the “Menu” button on the
status bar. Then select “Kindle Store” to launch the
online Kindle store. You will be presented with numerous
genre options. Pick one to continue.
Page 25

XII. KINDLE FOR ANDROID
Getting Started
Step 4
Step 5
Step 6
Step 7
When you find a book you want to download/purchase, tap
the book cover to select it and advance to the next step.
The app will bring you to a product page with the book
cover, the price, a “Buy Now” button, as well as a synopsis
of the book lower on the page.
Tapping “Buy Now” will confirm that you want to add
the book to your library. To begin the download, tap the
“Menu” button on the status bar, then select “Sync” from
main Kindle screen. Then select “Archived Items” from the
“Menu” button to load the book.
You may be prompted to enter billing information if you
did not previously save credit card info from within your
Amazon account.
25
Page 26

XIII. READING EPUBS
Many eReader files are in the ePUB file format.
The Cruz does not natively support this file format,
so an additional application available on the Cruz
Market must first be downloaded.
Keep in mind that many ePUB files are also
DRM-protected, preventing illegal distribution of
publications. In order to read DRM-protected
ePUBs, you will need to download a specialized
application that manages the DRM requirements.
For instructions on how to read a DRM-protected
ePUB on your Cruz, visit the Cruz Support Hub at
www.cruzreader.com/support
Reading Unprotected ePUBs
Getting Started
26
Step 1
Step 2
Step 3
Install Word Player from the Cruz Market (Apps > Books &
Reference > Word Player) onto your Cruz.
Transfer your ePUB files to your SD card at the following
folder location: /sdcard/Books.
Open Word Player and select “Load ePUB from SDcard.”
Navigate to the “Books” folder and select your book to
begin reading.
Page 27

Getting Started
XIV. CAMERA
There is one forward-facing camera on your CRUZ
PS47. It is capable of capturing both still images and
video. There is a pre-installed application used to
shoot photos/video and save them to your device. To
access this application, tap the round, grey icon on
your homescreen labeled “Camera.”
A grey panel will appear on
the right with several buttons.
Among these is a vertical
sliding-panel with 2 main
options on it. Once you have
dragged the dark round dial to
the proper media-type you’d
like to capture, position the
camera on the CRUZ PS47 in
the direction of your target.
When taking photos, tap the bottom icon once. When taking video, tap the
bottom icon to begin recording, then again to end recording.
Many different
applications can access
the built-in camera, the
most popular of which is
Skype. Skype is a free
webcam communication
application that allows
the person you are
chatting with to see and
hear you in real time.
27
Page 28

XV. BLUETOOTH
The CRUZ PS47 has built-in Bluetooth functionality, which enables other
devices to interact with your CRUZ PS47 wirelessly. To utilize the bluetooth
function of your CRUZ, follow these steps:
MAKE PS47 DISCOVERABLE
Getting Started
Step 1
Step 2 Tap “Bluetooth to turn on Bluetooth power
Step 3 Tap “Discoverable”
CONNECT DEVICES
Step 1
Step 2
Step 3
Tap the Wi-Fi Settings icon then tap Wireless & Networks >
Bluetooth settings
Ensure that the device you’re connecting to your CRUZ
PS47 is also set on “Discoverable” mode
Tap the Wi-Fi Settings icon then tap Wireless & Networks >
Bluetooth settings
Tap “Bluetooth” to turn on Bluetooth if necessary, then
tap “Find nearby devices” to scan for available bluetooth
devices in range. Tap the device you wish to connect with.
If necessary, tap “Pair” or enter passkey for device.
28
Page 29

XVI. INSTALLING APPS
Android Applications are available via the Cruz Market or other third-party
sources like the developer’s website. Many Android apps are designed for
use with phone devices rather than just tablet devices, but many, many more
are great for use on tablets! You can also install any number of eReader
Android apps, allowing you to have multiple eReader file formats, all on one
Cruz. Visit the CruzMarket at www.cruzmarket.com for access to 100’s of
apps. Many of them are free downloads.
NOTE: Google does not permit access to the Official Android Market for any
tablet not identified as a “phone” or any device over 7 inches not running Android 3.0
Getting Started
29
Page 30

XVI. INSTALLING APPS
When you download an app to the CRUZ PS47, it is saved as a zip folder in
the “download” directory on the SD card. Inside the zip folder is an .apk file
and other source files. It is vital that you keep these files together in their
original folders. To install applications from the web, follow these steps:
Download your app to your PC. Files are often distributed
Step 1
Step 2
in archive format (ie: .ZIP, .RAR). If so, their contents first
must be extracted so that the .APK file is all that remains.
Note: If the file you download looks like “appname.apk” you
can skip to Step 2.
Unmount the SD card prior to removal. Once unmounted,
eject the SD card that accompanied your Cruz device,
insert it into the SD slot on your PC, and copy the
appname.apk file to it.
Getting Started
30
Step 3
Step 4
Open the Application Manager (Settings > Applications)
and make sure the Unknown Sources option is checked so
that you may install 3rd party apps.
Open your ASTRO File Manager app and navigate to
your /sdcard folder to locate your app. Tap to install using
Application Manager.
Page 31
XVII. PREINSTALLED APPS
Getting Started
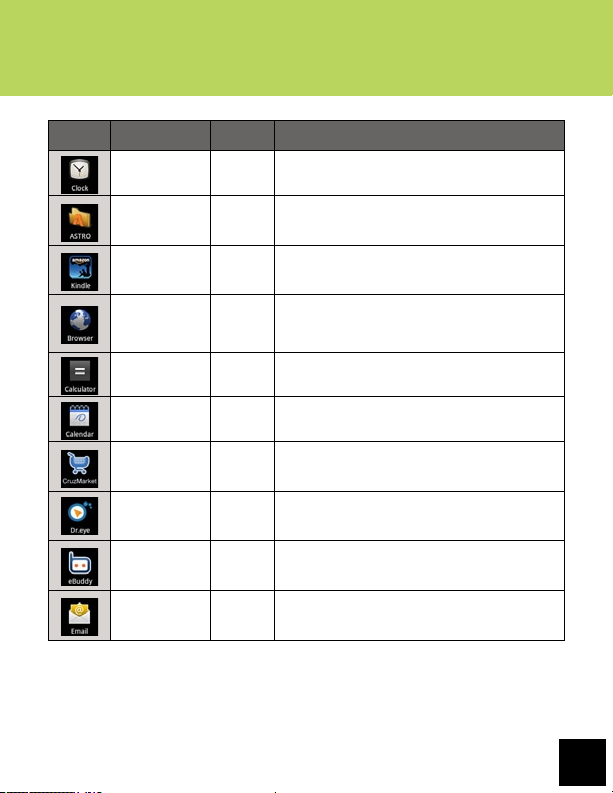
Icon Name
Clock No Allows you to set alarms for easy reminders.
ASTRO No
Amazon ® Kindle Yes
Browser Yes
Calculator No
Calendar No
CruzMarket Yes
Dr.eye No Full dictionary application.
eBuddy Yes
Email Yes
Requires
Wi-Fi
Purpose
This is your file management application. Use it to
browse your storage locations, transfer files and even
install/uninstall apps.
Your primary eBook library portal. Wi-Fi is only
required for downloading new content.
Default Internet browser. Surf the web, store tons of
bookmarks, and stay in the loop!
Turns your Cruz into a fully functioning calculator with
touch screen inputs.
Stores important scheduled events, organizes your
appointments. Stay up to date!
Browse, purchase, and install applications
specifically selected to work great on the Cruz. Many
are free!
Instant messenger application. Supports your MSN,
Yahoo!, AIM, ICQ, Google Ta lk and Facebook contacts
in one single buddylist.
Set up most web based email accounts quickly and
easily with this default mail application. Stay in touch
through any Wi-Fi hotspot.
31
Page 32

XVII. PREINSTALLED APPS
Getting Started
Icon Name
Facebook
Mobile
Gallery No
Music No
Napster Yes
Office Suite No
Settings No
Twidroyd Yes
UerWallpapers No
Requires
Wi-Fi
Yes
Purpose
Log into your Facebook account and stay
connected on the go!
Access photo or video files for play or display right on
the Cruz’s full color screen. Use your Cruz as a digital
picture frame or fully mobile media hub!
Jam to your favorite tunes! Insert headphones or
listen through the built-in speakers. This app can play
music while other apps are running.
Purchase songs and download them directly to your
CRUZ PS47! Requires Wi-Fi only when browsing and
downloading music.
Allows you to view Microsoft® Office files, including
Excel® Spreadsheets, Word® documents, and even
PowerPoint® presentations.
Access device settings for Wi-Fi, sound and display,
location and security, applications, SD card settings
&device storage, privacy, language and
keyboard, and date and time.
Tweet updates to all your followers with this useful
Twitter application!
Offers multiple preinstalled wallpaper options that give
your Cruz a stylish flair! Upload your own
images to make it truly personal!
32
Page 33

XVIII. MULTIMEDIA
Not only does your Cruz hold tons of eBooks, browse the web, and keep
you connected with social networks, it also functions as a great portable
media player too. Just load up your micro SD card with your music collection,
favorite pictures, or digital videos and take all of your favorites on the road
with you. Before beginning, you should understand that certain file formats
are not supported. These file formats may require additional applications to
open.
Getting Started
Music
After loading your music onto your Cruz, tap the music
icon (found by default on your home screen or by
opening the App Panel). You’ll be given the option of
to select. Your selection will begin to play through the Cruz’s built in speakers
or through external headphones if attached via the headphone port. The Cruz
media player allows you to shuffle, skip, or pause your current selection and
even displays the album artwork when available.
selecting by Artist, Song, Album, or custom Playlist. Tap
Pictures
You can view and show off your digital pictures on the
Cruz’s full color, high resolution display. After loading
your media tap Gallery on your home screen or within
picture to display. To scroll through your collection, tap left or right.
You can even set images as your wallpaper or share via your social networks
by using the icons along the top of the display.
the App Panel, then select All Pictures. Tap the desired
33
Page 34

XVIII. MULTIMEDIA
Getting Started
Video
After loading your music onto your Cruz, tap the music
icon (found by default on your home screen or by
opening the App Panel). You’ll be given the option of
selecting by Artist, Song, Album, or custom Playlist. Tap
to select. Your selection will begin to play through the
if attached via the headphone port. The Cruz media player allows you to
shuffle, skip, or pause your current selection and even displays the album
artwork when available.
Cruz’s built in speakers or through external headphones
NOTE: Your media playback experience will be optimal with no
other apps or widgets running in the background. If you experience
hesitation or stuttering with your video or audio playback, first try
terminating all running applications.
34
Page 35

XIX. SYSTEM REQUIREMENTS
Platform
Getting Started
Operating
System
Processor
RAM
Video
USB
Windows
Microsoft® Windows® 2000. Me, XP,
Vista, 7 or higher (32-bit or64-bit)
Intel Pentium II or AMD K6-2
300MHz or higher
128 MB 256 MB
Super VGA (800 X 600) or higher
resolution video adapter and monitor
USB 2.0 USB 2.0
Mac
MAC OS X v10.4, 10.5
or higher preferred
PowerPC G3 300MHz or higher
Including Intel-based Macs
Super VGA (800 X 600) or higher
resolution video adapter and monitor
35
Page 36

XX. OPEN SOURCE LICENSE
Where such specific license terms entitle you to the source code
of such component, that source code is available upon request via
vmsupport@velocitymicro at cost from Velocity Micro or visiting our website in
http://cruzsupport.velocitymicro.com/ at least three years from the purchase
date of this product. If you would like to have a copy of the GPL or certain
other open source code in this component on a CD, Velocity Micro will mail to
you a CD with such code for $5 plus the cost of shipping, upon request.
This product’s software/firmware includes the following open source
components:
GPL license:
1. Xvid,
2. libmad
3. libfaad2
LGPL license:
1. FFMPEG
Full open source agreement is available for download at
http://cruzsupport.velocitymicro.com
Getting Started
36
Page 37

XXI. SUPPORT & REGISTRATION
Cruz Support is available at http://cruzsupport.velocitymicro.com. There
are a large number of informative knowledgebase articles to answer your
questions. You can also download the latest manual for your product. Once
registered at the site, you can register your product, submit tickets for
support, and administer your tickets and personal profile.
Getting Started
How Do I Get Support?
1. If you have not already done so, create a Support account for yourself at
our website: http://www.cruzreader.com/support
Note: Those customers who have purchased a Cruz product directly from
Velocity Micro may skip this step.
2. Then register your purchased Cruz products.
3. When complete, go to ‘My Products’ and submit a ticket for the product you
are seeking support for.
4. If you need to return your Cruz product for repair, you must first contact our
technical support for a RMA (Returned Merchandise Authorization).
Note: Proof of Purchase is required for RMA services. You create a ticket to
upload your Proof of Purchase.
37
Page 38

XXII. CONTACT INFO
Address
7510 Whitepine Road
Richmond, VA 23237
Phone
800-296-4312
Fax
804-897-4777
Websites
www.cruzreader.com
www.velocitymicro.com
Getting Started
38
Page 39

XXIII. FCC INFORMATION
This device complies with Part 15 of the FCC Rules. Operation is subject to the following two conditions: (1) this device may not cause harmful interference, and (2)
this device must accept any interference received, including interference that may
cause undesired operation.
Changes or modifications not expressly approved by the party responsible for
compliance could void the user’s authority to operate the equipment.
NOTE: This equipment has been tested and found to comply with the limits for a
Class B digital device, pursuant to Part 15 of the FCC Rules. These limits are
designed to provide reasonable protection against harmful interference in a
residential installation. This equipment generates, uses and can radiate radio
frequency energy and, if not installed and used in accordance with the
instructions, may cause harmful interference to radio communications. However,
there is no guarantee that interference will not occur in a particular installation.
If this equipment does cause harmful interference to radio or television reception,
which can be determined by turning the equipment off and on, the user is
encouraged to try to correct the interference by one or more of the following
measures:
• Reorient or relocate the receiving antenna.
• Increase the separation between the equipment and receiver.
• Connect the equipment into an outlet on a circuit different from that to which the
receiver is connected.
• Consult the dealer or an experienced radio/TV technician for help.
FCC RF warning statement: The device has been evaluated to meet general RF
exposure requirement. The device can be used in portable exposure condition
without restriction.
Getting Started
39
 Loading...