

Page 1
GETTING STARTED GUIDE
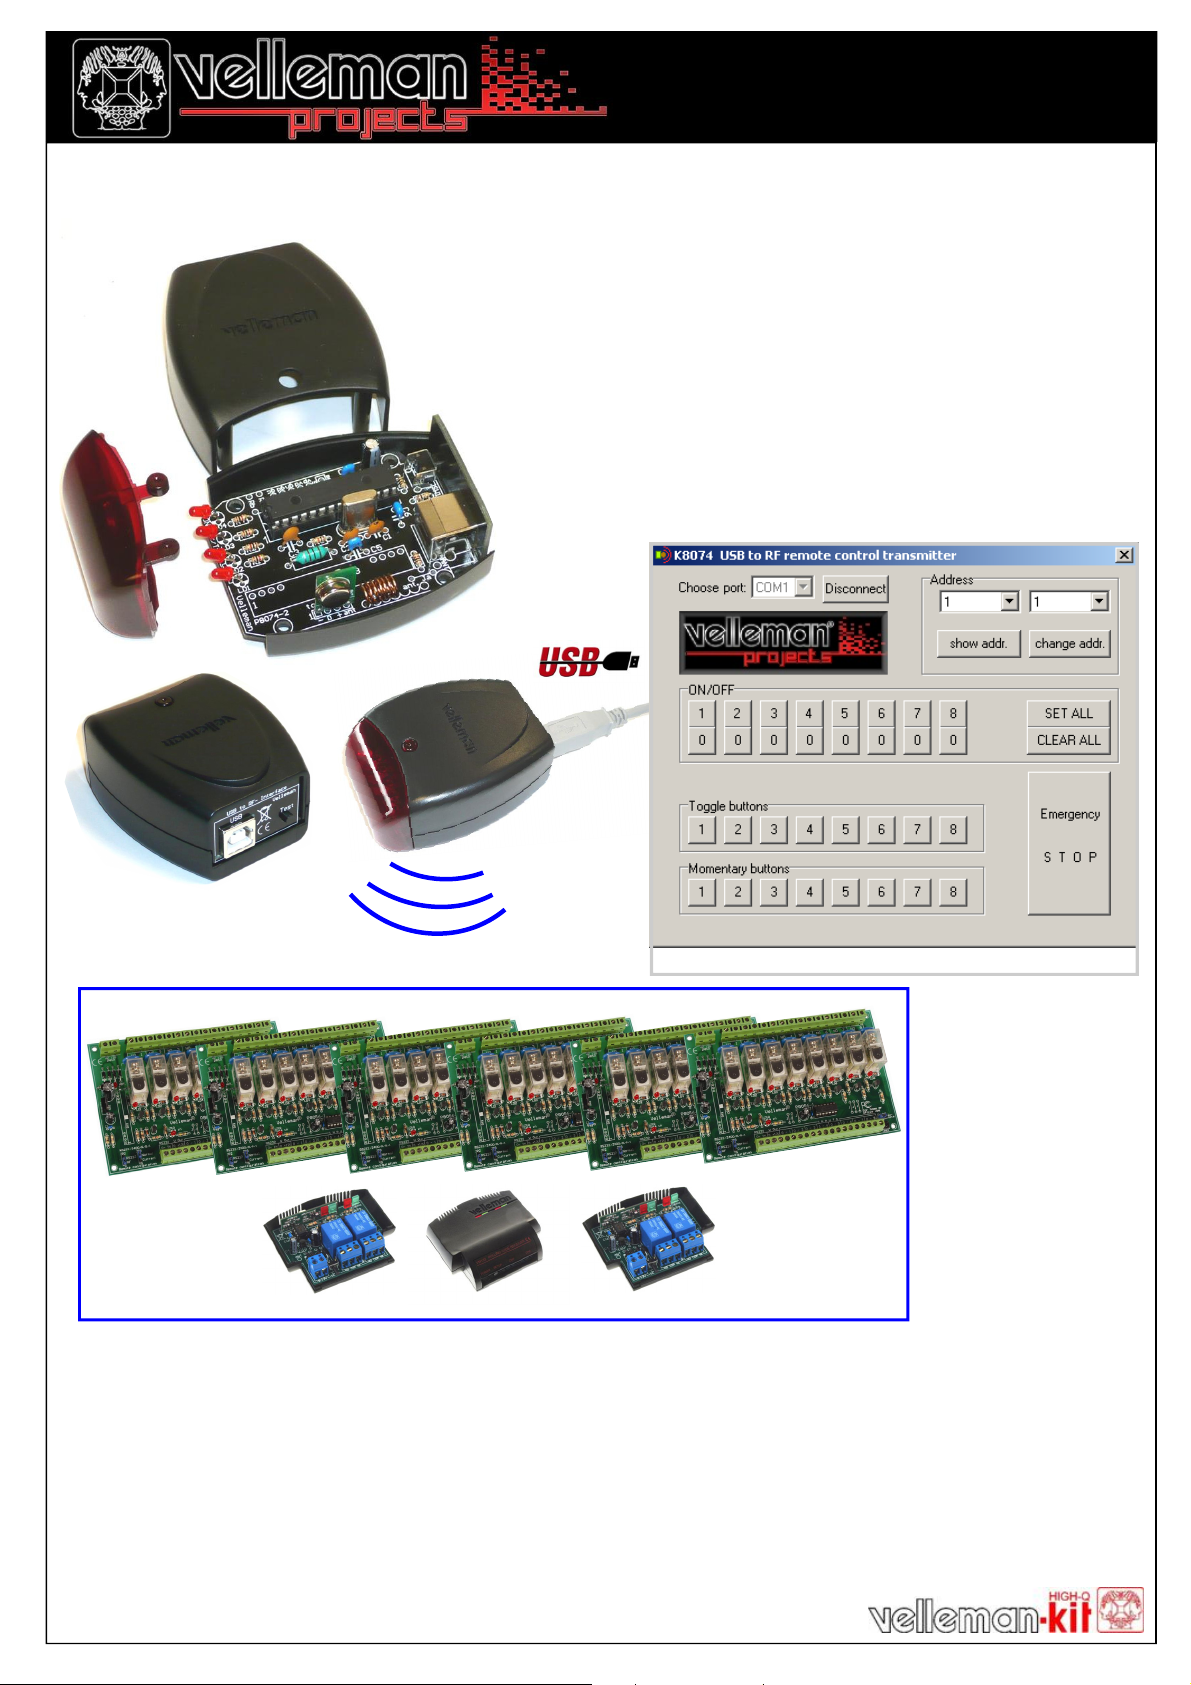
USB to RF remote control transmitter
This unit will turn your computer into a powerful remote control.
Simply connect to the USB port, install the driver and you are set.
The transmitter works together with our K8056 card, equipped with
an RX433 receiver module. Also our K8070 / VM119 one channel
receiver can be used. In total a combination of 255 cards can be
addressed, resulting in a maximum of 2040 channels !!
Our wireless RGB controller, VM151 can also be used.
Drivers and example software can be downloaded from our
web site.
K8074
K8056 8 channel relay cards
K8070 / VM119 one channel dual output receivers
Technical :
• USB1.1 or 2.0 port compliant
• Range : up to 30m (depends on environment)
• Works with K8056(+RX433) and K8070 / VM119
VM151..
• RF transmit indicator LED
• Power LED
• USB port function LED’s
• 255 selectable addresses
• Transmit—test button
Screenshot of the demo and test software
• 433MHz transmitter
• R&TTE compliant design
• Power supply : USB
• Includes enclosure
• Dimensions : 80x55x35mm
Page 2
K8074
GETTING STARTED GUIDE
TEST BUTTON FUNCTION
When the TEST-button is pressed, the unit will transmit an ‘ALL CLEAR’-command. All outputs on the K8056/
VM118/K8070/VM119 will turn off. Careful: The TEST-button will only work when the unit is connected to the PC via
a USB cable.
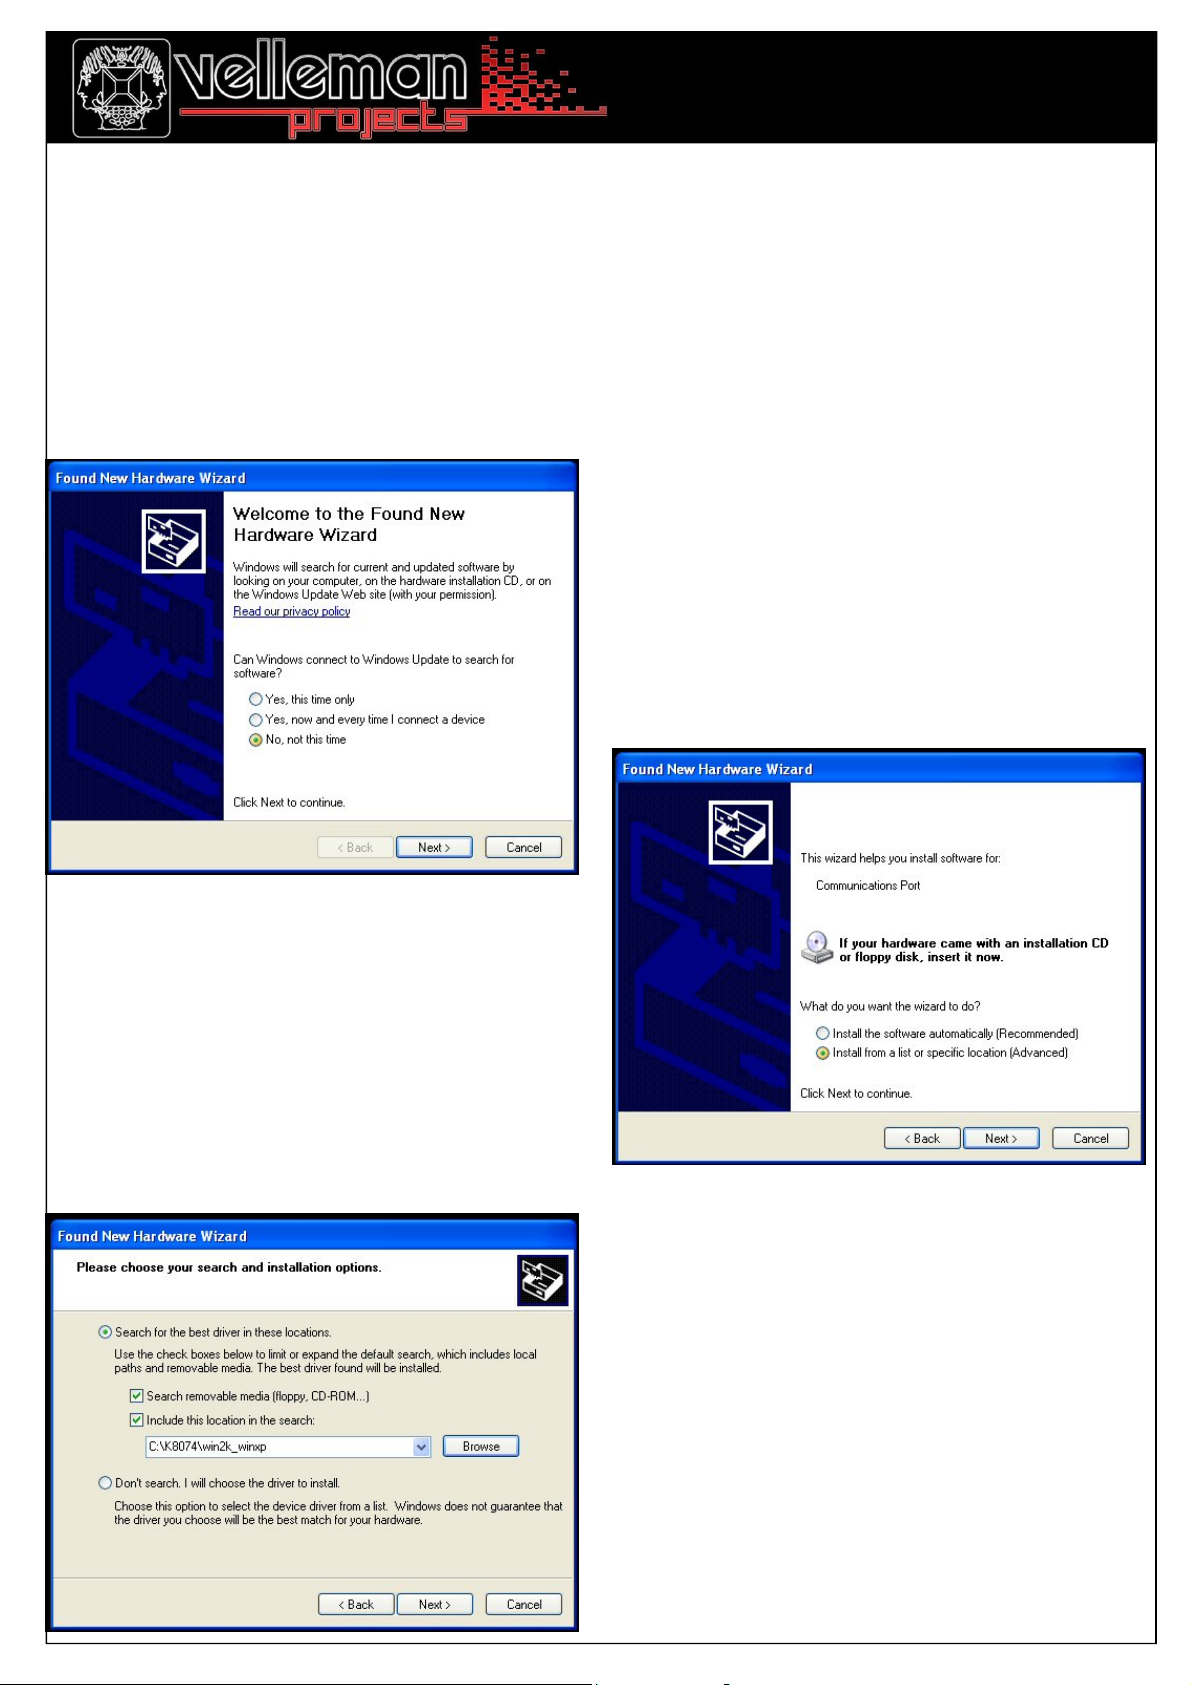
INSTALLATION OF THE USB DRIVER
Connect the K8074 to the USB port of your PC. The first time you connect the device to the PC, Windows will
try to locate the necessary .inf file. Do not allow Windows to connect to Windows Update in order to look for
the software. Click ‘next’.
Point to the path that leads to the ‘K8074.inf’-file
for either XP or Vista. Click ‘next’
Choose install from a specific location:
Page 3

GETTING STARTED GUIDE
An extra ‘COM’-port will appear in the Device Manager. Right click and select ‘Properties’. Make sure it is the
COM-port that connects to the K8074. Remember the port number.
K8074
USING THE TEST SOFTWARE with K8056/VM118 relay card (K8056 must be equipped with optional RF receiver)
Locate and launch K8074Proj.exe. Make sure that the file ‘K8074.dll’ is located in the same directory.
Select correct COM-port numer and click ‘CONNECT’
Select K8056/VM118 card address (default: 1)
If you do not know the card address, click ‘show addr.’ Check K8056/VM118 manual for ‘how-to’-instructions.
Click ‘Reset to addr 1.’ if you do not know the card address. All cards within the transmitter range wil be set to address 1.
Afterwards, you can change the address of each card individually (select the new address and press ‘change addr.’)
You can choose between momentary, toggle or ON/OFF operation for each relay, by pressing the appropriate button.
‘Set all’ turns on all outputs, while ‘Clear all’ turns them all off.
Press ‘Emergency stop’ to turn off all relays on all cards simultaniously.
The source code of the test program is supplied, in order to allow you to write your own software to control the card. A list of
available commands can be found in the partlist of the K8056 relay card..
Page 4

GETTING STARTED GUIDE
USING THE TEST SOFTWARE with K8070/VM119 One channel dual output receiver
Locate and launch K8074Proj.exe. Make sure that the file ‘K8074.dll’ is located in the same directory.
Select correct COM-port number and click ‘CONNECT’
Select K8070/VM119 address (default setting: address 1, button 1)
Only the momentary buttons and the ‘0’-buttons (OFF) are implemented with the K8070/VM119
To learn an address/button to the K8070/VM119, please check K8070/VM119 manual.
To activate K8070/VM119 outputs, press appropriate Momentary button.
To de-activate K8070/VM119 outputs, press any ‘0’-button (OFF)
K8074
 Loading...