

VelectriX Urban Mens 2.0, Urban Unisex 2.0, Urban 2.0+ Unisex, Urban 2.0+ Mens Instruction Manual
Instruction Manual: VelectriX Urban 2.0
Page 1
CONTENTS
Safe Riding Recommendations
Page 2
Pre-Ride Checklist
Page 3
Display and Controls
Page 4
Maintenance
Page 8
Warranty
Page 9
Contact Details
Page 10
Service Log
Page 11
Model Specification
Page 12

Page 2
Safe Riding Recommendations
1. Please ensure you are familiar with and follow all traffic laws
and regulations for your state. Please remember you may need
to review these when travelling interstate.
2. Always wear a helmet when riding your bike.
3. Don’t lend your bike to anyone who is unfamiliar with it.
4. As with all bikes it is important that you stay within safe limits
and speeds. If you feel you are travelling too quickly for the
road conditions, then slow down!! High speeds will increase
risk of injury in the event of an accident.
5. Please read and become familiar with the “Pre-Ride Checklist”
in this manual before riding your bike.
6. Switch the lights on your bike on when riding at all times of the
day or night. If your bike doesn’t have lights fitted as standard,
it is recommended that you purchase them and fit before
riding.
7. Your VelectriX bike must be returned to your servicing dealer
after 250kms or 6 weeks from date of purchase, whichever
comes first, to re-tension the spokes. Spokes should then be
re-tensioned every 1500kms.

Page 3
Pre-Ride Checklist
1. Check your bike for any loose nuts, bolts or fixings.
2. Check tyre pressures on your bike are correct. Please always
refer to the tyre manufactures suggested levels on the side of
the tyre. The following can be used as a guide only: Urban 2.0
(40-80psi).
3. Check the tyres on your bike for any visible damage, wear and
tear or bald spots.
4. Check that the brake levers have been installed correctly on
your bike. The left hand brake lever should operate the rear
brake and the right hand brake lever should operate the front
brakes.
5. Check the brakes are working effectively to stop your bike and
the power from the motor halts when the brakes are on.
6. Check that your bike is fitted with a working bell and reflectors.
7. Check that the wheel nuts or quick release skewers on your bike
are tight.
8. Check that the electronic functions on your bike are working.
9. Check that the handlebars and stem are tightened.
10. Check that all bags, baskets, boxes, etc. are securely fastened.
11. Check that your battery has sufficient charge for your ride.
Page 4
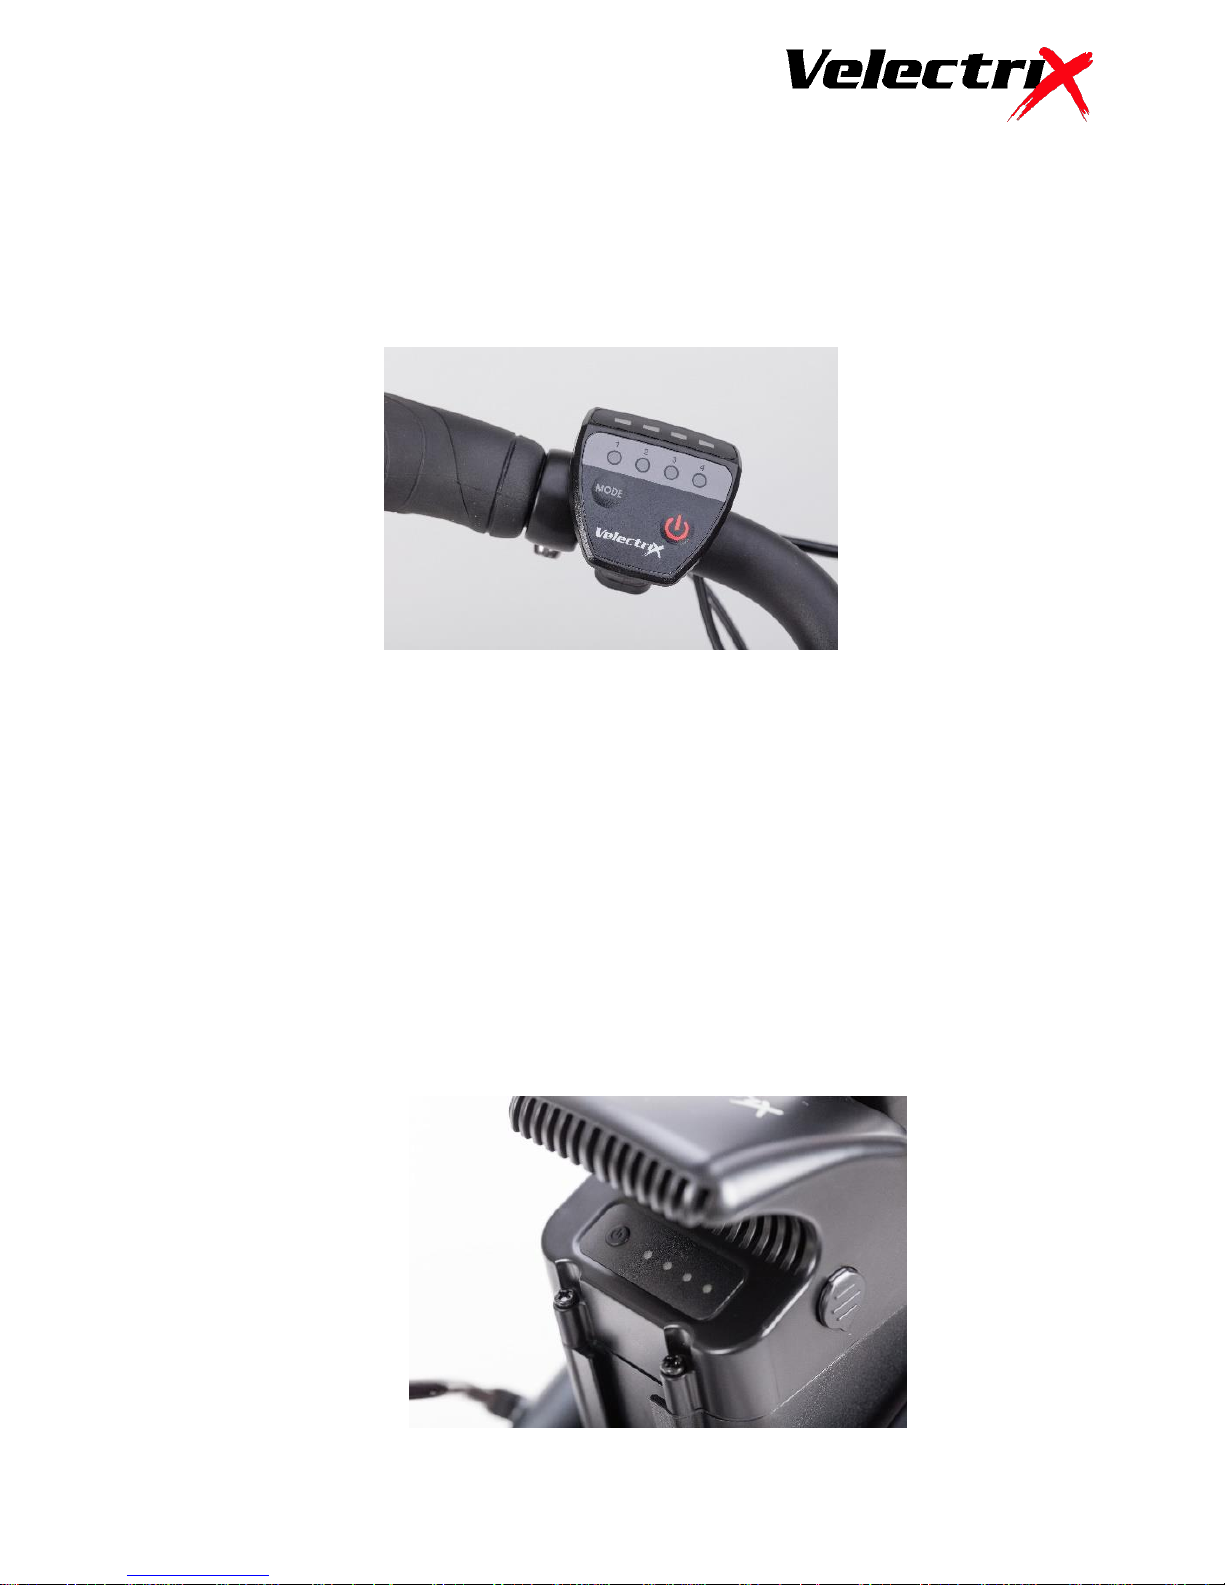
LED Display and Controls
Your electric bike is equipped with a LED display, mounted on the left side
of the handlebar, and is controlled with the use of 2 buttons (MODE) and
(POWER)
Turning the Battery On/Off
To ride the bike with assisted power, you must first switch the battery on.
This is done by simply pressing the power button located on the top of the
battery. You will hear a short beep and the green lights will appear. To turn
off the battery, do the same and battery will beep and the lights will
disappear.
 Loading...