

Page 1

User’s Guide
Page 2

2 Vectrix Electric MAXI-Scooter User’s Guide
WARNING!
This manual is to be used with your scooter
to improve your riding experience. Please
read this manual completely before
operating your scooter. If you should ever
sell your scooter please pass this manual
on to the new owner.
NOTE!
Vectrix Corporation cannot be held responsible
for any errors, omissions or mistakes associated
with this manual. Vectrix Corporation reserves
the right to make changes to this manual as
we see fi t and to further improve our technology and the experience of the rider. If you lose
this manual please go to www.vectrix.com
for details on getting a new manual.
NOTE!
This User’s Guide is written in Italian and English. At the end of the manual you will fi nd a mini CD
containing translations in French, Spanish, Portuguese and German.
Furthermore, this guide can be downloaded from: www.vectrix.com
Page 3
Vectrix Electric MAXI-Scooter User’s Guide 3
WELCOME!
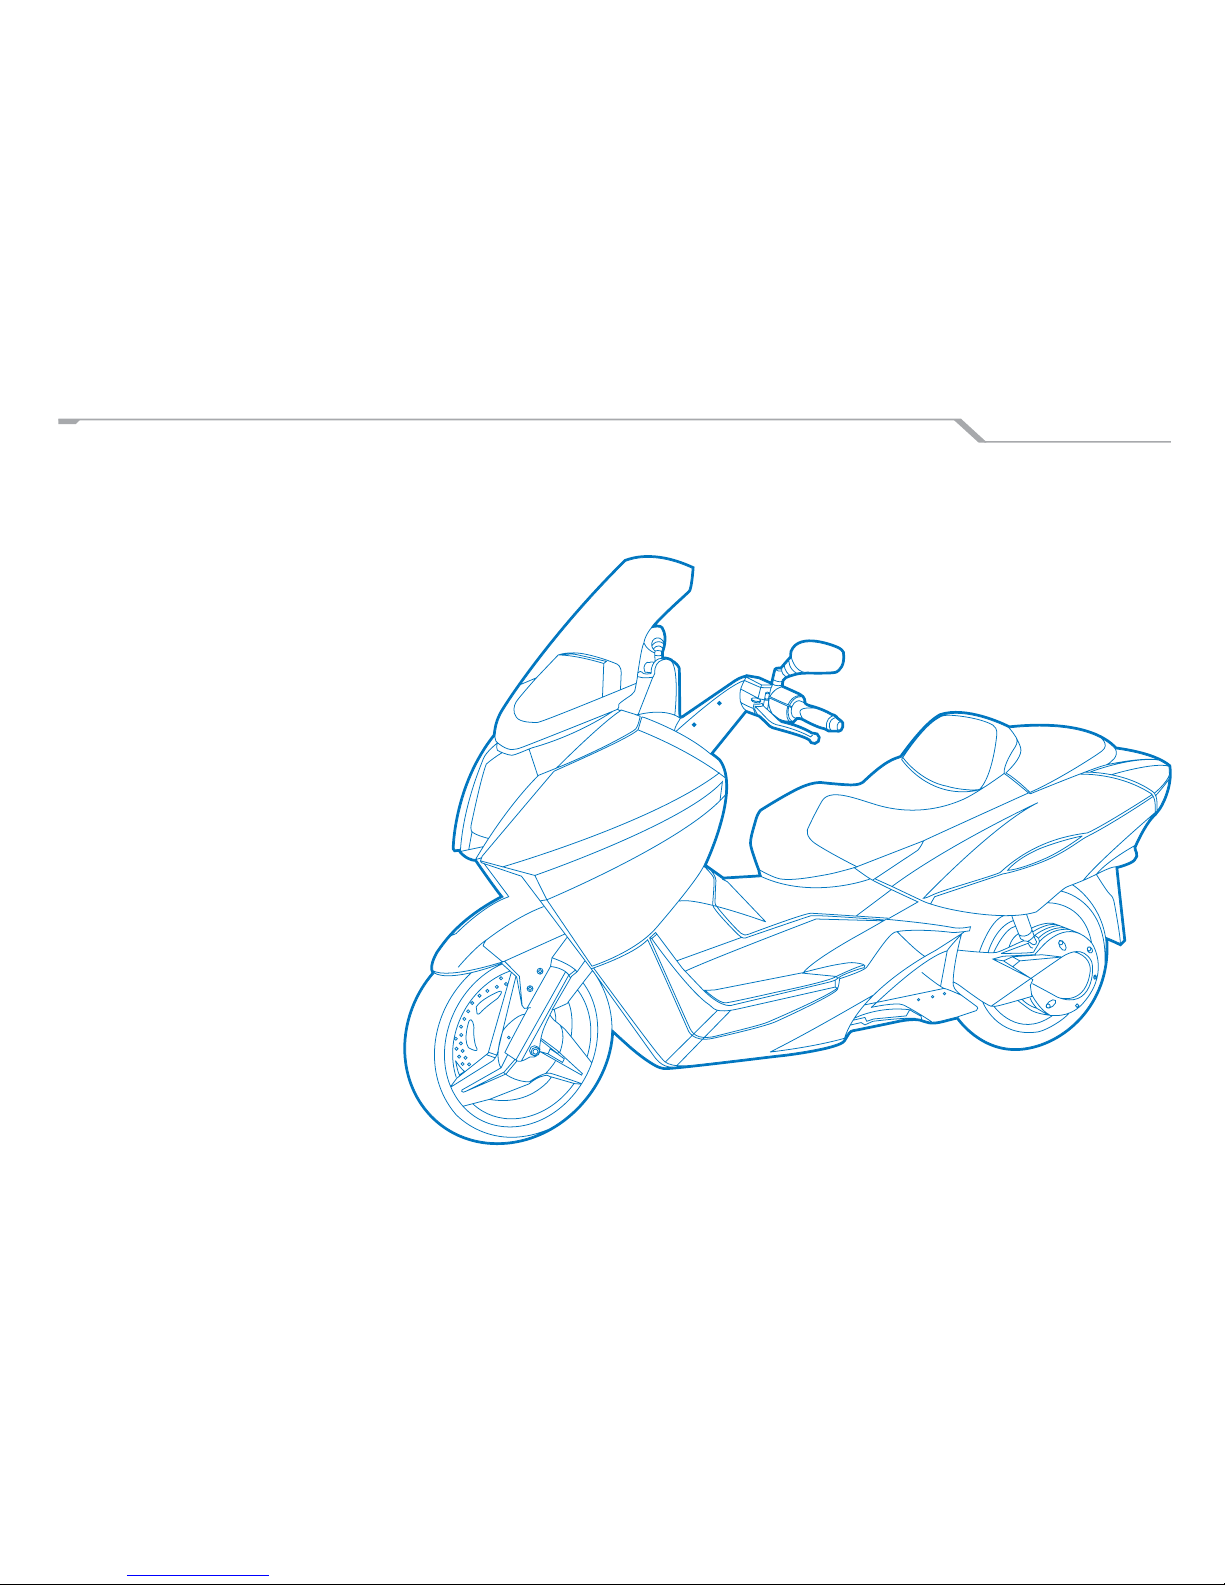
Thank you and congratulations for purchasing a Vectrix Electric MAXI-Scooter! You are helping the environment, and your daily
commute as well! We hope that you enjoy the experience of the future in motion! If you need any repairs to your scooter or just want some friendly
advice, please see your local service center. This manual is provided to help you get to know your Vectrix Scooter.
Enjoy your
Vectrix Electric MAXI-Scooter!
Page 4

4 Vectrix Electric MAXI-Scooter User’s Guide
TABLE OF CONTENTS
GENERAL .............................................. 5
Warranty Information 5
Symbol Guide 5
Safe Riding 6
Maximum Weight Allowance 7
VIN Information 9
CONTROLS ............................................ 10
Instrument Panel 11
Telltales 12
Switches 14
Setting Clock 14
Changing between Miles and KM 14
Setting Trip Meter 14
Dashboard information during charging 15
Key Function 16
Handlebar Switches Left 17
Handlebar Switches Right 18
MAIN COMPONENTS ............................. 18
Side Stand 20
Center Stand 20
Trunk Area 21
Glove Box 21
Motor Controller 22
Rear Shock Absorbers 23
Rear Wheel Drive 24
Battery Pack 25
USE ....................................................... 26
Initial Startup 26
Pre-Ride Checks 27
Scooter Interlocks 27
Initial Use of the Scooter 28
Braking 29
Reverse Feature 30
Charging the Battery 31
Parking 32
MAINTENANCE ..................................... 33
Battery Pack 34
Brake Fluid Levels 35
Brake Pads 36
Bulb Replacement 37
Beam Setting 38
Fuses Replacement 39
Tires 40
Cleaning 42
Storage 41
Troublesho oting 44
TECHNICAL DATA .................................. 45
Specifi cations 45
Performance Data 46
SAFETY INFORMATION ......................... 47
Safety Warnings 47
Safety Information 50
ROUTINE
MAINTENANCE RECORD ...................... 51
Page 5

Vectrix Electric MAXI-Scooter User’s Guide 5
GENERAL
WARRANTY
Your Vectrix Electric MAXI-Scooter is warranted
for forty-eight months through the Plug & Go Program. Standard warranty is twenty-four months.
To maintain the warranty you must comply with
the servicing requirements called out in the Vectrix Warranty Book.
SYMBOLS CONTAINED IN THIS MANUAL:
WARNING!
When this symbol is shown it means that
you must read this section. Failure to read
this section could result in injury or death!
NOTE!
When this symbol is shown it means that
there is some important information that will
help you enjoy your scooter even more!
Page 6

6 Vectrix Electric MAXI-Scooter User’s Guide
SAFE RIDING
In order to operate your scooter properly you
must familiarize yourself with the scooter
controls and movements.
+ ALWAYS ride with your license and insur-
ance certificate in your possession.
+ You must ALWAYS wear your safety
helmet.
+ ALWAYS hold both ends of the handlebar /
handgrips.
+ ALWAYS remain seated while riding the
scooter. Do not stand while riding.
+ ALWAYS obey state and local traffi c laws.
+ In the event of bad weather adjust your speed
to refl ect the type of weather while still obeying
speed limits.
+ You should wear appropriate clothing to ride.
Proper helmet and gloves are a must.
+ Park in an area that is visible to others and
always have either your center or side stand
down when parked. Do not leave the key in
your ignition unattended.
+ ALWAYS avoid parking on sand, gravel or
soft surfaces.
+ Become familiar with the handling of the
scooter before carrying a passenger. You
should instruct your passenger about safety
on a scooter. A passenger should have his
hands on the passenger grab bar or wrapped
around the driver of the scooter at all times
that the scooter is in motion.
+ Never permit an inexperienced rider to ride your
scooter. You are responsible to tell them about
scooter safety and safe scooter handling.
+ ALWAYS use your turn signals to identify your
intent to change lanes, or turn.
Page 7
Vectrix Electric MAXI-Scooter User’s Guide 7
MAXIMUM WEIGHT ALLOWANCE
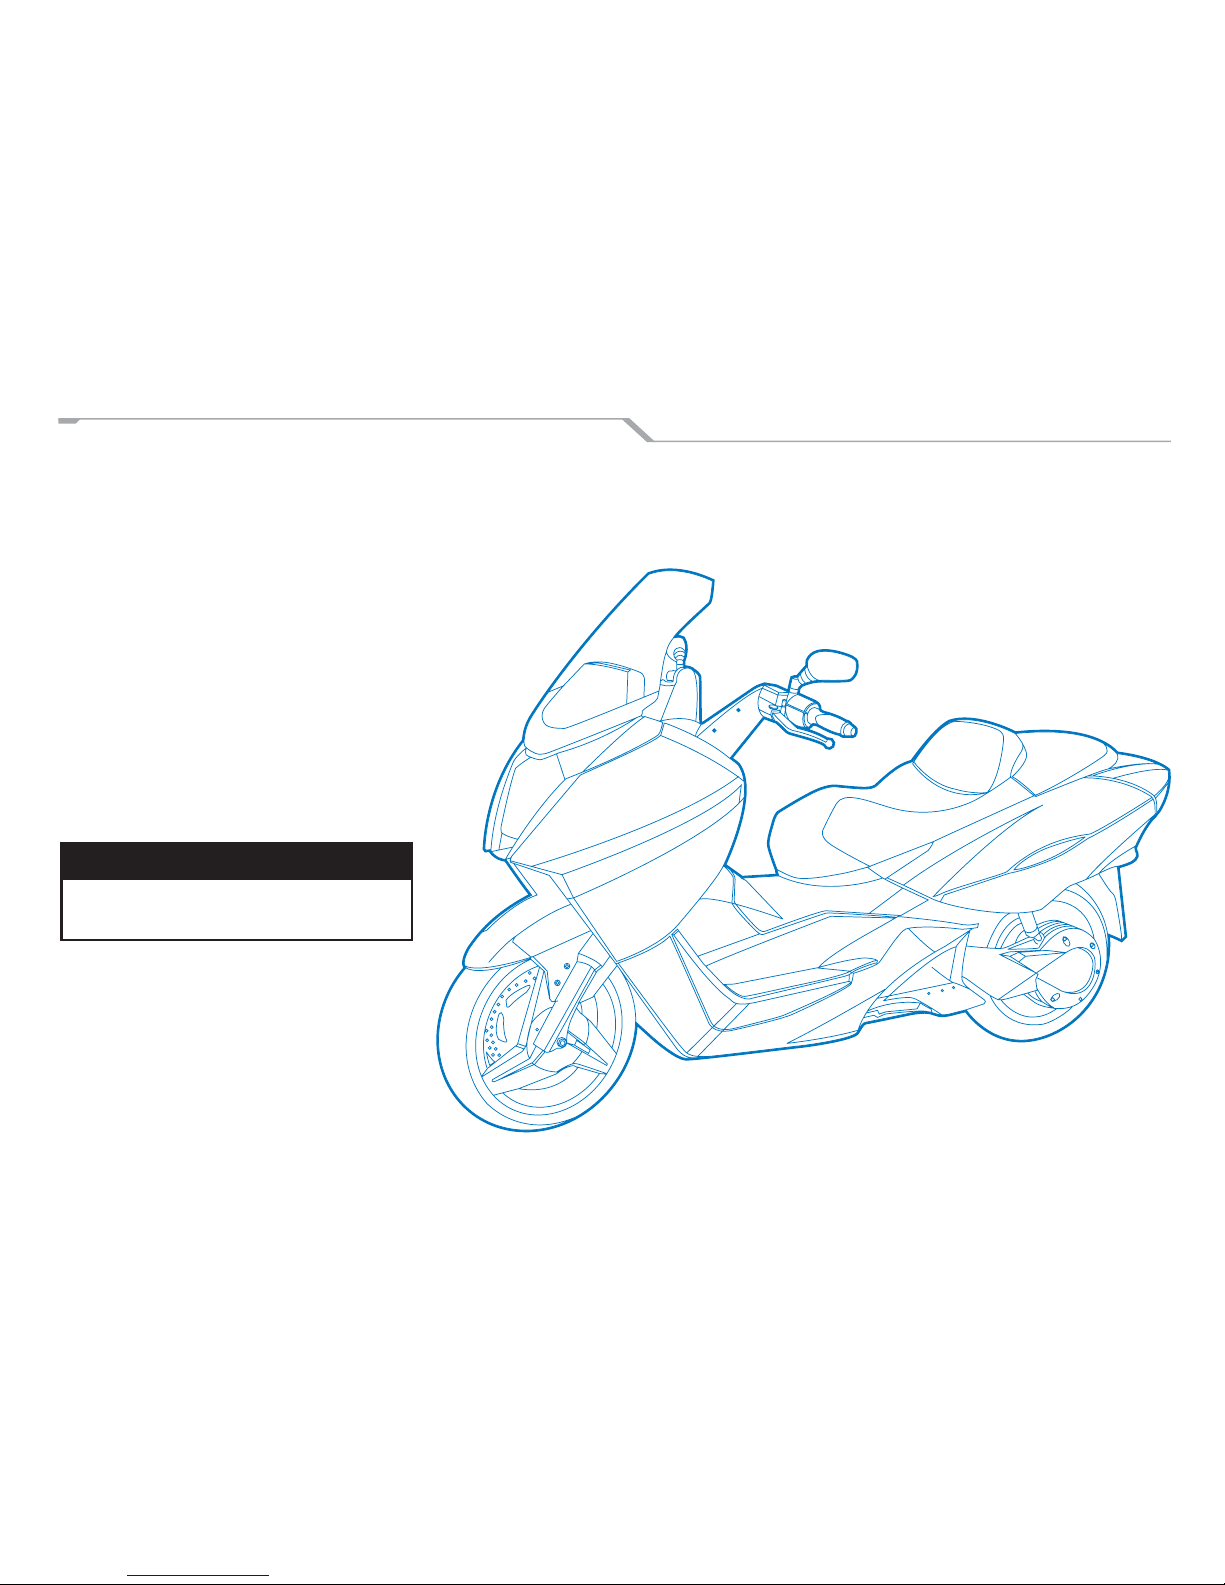
The design weight allowance on the scooter is
250 Kg, which includes the rider, passenger and
cargo (approx. 551 lbs). This weight allowance is
refl ected in all performance fi gures.
Make sure any luggage put on the scooter is
fi rmly placed and secured. Do not overload your
scooter or arrange heavy items higher up on the
scooter. Do not attach items to the handlebars.
Do not have long or loose clothing on while
riding, as the pieces could get caught in
components of the scooter. Do not jam any
items in any openings on the scooter as this
could cause loss of stability and failure of the
scooter.
NOTE!
The passenger grab rail will accommodate the
attachment of a Standard Vectrix Cargobox.
Page 8
8 Vectrix Electric MAXI-Scooter User’s Guide
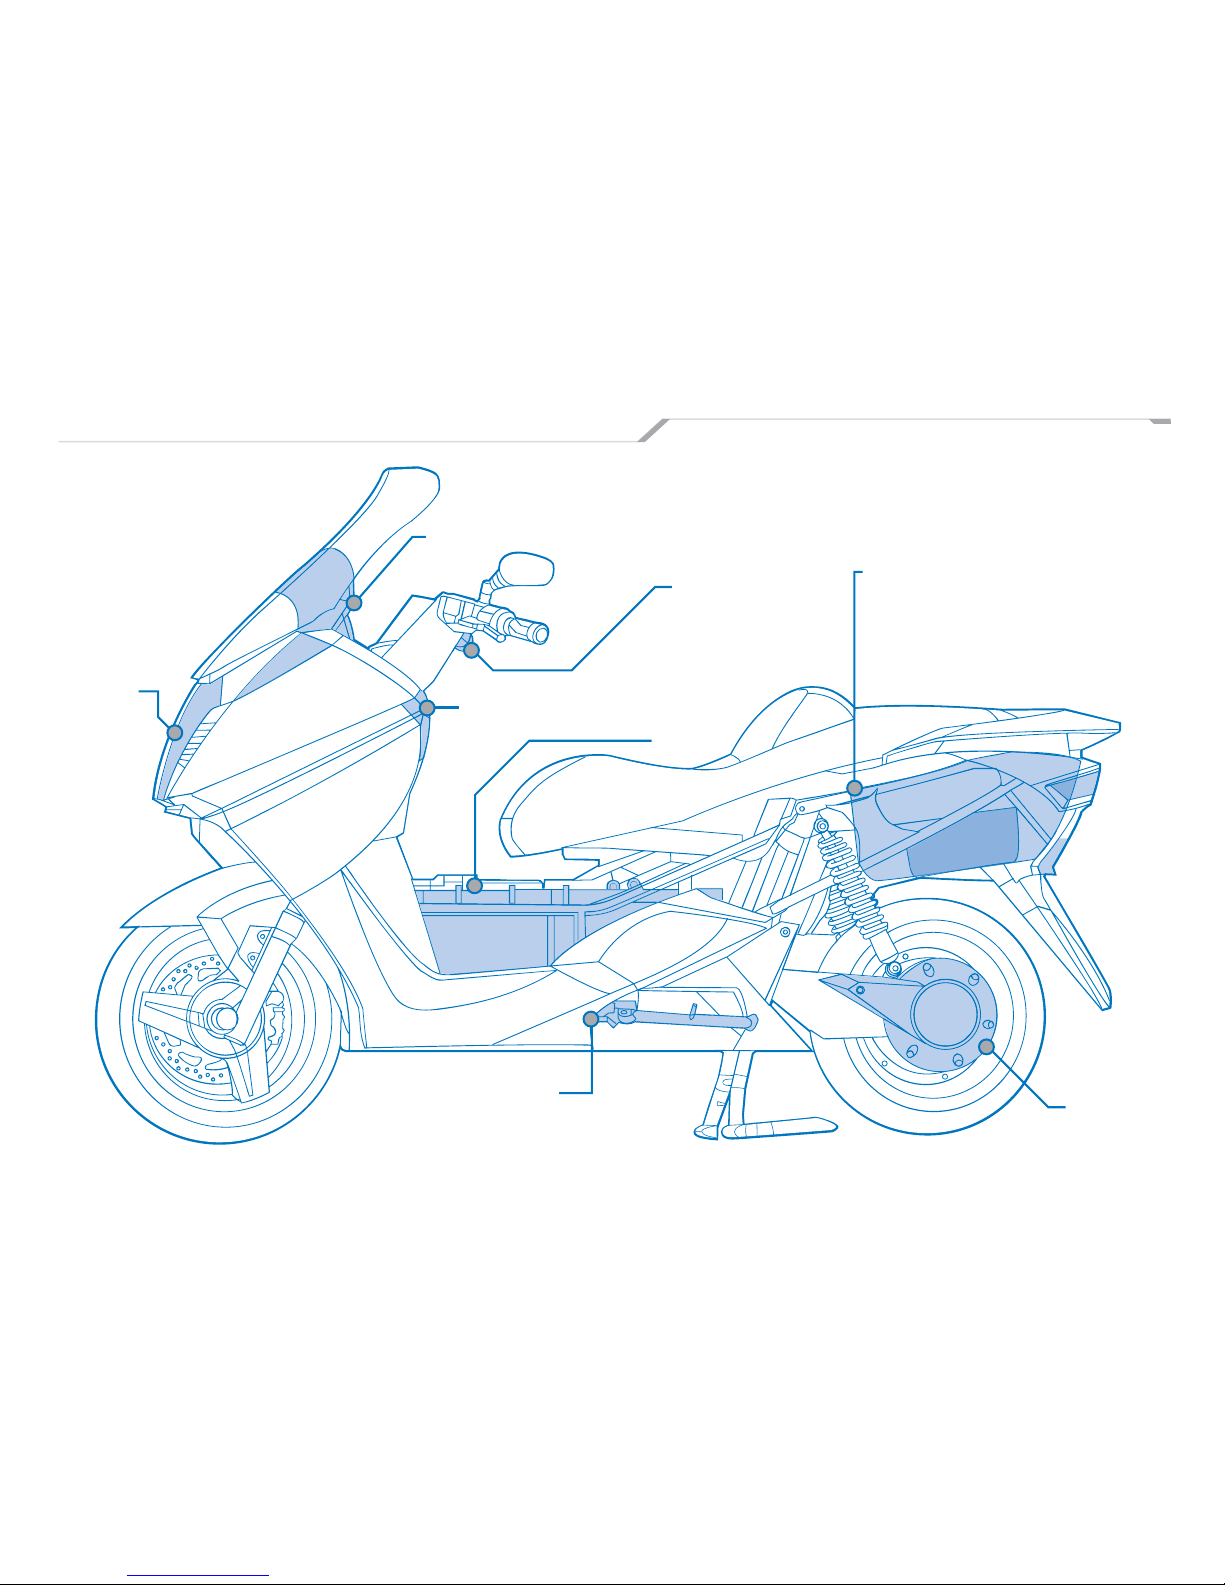
IMPORTANT SCOOTER COMPONENTS
Headlight
(Pg 36)
Instrument Cluster
(Pg 11)
Trunk
(Pg 20)
Battery
(Pg 24)
Throttle
(Pg 17)
Keylock / Ignition Switch
(Pg 15)
Motor
(Pg 23)
Side Stand
(Pg 19)
Page 9
Vectrix Electric MAXI-Scooter User’s Guide 9
VEHICLE IDENTIFICATION NUMBER (VIN
)
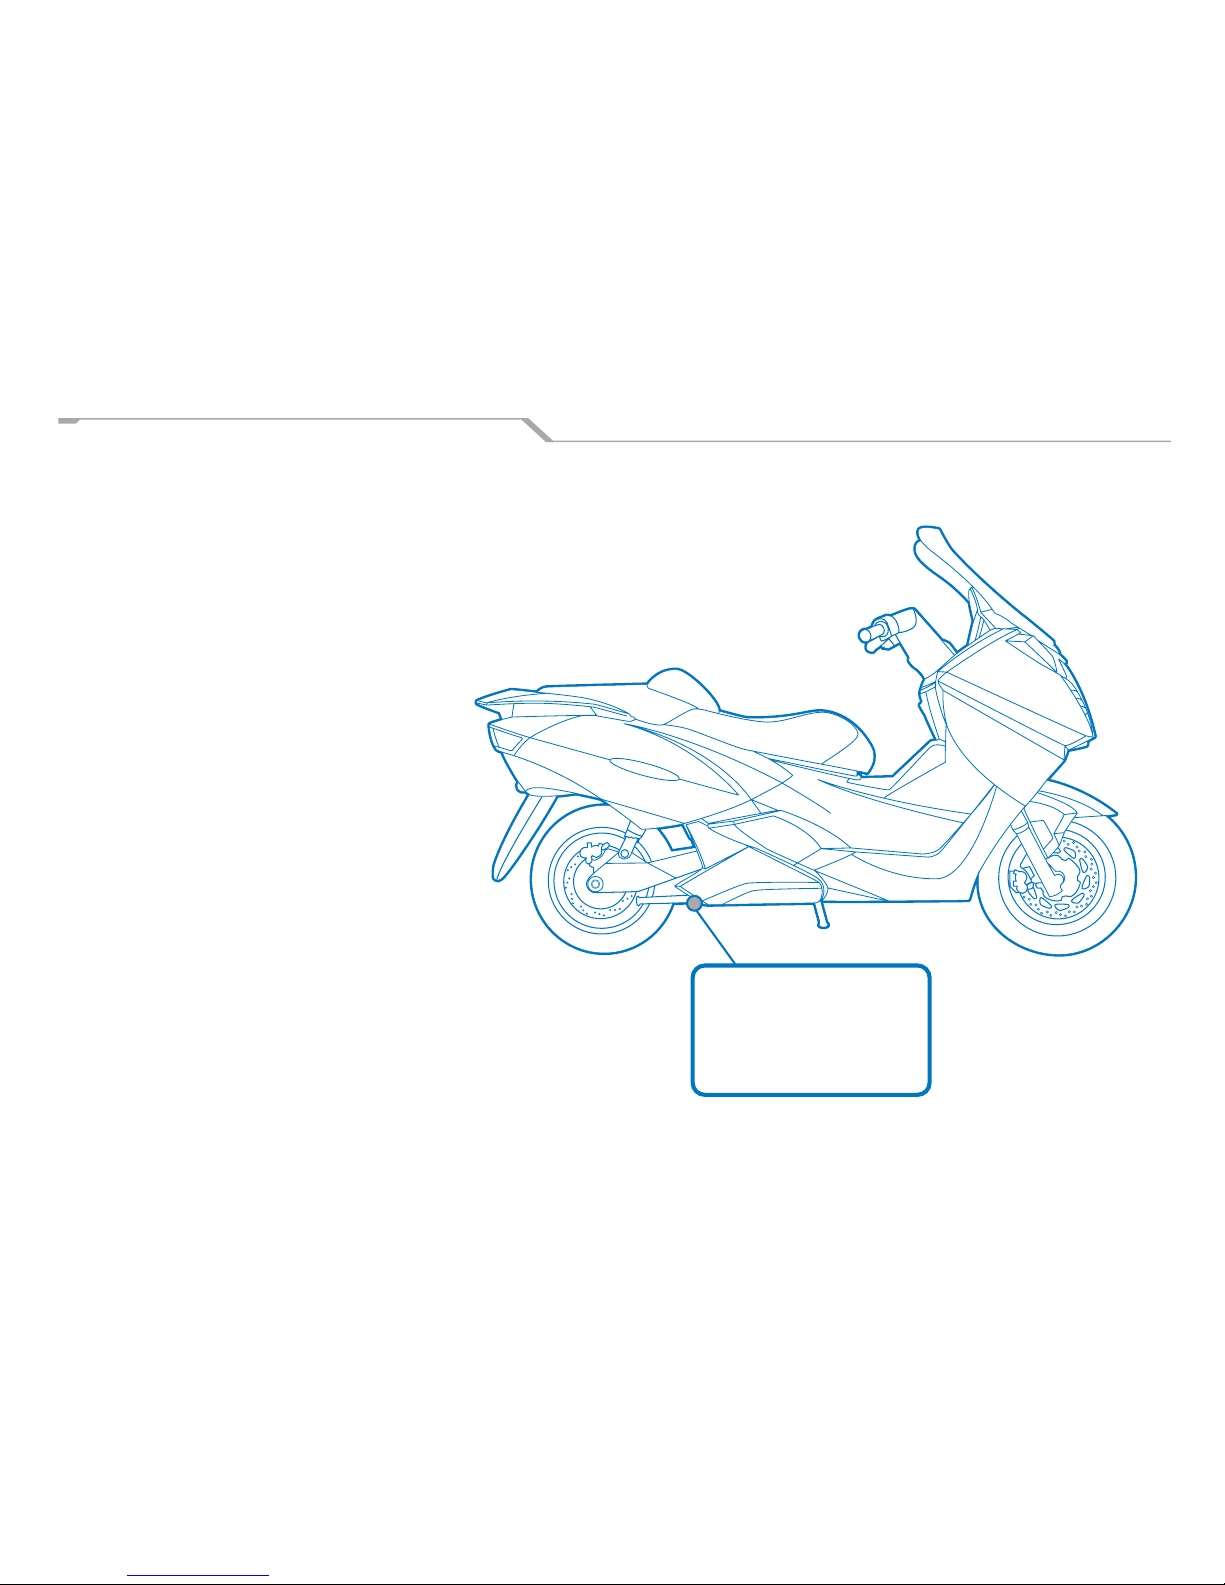
The VIN is located on the back of the frame in
the right bottom corner. It is stamped right into
the metal.
The Manufacturer’s Label is located on the bot tom
rear of the rear frame casting. This label displays
the VIN (upper section), Manufacturer’s name, 2
type approval mark, the VIN printed again (lower
section), and the Static Sound Level.
The VIN is a 17 digit alphanumeric code, which
uniquely identifi es your scooter. The standard for
the VIN comes from the International Standards
Organization (ISO). The VIN number should
be used when ordering parts so that we can
access our database to insure that the correct and
appropriate parts are provided.
VECTRIX SP Z.O.O.
e22*2006*61*0241
*4MOCV22766N000054*
* dB (A) - * 1/min
Page 10
10 Vectrix Electric MAXI-Scooter User’s Guide
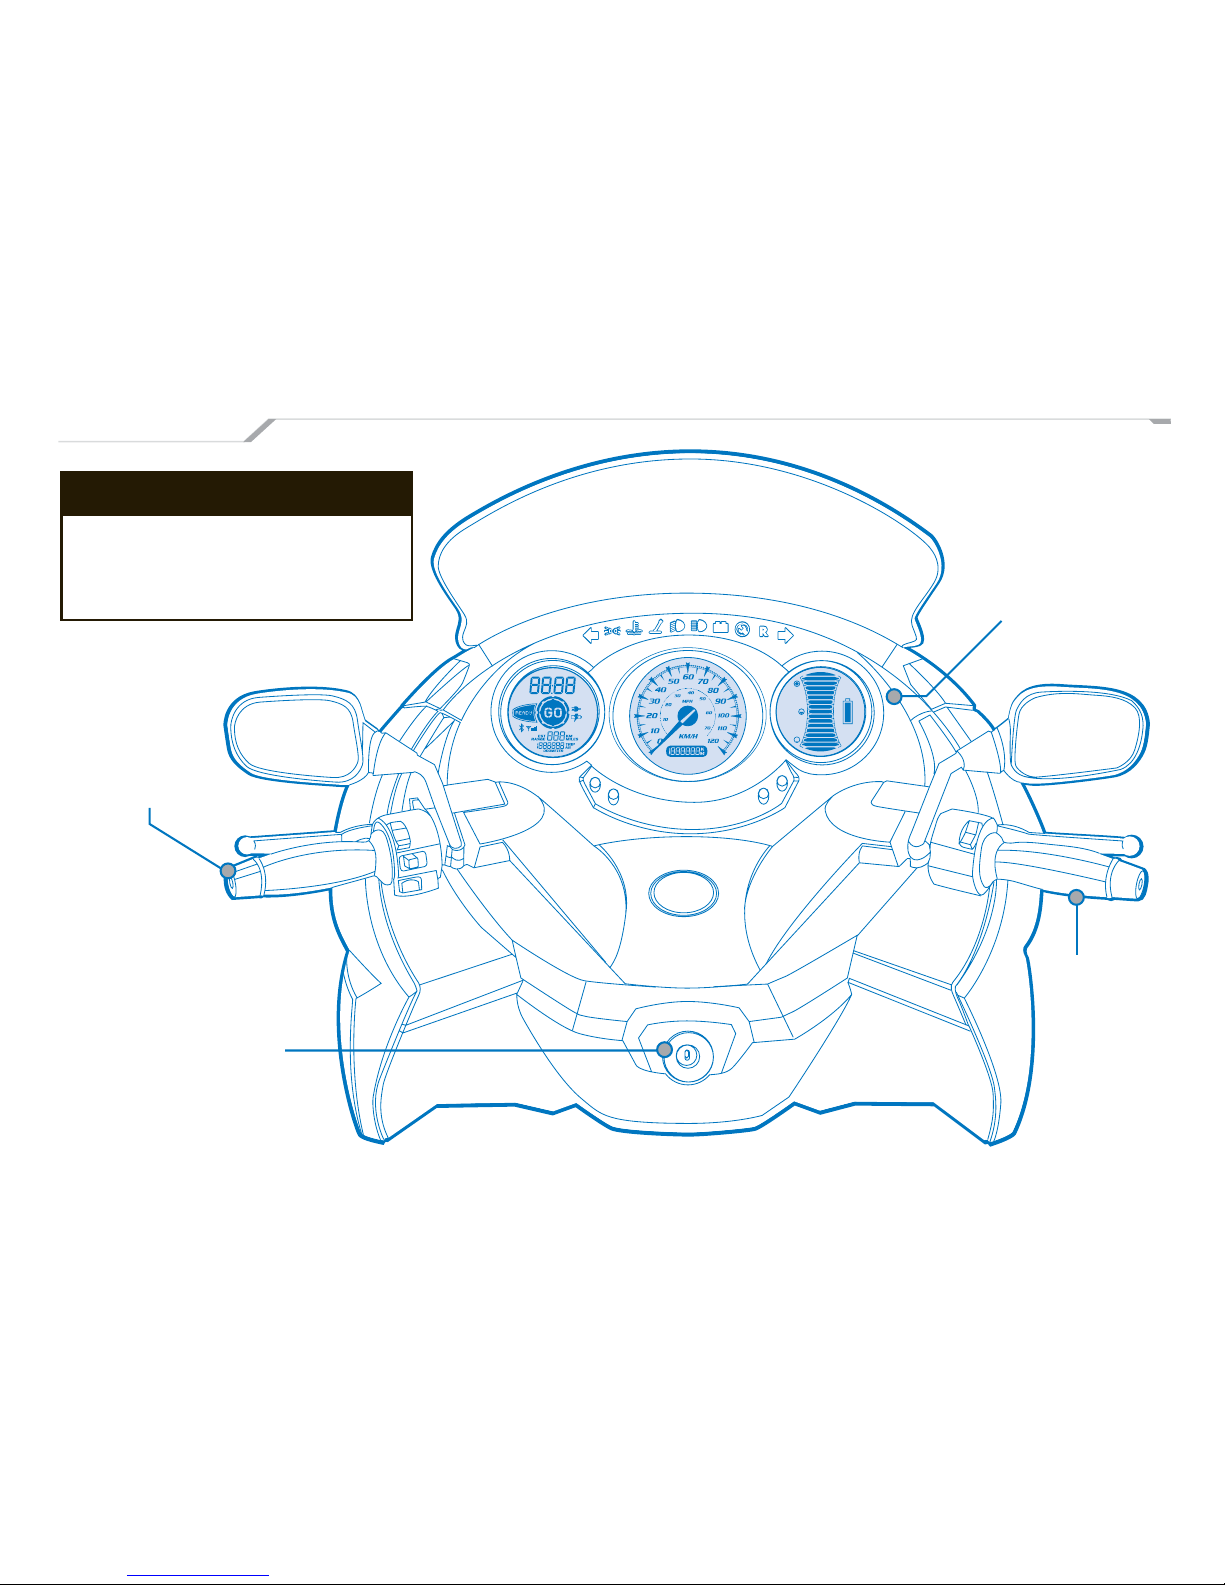
CONTROLS
WARNING!
In order to properly run your vehicle you
must read and understand this section of
the manual. It will help you get more familiar
with your scooter.
Instrument Panel
Ignition Switch
Regen Throttle
Left Handlebar
Page 11
Vectrix Electric MAXI-Scooter User’s Guide 11
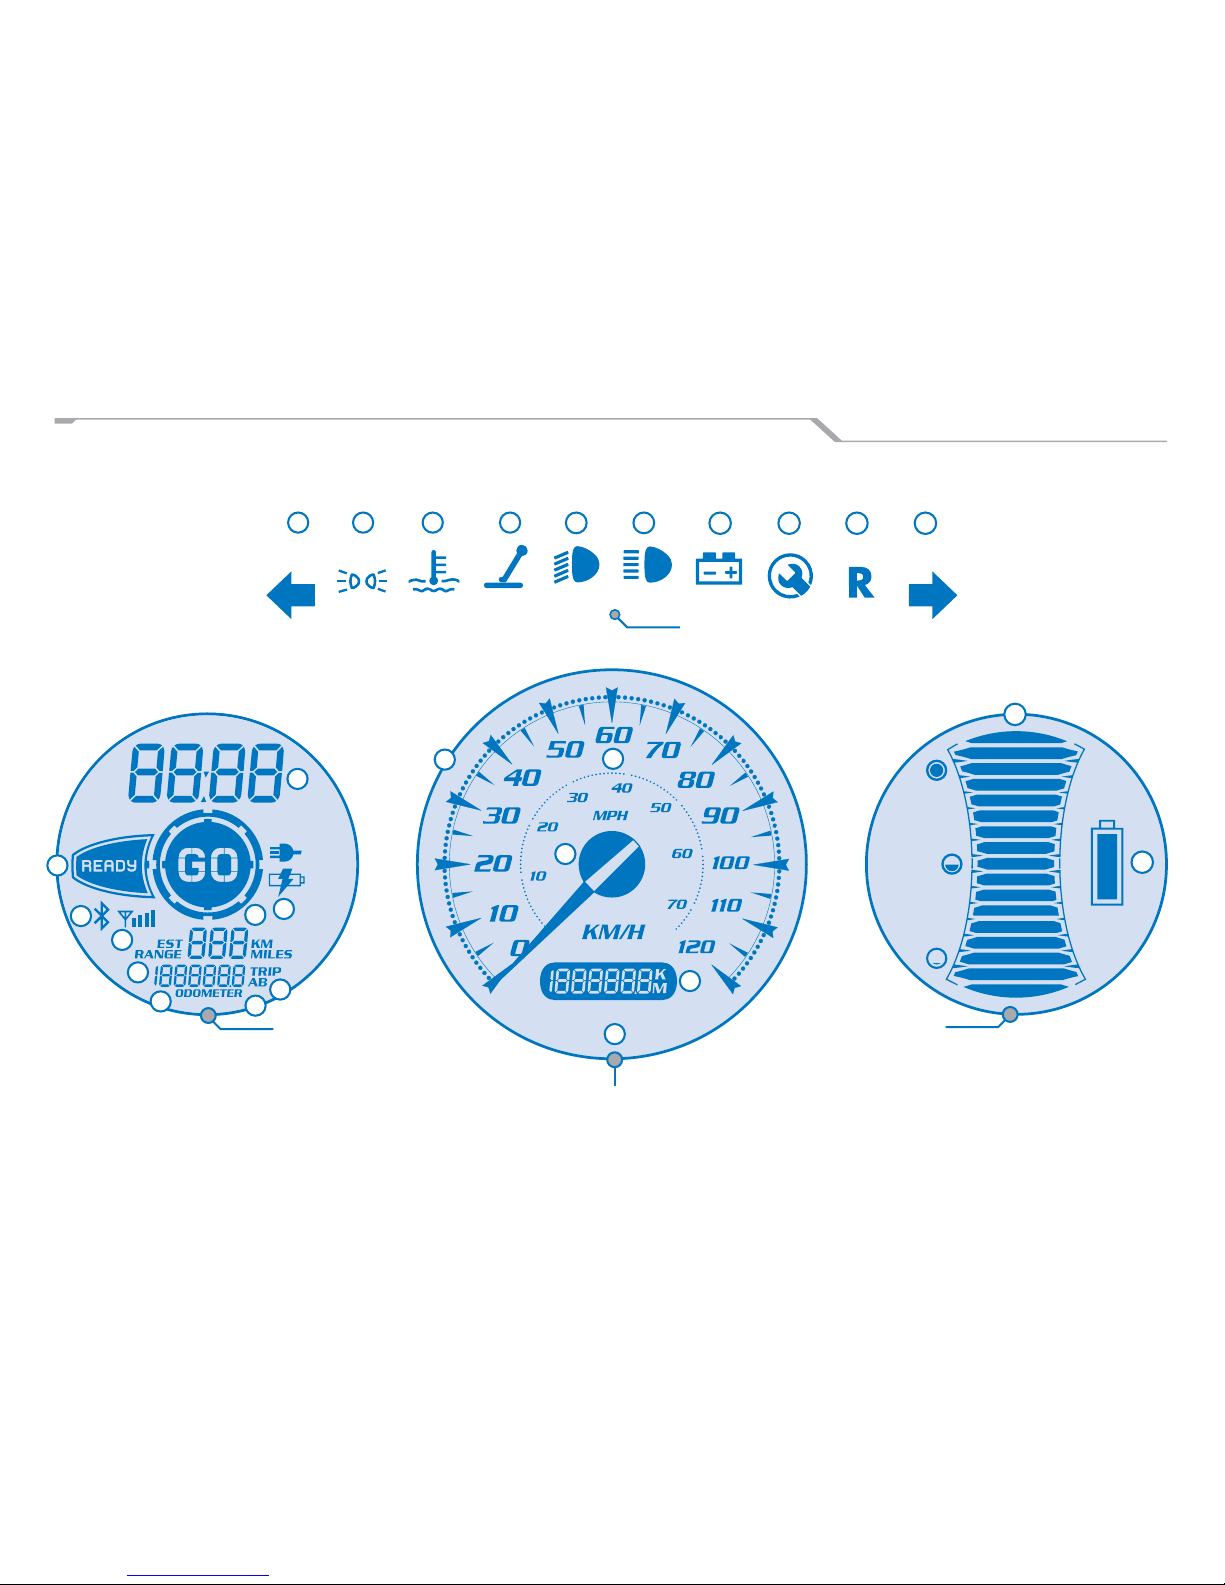
INSTRUMENT PANEL
Left LCD
Telltales
Right LCD
Speedometer / Odometer
Fig 1.0
1
2
3
4
5
6
7
8
9
10
11
12
13
14
15 16 17 18
19
20 21 22 23 24
26
25
27
Page 12

12 Vectrix Electric MAXI-Scooter User’s Guide
INSTRUMENT PANEL
FIG 1 ILLUSTRATES WHERE ITEMS
1–30 ARE LOCATED
1. TRIP AB INDICATOR
This indicator allows the user to keep track
of two trips: tripA and tripB.
2. ODOMETER INDICATOR
The odometer indicator allows the user to keep
track of the total mileage.
3. ODOMETER OR TRIP AB READING
Shows number of miles or kilometers scooter
has gone in the selected trip.
4. ESTIMATED RANGE READING
Displays number of miles or kilometers that
are estimated to be available from the last
charge.
5. BLUETOOTH INDICATOR
This indicator is installed for the future
possibility of a Bluetooth interface.
6. RF RANGE INDICATOR
This shows four RF signal bars and is installed
for a possible future implementation of the RF/
Bluetooth interface.
7. READY INDICATOR
This is displayed when the system is in READY
mode.
8. GO INDICATOR
The GO Indicator will light up when it is safe to
accelerate.
9. BATTERY CHARGE/CHARGING INDICATOR
When the system is being charged by an
external power source the Battery Charging
Indicator will flash.
10. CLOCK READING
Displays the time of day in either 12 or 24
hour format.
11. SPEEDOMETER (KM/H – MPH)
The speedometer displays your current speed
in both KM/H and MPH.
12. ODOMETER READING
The odometer reading lets you see how many
total miles or kilometers you have traveled on
your scooter.
13. KM/H INDICATOR
Displays your rate of speed in kilometers per hour.
14. MPH INDICATOR
Displays your rate of speed in miles per hour.
15. LEFT DIR. INDICATOR LAMP TELLTALE
Illuminates in a green color when the user
activates the left signal.
16. PARKING/POSITION LAMPS TELLTALE
Illuminates green when the position lamps
are in use.
Page 13
Vectrix Electric MAXI-Scooter User’s Guide 13
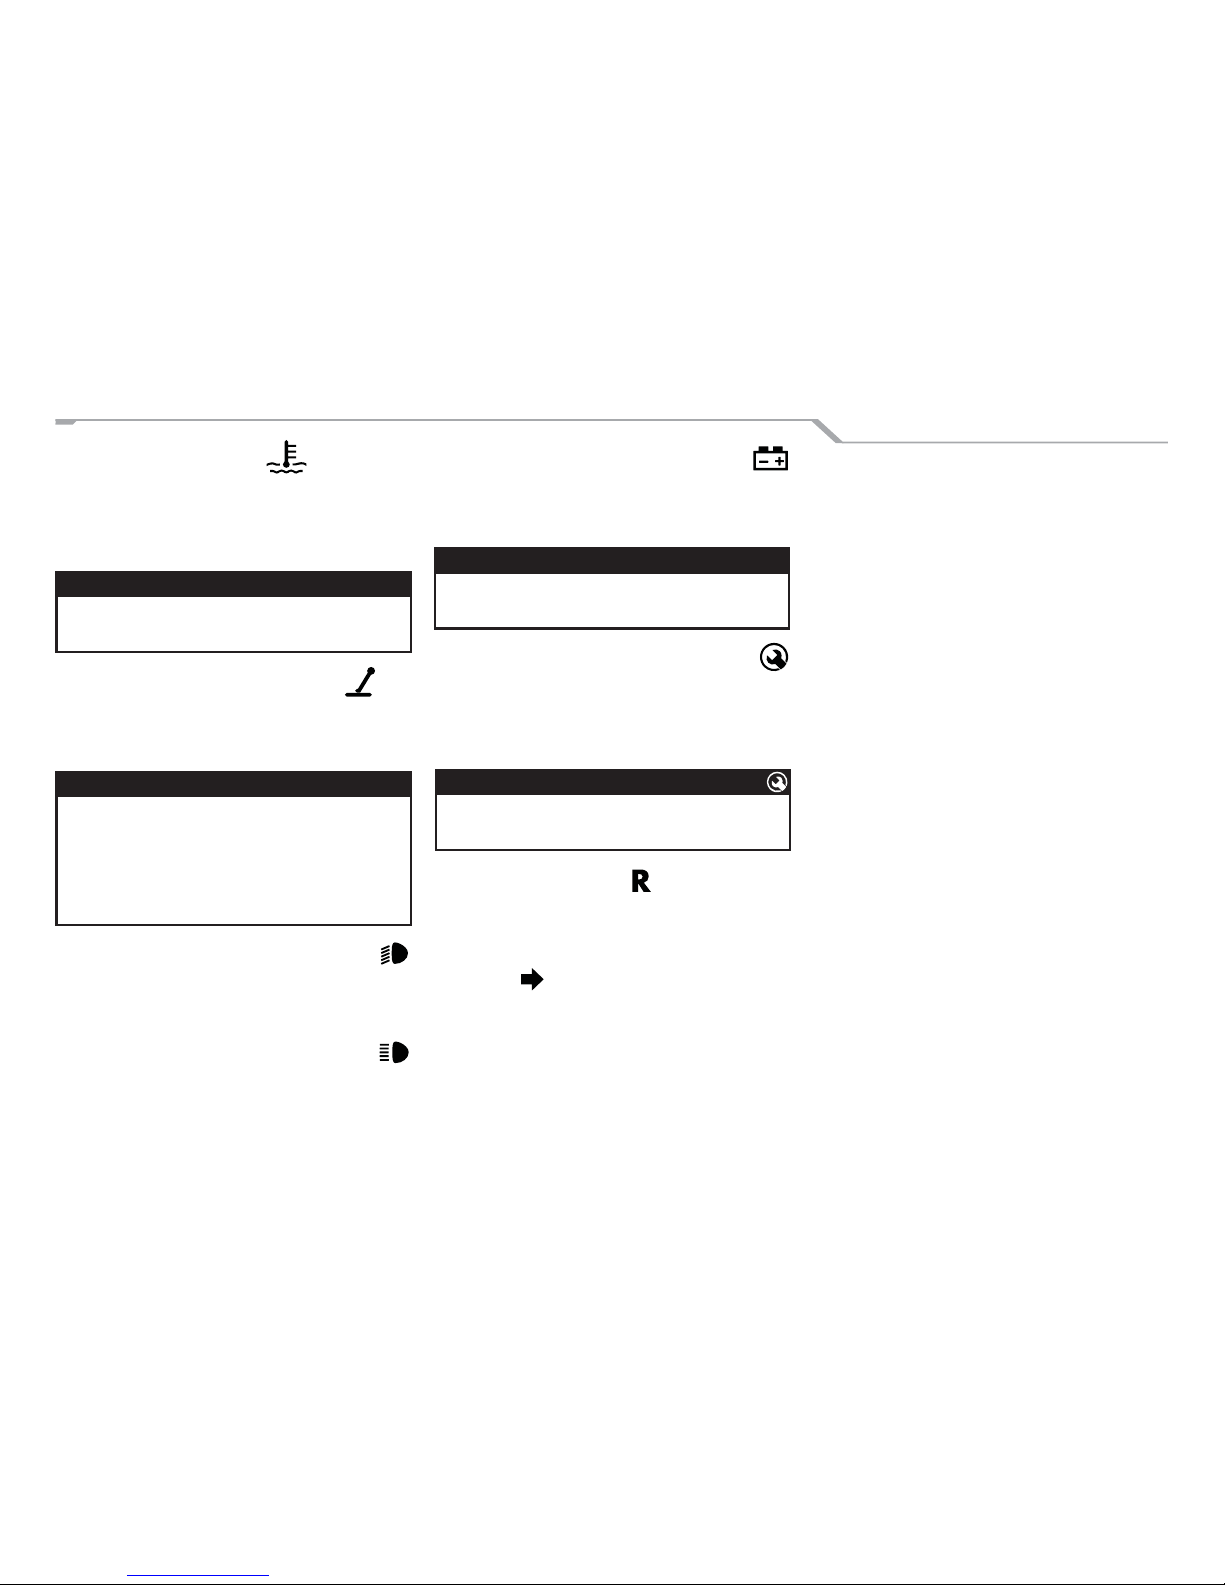
17. HIGH TEMP TELLTALE
This will illuminate in red when the battery or
key system components exceed safe temperature operation.
WARNING!
The scooter will not operate if the High Temp
Telltale is illuminated.
18. SIDE/CENTER STAND TELLTALE
An amber light will illuminate if the side or
center stands are down or lowered.
WARNING!
Do not operate scooter when the side or center stands are in the down or lowered position.
There is an interlock which prevents the scooter
from being enabled unless the sidestand is in
the up position.
19. DIPPED-BEAM HEADLAMP TELLTALE
When the low beam is being used the signal
will illuminate green.
20. MAIN-BEAM HEADLAMP TELLTALE
This blue light will illuminate when the main
beam or high beam light is in use.
21.BATTERY MALFUNCTION TELLTALE
This will illuminate red when the battery
system is malfunctioning.
WARNING!
You must get your scooter checked if this light is
illuminating as soon as possible.
22. MAINTENANCE REQUIRED TELLTALE
When this amber color light is illuminated it
means that there is a need to take your scooter
to your local service center to be checked out.
WARNING!
You must get your scooter checked if this light
is illuminating.
23. REVERSE TELLTALE
Indicates that the user is in reverse mode.
24. RIGHT DIRECTION INDICATOR LAMP
TELLTALE
Illuminates in a green color when the user
activates the right signal.
25. BATTERY LEVEL INDICATOR
The battery level chart is a 17 bar indicator that
shows how much charge is left in the battery.
26. BATTERY INDICATOR
Displays the amount of charge in the battery.
27. LIGHT SENSOR
The light sensor detects the level of ambient
light and automatically turns on/off the headlight as a safety precaution. In some geographic areas this feature is defeated such
that the headlight will always be on.
INSTRUMENT PANEL
Page 14
14 Vectrix Electric MAXI-Scooter User’s Guide
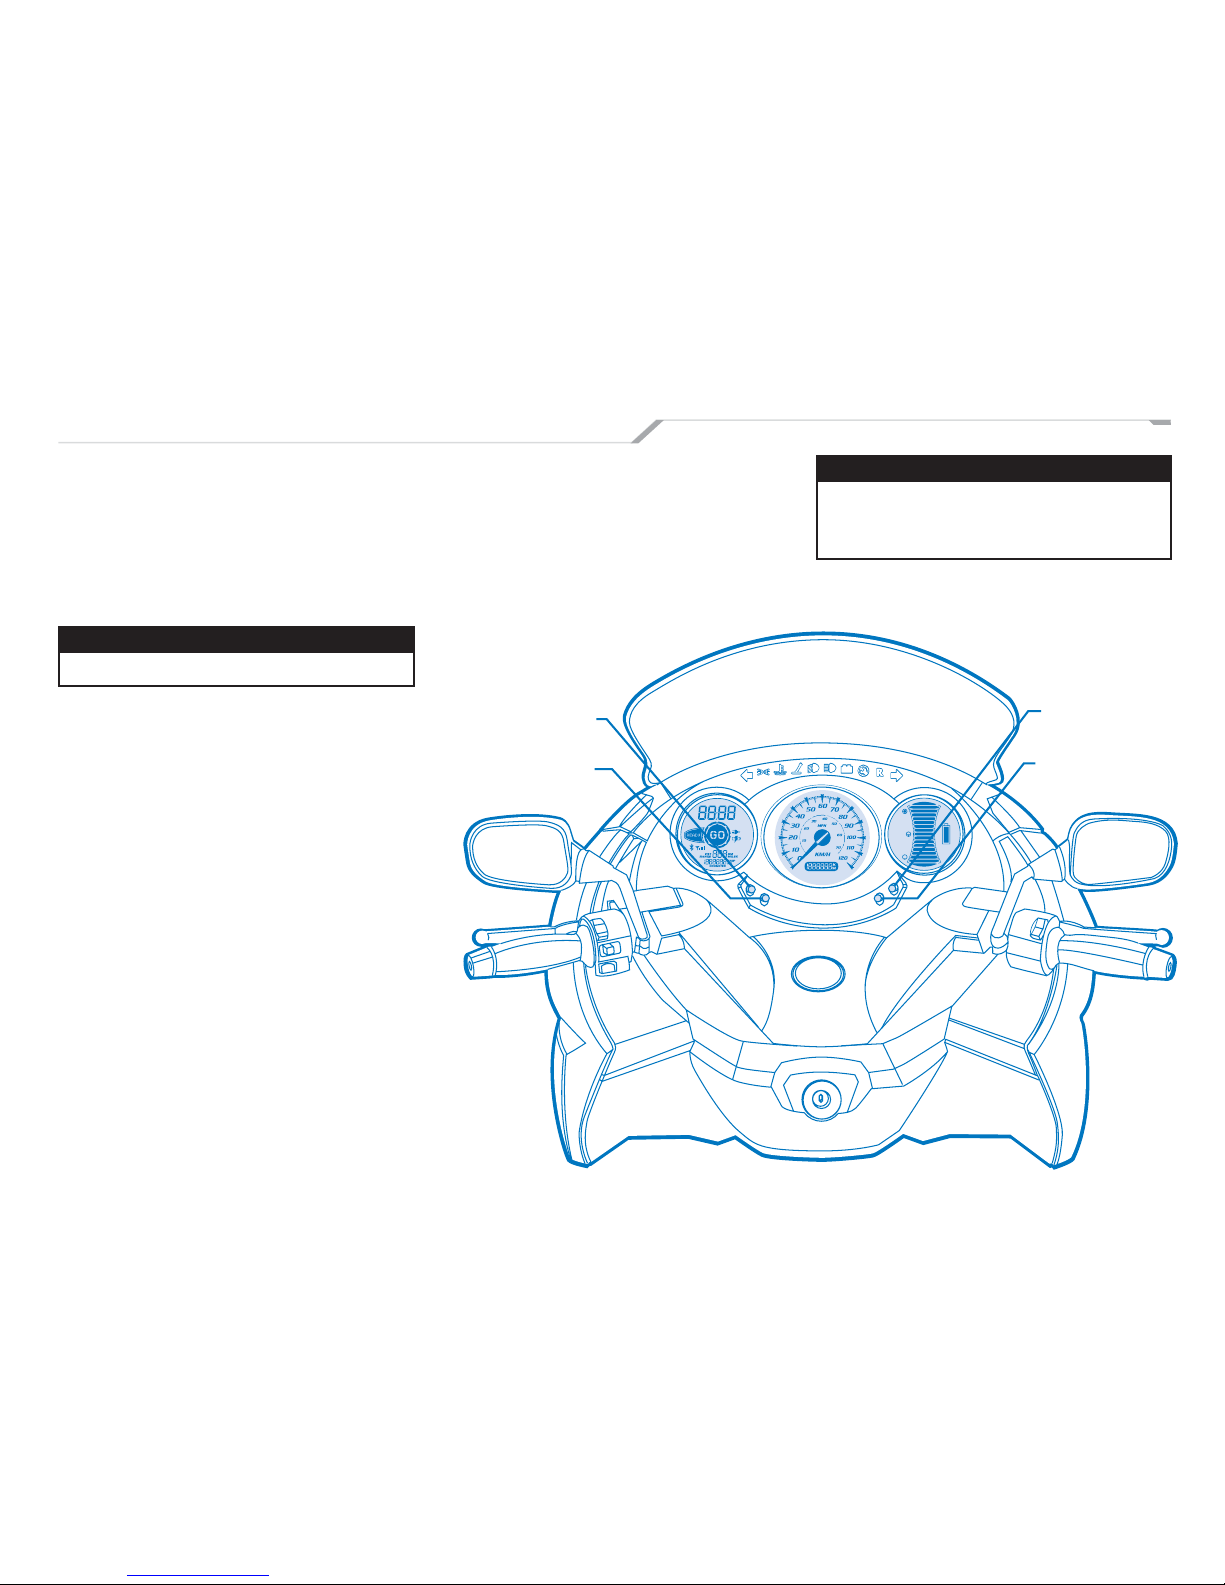
SWITCH ASSEMBLY AND FUNCTIONS
A1. KM/H – MPH SELECTOR
This allows you to switch between kilometers
and miles. The pushbutton is labeled “K/M”
Simply push the button to switch to the desired
measurement. Your desired measurement will
be illuminated on the left LCD screen.
NOTE!
The default setting is kilometers.
A2. TRIP A-B ODOMETER SELECTOR
Labeled as an “S” on the switch assembly, it
allows you to scroll through Trip A, Trip B, and the
normal odometer settings.
SCROLLING AND RESETTING TRIPS:
By pushing the A2 button you can scroll between
the odometer, Trip A and Trip B. To reset Trip A or
B scroll to the desired trip and press the button
for three (3) seconds.
A3. MINUTE ADJUSTMENT
This allows you to change the minutes on your
clock. The push button is marked with an “M” to
signify minutes.
A4. HOUR ADJUSTMENT
This allows you to change the hour on your clock.
The push button is marked with an “H” to signify
hours.
SETTING YOUR CLOCK:
Simply push the hour or minute
button to the desired time.
NOTE!
You can switch from 12 hour to 24 hour
modes by holding the hour button for three
(3) seconds.
A3 Minute
Adjustment
A4 Hour
Adjustment
A1 KM/H-MPH
Selector
A2 Trip A-B
ODO Selector
Page 15

Vectrix Electric MAXI-Scooter User’s Guide 15
SWITCH ASSEMBLY AND FUNCTIONS
DASHBOARD INFORMATION DURING
CHARGING
During charging the following information is displayed on the dash.
In the center of the dash, the charge current is
displayed on the speedometer where each 10
k/h equals 1 amp charge current. For example a
reading of 100 k/h equals 10 amps.
Underneath the speedometer, in the odometer
fi eld, two things are displayed. The two left digits
indicate the charge mode where “CP” is constant
power, “tr” is transition (cool down), “CC” is constant current and “EC” is end of charge.
On the right 3 digits the cutoff charge voltage is
displayed, i.e. the voltage at which the charge
mode will change.
On the left side of the display in the clock fi eld,
the charge time is displayed (in hours and minutes).
The estimated range fi eld displays the actual battery voltage, and the trip odometer fi eld displays
the highest temperature of the twelve battery
modules.
Page 16
16 Vectrix Electric MAXI-Scooter User’s Guide
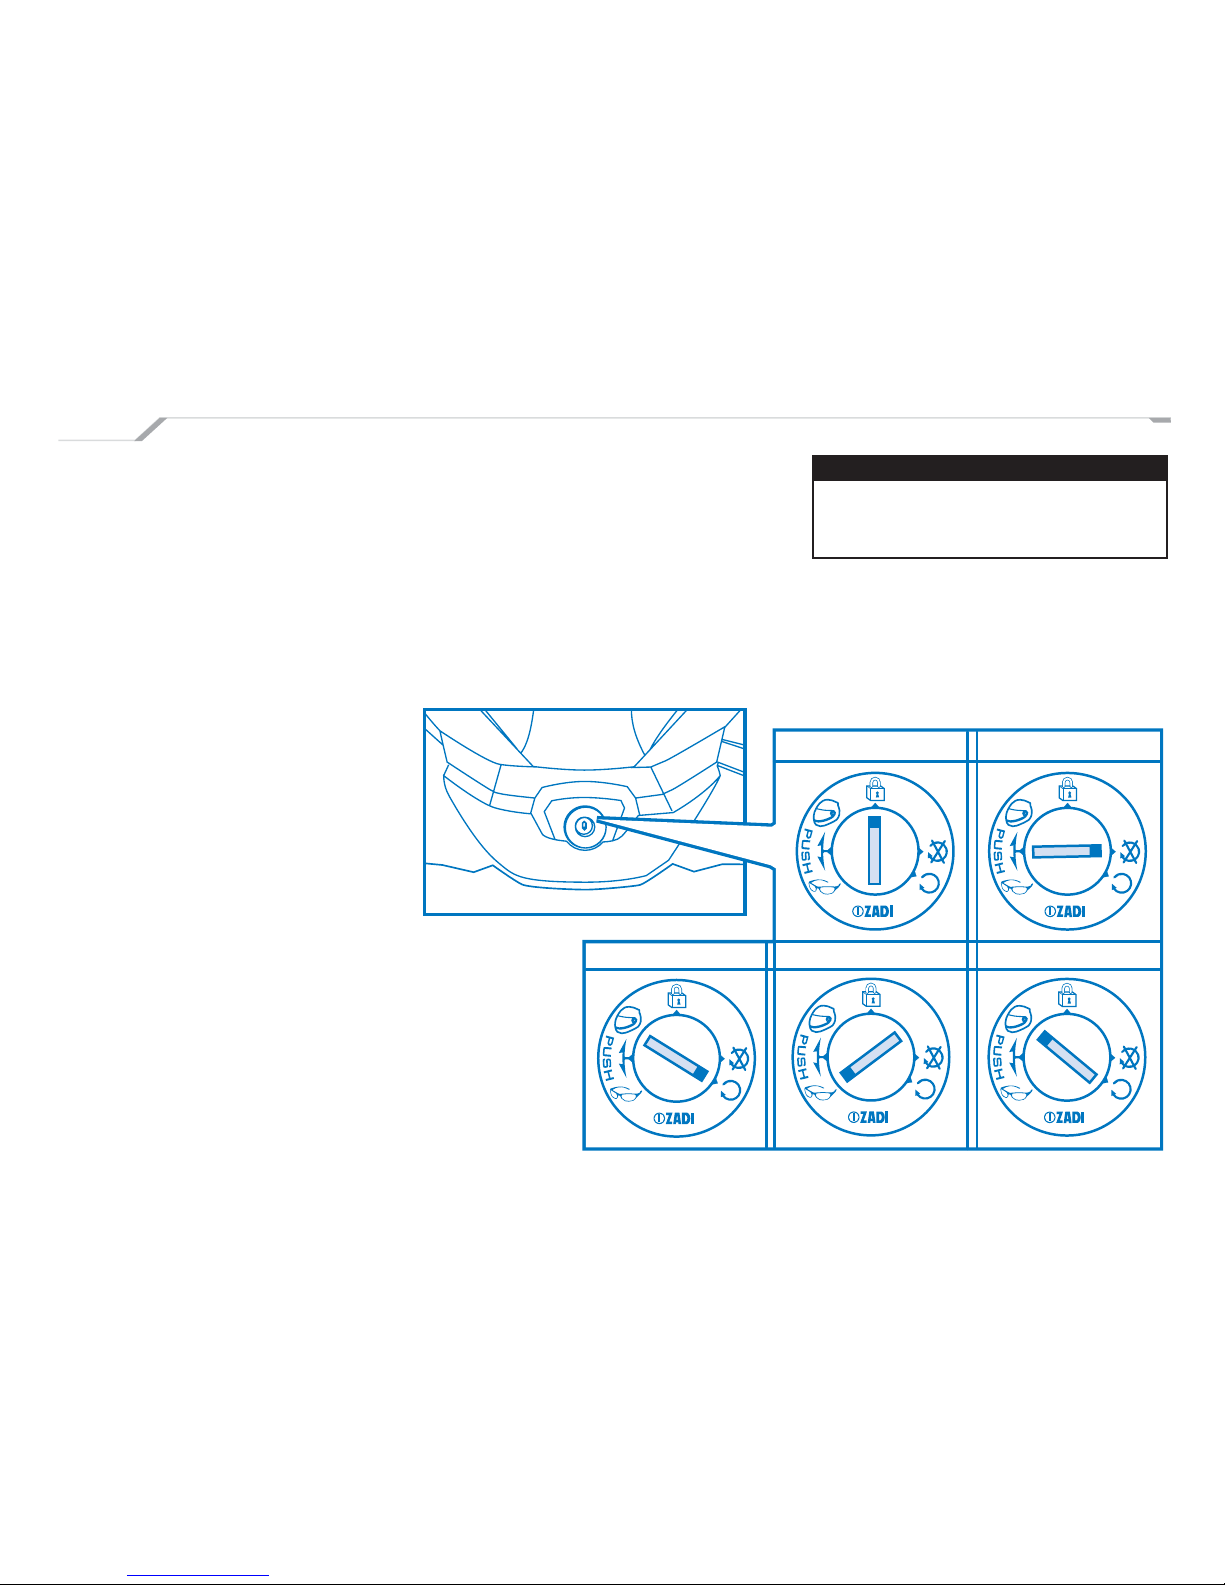
Only one key is needed to start your scooter, get
into the storage area, open your glove compartment, and lock your bike.
The ignition switch is located in the center of
the scooter in front of the stepthrough. The
ign ition features a nu mber of positions that al low
you to lock and unlock areas on the scooter.
DUPLICATE KEYS
See your service center for duplicate keys.
POSITIONS:
1. LOCK STEERING
When the key is turned to this setting you are
able to lock the steering mechanism. You simply
pull out the key and your scooter is fully locked
until reinsertion of the key.
2. SYSTEM OFF
In this position the scooter will be off, including
the motor and lights.
3.SYSTEM ON
In this position you will be able to ride the scooter.
KEY
4. GLOVE BOX
In this position you will be able to pop open the
glove box. To lock the glove box simply shut the
door and it will automatically lock itself.
5. TRUNK UNLOCK
In this position you will be able to open the
trunk.
NOTE!
Do not attempt to open your trunk while sitting
on the trunk. This could cause the mechanism
to break.
1.Lock Steering 2. System Off
3. System On
4. Glove Box 5. Trunk Unlock
Page 17
Vectrix Electric MAXI-Scooter User’s Guide 17
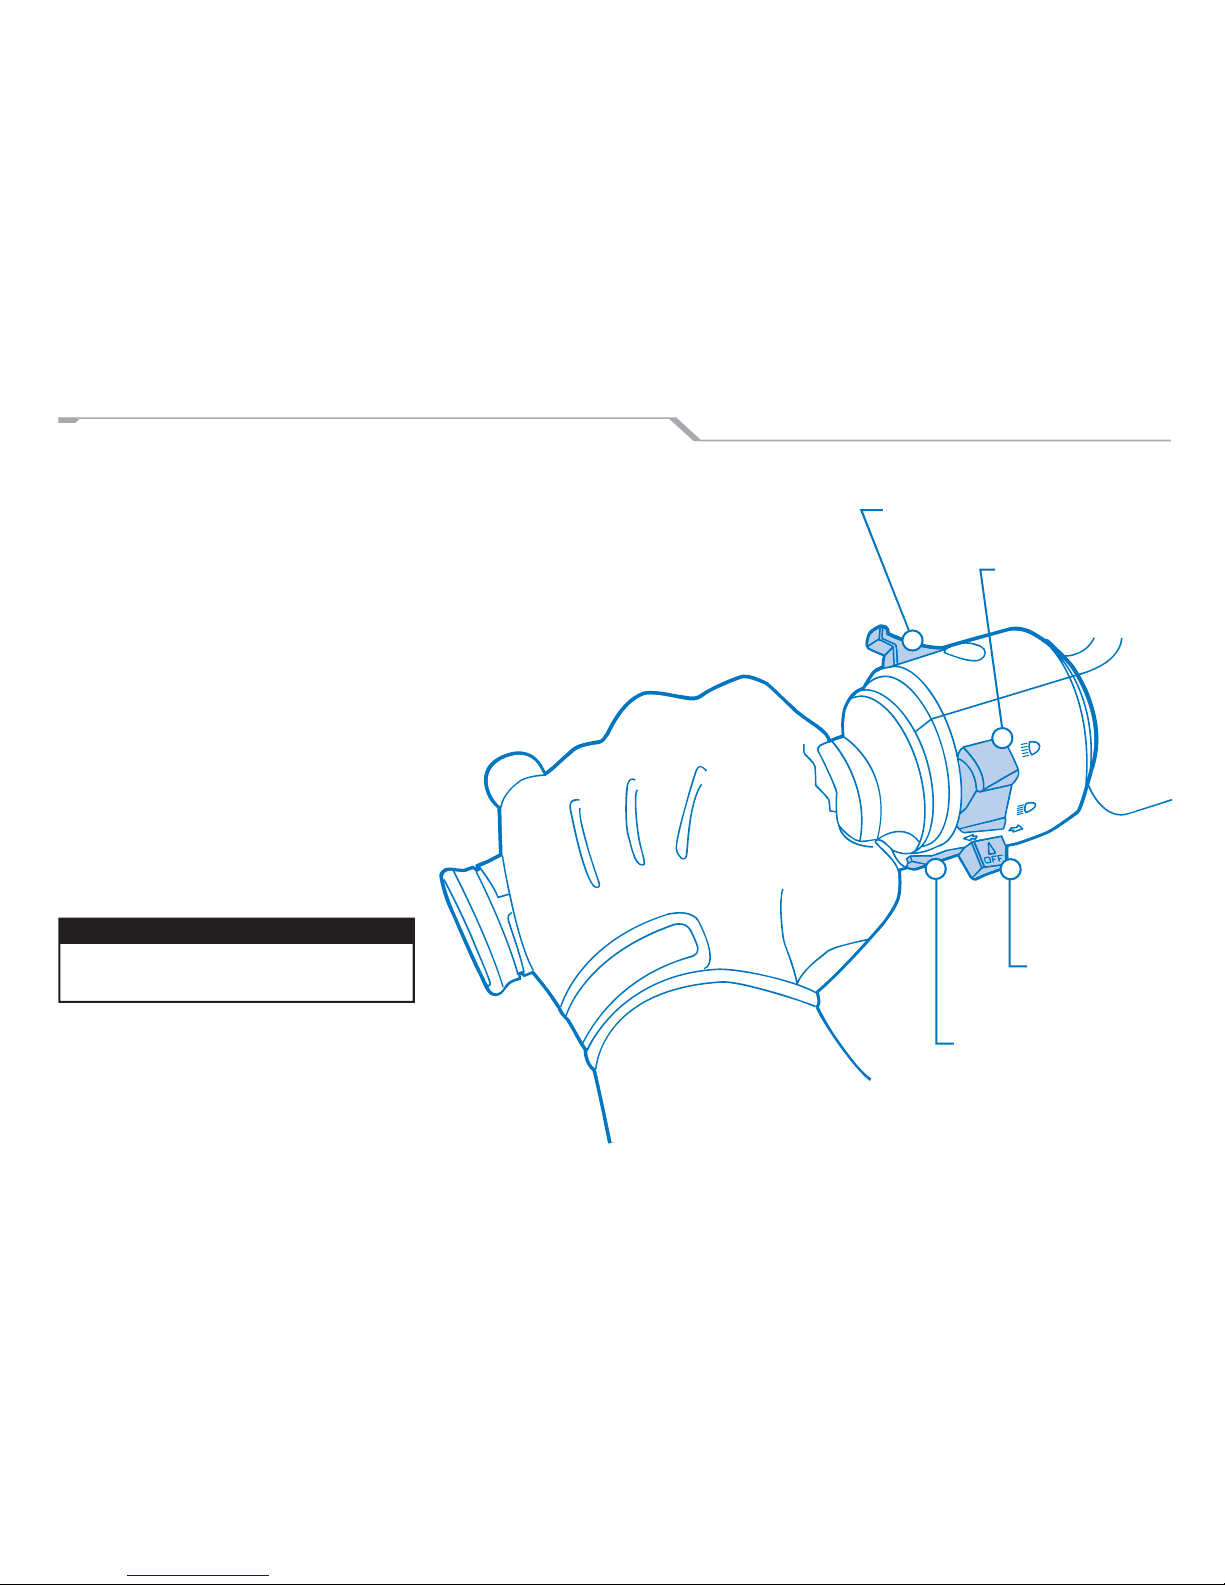
HANDLEBAR SWITCHES LEFT
1. MAIN/DIPPED BEAM SWITCH
This switch allows the user to switch from high
to low beam. Push up to select low beam to high
beam, or push down to select high beam to low
beam.
2. MAIN-BEAM PASS SWITCH
This switch is used to let other drivers know that
you are passing. Pulse the switch to fl ash your
beams. The switch is located on the backside of
the handlebar.
3. LEFT/RIGHT DIRECTION SWITCH
To engage the turn signal, move the switch to
the right to signal a right hand turn and move the
switch to the left to signal a left hand turn. Push
the button back to reset the switch
NOTE!
Always use turn signals to make other motorists
aware of your intentions.
Main/Dipped Beam
Switch
Main-Beam Pass
Switch
Left/Right
Direction Switch
4. HORN SWITCH
By tapping the horn you will hear a chirping noise.
If you hold on to the horn switch it will fi rst chirp
and then make a louder sound.
Horn Switch
4
3
1
2
Page 18
18 Vectrix Electric MAXI-Scooter User’s Guide
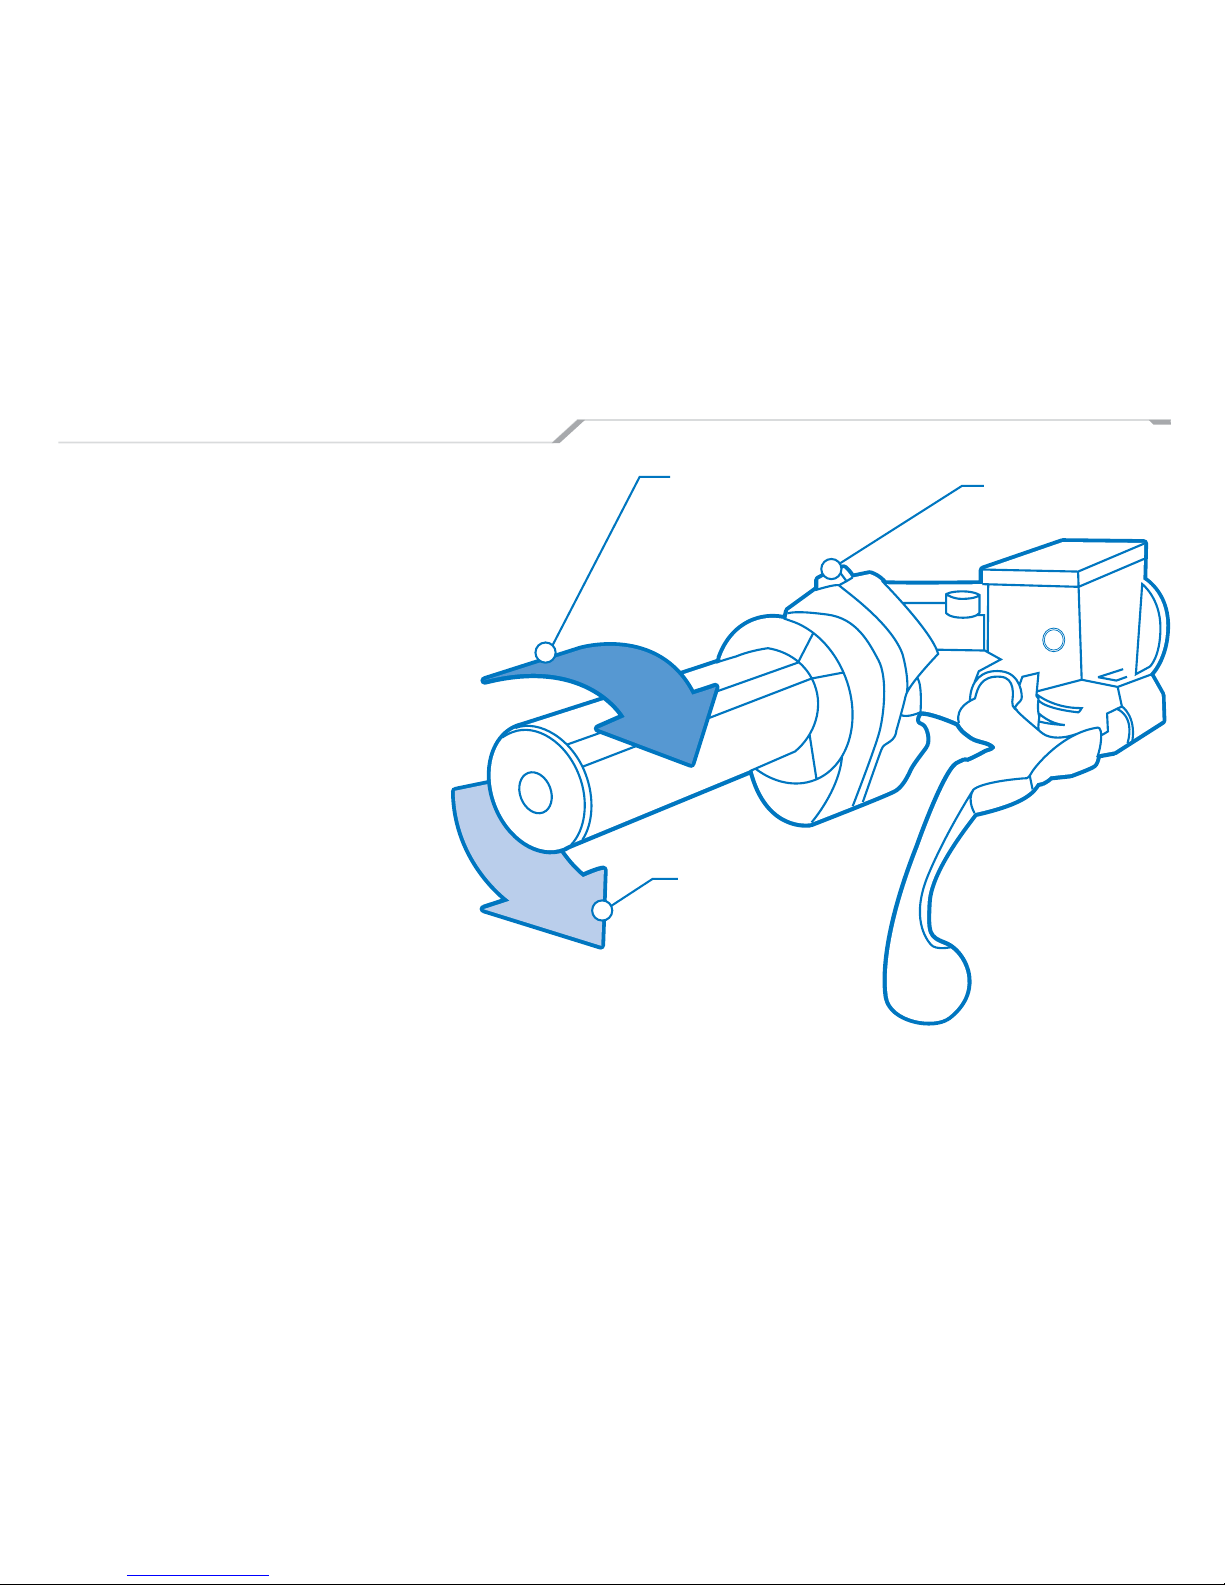
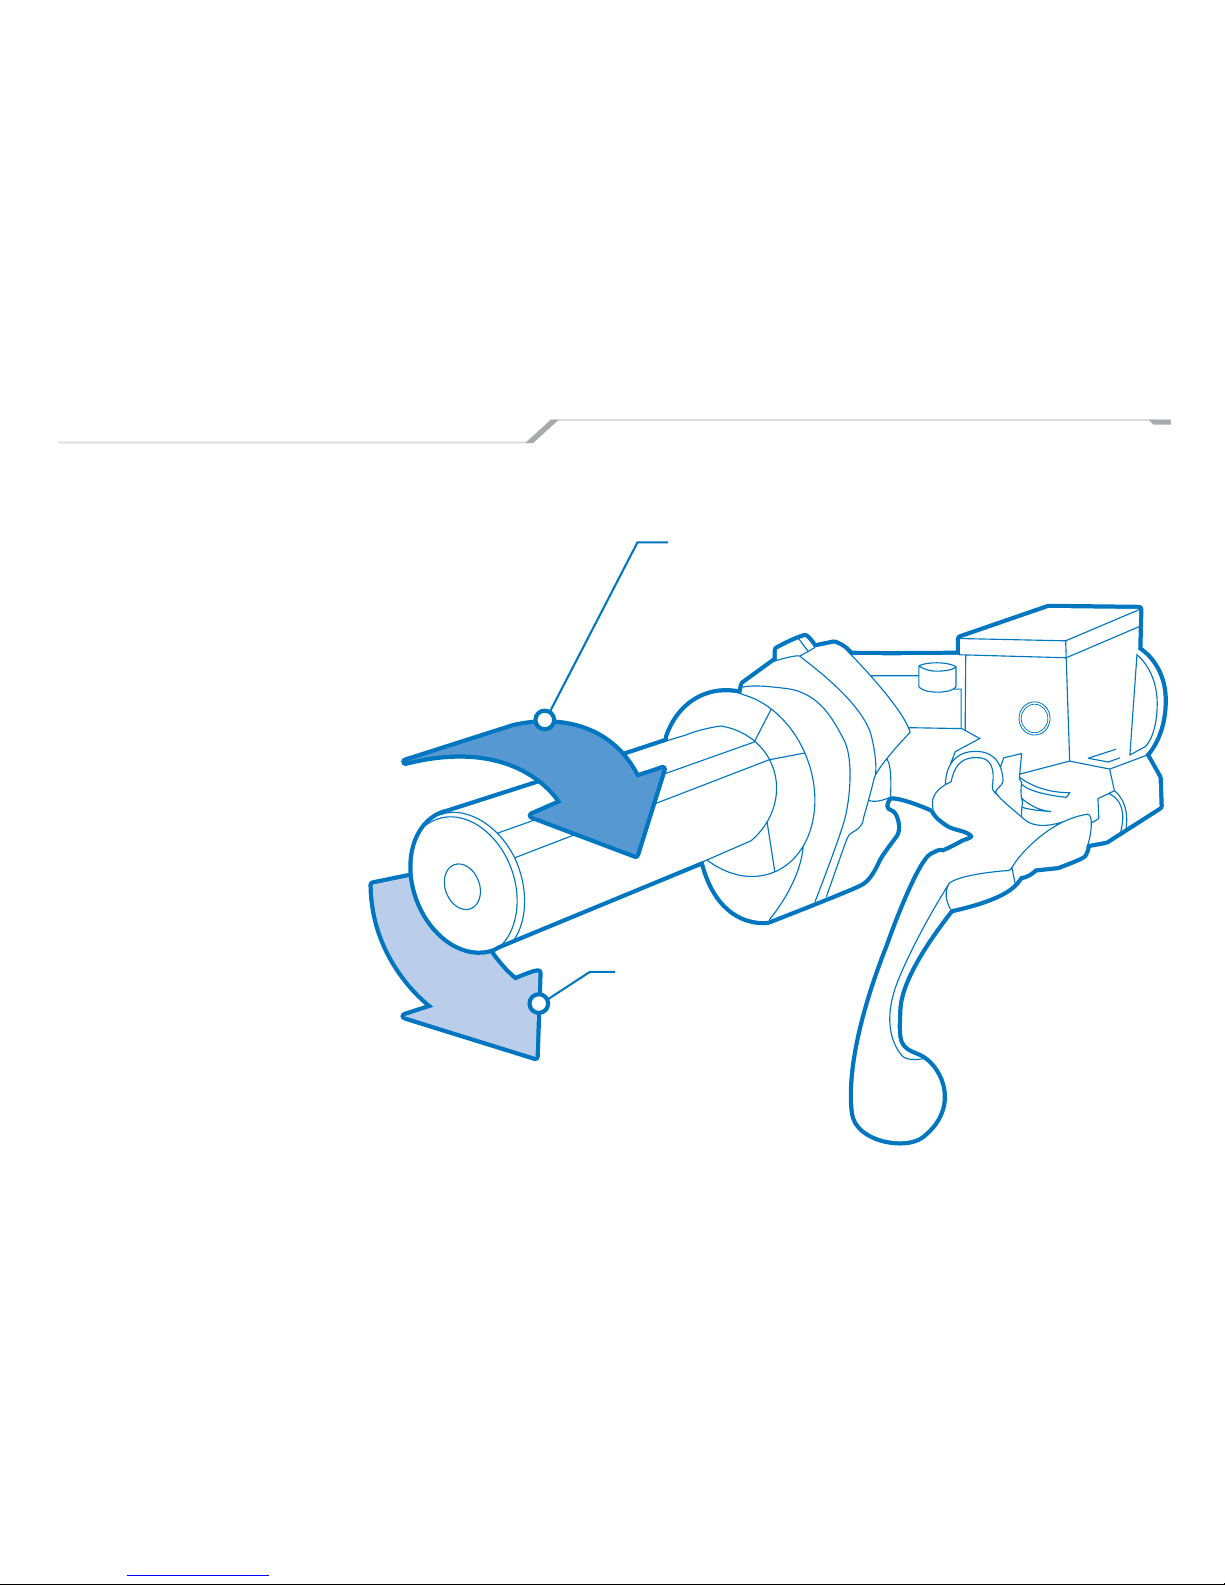
1. THROTTLE/REGEN POSITION
The throttle in the right handlebar is a
distinctive feature of your Vectric Electric MAXIScooter. The throttle is the user interface, which
determines forward motion as well as implementing regenerative braking and the reverse feature.
This bi-directional throttle is very simple to use.
+ Roll the throttle downward (rearward) to
accelerate in the forward direction. (A)
+ Release the throttle and it returns to a
neutral position.
+ To activate regenerative braking simply roll the
throttle forward beyond the neutral positions
and you will progressively engage regenerative
braking. (B)
+ From a standstill position rolling the throttle
forward puts the scooter in reverse at a very
low speed to maneuver out of tight parking
situations. (B)
HANDLEBAR SWITCHES RIGHT
2. ON/OFF (POWER) SWITCH
The power switch is a fast, convenient method of shutting down the scooter in either
an emergency or under normal operation.
Use your right thumb to operate the power
switch. Push up to turn the switch on, and
push down to turn the switch off.
Regenerative Braking /
Reverse
Acceleration
A
B
2
On/Off (Power)
Switch
Page 19
Vectrix Electric MAXI-Scooter User’s Guide 19
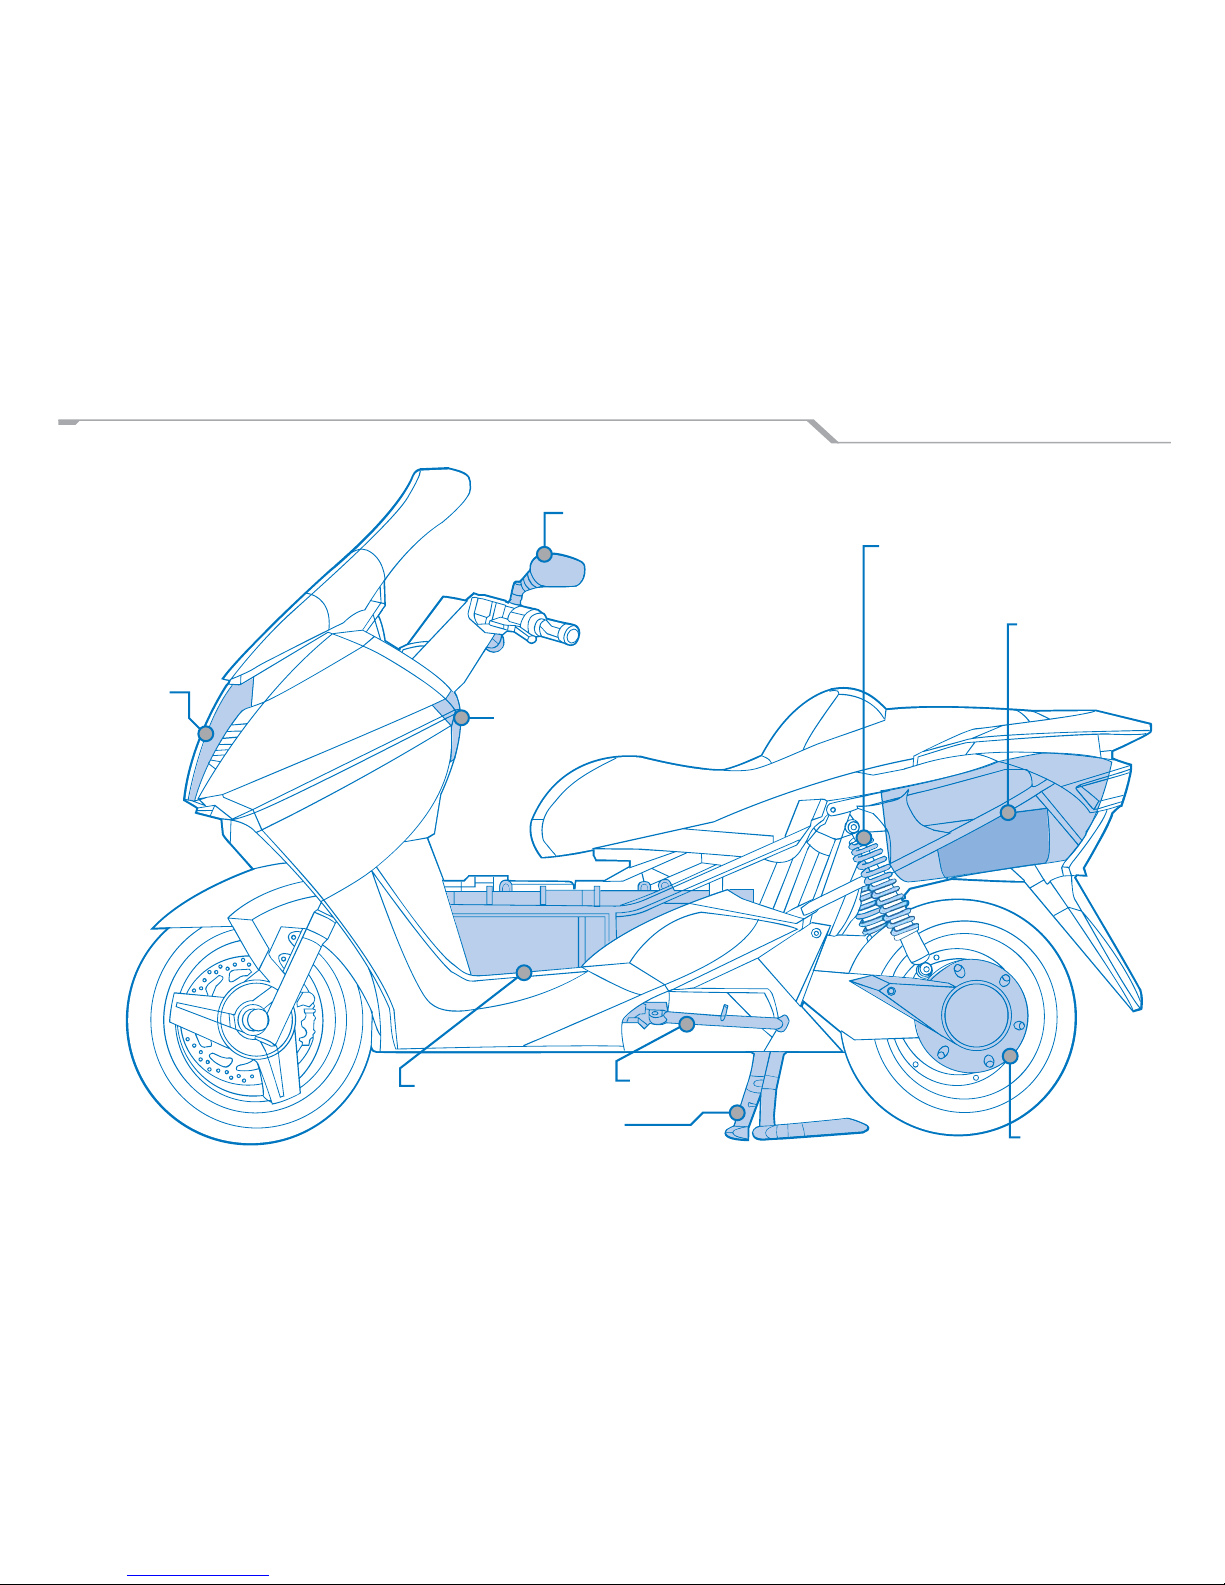
MAIN COMPONENTS
Headlight
Rear View Mirrors
Glove Box
Battery Pack Side Stand
Brushless Motor
Charging Cord
Center Stand
(optional)
Rear Shock Absorber
Page 20
20 Vectrix Electric MAXI-Scooter User’s Guide
Never park your scooter on soft earth. You should
make every attempt to park your scooter on a
level, hard surface.
Always park in an area where you are visible to
other motorists so to avoid possible damage to
your scooter.
NOTE!
There is a telltale on the middle of the
instrument panel that will illuminate when
either the side or center stand is down.
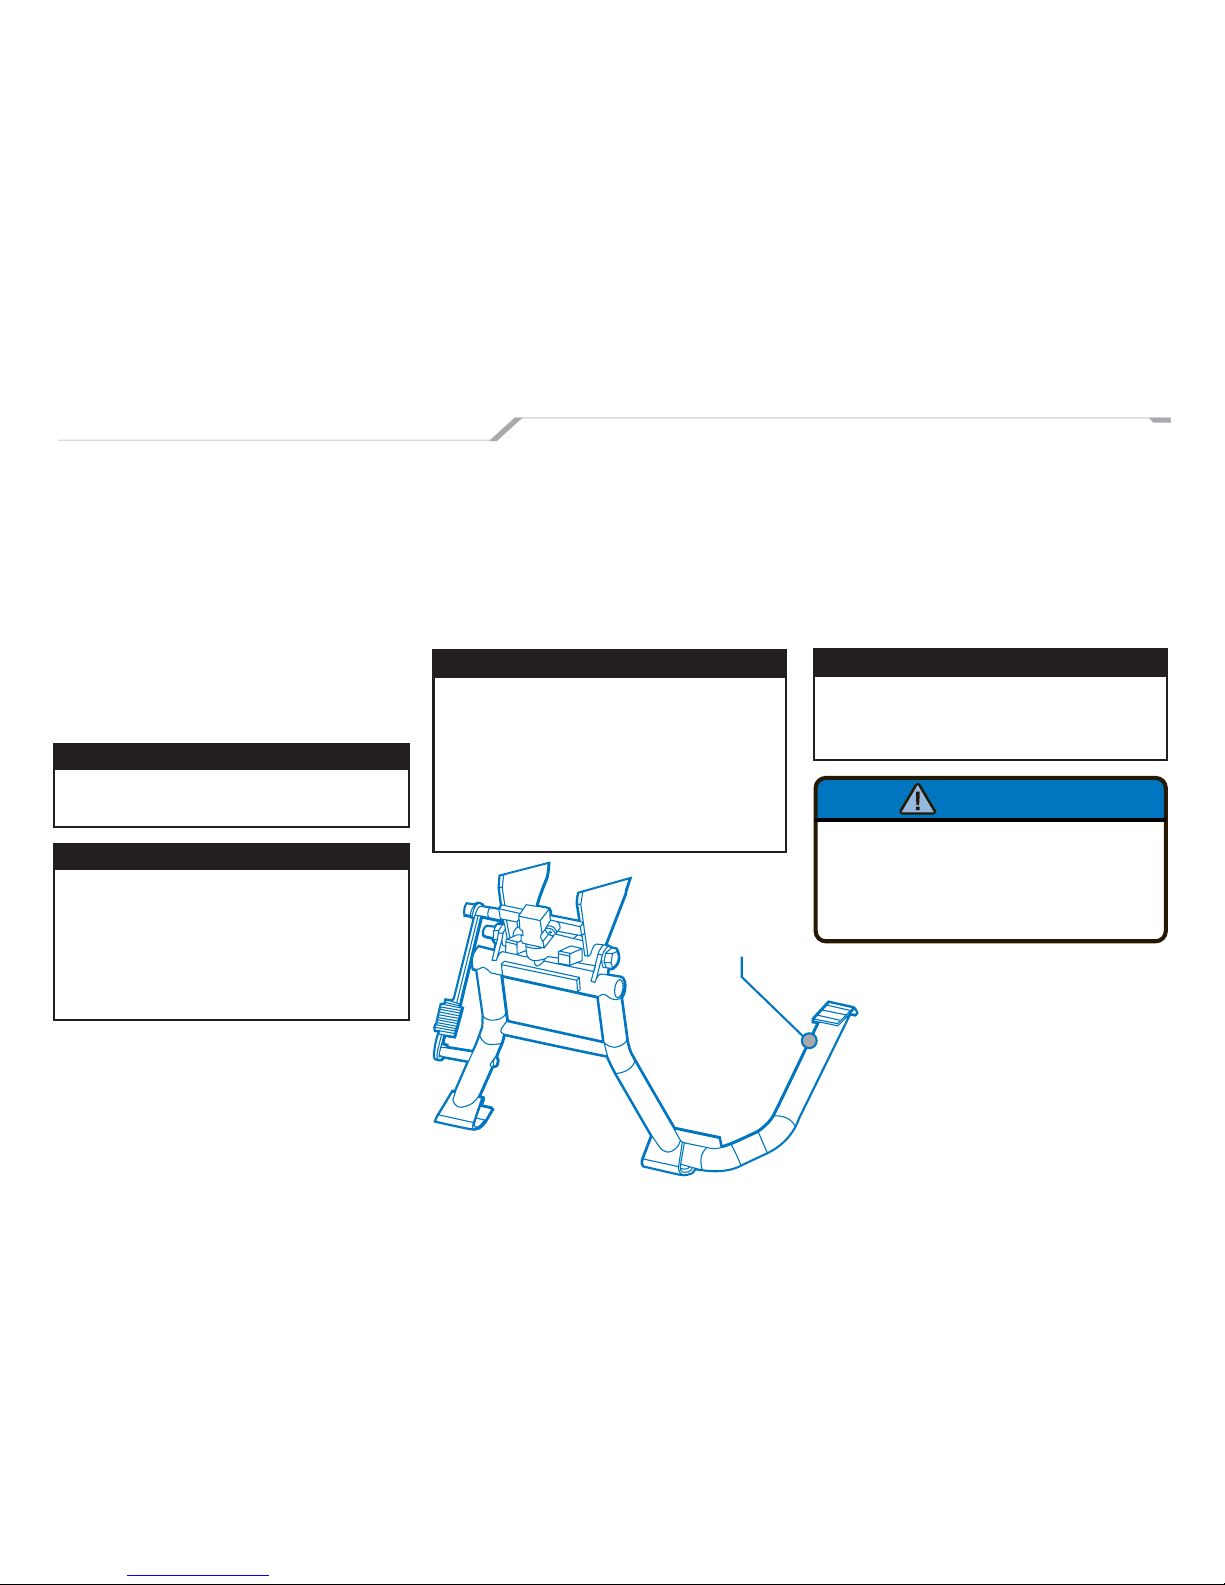
SIDE AND CENTER STANDS
SIDE STAND
The side stand is located on the left side of the
scooter. To lower the stand, push down on the
side stand bar, which protrudes out from the side
stand.
Park on level hard surfaces. Avoid parking on
hills, or unstable ground.
To put the stand back up tilt the scooter to the
right and lift the side stand bar with your foot.
WARNING!
Do not sit on the scooter while the stand is
down.
NOTE!
Always check the ground before putting the
side or center stand down to ensure that
the ground is stable. Hot temperatures can
cause the stand to sink into pavement, so
it is recommended to have a small metal
plate for the stand to rest on in high heat.
CENTER STAND (OPTIONAL)
The center stand is an optional feature of the
scooter. To lower the center stand push down on
the thrust arm with your foot while slowly pushing the bike in the rearward direction. The scooter
should “snap” onto the stand. To disengage the
center stand rock the scooter forward and make
sure the center stand is properly retracted.
WARNING!
The side and center stands must be in the
upright position in order to safely operate the
scooter. Failure to move the stand up could
result in injury to both you and the scooter.
There is an interlock which prevents the
scooter from being enabled unless the side
stand is in the up position.
Thrust Arm
Your Vectrix scooter is equipped with a warming light fl ashing
when the side stand is lowered (on).
However, it is the rider’s responsability to insure that the side
stand is stowed completely before starting out.
Faillure to observe this warming could result in an upset and
consequent bodily injury.
WARNING!
Page 21
Vectrix Electric MAXI-Scooter User’s Guide 21
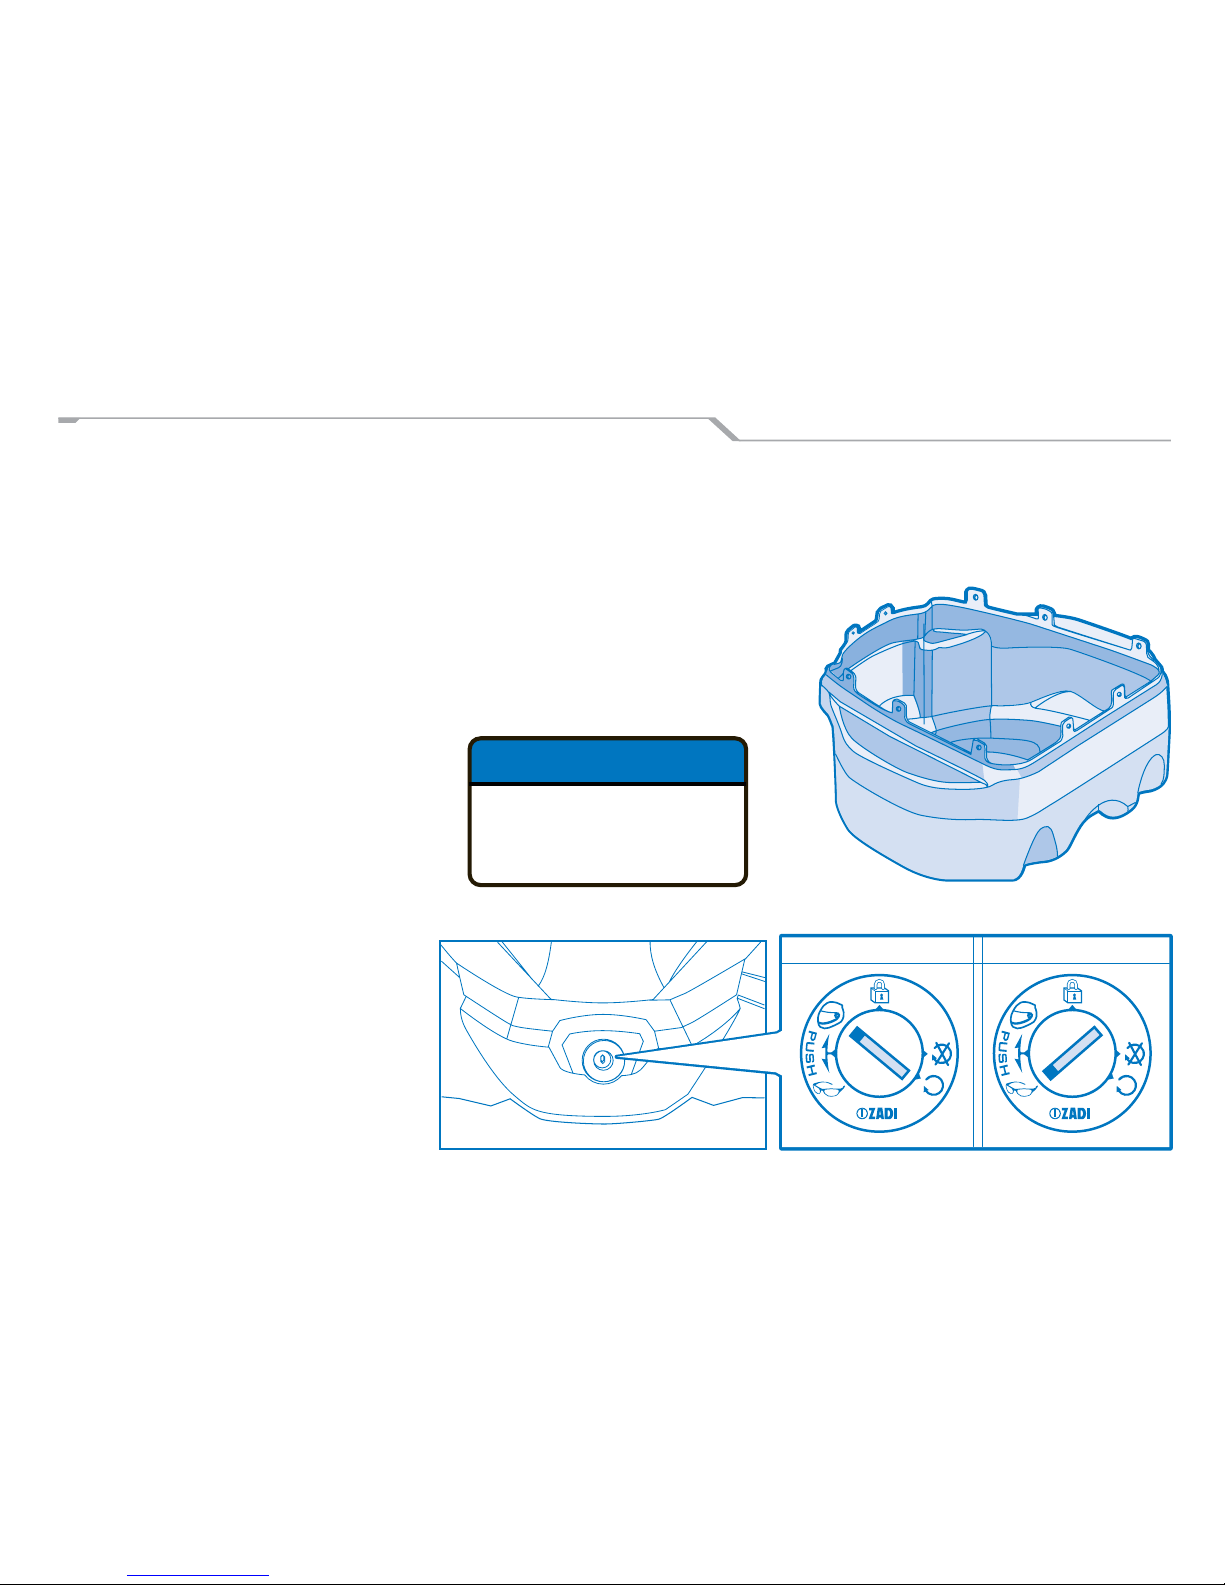
STORAGE COMPARTMENTS
Your key will open your glove box by turning the
key to the glove box position.
To close your glove box simply shut the compartment. The door locks itself.
The glove box contains a panel mounted 12 VDC,
0.5 AMP cell phone power point for charging
your cell phone.
UNDER SEAT HELMET STORAGE
The scooter has a hidden storage area for your
helmet located under the passenger seat. Your
key controls the lock to the under seat storage
compartment.
OPENING TRUNK
Turn your key to the “Trunk” position while off of
the seat to open the trunk area. The passenger
seat will lift up. Pull the seat upward to get it off
of the latch. Inside you will see the charging cord
and a place to store your helmet.
CLOSING THE TRUNK
After checking to ensure everything is secured
properly, and not overfl owing, lower the passenger seat into place. The seat will automatically
lock itself.
TRUNK COMPONENTS
The trunk storage area includes the charging cord for the scooter. The eight foot (2.4m)
charging cord is coiled in the trunk.
GLOVE BOX COMPARTMENT
Trunk Position Glove Position
NOTICE
ACCESSORY PORT
12 VDC 0.5 AMPS (6 WATTS)
MAXIMUM
Page 22
22 Vectrix Electric MAXI-Scooter User’s Guide
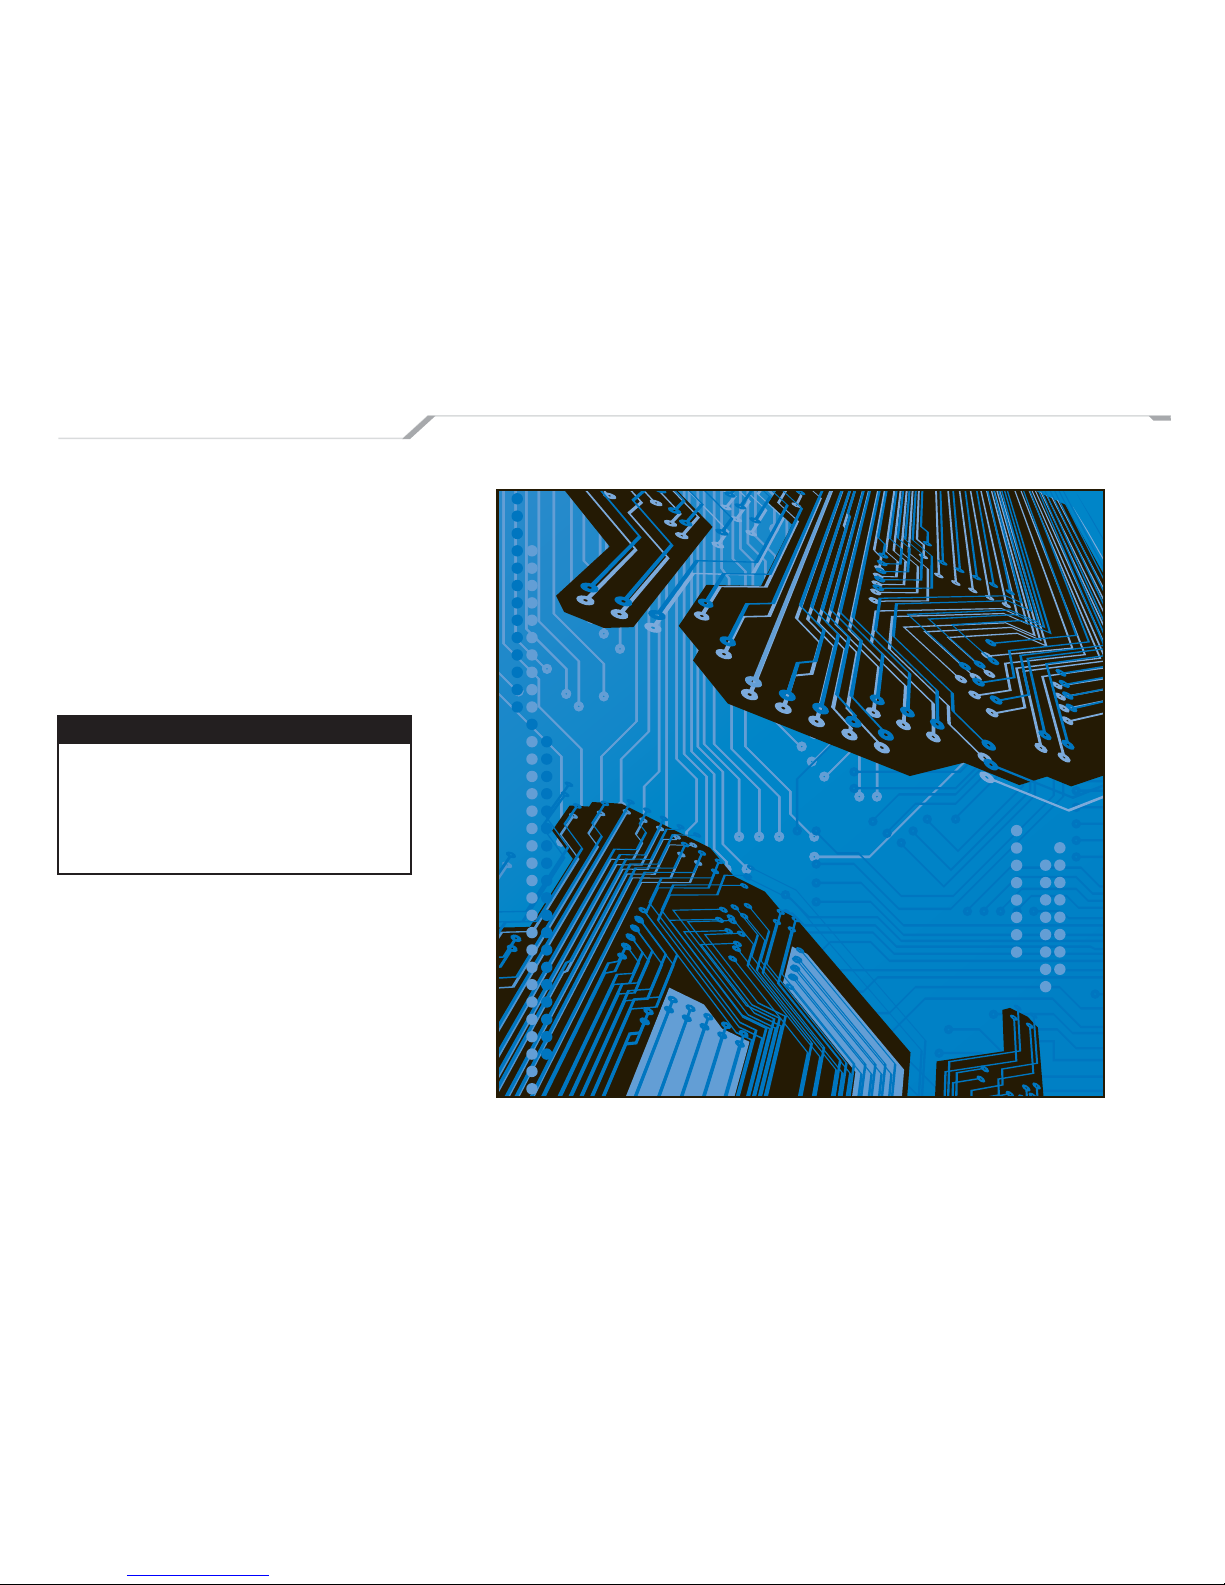
MOTOR CONTROLLER
The motor controller is the “brain” of the scooter
and provides the interface between the battery
pack and the motor. The design uses a single
circuit board for power system interconnections
as well as control components and onboard
power supplies. The motor controller incorporates Digital Signal Processing (DSP) technology as part of the proprietary Electronic Control
System (ECS) which provides the fl exibility to
incorporate additional features as required.
WARNING!
Only a Vectrix authorized service agent should
troubleshoot or repair a motor controller. Removal of the cover and/or altercation of the motor controller in any fashion voids the warranty
and is extremely hazardous.
Page 23
Vectrix Electric MAXI-Scooter User’s Guide 23
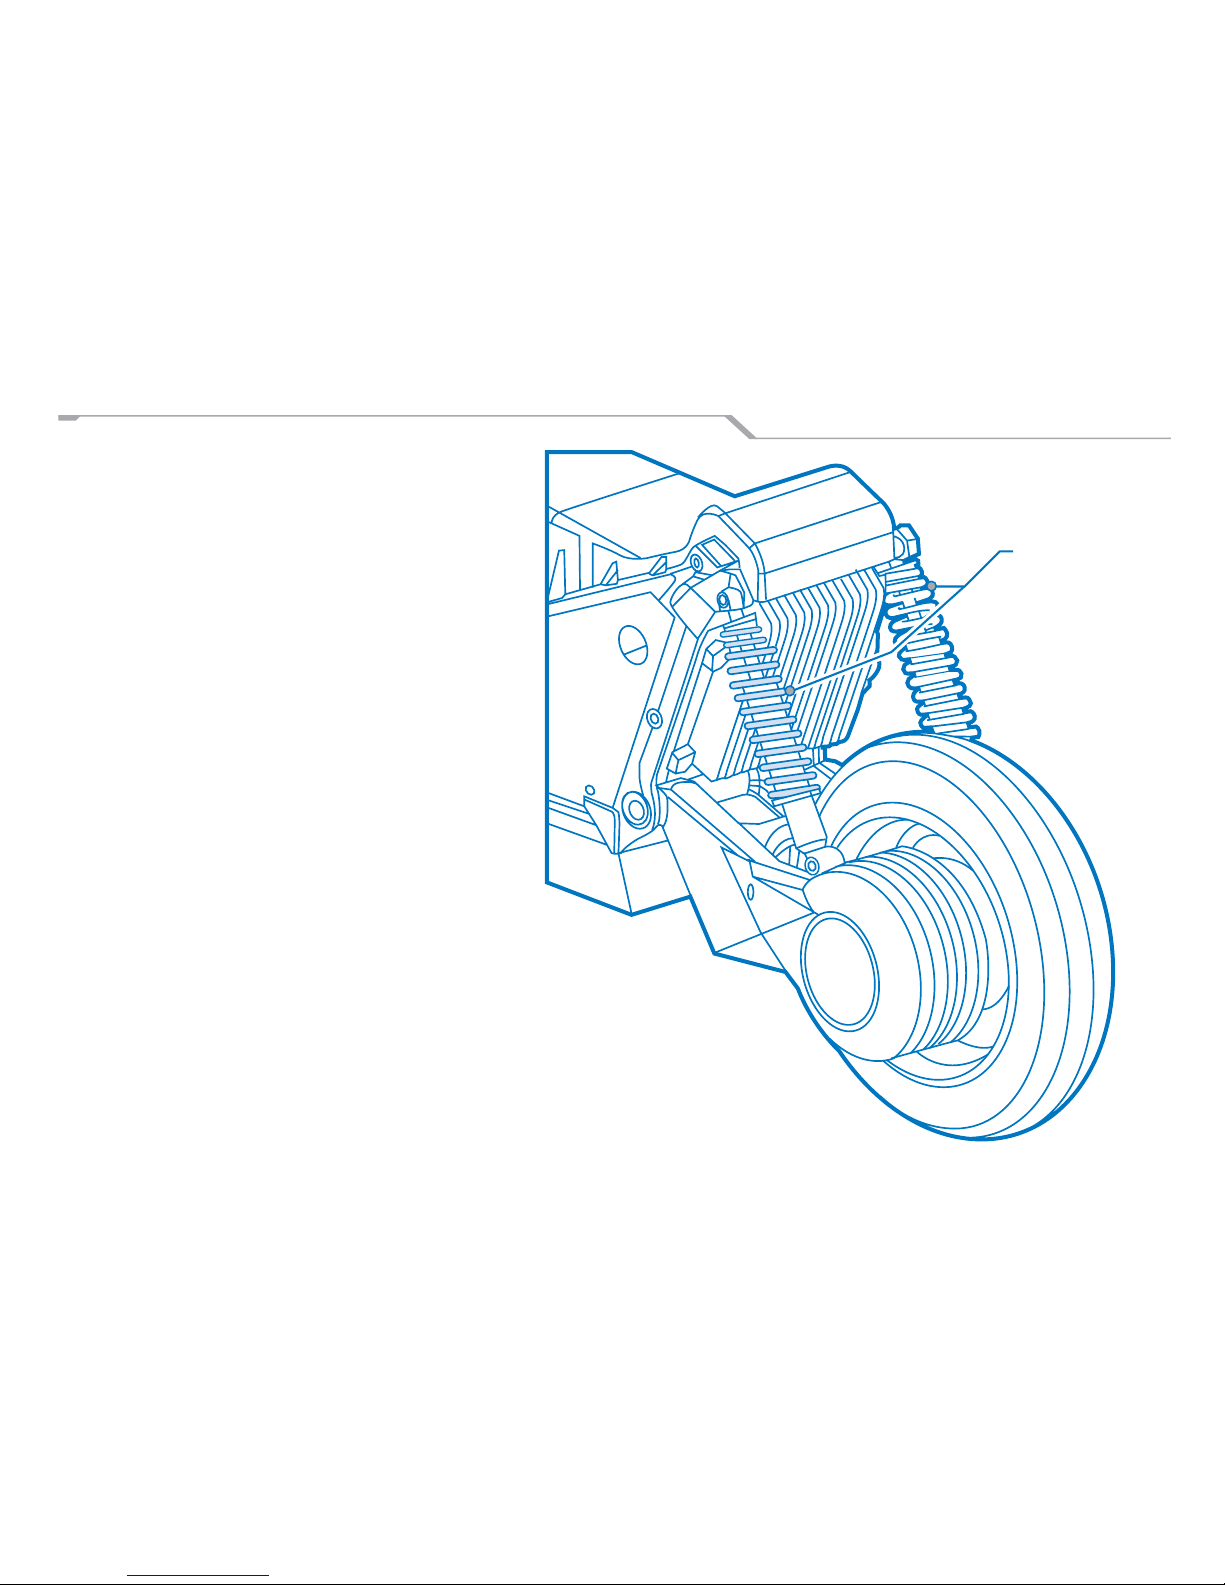
REAR SHOCK ABSORBERS
Your scooter is equipped with dual rear shock
absorbers to enhance your riding experience.
You should periodically inspect the exterior of
the shocks for signs of fluid leakage. If a leak
is indicated see your service agent at your
earliest convenience.
Shock Absorbers
Page 24
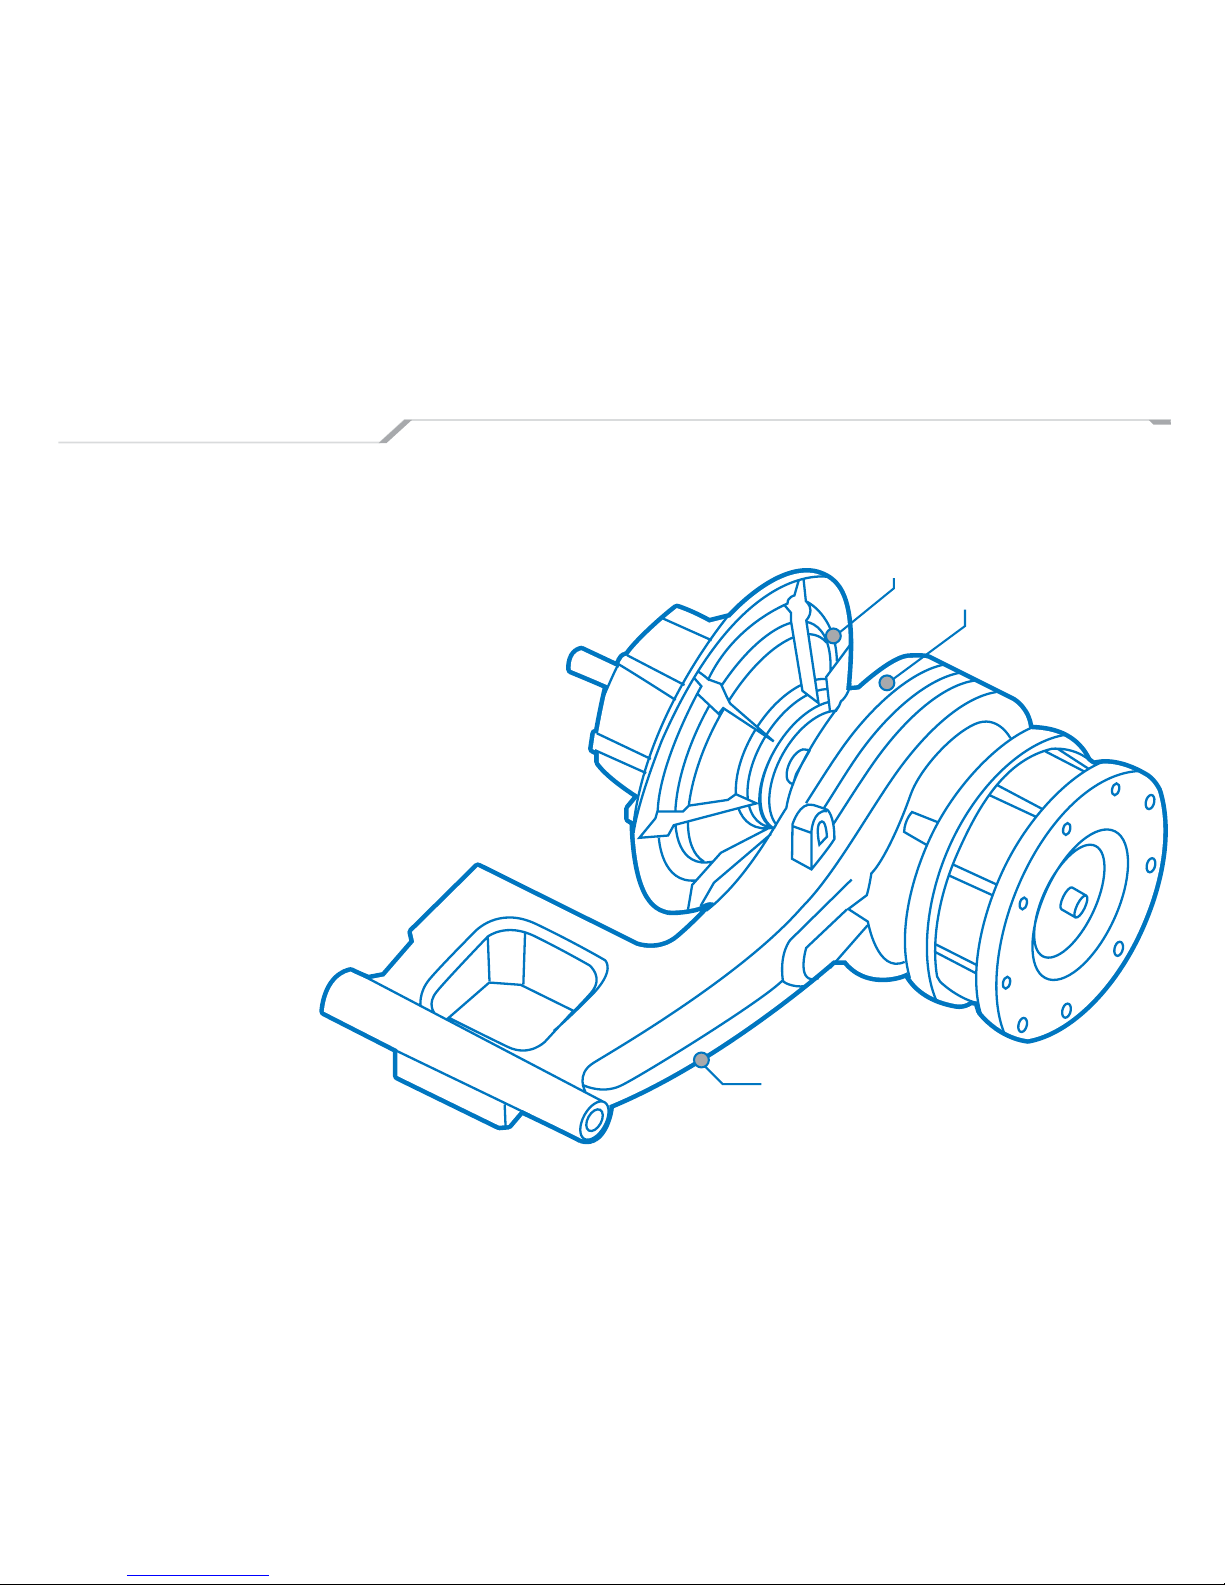
24 Vectrix Electric MAXI-Scooter User’s Guide
REAR WHEEL DRIVE
PLANETARY GEARBOX
The single stage planetary gearbox is permanently sealed and lubricated. To vent the gearbox
there is a small vent cap located on the topside of
the motor side swingarm centered on the motor.
This vent should be kept clean of dirt and debris.
BRUSHLESS DC MOTOR
The brushless DC motor is mounted in the
motor side swingarm with its shaft connected to
the gearbox in the rear wheel. There is no need
for the consumer to remove the motor cover.
Motor cover removal should only be done by an
authorized service agent. Removing the motor
cover could lead to entrance of dirt and moisture
and/or disrupt the adjustment of the encoder.
Motor Side Swing Arm
Motor / Gearbox
Vent Cap
Page 25
Vectrix Electric MAXI-Scooter User’s Guide 25
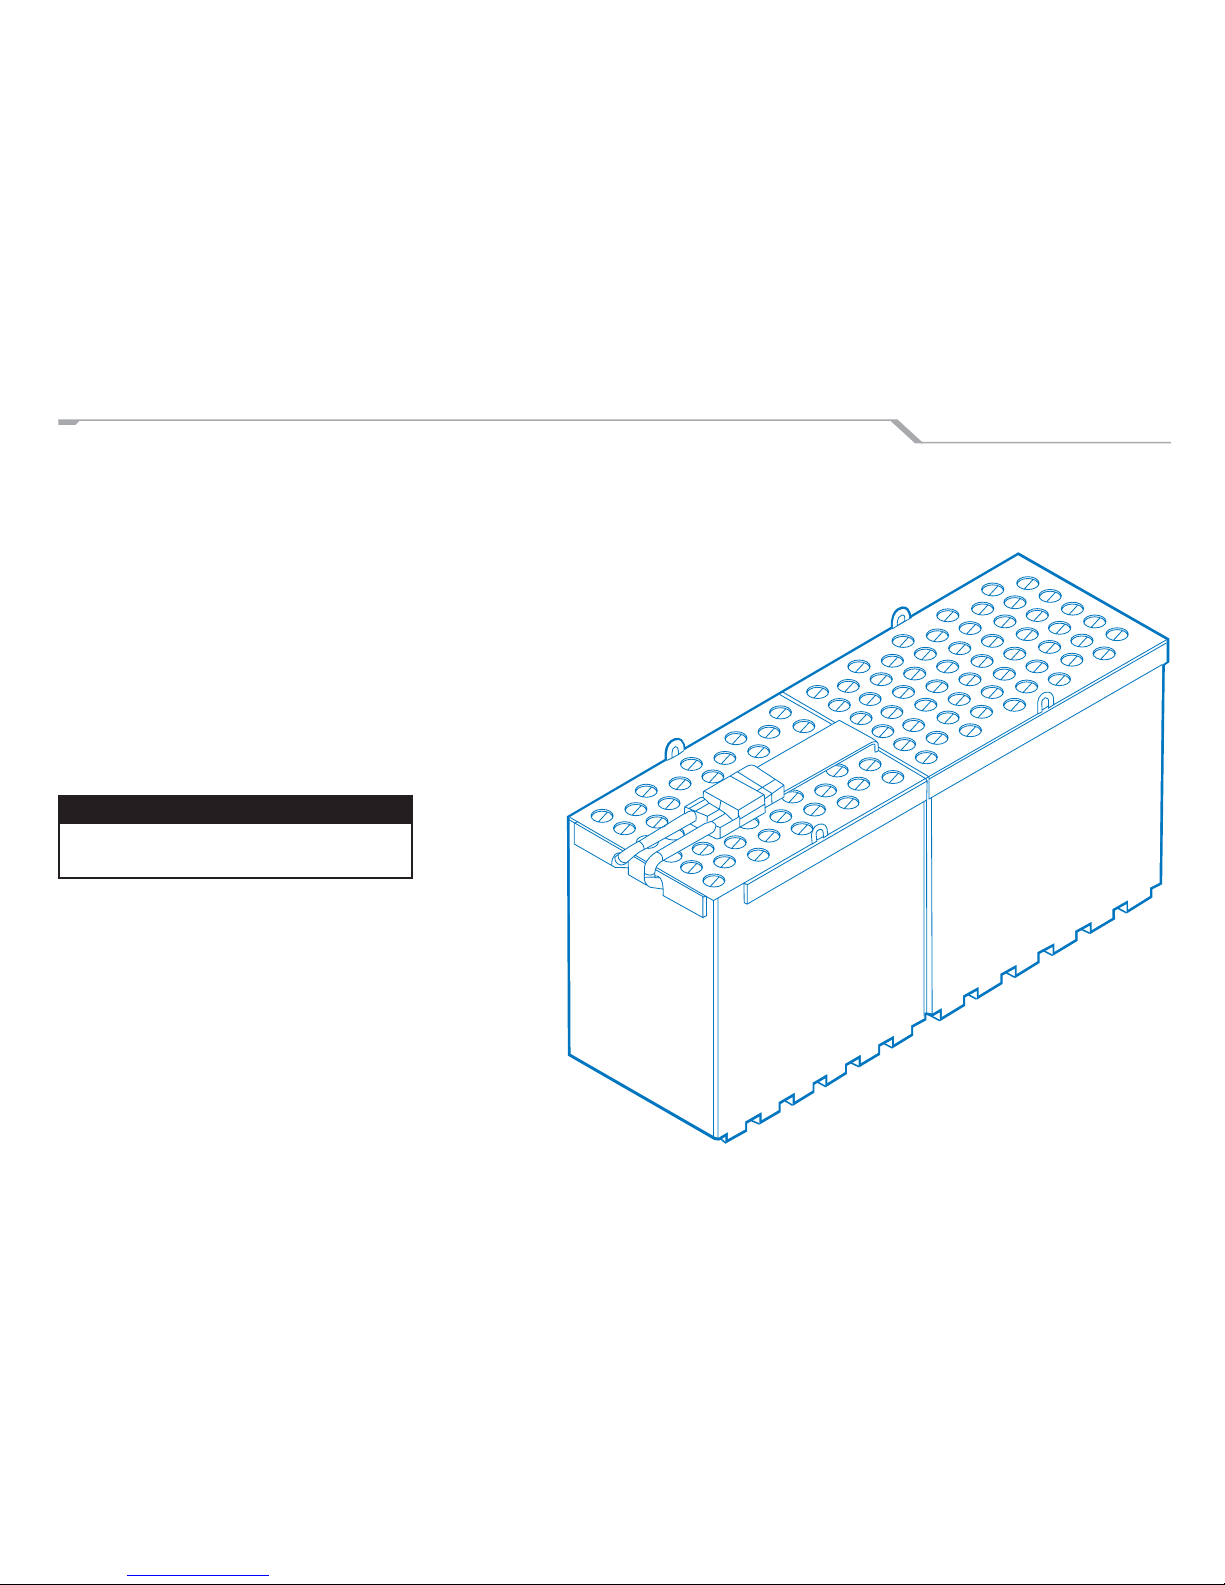
BATTERY PACK
The battery pack is connected to the motor
controller with a 125 amp fuse. This fuse is
only accessible to qualifi ed service technicians.
LIFE IN NUMBER OF CYCLES AND YEARS
Your battery likes to be charged. You should plug
it in whenever it is convenient to do so. This is
referred to as opportunity charging.
DESCRIPTION OF BATTERY PACK
The proper care of your battery pack is essential
for maximum scooter performance. The battery
has a nominal bus voltage of 125 volts DC which,
if not respected, could result in serious injury.
Only an authorized service agent is qualifi ed to
have access to the battery pack.
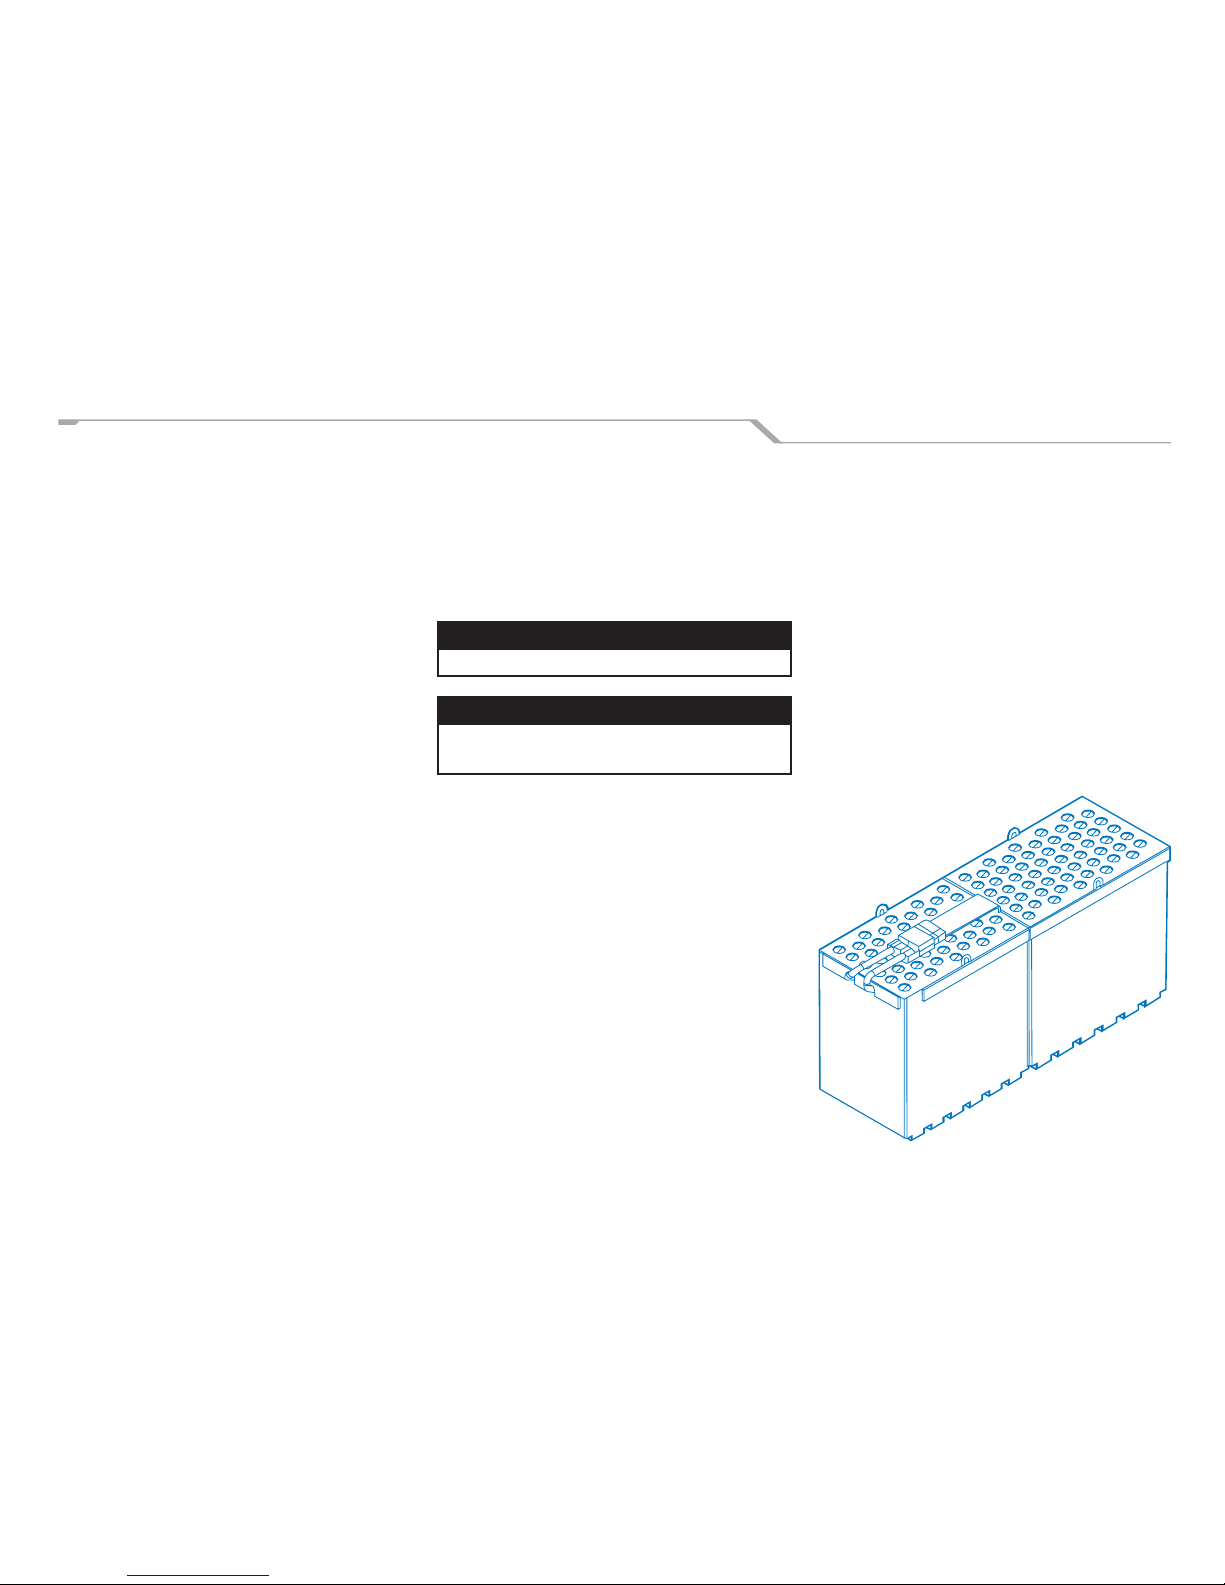
Your battery pack consists of two boxes located
within the scooter frame. Each battery box
weighs approximately 45 Kg. Only an authorized
service agent is qualified to troubleshoot a
battery related issue.
WARNING!
Opening battery packs is dangerous. Doing so
will void your warranty.
The battery pack needs to be kept within distinct operating temperature limits. The battery
includes two fans built into an air plenium, which
draw cool air through the battery boxes. The fans
run in response to temperature and are active
while the scooter is running and while charging
the battery. You will detect the sound of the fans
when they are operating.
Page 26
26 Vectrix Electric MAXI-Scooter User’s Guide
USE
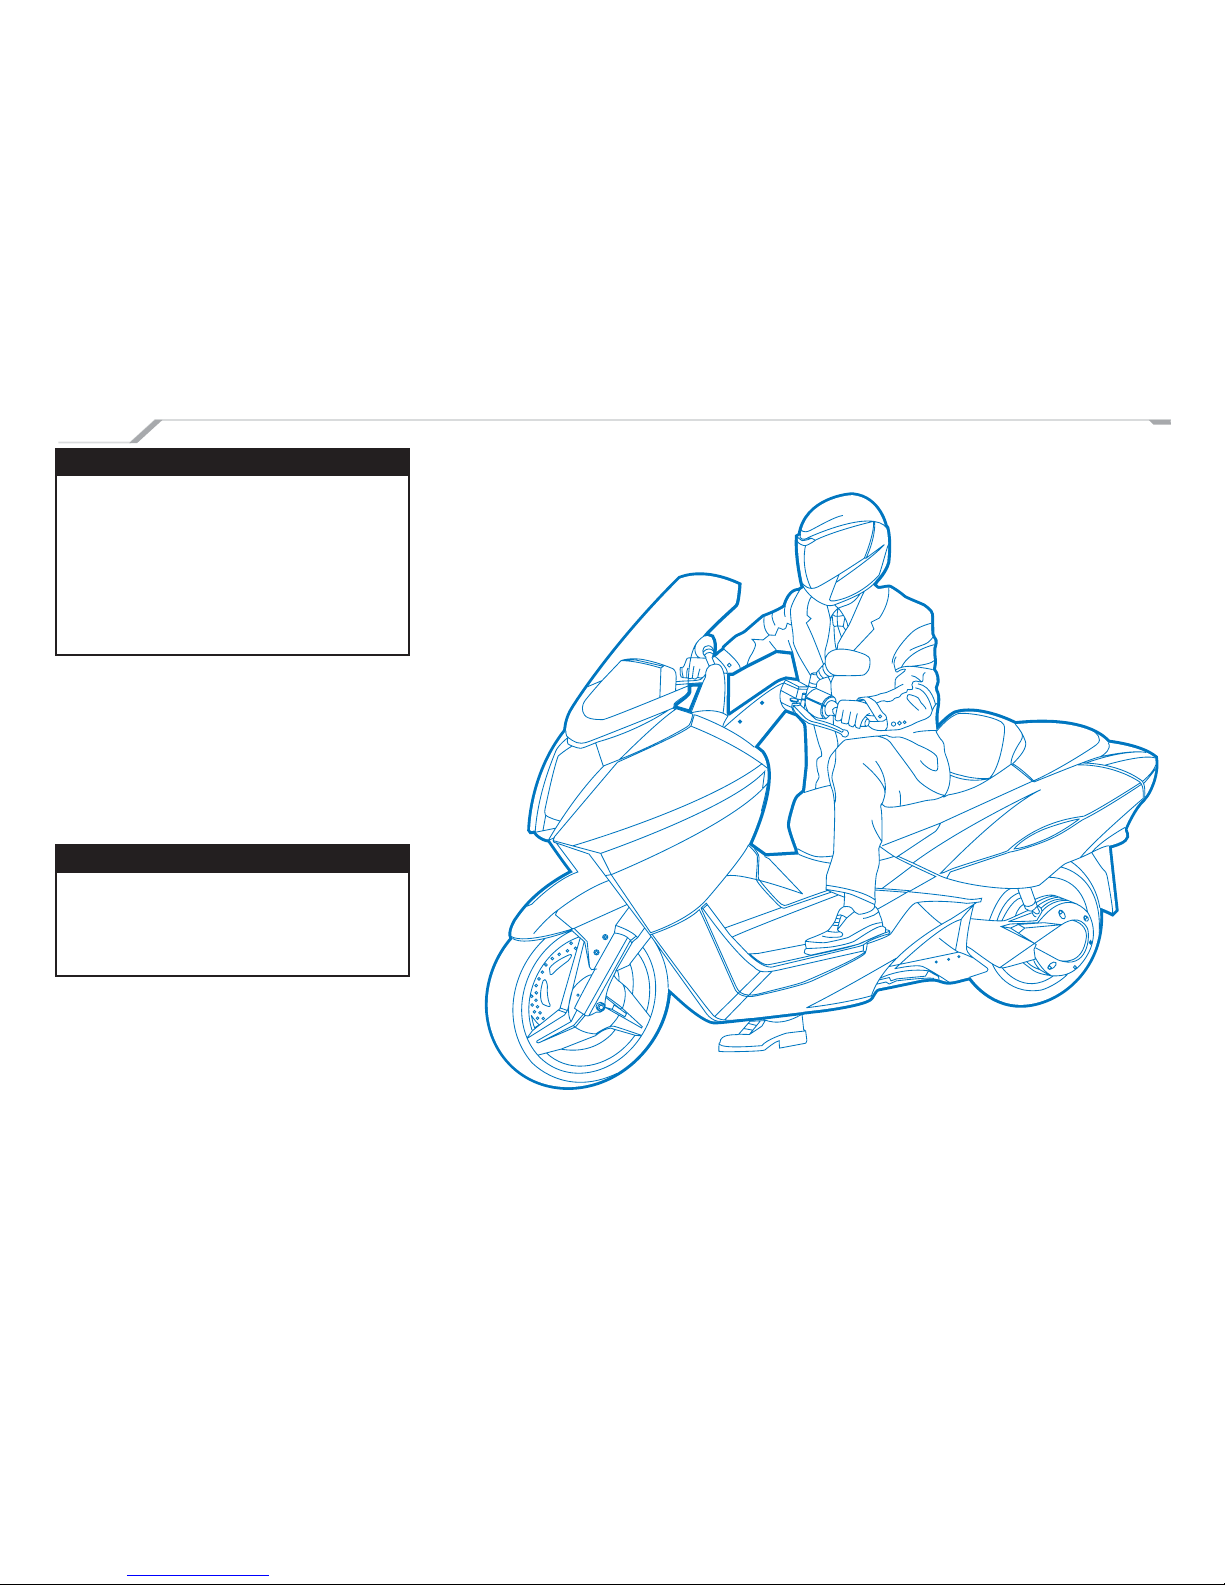
WARNING!
This scooter is designed for a top speed of 62
mph (100 km/h). Going over 100 km/h could
cause damage to your scooter. You should avoid
braking suddenly. Quick braking can cause you
to become unstable and lose control of your
scooter especially on loose pavement and/or
wet road surfaces.
INITIAL STARTUP
For maximum performance from the battery pack
the scooter needs to experience 5 initial charge
/ deep discharge cycles. These cycles allow the
battery to become fully conditioned and able to
perform as designed.
NOTE!
Prior to the initial 5 charge / deep discharge
cycles you may experience lower scooter
range. With each initial deep discharge /
charge cycle the range will improve.
Page 27

Vectrix Electric MAXI-Scooter User’s Guide 27
PRE-RIDE CHECKS
WARNING!
For safety reasons it is extremely important that
you read and understand this section. Failure to
perform these pre-ride checks could result in
serious injury or death.
CHARGE LEVEL
Look at the charge level on the right LCD module.
If it is in the lower part we suggest you recharge
before use.
STANDS UP
Make sure both the side stand and center stand
(if applicable) are up (retracted).
LIGHTS AND INDICATORS
When you turn the key to “System On” you
will notice that the entire instrument panel will
illuminate. After a few moments all malfunction
lights tell-tales should go off. If they do not go
off have your scooter checked at a service center. Replace the headlight bulb if it has burnt out
before riding.
TIRES
Always check tires for punctures, tears, or
worn tread. Never ride on balding or bald tires.
Maintain tire pressure at 32 psi (2.2 bar) for the
front tire and 40psi (2.8 bar) for the rear tire.
BRAKE FLUID LEVELS
Refer to the section on brake fl uid level. Make
sure that you have the required amount of fl uid
before starting the scooter.
SCOOTER INTERLOCKS
SIDE STAND SWITCH
Make sure the side stand is in the upright
position.
CENTER STAND SWITCH (OPTIONAL)
Make sure the center stand is in the upright
position.
“READY” INDICATION
When you turn your key to the “System On”
position you will see the “Ready” icon in the
Left Liquid Crystal Display (LCD), provided all
of the interlocks are satisfied. The ready icon
means that the system is ready to run.
“GO” SEQUENCE OF BRAKE LEVER ACTUATION
After the ready icon is activated you are able to
move to the “Go” condition by fi rst squeezing
and holding the left brake lever and then the
right brake lever. Once the “Go” icon is on you
can release the brake levers. The system is now
enabled and the throttle is “hot”.
Page 28
28 Vectrix Electric MAXI-Scooter User’s Guide
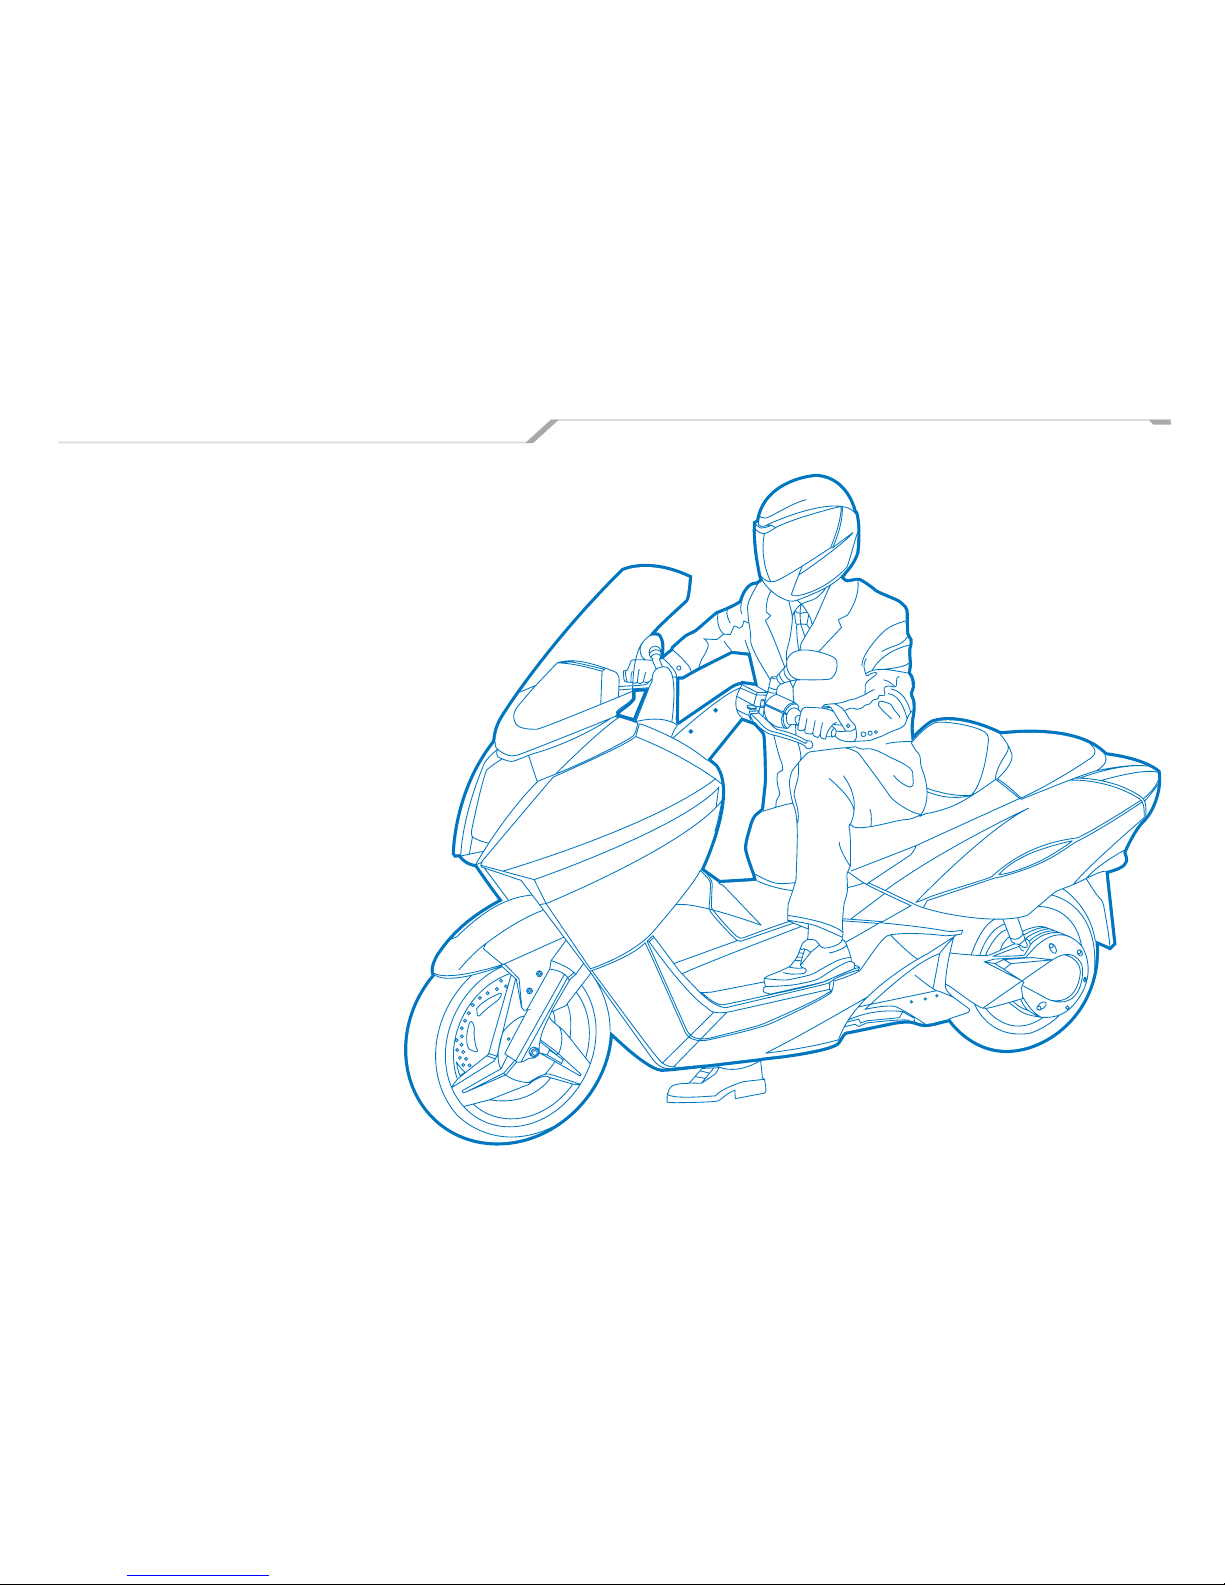
INITIAL USE OF THE SCOOTER
With any new vehicle you must fi rst get use
to the feel of the vehicle before driving in any
dangerous conditions. Bad weather can cause
even an experienced driver to get into an
accident. You should use caution at all times
while riding your scooter.
For maximum performance from the battery pack
the scooter needs to experience 5 initial charge
/ deep discharge cycles. These cycles allow the
battery to become fully conditioned and able to
perform as designed.
This scooter is designed for a top speed of 62
mph (100km/h). Going over 100km/h mph could
cause damage to your scooter. You should avoid
braking suddenly. Quick braking can cause you
to become unstable and lose control of your
scooter especially on loose pavement and/or
wet road surfaces.
Page 29
Vectrix Electric MAXI-Scooter User’s Guide 29
BRAKING
The Vectrix scooter includes a patented
regenerative braking throttle which is easy to
use and will improve your riding experience. In
the regen mode the motor acts as a generator
to apply a load/braking to the rear wheel while
dumping energy into the battery pack. Once you
become familiar with the regen braking action we
encourage you to use it as your primary means of
normal braking.
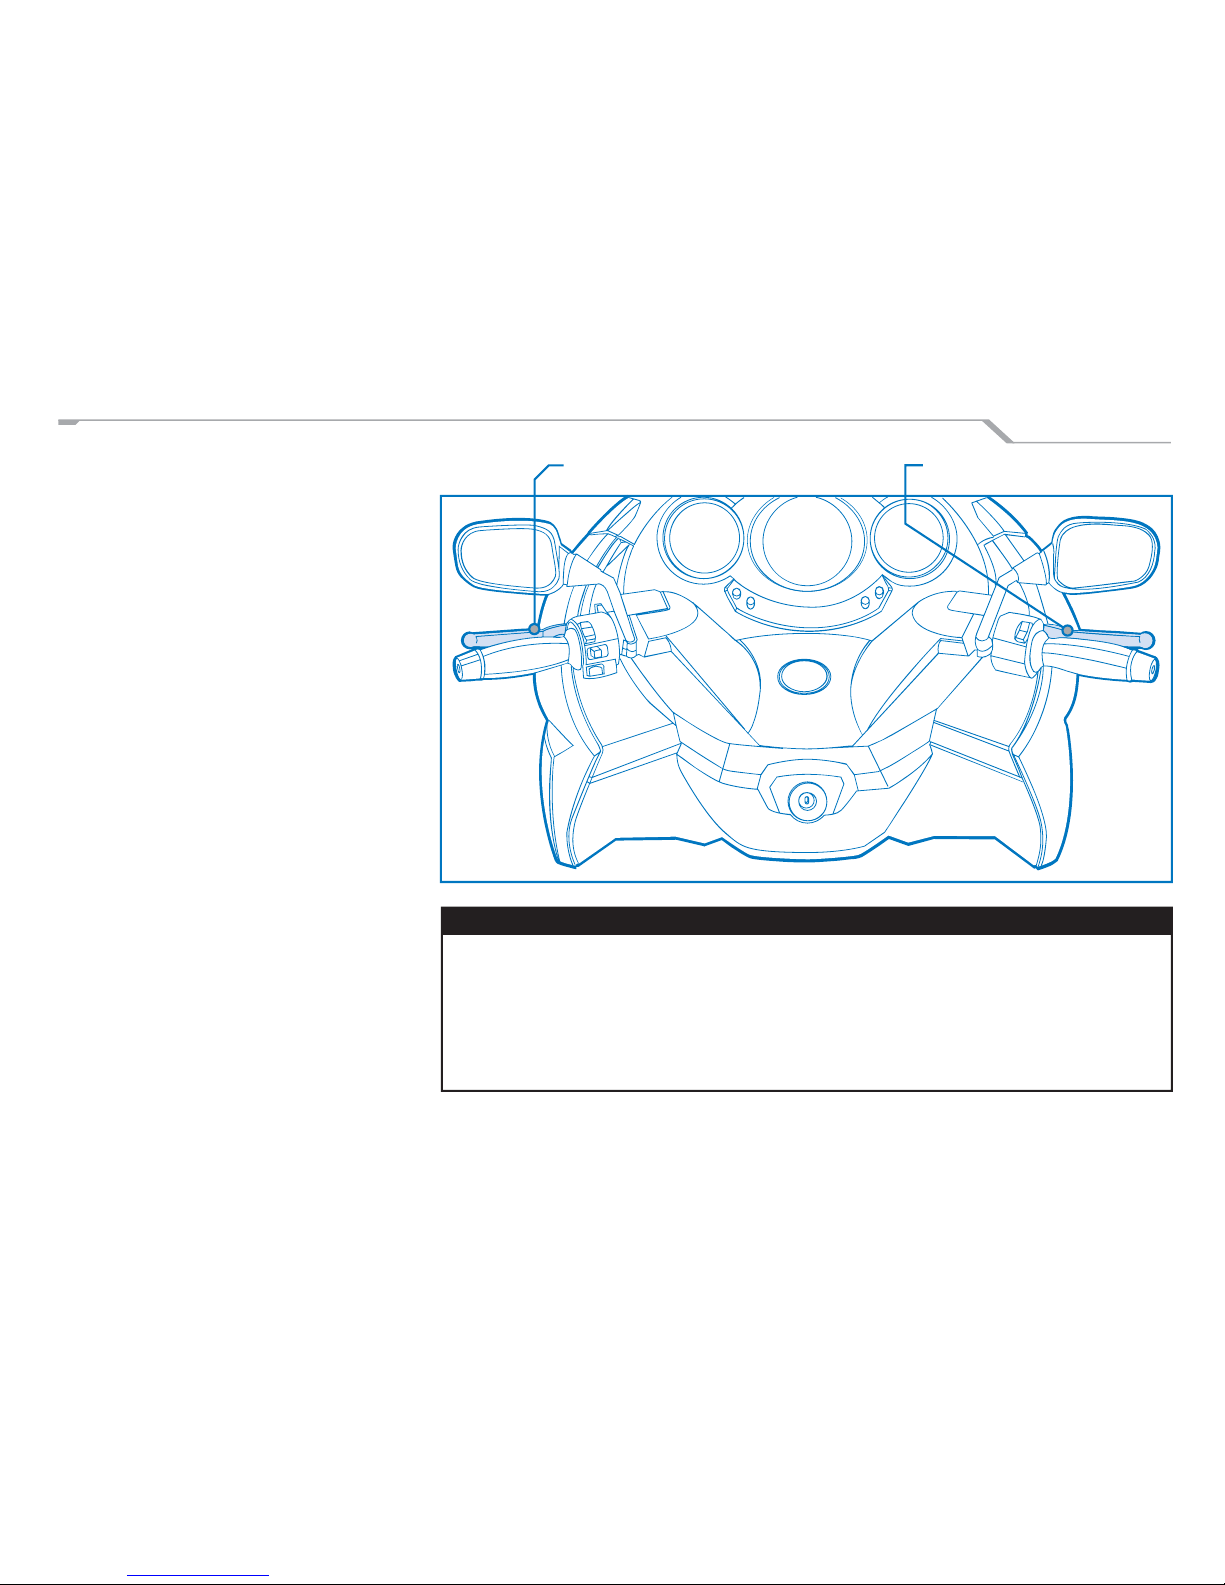
FRONT BRAKE LEVER
To operate the front brake you pull the right hand
brake lever towards the twistgrip. The braking is
hydraulically operated so you need not pull hard on
the lever. Instead squeeze steadily and smoothly.
REAR BRAKE LEVER
To operate the rear brake you pull the left hand
brake lever towards the twistgrip. The braking is
hydraulically operated so you need not pull hard on
the lever. Instead squeeze steadily and smoothly.
PROPER BRAKING
Be cautious and slow down gradually fi rst using
the regenerative braking, and then by applying
both mechanical brakes.
WARNING!
You should always use both brake levers for the most effective braking. One lever will not give you
as effective of braking power.
Never brake suddenly or in a harsh manner. This could cause the wheels to lock and you could
lose control of the scooter. Bad weather, including slippery wet roads, can cause braking to be less
effective. Always use caution in wet conditions. Low tire pressure can reduce braking effectiveness, so checking your tire pressure is very important.
Rear Brake Lever
Front Brake Lever
Page 30
30 Vectrix Electric MAXI-Scooter User’s Guide
REVERSE FEATURE
Your Vectrix Scooter has the ability to reverse at
very low speeds to assist you with maneuvers
such as backing out of parking spots. Reverse
is only enabled when the scooter is completely
stopped. To activate reverse from the stop
position, roll the throttle forward (regen direction).
The scooter will reverse at a slow speed limit of 1
km/h. Release the throttle and the reverse drive
ceases.
Regenerative Braking /
Reverse
Acceleration
Page 31
Vectrix Electric MAXI-Scooter User’s Guide 31
The charge is complete when all bars have been
fi lled on the right LCD on the instrument panel.
It is perfectly fi ne to unplug the scooter from
the outlet and interrupt the cycle. The scooter
will benefi t by any amount of charging you have
time for.
WARNING!
Do not charge in standing water.
WARNING!
If you use an extension cord be sure it is at least
a 10A cord and minimize the length.
CHARGING THE BATTERY
The Vectrix Scooter includes a 2.4 meter (8ft)
charging cord which is located in the trunk under the passenger seat.
The male connector on the charging cord is specifi c to the country of use. For instance in Italy
the plug consists of a 4 conductor assembly. This
accommodates “hot”, “neutral”, “ground” and a
“pilot” pin. In this case the pilot pin is used by the
AC power source (charging station) to detect the
presence of the scooter which in turn enables the
stationary power outlet.
To charge the scooter open the trunk, remove
the cord, close the trunk taking care to route the
cord in the designation slot in the bodywork, and
plug the scooter into an appropriate 120v / 60Hz
220v / 50Hz outlet. Once plugged in the onboard
charger will automatically control the charging
process. During the charging process the battery
charge icon on the left LCD will be active. As the
charge progresses the battery level indicator on
the right LCD will increase in level.
Page 32
32 Vectrix Electric MAXI-Scooter User’s Guide
PARKING THE VEHICLE
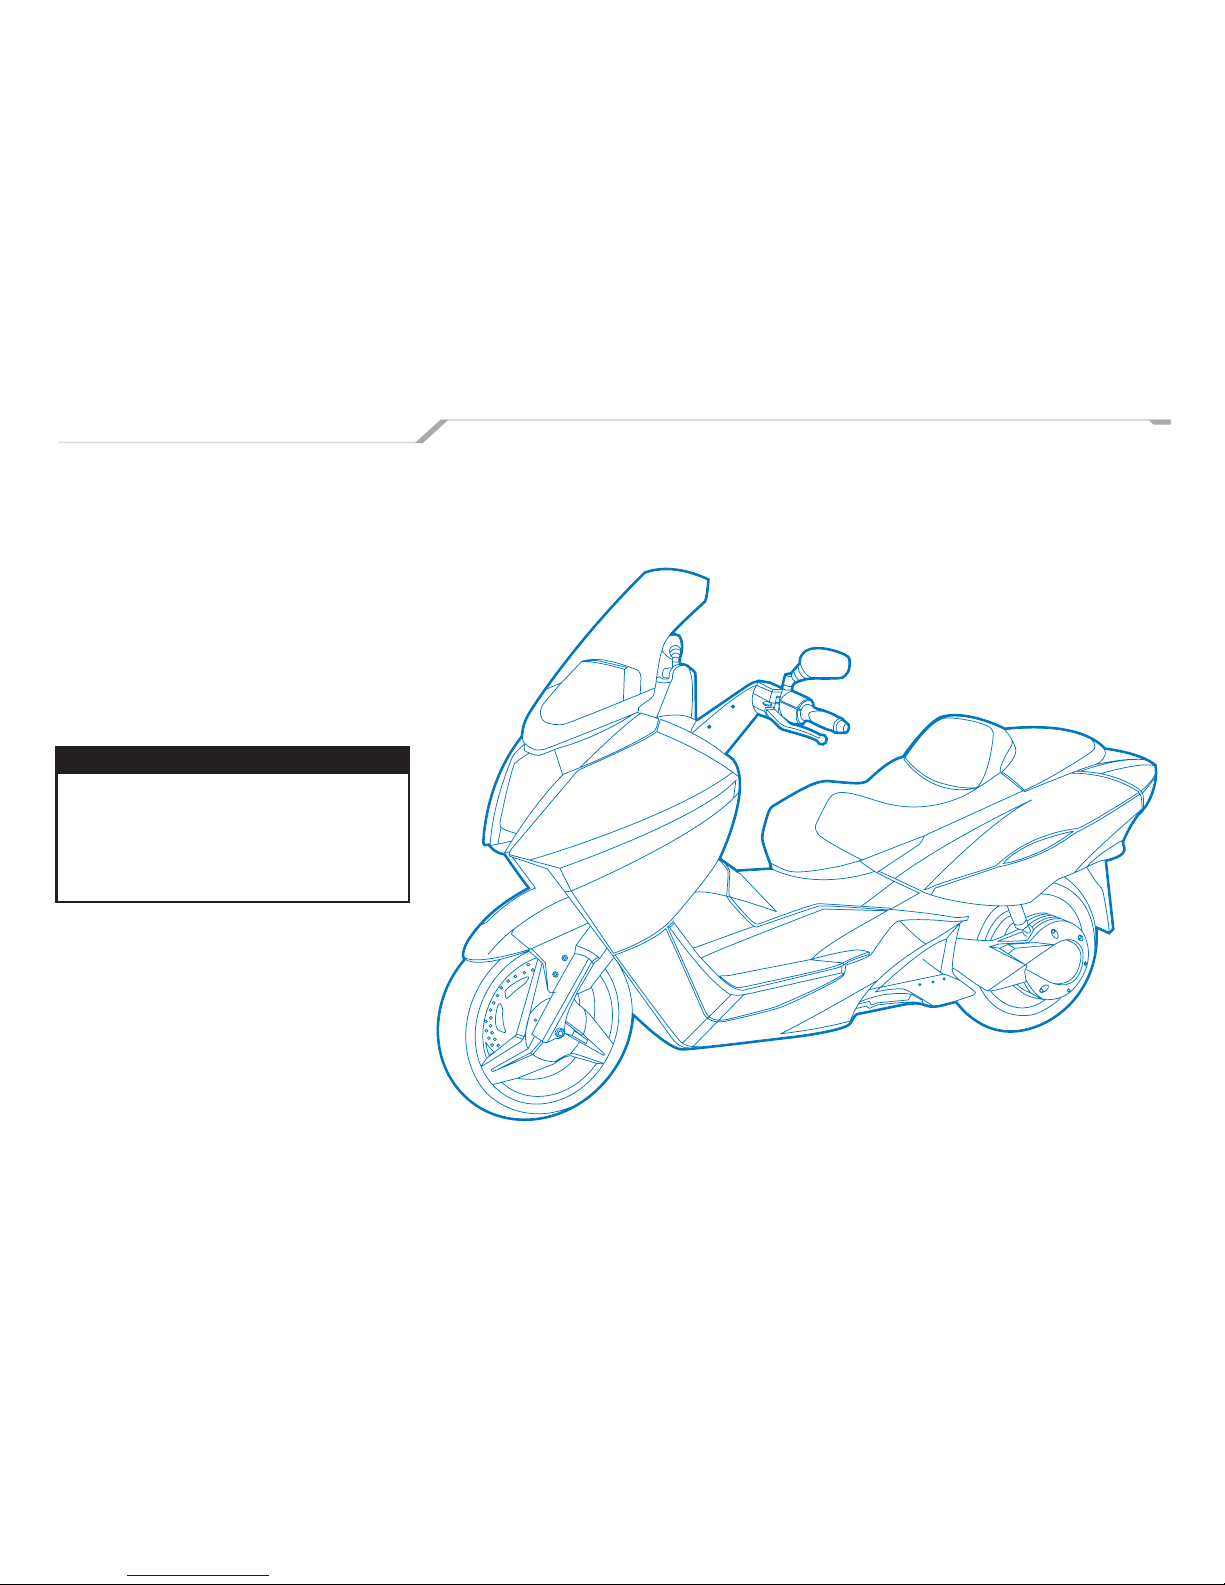
+ Stop the scooter and put either the side or
center stand down for support.
+ Turn the handlebar all the way to the left
and block it there by turning the key to the
“lock” position.
+ Park the scooter in a visible area to other
motorists.
+ Never park on soft earth.
WARNING!
The use of padlocks that prevent motion is very
dangerous and can effect the operation of the
scooter. If you use a padlock to secure your
scooter the padlock must be removed before
operating the scooter.
Page 33

Vectrix Electric MAXI-Scooter User’s Guide 33
MAINTENANCE
Although your Vectrix Electric Scooter requires
little maintenance, it is important that you read
and follow closely the maintenance items identifi ed on the following pages.
WARNING!
If you are unsure of the problem with your
scooter take it to a service center to get it
checked out.
Page 34
34 Vectrix Electric MAXI-Scooter User’s Guide
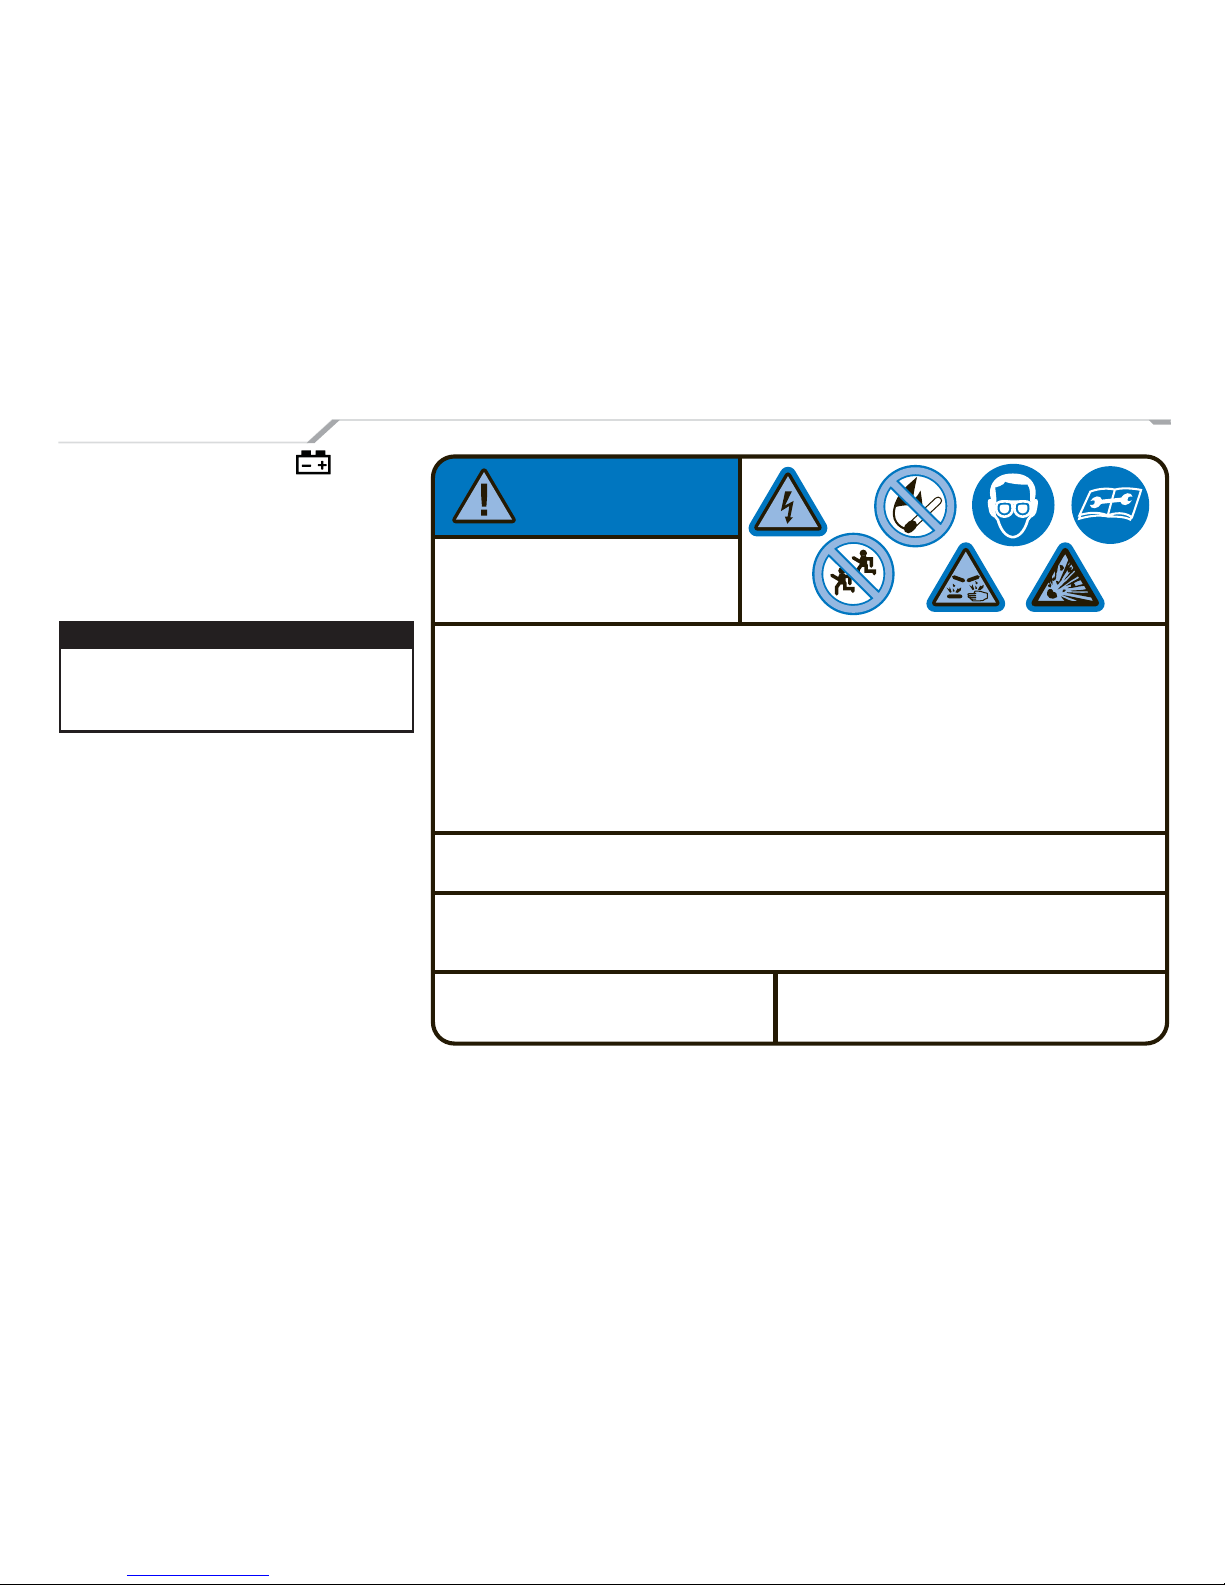
BATTERY PACK
If your Battery malfunction light comes on
get your scooter checked out at a service center.
If you notice any discharge coming from your
scooter take it to a service center to get the
system checked.
WARNING!
The Battery Pack is rated at 125 Volts, 30 Amp
hours. Contact with the terminals of the Battery
Pack can result in injury or death.
The onboard smart battery charger monitors the
status/condition of the Battery Pack during normal operation as well as charging. The Battery
Pack is an integrated system of temperature/
voltage monitoring as well as cooling air fl ow/
control. The charger will detect any underperformance in the Pack and automatically perform
an “Equalization charge” of the battery. Such an
event will be seamless to the operator except
that the charge time will be extended beyond
the 2 hour typical charging time.
High Voltage Inside /
Alkaline Electrolyte
To avoid injuries, burns or electric shocks:
• Never disassemble this battery unit or remove its covers.
- Service by Qualifi ed Personnel-
• Avoid contact of alkaline electrolyte with eyes, skin, or clothes.
in event of accident, fl ush with water and get medical help immediately.
• Keep children away from this unit.
• Do not puncture or impact on this unit when operating forklift, or expose to open fl ame or
incinerate, or expose to liquids when storing this unit, as excessive heat may generate fi re and
electrolyte may leak out.
To Qualifi ed Service Personnel:
Be sure to read the Repair Manual before servicing or replacing the battery.
Residents in the USA
Phone (401) 848-9993
Vectrix Corp
11 Toro Street
Newport, RI 02840
Residents in Europe
Phone +39 06 71280295
Vectrix Europe
Via Papirio Carbone 15
00178 Rome, Italy
Battery Recycling Information
• Please transport this battery in accordance with all applicable laws.
• Be sure to consult Vectrix dealer or the following address for replacing and disposing of this battery.
DANGER
Page 35
Vectrix Electric MAXI-Scooter User’s Guide 35
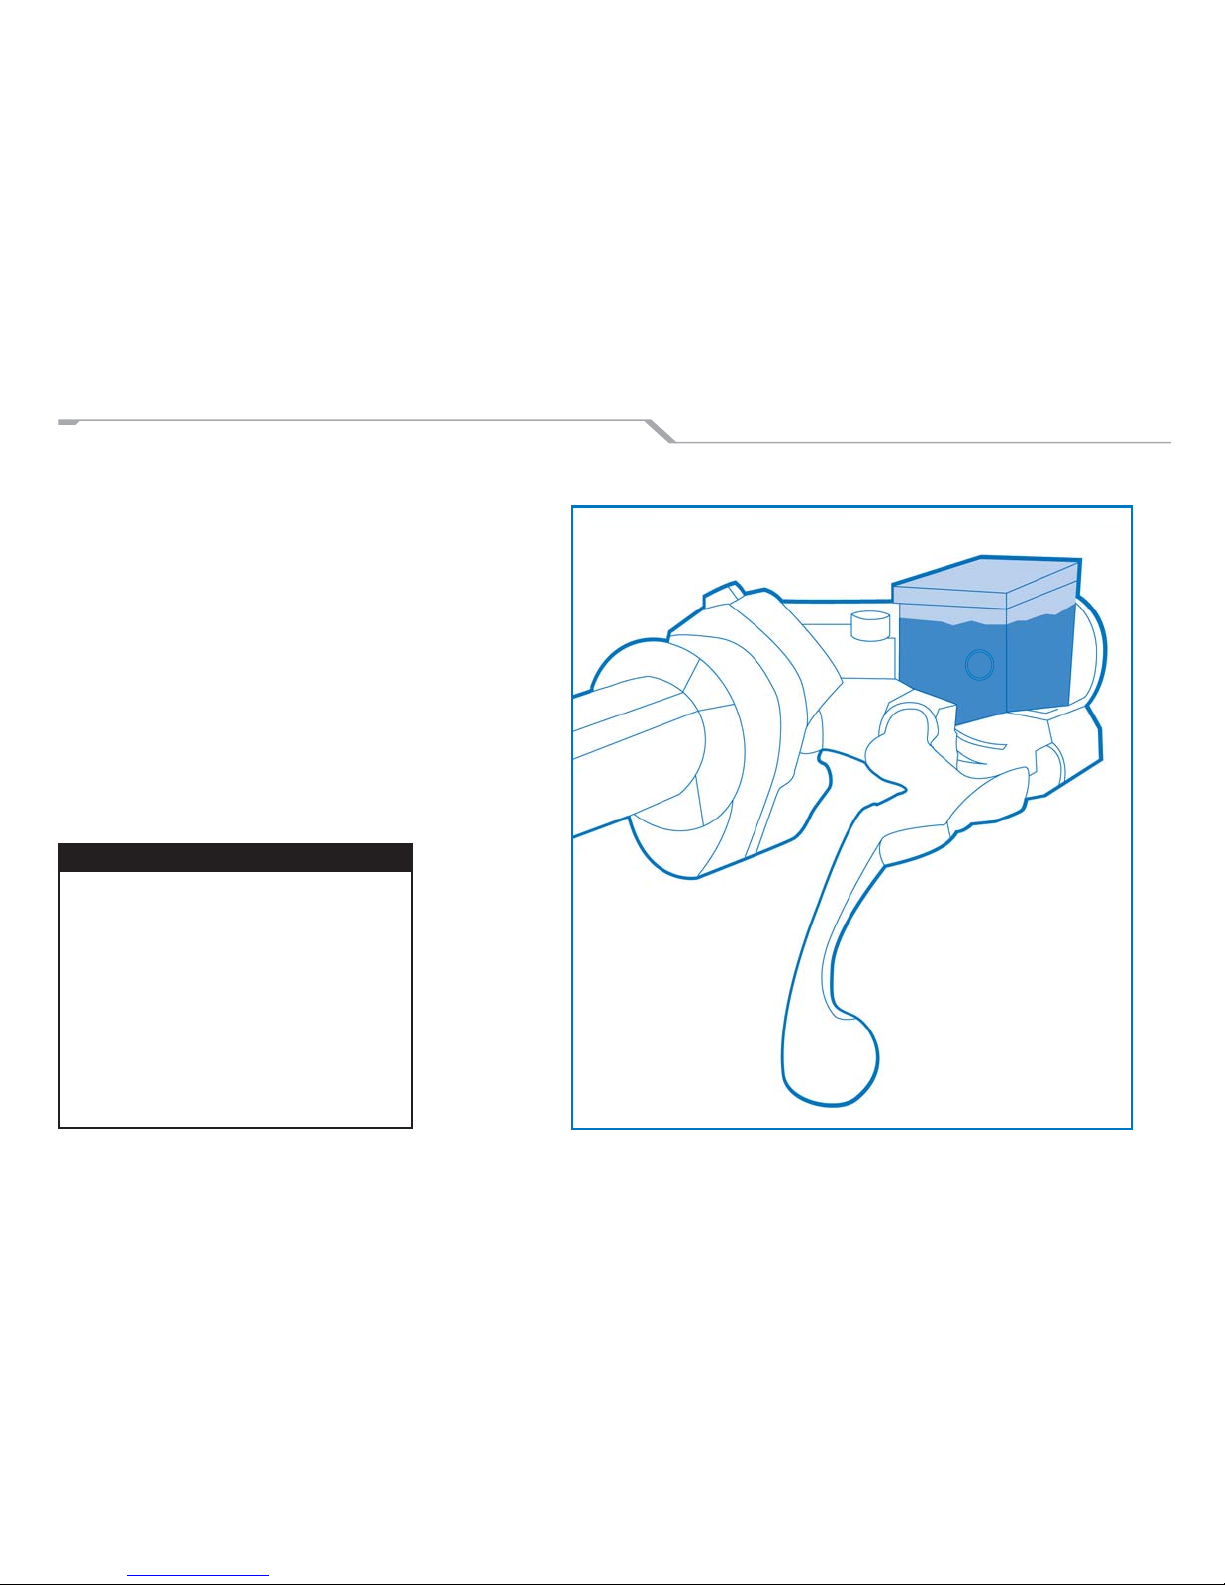
CHECKING BRAKE FLUID LEVEL
Your brake fl uid should never go below the MIN
mark on the reservoir. Air can enter the reservoir
if the fl uid level is below MIN. This could cause
problems in your scooter’s system. Brake fl uid
should always be topped off and changed on
a routine basis. The brake fl uid reservoirs are
located on the handlebar assembly.
It is recommended that the brake lines be
changed every four years.
If you fi nd excessive play on the brake lever but
the brake pads are still in good condition, you
should go to a service agent at your earliest
convenience to get the system checked out.
WARNING!
Brake fl uid may damage the scooter’s paint and
plastic parts if accidentally spilled.
Brake fl uid can cause damage and injuries if not
handled properly and safely.
If the brake fl uid gets on your skin you should
wash off immediately with running water. If
the brake fl uid gets into your eyes fl ush with
running water, and seek medical attention.
Never mix old and new fl uid. Always check for
proper sealing.
Page 36
36 Vectrix Electric MAXI-Scooter User’s Guide
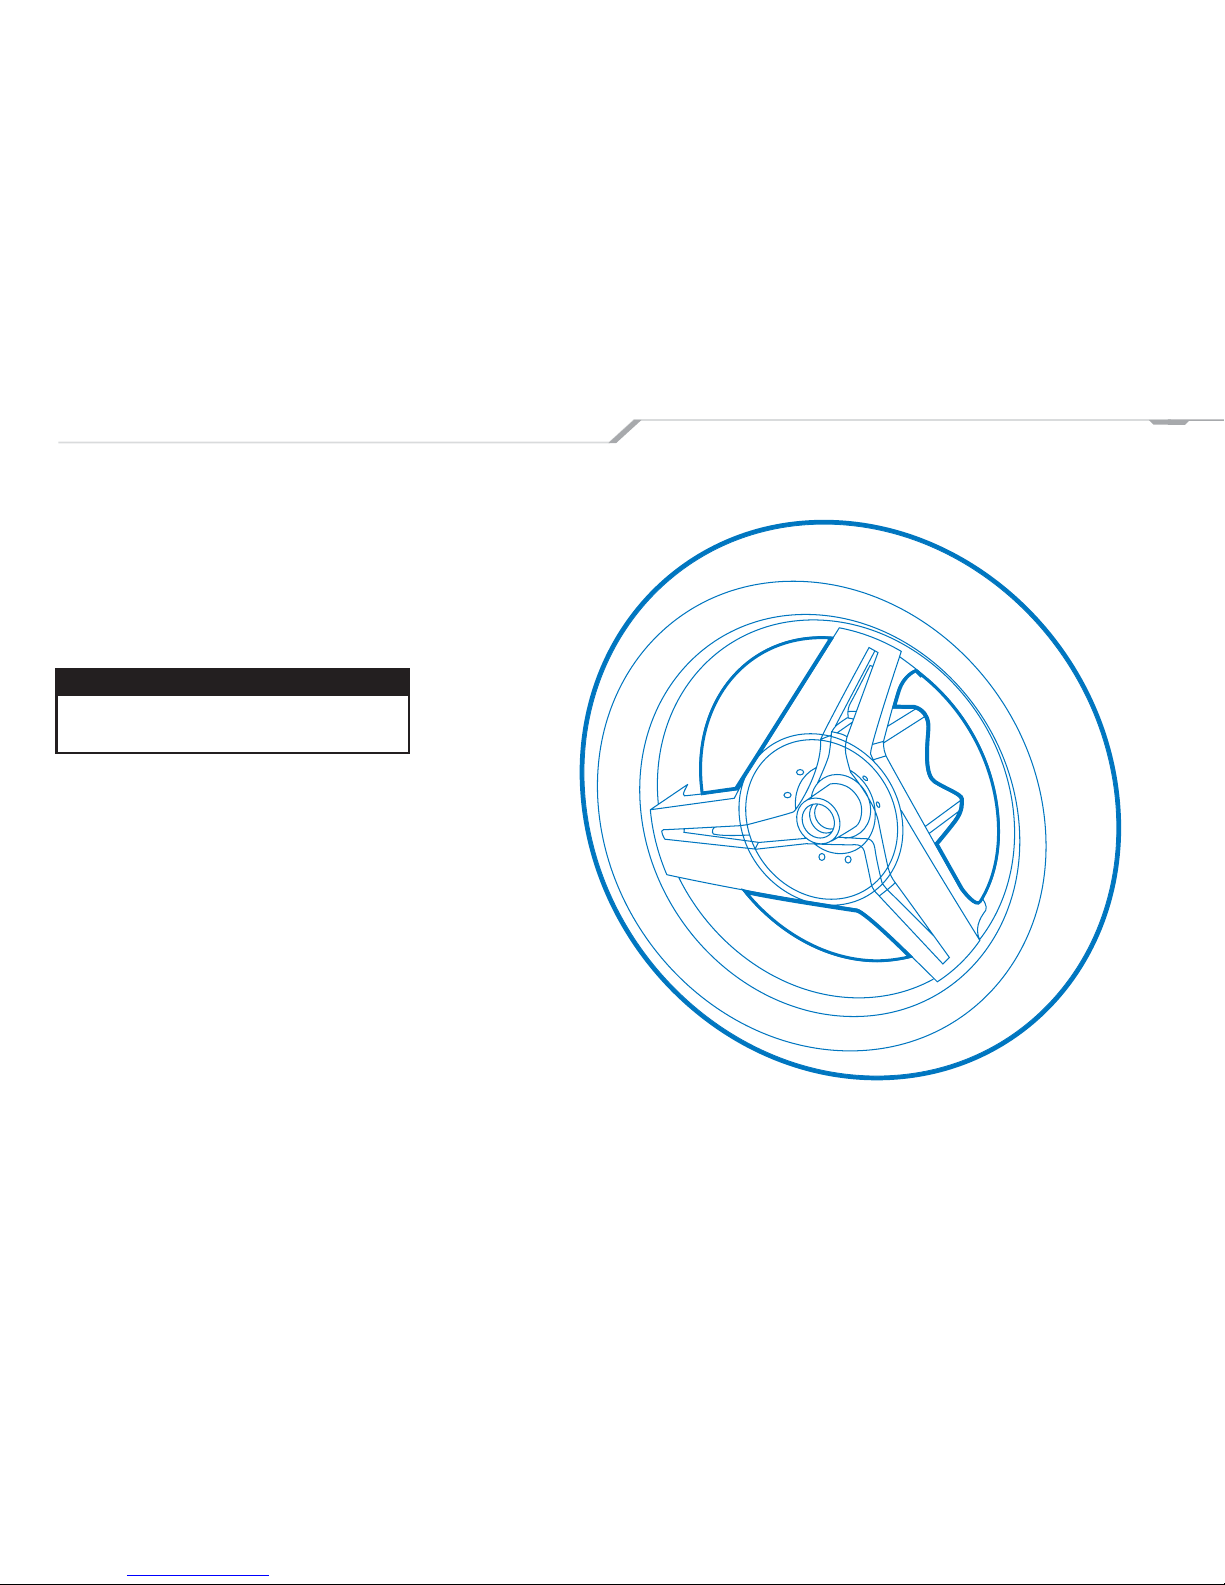
CHECKING BRAKE PADS FOR WEAR
FRONT BRAKE
Brake pads have a wear mark. If the grooves in
the friction material are visible, the pad is not
worn.
REAR BRAKE
The rear brake pad material should be at least
1mm thick for effectiveness.
NOTE!
See your service agent for brake
replacement.
Page 37
Vectrix Electric MAXI-Scooter User’s Guide 37
BULB REPLACEMENT
WARNING!
Do not change bulbs immediately after running your scooter. Let the lights cool off. Bulbs
become hot when the scooter is running, and
need proper time to cool off. Hot bulbs can
cause severe burns if handled.
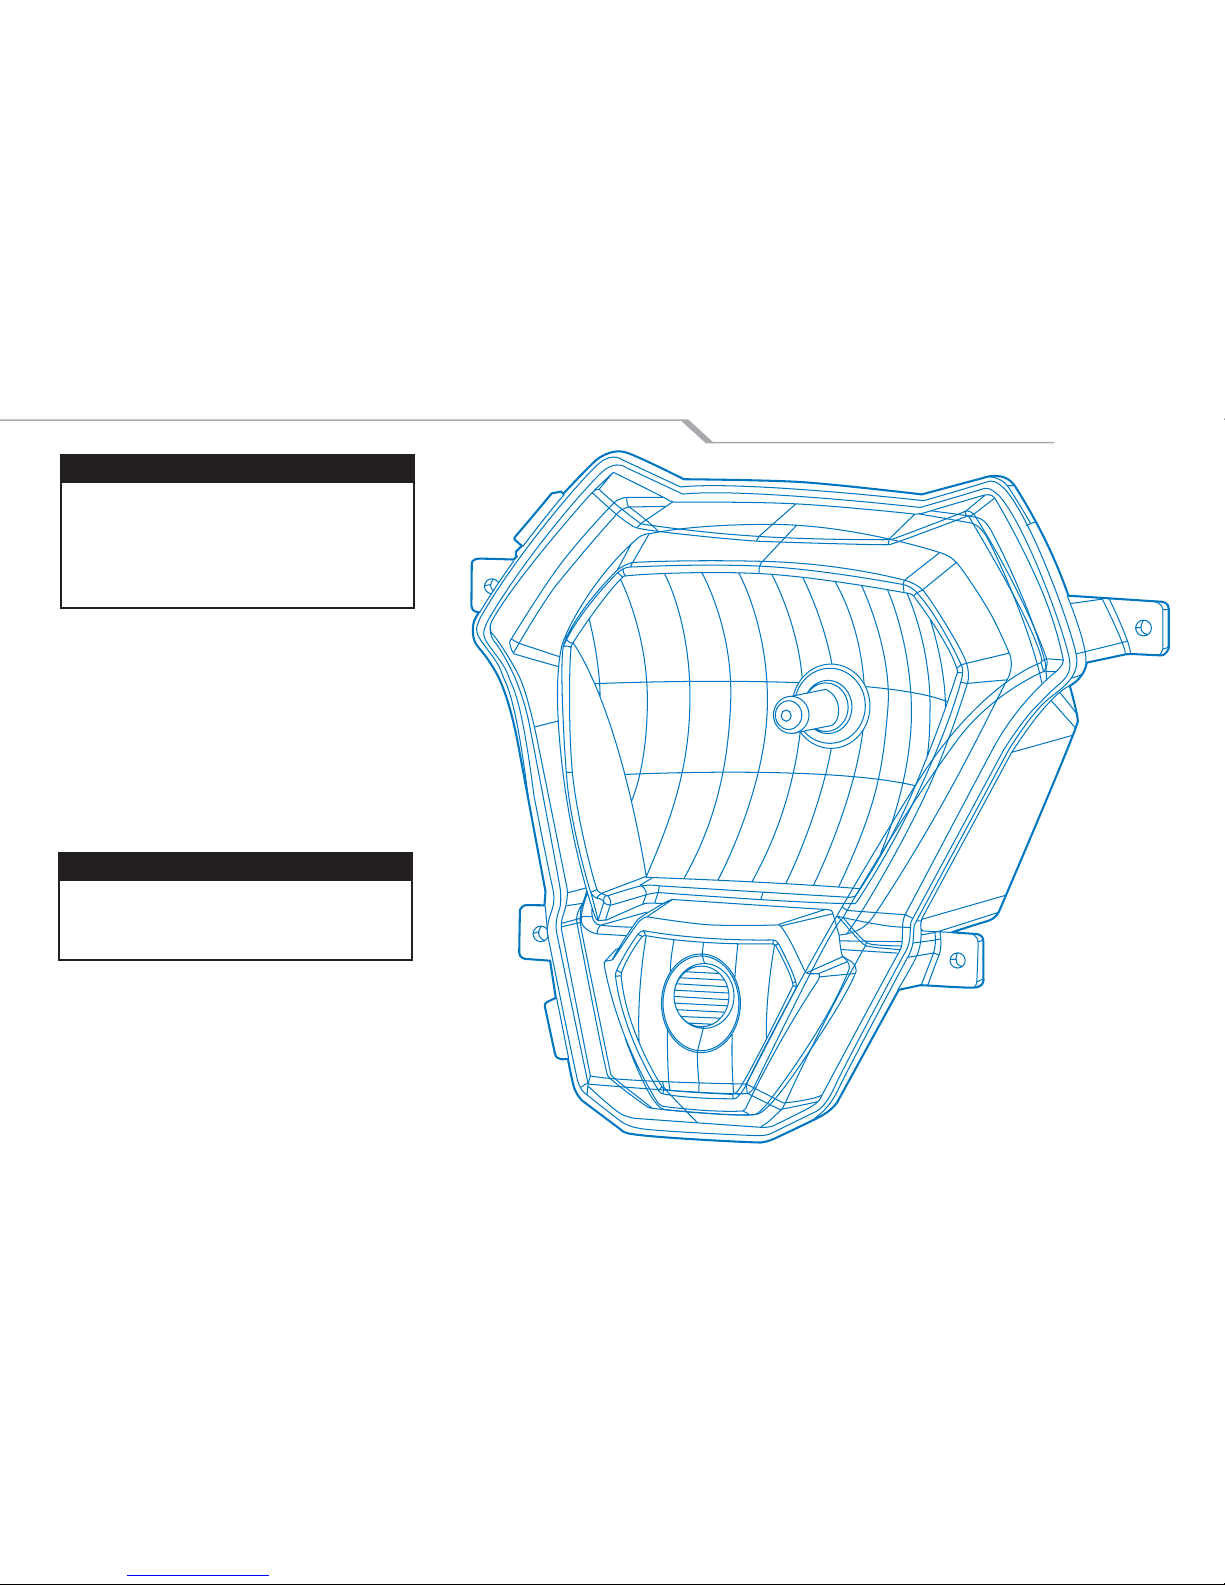
HEADLIGHT
To replace the headlight bulb you will need to
work behind the headlight fairing. Remove the
connector from the bulb. Pull the tab to remove
the protective cap. Release the clip that holds the
bulb in place and take the bulb out of the socket.
The headlight is a dual fi llament 2 x 35 watt
Philips HSR-1
NOTE!
Always hold the new bulb from the base. Oil
from human hands can cause the bulb to turn
black and become less brilliant.
LED LIGHTING SYSTEM
Due to the extremely long life of the LED lighting
system individual LED replacement is not expected. If a turn signal, stop/tail light, license plate light
or trunk light fails it is necessary to replace the
entire lighting module which has failed.
Page 38
38 Vectrix Electric MAXI-Scooter User’s Guide
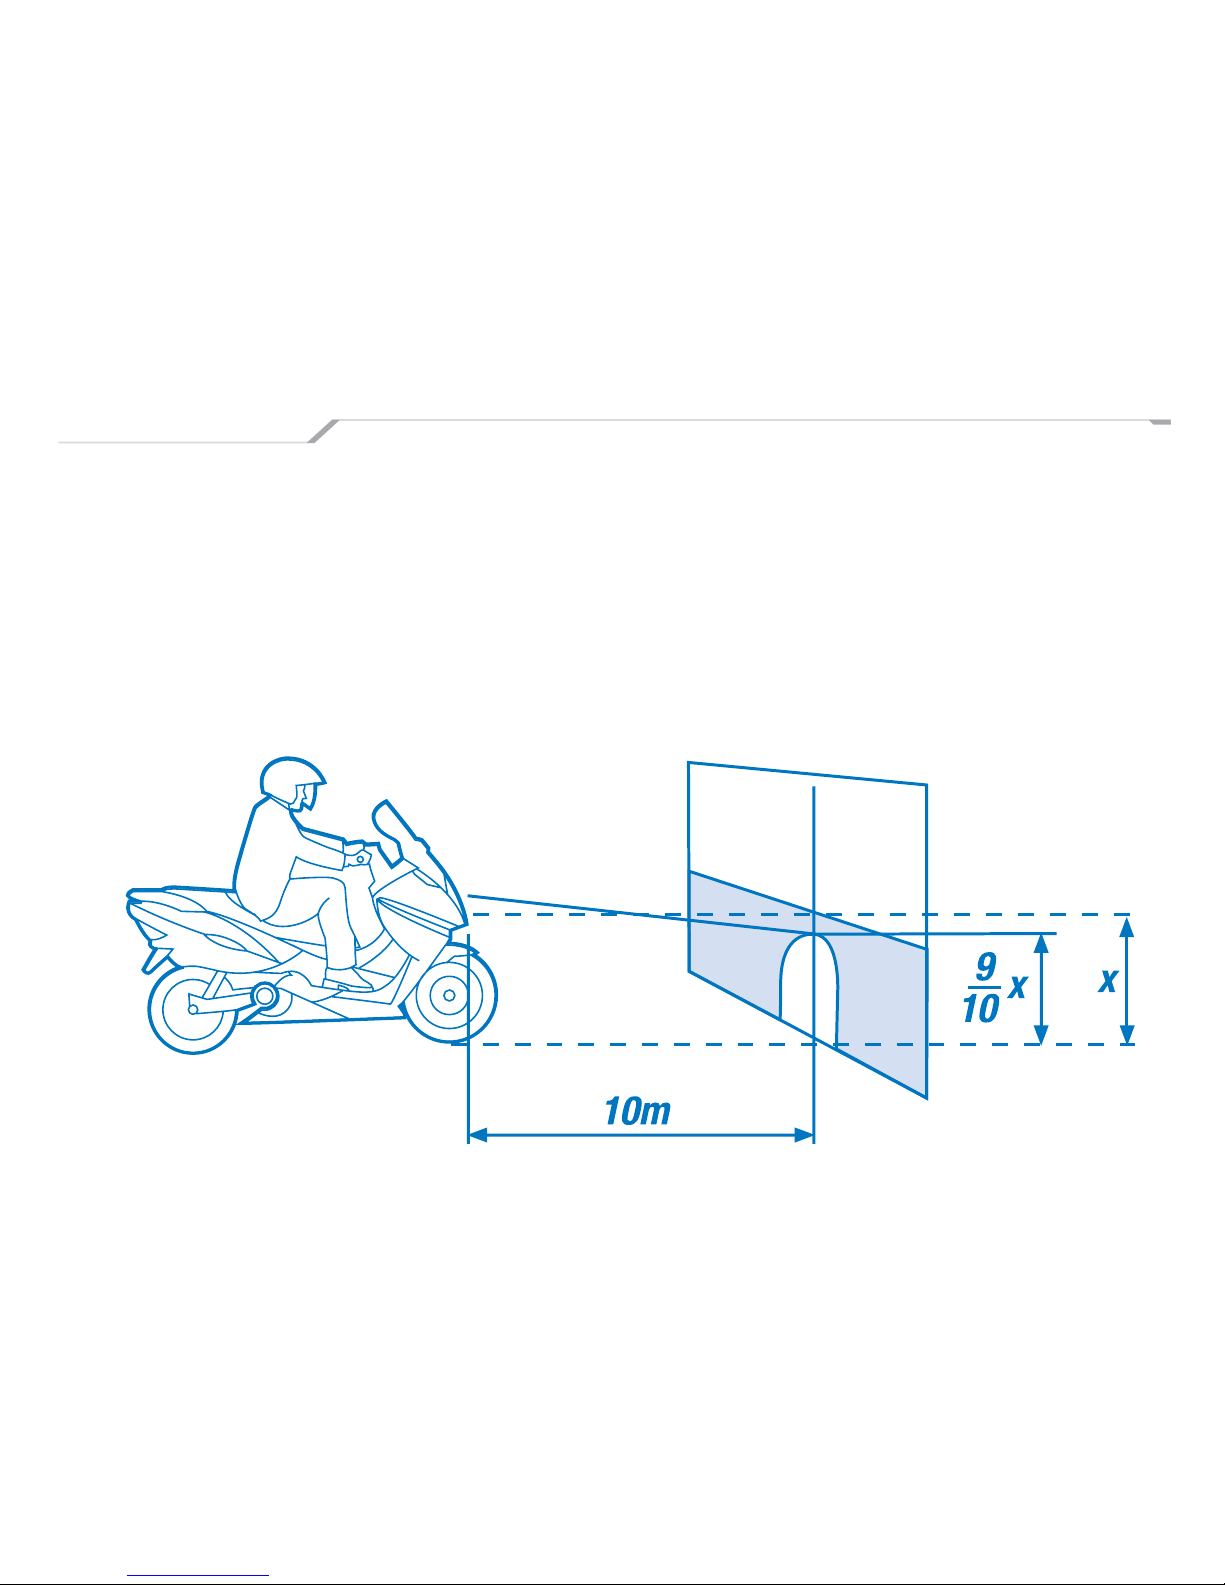
BEAM SETTING
The scooter must be in an upright position to
check the beam setting. Make sure that the
tires are at the proper infl ation and have one
person sitting on the scooter. Place the scooter
opposite a wall about 10 meters from it. Draw a
horizontal line dictated by the headlight center,
and a vertical one in line with the scooter axis. It
is better to perform this test in dim light. Switch
on the low beam. The height of the light spot
should not exceed 9/10th of the height from
ground of headlight center.
CORRECTING THE LIGHT BEAM
To correct the light beam take the left side screw
of the headlight and screw it clockwise to lower
the beam and counter clockwise to lift the beam.
SIDE POSITION OF HEADLIGHT
To adjust the side position of the headlight,
use the adjusting screw on the right side of the
headlight. Turn the screw clockwise to move the
beam to the right and turn the screw counter
clockwise to move the beam to the left.
Page 39

Vectrix Electric MAXI-Scooter User’s Guide 39
FUSES
WARNING!
Any and all fuses need to be serviced by your
service agent. Do not attempt to change these
fuses, or you will cause injury or death to yourself and others.
The fuse protection scheme for your Vectrix
scooter limits access to the fuses to an authorized service technician. You should not attempt
to change any fuse on your scooter.
Page 40
40 Vectrix Electric MAXI-Scooter User’s Guide
TIRES
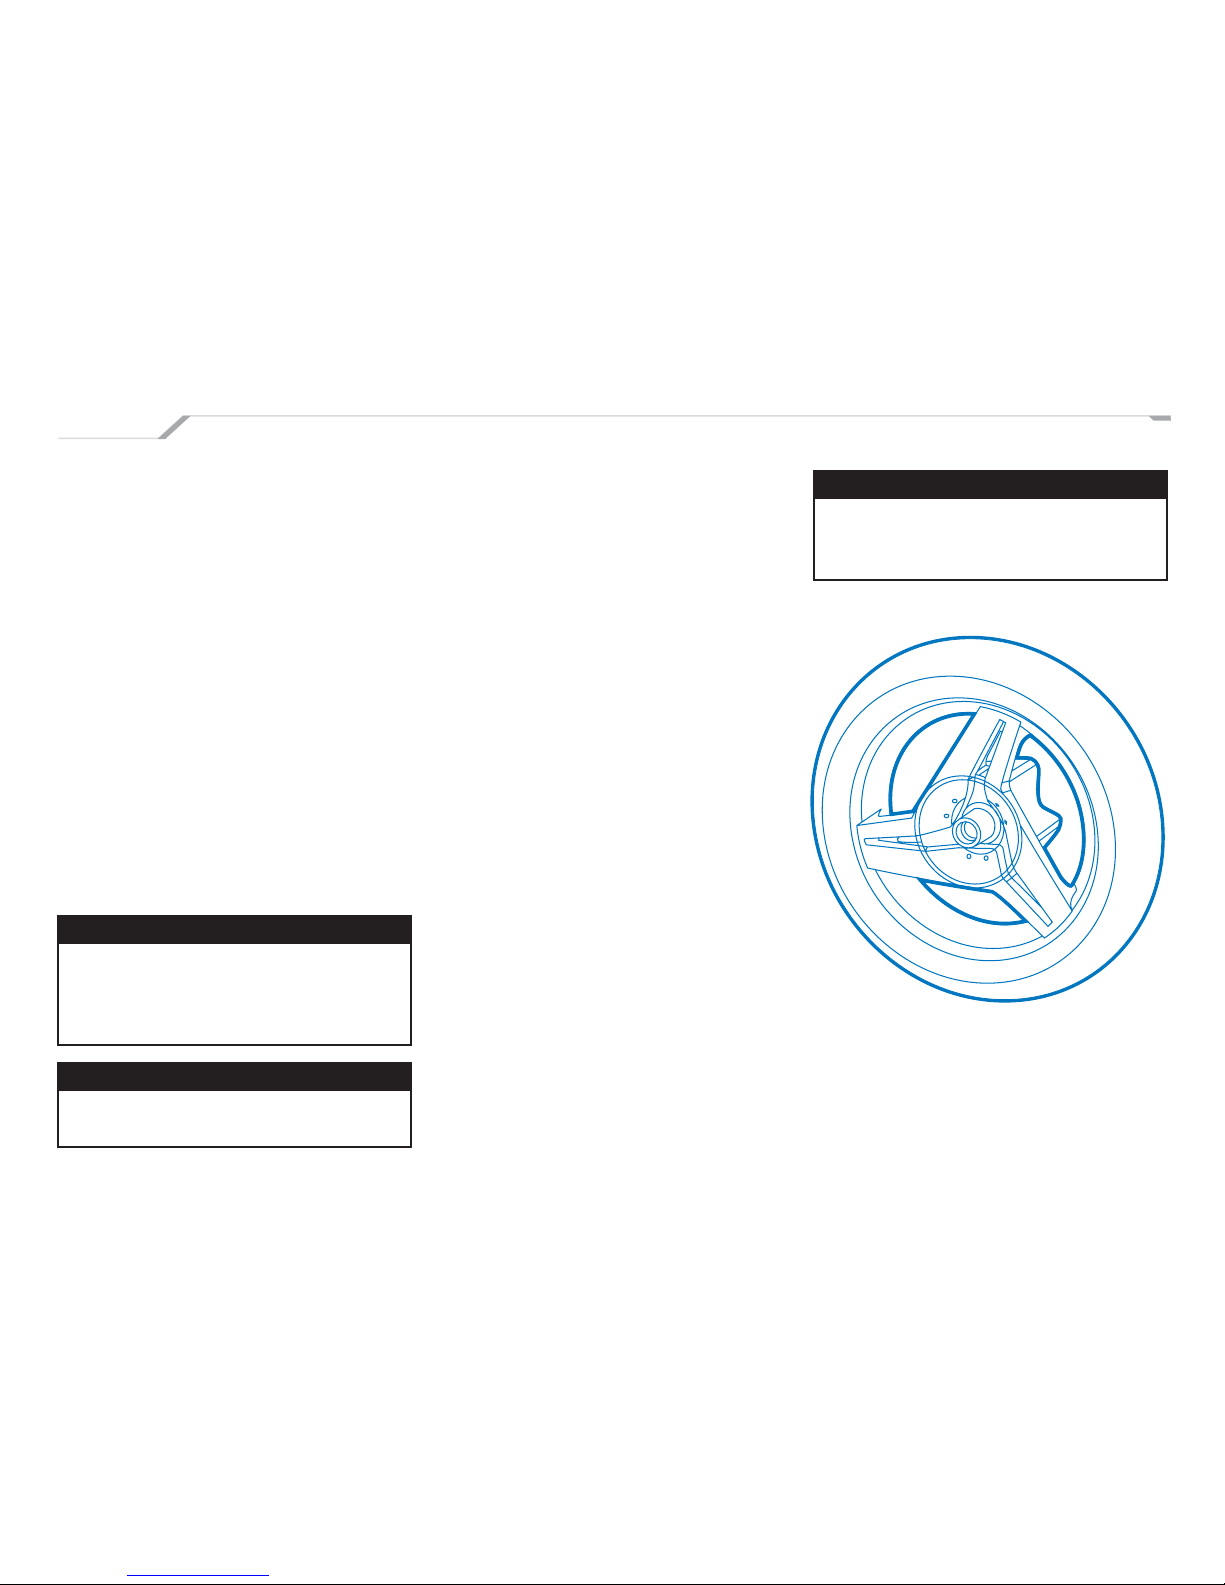
PROPER PRESSURE FOR YOUR FRONT
AND REAR TIRE
Tire pressure changes with the temperature and
by altitude. You should check the pressure on
your tires often to ensure a safe ride. The front
tire should be at 32 psi (2.2 bar) and the rear
wheel should be 40 psi (2.8 bar).
If you fi nd that the pressure in your tire is always
low and quickly changes from high to low after
being fi lled with air, see your service agent to inspect the tire.
REPAIR AND REPLACEMENT OF TIRES
Tires should be checked by a service agent on
a regular basis to ensure that they have enough
tread and are not damaged or punctured in any
way. If you have any questions about your tires
see your service agent for advice and help.
WARNING!
You should replace tires with the standard size
recommended. You should avoid larger tires
than the recommended size. Failure to do this
could result in injury or death.
NOTE!
Always have the tires balanced after
replacing them.
TO REPLACE THE FRONT TIRE....
+ Make sure that the scooter is turned “off”.
+ Raise the scooter up on its center stand on a
fi rm, level surface such that the front tire is off
of the ground.
+ Remove the front brake caliper.
+ Remove the front axle mounting hardware.
+ Move the front axle out of the way and pull the
front wheel from the front fork.
+ Repair/Replace the tire on the front rim and
infl ate to the proper tire pressure.
+ Place the front wheel into position and install
the front axle.
+ Install the front brake caliper.
+ Check that the front wheel is secure and that
the front brake is functioning by exercising the
front brake lever.
+ Retract the center stand to complete
operation.
NOTE!
Low tire pressure can result in decreased range
performance. Always check tire pressure to
keep at optimal performance.
Page 41
Vectrix Electric MAXI-Scooter User’s Guide 41
WARNING!
Driving on tires with little or no tread is
dangerous and could cause an accident.
Checking your tread depth is extremely
important. Failure to do so could result in
riding on bald tires, which can cause injury
or death especially in wet conditions.
TIRES
PROPER TREAD DEPTH
It is recommended to replace the tire when the
tread is below 2mm.
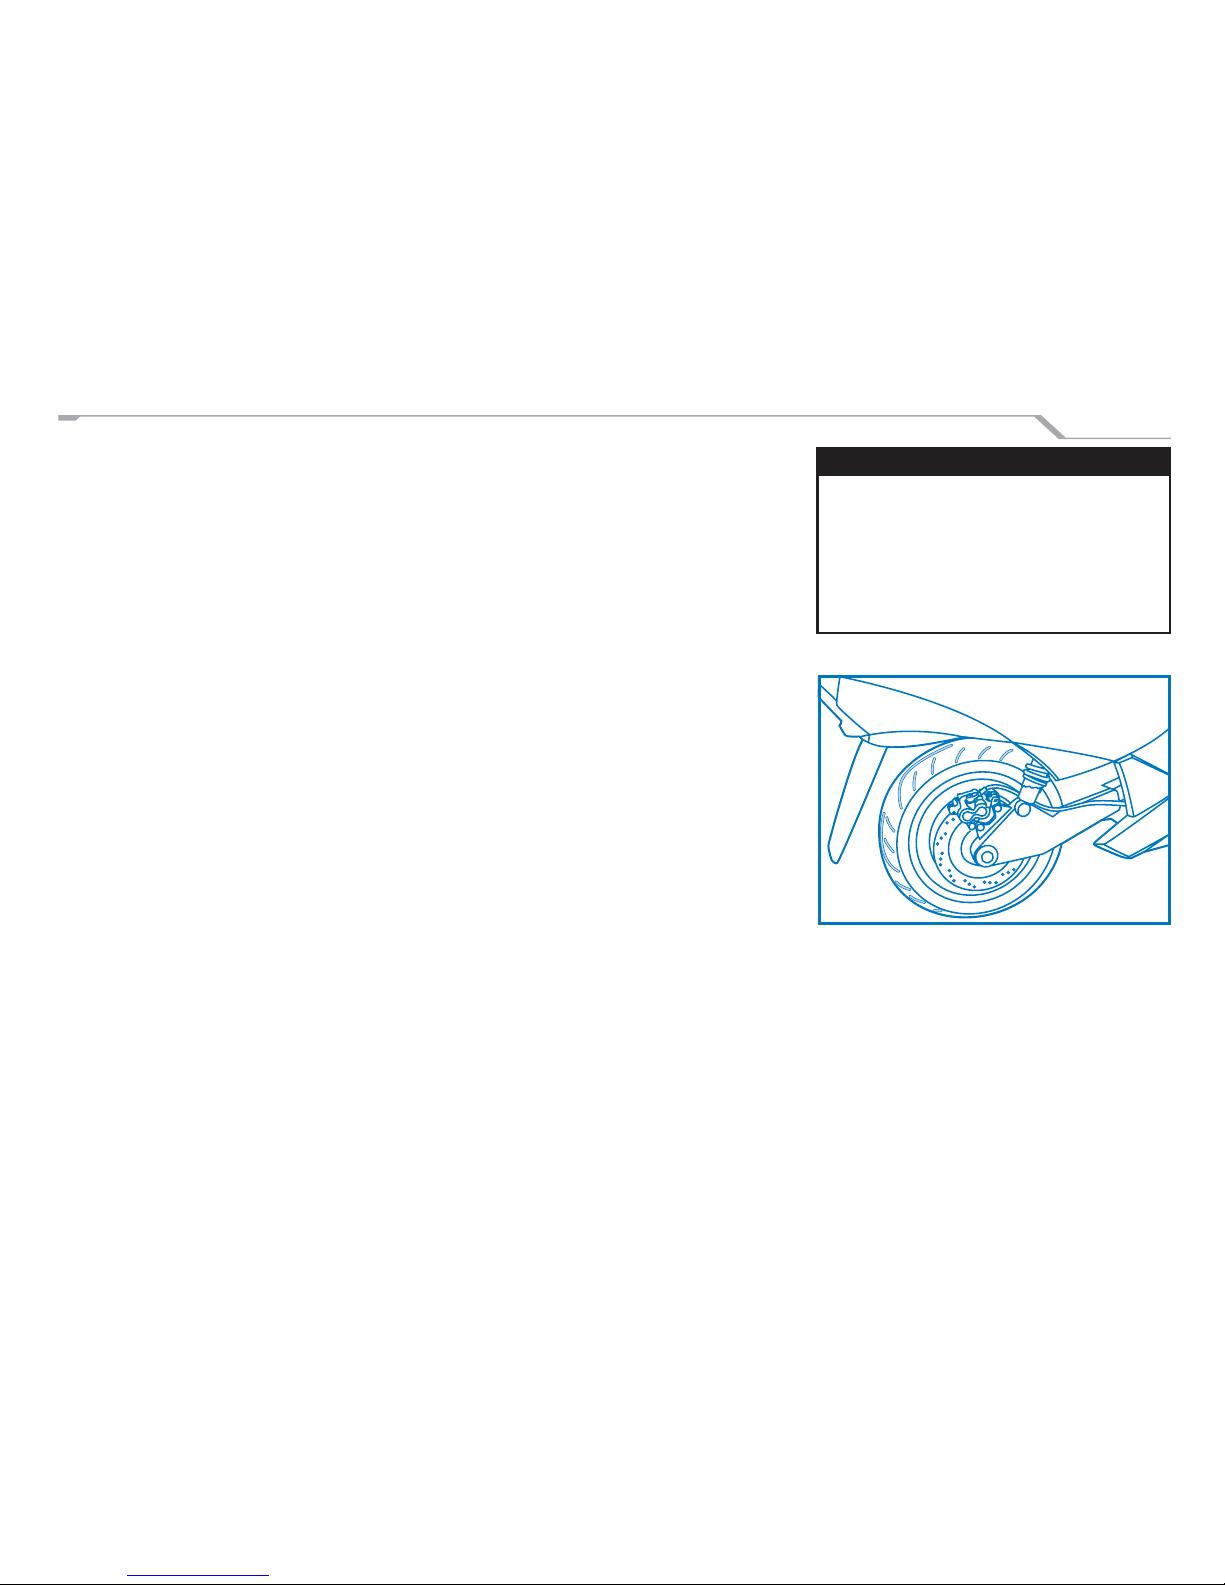
TO REPLACE THE REAR TIRE....
• Make sure that the scooter is turned “off”.
• Raise the scooter up on its center stand on a
fi rm, level surface such that the rear tire is off
of the surface.
• Remove the rear brake caliper from the brake
side swingarm.
• Remove nut, fl at washer, and lock washer from
the brake side of the rear axle.
• Remove the four (4) nuts and washers which
fasten the brake side swingarm to motorside
swingarm near the pivot point.
• Move the brakeside swingarm out of the way.
• Remove the six (6) fasteners which secure the
rear rim to the gearbox.
• Slide the rear rim/ fl at tire assembly over the
rear axle and out of the way.
• Repair/ Replace the tire on the rim and infl ate
to the proper tire pressure.
• Slide the repaired/replaced tire/wheel assembly over the rear axle and secure to the gearbox with the six (6) fasteners.
• Place the brakeside swingarm back in position
and secure it to the motorside swingarm using
the four (4) nuts and washers.
• Attach the motorside swingarm to the rear
axle using fi rst the fl at washer, then the lock
washer and then the nut.
• Reinstall the rear brake caliper by sliding it
over the brake rotor and then fastening it to
the motorside swingarm.
• Check that the rear wheel is secure and that
the rear brake is functioning by exercising the
rear brake lever.
• Retract the center stand to complete the
operation.
Page 42

42 Vectrix Electric MAXI-Scooter User’s Guide
CLEANING
As with any vehicle it is important that you wash
it on a regular basis to keep the fi nish in good
condition. Never use harsh detergents on your
scooter. Try to fi nd cleaners that are safe for your
vehicle and that are environment friendly.
When cleaning you should avoid using a pressure
washer or high pressure water unit. These units
could damage your scooter.
When drying your scooter always use clean
cloths. Dirty cloths can cause scratches on your
scooter. Clean cloths will minimize scratching.
NOTE!
Always allow your scooter to fully dry before
using it.
Page 43

Vectrix Electric MAXI-Scooter User’s Guide 43
STORAGE OF YOUR SCOOTER
If you were planning on not riding your scooter for
a long time then it would be best to follow these
procedures:
+ Clean the scooter, and allow it to dry before
storing.
+ Place the scooter on a service stand.
+ Check the scooter for any problems every few
weeks.
+ A cover protects the scooter from the
elements, and is a good investment.
Page 44
44 Vectrix Electric MAXI-Scooter User’s Guide
TROUBLESHOOTING
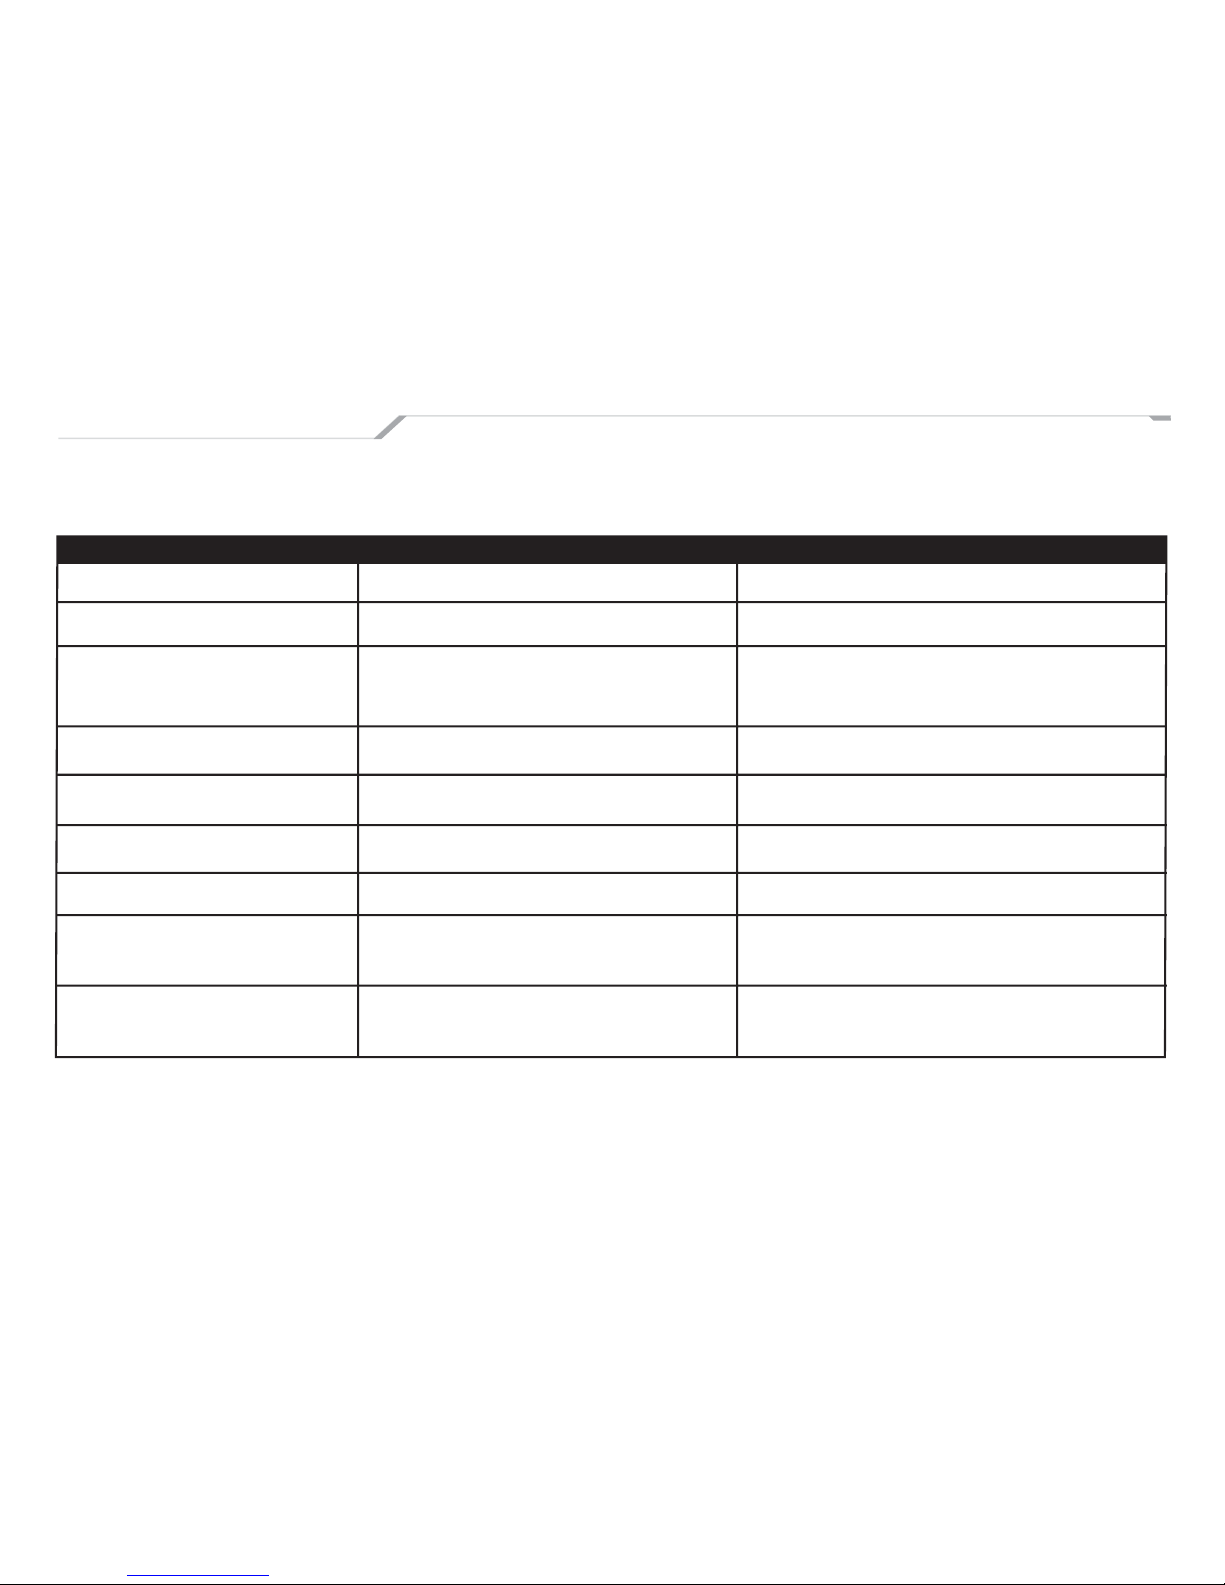
All of our scooters are carefully inspected before they are delivered to the customer. Even after scooters are inspected some technical problems can occur.
The following chart offers a guide for you to identify a problem, and if possible fi x it yourself. If you are unable to solve a problem with your scooter you
should take it to a service agent at your convenience.
SYMPTOM POTENTIAL CAUSE CORRECTIVE ACTIONS
Ready Icon not displayed Interlocks not satisfi ed Check side stand, center stand switch
Transition from Ready to Go fails Improper startup sequence Redo startup sequence
Scooter does not respond to Throttle out of adjustment Set throttle (Vectrix Assistance required)
forward throttle
Scooter fails to reverse Throttle out of adjustment Set throttle (Vectrix Assistance required)
Regenerative braking not active Throttle out of adjustment Set throttle (Vectrix Assistance required)
Scooter fails to reach top speed Motor controller thermal Allow motor controller to cool down
Range less than expected Battery pack not conditioned Condition battery
Longer than 3 hours to charge Battery thermal protection limits charge Allow battery pack to cool prior to charging
the battery
Soft or spongy mechanical braking Brake leak / Low fl uid brake lines Check master cylinders for correct fl uid level
Page 45

Vectrix Electric MAXI-Scooter User’s Guide 45
SPECIFICATIONS
VECTRIX ELECTRIC MAXI-SCOOTER
WARRANTY:
Standard is twenty-four months. Plug and Go
Pack has a forty-eight month warranty.
EMISSIONS:
Zero
WEIGHT:
495 lbs (225 kg)
SEAT HEIGHT:
30.3” (770 mm)
STORAGE CAPACITY:
Under-seat storage for 1 full-faced helmet, glove
compartment below dash
MOTOR TYPE:
Brushless, DC, radial air-gap motor
Peak Power: 20 kW at 3000 rpm
Max Countinuous Power: 7 kW
Max Current: 275 Amps
Max Torque: 65 Nm
GEARBOX:
Integrated rear-wheel mounted planetary gear
drive
BATTERY TYPE:
Nickel Metal Hydride (NiMH)
RATED BATTERY CAPACITY:
30 Ah, 3.7 kW-h
RATED BATTERY VOLTAGE:
125V
CHARGER:
1.5 kW on-board battery charger
RECHARGE REQUIREMENTS:
110V-220V (50/60Hz)
RECHARGE TIME(80% CHARGE) :
2 hours
BATTERY DEEP DISCHARGE CYCLES
(80% CHARGE):
1,700
ESTIMATED BATTERY LIFE:
50,000 miles / 80,000 km
BRAKING:
Patented multi-function throttle provides
regenerative braking and slow speed reverse
with mechanical brakes front and rear
Page 46

46 Vectrix Electric MAXI-Scooter User’s Guide
PERFORMANCE DATA
MAX SPEED:
62 mph/100 km/h
ACCELERATION:
0-50 mph (80 km/h) in 6.8 seconds
MAX RANGE:
68 miles (110 km) @ 25mph (40km/h)
FRAME:
Lightweight aluminum frame
WHEELS:
Front – 120/70-14” Rear – 140/60-13”
WHEELBASE:
60” (1525 mm)
CONTROLLER:
DSP & IGBT based all-digital electronic control
and motor drive system
INSTRUMENTATION:
LCD’s display speed, odometer, energy consumption, battery status, estimated range and system
status
Page 47

Vectrix Electric MAXI-Scooter User’s Guide 47
SAFETY RULES AND REGULATIONS
Traffi c rules and regulations vary from jurisdiction
to jurisdiction. Please become aware of those
regulations before riding your scooter.
SAFE RIDING
These safety tips are useful and may save your
life in case of a potential accident. Please read
and understand these tips before riding your
scooter. Defensive driving is more important on
a scooter versus a car. Always wear protective
gear, but understand that protective gear cannot
totally protect you in the event of an accident.
Always use turn signals to alert other drivers of
your intentions. Use caution in bad weather when
roads become wet and slippery. Sudden braking
can cause the scooter to become unstable, and
cause an accident.
DO NOT DRINK AND RIDE.
PROTECTIVE APPAREL
When riding you must always wear your safety
helmet. Helmets prevent fatalities by protecting
your head and brain. It is recommended that you
wear above ankle boots, and eye goggles when
not wearing a full helmet. Without eye protection
wind and debris could get into your eyes and
cause an accident.
SAFETY
Page 48
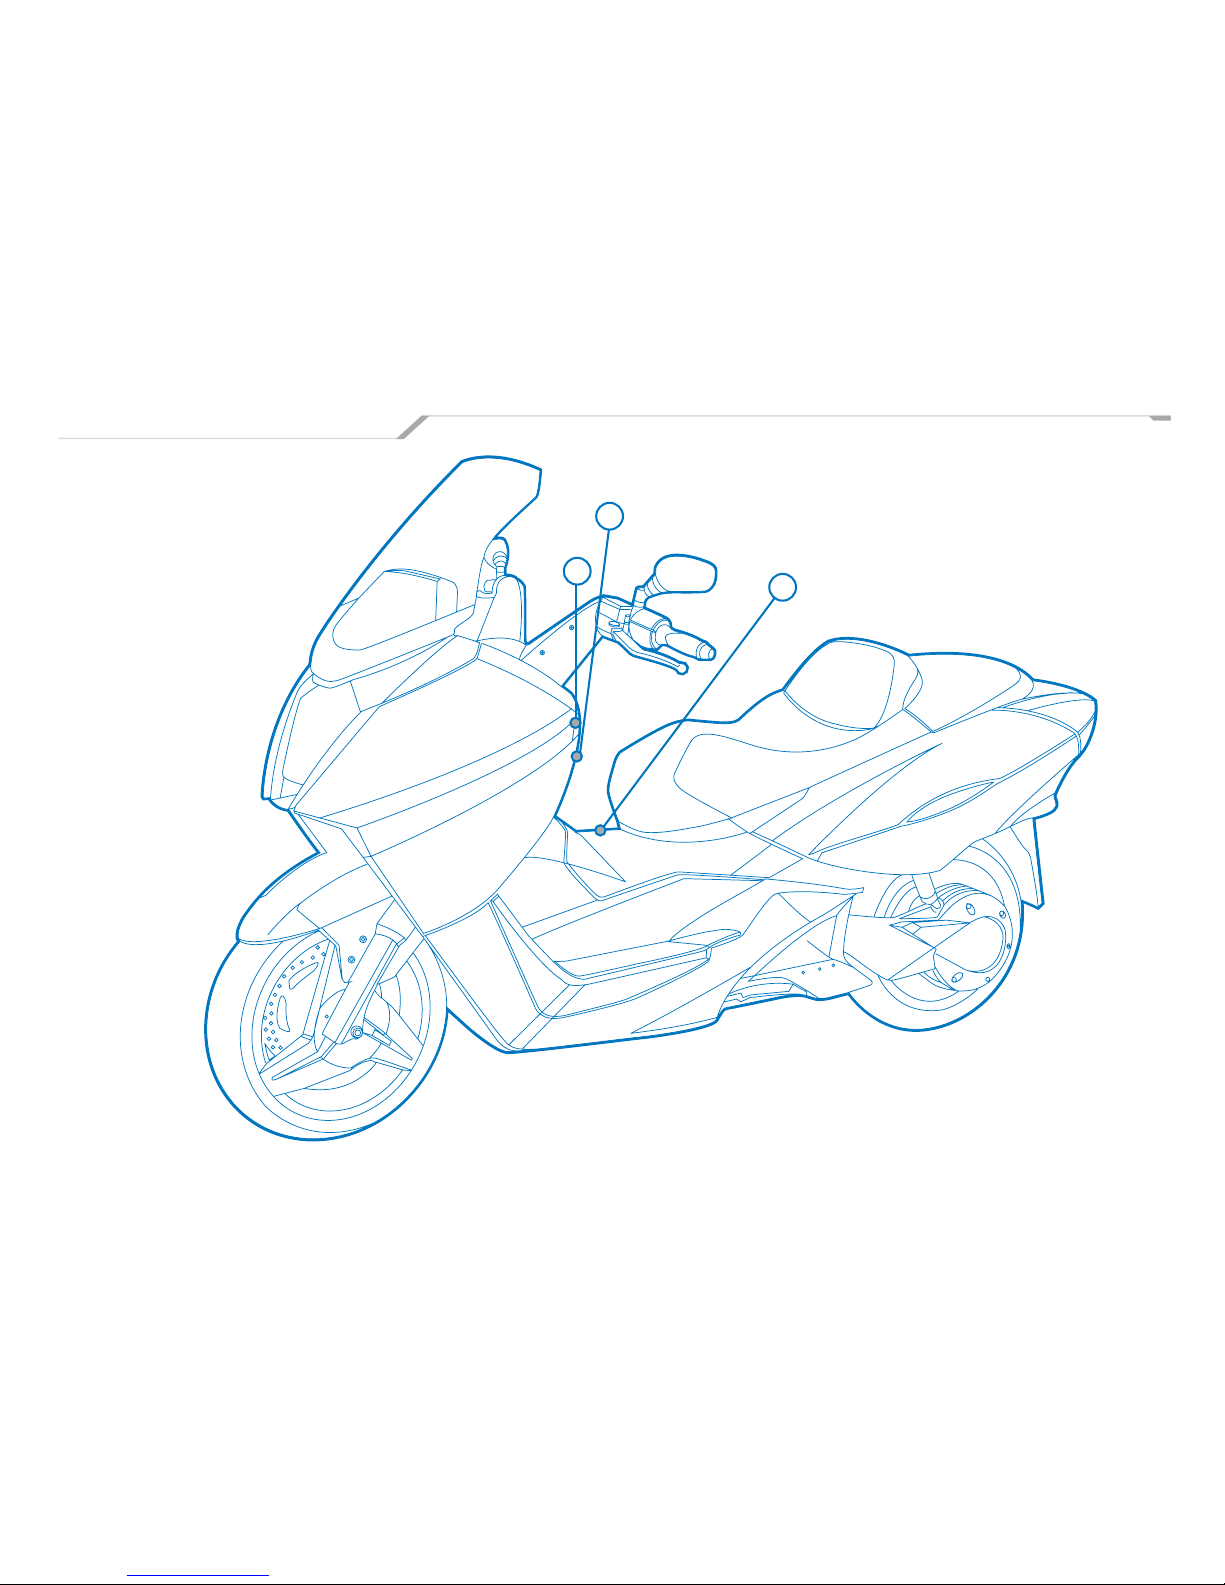
48 Vectrix Electric MAXI-Scooter User’s Guide
LABEL LOCATIONS
3
2
1
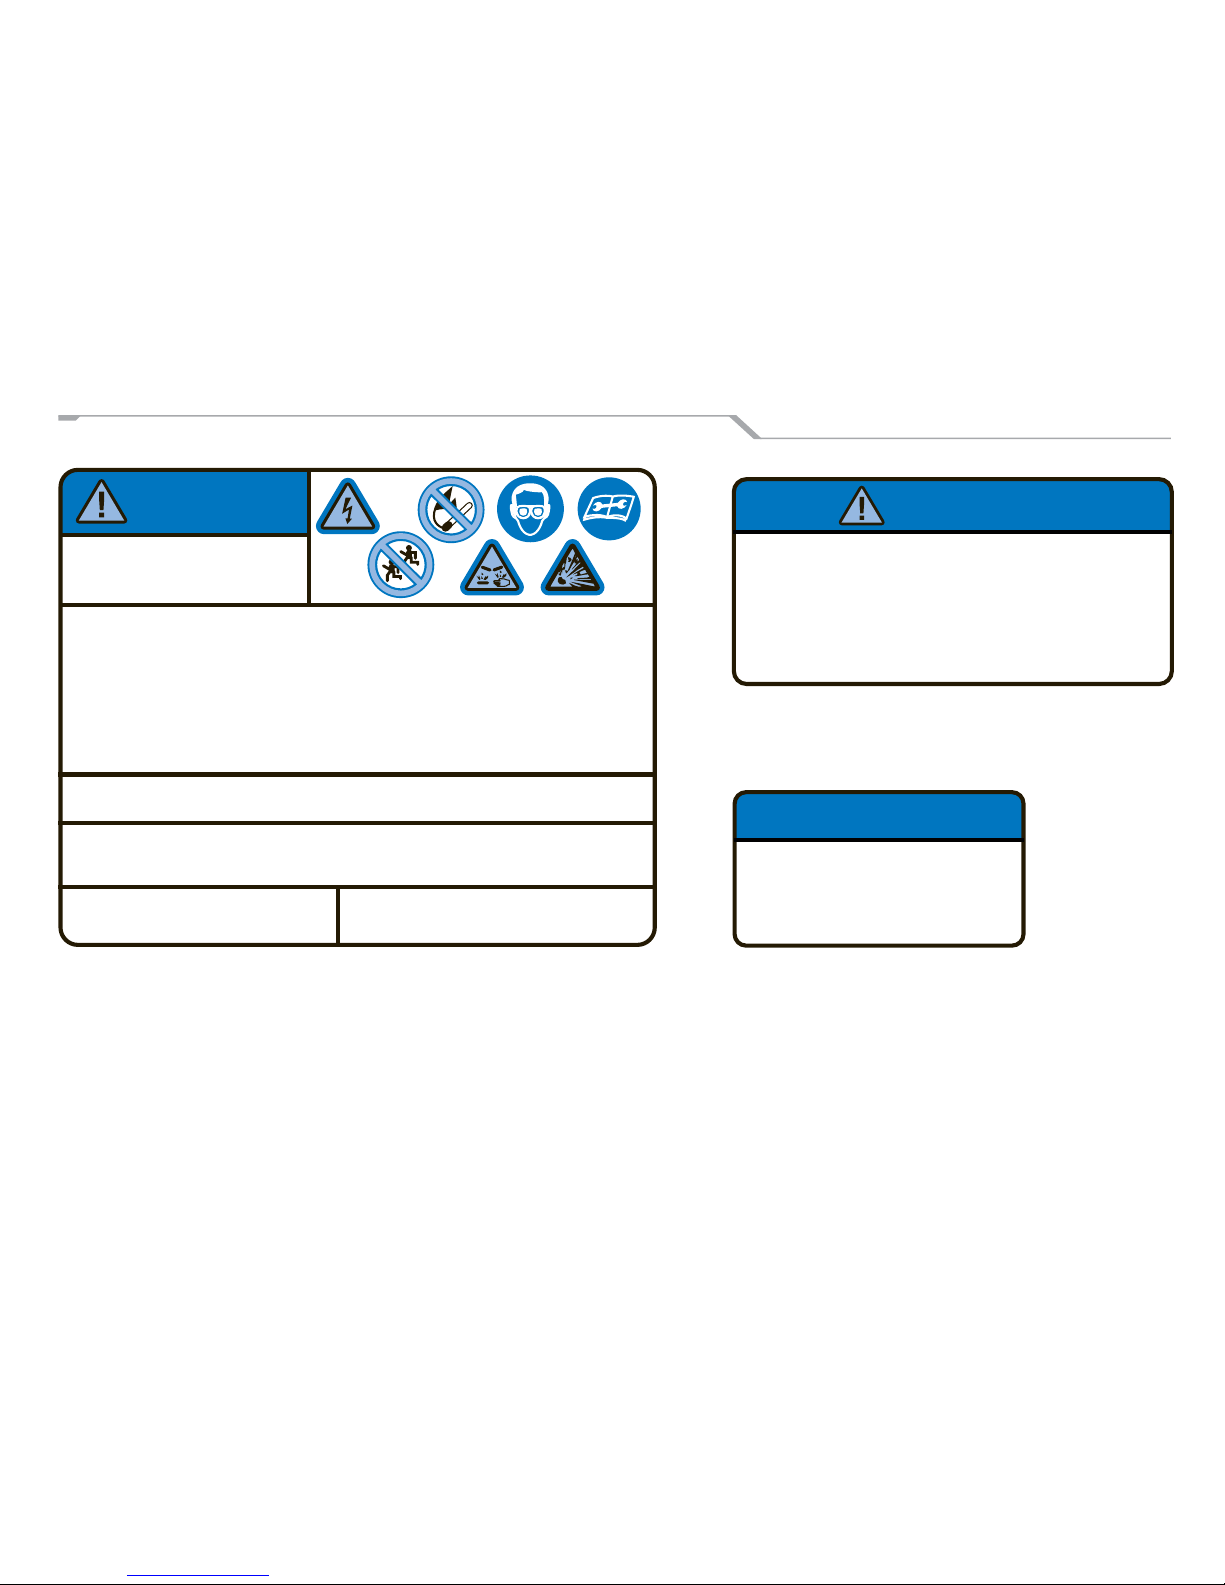
The following pages (47-48) display the locations
of safety labels, and the labels themselves.
Page 49
Vectrix Electric MAXI-Scooter User’s Guide 49
1
2
3
NOTICE
ACCESSORY PORT
12 VDC 0.5 AMPS (6 WATTS)
MAXIMUM
DANGER
High Voltage Inside /
Alkaline Electrolyte
To avoid injuries, burns or electric shocks:
• Never disassemble this battery unit or remove its covers.
- Service by Qualifi ed Personnel-
• Avoid contact of alkaline electrolyte with eyes, skin, or clothes.
in event of accident, fl ush with water and get medical help immediately.
• Keep children away from this unit.
• Do not puncture or impact on this unit when operating forklift, or expose to open fl ame or
incinerate, or expose to liquids when storing this unit, as excessive heat may generate fi re and
electrolyte may leak out.
To Qualifi ed Service Personnel:
Be sure to read the Repair Manual before servicing or replacing the battery.
Battery Recycling Information
• Please transport this battery in accordance with all applicable laws.
• Be sure to consult Vectrix dealer or the following address for replacing and disposing of this battery.
Residents in the USA
Phone (401) 848-9993
Vectrix Corp
11 Toro Street
Newport, RI 02840
Residents in Europe
Phone +39 06 71280295
Vectrix Europe
Via Papirio Carbone 15
00178 Rome, Italy
WARNING
Your Vectrix scooter is equipped with a warming light fl ashing
when the side stand is lowered (on).
However, it is the rider’s responsability to insure that the side
stand is stowed completely before starting out.
Faillure to observe this warming could result in an upset and
consequent bodily injury.
Page 50

50 Vectrix Electric MAXI-Scooter User’s Guide
FOR USA VERSIONS ONLY
SAFETY DEFECTS
Contact the ( NHTSA) National Highway Traffi c
Safety Administration if you believe that this
vehicle has a defect that could cause an
accident injury or death. Also contact Vectrix
Corporation immediately. If the NHTSA receives
multiple complaints it could lead to an investigation. The NHTSA may opt to recall vehicles
if they see a safety threat. The NHTSA cannot
deal with individual problems with dealerships
or Vectrix Corporation.
THE NHTSA CAN BE REACHED AT:
1-800-424-9393
OR YOU CAN WRITE THEM AT:
NHTSA
US Dept. of Transportation
Washington, D.C. 20590
Page 51

Vectrix Electric MAXI-Scooter User’s Guide 51
DATE OF SERVICE MILEAGE SERVICE DESCRIPTION COMMENTS
ROUTINE MAINTENANCE RECORD
Page 52

VECTRIX CORPORATION
11, Touro Street, Suite 201
Newport, RI 02840
USA
Phone: +1 401 848 9993
Fax: +1 401 848 9994
www.vectrix.com
 Loading...