

Page 1
Ultra Pro Powerhead
VACUUM CLEAN
VACUUM CLEANER
CYCLONIC
BARREL
VACUUM
LET’S GET STARTED.
VX59
vax.com.au
vax.co.nz
Page 2

Let’s talk safety
Basic
safety
precautions
Don’ts
This vacuum cleaner is intended for household use only and
NOT for commercial or industrial use.
READ ALL THE INSTRUCTIONS BEFORE USING
THIS APPLIANCE
• Only use the vacuum cleaner indoors and keep the area you’re
cleaning well lit.
• Keep ngers, hair and loose clothing from moving parts and
openings whilst using the vacuum cleaner.
• This appliance is not intended for use by persons (including
children) with reduced physical, sensory or mental capabilities
or lack of experience and knowledge unless they have been given
supervision or instruction concerning use of the appliance by a
person responsible for their safety.
Children should not play with the vacuum cleaner. Cleaning and user
maintenance should not be made by children without supervision
• Do not pull or carry by cord, use cord as a handle, close a door
on cord, or pull cord around sharp edges or corners. Do not place
product on cord. Do not run appliance on cord.
• Don’t handle the plug or use the vacuum cleaner with wet hands.
• Don’t use the vacuum cleaner with incorrect voltage as this may
result in damage or injury to the user. The correct voltage is listed
on the rating label.
• Don’t vacuum up hot coals, cigarette butts, ash, matches or smoking
hot burning items or use in an area where there may be harmful
uids (chlorine, bleach, and ammonia drain cleaner).
Do’s
• Always make sure the lter and dirt container are tted correctly
before using your vacuum cleaner.
• Turn o all controls on the vacuum cleaner before disconnecting
or connecting the battery.
• Take extra care when cleaning on the stairs.
• Always switch o the vacuum cleaner before disconnecting or
connecting the hose and accessories.
• Always protect the charger cord from heated surfaces
or near open ames.
Page 3

• Only Vax recommend tools and accessories should be used with this vacuum cleaner
• Vax recommends the use of a Residual Current Device rating of 30 mA or less.
• If the supply cord is damaged, it must be replaced by the manufacturer, or
similarly qualied person in order to avoid a hazard, or invalidating the warranty.
• CAUTION: The hose contains electrical connections:
– Do not use to suck up water
– Do not immerse in water for cleaning
– The hose should be checked regularly and must not be used if damaged
• IMPORTANT: The motor is equipped with a thermal cut-out. If for any reason the
unit should overheat, the thermostat will automatically turn the unit o. Should
this occur, unplug the vacuum cleaner from the electrical outlet and turn o the
switch. Remove dirt container and empty. Clean lters. Allow the unit to cool for
approximately one (1) hour. To re-start, plug into an electrical outlet and switch
back on.
• Don’t attempt to remove blockages with sharp objects as this may cause damage
to the vacuum cleaner.
• Do not vacuum hard or sharp objects such as glass, nails, screws or coins etc.
• Do not vacuum plaster dust, concrete dust or any other building
or vitreous material.
• Do not vacuum our, baking soda or any other powder-based carpet refresher
or deodoriser.
• Don’t use this vacuum cleaner if it has been dropped, damaged or left outdoors.
• Don’t vacuum up any ammable or combustible materials (lighter uid, petrol,
kerosene etc.) or use the vacuum cleaner in an area with explosive vapours or liquid.
• Use only SAA approved 10amp extension cords. Care should be taken to arrange
the extension cord as it can be a trip hazard.
• Always carry the vacuum cleaner by the handle.
• Store your vacuum cleaner in a cool, dry area.
• Always keep the power cord away from the brushes whilst using your
vacuum cleaner.
PLEASE KEEP INSTRUCTIONS FOR FURTHER USE.
Page 4

Thank you for buying this Vax Ultra Pro Powerhead.
Taking care of your carpets and hard fl oors
The Vax Ultra Pro Powerhead is designed to make vacuuming carpets and hard oors regularly
as e ective and effi cient as possible and this user guide will help you get the most out of your
machine. Maintaining your carpets will ensure they keep their appearance for longer. You’ve
chosen the carpets and hard oors for your home for a reason and Vax will help you take
good care of them.
Taking care of your Vax Ultra Pro Powerhead
Also inside this guide are instructions on maintaining your new machine, so that it’s always ready
when you are to tackle your carpets and hard oors.
We’re here if you need us
For troubleshooting simply visit or call:
Australia: 1300 361 505* New Zealand: 0800 800 900*
vax.com.au vax.co.nz
*Monday – Friday: 8:30am -5:00pm
Calls are charged at the standard local rate. Please make note of the serial
number and model number of the product before calling.
Page 5
Contents
Let’s talk safety
Vax Performance
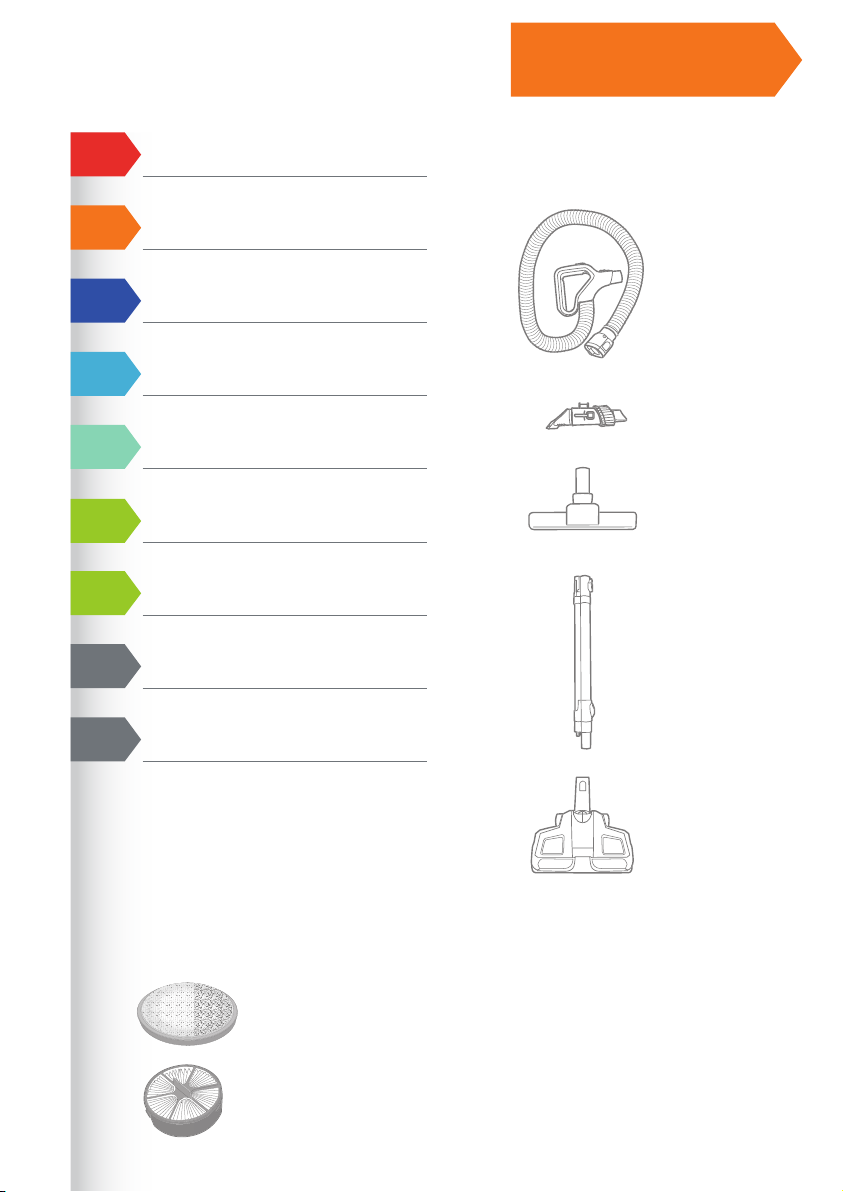
Included with
your machine
Getting to know your machine
Getting started
Using your machine
Taking care of your machine
What to do if it goes wrong
Getting in touch
Accessories
Notes
Hose and handle
3 in 1 tool
Hard oor brush
Telescopic extension
wand
Filters
Motorised
powerhead
Pre-motor lter
HEPA post-motor lter
Page 6
This product
regulatory
requirements
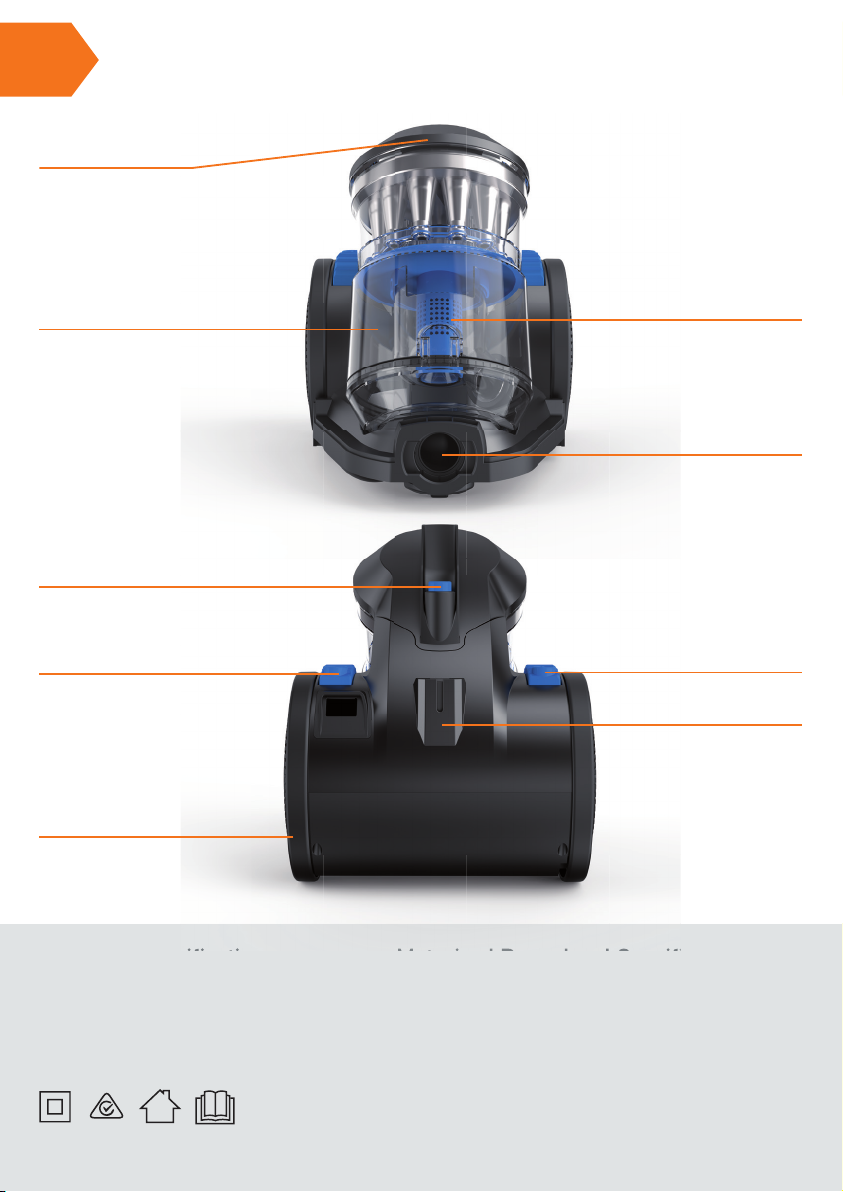
Carry handle
Getting to know your machine
Dirt container
Dirt bin release button
Cord rewind button
Wheel
Cyclone separator and shroud
Hose connector
On/o button
Floor head parking slot
Technical Specifi cation
Name Vax Ultra Pro Powerhead
Voltage 220-240V ~ 50Hz
Wattage 1500W
Cord length 6m
Weight 5.9kg
Subject to technical change without notice.
Motorised Powerhead Specifi cations
Rated Voltage 220-240V ~ 50Hz
Rated Input Power 120W
Model Number HW-PO6
Accessories & Consumables
Filter pack*
VWCF
*To purchase consumables and accessories, please visit vax.com.au
Page 7
Getting started
PLEASE READ ‘LET’S TALK SAFETY’ AT THE BEGINNING BEFORE USE
CAUTION: Always switch o the vacuum cleaner before connecting or disconnecting the hose/attachments,
or removing and emptying the dirt container.
Keep you Vax like new
IMPORTANT: The condition of the lters a ects the performance of your machine. Please check, clean and replace
lters periodically (depending on the level of use). For full cleaning instructions, see “Cleaning the pre-motor lter”
and “Cleaning the post-motor lter”.
IMPORTANT: Do not use the vacuum cleaner with blocked lters and without all of the lters in place.
Connect Hose
C
Push Hose Connector end (A) into
opening (B) on front of cleaner.
To disconnect hose from cleaner,
B A
WARNING: Always turn o this appliance before connecting hose.
IMPORTANT: The exible hose contains electrical wires for connection to the Power Nozzle and should not be used if
damaged, cut, punctured, or wires are exposed.
press release buttons (C) on sides
of Hose Connector and pull out.
Page 8
Getting started
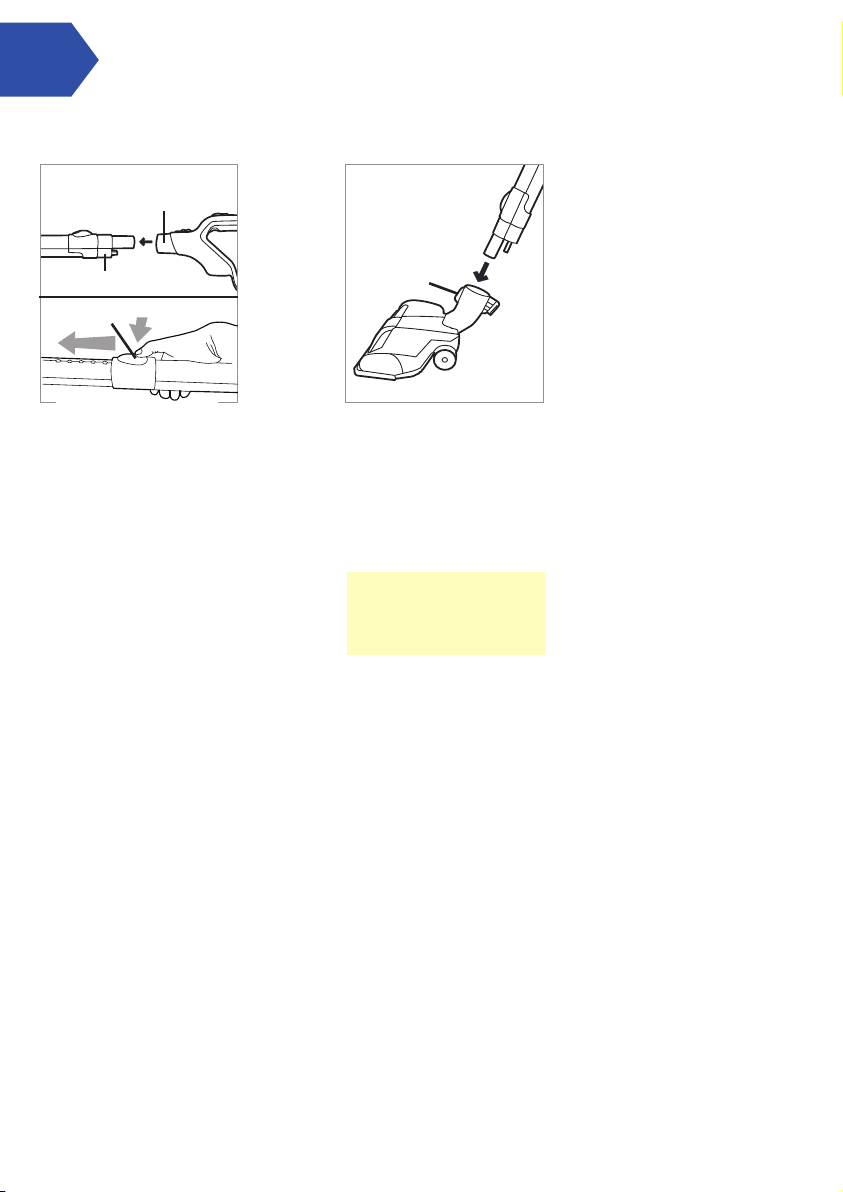
Connect wand Connect nozzle
D
E
F
Push Hand Grip (D) rmly into
end of Wand (E) until Latch
clicks. Push button (F) on wand
to utilize telescopic feature. To
remove Wand from Hose, press
on Wand Release Button on
end of Wand and pull apart.
G
Push the opposite end of Wand
rmly into Power Nozzle.
To remove, press on Nozzle
Release Button (G) and
pull wand out to disconnect
from nozzle.
WARNING: Always turn
o this appliance before
connecting Power Nozzle.
Page 9

Using your machine
Cord release
Grasp the end of the plug and pull to release cord from cord reel.
WARNING: When pulling on the cord, yellow tape will identify when the cord is almost fully extended.
When red tape is visible on the cord, the cord has reached its full length. (Do not pull the cord past the
red tape.)
Carry handle
Use the carry handle located
on the top of the canister to
move the vacuum cleaner from
room to room.
On-Off switch Stair cleaning
A
Insert the plug into the electrical outlet. Press the on/o
pedal (A) on back of canister,
to switch the cleaner on and
press pedal again to turn the
cleaner o .
Clean stairs from bottom to top.
CAUTION: Use extra care
when cleaning on stairs.
To avoid personal injury or
damage, and to prevent the
cleaner from falling, always
place cleaner at bottom of
stairs or on oor. Do not
place cleaner on stairs or
furniture, as it may result
in injury or damage.
Page 10

Using your machine
Floor surface selector
C
D
Carpet, Rug or Hard Floor Cleaning
Push brushroll button (C) to turn brushroll On and O .
Brushroll on: Vacuums carpets.
Brushroll off : Vacuums hard oors.
Selector proper tool
B C
A
CAUTION: Not to be used for grooming a pet.
D
Variable Suction
Slide the Variable power slider (D) to close for maximum
suction; open if power nozzle is diffi cult to push on some
carpets or if lightweight rugs or draperies are being cleaned.
3-in-1 Combination Tool
Simply push the attachment rmly on the end of the wand or
hose end. To remove tool, twist and pull apart gently and return
to storage.
A. Telescoping Extension Wand: The telescoping extension
wand can be lengthened or shortened by pushing the button in
and sliding the wand apart or together as required.
B. 3 in 1 Combination Tool: Push lock button in to release
dusting brush and slide down to revert to crevice mode.
Crevice Tool may be used in tight spaces, corners and along
edges in such places as dresser drawers, upholstered furniture, stairs and baseboards.
Dusting Brush may be used for furniture, table tops, books,
lamps, lighting xtures, venetian blinds, baseboards, shutters,
and registers.
Furniture Nozzle may be used for upholstered furniture, draperies, mattresses, clothing, and carpeted stairs.
C. Motorised Powerhead: May be used for carpets, rugs and
hard oor surfaces.
Brushroll on: Vacuums carpets.
Brushroll o : Vacuums hard oors.
D. Hard Floor Tool: Use hard oor tool to vacuum hardwood,
laminate and ceramic oors.
Page 11

Attaching tools
Cord rewind/storage
Using your machine
Tools may be attached directly to the hand grip or to the
telescoping wand. Firmly push tool into the hand grip or wand.
Twist tool slightly to tighten or loosen connection.
To return cord for storage,
unplug from wall hold plug
and press down Cord
Release Pedal.
WARNING: Hold plug when rewinding onto cord reel. Do not allow plug to whip when rewinding.
For convenience there is
a parking slot located at the
rear of the vacuum cleaner
where the oor tool and hose
can be parked for carrying
and storage.
Page 12

Cleaning the pre-motor fi lter
Familiarise yourself with these home maintenance tasks as proper use and care of your cleaner will ensure
continued cleaning e ectiveness.
Any other servicing should be done by an authorized service representative.
If appliance is not working as it should, has been dropped, damaged, left outdoors, or dropped into water,
take it to a service center prior to continuing use.
IMPORTANT
An Auto Reset Thermal Protector has been designed into your cleaner to protect it from overheating. When the Auto
Reset Thermal Protector activates the cleaner suction motor will stop running.
If the vacuum stops running proceed as follows:
1. Turn cleaner OFF and unplug it from the electrical outlet. *IMPORTANT: If left plugged in and turned on, the cleaner
suction motor may restart unexpectedly.
2. Empty dirt cup.
3. Inspect the nozzle inlet, nozzle connector, hose connector, hose, wand, primary lter and HEPA lter. Clear
obstructions if present.
4. When cleaner is unplugged and motor cools for 30 minutes, the Auto Reset Thermal Protector will deactivate and
cleaning may continue.
If the Auto Reset Thermal Protector continues to activate after following the above steps, your cleaner needs servicing.
Dirt cup
When to Empty
Empty the dirt cup and before
the dirt reaches the max ll
line or at the end of each
cleaning session.
WARNING: To reduce the
risk of personal injury Unplug vacuum before
cleaning or servicing.
Do not use vacuum without
dirt cup or lters in place.
Very ne materials, such as
face powder or cornstarch,
may seal the lter and
cause a reduction in
performance. When using
the vacuum for this type
of dust, empty the cup and
clean the lters often.
How to Empty
Press button on the handle
located on the dirt cup lid and
pull dirt cup out.
Holding dirt cup over trash
receptacle, press dirt cup
door release button to open
and empty dirt cup. When all
the dirt has fallen, close the
dirt cup door and replace.
Page 13

Taking care of your machine
Cyclone separator
WARNING: To reduce the risk of personal injury - Unplug vacuum before cleaning or servicing.
Do not use vacuum without dirt cup or lters in place.
IMPORTANT: The cyclone separator should not be submerged in water.
How to Clean
Remove dirt cup as described
in “Dirt cup - How to Empty”
To remove inner shroud, hold
the dirt cup and rotate the
shroud clockwise.
Hold the dirt cup and turn the
separator counter-clockwise.
Dirt and debris can be cleaned
from the lter assembly
with dusting brush or a towel
or rag.
Replace the lter assembly
on the dirt cup, and twist
it clockwise to secure into
position.
Replace dirt cup.
Page 14

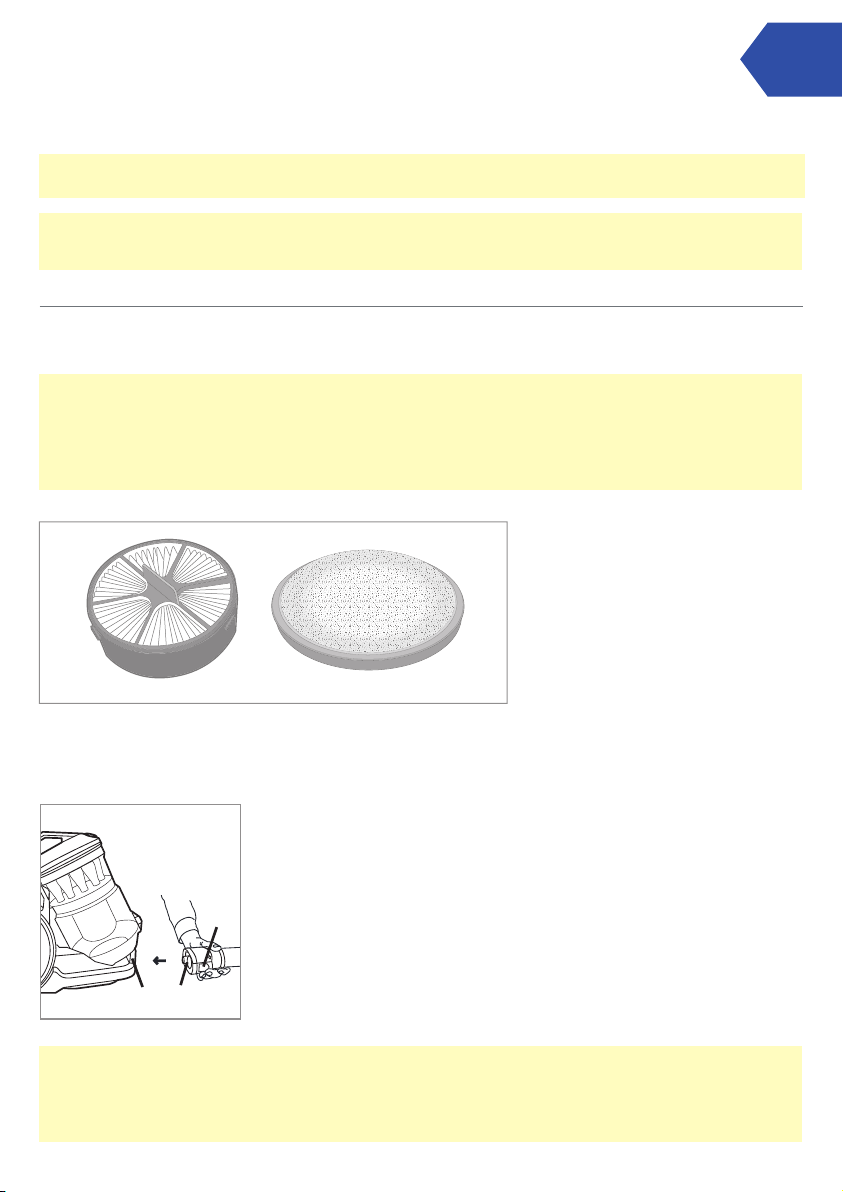
Filters
Rinsable Filter
WARNING: To reduce the risk of personal injury - Unplug vacuum before servicing.
Do not use vacuum without dirt cup or lters in place. Allow lter to dry completely before replacing.
When to Clean
It is recommended that the Rinsable lter be checked and cleaned at least every 2 months or more frequently with
heavy use.
How to Clean
Remove dirt cup as described
in “Dirt cup - How to Empty”
Twist dirt cup lid
counterclockwise and remove
Rinsable lter.
IMPORTANT: Rinsable can be rinsed in warm water (max 40°C). Allow to air dry for 24 hours before replacing.
Do NOT use any detergents or boiling water to wash lter.
Grasp tab on lter and remove
from dirt cup.
Hold Rinsable lter under
running water to clean.
Allow to air dry for 24 hours
before replacing.
Replace lter in dirt cup
and twist lid clockwise
until secure.
Replace dirt cup.
Gently tap the lter on the
inside of a trash receptacle to
remove dust and dirt.
Page 15

Taking care of your machine
Filter made with HEPA
WARNING: To reduce the risk of personal injury - Unplug vacuum before cleaning or servicing.
Do not use vacuum without dirt cup or lters in place.
When to Clean
It is recommended that the Filter Made With HEPA be checked and cleaned at least every 2 months or more
frequently with heavy use.
WARNING: DO NOT RINSE OR WASH THE FILTER MADE WITH HEPA.
How to Clean
The Filter Made With HEPA is
located inside the right wheel.
Remove lter by turning
the wheel cover counterclockwise.
Fold down small tab to grasp
lter in center of lter and
pull out.
Place lter back into wheel.
Replace the wheel cover
by aligning with slots, push
in and turn clockwise to lock
into place.
Gently tap the lter on the
inside of a trash receptacle to
remove dust and dirt.
Place lter back into wheel
and replace lter wheel cover.
Page 16

Lubrication
The motor and brushroll are equipped with bearings which contain suffi cient lubrication for their lifetime.
The addition of lubricant could cause damage. Do not add lubricant to motor or brushroll.
Checking for and clearing blockages
WARNING: To reduce the risk of personal injury - Unplug vacuum before cleaning or removing hose, wands,
tools and accessories to check for or clearing blockages.
Low suction or pick up may be due to a blockage in the system. Refer to the following steps to check for blockages,
continuing with each step until the blockage is found.
Checking vacuum connection: While vacuum cleaner is o and
unplugged, remove hose from vacuum cleaner, visually check
hose inlet on canister for blockages and remove if any is found.
Reconnect hose.
CAUTION: Do not use sharp objects to clean out hose as they can cause damage.
Page 17

Taking care of your machine
Checking for and clearing blockages
Checking hose: While vacuum cleaner is o and unplugged. Remove wand and all attachments from hose.
Plug in vacuum and turn on. Check suction level at the end of the hose. If low suction is detected, turn o vacuum
and unplug. Clear blockage in hose.
Check wand: Turn vacuum o
and unplug. Remove wand
from hose AND remove nozzle
from wand. Visually inspect
wand looking through from
one end to the other.
If daylight cannot be seen,
clear blockage.
Clean debris from brushroll.
Also check and clear any
blockages in nozzle around
wand connection.
Reposition bottom plate and
refasten all (6) screws.
Check nozzle: While vacuum
is o and unplugged, detach
nozzle from wand. Turn vacuum
over so bottom side is facing
up. Remove 6 screws from
bottom plate as shown.
Pivot bottom plate out to
access brushroll.
Page 18

What to do if it goes wrong What to do if it goes wrong
Problem
Vacuum cleaner
won’t pick up
Dust escaping from
the vacuum
The vacuum
cleaner won’t run
The vacuum suction
motor won’t run
Solution
• The lters may be clogged – Refer to “Taking care of your machine”
section regarding the lters.
• The dirt cup is full or blocked – Refer to “Taking care of your machine”
section regarding the dirt cup.
• Dirt cup may be incorrectly installed – Refer to “Taking care of your
machine” section regarding the dirt cup.
• Hose/Wand may be clogged – Refer to “Maintenance section”
• The lters may not be installed correctly – Refer to “Taking care of your
machine” section regarding the lters.
• The dirt cup may be incorrectly installed – Remove the Dirt Cup from
the unit by pressing the Dirt Cup Release Button and reattach it to the
unit, ensuring it is locked rmly back into place.
• The lters may be clogged – Refer to “Taking care of your machine”
section regarding the lters.
• It may not be plugged into the electrical outlet correctly – Ensure that
the plug is pushed into the electrical outlet securely.
• No voltage in wall plug – Check the fuse or breaker in home.
• Blown fuse or tripped breaker – Replace fuse/reset breaker in home
or consult an electrician.
• The motor Thermal Protector may have tripped – Refer to the “Taking
care of your machine” section regarding the Thermal Protector.
Motorised powerhead
brushroll won’t run
• Hose power cord not rmly plugged in – Plug rmly into receptacle
on cleaner base.
• Broken or worn belt – Call AU 1300 361 505 / NZ 0800 800 900 for
Customer Service.
• Brushroll switch set to “OFF” – Set Brushroll switch to “ON”.
• The motorised powerhead motor protector activated – Call
AU 1300 361 505 / NZ 0800 800 900.
• Brushroll jammed – Refer to “Taking care of your machine” section.
• Hose/Wand may be clogged – Refer to “Taking care of your machine”
section.
Page 19

What to do if it goes wrong
Problem
Powerhead won’t pick up
Accessories won’t
pick up properly
Solution
• Blockage in nozzle connector – Remove blockage.
• Brushroll not running – See section “Power nozzle brushroll
won’t run” above.
• Brushroll brushes worn – Replace brushes.
• The accessory may be blocked – Refer to ““Taking care of your
machine” section.
CAUTION: To reduce the risk of personal injury, unplug the product before performing
maintenance/troubleshooting checks.
Page 20

Getting in touch Accessories
* Calls are charged at the standard local rate. Please make a note of the serial number and model number of the vacuum cleaner
before calling.
Page 21
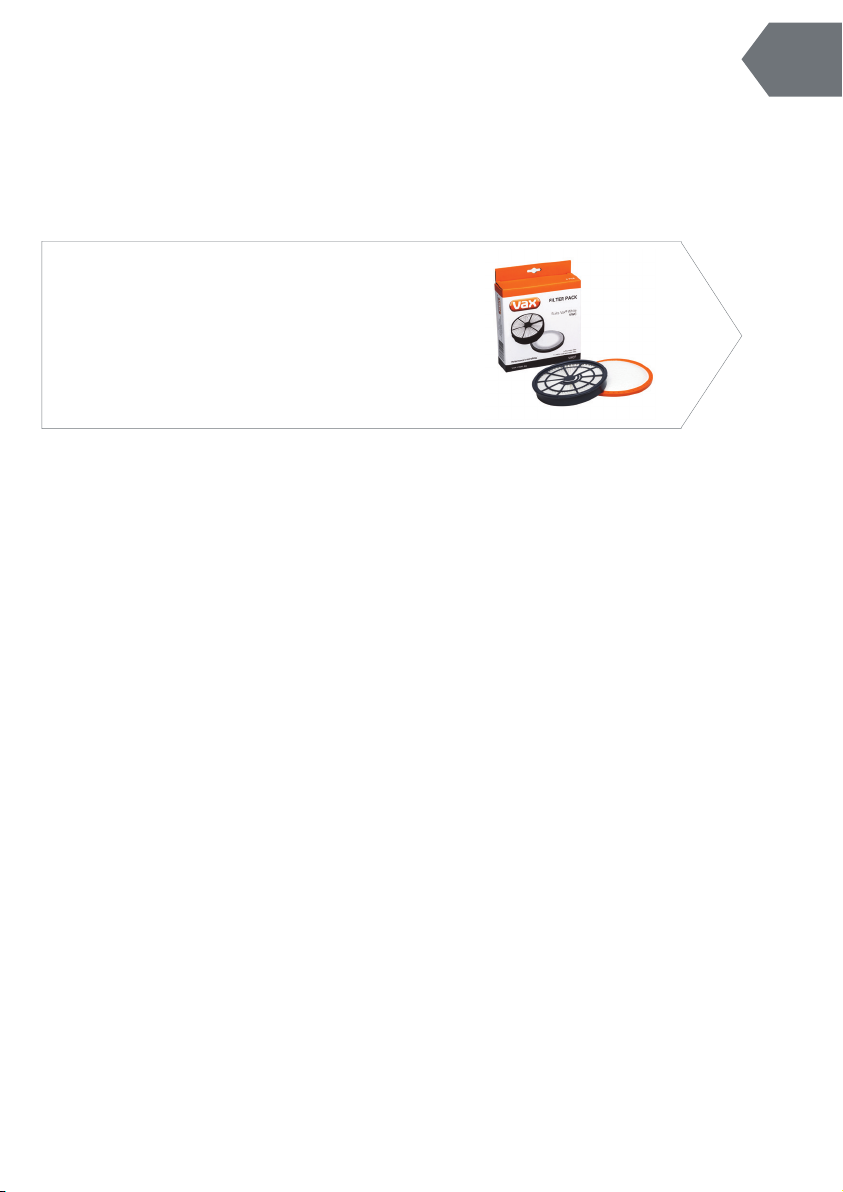
Accessories
Don’t forget your accessories!
Order at: www.vax.com.au / www.vax.co.nz
Filter Pack
Model no. VWCF
Includes pre-motor lter and pre-motor lter.
Page 22

Notes Notes
Page 23

Notes
Page 24

Distributed by Techtronic Industries Australia Pty. Ltd.
31 Gilby Road, Mt Waverley, VIC 3149 Australia.
Careline AU: 1300 361 505 www.vax.com.au
Careline NZ: 0800 800 900 www.vax.co.nz
 Loading...