

Page 1

Vasco Translator 5”
USER MANUAL
ENGLISH
Page 2

Copyright © 2017 Vasco Electronics LLC
www.vasco-electronics.com
Page 3

Table of contents
1. Operation of the device 4
1.1 Function keys 5
1.2 Battery charging 6
1.3 Memory card 6
1.4 In-built SIM card 6
1.4.1. Top-up 6
1.4.2. SIM card expiration 7
1.4.3. SIM card number 7
1.5 First start 7
2. Vasco Translator 7
2.1 Choosing the source and target languages 8
2.2. Voice recognition 8
2.3. Typing 9
2.4. Pronunciation 9
2.5. Clean 10
2.6. Menu 10
2.6.1 Translator 10
2.6.2 History 10
2.6.3 Counters 11
2.6.4 Phrasebook 11
2.6.5 Conversation 12
2.6.6 Accessories 13
2.6.7 Settings 14
3. Menu 14
4. Device Settings 16
4.1. Networks 16
4.2.1 WiFi conguration 16
4.2.2 Change the network operator manually 17
4.2 Device 18
4.3. Bottom bar 19
Specication 20
Page 4
4
1. Operation of the device
5
6
3 7 4
1 2
1
2
10 11
9
88
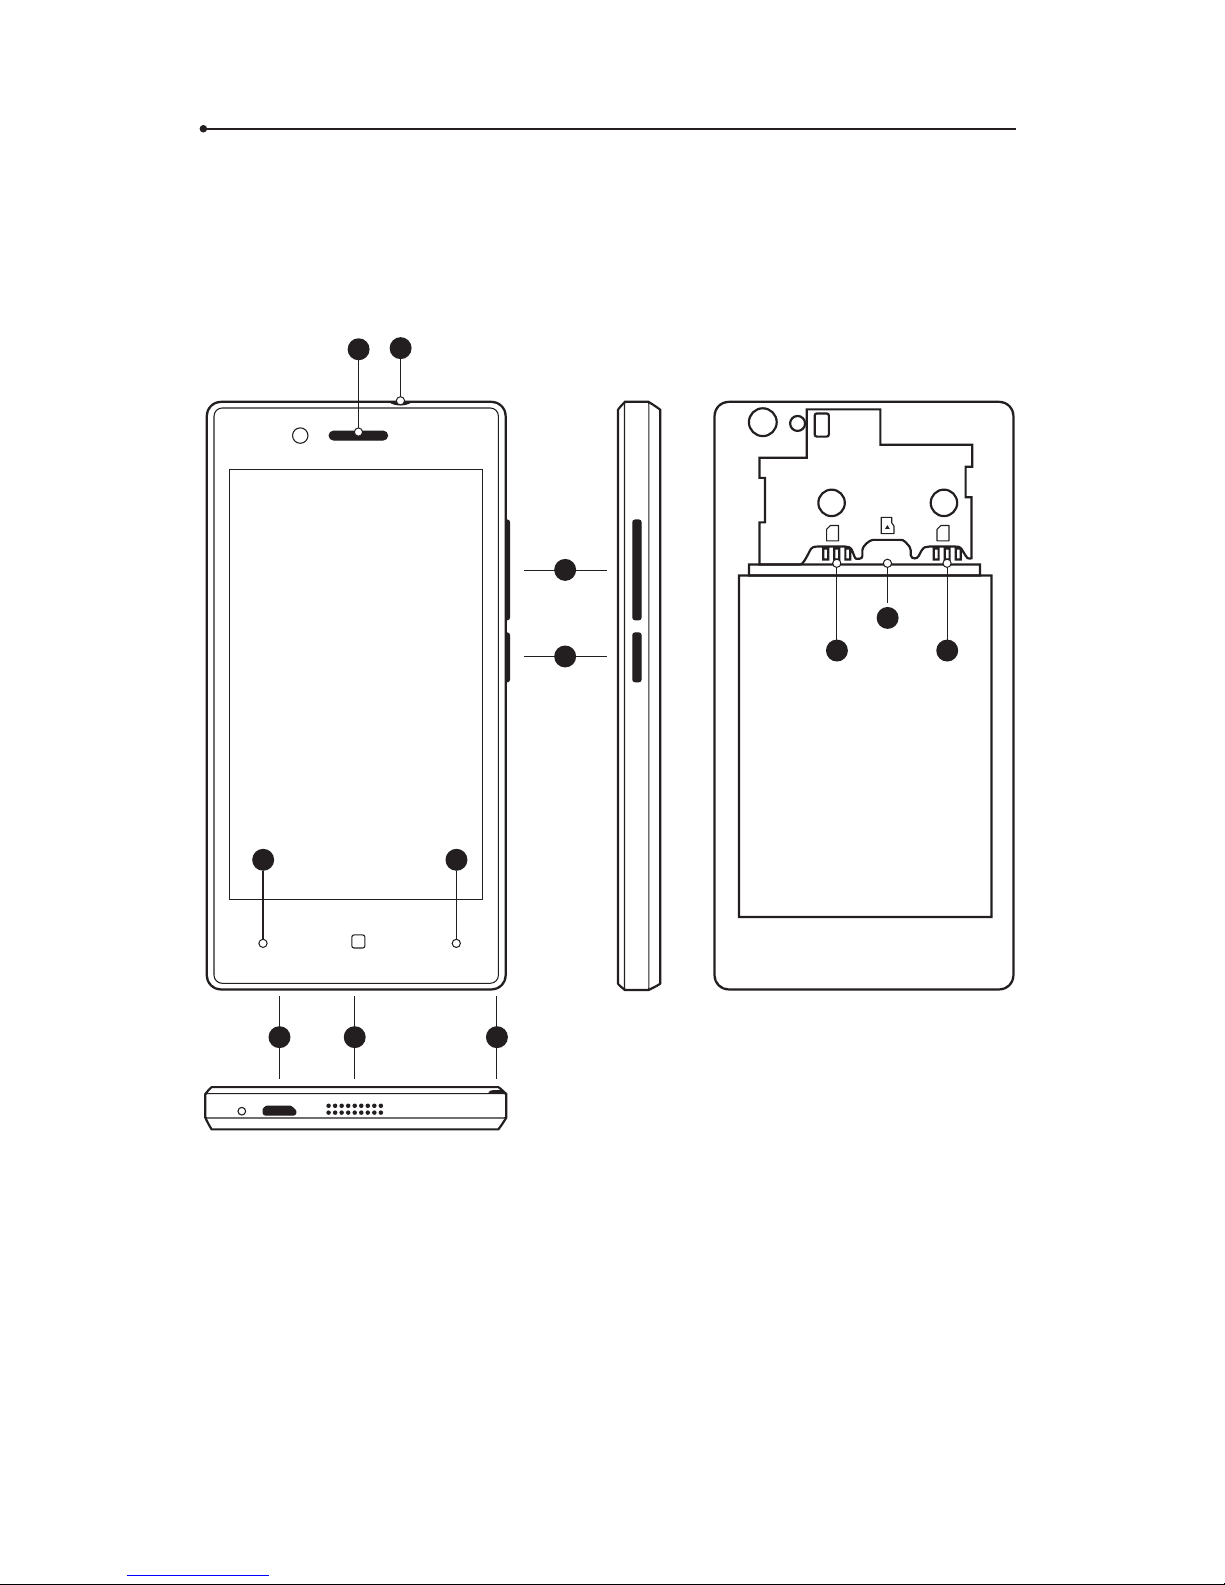
1. Loudspeaker, 2. Earphone input, 3. USB, 4. Cover lift, 5. Volume,
6. Power ON/OFF, 7. Loudspeaker, 8. SIM card, 9. SD card, 10. Menu,
11. Back
Page 5
5
1.1 Function keys
Power
• Device turned o: hold this key for 5 seconds to turn the device on.
• Working device:
• push this key to block the screen, push again to unblock
• push and hold the key for 2 seconds and tap “Power o” to turn the
device o
• push and hold the key for 2 seconds and tap “Reboot” to reboot
the device
• push and hold the key for 2 seconds and tap “airplane mode” to activate ight mode; ight mode disconnects GSM and WiFi; repeat the
steps to deactivate ight mode
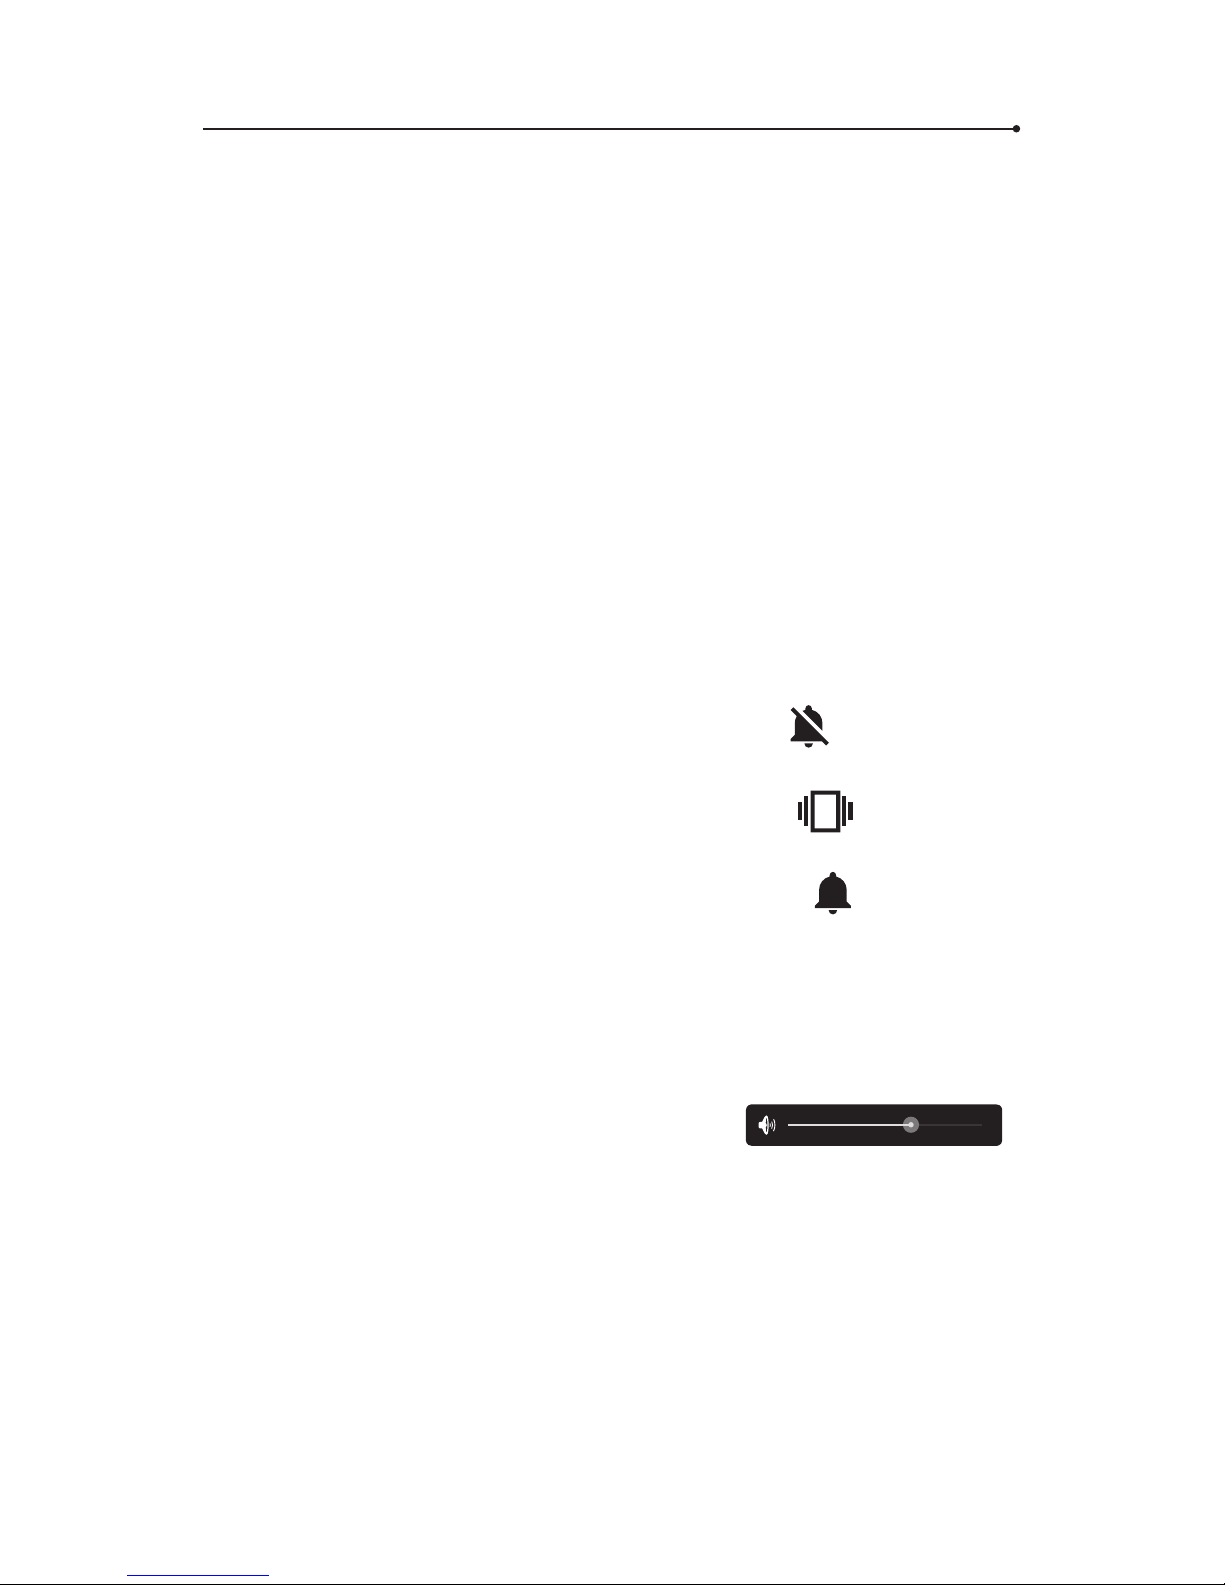
• push and hold the key for 2 seconds and tap
to activate silent
mode, all the sounds will be turned o
• push and hold the key for 2 seconds and tap
to turn o the
sound but turn on vibration
• push and hold the key for 2 seconds and tap
to turn all the
sounds on
Volume
• Working device: push up or down to increase or decrease the volume.
• You will see the following icon. Tap and hold the blue dot and swipe left
to decrease and right to increase the volume:
.
Menu
The menu button is located in the left bottom corner of the device. Tap it
to see the menu of the device.
Page 6

6
Back
The back button is located in the right bottom corner of the device. Tap it
to get back to the previous screen.
1.2 Battery charging
• Plug the charger into an electric socket and the USB cable into the
device in order to charge the battery.
• The battery indicator moves to charging mode.
• The battery is fully charged after about 4 hours.
• After the battery is charged, remove the charger and the USB cable.
WARNING: Charge the battery in a well-ventilated area between 14°F
and 95°F (-10C to +35C). To charge the battery use the charger provided
by the manufacturer. Using any other charger may damage the device.
1.3 Memory card
The device is provided with a memory card. Removing and/or damaging
the card may cause incorrect functioning of the device. In the event of damaging the card, contact the seller.
1.4 In-built SIM card
The device is equipped with an international SIM card that allows it to
work without WiFi. The in-built SIM card is pre-paid and doesn’t require
any contract.
1.4.1 Top-up
The SIM card is active and topped-up. In order to top up your account visit:
www.vasco-sim.com or contact the seller.
Page 7

7
1.4.2 SIM card expiration
The SIM card expires after 2 years from last use of the device. In order to
prolong this period, just use your device through a GSM network.
1.4.3 SIM card number
Your SIM card number starts with +372. You will nd the complete number
on the inner side of the box, on the protective case or under the cover of
the battery.
WARNING: Don’t bend or scratch the SIM card. It should not have any
contact with water, dust or electricity.
1.5 First start
After turning the device on, choose your language. Then, read and accept
the terms of service. The language chosen will change all the regional settings, including the language of the keyboard.
You will see the main screen of Vasco Translator. The device is now ready
to use.
2. Vasco Translator
Vasco Translator recognizes voice and translates full sentences
into supported foreign languages. The translator pronounces the
translated text out loud. For the full list of supported languages
consult the manufacturer’s website. Vasco Translator needs a WiFi or
a GSM network in order to translate.
Page 8
8
2.1 Choosing the source and target languages
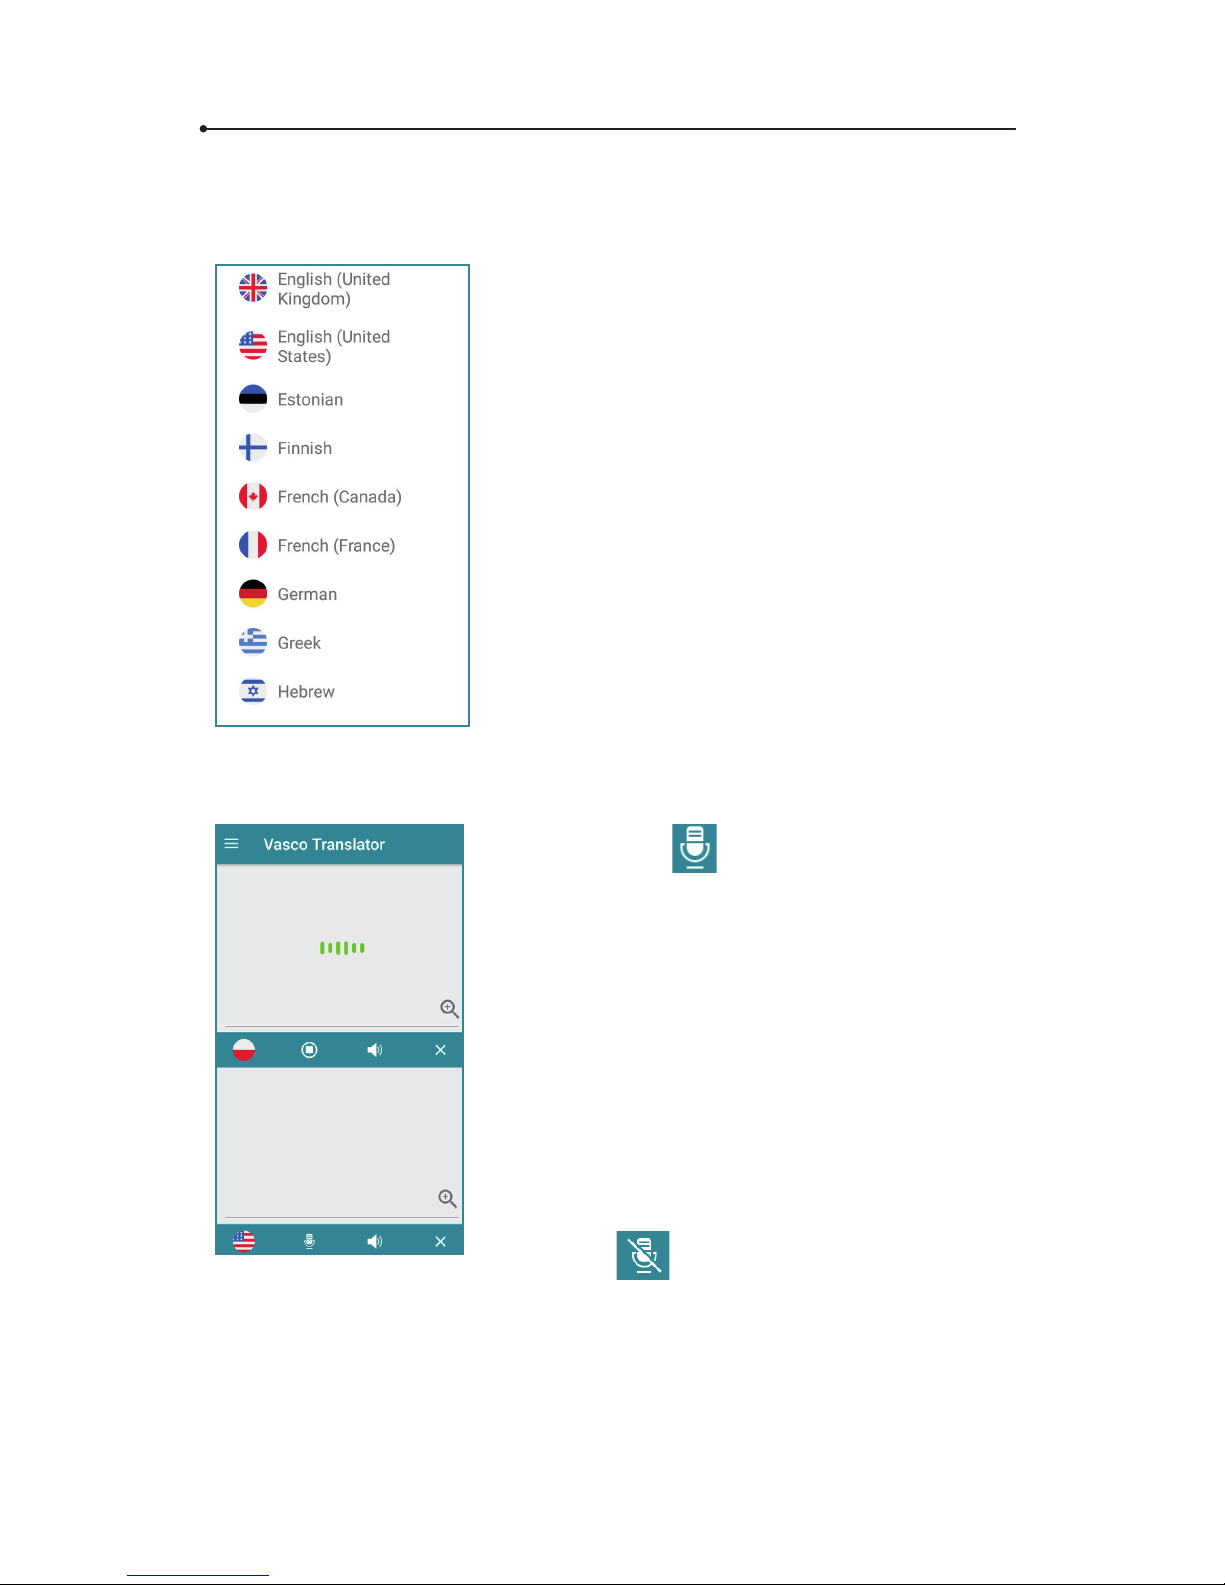
Tap the ag to see the list of available
languages. Swipe up or down to nd the
language you need. Tap the name of the
language to activate it.
You can quickly switch between the
languages by tapping the flag. You
don’t need to enter the text again if you
want to see the translation in dierent
languages. The current text will be translated
automatically right after changing the
language.
2.2 Voice recognition
The icon serves to enter
text using the voice recognition
function. In order to enter any spoken
text, tap the key and, after hearing a beep,
say what you want to translate in a clear,
monotonous voice, from a distance of
a foot (half a meter).
When you nish, the translation is done
automatically and lasts about 2 seconds.
The icon
means that the voice recognition is not available for the chosen
language. Please enter the text using the
keyboard.
Page 9
9
WARNING! The quality of voice recognition may worsen in a loud
environment.
2.3 Typing
Use the text boxes to type text. Tap the top or bottom text box
to display the touch keyboard and enter a word or a sentence for
translation. Confirm the typed text with “Done” to start the
translation.
You can change the keyboard language by holding “space”. In order
to use diacritics, tap and hold a letter and choose a sign.
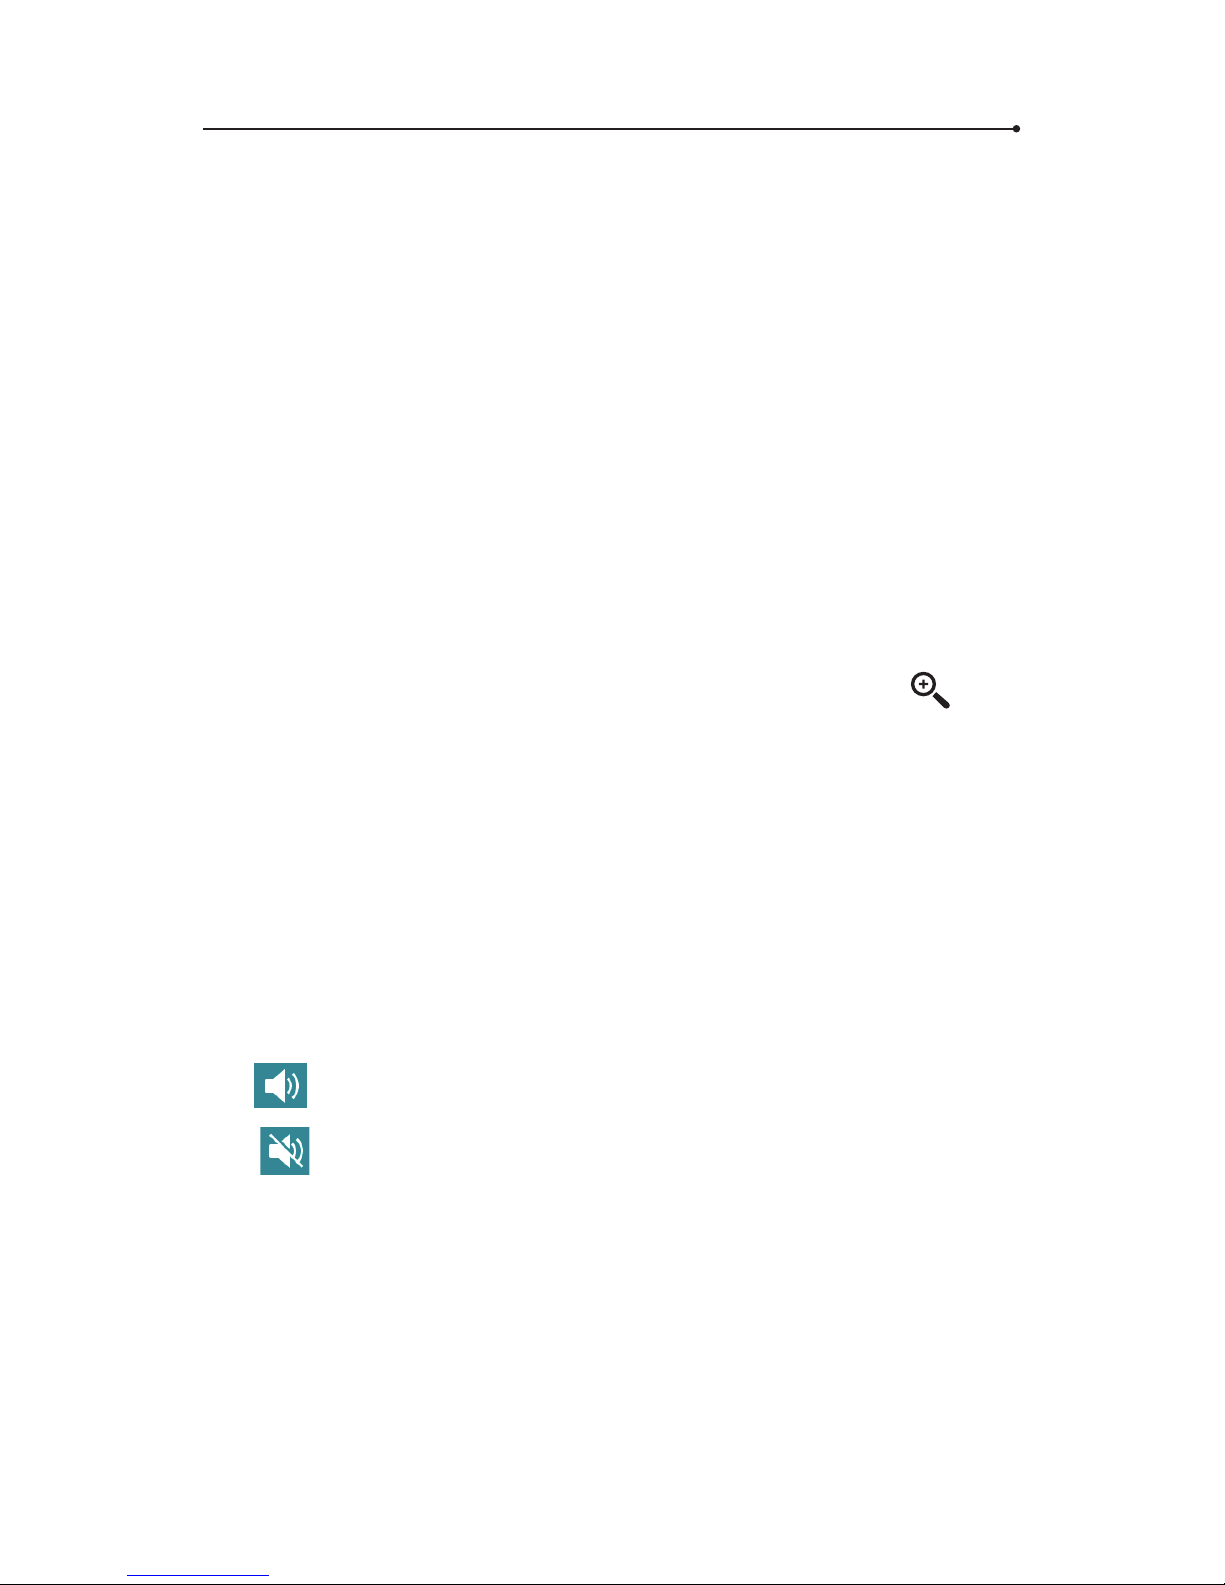
It is possible to enlarge the text box. To do so, tap the
icon.
To close the enlargement window tap “back”.
You can enter text using a hardware keyboard if available. Please
see chapter 1.6.6 or Vasco Keyboard user manual.
2.4 Pronunciation
The pronunciation starts automatically unless you turn it o in the
application settings or it is not available for the selected language.
Tap
to listen the translation again.
The
icon means that pronunciation is not available for the
selected language.
Page 10
10
2.5 Clean
The button serves to delete all the entered text.
In order to delete single letters or words use the backspace on the
keyboard.
2.6 Menu
Tap the icon or swipe the screen from left to right to display the
menu of Vasco Translator.
2.6.1 Translator
Tap « Translator » to see the Vasco Translator main screen.
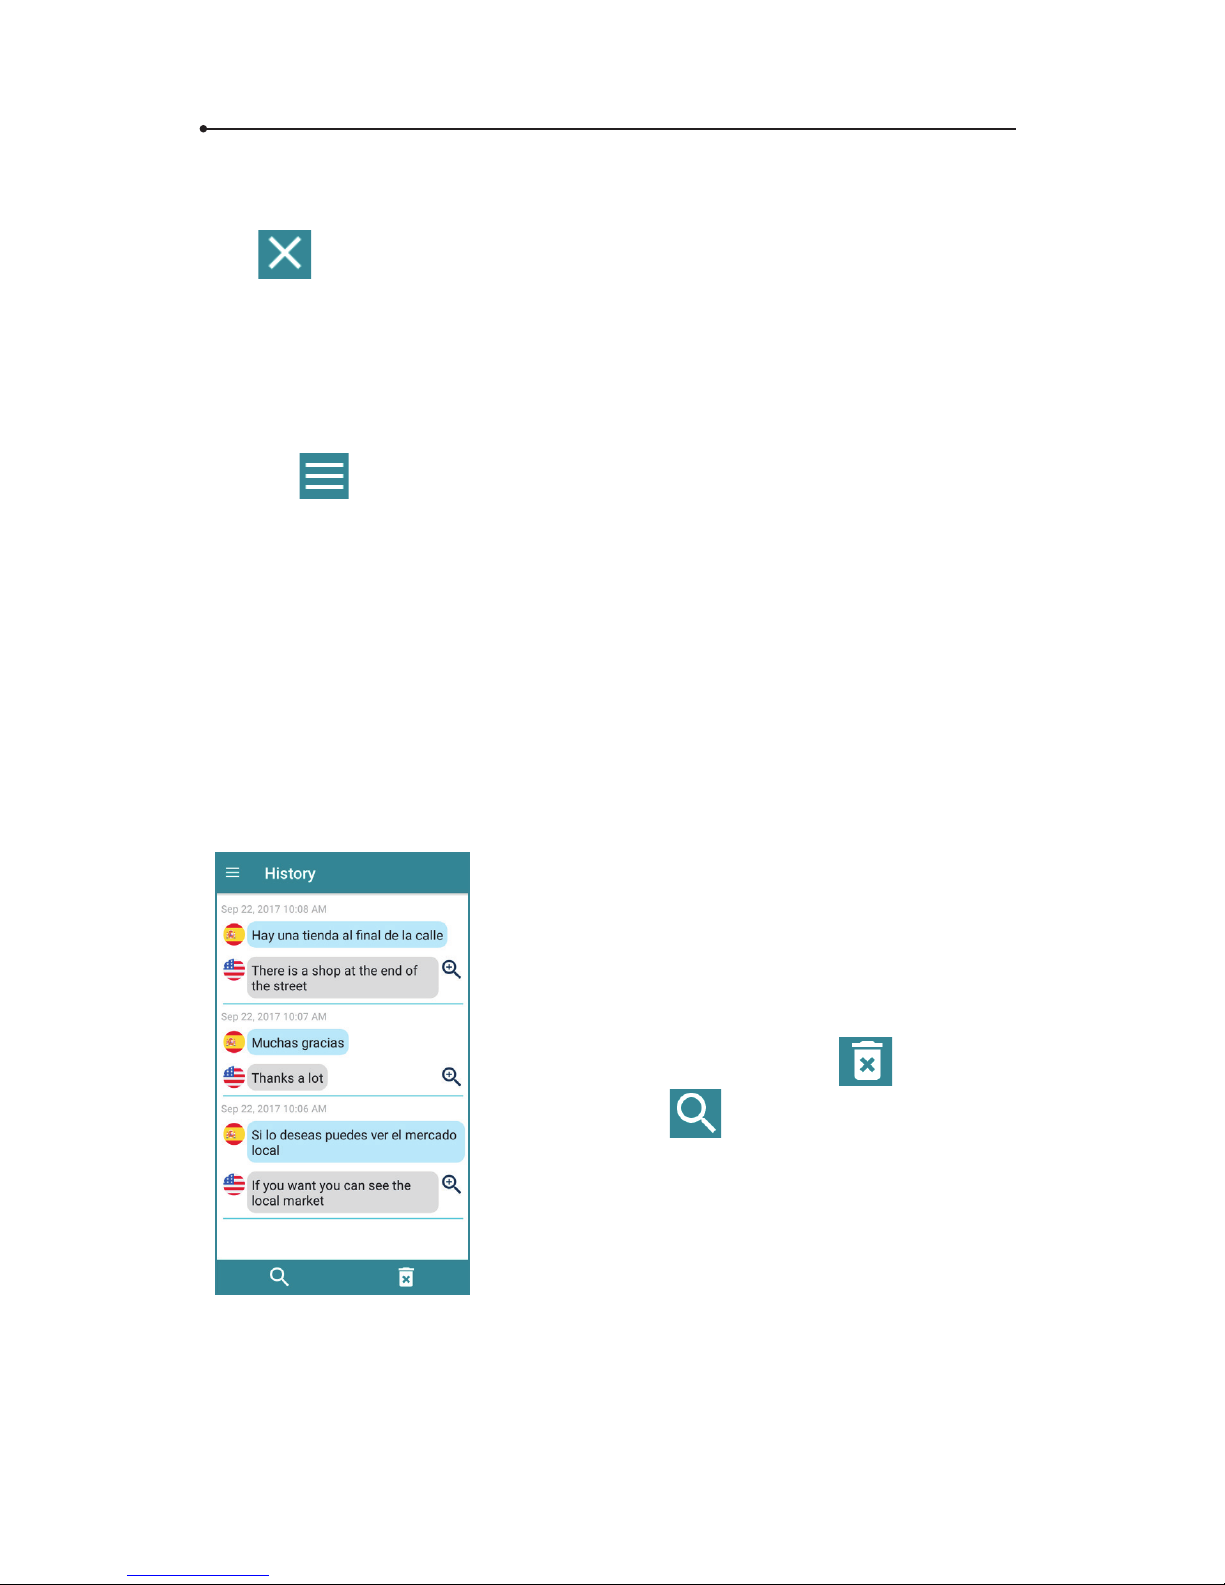
2.6.2 History
To see or clear translation history, open the application menu and
tap « History ».
Tap the selected sentence to display it on
the main screen.
Tap and hold the line for about 1 second
to delete it.
To clear all translations, tap
.
To search, tap
.
To enlarge the chosen translation, tap the
magnifying glass icon.
Page 11
11
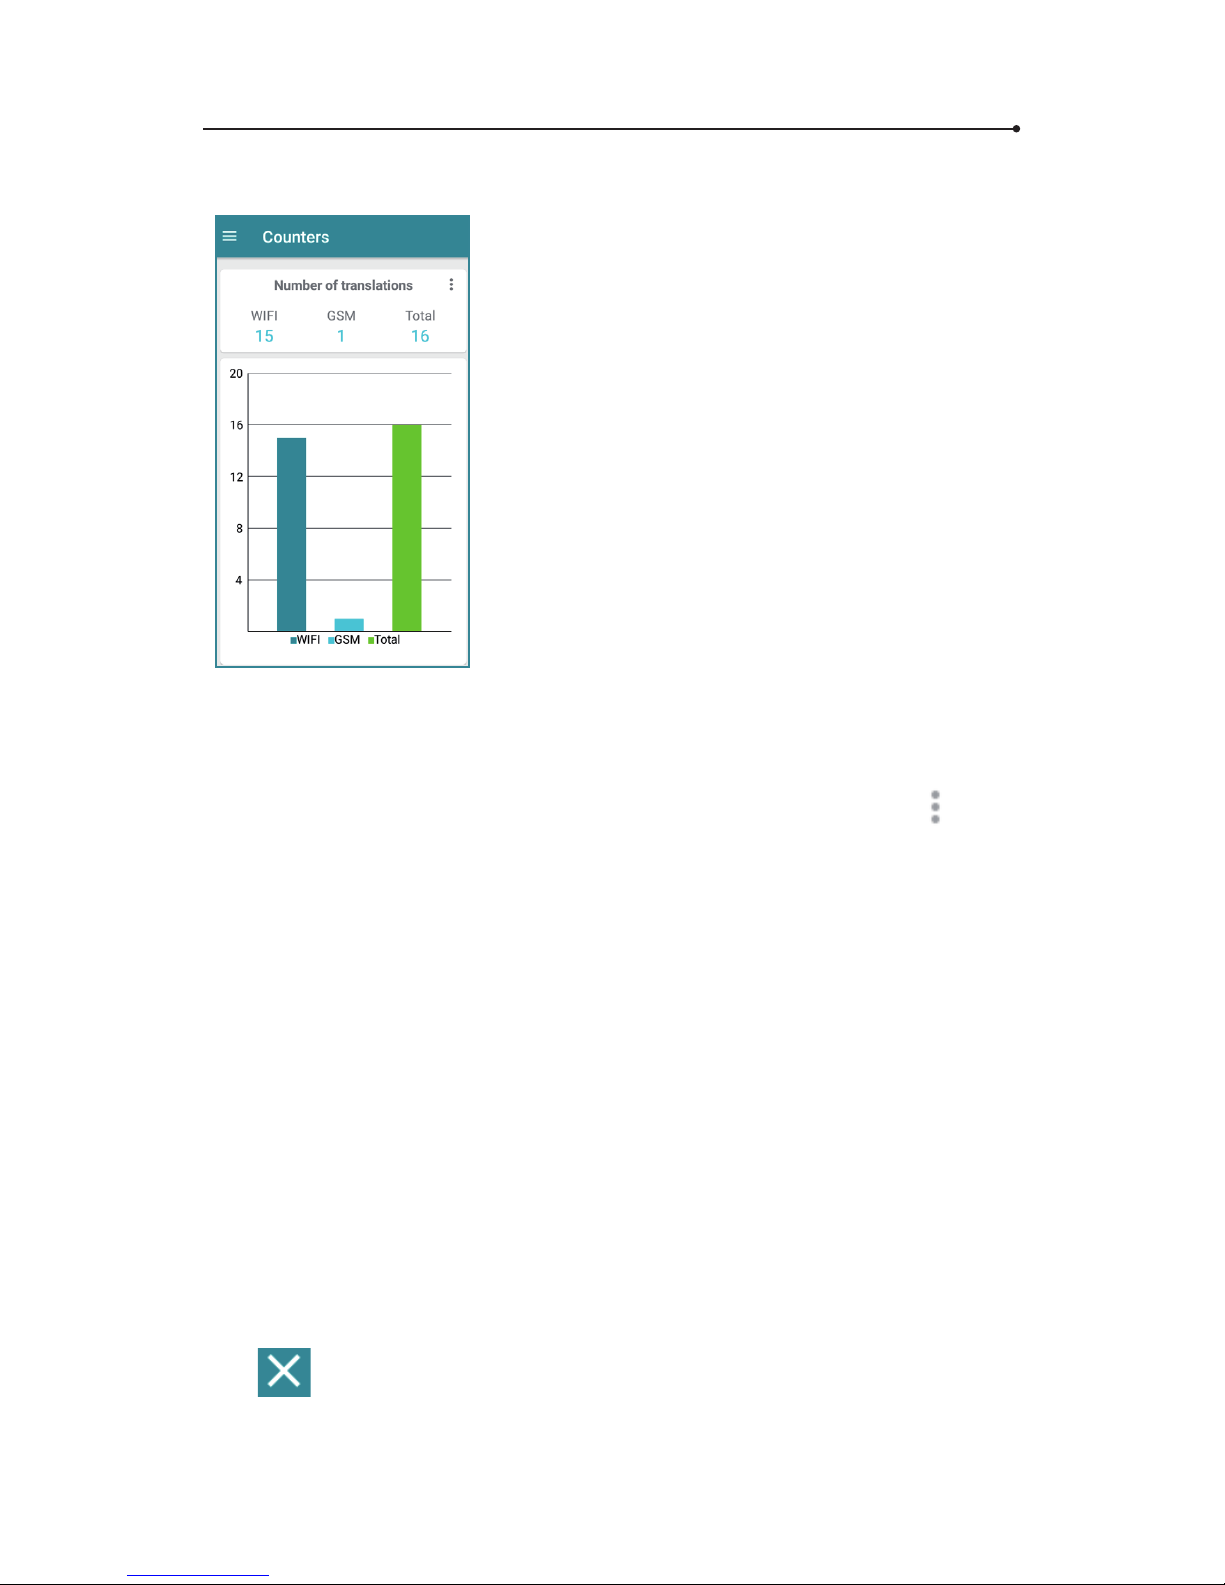
2.6.3 Counters
The translation counters allow you to
control the number of translations carried
out over WiFi and GSM.
The manufacturer’s top-up allows you to
translate around 5,000 sentences in most of
the countries. If your translator doesn’t work
and the counter shows a number higher
than 5,000, check your balance by contacting the seller.
There are 3 counters: translations via WiFi,
translations via mobile network (GSM) and
the total number of translations.
Translations via WiFi are unlimited.
To reset selected counter, tap
and
conrm by clicking « Reset counters ».
2.6.4 Phrasebook
This is a set of the most useful phrases in traveling.
Tap the ag icons to set the language pair. You will see the list of
available languages.
• Choose the source language
• Choose the target language
Tap « search » to see the keyboard. Start typing. You will see the list
of available phrases containing letters/words you’re typing. If you
don’t see anything, it means that there is no translation available in
the phrasebook.
Tap
to delete text.
Page 12
12
Choose the phrase that interests you and tap the line with it. You
will see its translation.
Tap
to listen to the translated phrase.
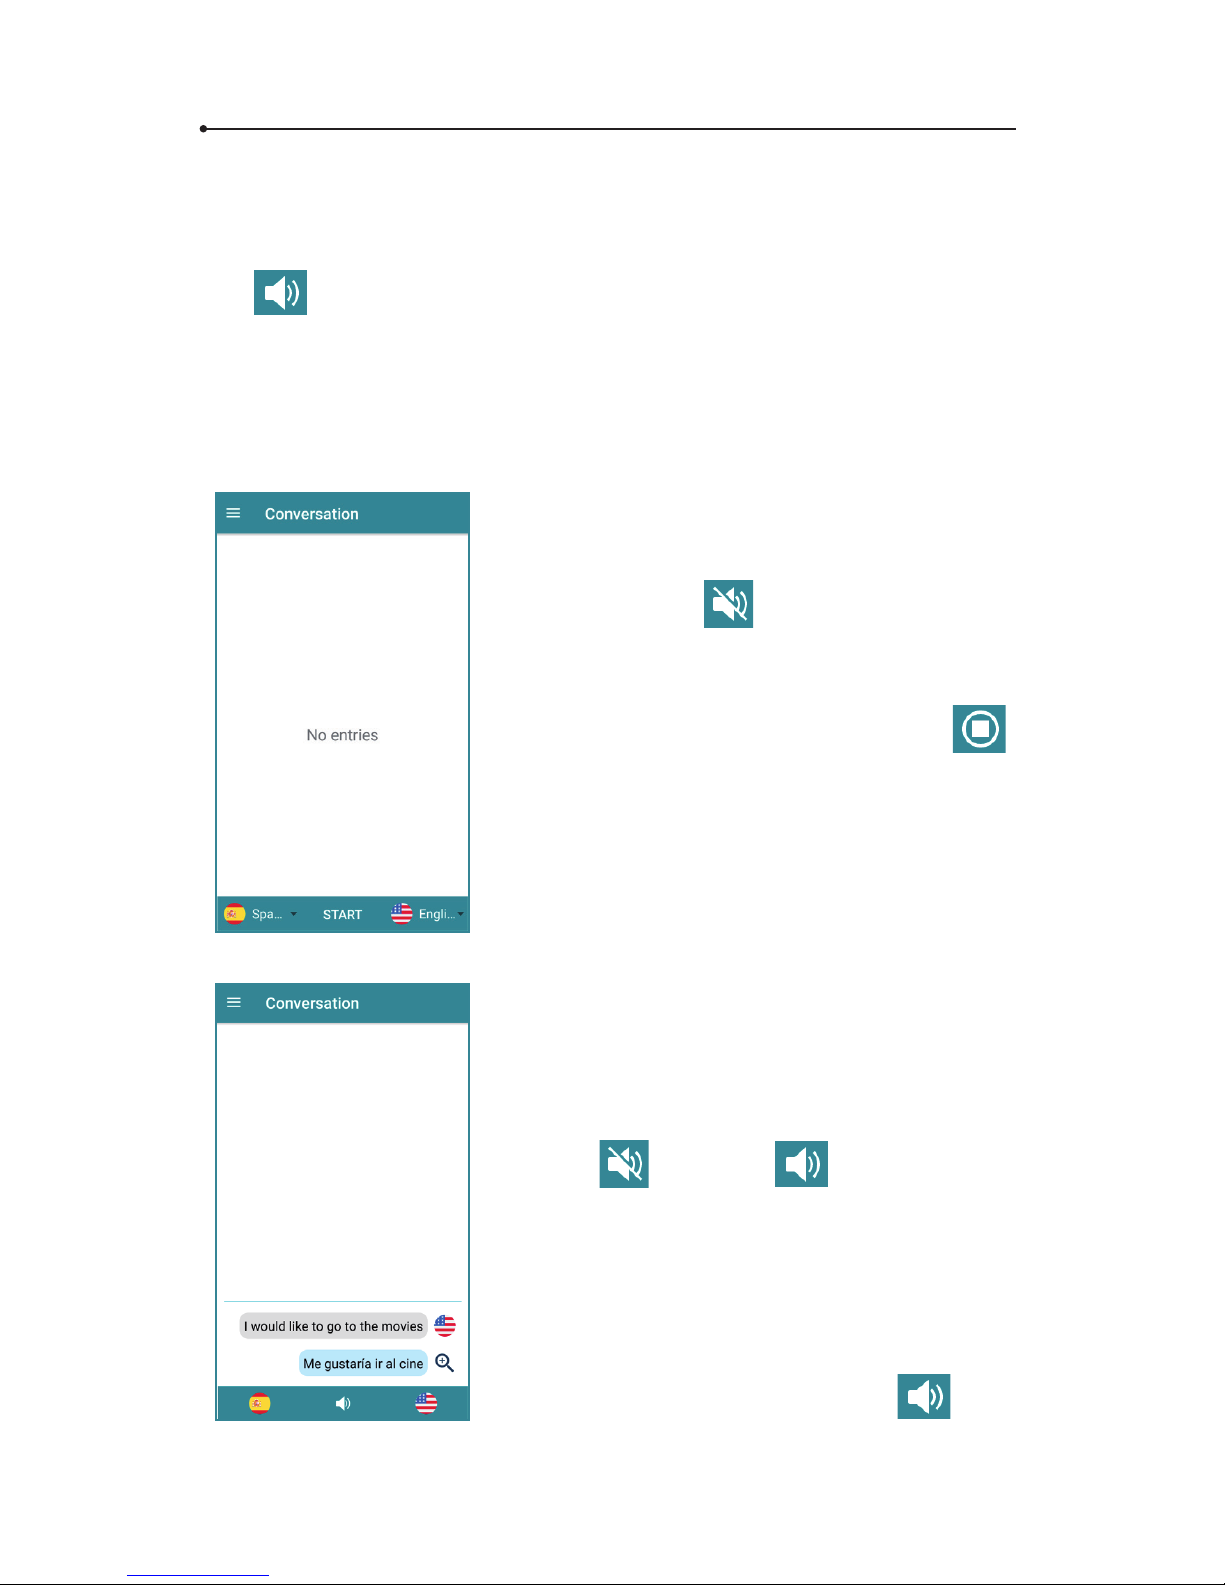
2.6.5 Conversation
The “Conversation” allows you to hold a conversation in a foreign
language.
Tap the ags to set the language pair.
Tap « START » to begin the conversation.
You will see the
icon on the bottom
of the screen.
Tap the selected ag and say what you
want. At this time, you will see the
icon instead of the ag icon.
The translation should take about two
seconds. You will see both the recognized
and translated text on the screen.
The pronunciation starts automatically and
the icon
turns into .
Tap the selected ag again to continue the
conversation.
To enlarge the chosen translation, just tap
the magnifying glass icon.
To listen to the last sentence, tap
icon
again or the line with the text.
Page 13
13
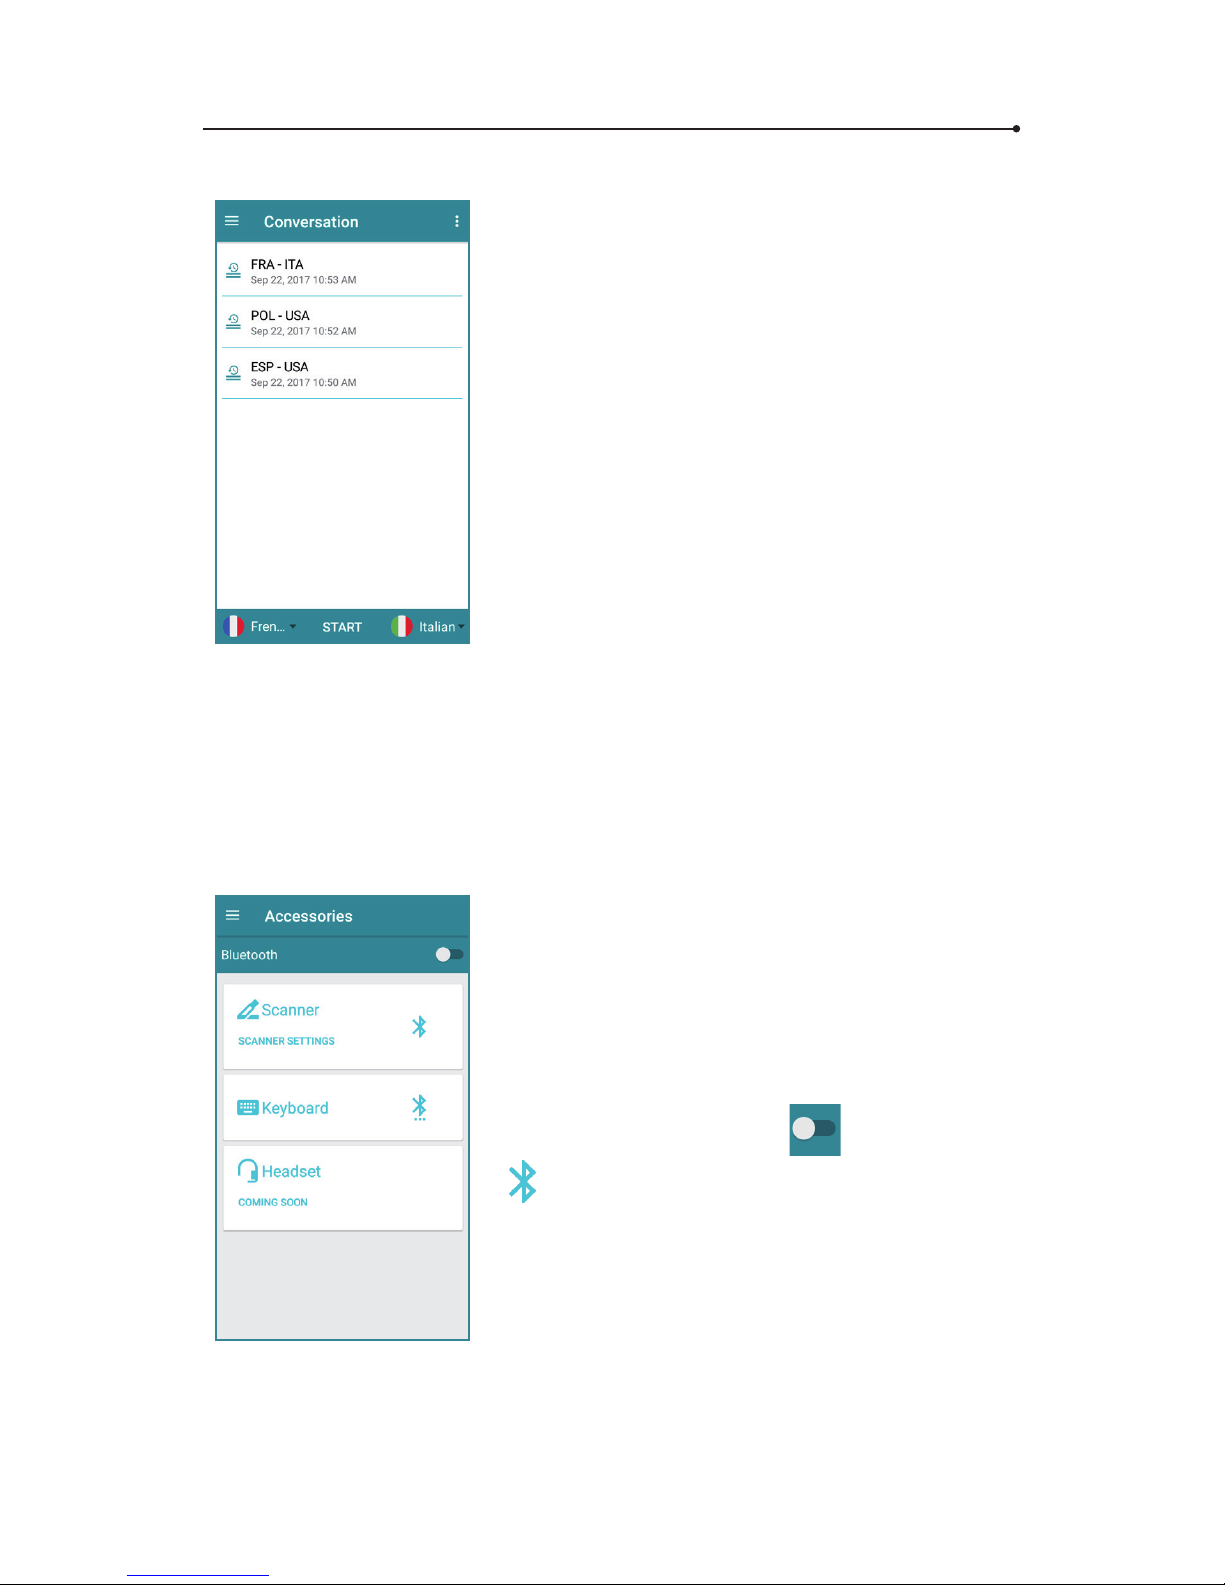
After tapping the « Back » button, the
translation will be saved automatically with
a default name - conversation language and
date.
To rename or delete a saved conversation,
tap and hold it until the settings window
shows up on the screen.
2.6.6 Accessories
The “accessories” menu allows you to set
up and connect devices compatible with
Vasco Translator such as Vasco scanner,
a hardware keyboard or headset.
To connect to the selected device, turn
Bluetooth on by tapping
, then tap the
icon next to the device's name.
You will nd more detailed information in
the user manuals of individual accessories.
Page 14

14
2.6.7 Settings
Translator settings
Continuous translation
This option allows you to see the process of translating while
speaking. Please note that it requires more data to translate continuously. If you do not want to lose credit, please tick “only
via WiFi’ or “never”.
• Always
• Only via WiFi
• Never
Text-To-Speech settings
Auto Text-To-Speech
This option allows you to hear the translated text right after the
translation.
• Enabled
• Disabled
Speech rate - This option allows you to increase or decrease the
speed of pronunciation. Swipe left to decrease or right to increase
the speed.
Font size - swipe left or right to increase or decrease the font size.
About - information about the software. You can see the version of
the device and read the terms and conditions.
3. Menu
To see the menu of Vasco Translator, tap the button in the left
top corner of the screen or in the left bottom corner of the device.
You can also display the menu by swiping the screen from left to
right.
Page 15

15
3.1 Translator – tap to launch the “Translator” application (see
point 2).
3.2 History – allows you to look up the history of translations and
conversations (see point 2.6.2).
3.3 Counters – allow you to control the number of translations.
3.4 Phrasebook – tap to launch the “Phrasebook” application
(see point 2.6.4).
3.5 Conversation – tap to launch the “Conversation” application
(see point 2.6.5).
3.6 Converter – an application that allows you to convert uni
ts
such as currency, weight, length, pressure, etc.
Use the Unit Converter to convert currencies, length, mass, pressure,
speed, temperature and volume.
Tap the blue top bar to choose units to convert.
Enter the number in the left white box and you will see the converted
number in the right box.
WARNING! The application downloads current exchange rates automatically. You can enter the rate manually. In order to do so, tick the
box “manual rate entry”. The names of the units will disappear. The
converter will multiply the number from the left box by the manually
entered rate. The result will be seen in the right box.
3.7 Calculator – an application that allows you to do basic and
advanced mathematic operations.
3.8 Camera - allows you to take a photos.
3.9 Gallery - all the pictures are saved in the Gallery.
3.10 Connectivity (for advanced users only)
- tap to get into the
connectivity settings.
Page 16
16
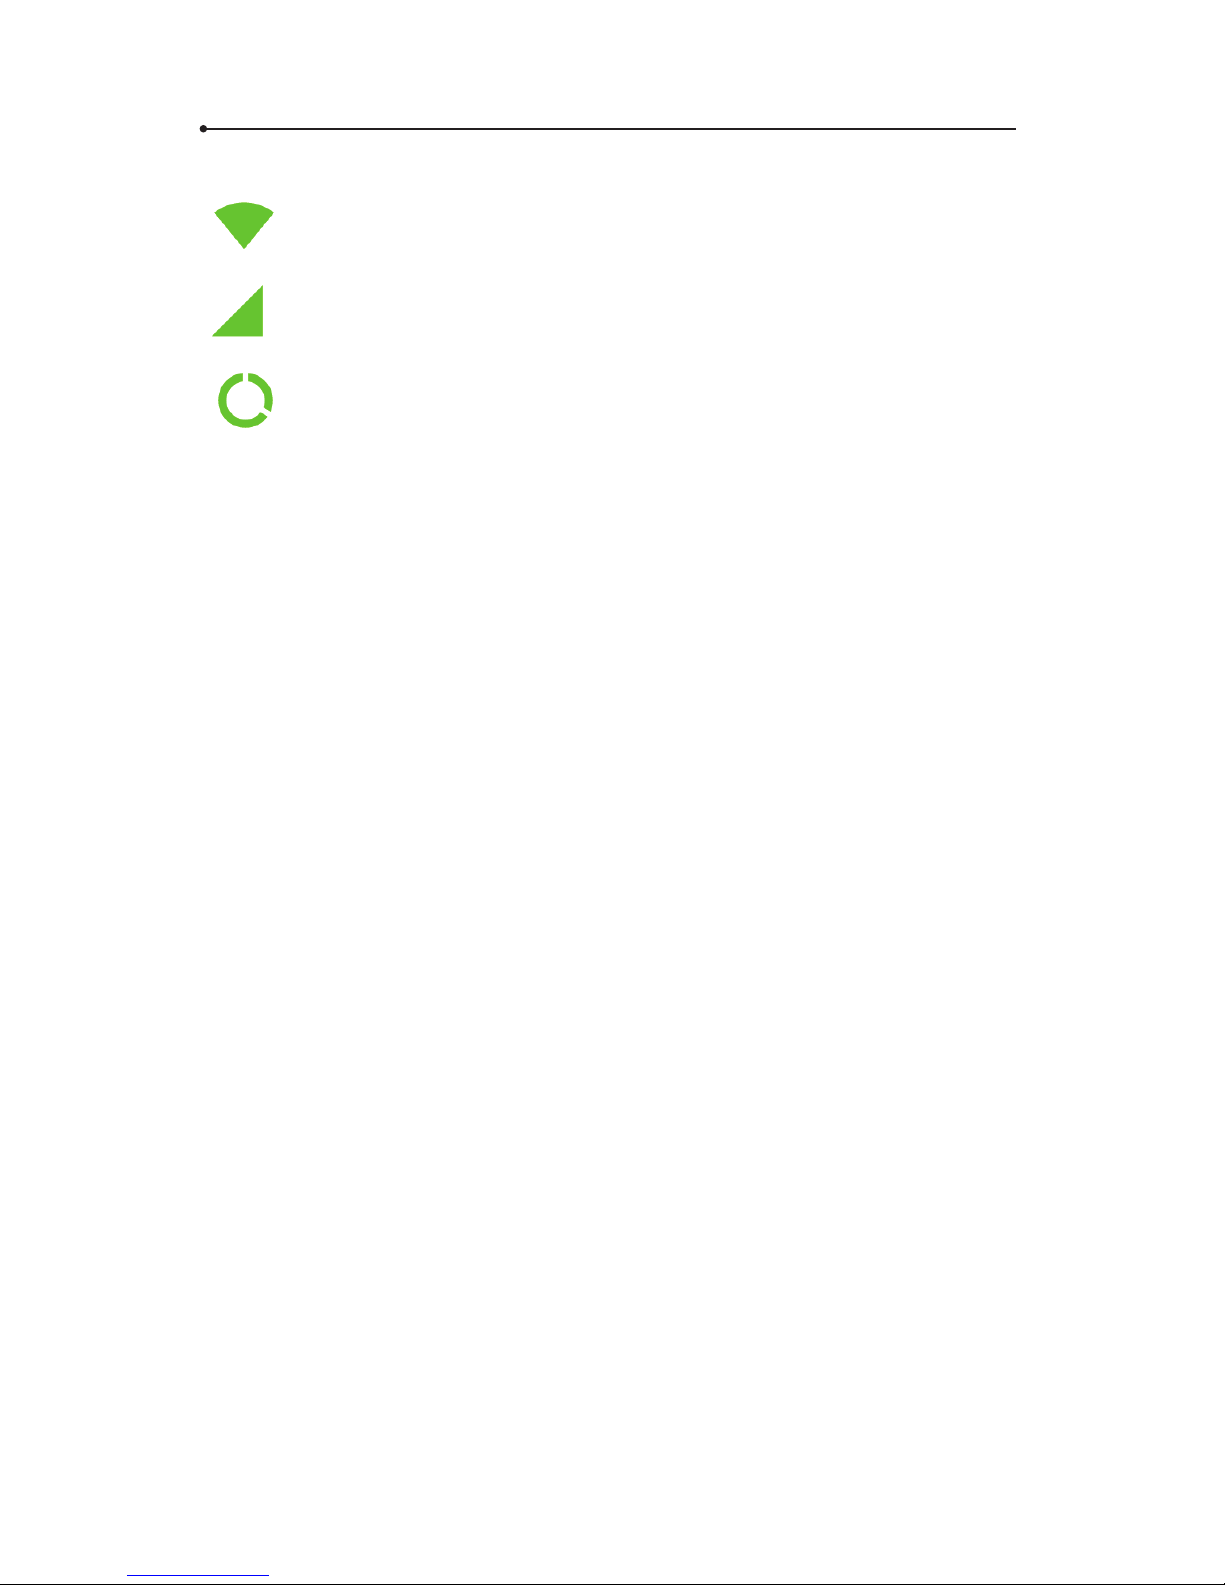
Tap the WiFi key to get into the WiFi settings.
Tap the GSM key to get to the mobile network settings.
Tap the icon to get into the data usage settings.
Check the box to display the connectivity bar on the main screen.
3.11 Accessories - allows you to set up and connect peripherals.
3.12 Settings - tap to congure the “Translator” settings.
(see
point 2.6.7).
3.13 Device Settings - you can congure certain device settings
here.
4. Device Settings
Tap “Menu” and “Device settings” to get into the settings of the device. Here you can change the WiFi conguration, and change the
menu language, brightness etc.
4.1 Networks
4.2.1 WiFi conguration
Manage your WiFi networks here.
If you see “WiFi is disabled”, tap the WiFi icon on the bottom of the
screen. If WiFi is active, the icon is green and you will see the list of
available networks.
Tap the name of the network to connect to it.
Page 17

17
Padlock – this icon means that the network is secured with a password. If you have the password, tap the name of the network and
enter the password. Then, tap “ok” and use the device. If you don’t
know the password, contact the network provider.
Range – the green bars show the signal strength. The more green
bars, the stronger the signal is.
Name – tap the name of the network to connect to it.
WARNING: A network without a padlock means that this net-
work is open. You don’t need any password to connect to it.
Please note, that some open networks require additional actions to be taken such as logging in or accepting its terms and
conditions. It’s not possible to use such a network.
4.2.2 Change the network operator manually
This function allows you to connect with a chosen GSM network operator in the country you’re in.
• Make sure you have a WiFi or GSM connection.
• Choose the continent you’re in, e.g., Europe.
• Choose the country, you’re in, e.g., France.
• You will see the list of the preferred operators in this country.
• Tap “Choose a network operator”, read the information and conrm by tapping “Yes”.
• The device will look for available GSM networks. Choose the one
you saw on the list and tap its name in order to connect to it.
• The device will register in the chosen network.
Done. You can now use the device.
Page 18

18
WARNING: If the device goes out of range of the preferred
operator, it will not connect to any other network automatically. Repeat the steps and tap “Select automatically” in order to
get back to the previous settings.
4.2 Device
Application language
Change the language of the menu. This will also change the regional
settings such as the language of the keyboard and the default
languages.
Brightness - Adjust the screen brightness manually or automatically.
Auto-rotate screen - Turn on/o screen autorotation.
Automatic unattended updates - Turn on/o automatic back-
ground updates.
Check for updates -
If a new version of the software is available,
you will see information about it after tapping “Check for updates”.
In order to update the device, download and install the application,
tap “OK” and reboot the device. If there are no new updates you will
see “No new updates”. If you see “Device not registered”, please contact the seller.
WARNING: You need a WiFi connection in order to download
system updates.
About -
information about the software. You can see the version of
the device and read the terms and conditions.
Page 19
19
4.3 Bottom bar
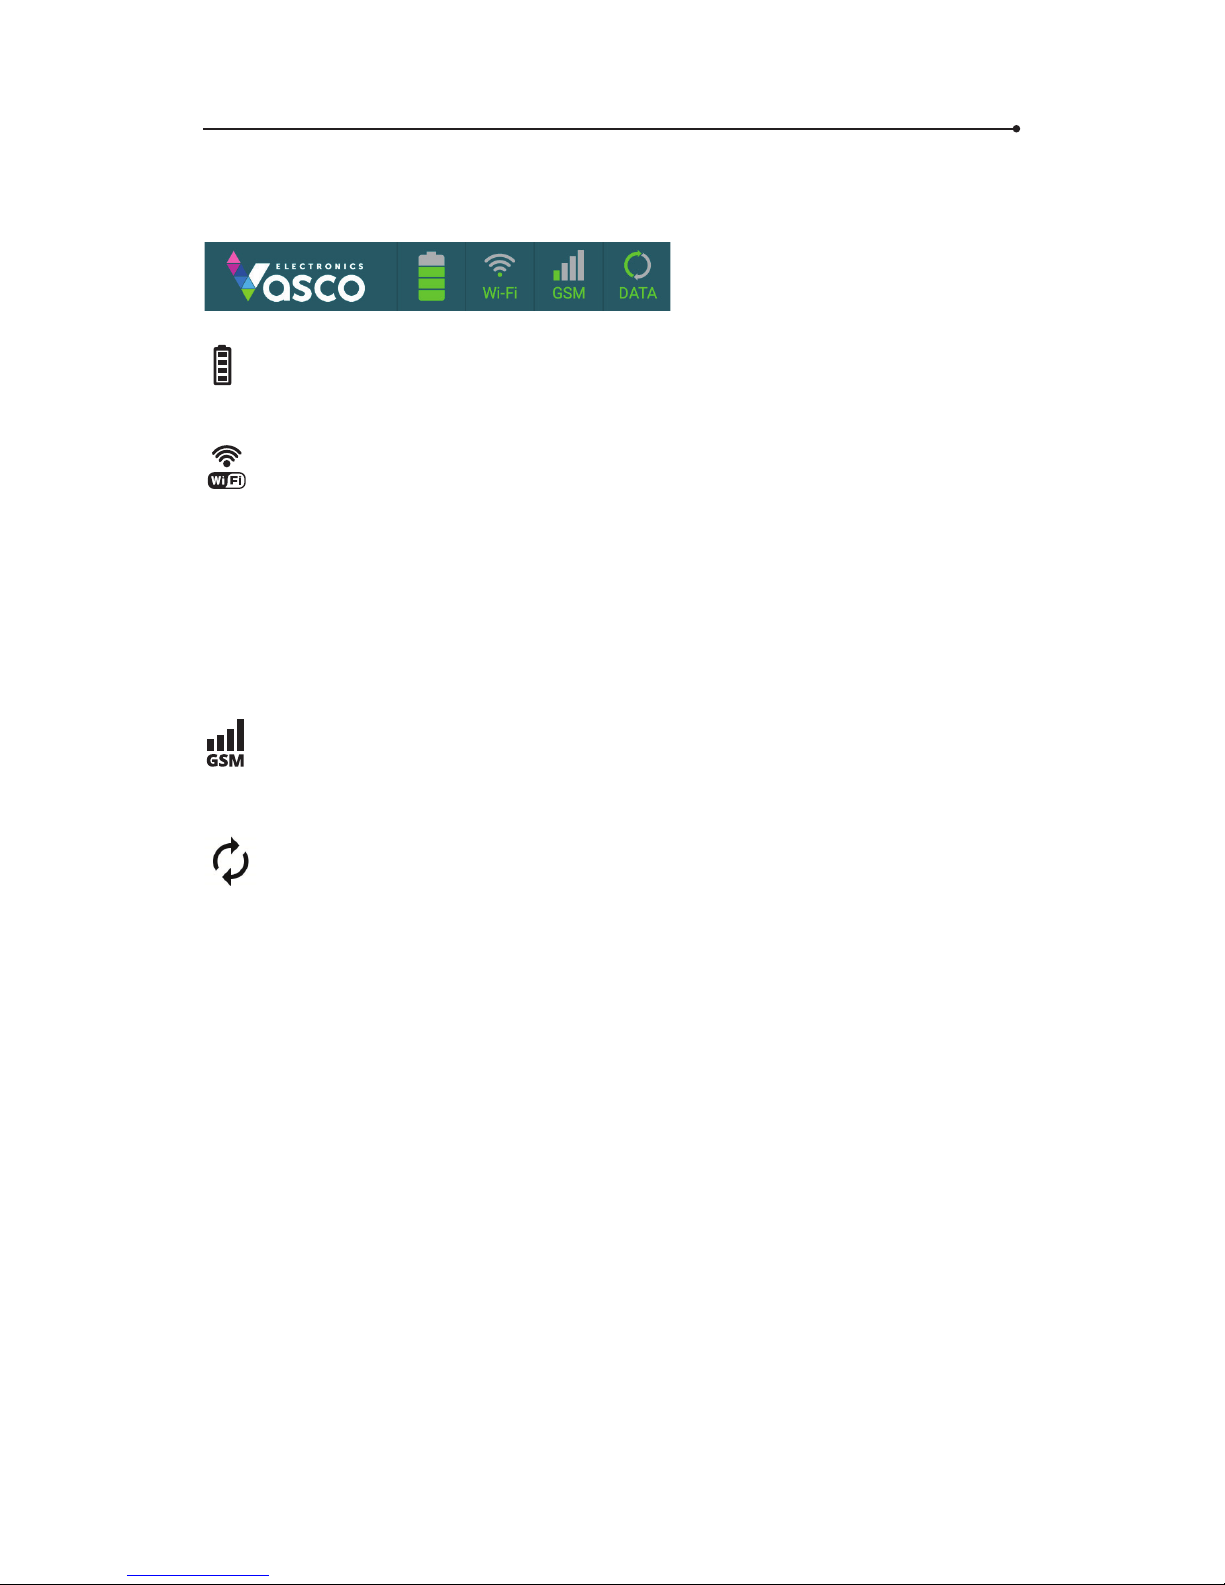
Battery status
The icon shows the current battery status.
WiFi
Turn the WiFi connection on/o . The WiFi connection is active if
the icon is green. Tap and hold the icon to see the available WiFi
networks.
It is NOT recommended to use a WiFi connection AND a GSM network at the same time.
GSM
The icon shows the strength of the network signal.
DATA
Turn on the data connection by pressing and holding the DATA icon
for a few seconds. The data connection is active when the icon is
ashing green.
Page 20

VTLSIS171114
Specication
Display IPS G+F 5”, HD 1280 x 720 pxls
Processor CPU: 64-bit QuadCore CPU
MediaTek MTK6735P 1.0GHz
RAM 1 GB, LPDDR3
ROM 8 GB
3G modem Yes
Wi-Fi 802.11 b/g/n
Battery 2200 mAh
Size 2.83 x 5.69 x 0.32 in
(71.7 x 144.3 x 8.0 mm)
Weight 0.32 lb (143 g)
Earphone input Mini Jack (3.5 mm)
USB Micro USB
SD card slot Micro SD (up to 32GB)
Camera Rear: 5.0 MP, Front: 2.0 MP
 Loading...